There are several steps in dropping off an asset for asset rental. The subsections below will highlight the procedure for dropping off selected assets.
Step 1: Create an "Equipment Rental - Drop Off" Work Order
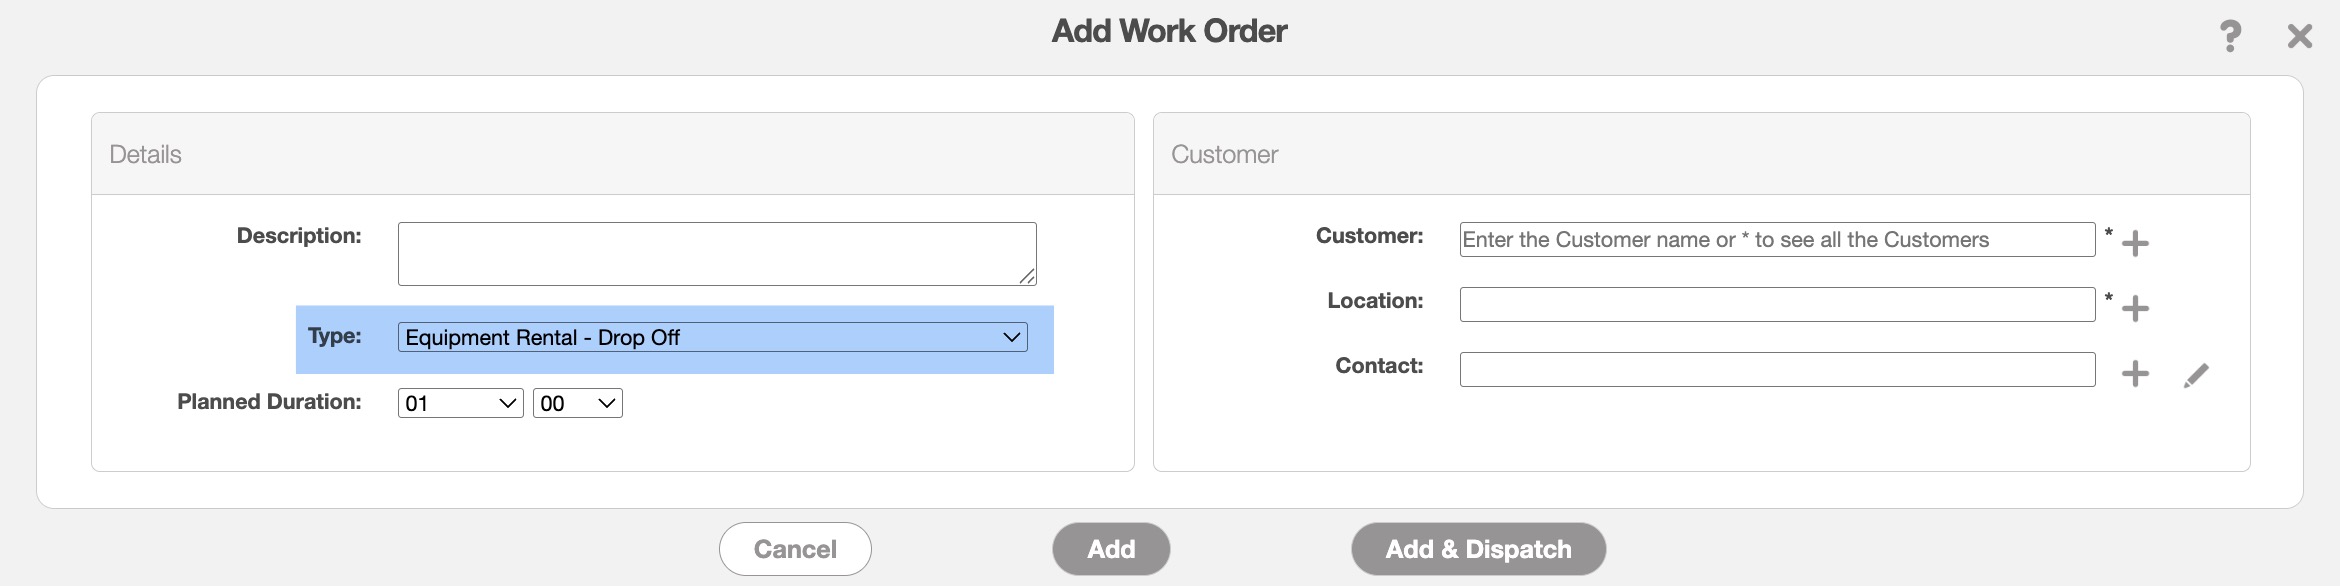
When creating a new work order for asset rentals, simply select the "Equipment Rental - Drop Off" option in the "Type" field:
Step 2: Add Asset(s) to the Work Order
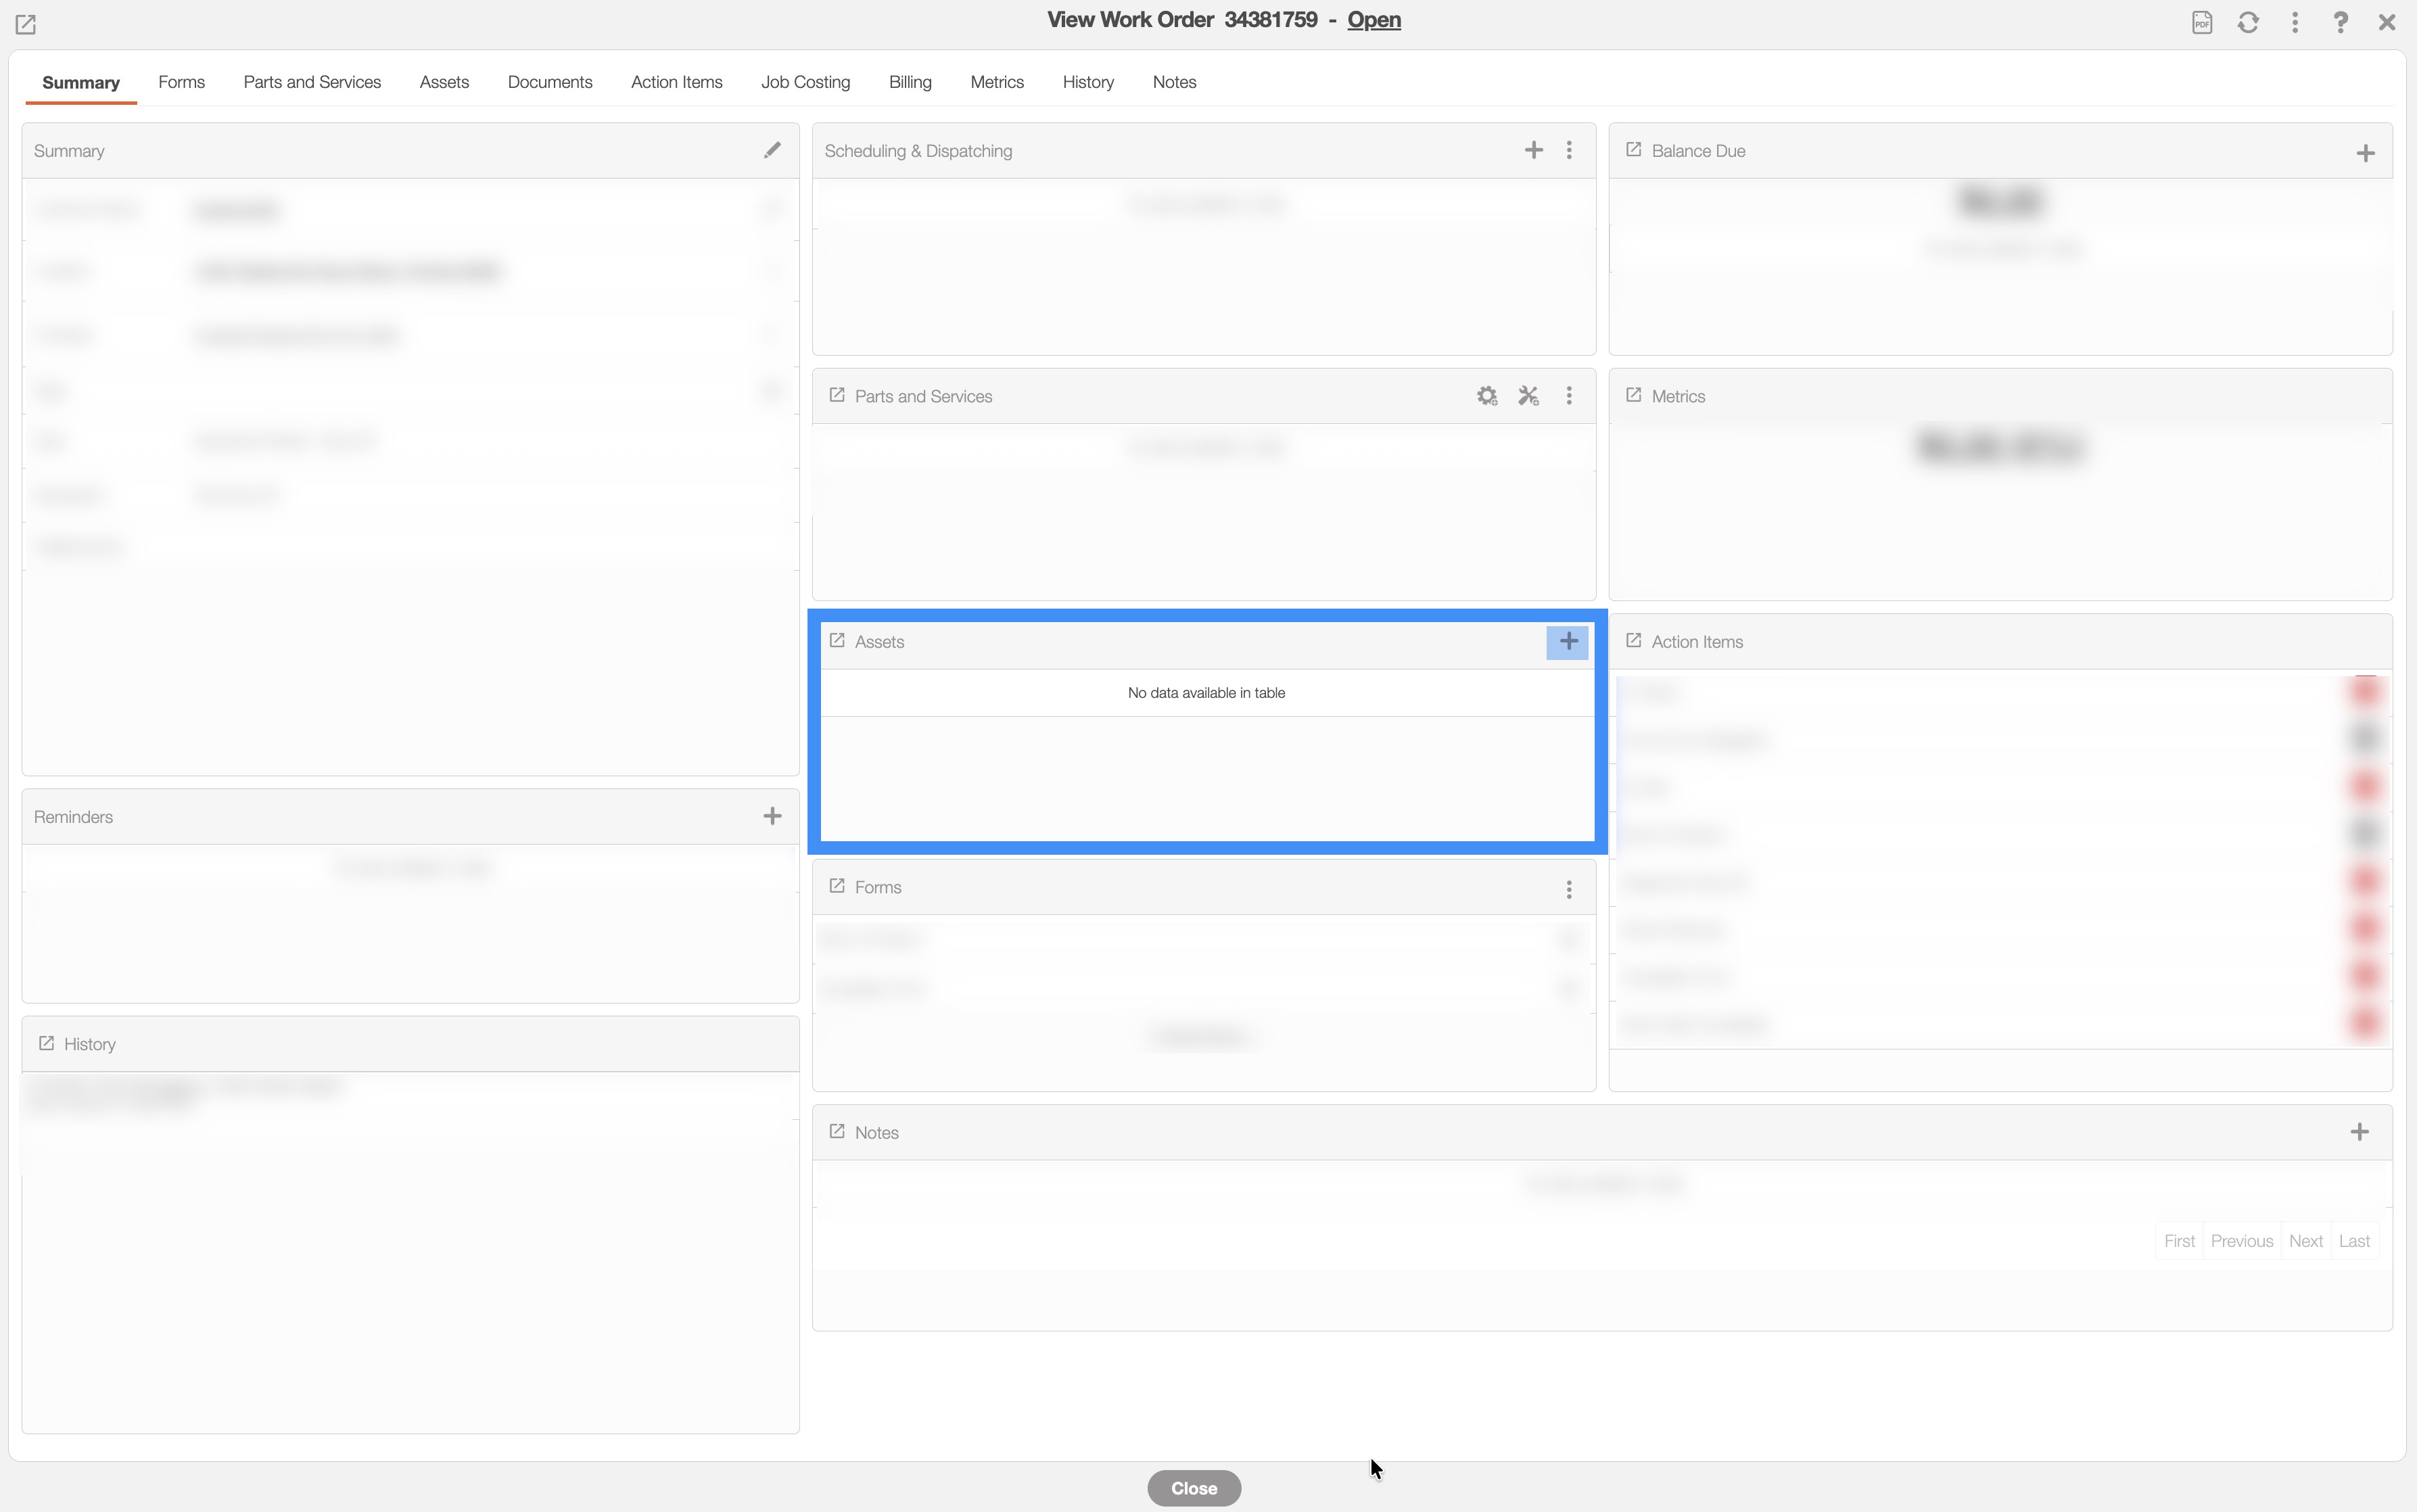
Once the work order is created, navigate to the "Asset" panel and click the Plus Sign icon:
The Add Equipment window will then appear. From the "Asset Usage Type" select the "Asset has to be delivered to the customer" option:
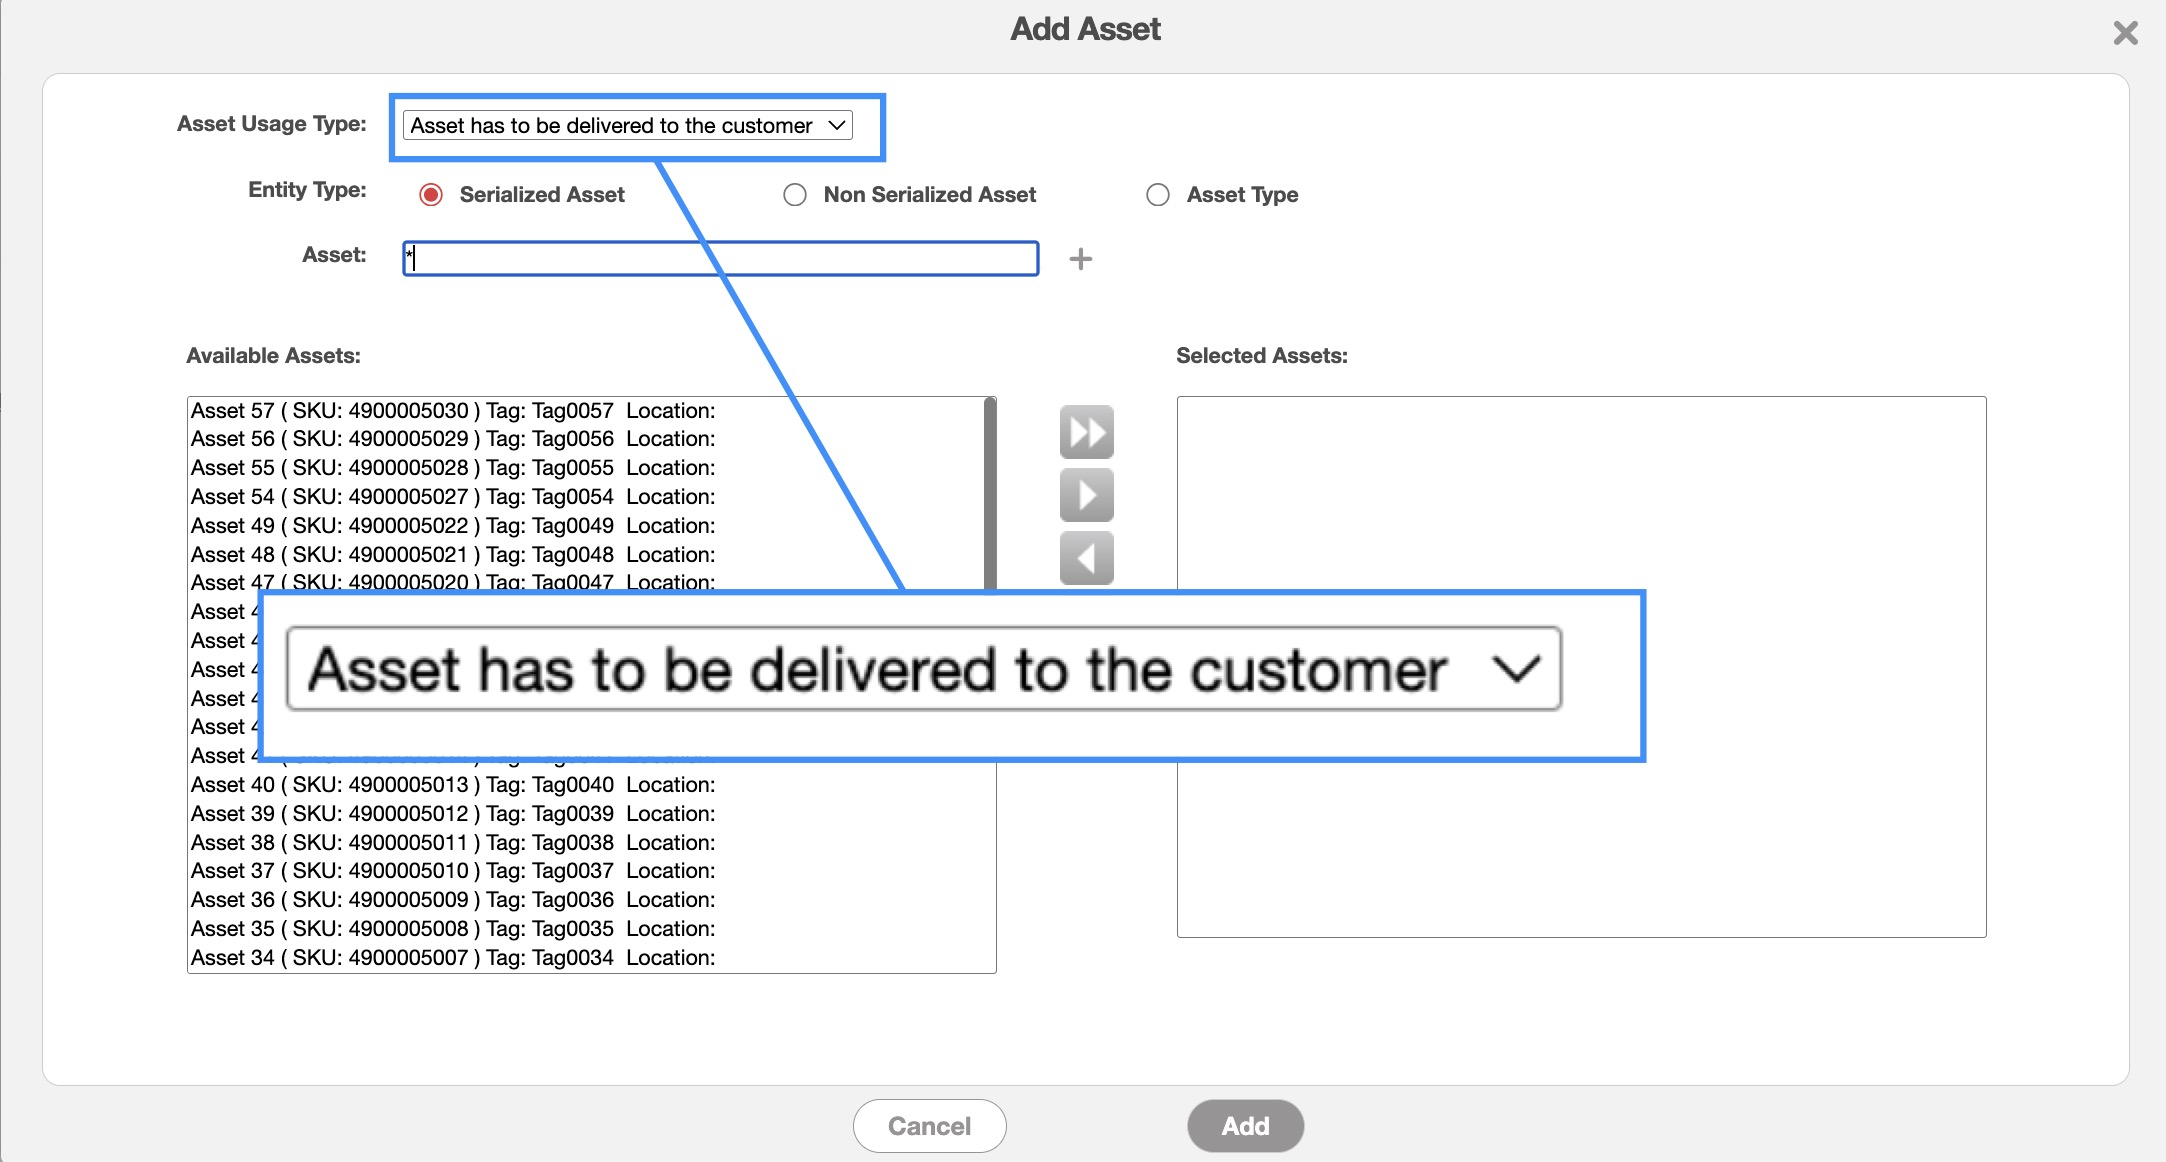
You can then choose the "Entity Type." The "Entity Type" fields are defined below:
Serialized Equipment: This selection is for assets that are identifiable by a unique manufacturer serial number. It selected from the list of available assets in your assets list.
Non Serialized Equipment: Non-serialized equipment is an asset that MobiWork does not keep track of by unique tag or serial number. For this column, select the desired non-serialized asset and its corresponding quantity (e.g. 50 feet of fence, 25 bags of sand). For more additional information on how to create a non-serialized asset, please see the Non-Serialized Assets page.
Equipment: Use this option to indicate that you need a specific type of asset without selecting a particular piece of equipment. In this case, the exact asset will be assigned when it is issued from the warehouse. When selecting an equipment type, you can also specify a quantity (e.g., requesting two oxygen tanks).
Once the assets have been added, you can then dispatch the work order as you normally would. Please see the Dispatching Overview page for more information about how to dispatch your work orders.
Step 3: Load From Warehouse (Delivery by Driver)
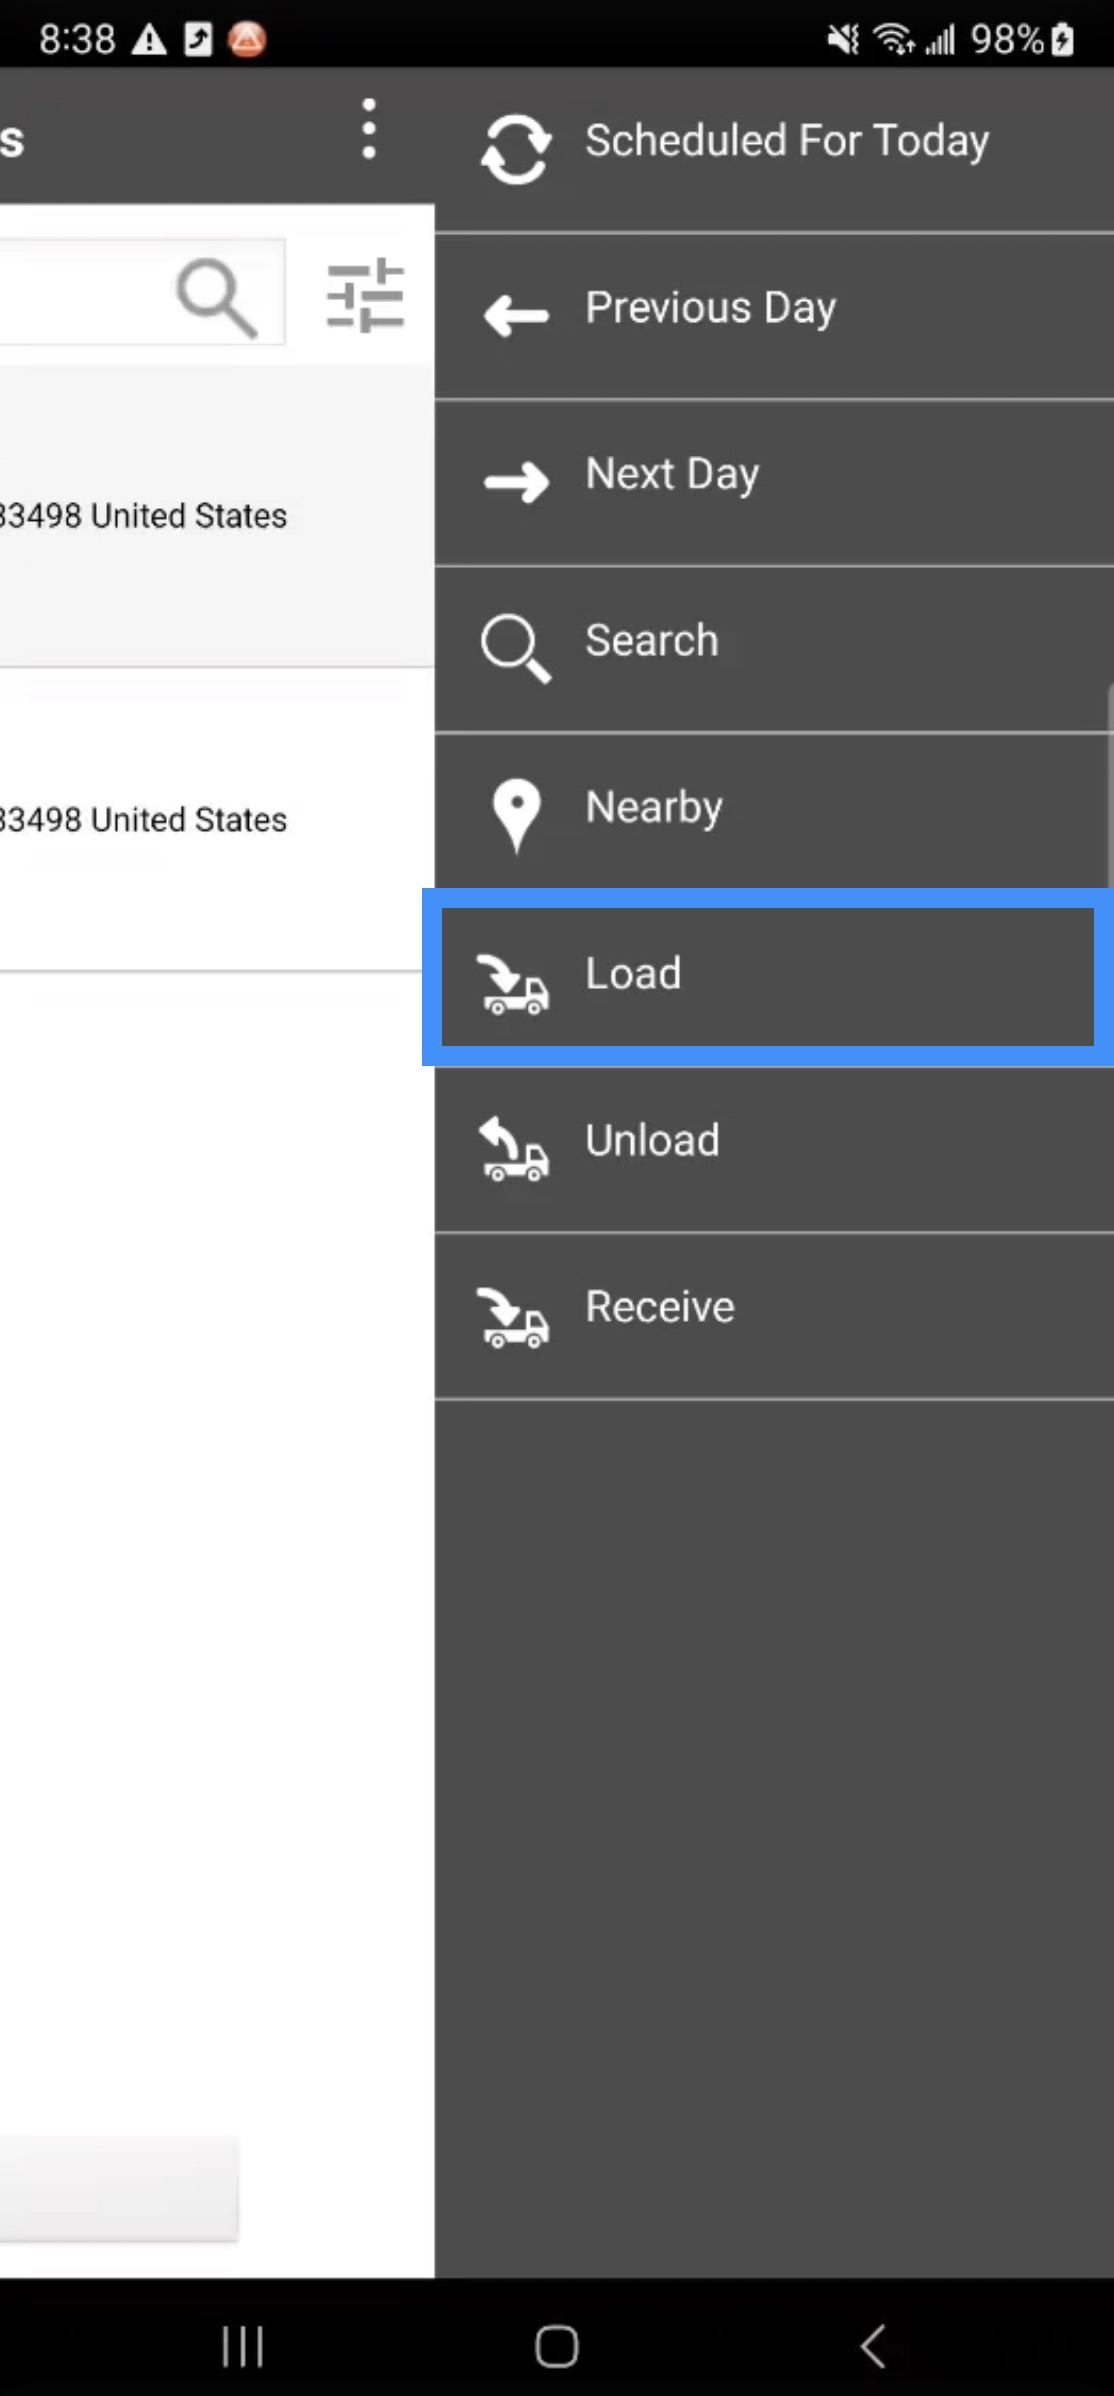
On the device, you will be able to load the rented assets for the work order. To load the asset rentals from the warehouse, first access the work order List page's Actions Panel and select the "Load" option:
From the "Load Items" panel, the assets that were added to your work orders will be listed. You can also search for the desired asset:
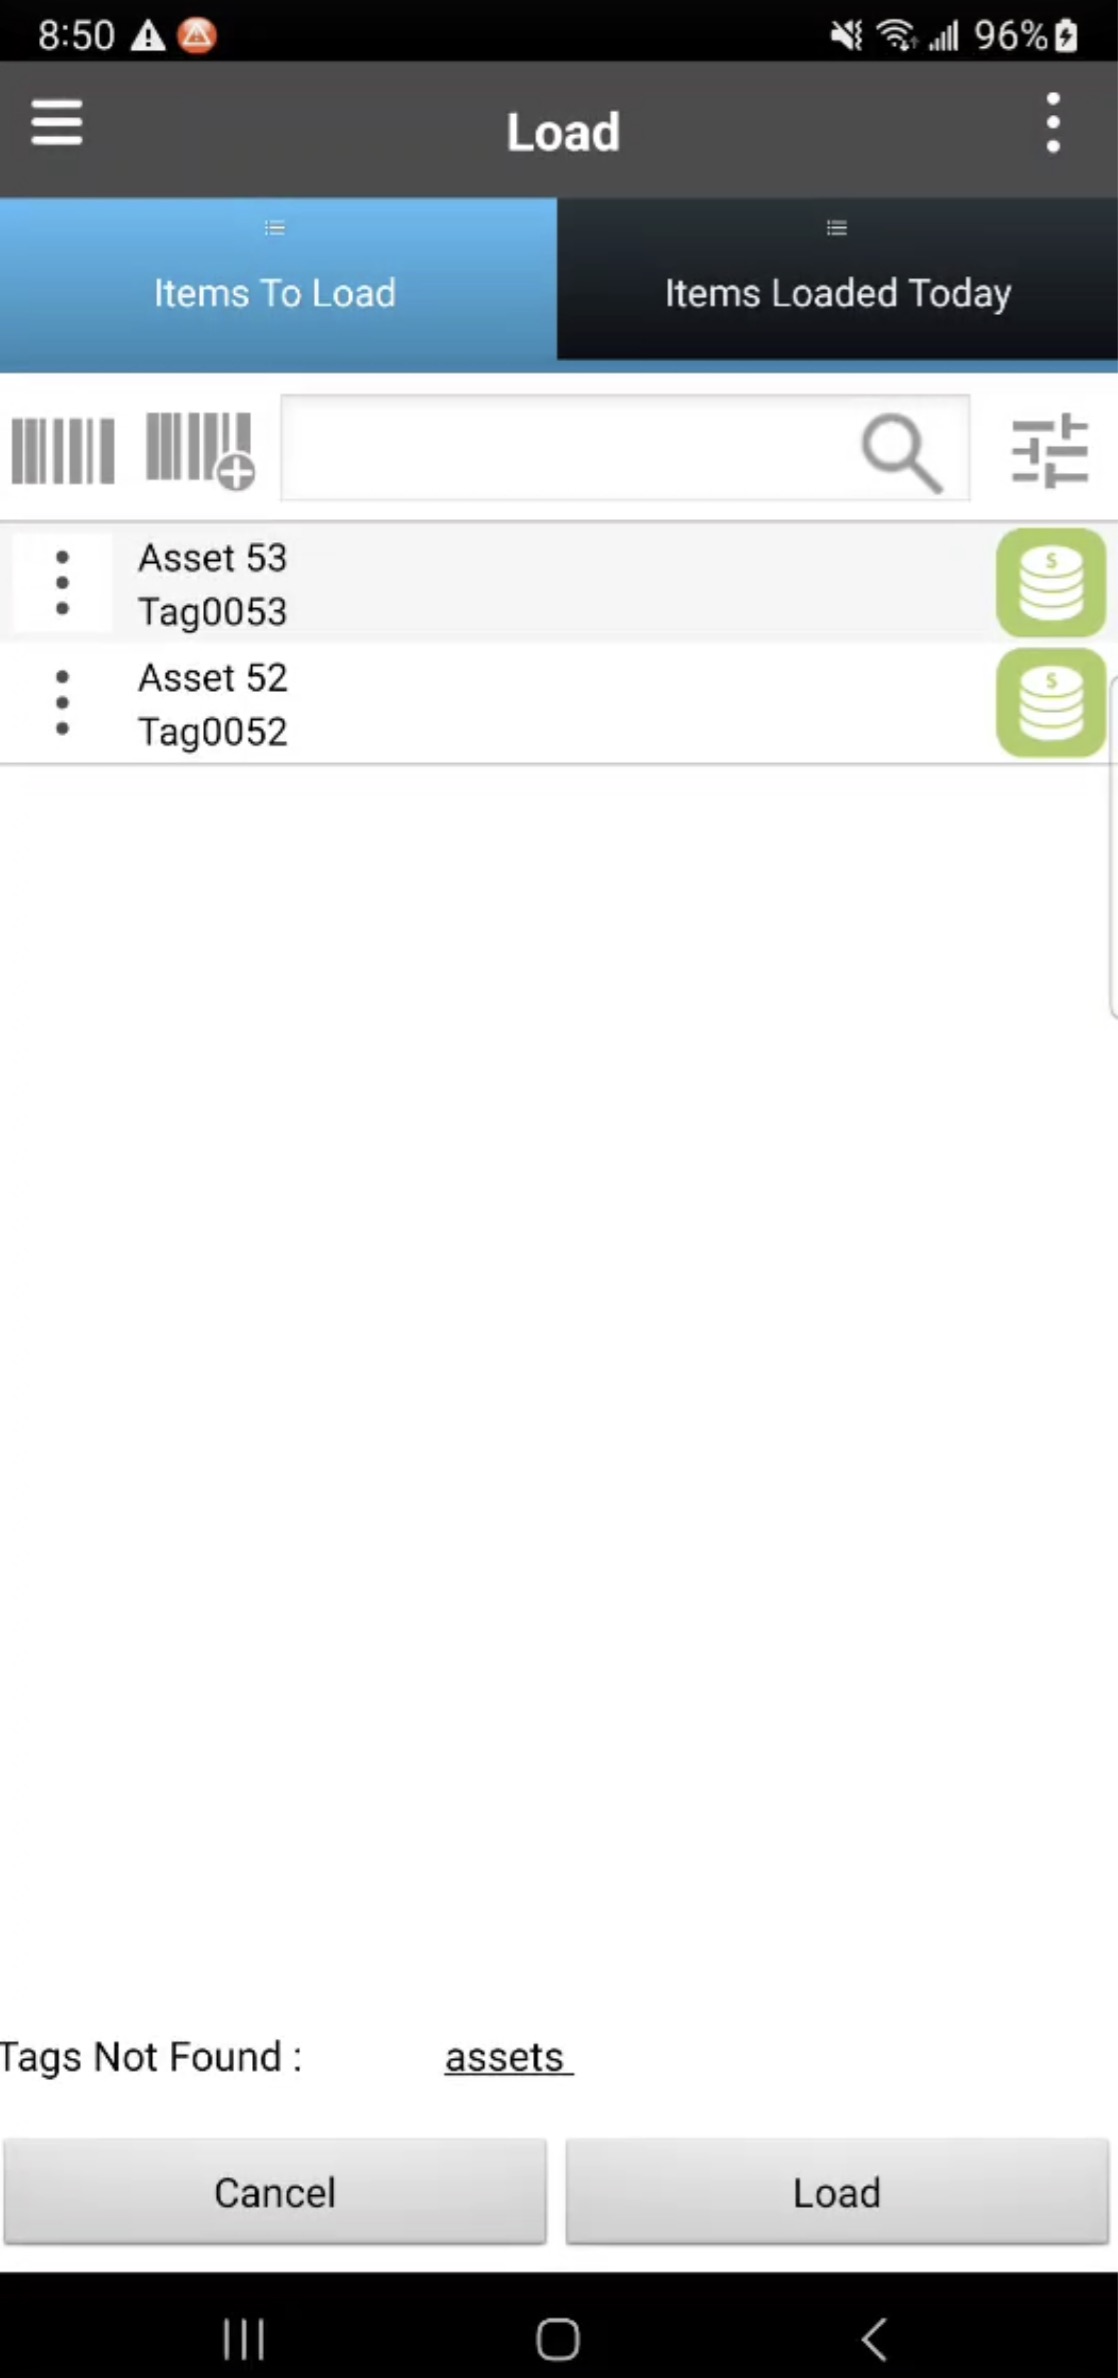
If you have trouble locating the correct asset, you can use the barcode or QR-Code to ensure that the requisite asset is being loaded.
Tap on the desired assets (this action will turn the Asset button green). Then click the Load button.
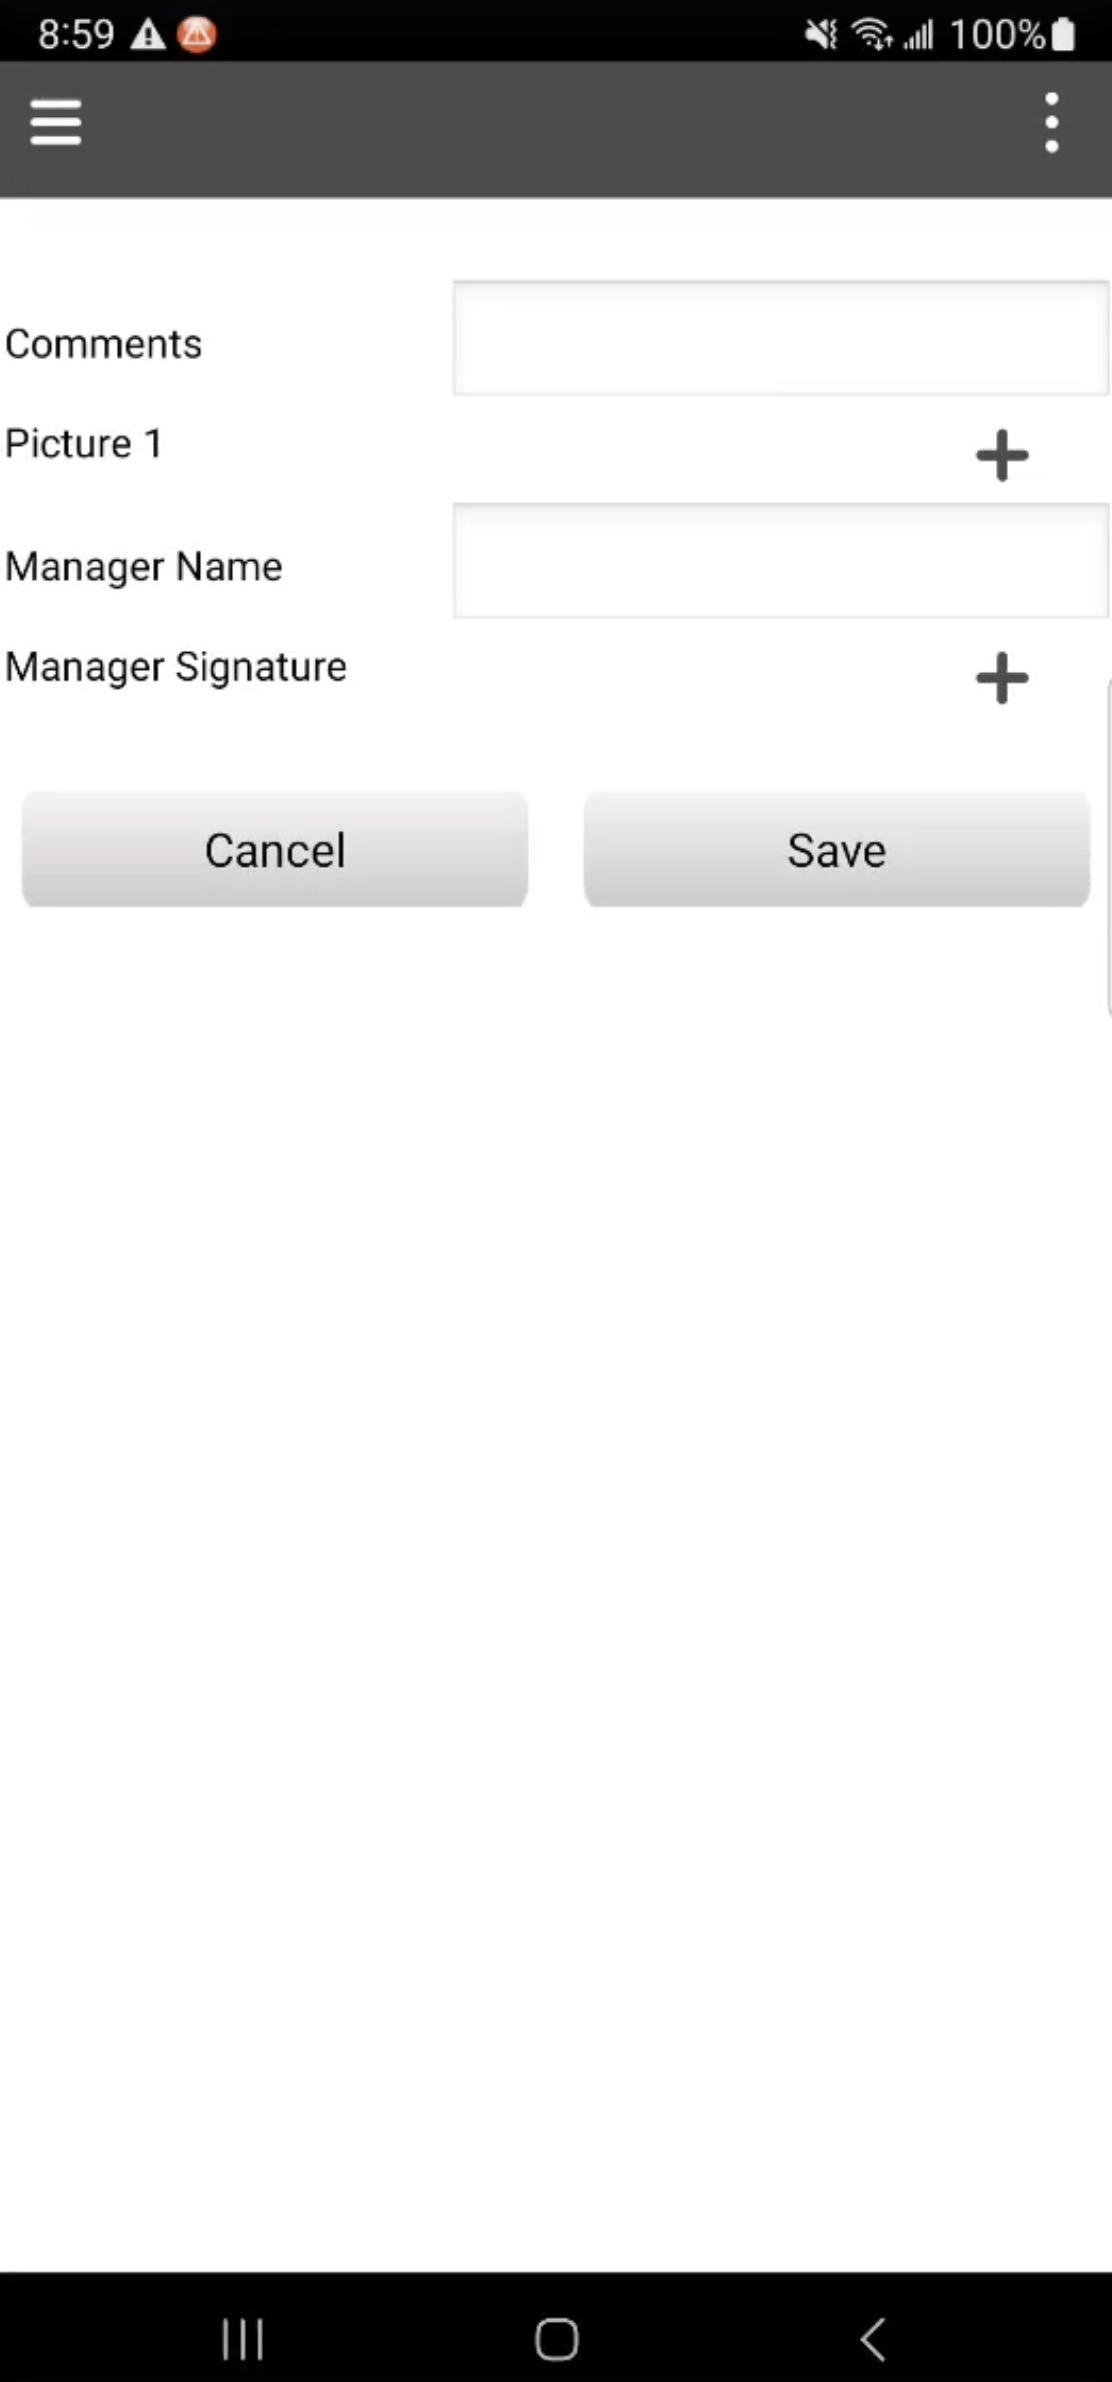
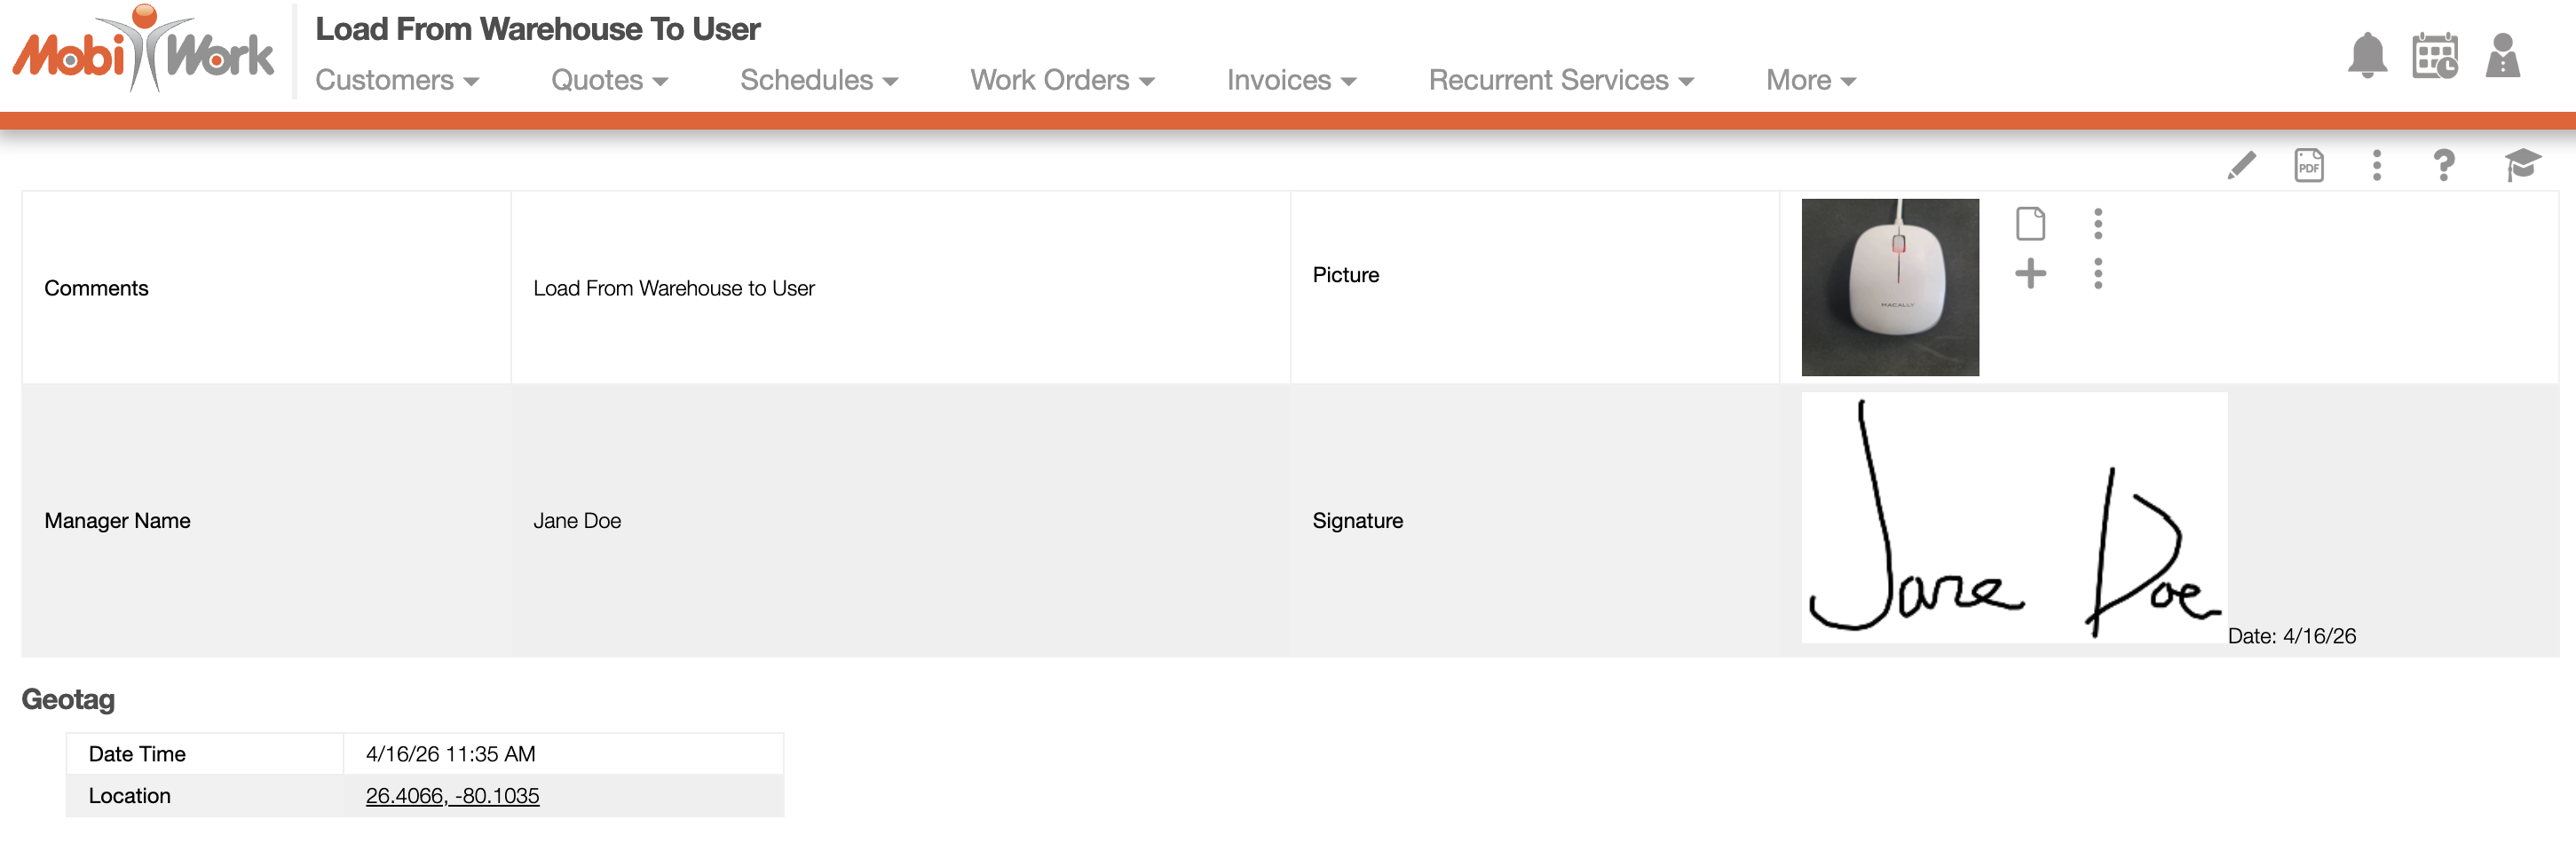
The Load From Warehouse to User form will then appear. In this form you can enter notes, take photos, capture signatures or you can ignore these fields and tap Save to continue with loading the asset:
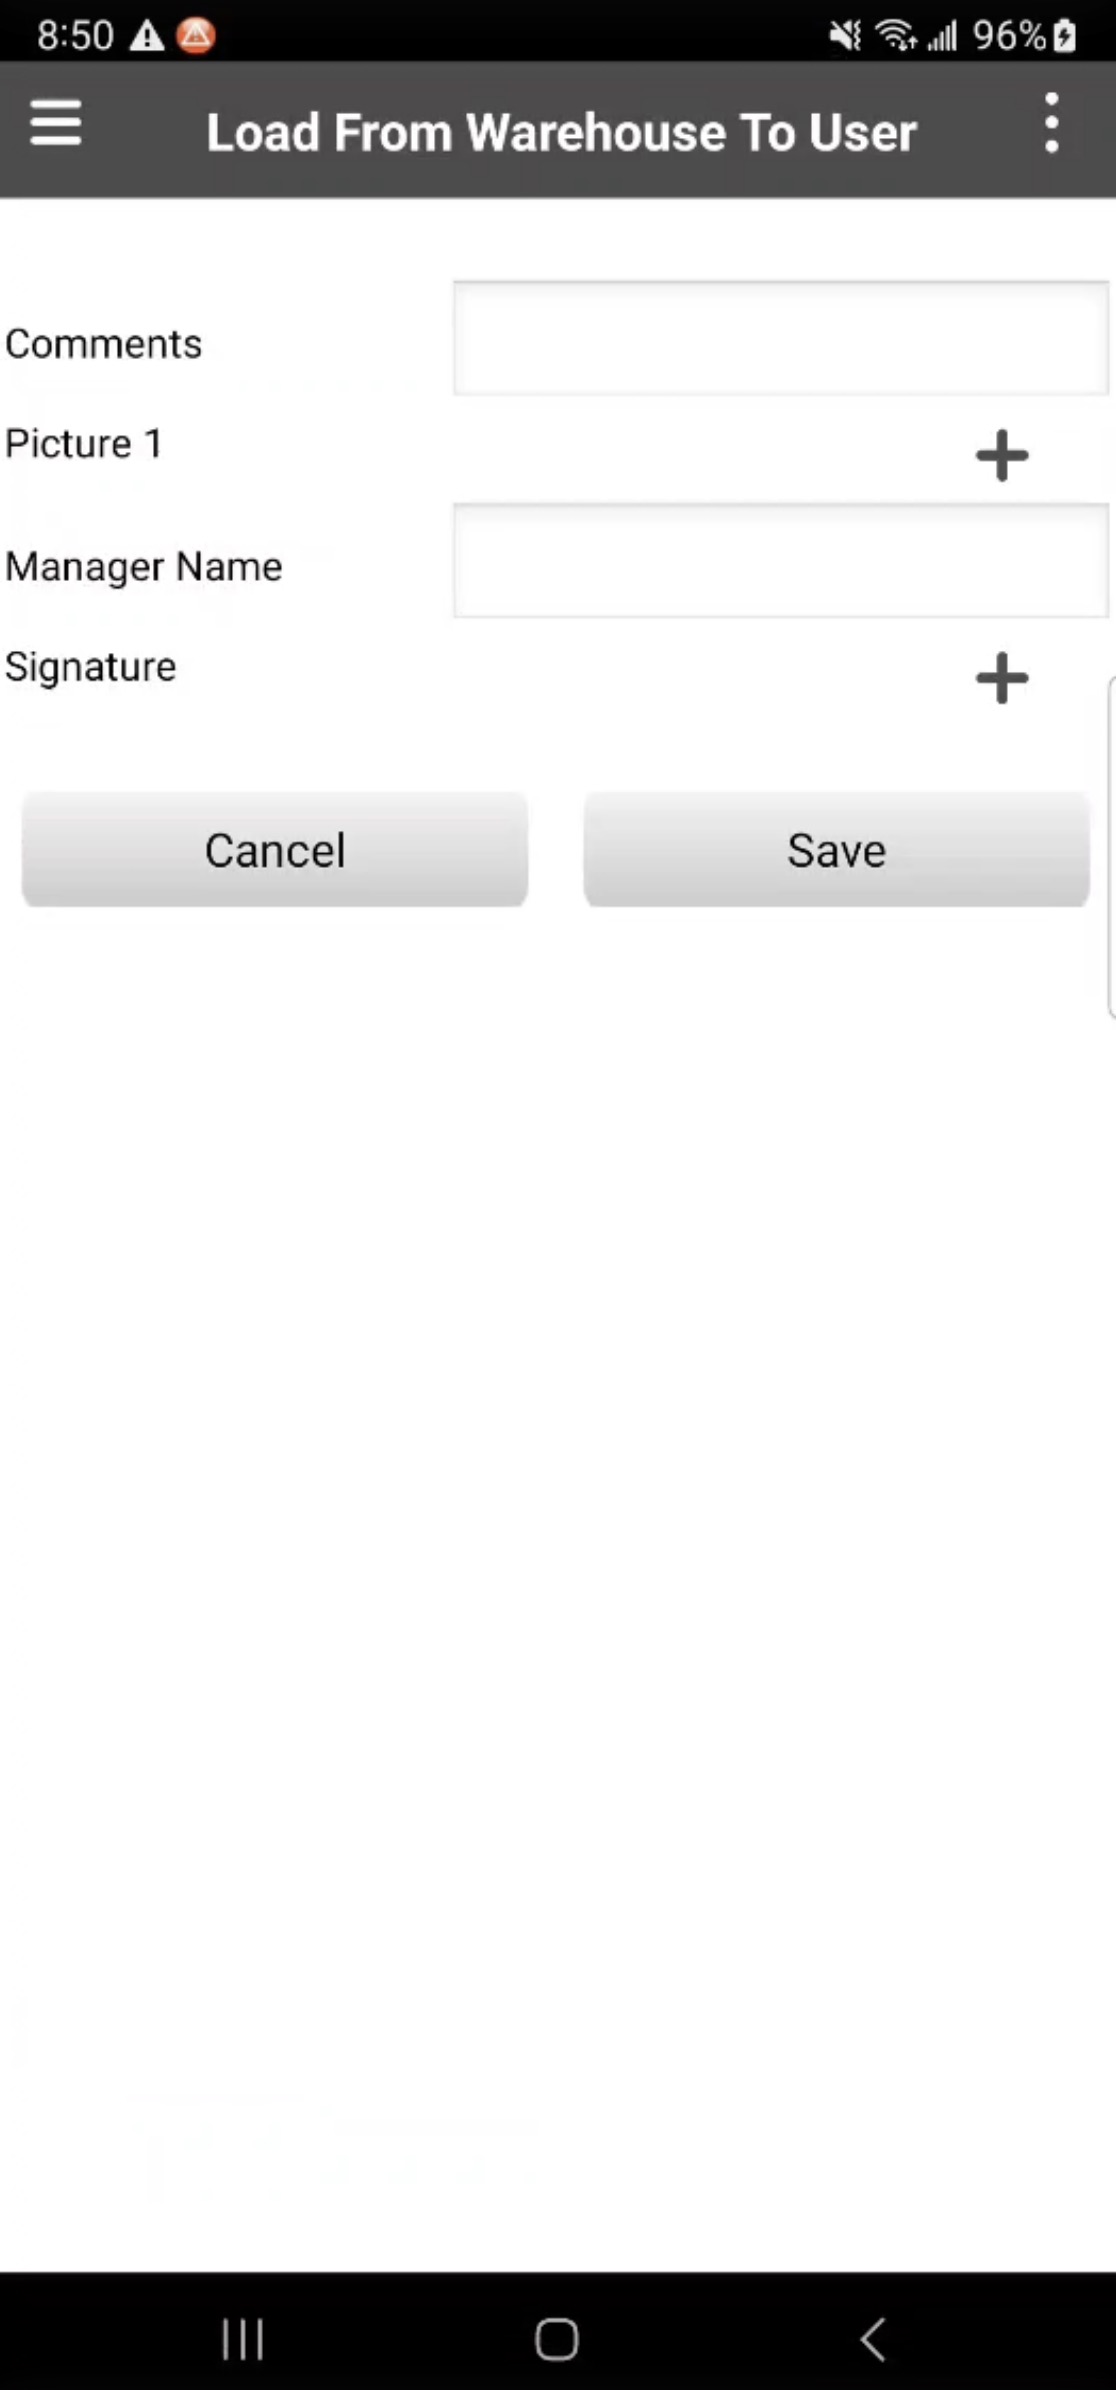
This form also functions as an accountability and traceability feature, since the warehouse manager can confirm that the asset is in possession of the user. The user will be able to substantiate this claim as well, in addition to indicating if there are any prior issues with the asset (e.g., if the asset was damaged upon pick-up).
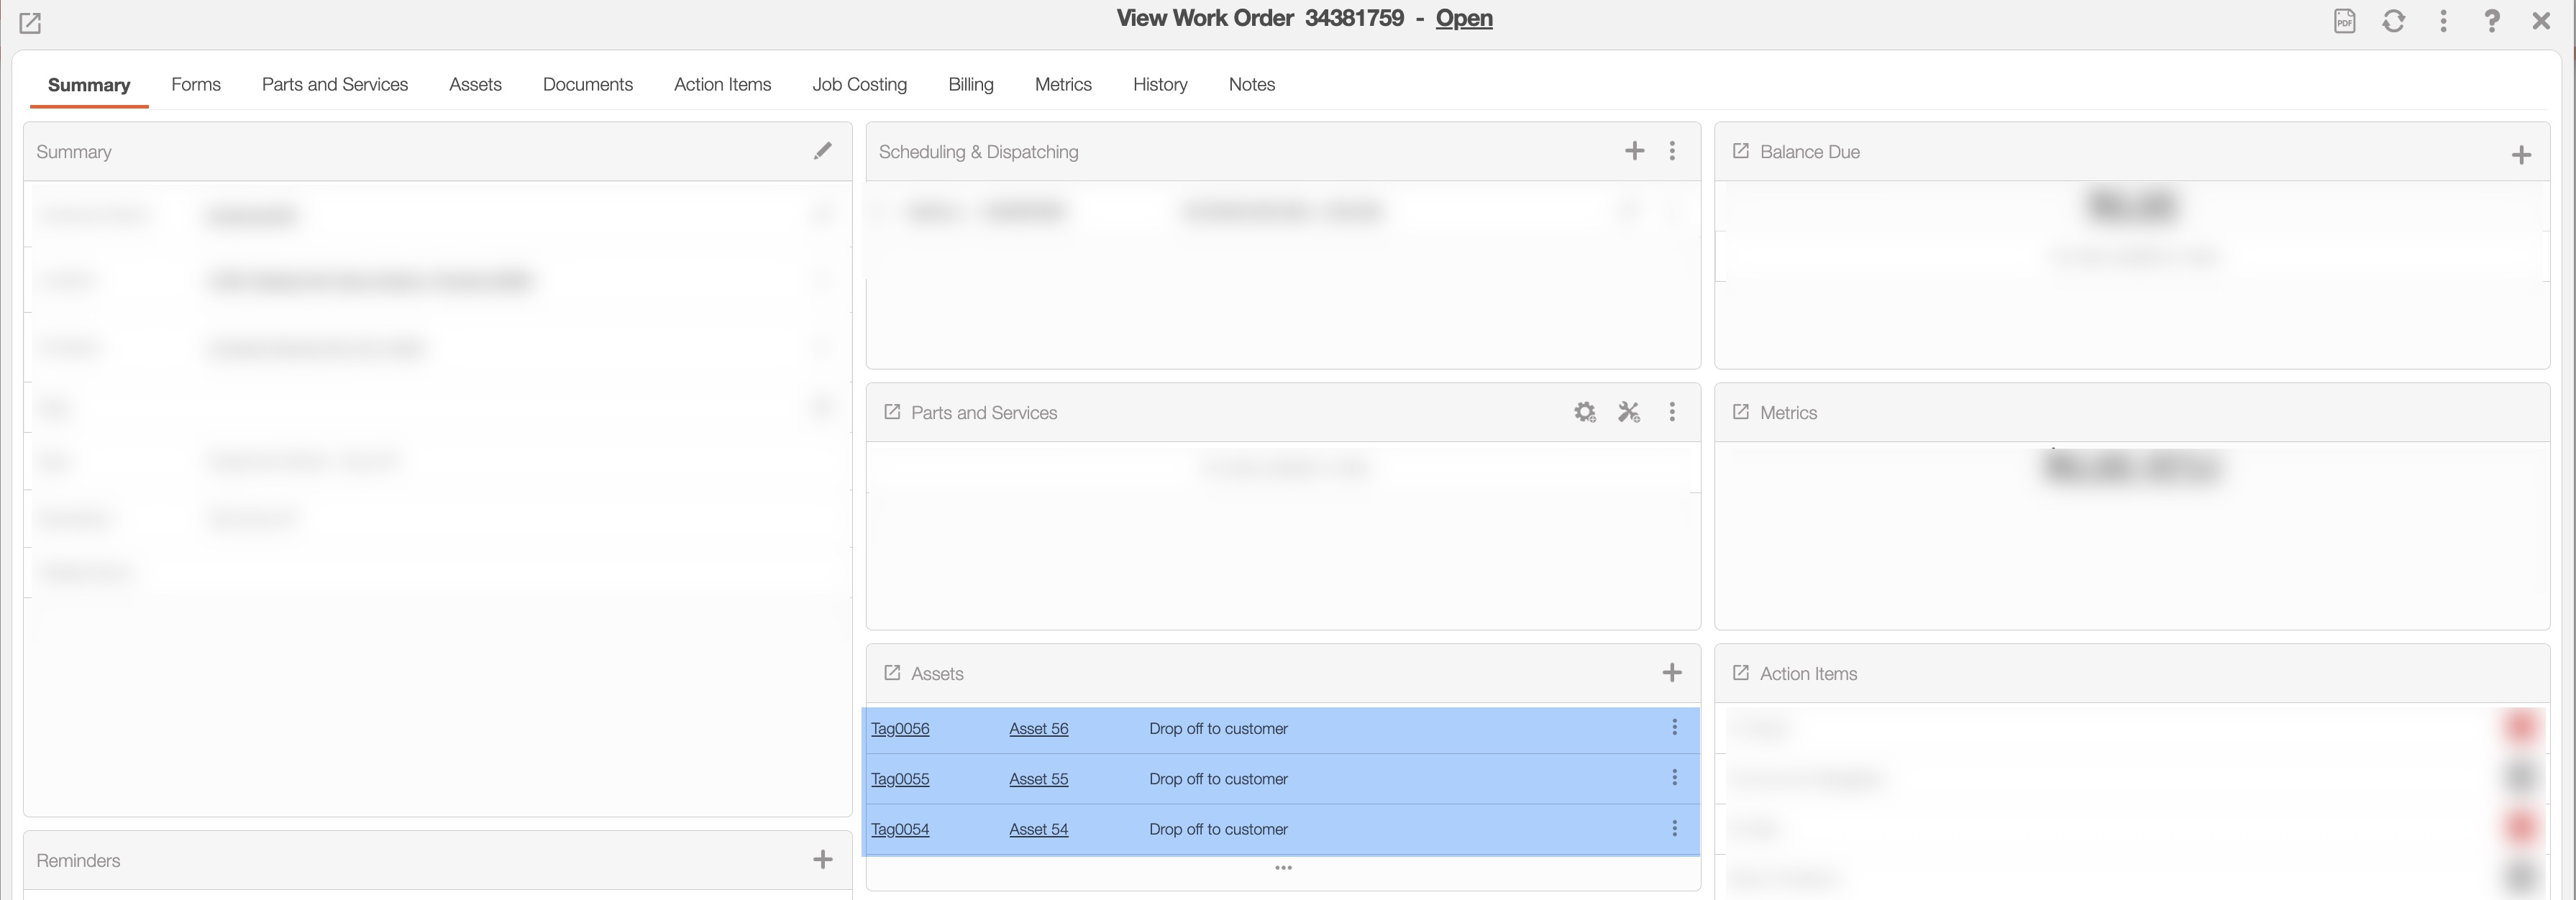
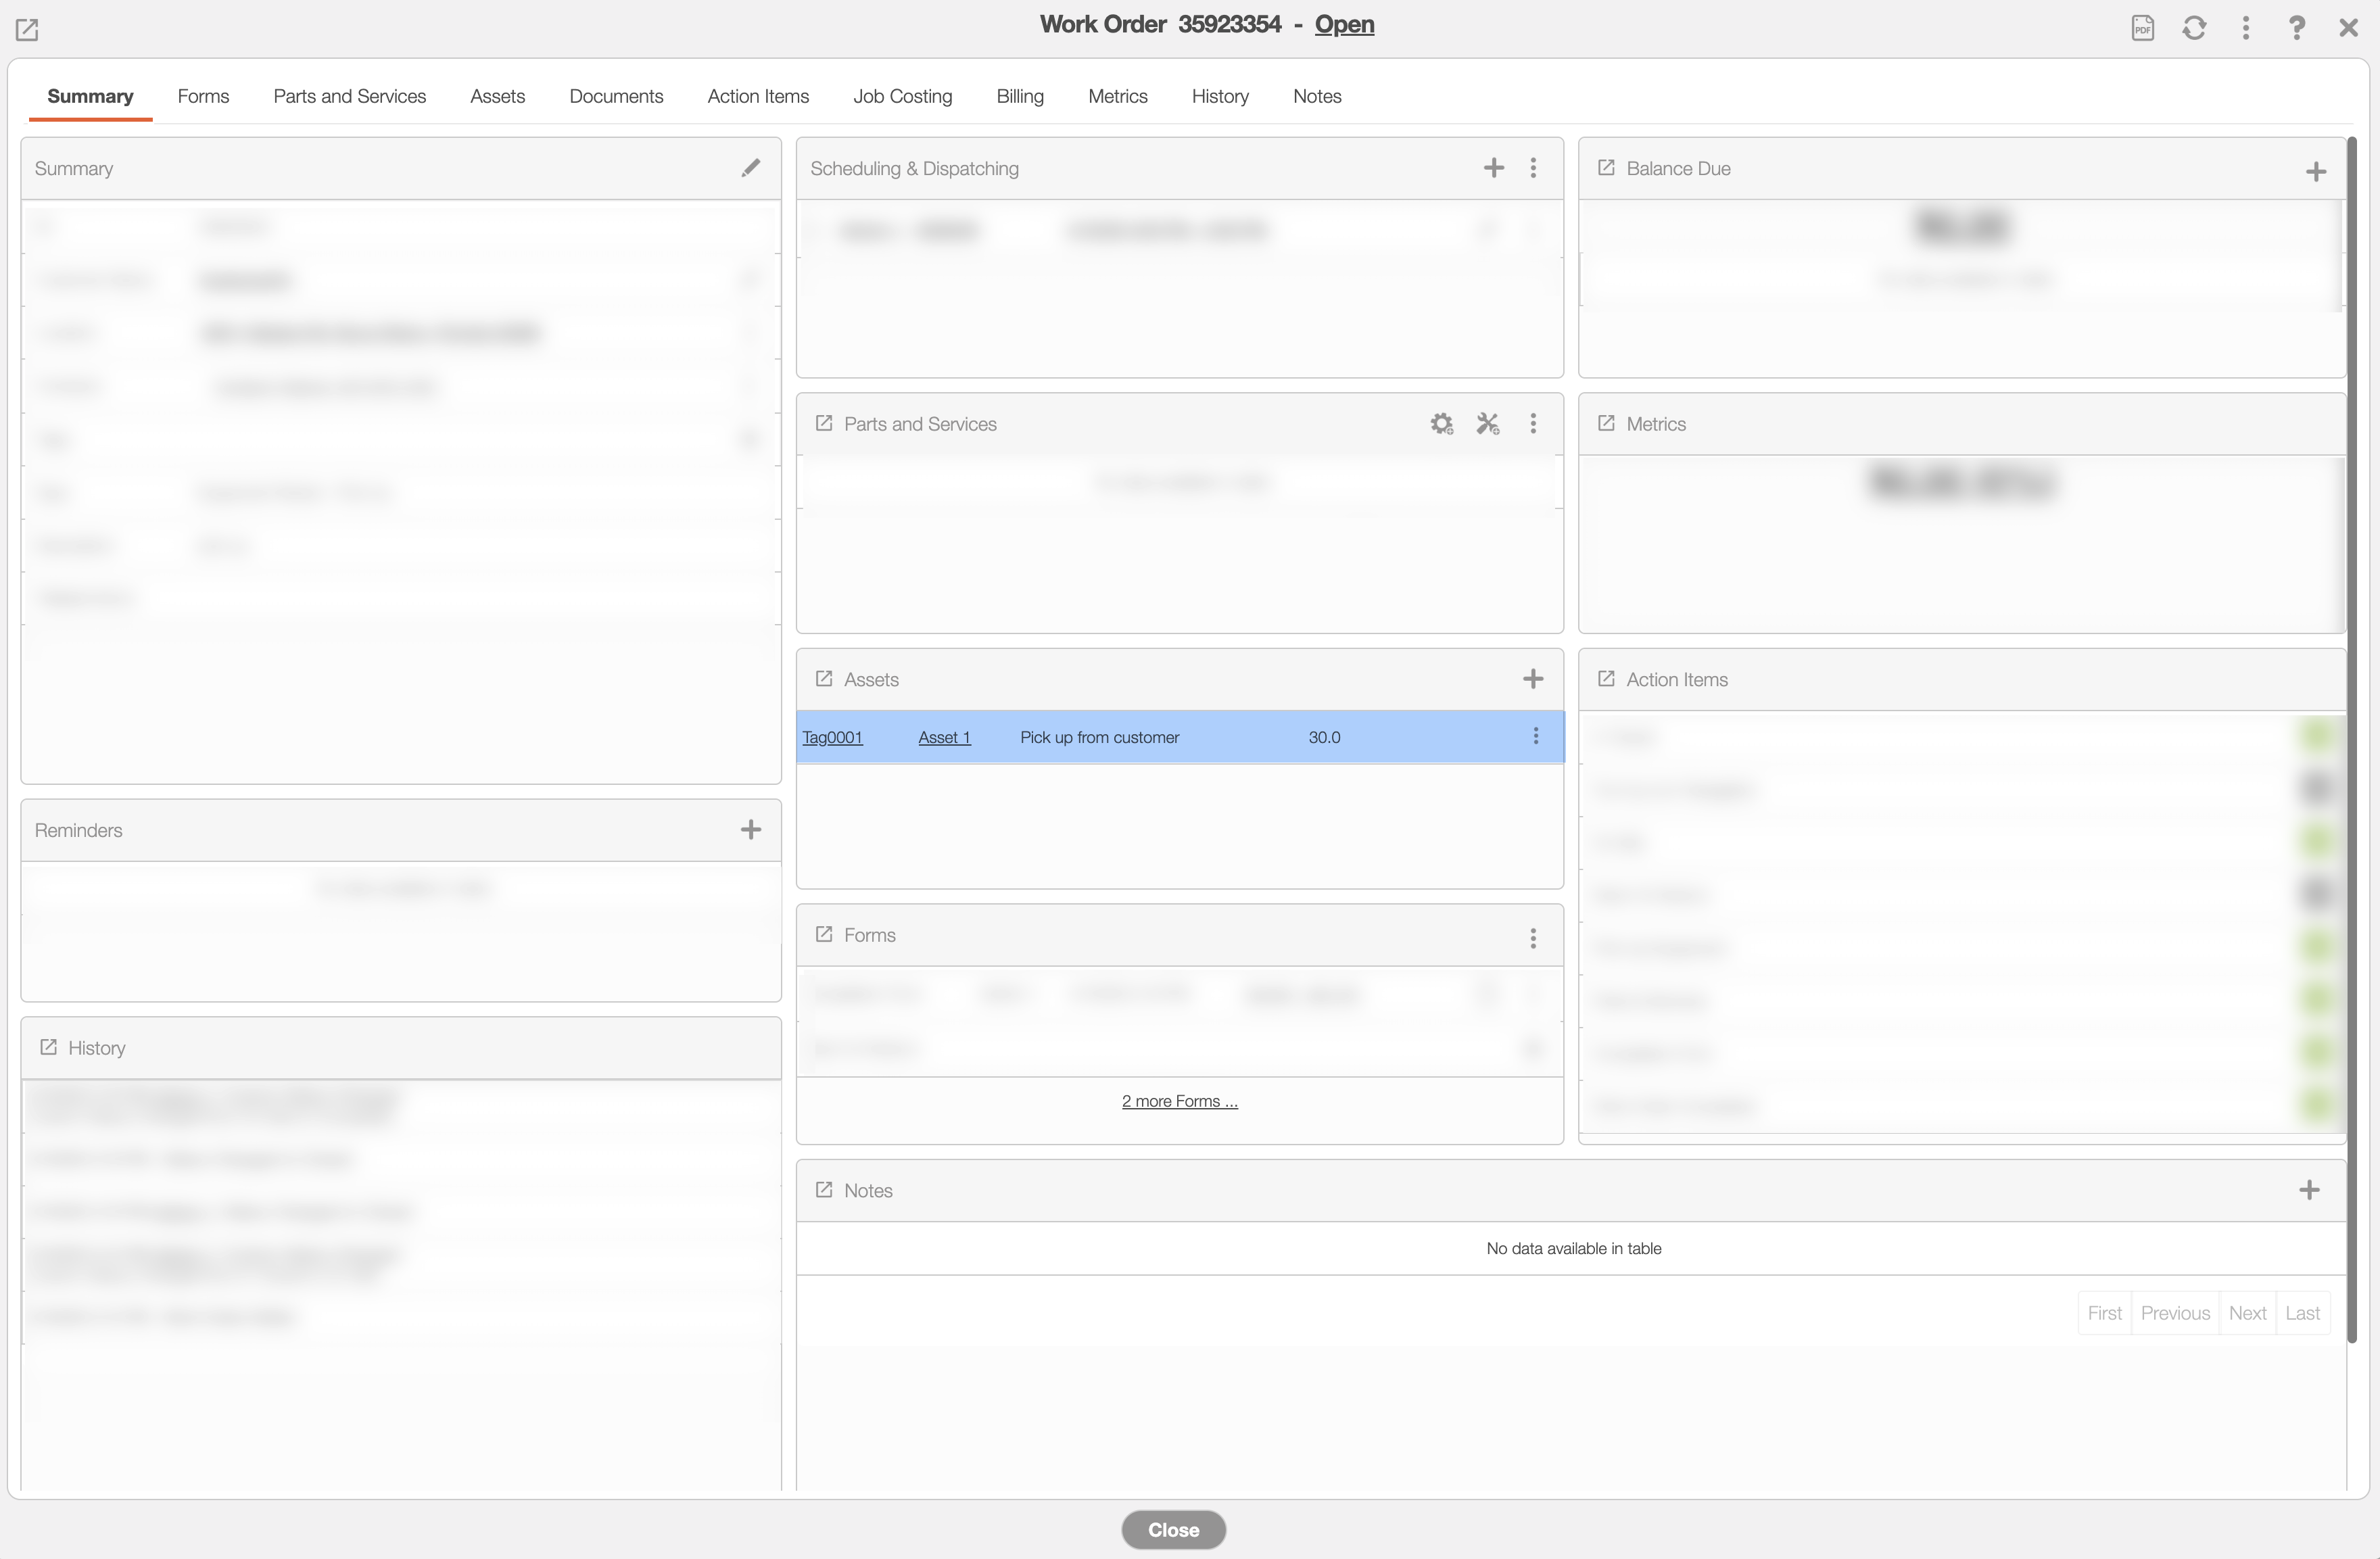
In the View Work Order pop-up window, you will be able to see that the asset is now associated to the work order:
Step 4: Asset Drop-off Work Order
To deliver assets to the customer you will first need to complete the work order Action Items on the device. Once you reach the "Delivery Equipment" Action Item, you will be able to select desired assets that should be delivered to the customer:
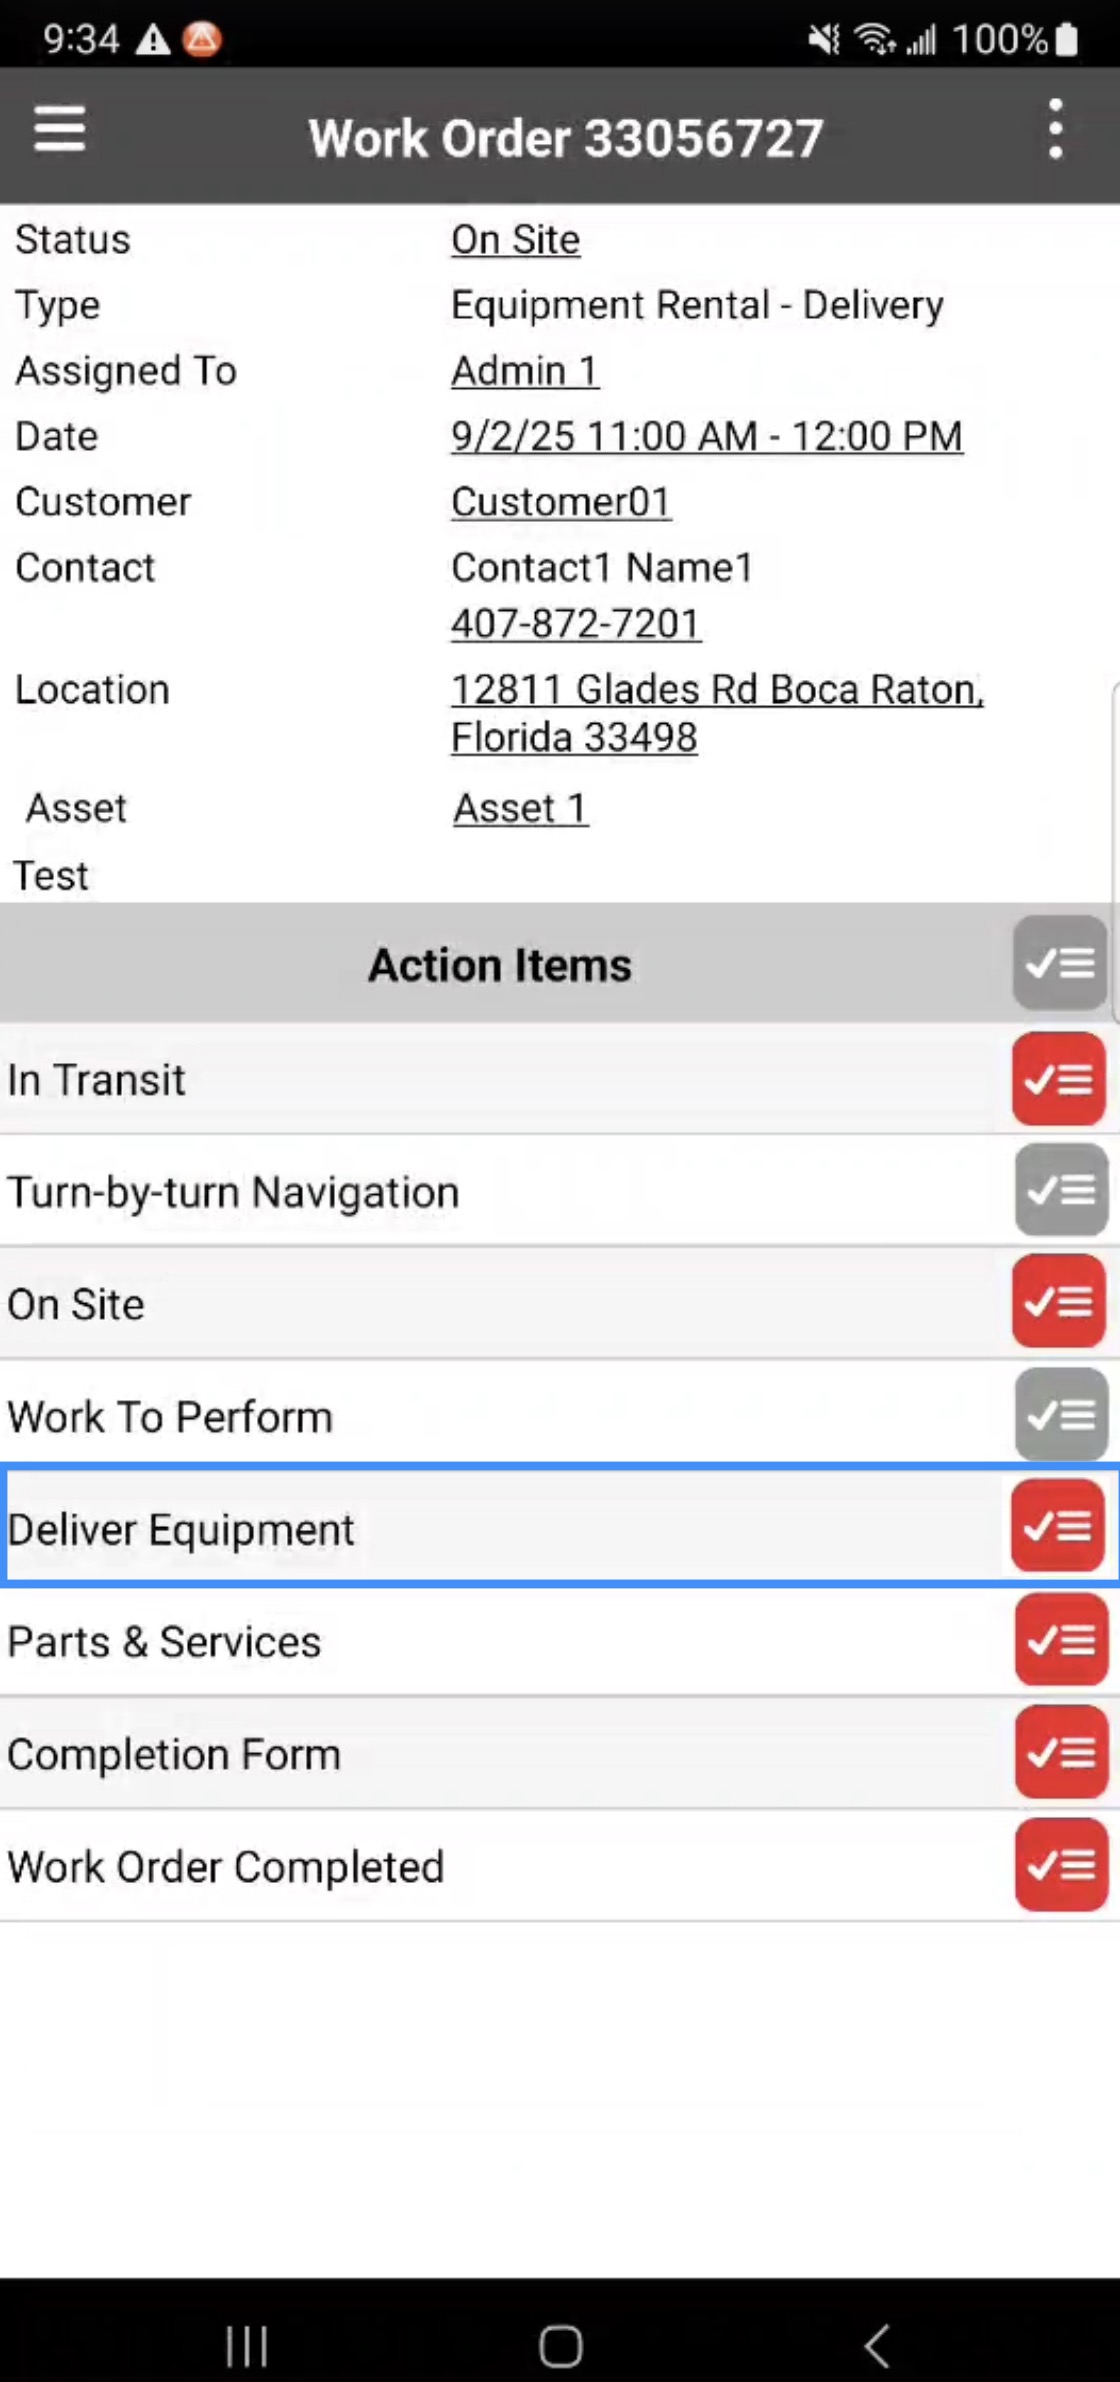
Note: The assets displayed on the Deliver to Customer list will only show the assets that were previously loaded.
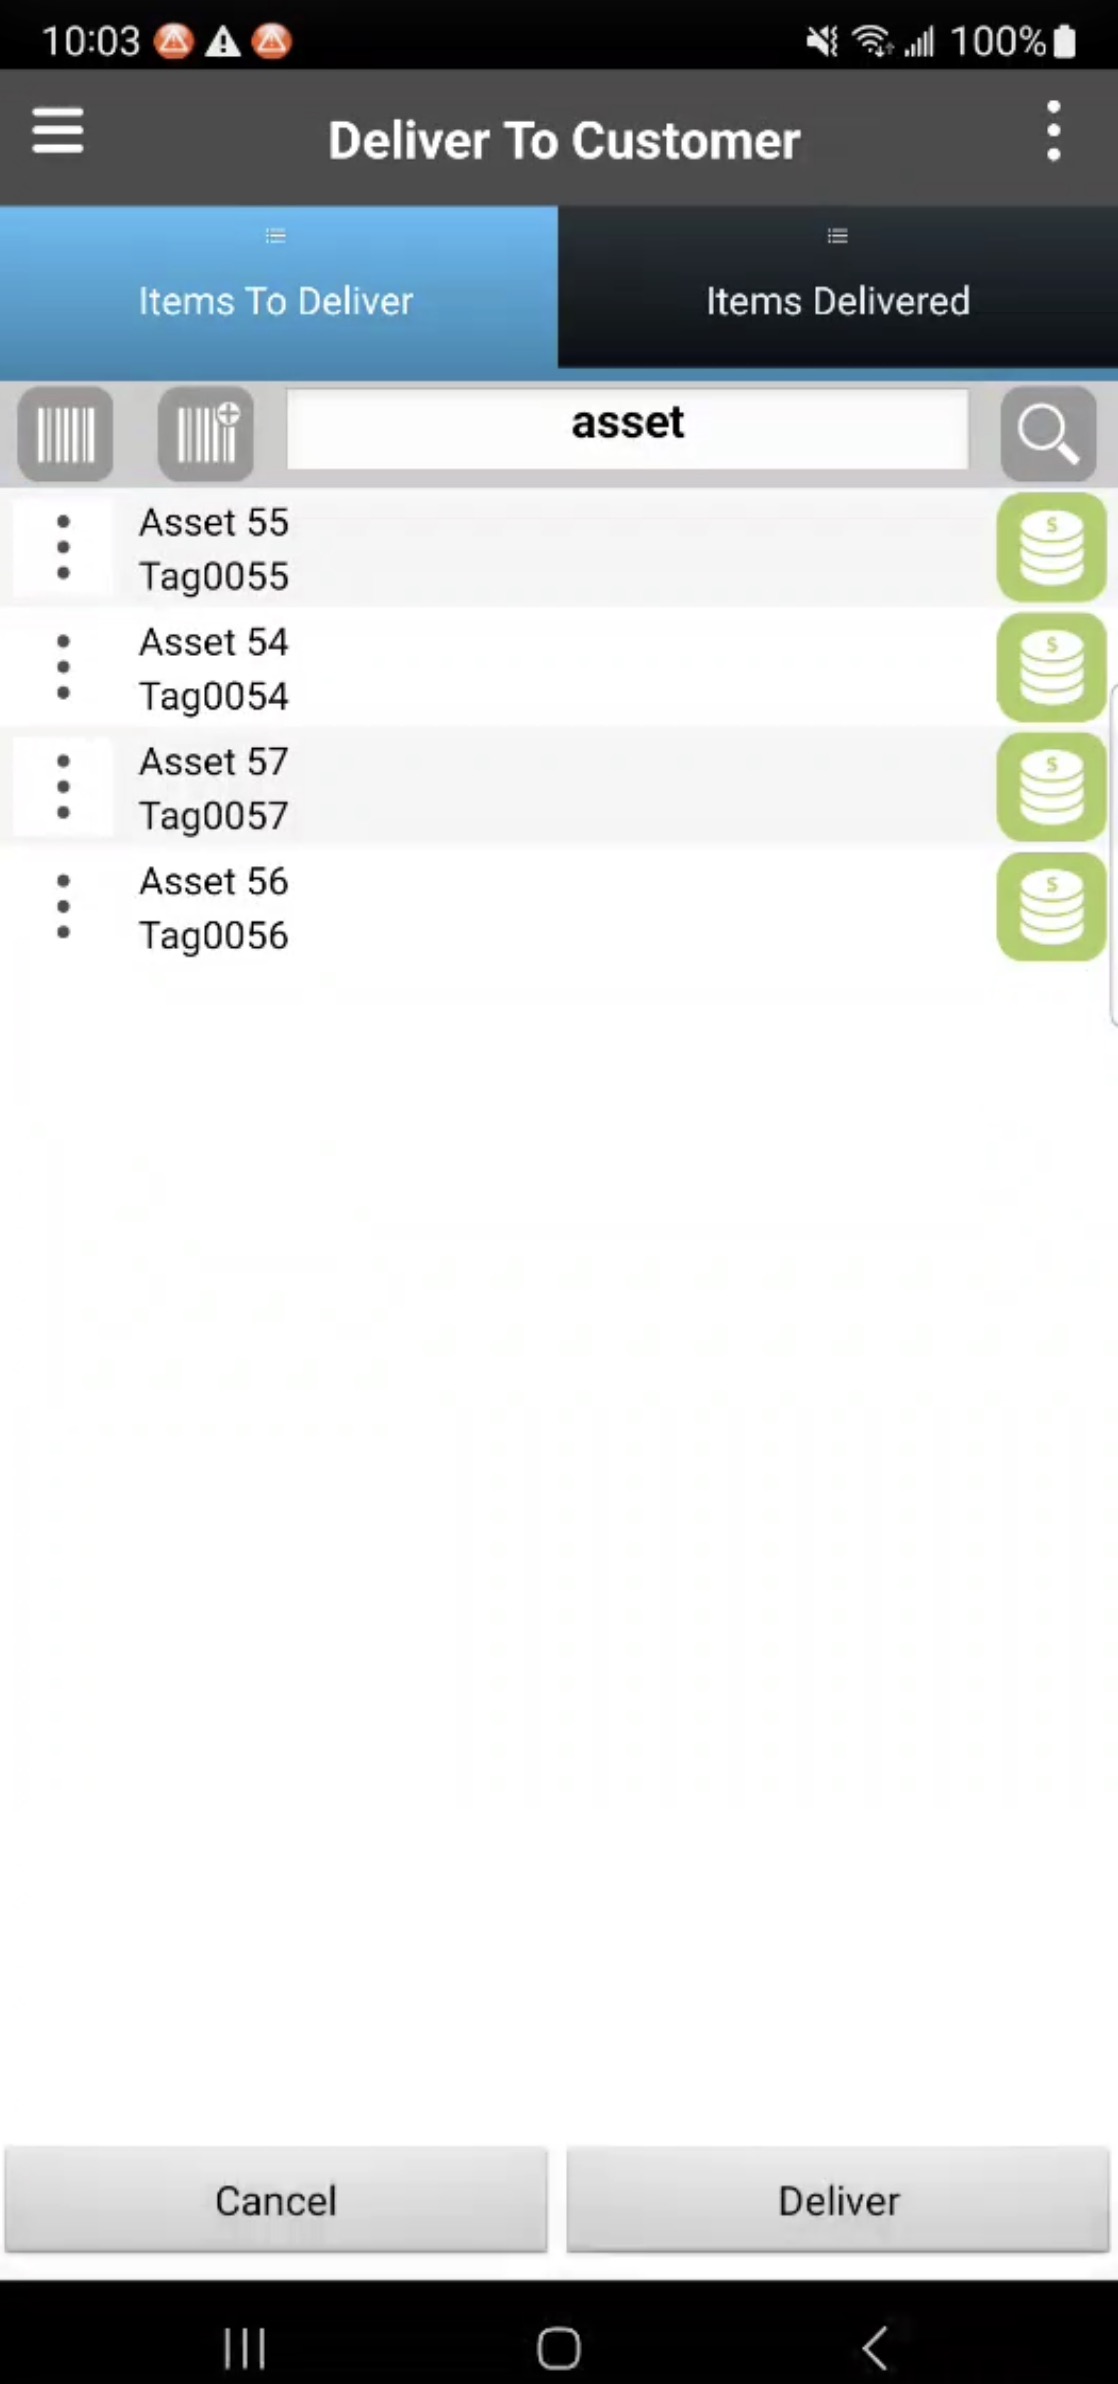
Select the desired asset (this action will turn the Asset button green). Once selected, click on the Deliver button:
You will see a notification that says, "Successfully delivered the items." Once the assets have been delivered to a customer location, you will be able to view the history on the View Asset pop-up window's "Tracking" tab. On this tab you will see:
Delivery items have moved from the User to the Customer
Under Customer Installations you can keep track of the date the items were delivered, including the start and end date of the asset rental.
Note: By default, forms are not displayed per piece of equipment. Instead, MobiWork uses a single Action Item with one form applied to all assets, though this behavior can be configured if needed.
There are several steps in picking up an asset for asset rental. The subsections below will highlight the procedure for picking up selected assets.
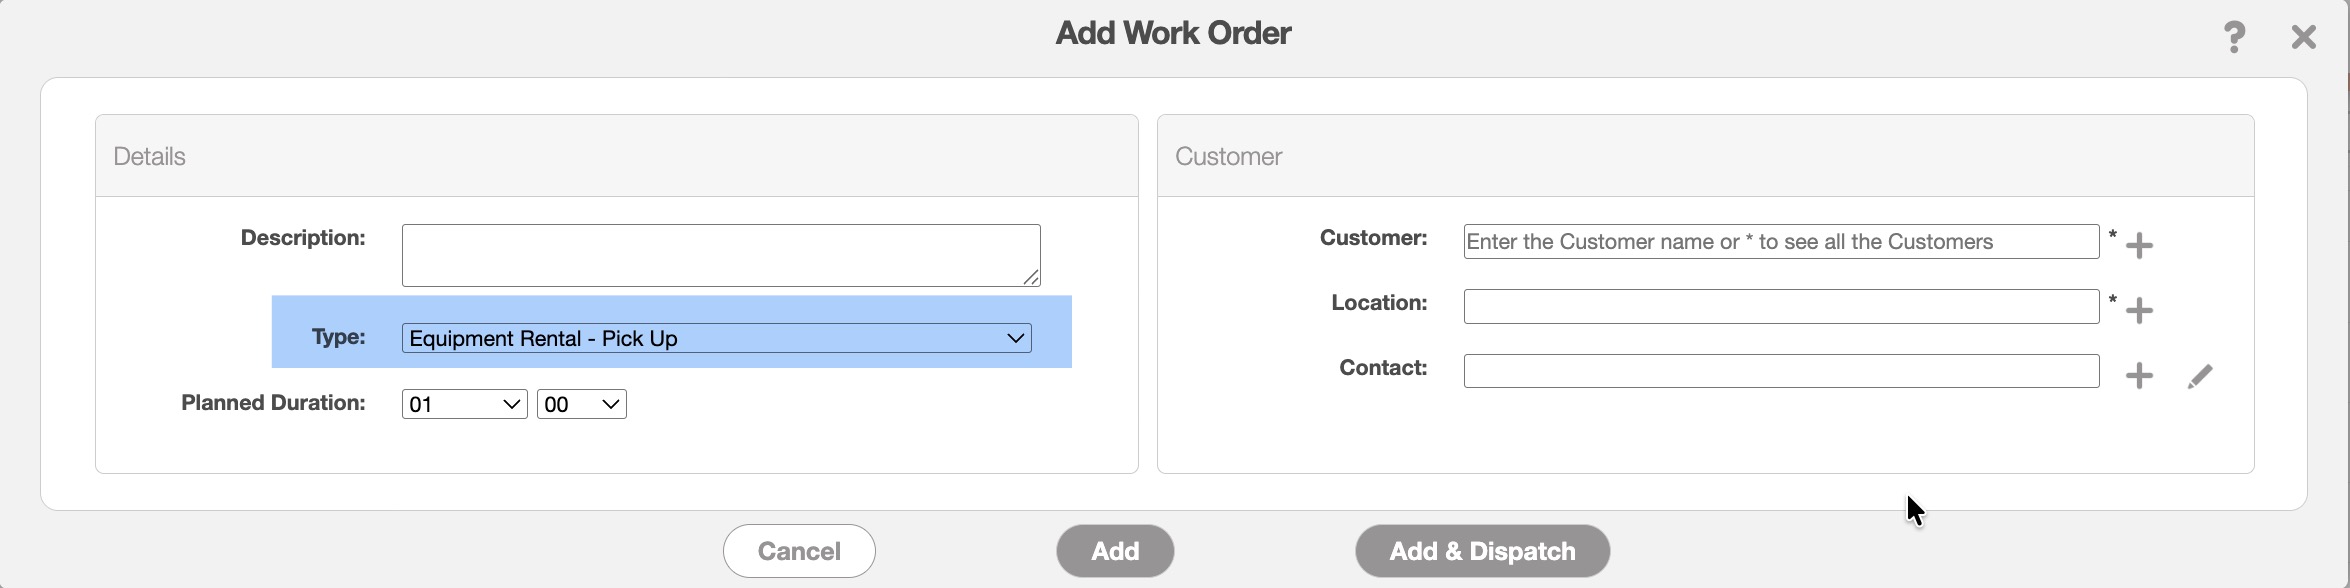
Step 1: Create an "Equipment Rental - Pick Up" Work Order
To retrieve assets from the customer you will first need to create a pick-up work order. When creating a new work order for picking up asset rentals, simply select the "Equipment Rental - Pick Up" option in the "Type" field:
Step 2: Add Asset(s) to the Work Order
This step is optional, particularly when picking up all assets. If no specific asset is selected, the driver or technician will see the full list of assets at the customer location and can choose which ones to pick up or select all of them.
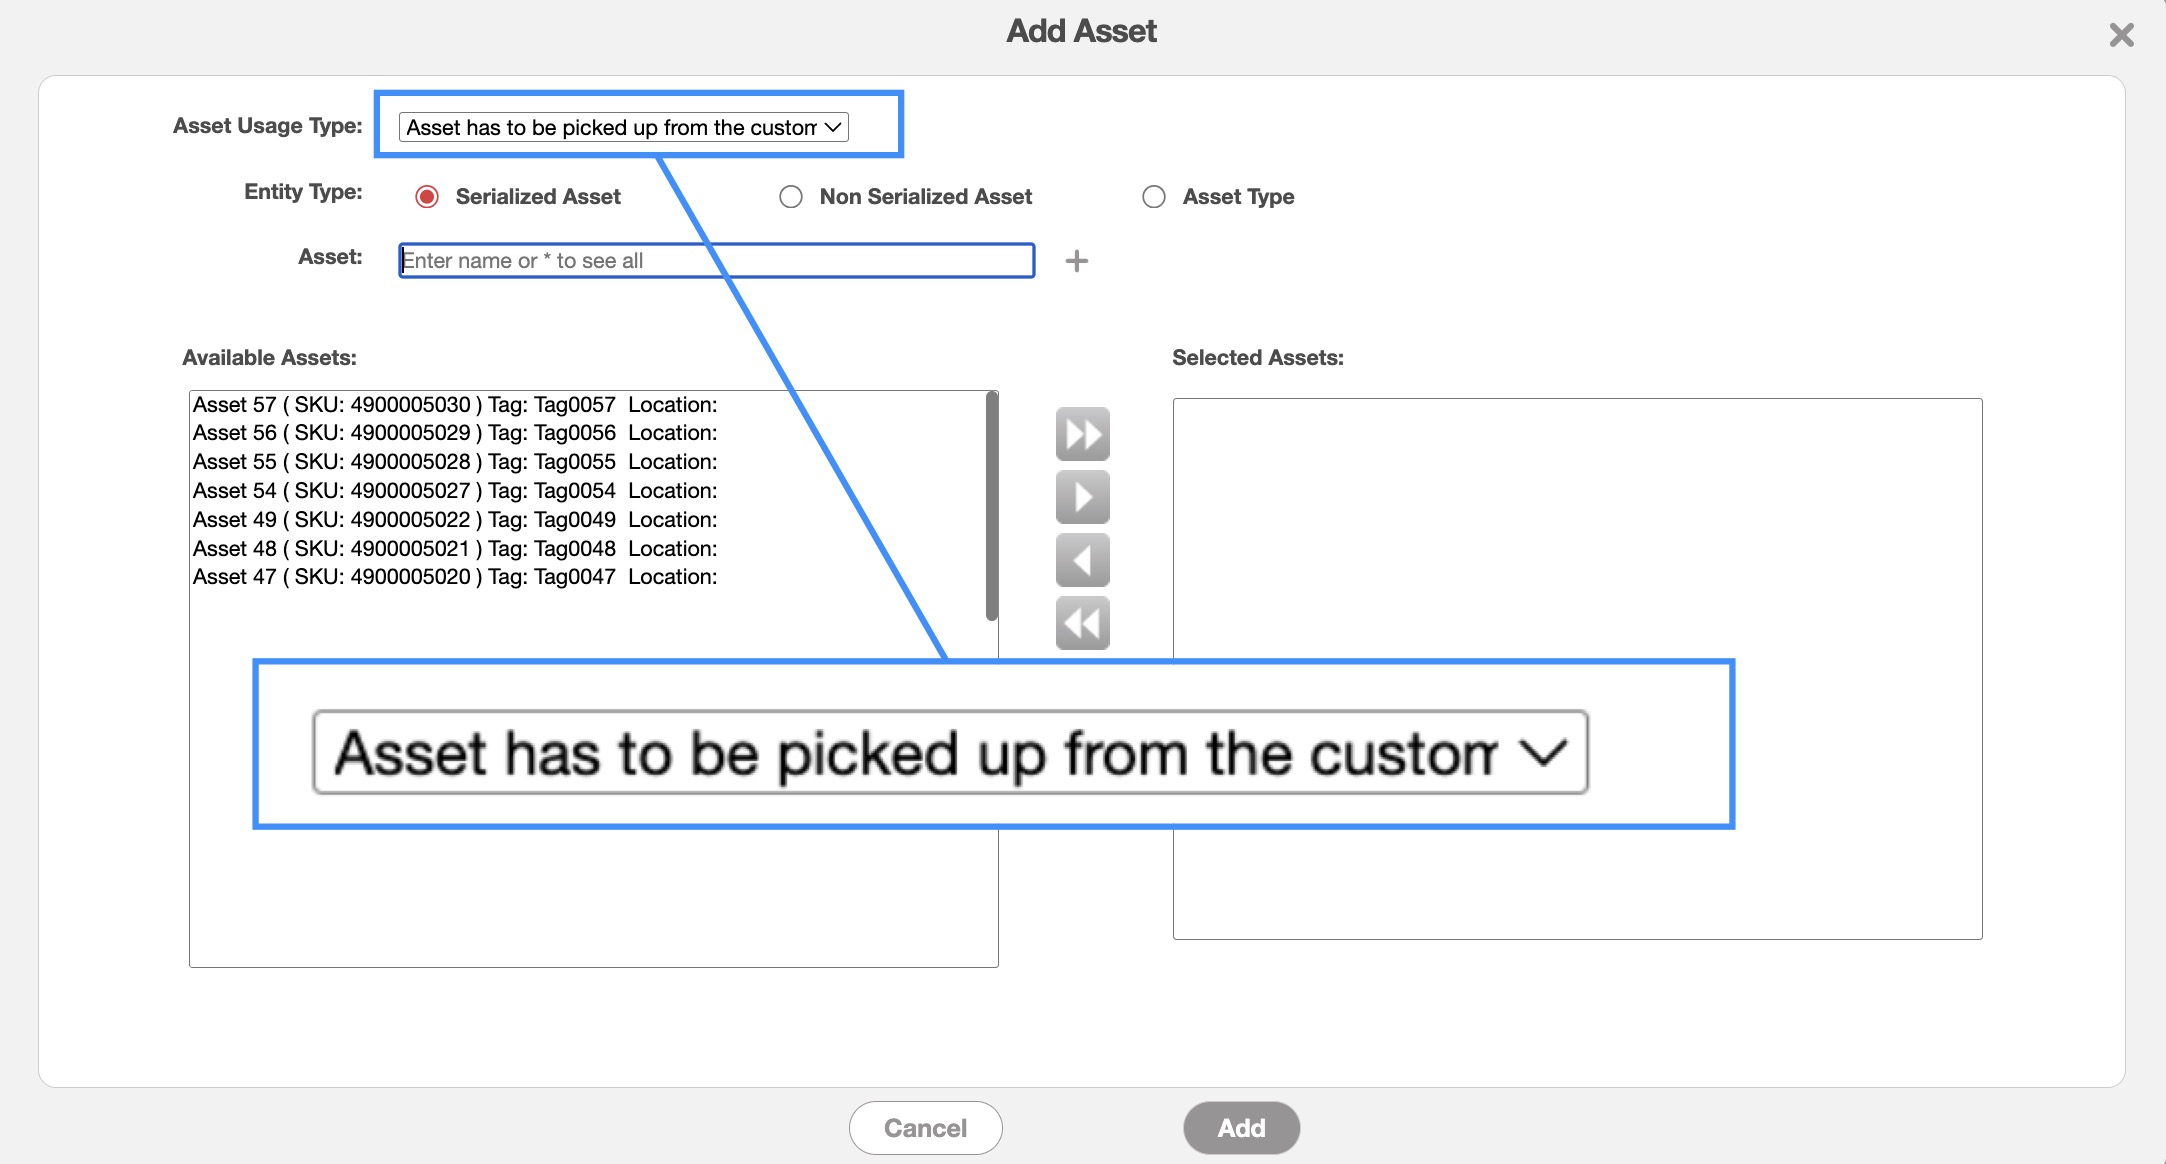
Once the work order is created, navigate to the "Asset" panel and click the Plus Sign icon:
From the "Asset Usage Type" select the "Asset has to be picked up from the customer" option:
Once the assets have been added, you can then dispatch the work order as you normally would. Please see the Dispatching Overview page for more information about how to dispatch your work orders.
Step 3: Pick Up Asset(s) From Customer
Once the appropriate work order has been created you will be able to retrieve the rented assets.
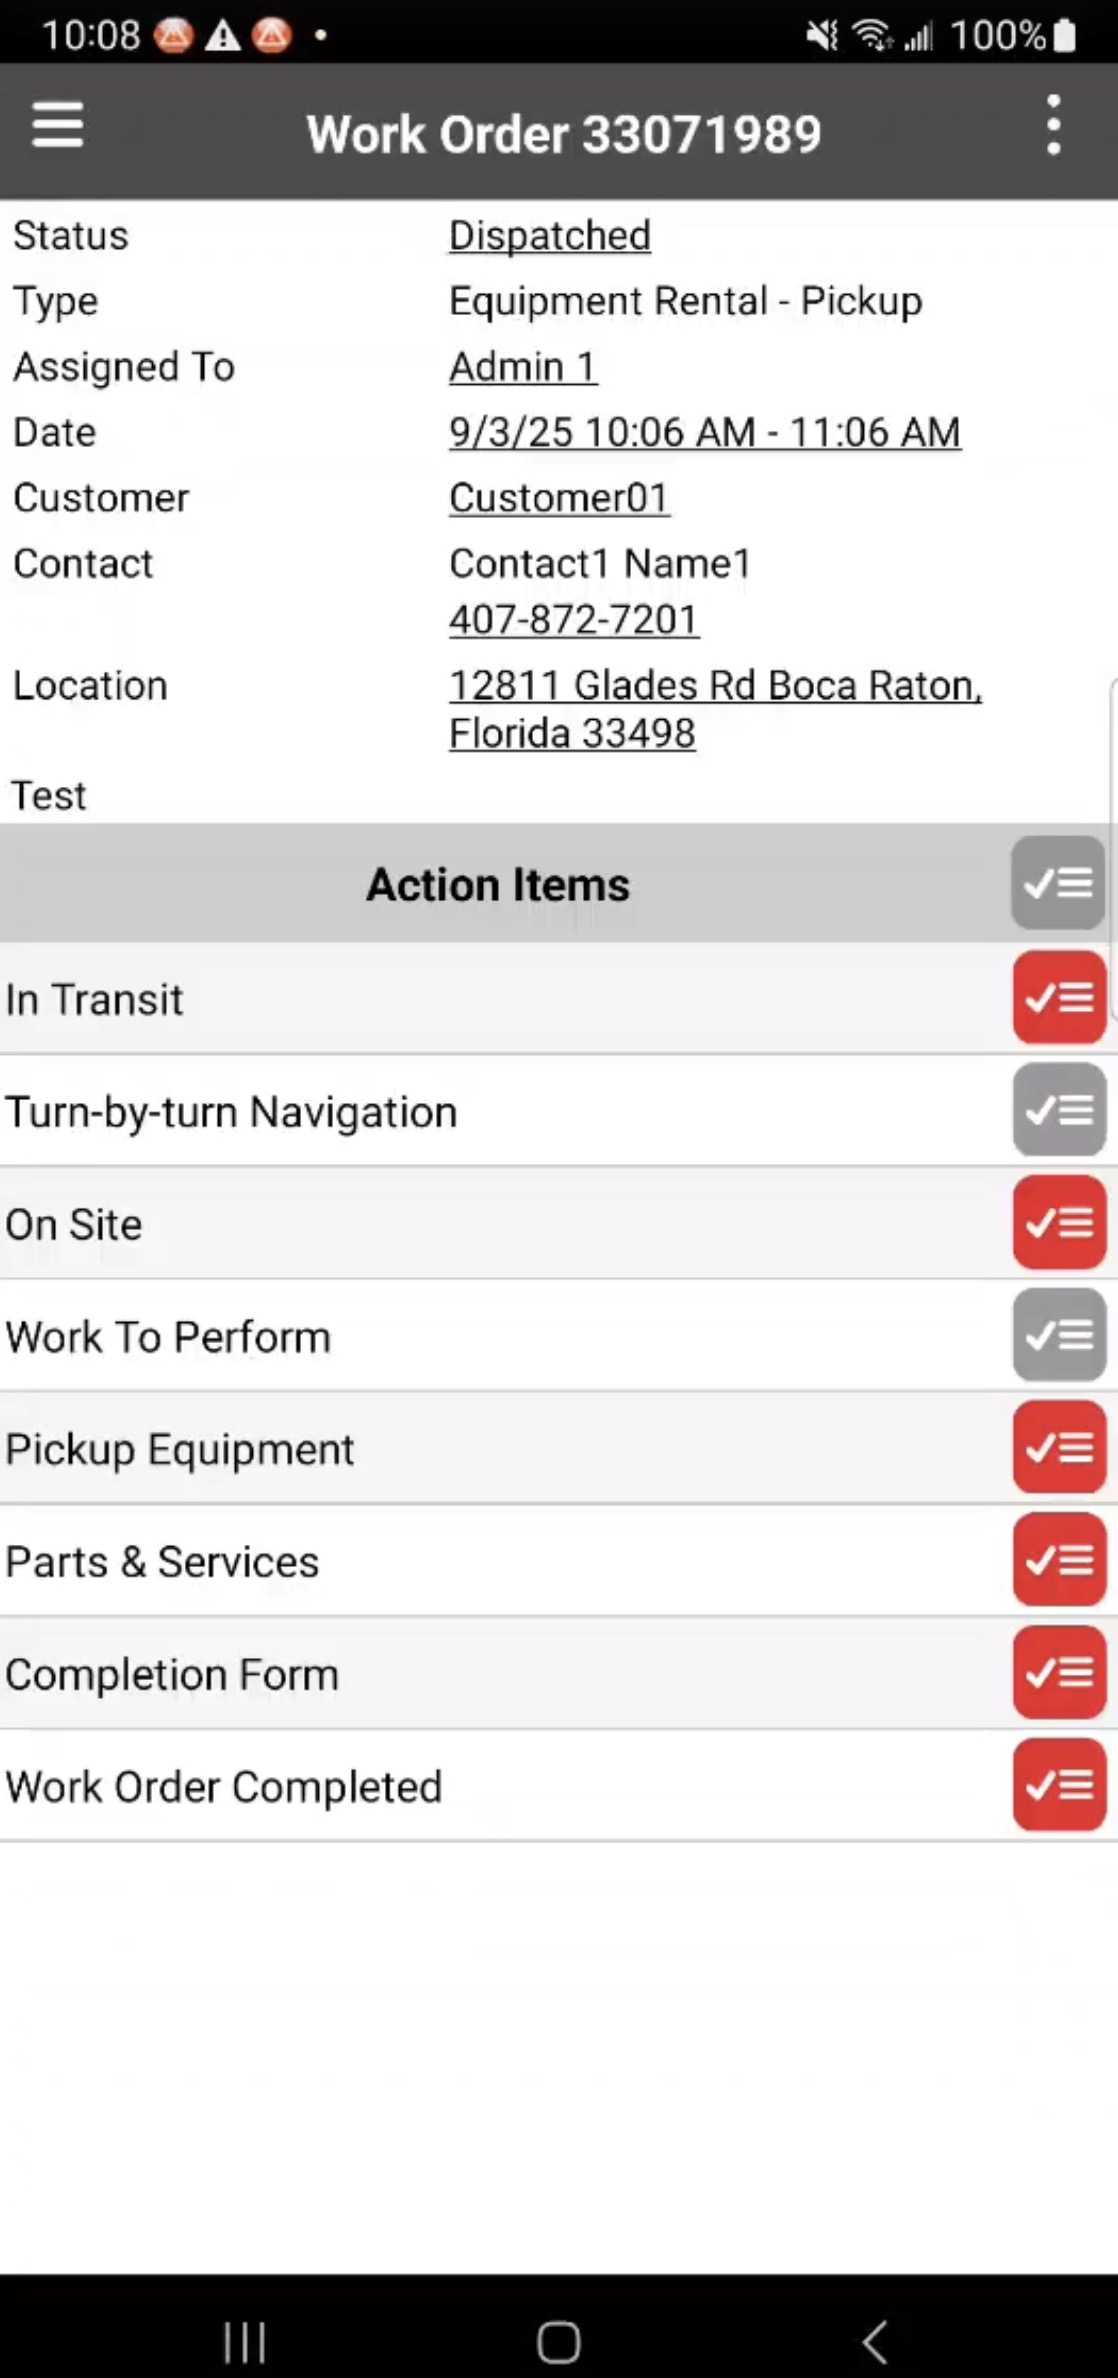
Complete the work order Action Items on the device. Then, once you reach the "Pick Up Equipment" Action Item, you will be able to select desired assets that should be collected from the customer:
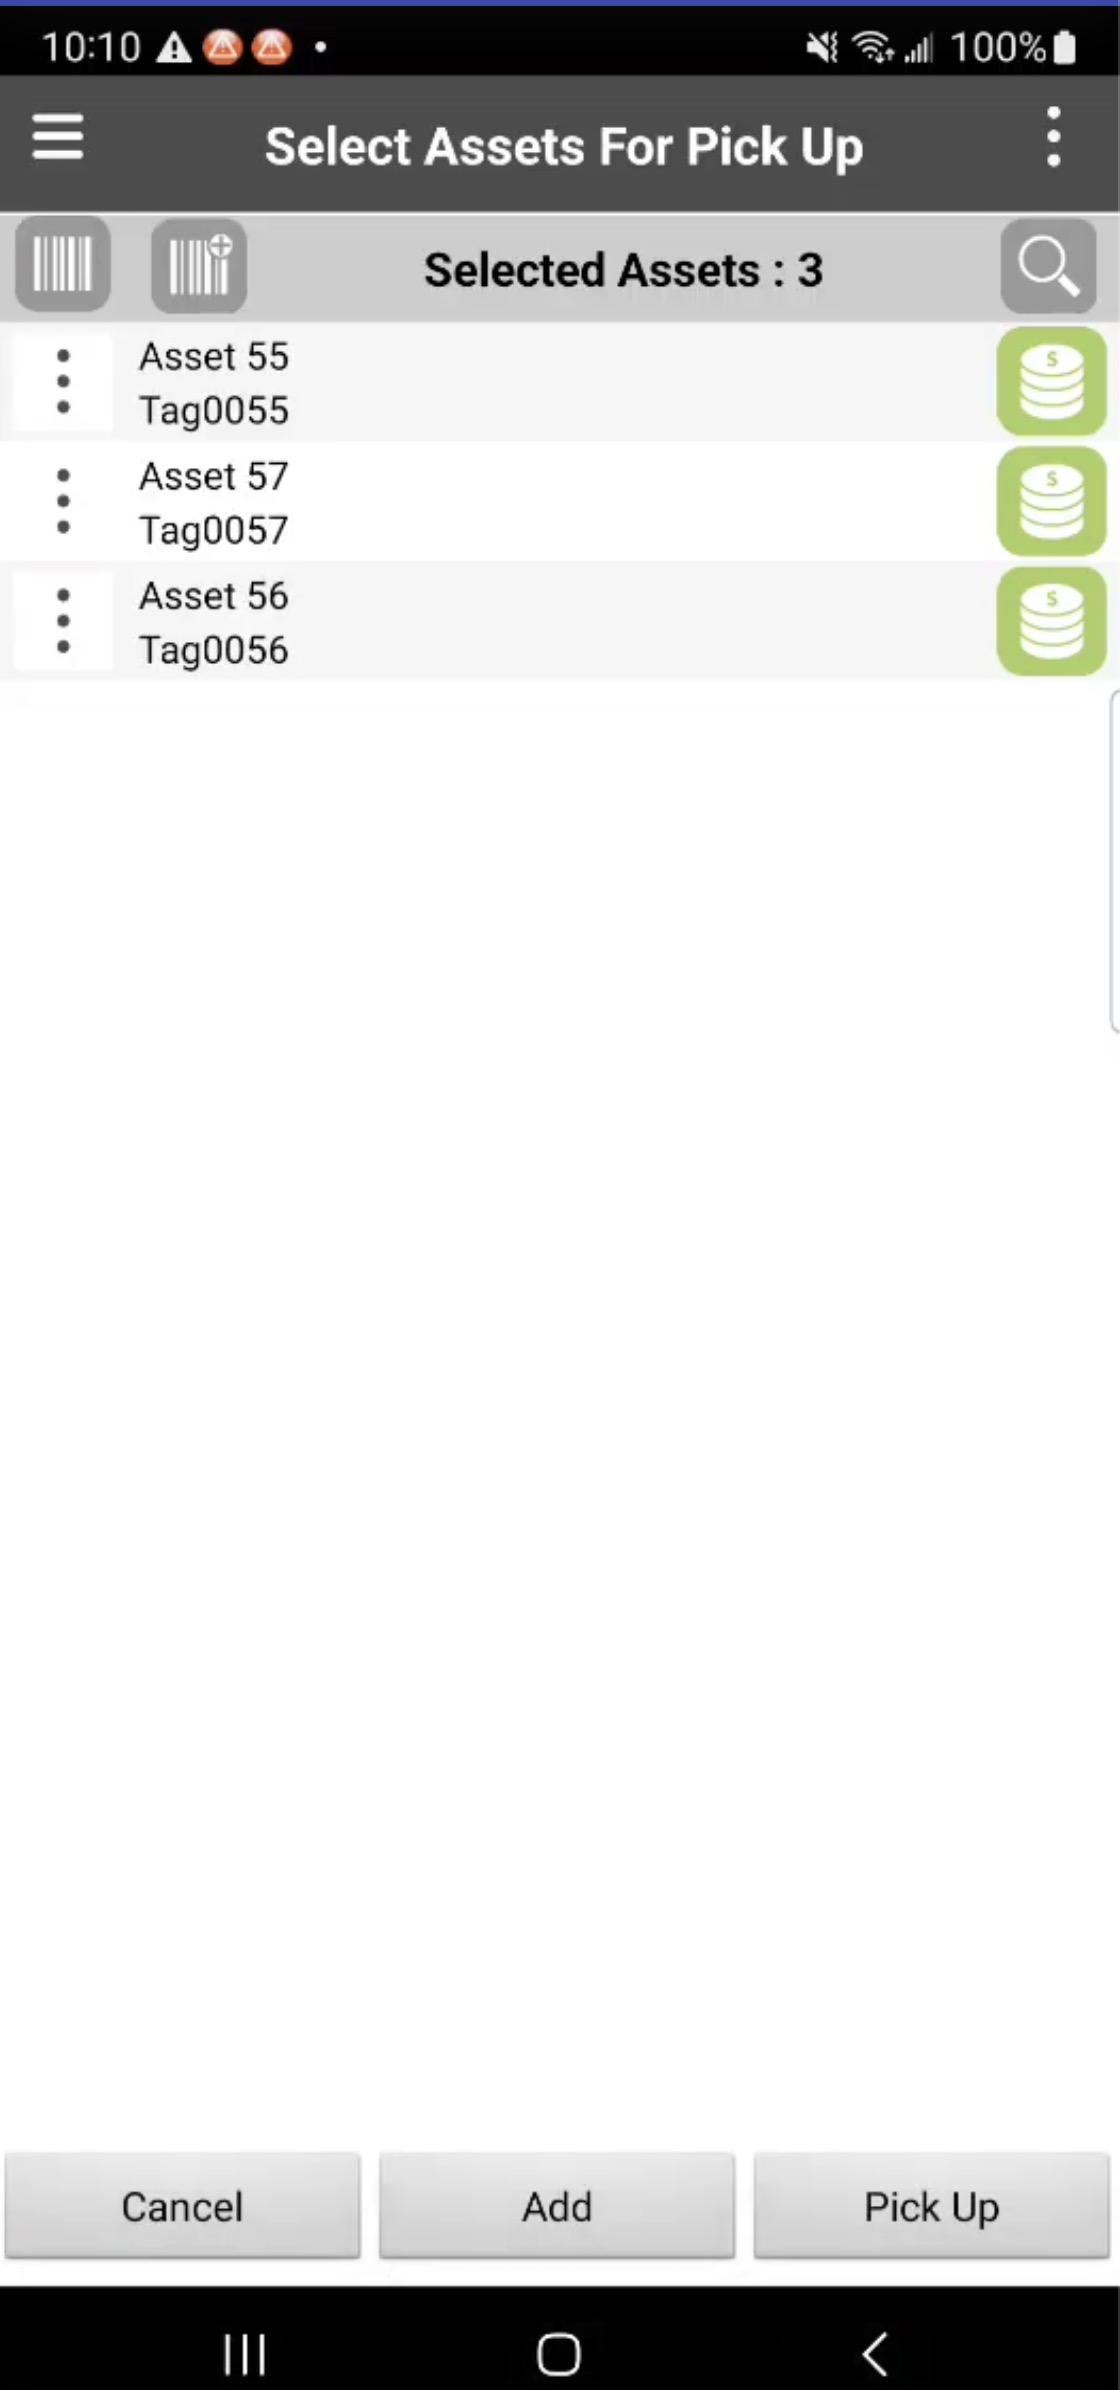
Select the assets that will be retrieved from the customer (this action will turn the Asset button green). Then tap on the Pick Up button. A notification that says "Successfully loaded the items" will then appear confirming that the assets have been loaded:
You can use the Add button for assets or equipment that were not previously registered at the customer location. For example if the asset or equipment was in a transition period.
Note: By default, we do not display a form by equipment. MobiWork only has one Action Item with one form at the end for all the assets (it could be configured).
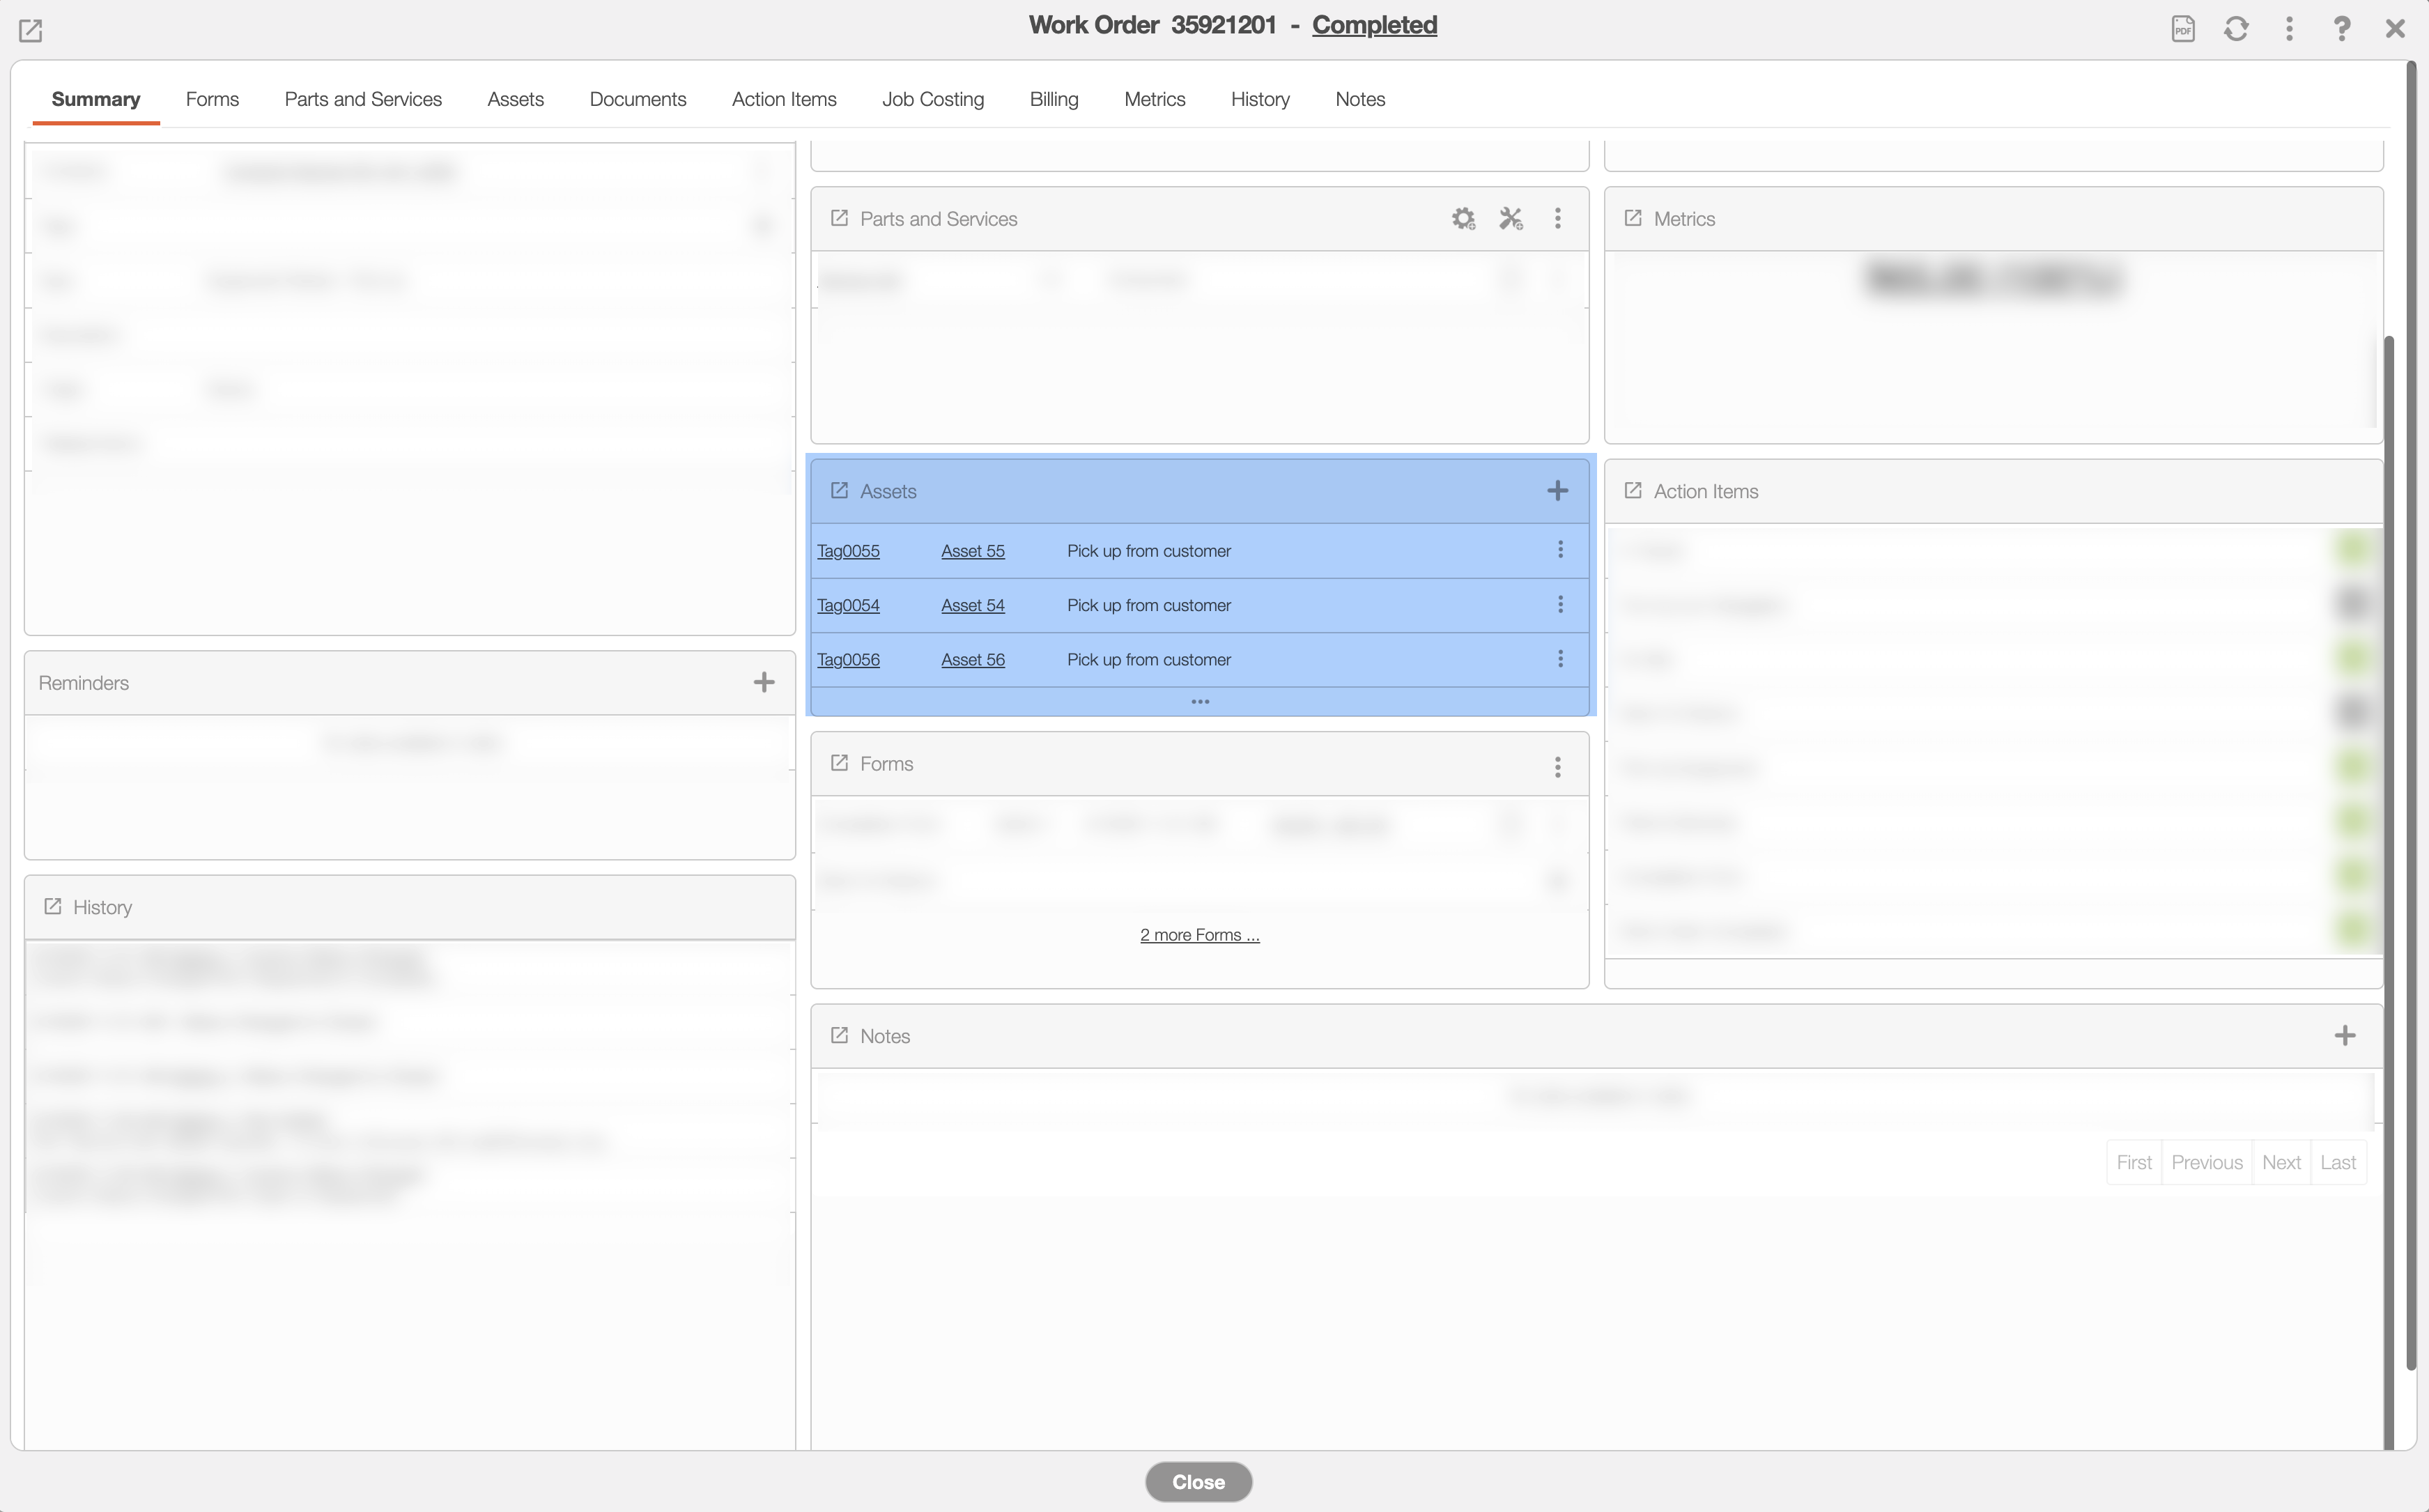
Once you tap Pick Up button, the assets are now transferred back to the user and the customer installation is updated in the View Work Order pop-up window:
Step 4: Unload Asset to Warehouse
The asset can stay with the user or can be returned to the warehouse with the unload action.
You can unload assets from the MobiWork mobile device. When the job is done and the assets have been collected, you will need to unload them so that they can be properly returned to the warehouse.
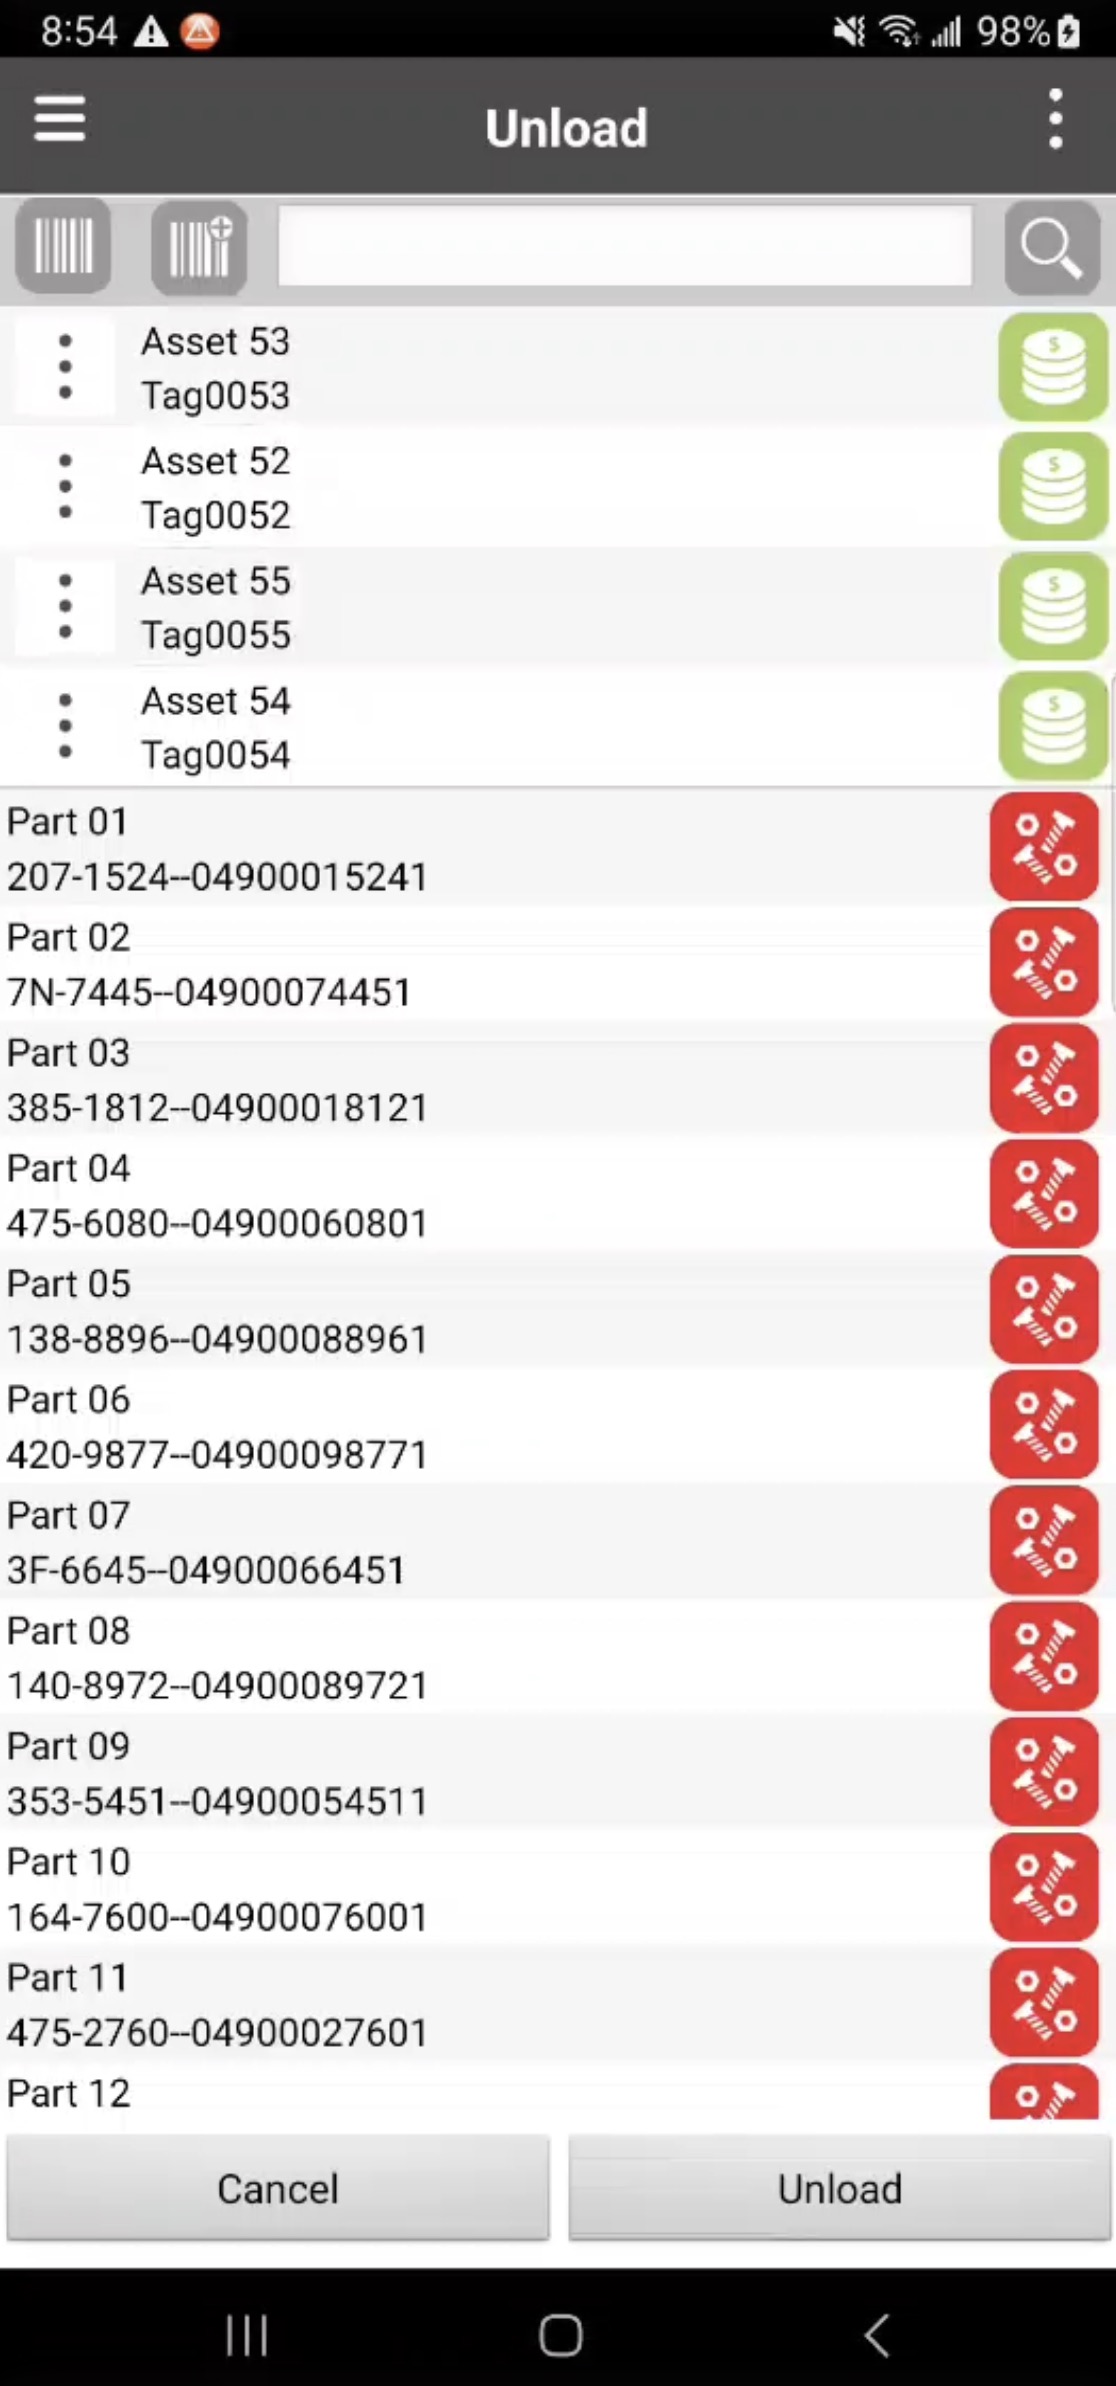
To accomplish this action, please navigate to the work order List page's Actions Panel and select the "Unload" option:

All assets that were collected during day for the listed work orders will be displayed. Tap on the desired assets (this action will turn the Asset button green). Then click the Unload button:
The Unload Form will then appear. In this form you can enter notes, take photos, capture signatures or you can ignore these fields and tap Save to continue with loading the asset:
The selected assets will then be returned back to the warehouse. You can track the return of the assets on through the MobiWork web interface by navigating to the "Tracking" tab on the View Asset pop-up window:
To load or unload a non-serialized asset, simply follow the steps outlined in the Asset Drop Off subsection or the Asset Pick Up subsection.
Once you reach the Add Asset pop-up window of Step 2, select the "Non-Serialized Asset" option in the "Asset Usage Type" selection. Then, input the quantity of the non-serialized asset being used:

You will notice on the work order it will populate the number of assets be delivered or picked up:
When you load or unload the assets for the corresponding work order, you will be prompted to input the quantity as well. You will also get this prompt when delivering the assets to the customer or when picking them up from the customer:
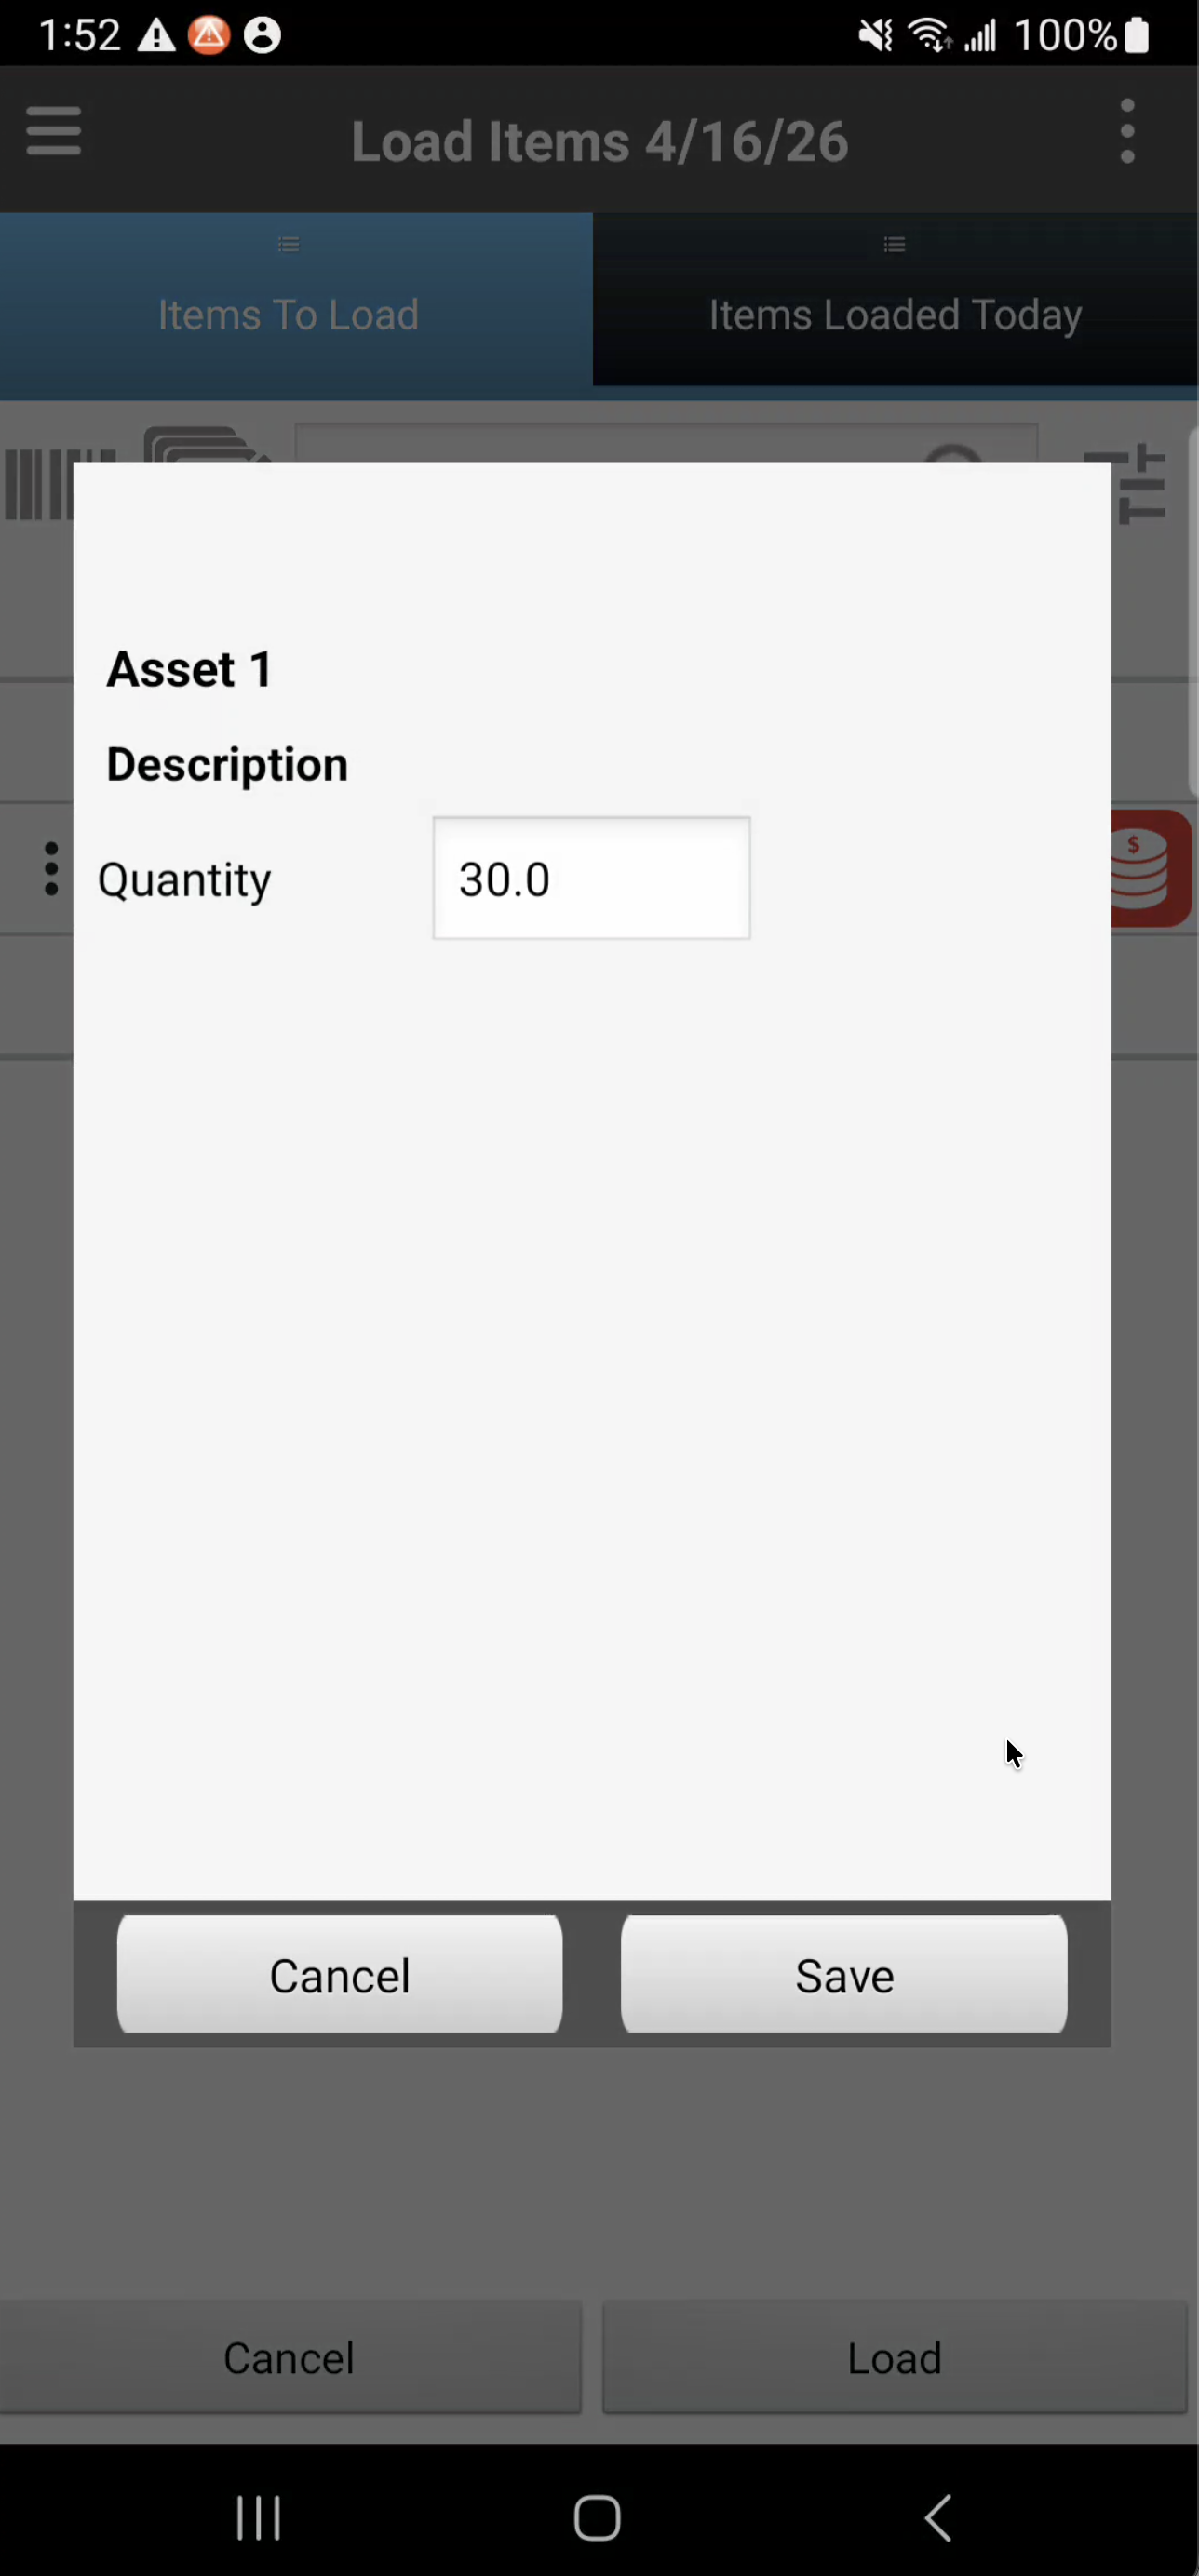
Once the quantity is entered and saved, the process of loading and unloading the asset will follow the same procedure as outlined in the Asset Drop Off subsection or the Asset Pick Up subsection.
Please see the Non-Serialized Assets for more information about non-serialized assets.
You will be able to manage and oversee your assets easily through MobiWork's array of forms, reports, and more. When loading or unloading an asset, MobiWork provides additional data. After registering a load event, the corresponding form will be available providing detailed information about the asset transfer. These features will help provide transparency and accountability for your asset rentals. The following subsections will go over how you can oversee your assets.
Assets Movements
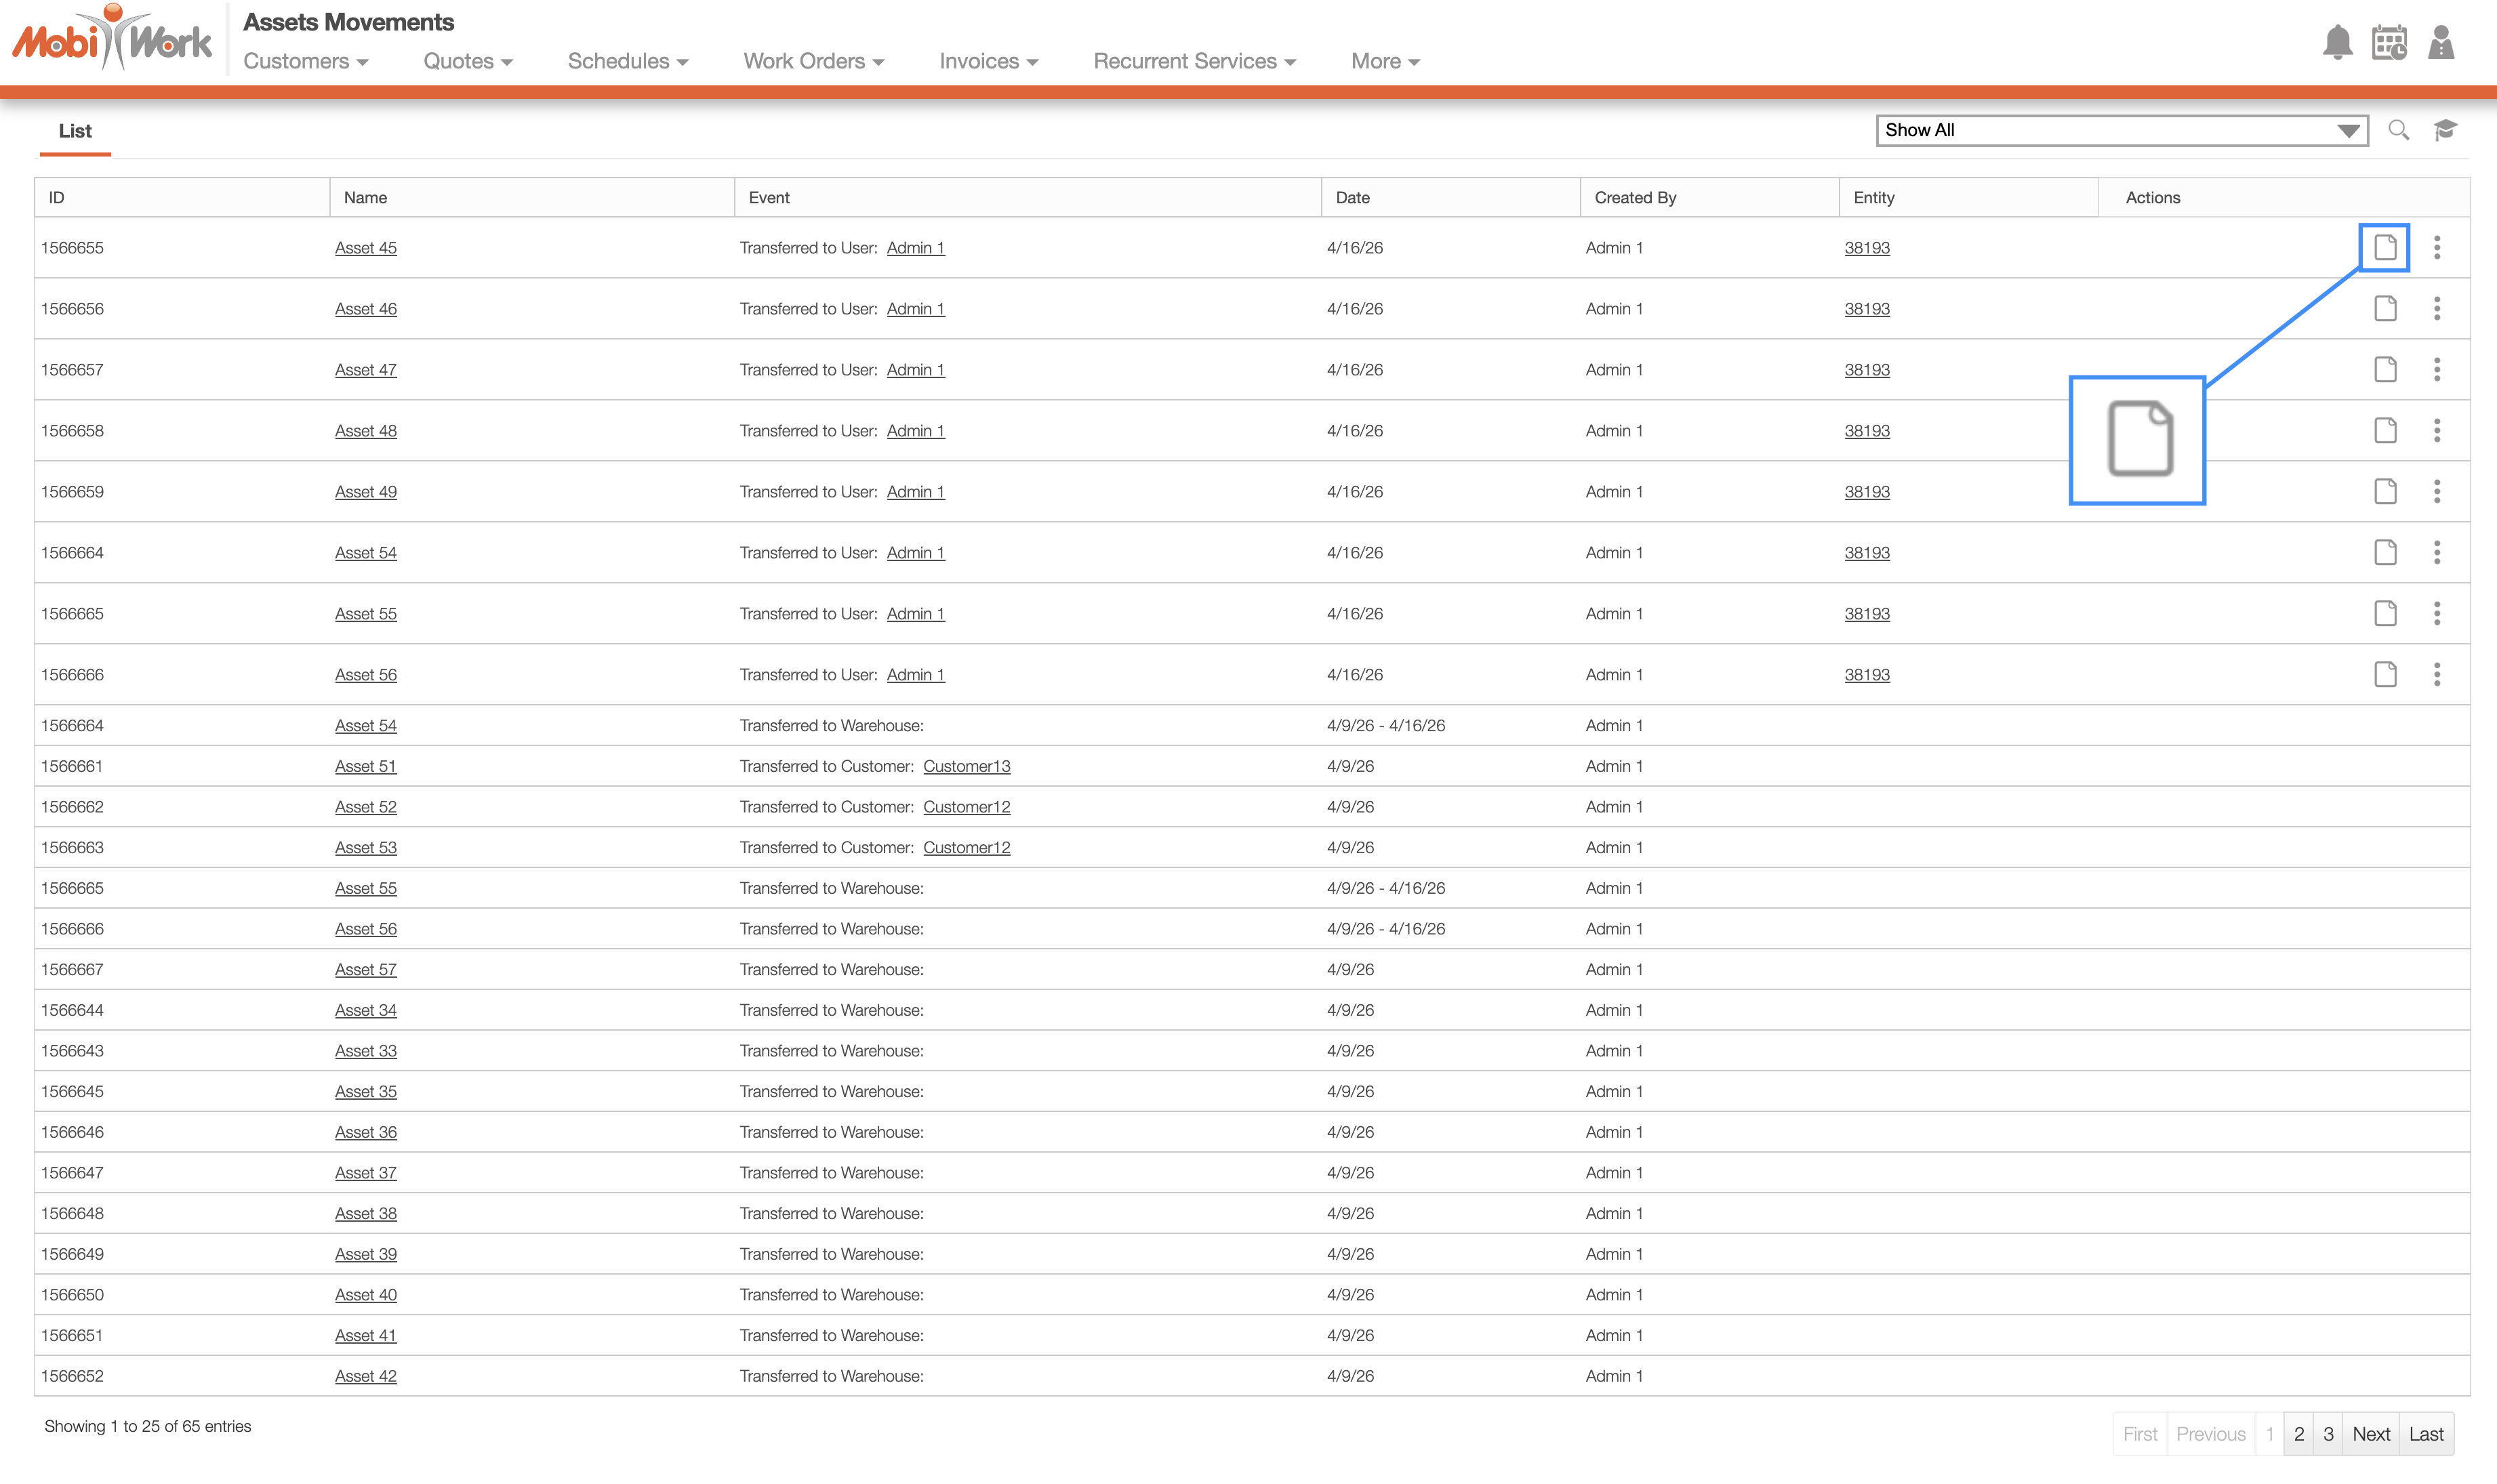
The Asset Movements List page provides an overview of where your assets are located. Whenever an asset is transferred from a warehouse, customer, or user, the event is registered:
For more information about asset transfers, please see the Transfer Assets page.
When performing a load or unloading event from the work order, then you can even obtain additional information regarding the asset status and transfer. To access this information, please click on the View icon for the corresponding load event.
Load Event
After performing a load or unload event from the work order, you can obtain additional information regarding the asset status and transfer.
The load and unload events will only occur when droping off or picking up the asset during a work order. Please see the Step 4: Asset Drop-off Work Order subsection or the Step 4: Unload Asset to Warehouse subsection for additional details.
To access the load event details, you can click on the View icon from the Asset Movements List page or from the Tracking" tab on the View Asset pop-up window. The Transfer Summary pop-up window will then appear:

By clicking on the Filled Form link, you will be able to view the corresponding form that was completed during the load or unload events:
This form will display the notes regarding the transfer, the manager name and signature, as well as pictures of the asset being loaded or unloaded. Furthermore, the geotag information will be captured, granting full visibility of where and when the asset was loaded or unloaded.
View Asset Window
Whenever you load or unload assets, you can view their tracking movements through the MobiWork web interface. To view the tracking history by navigate to the "Tracking" tab on the View Asset pop-up window:
![]()
You can even see where the asset is currently stored or being heled in the "Current Location" subsection.
You will also be able to view:
Delivery items have moved from the User to the Customer
Under Customer Installations you can keep track of the date the items were delivered, including the start and end date of the asset rental.
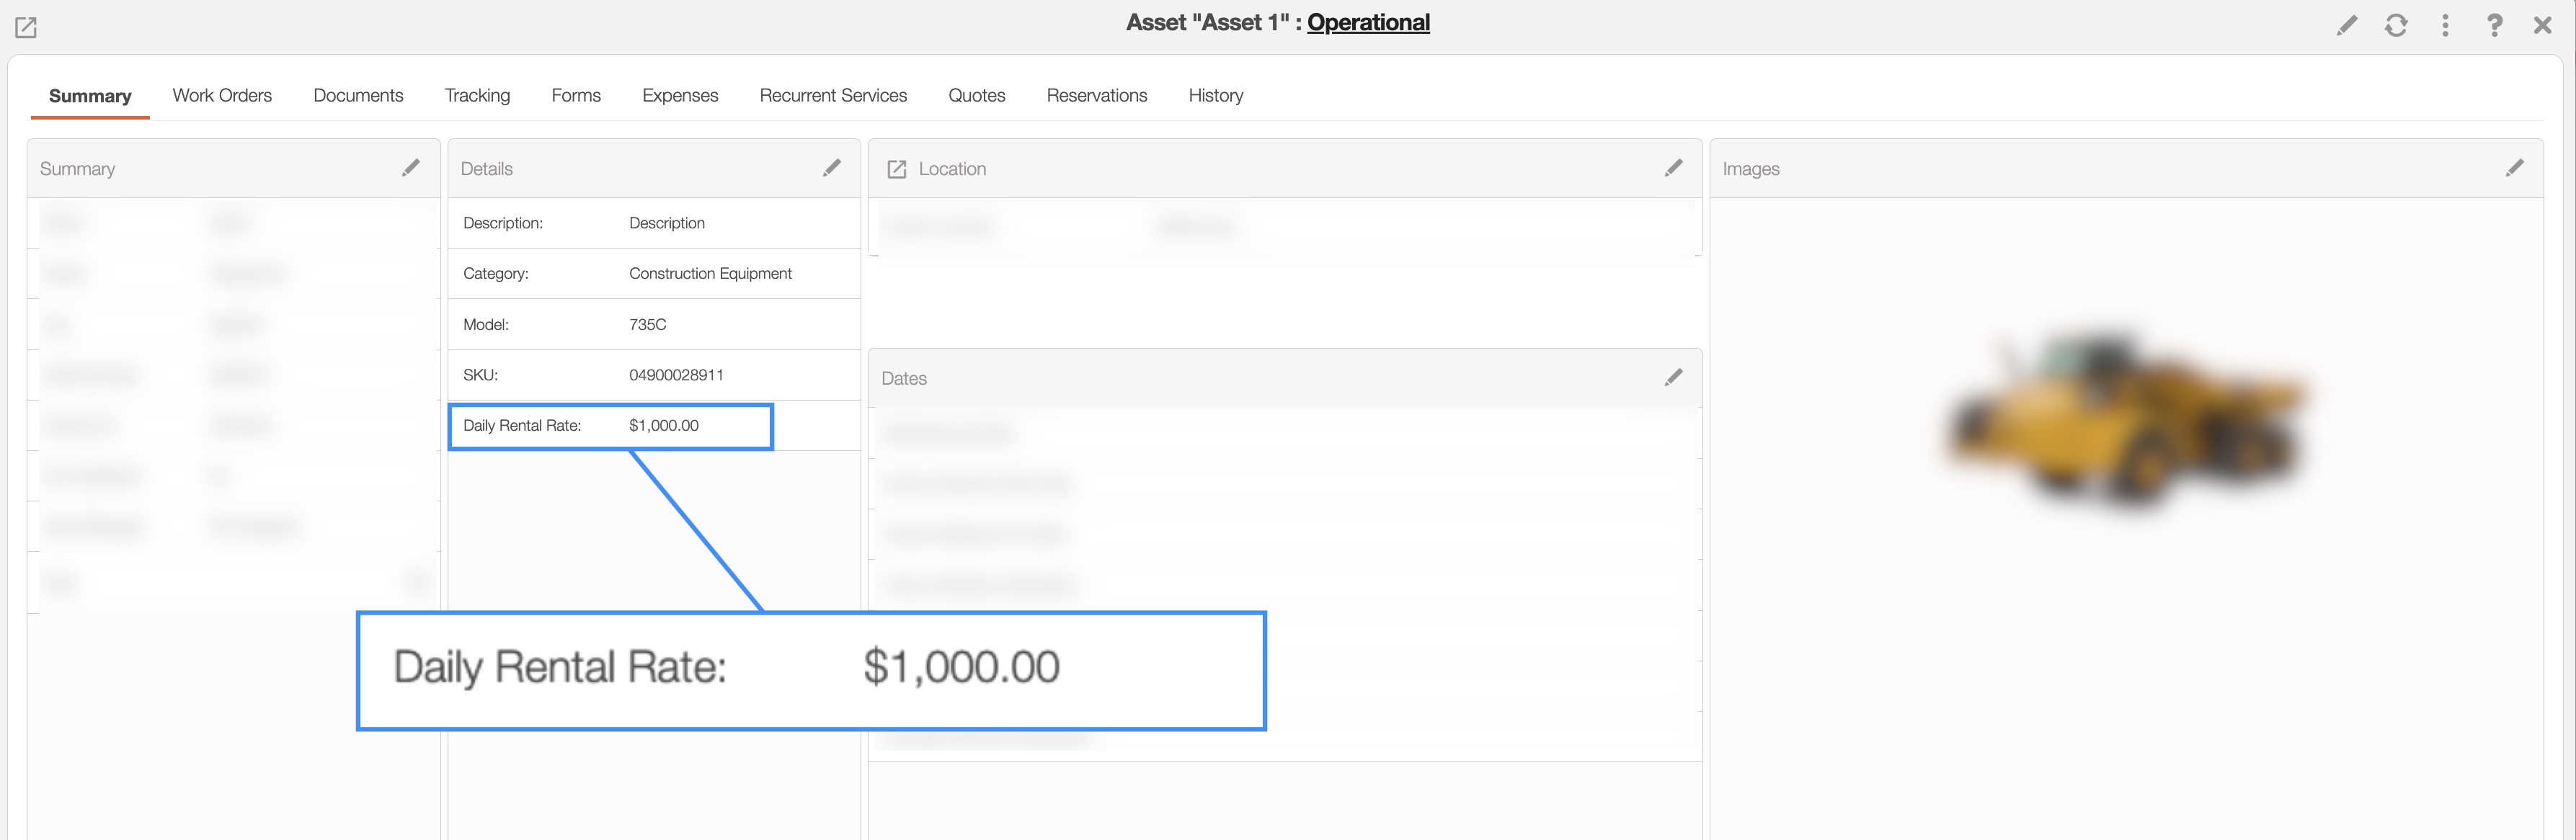
To update the daily rental rate for an asset, you can modify the "Daily Rental Rate" column within either the Edit Asset pop-up window.
For detailed instructions on editing an asset, please visit the Edit Asset page:

When calculating the asset rental charge for invoices or quotes, you should add the rental charge as a designated service. This service will then be listed under services on the quote or invoice.
For guidance on creating a new service, please refer to the Add Service page.
In the View Asset pop-up window, you can reserve assets for specific customers and locations. This is especially ideal when an asset needs to be reserved for a work order or project.
You can reserve the asset through the "Reservation" tab on the View Asset pop-up window:
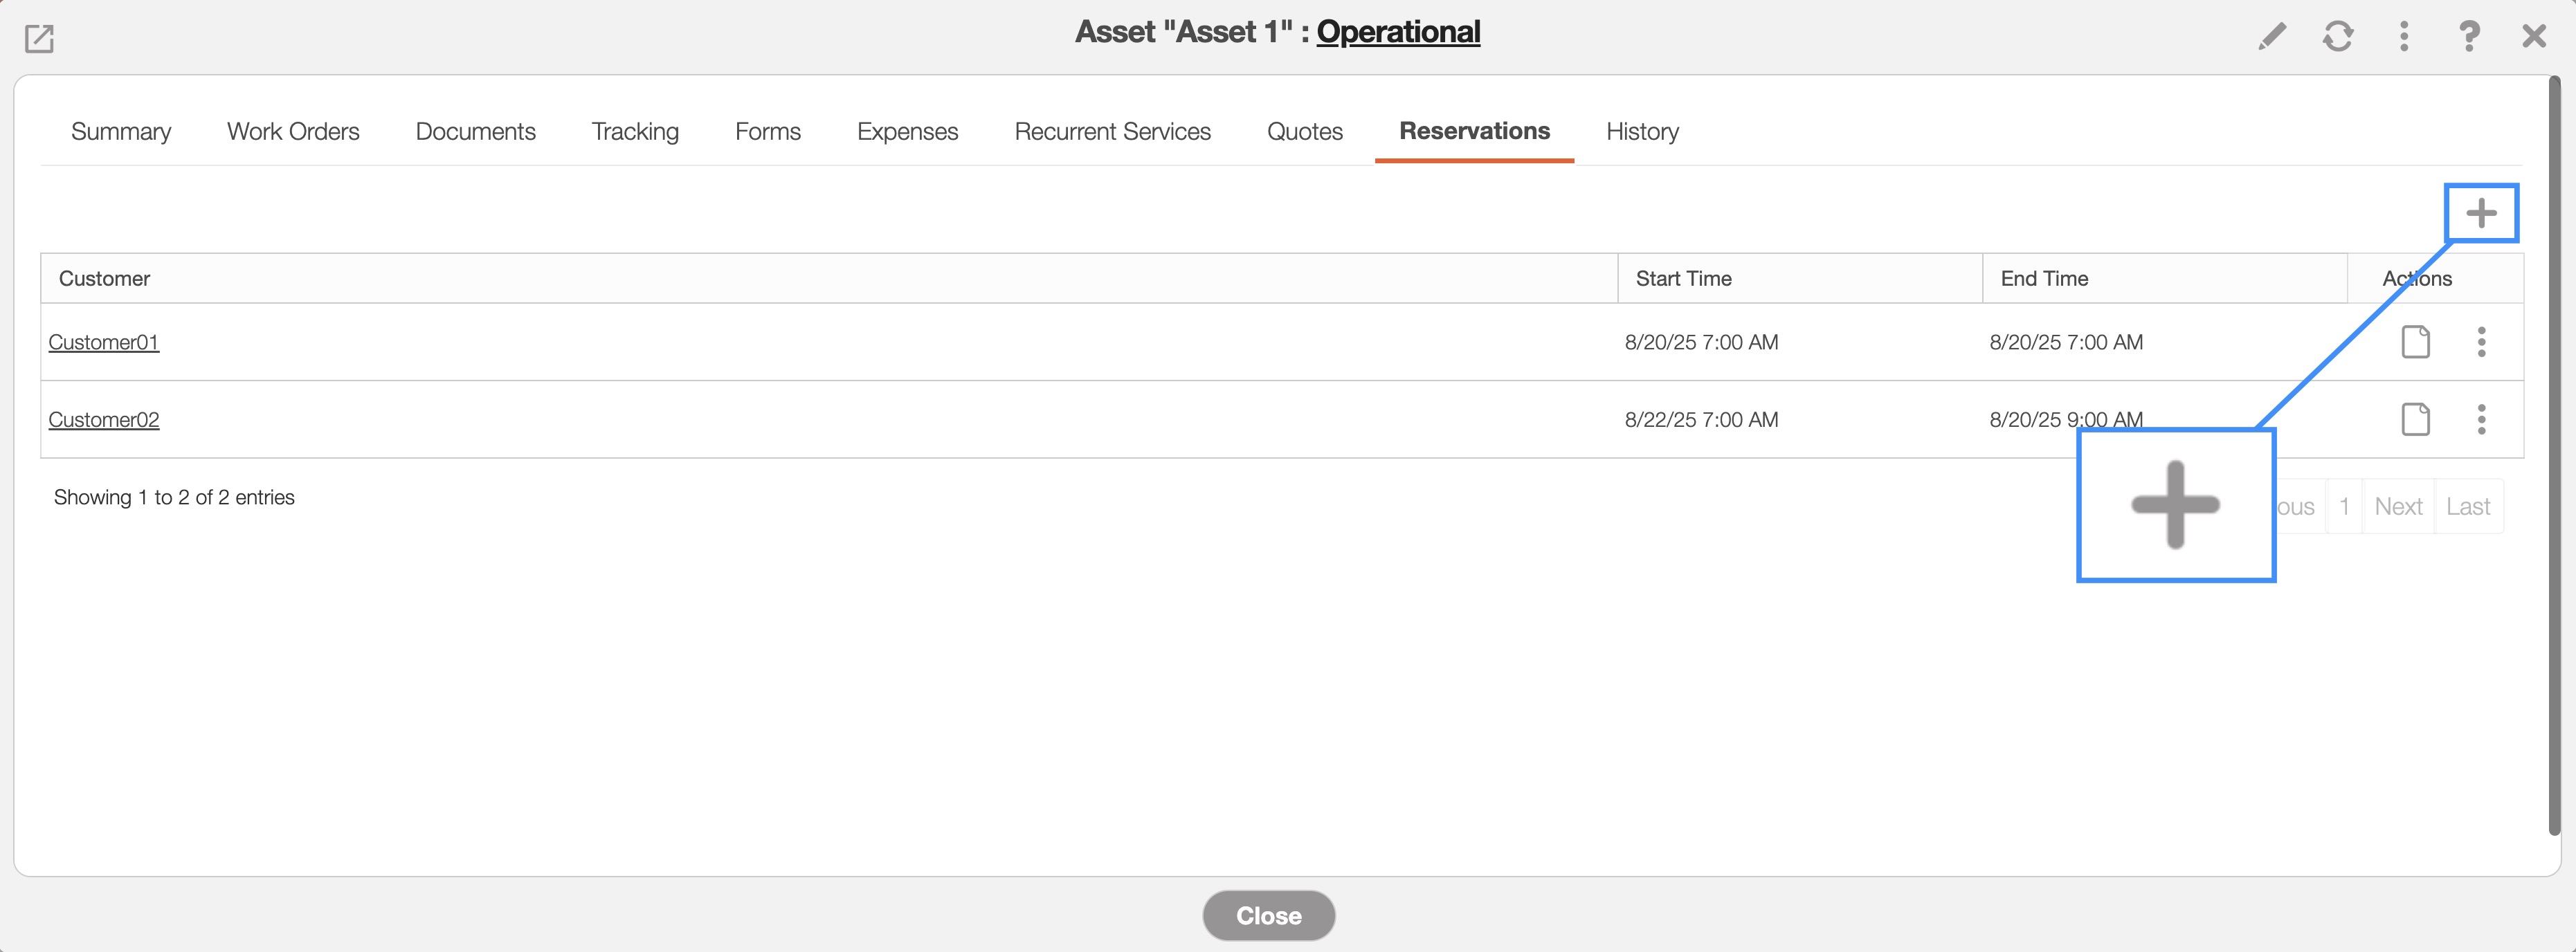
Once on this tab, press the Plus Sign button to add the reservation:
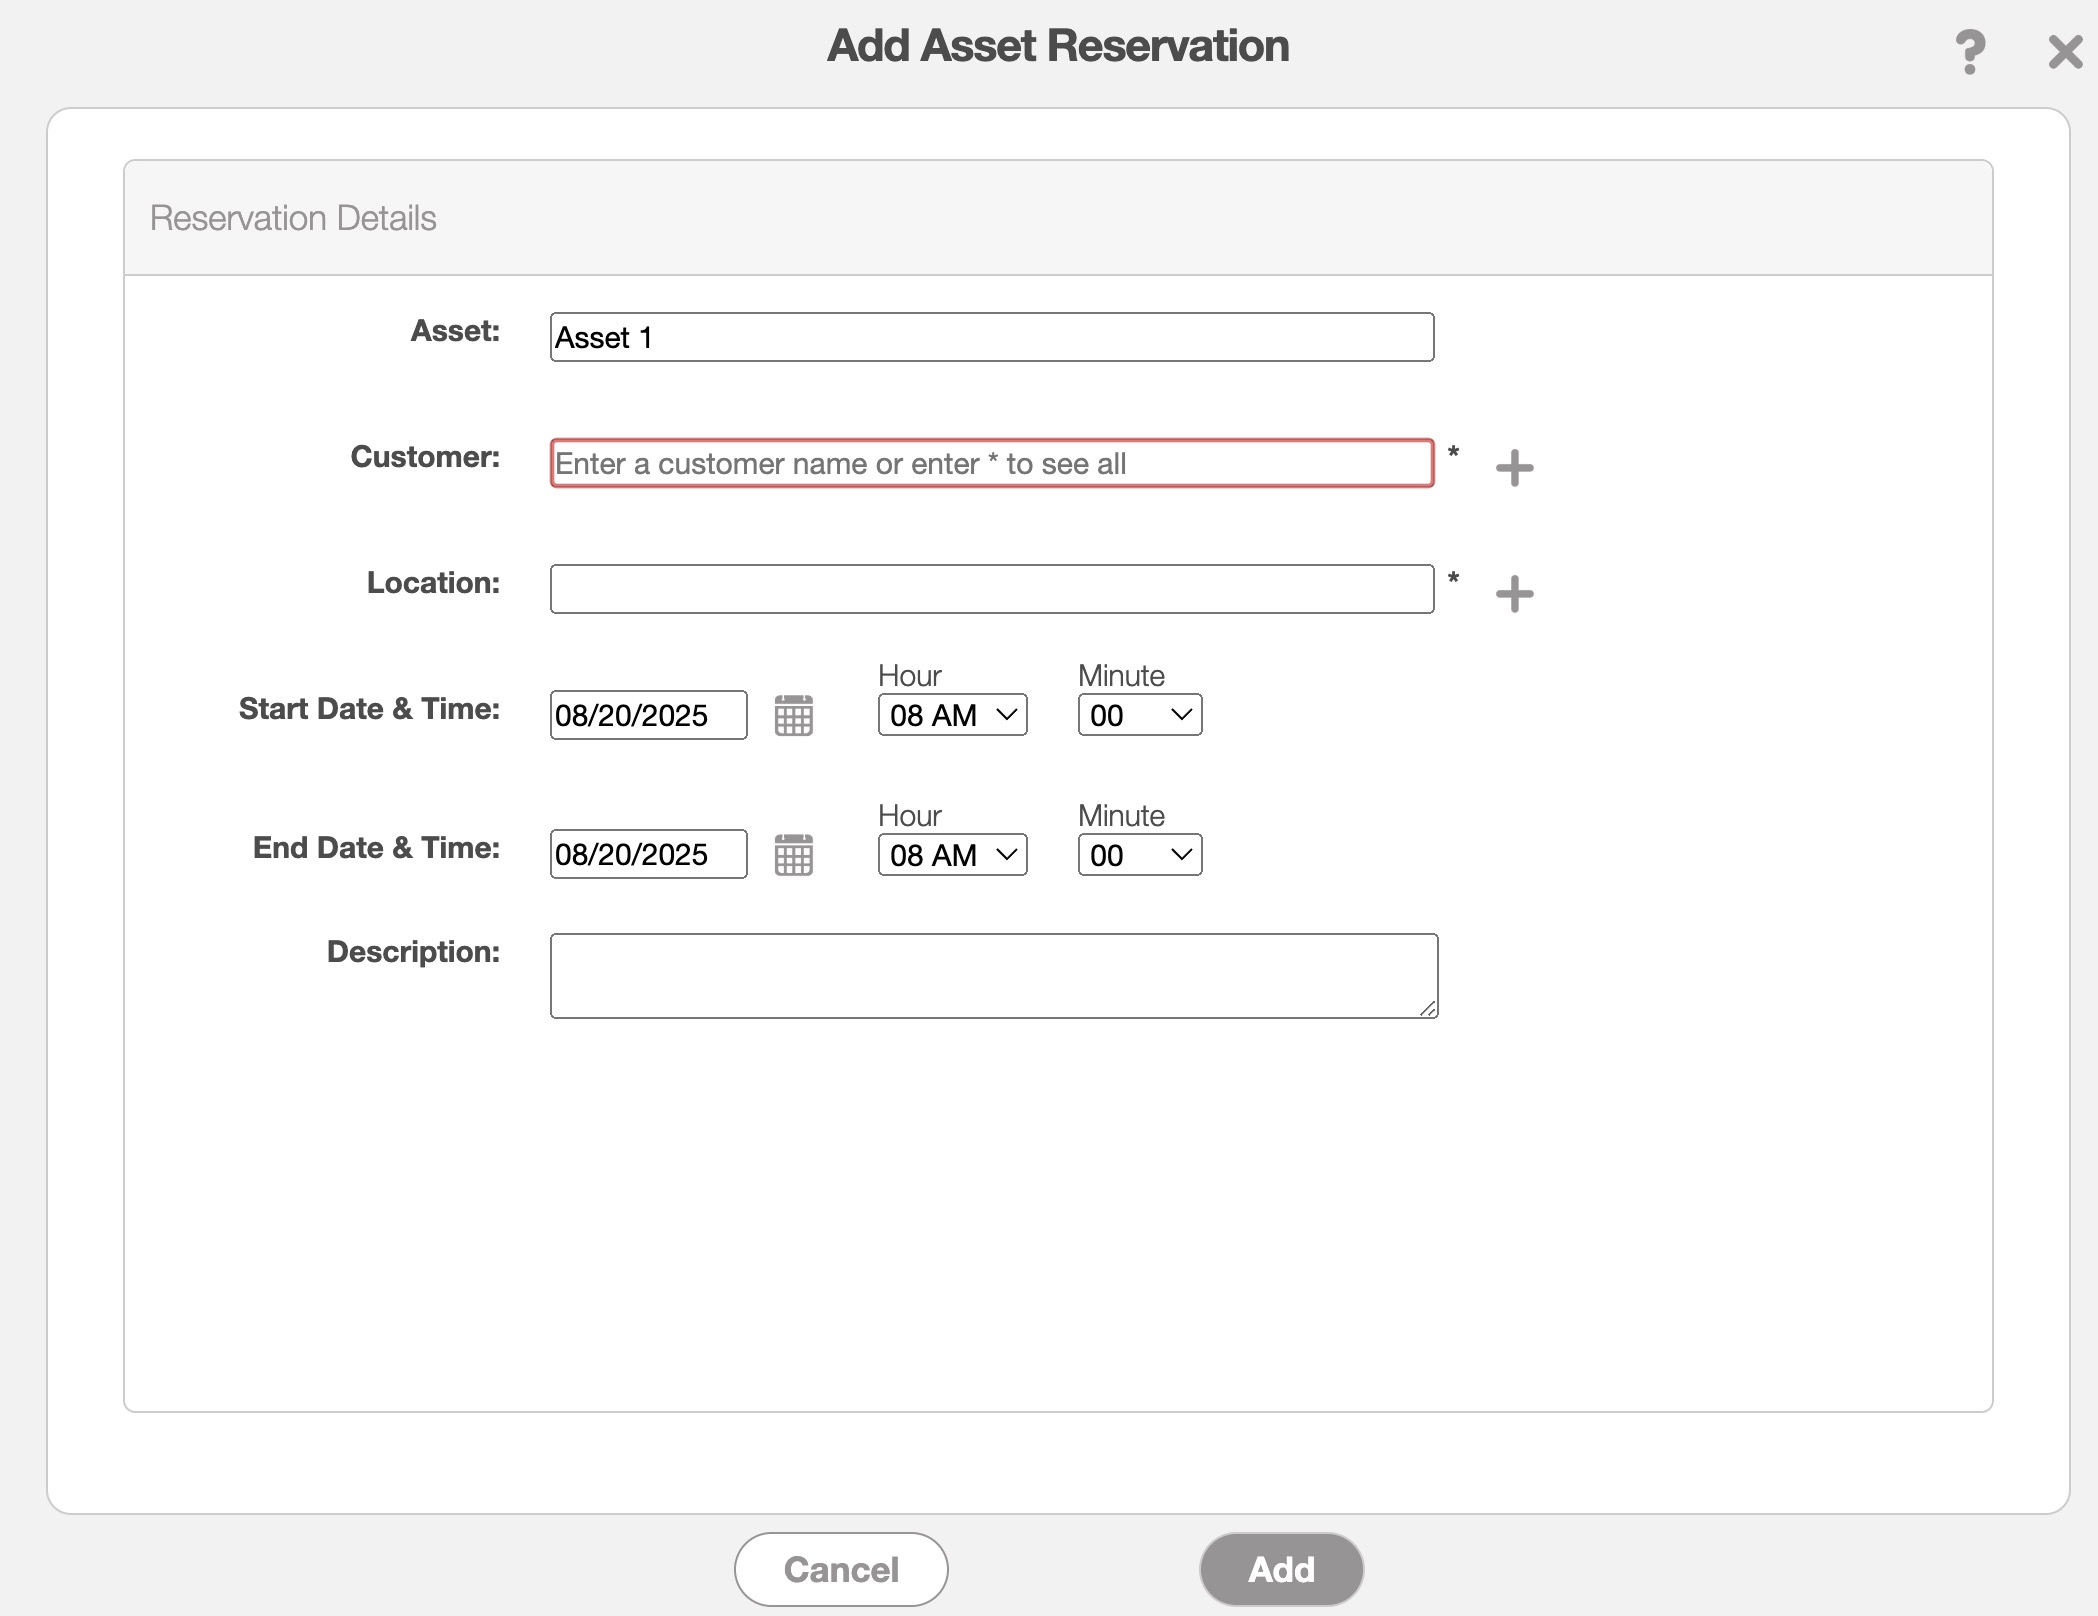
In the Add Asset Reservation enter the following information to complete the reservation:
The customer for whom the asset is reserved.
The location where the asset will be stored.
The start and end date/time for how long the asset will be reserved.
You can also include an optional description with additional details about the reservation.
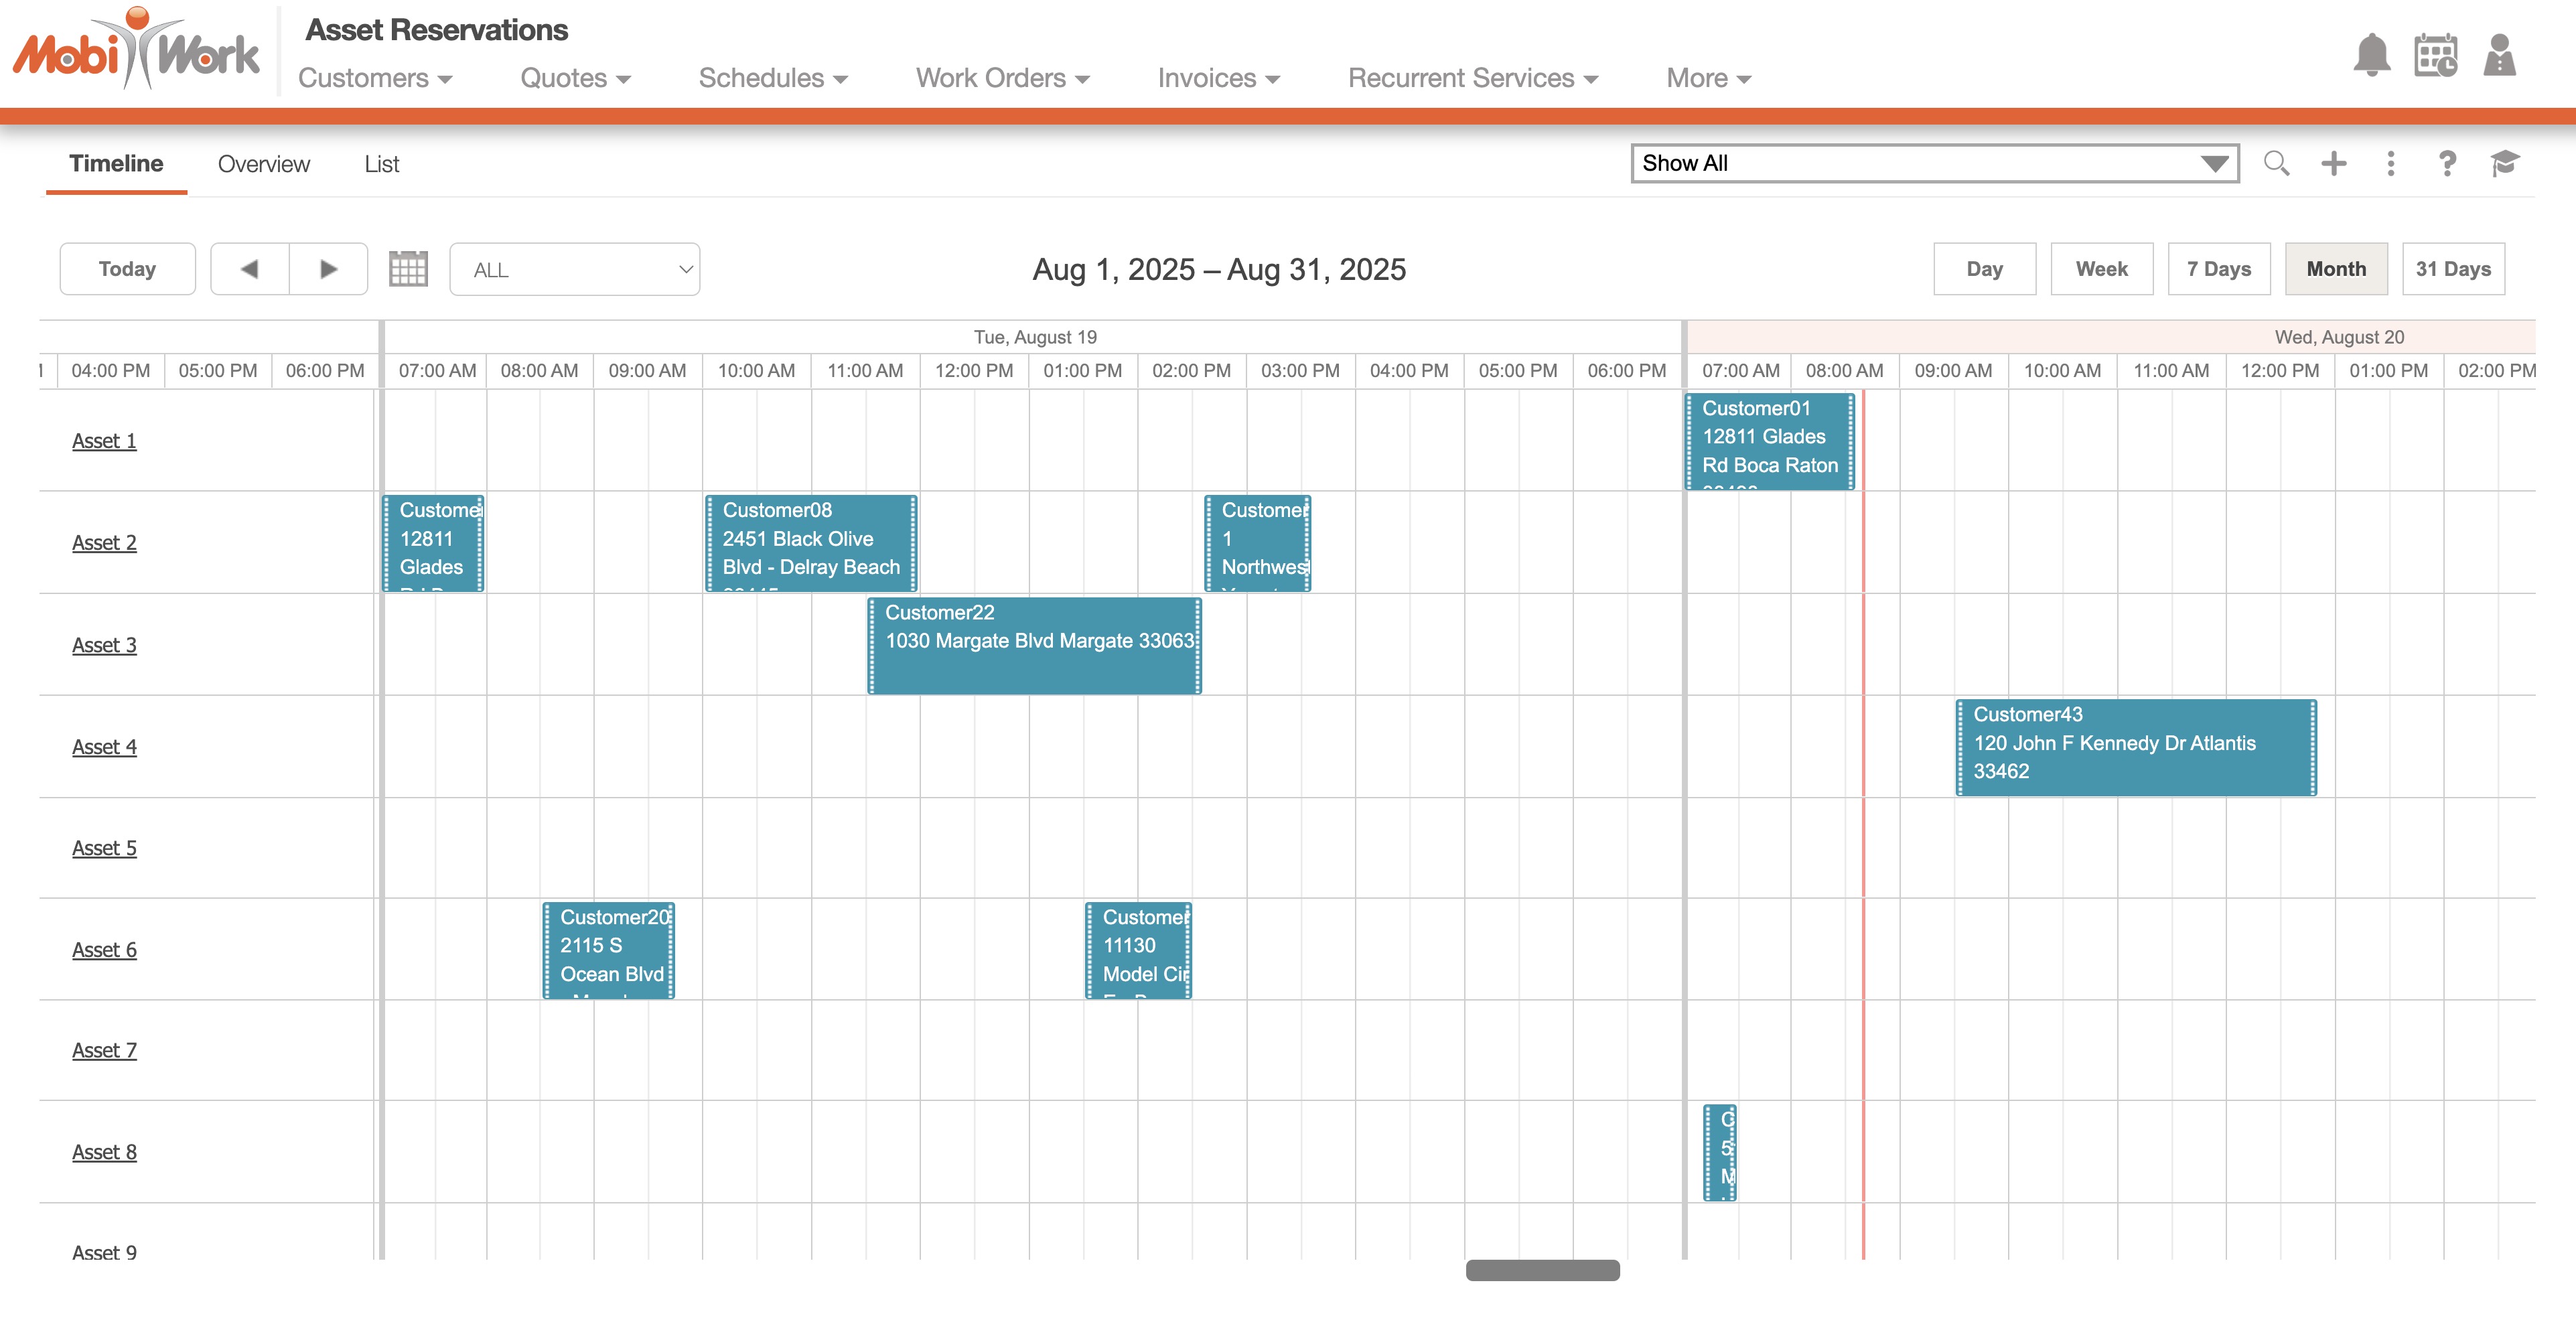
The "View Asset Reservation" option from the "Asset" drop-down will allow you to view all your asset reservations in an accessible and easy-to-read format. The assets are organized by name and the date and time of their reservations:
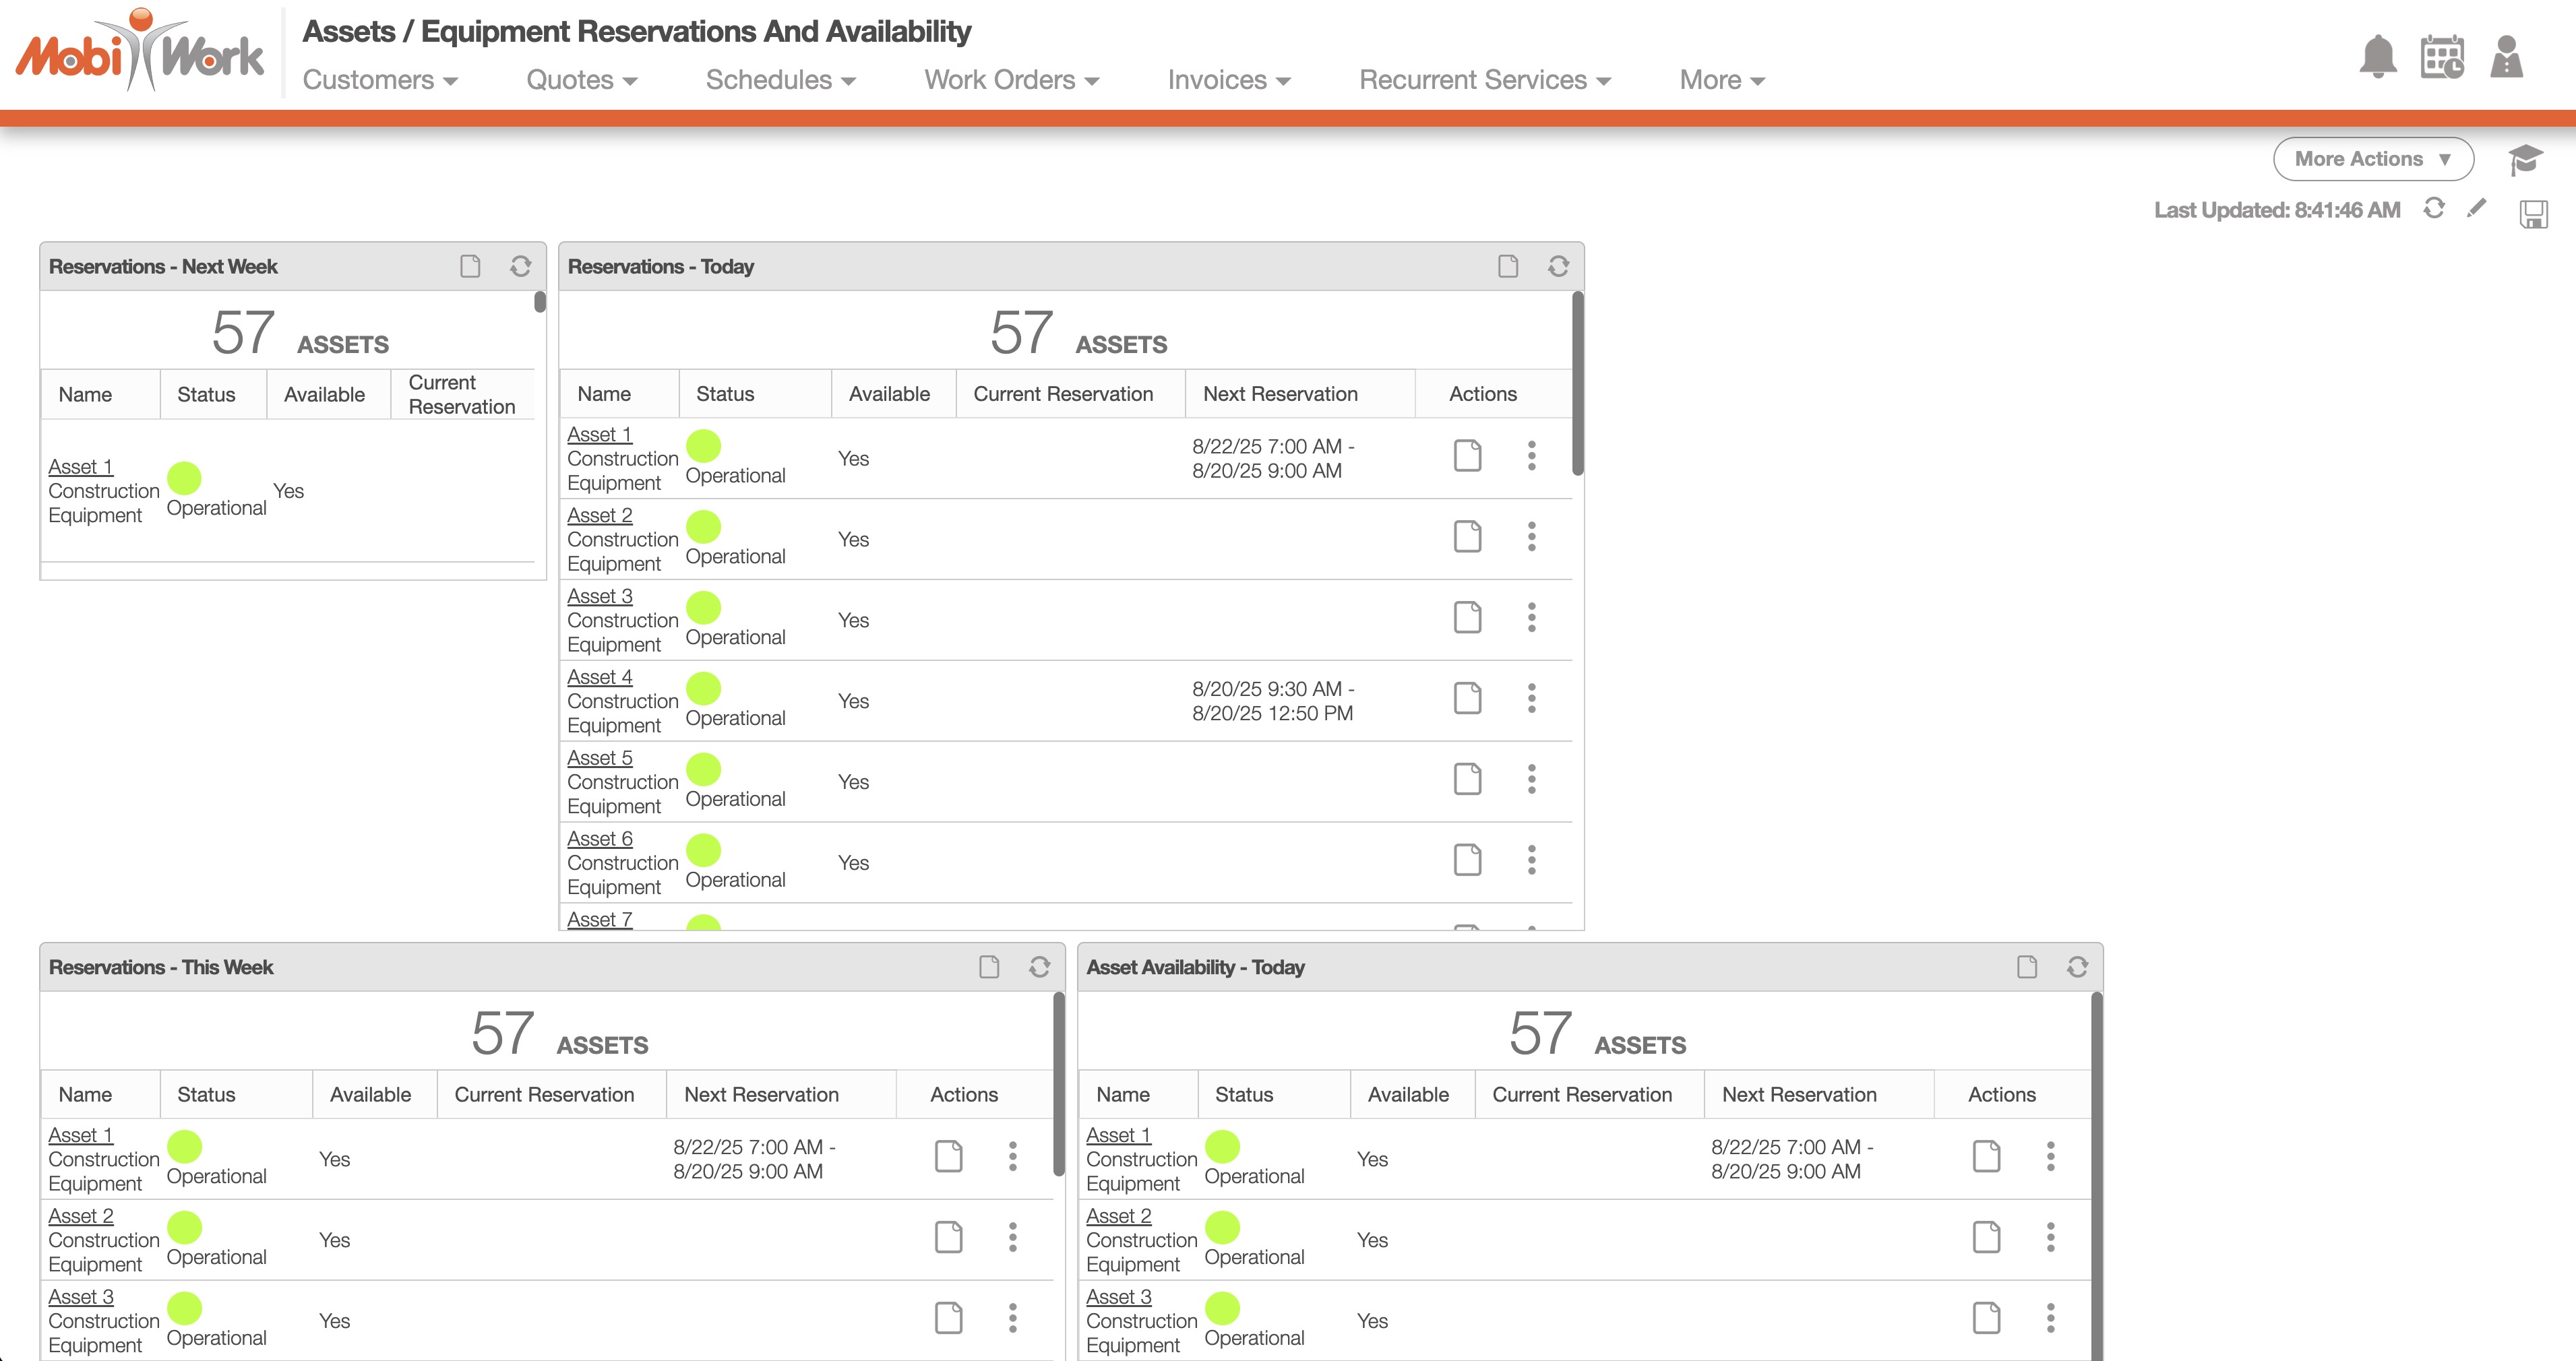
You will also be able to see asset reservation from the "Assets / Equipment Reservations and Availability" Dashboard:
All asset rentals and leases are now fully tracked in MobiWork. Reports can be generated on demand or scheduled to be automatically emailed on a recurring basis.
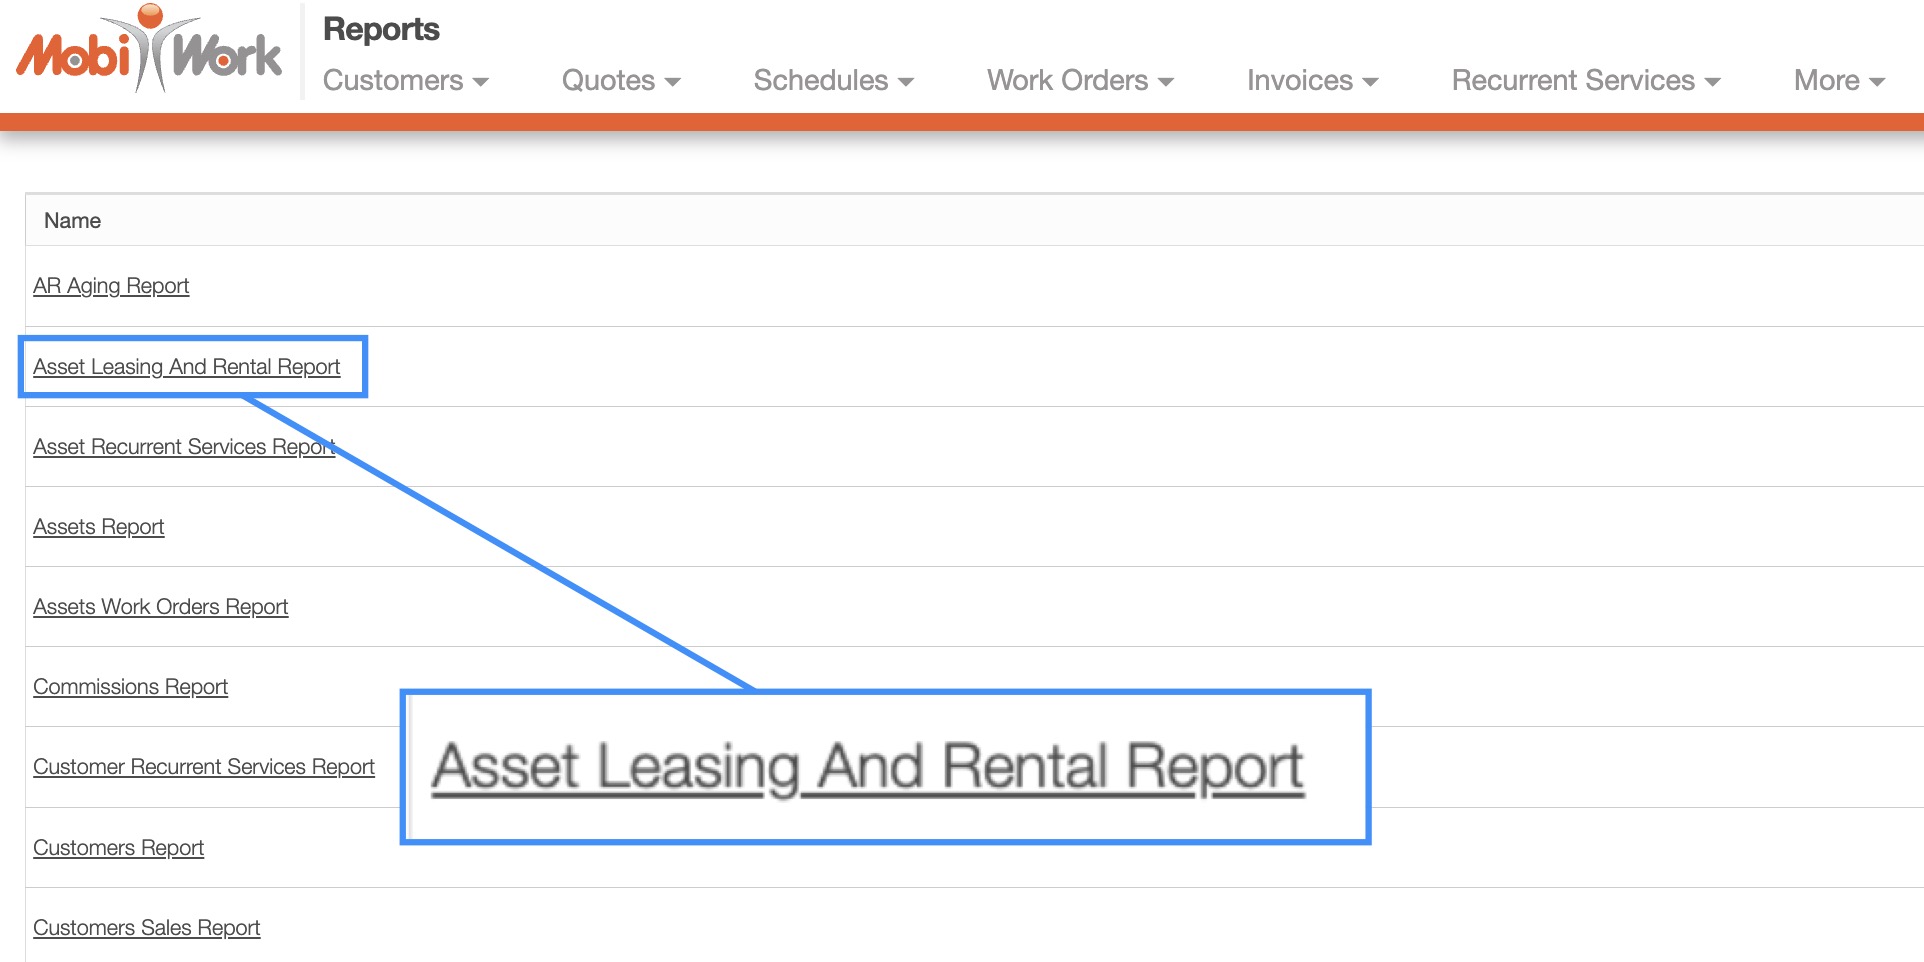
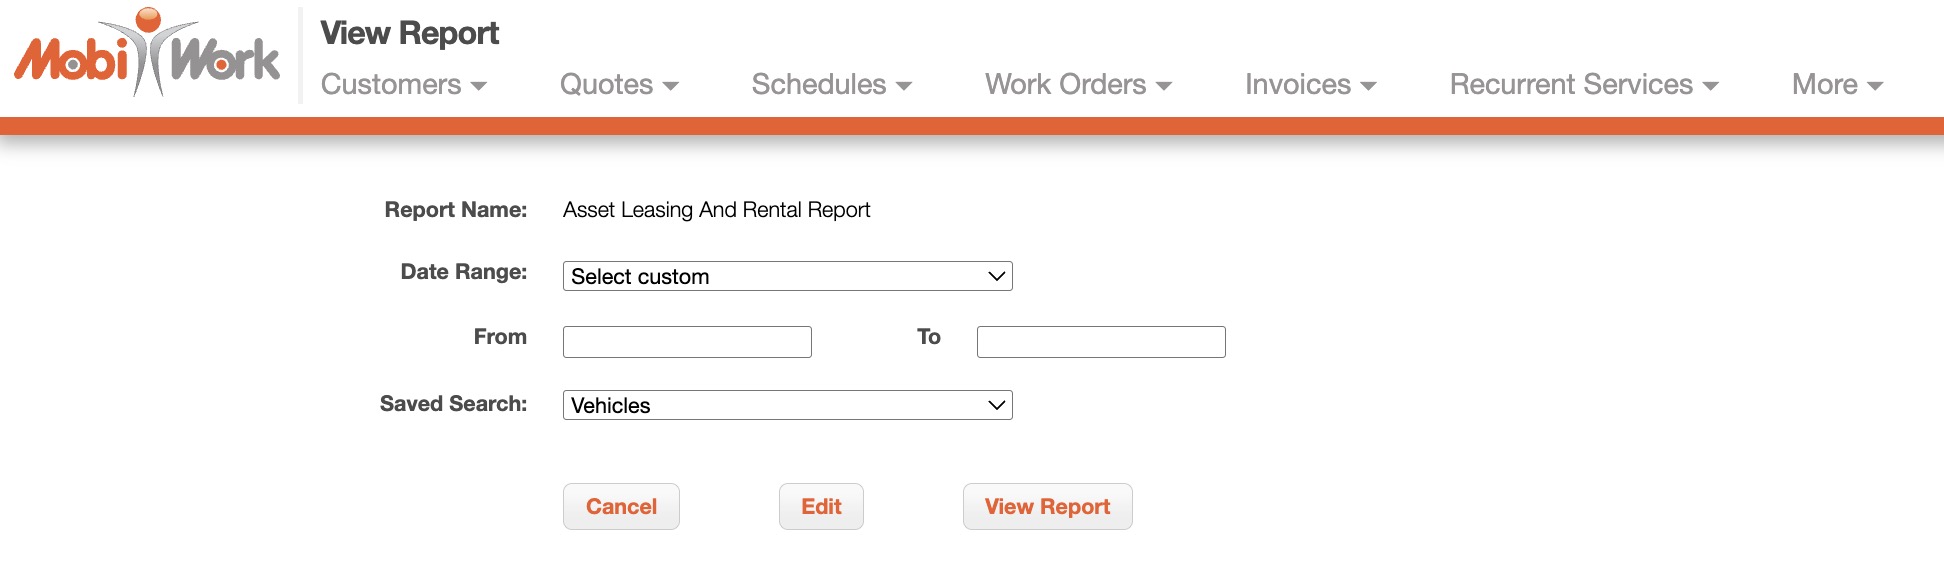
You can define a specific date range and apply a saved search to target particular assets or asset types:
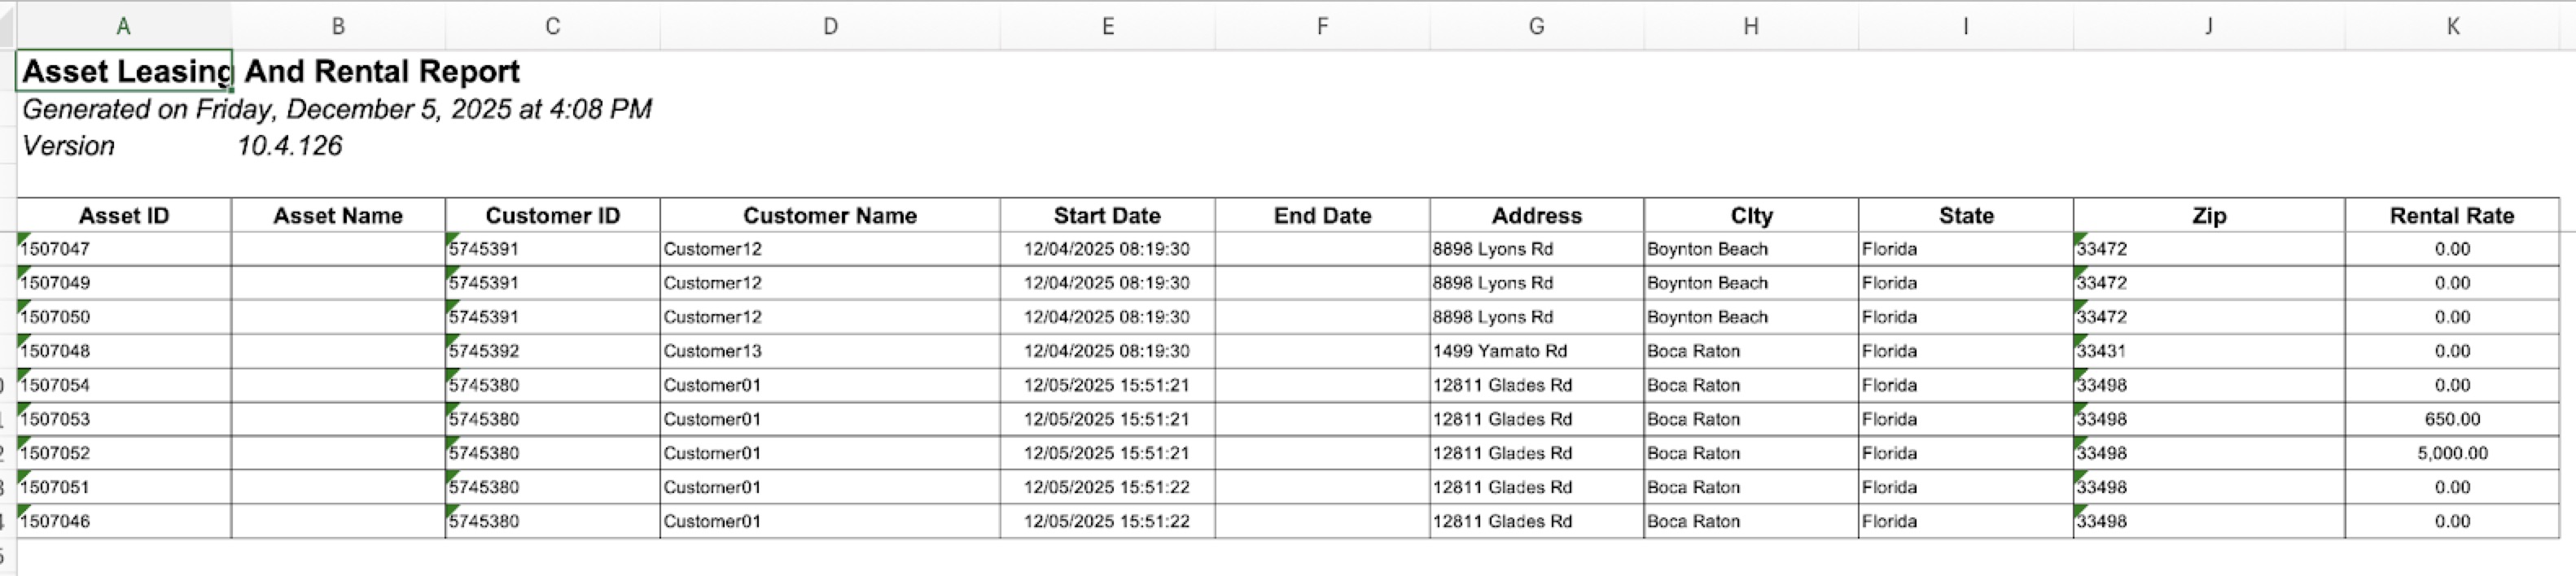
Please note that the report calculates charges using each asset's daily rental rate to determine the amount that should be invoiced and paid by the customer. This can be adjusted in the View Asset window:
With MobiWork's array of dashboards and saved searches you can easily view the status of your asset rentals at a glance. The following subsections will go over how to access the asset rental saved search and dashboard.
Asset Dashboard
You will also be able to see asset reservation from the "Assets / Equipment Reservations and Availability" Dashboard:
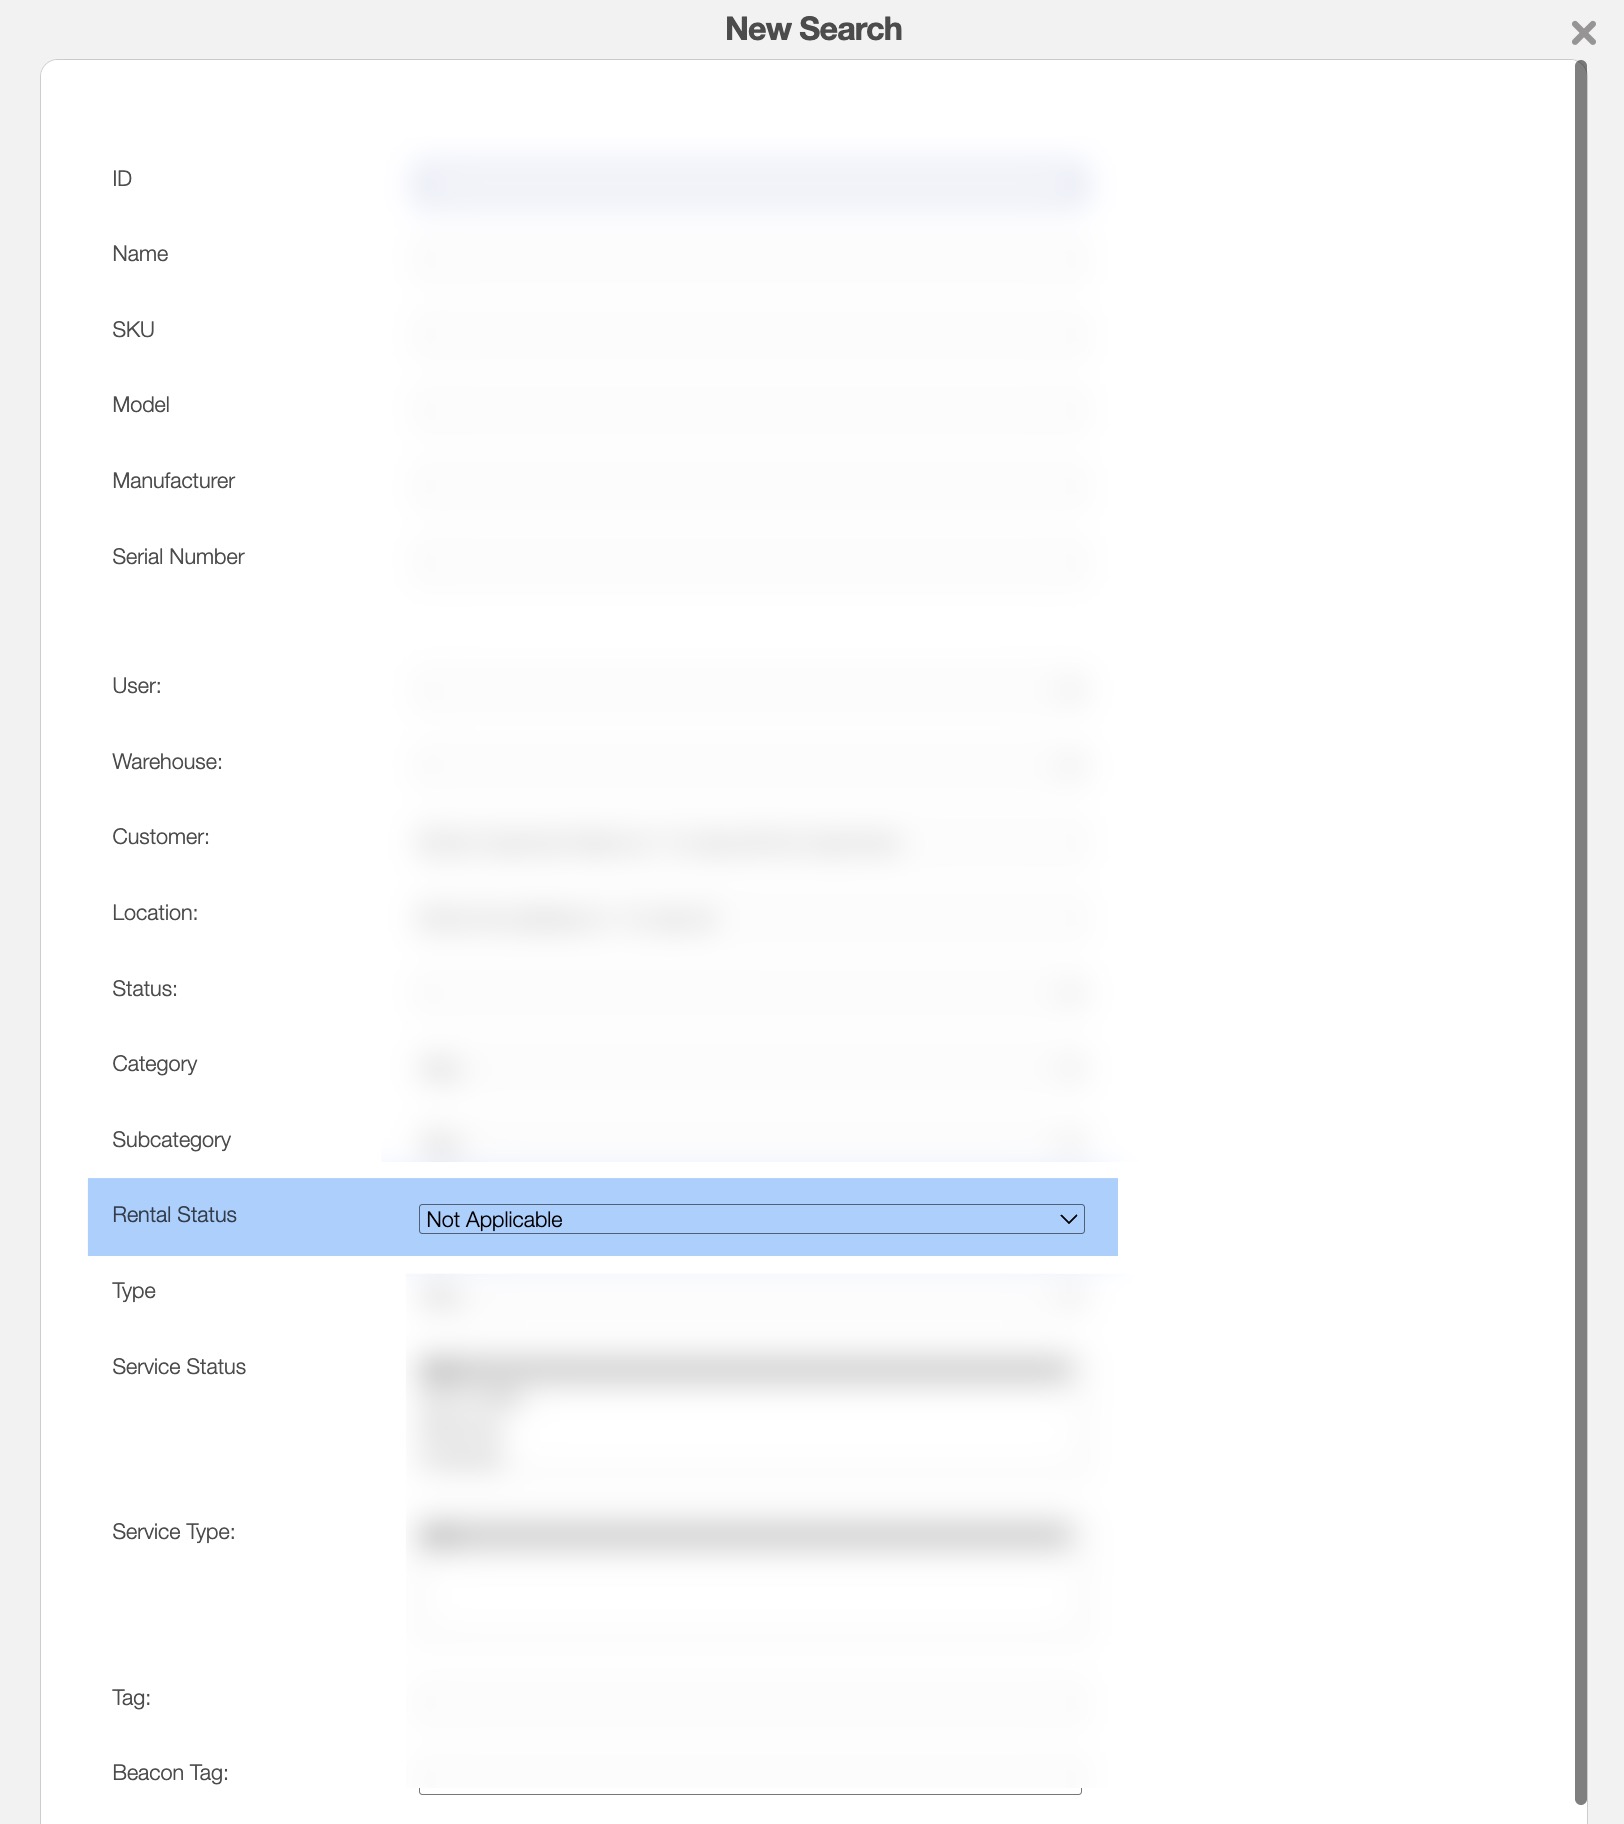
Asset Saved Search
With the Asset New Saved Search you will be able to search for assets with the following rental statuses:
Not Applicable
Rented
Not Rented
You will be able to save this search for future use: