To edit the part or products inventory levels, first access the "Inventory" tab in the View Part pop-up window:
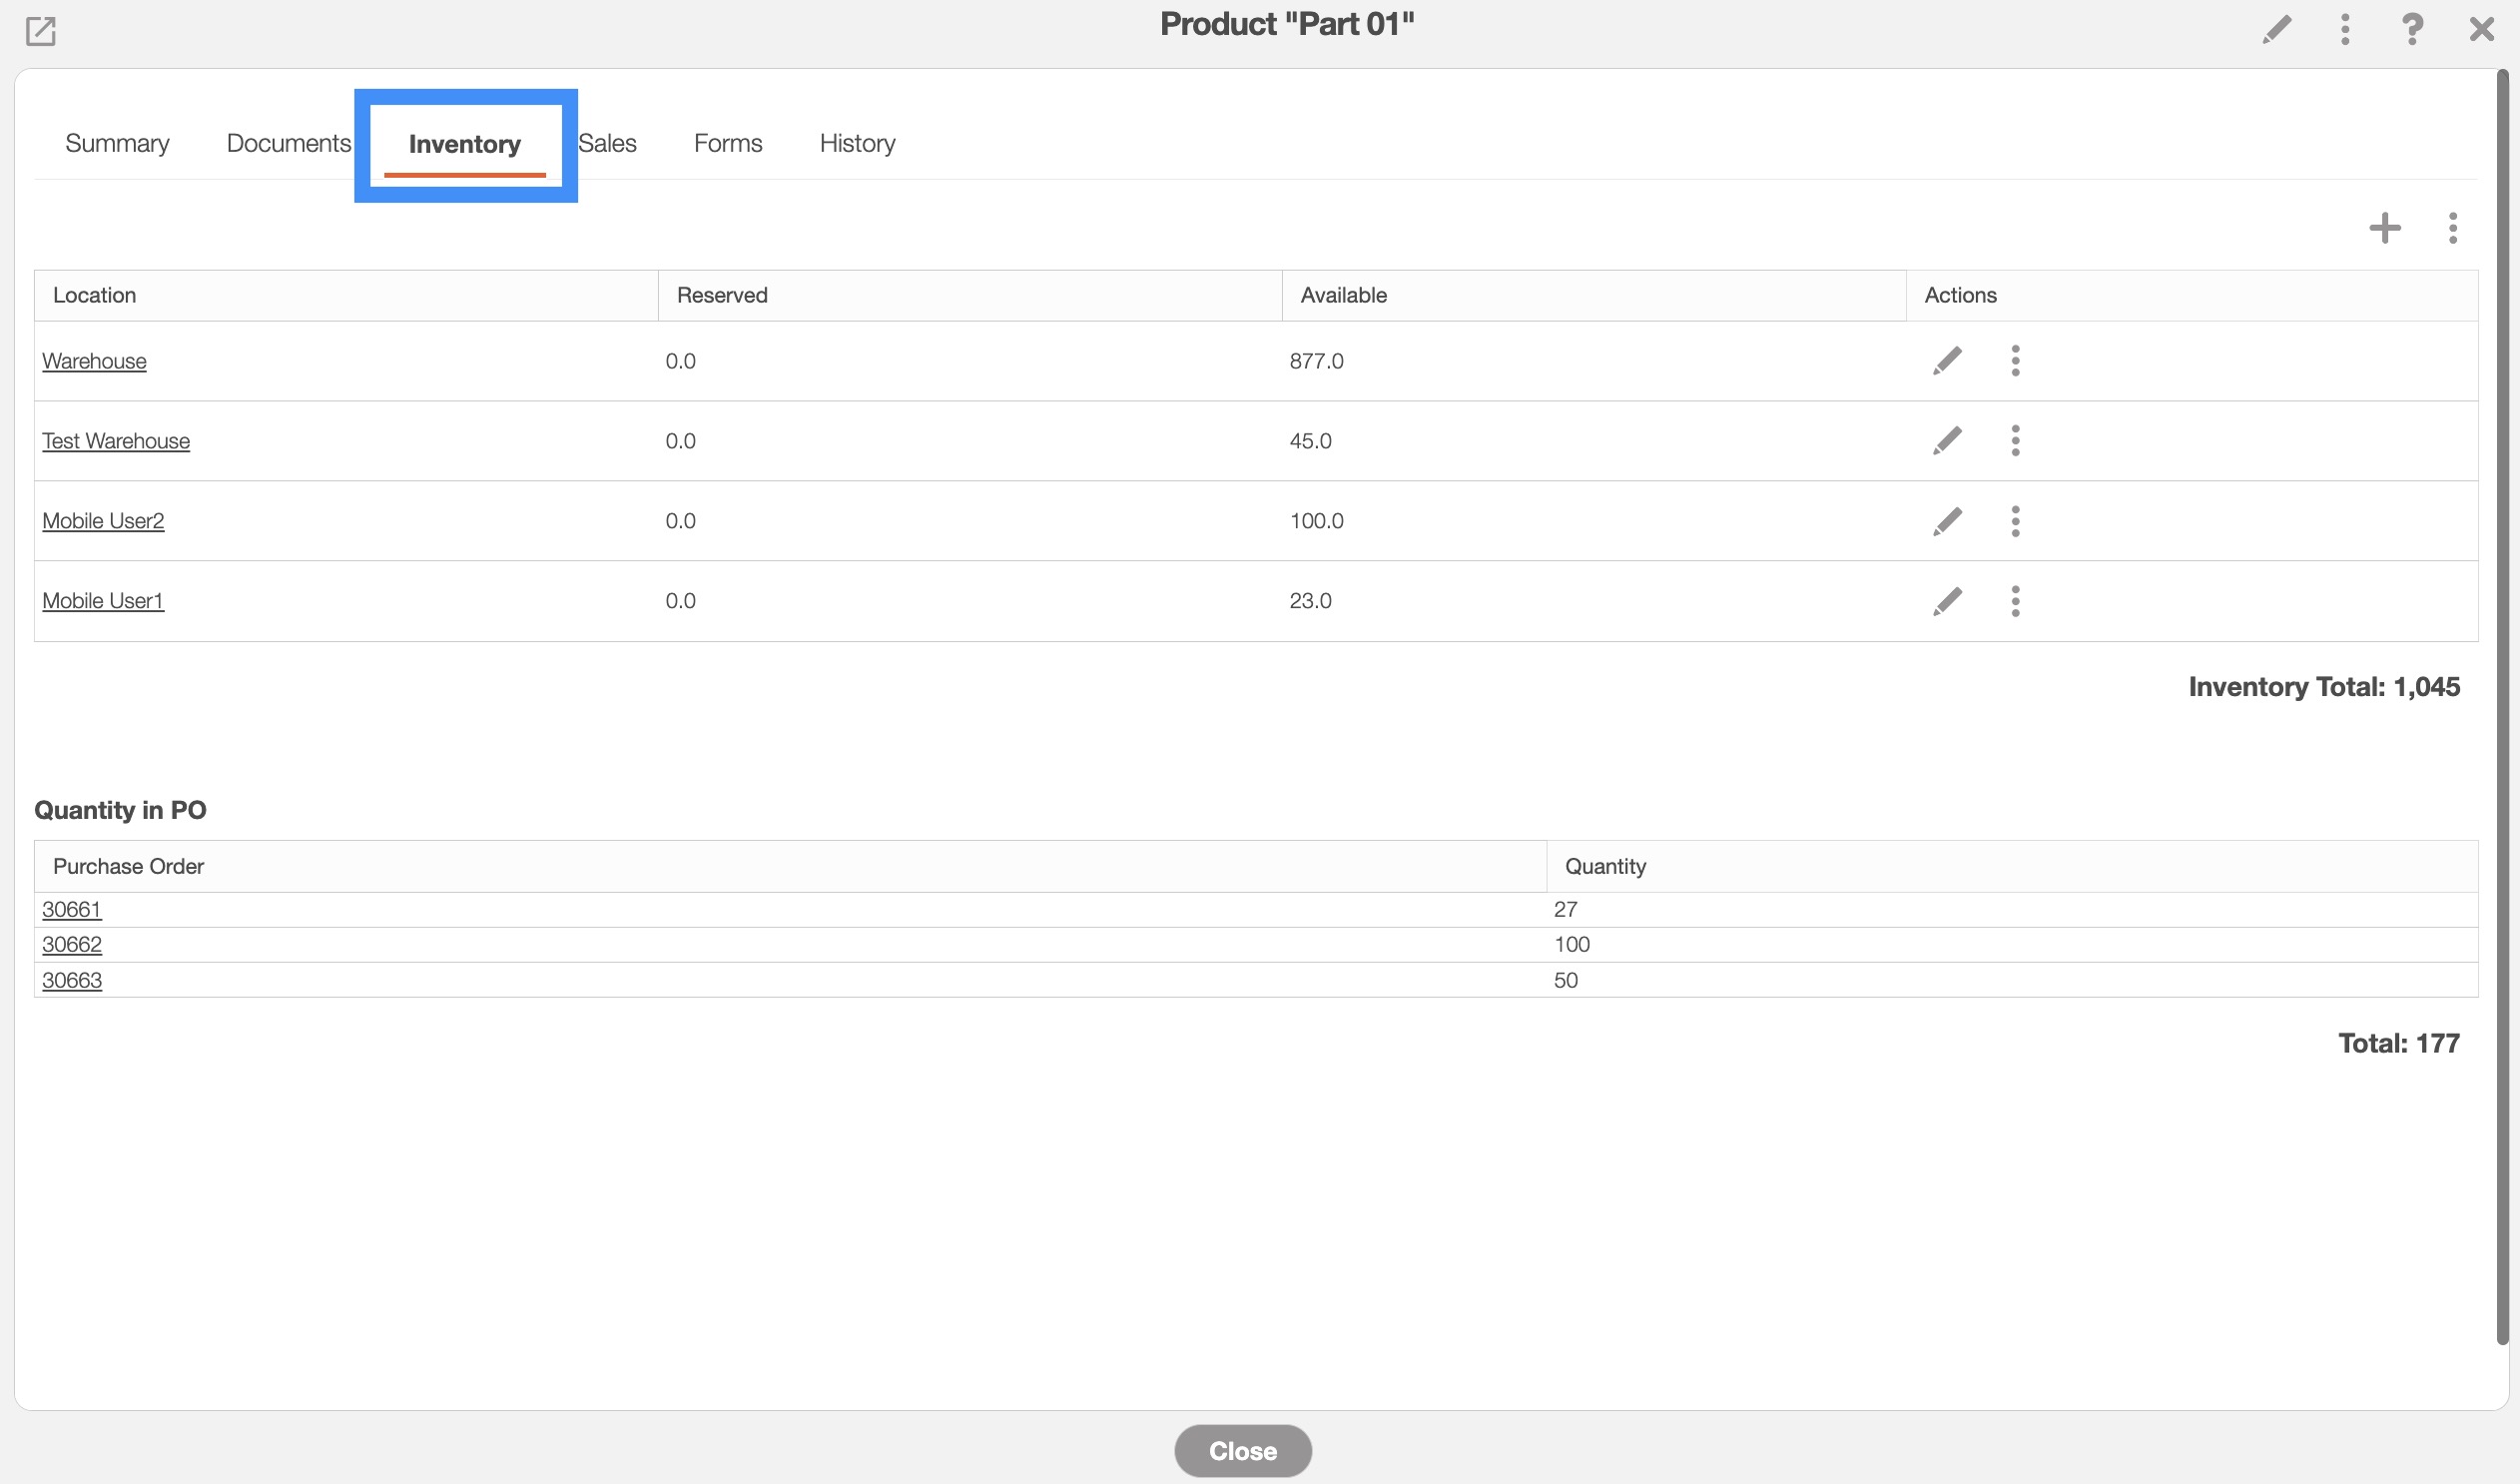
For more information on how to access this tab, please see the View Part page.
Once you are on the "Inventory" tab on the View Part pop-up window, there are three different ways that you can edit the inventory stock levels of the selected part or product:
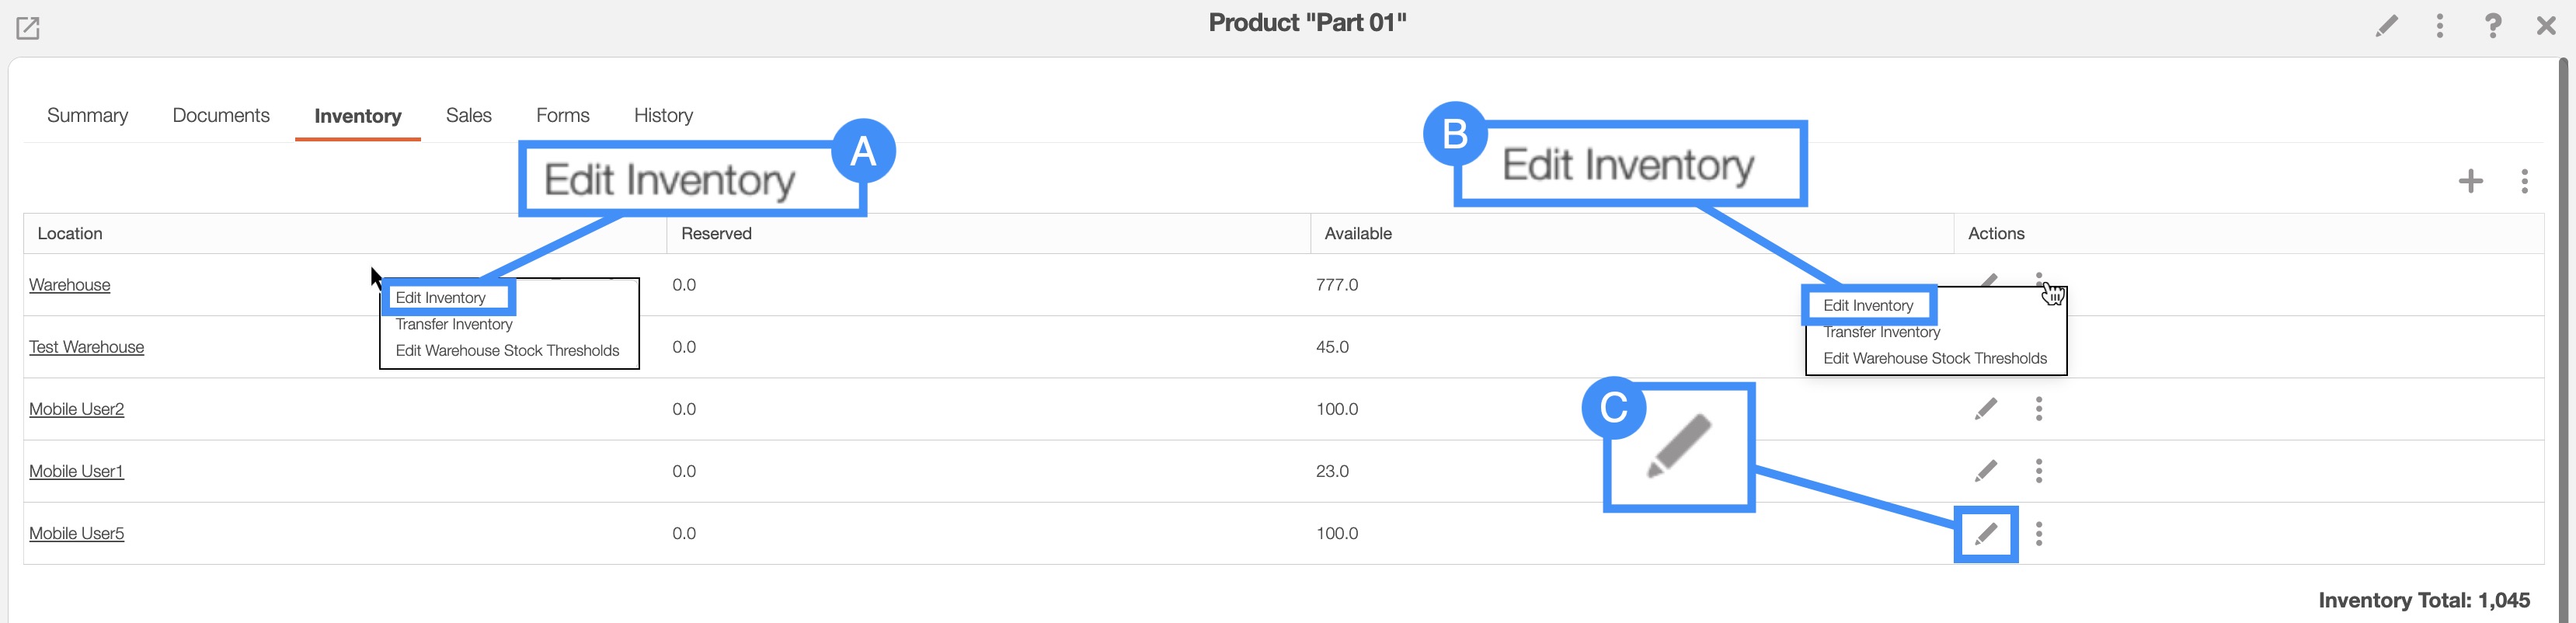
You can edit the inventory levels by:
Right-clicking on the selected part or product and selecting the "Edit Inventory" option from the drop-down.
Clicking on the Pencil icon.
Or by clicking on the Individual Actions button and selecting the "Edit Inventory" option from the drop-down.
Regardless of the method you use to edit the inventory stock levels, the Edit Inventory pop-up window will appear:
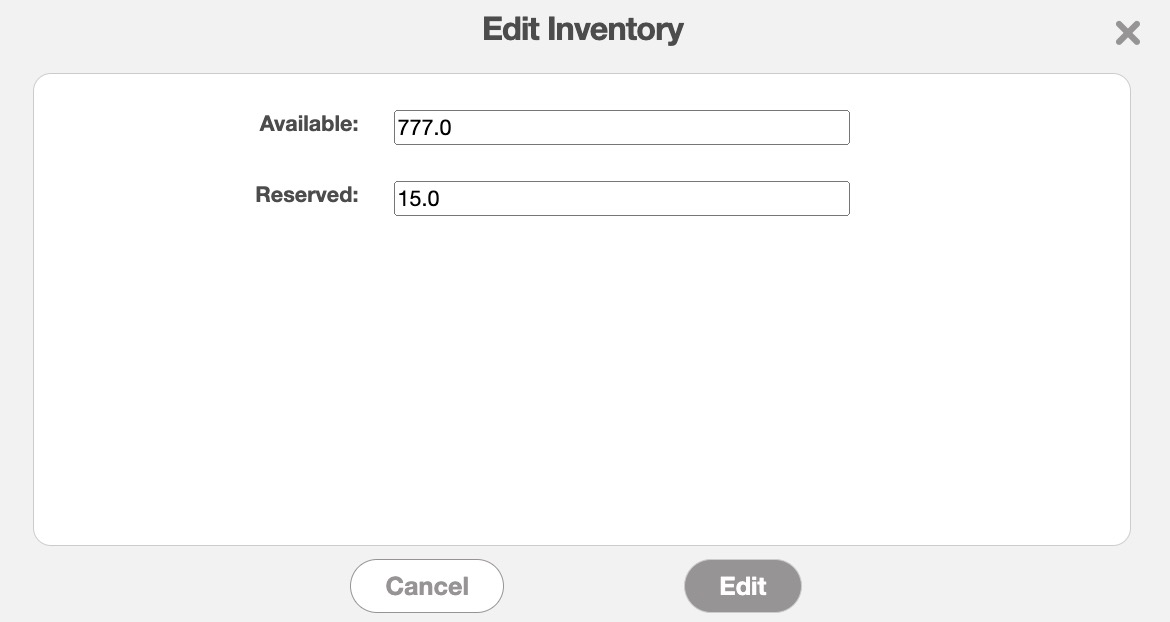
In this pop-up window, you can input the following data:
The available inventory stock levels.
The reserved inventory stock levels.
Once you are satisfied with the updated stock levels, click on the Edit button to confirm the changes.
Once you are on the "Inventory" tab on the View Part pop-up window, there are two different ways that you can edit the warehouse inventory stock levels of the selected part or product:
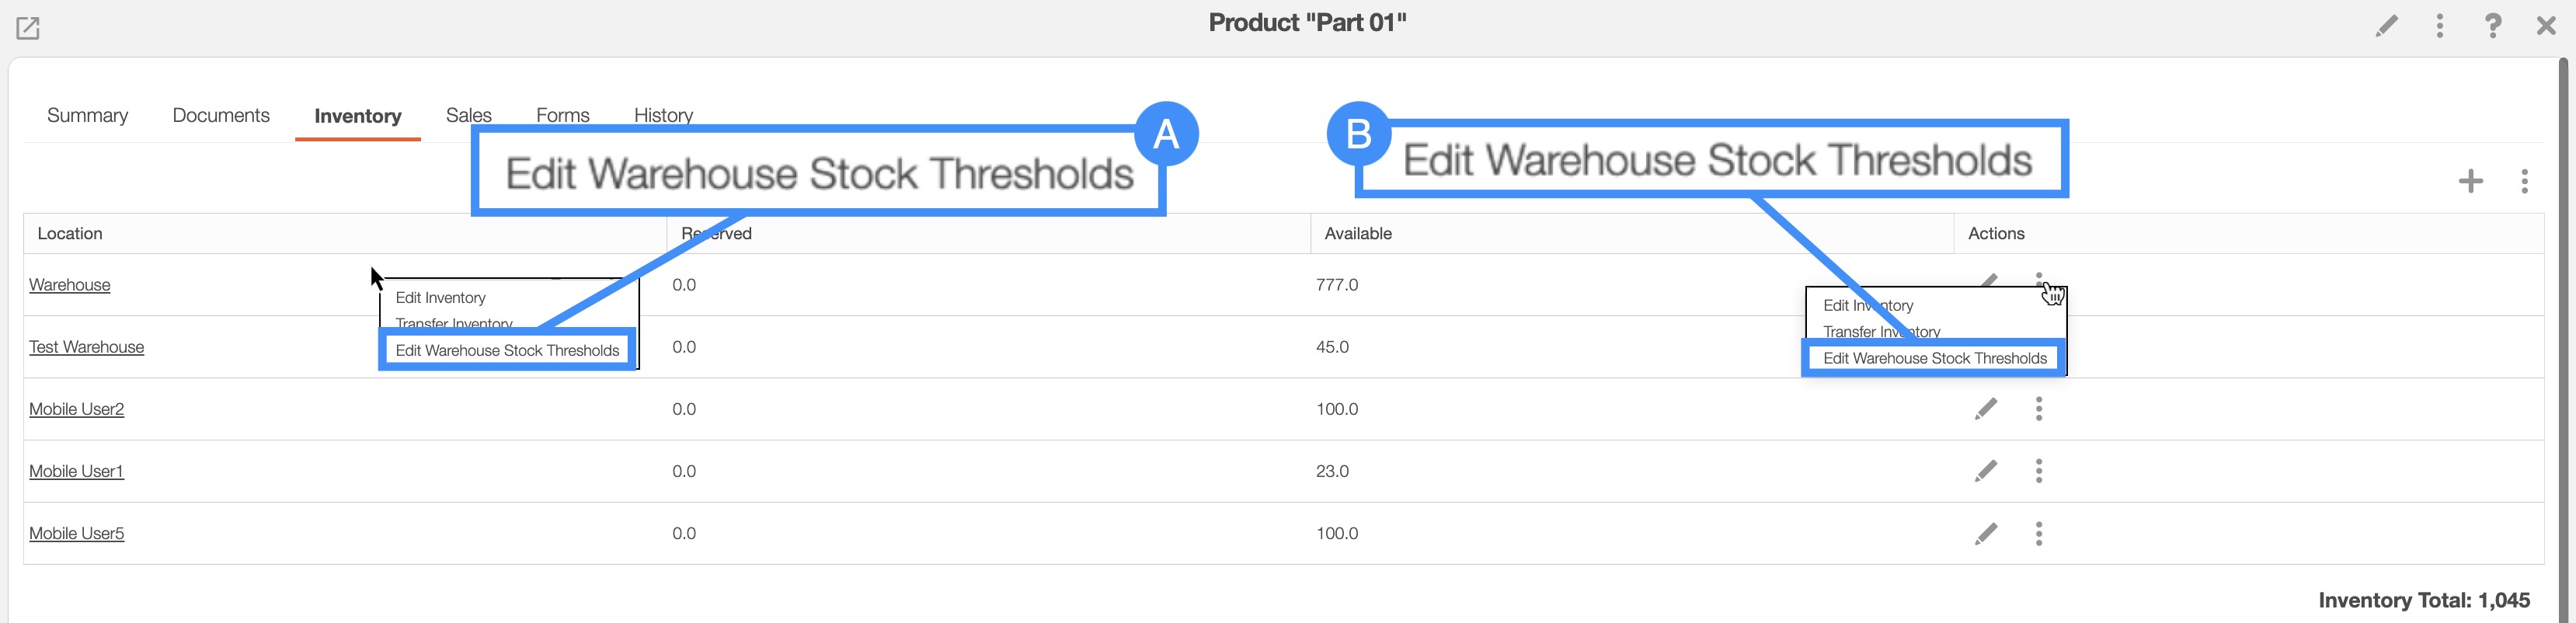
You can edit the inventory warehouse levels by:
Right-clicking on the selected warehouse and selecting the "Edit Warehouse Stock Thresholds" option from the drop-down.
Clicking on the Individual Actions button and selecting the "Edit Warehouse Stock Thresholds" option from the drop-down.
Regardless of the method you use to edit the warehouse inventory stock levels, the Edit Stock pop-up window will appear:

In this pop-up window, you can input the following data:
The standard stock levels.
As well as the minimum stock levels.
Once you are satisfied with the updated warehouse stock levels, click on the Edit button to confirm the changes.