To add a part or product quantity to your inventory, first access the "Inventory" tab in the View Part pop-up window:
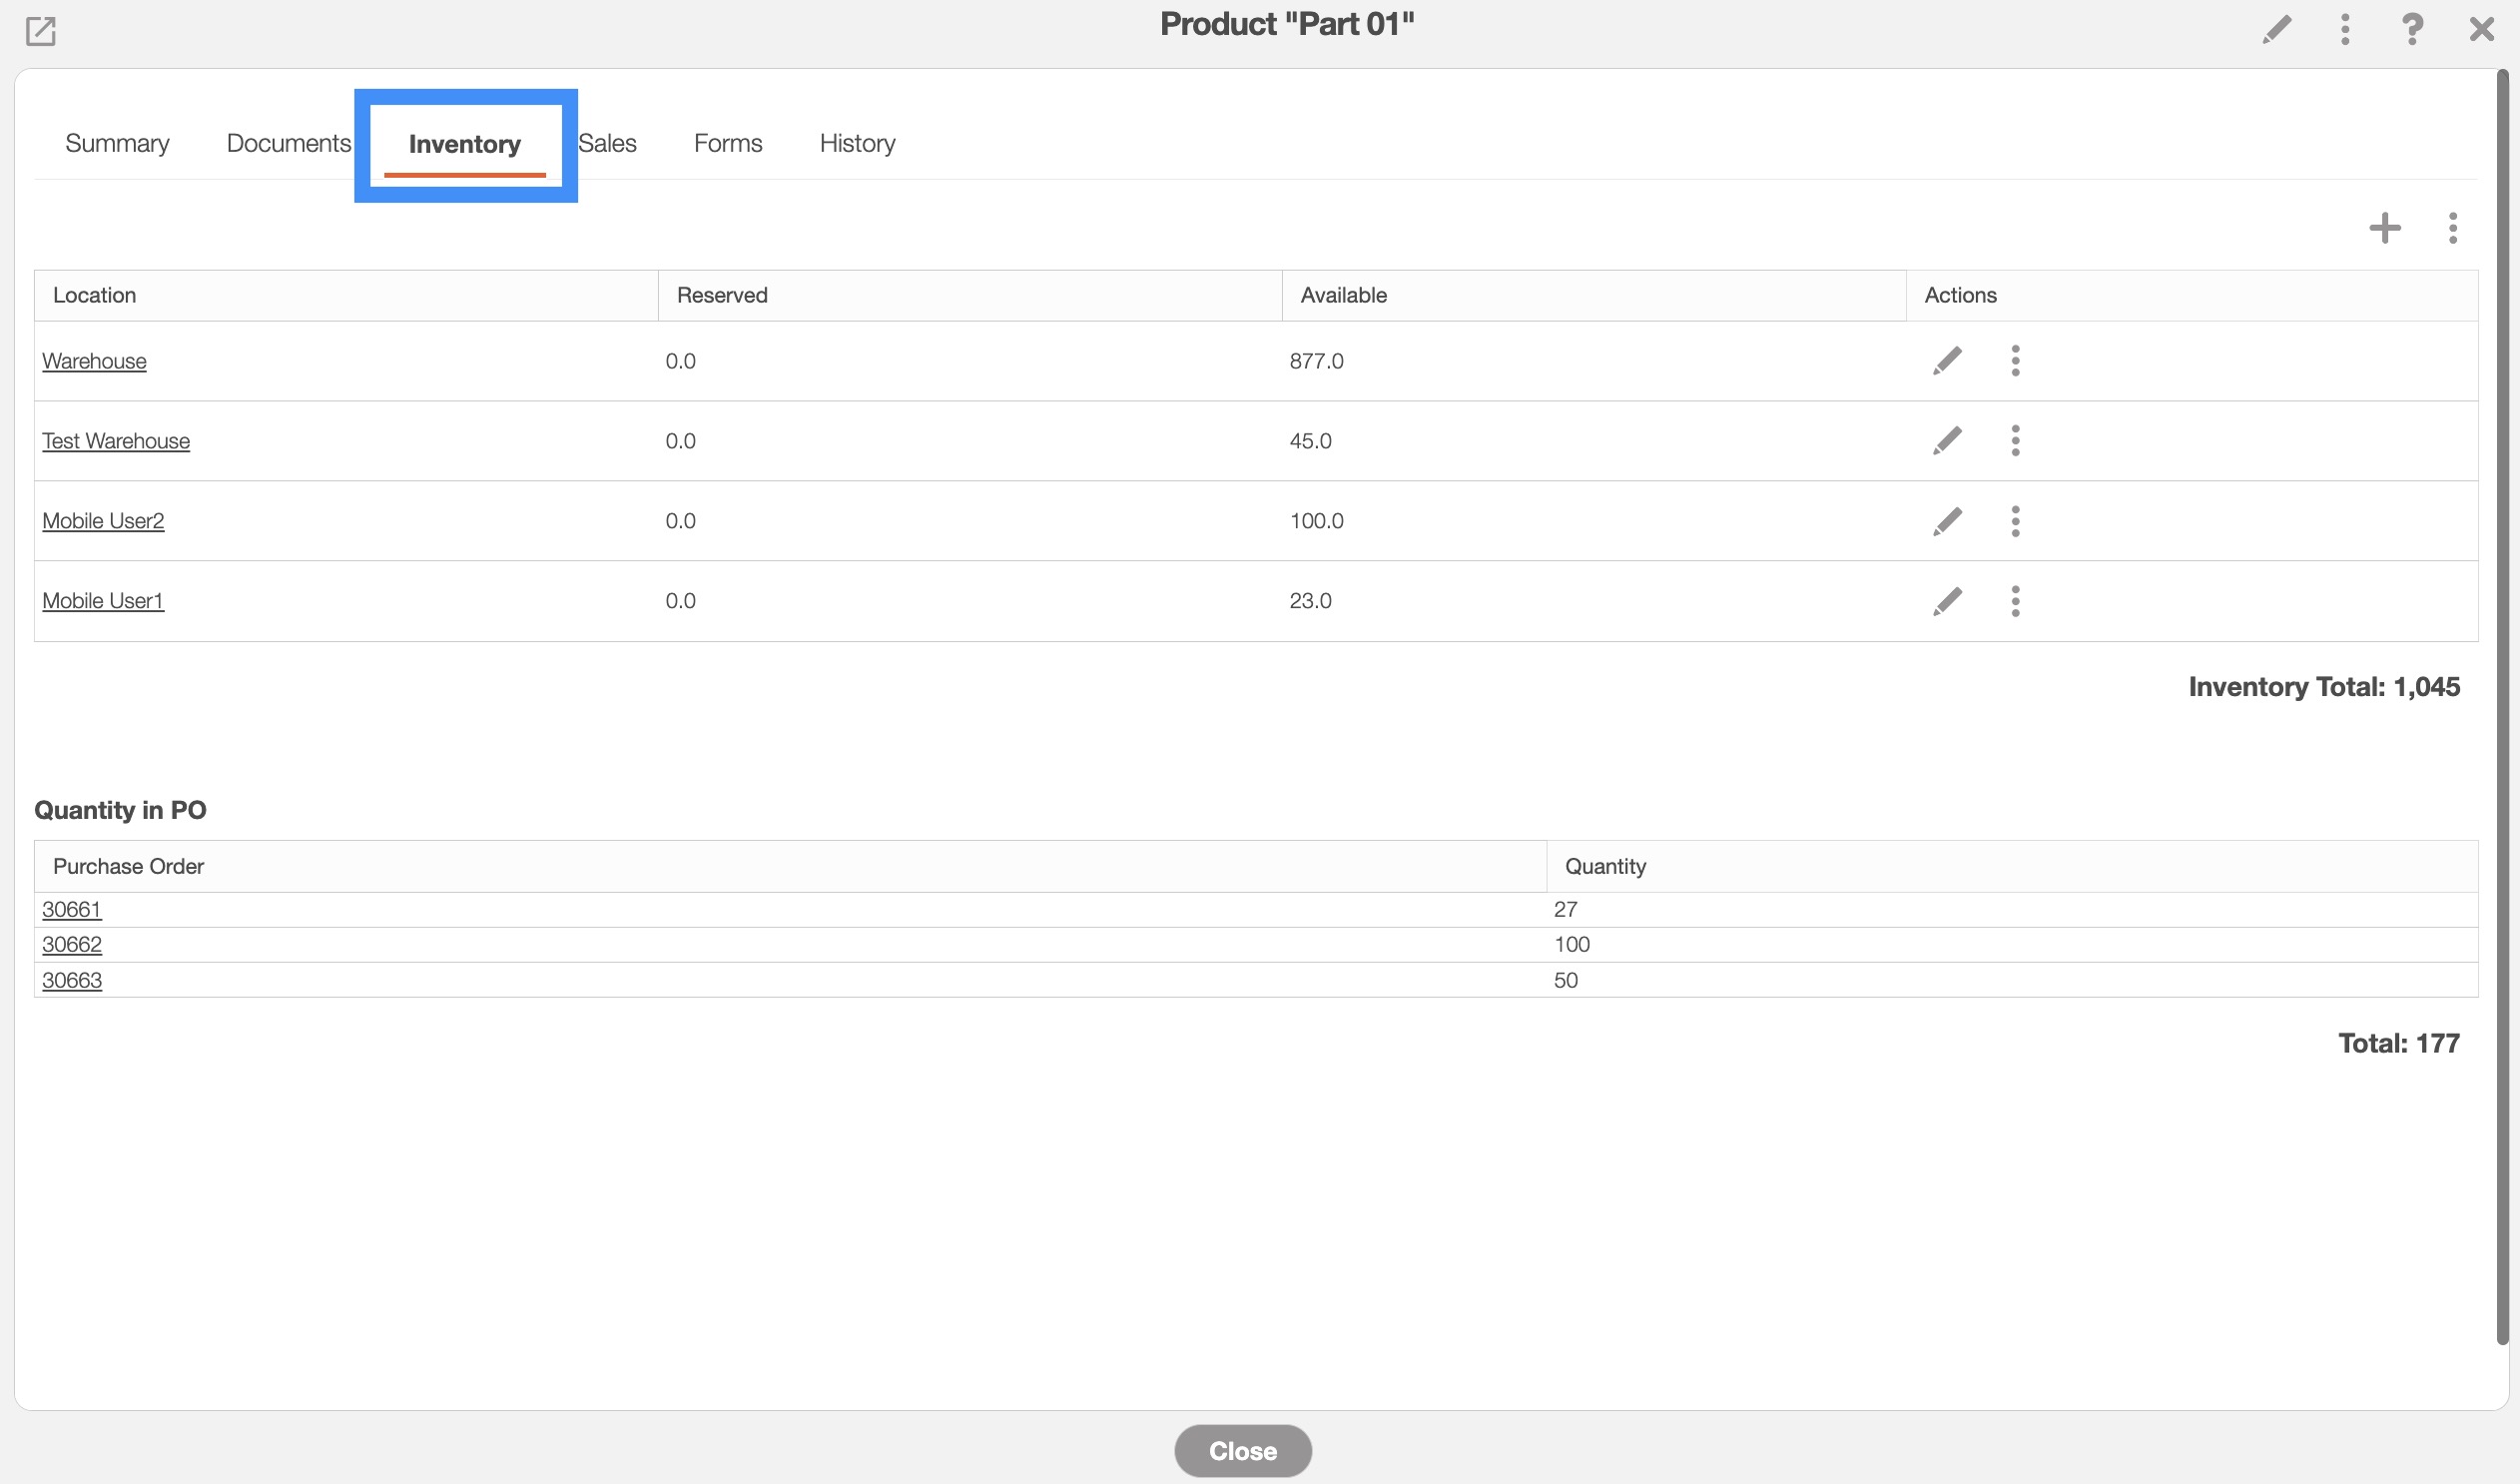
For more information on how to access this tab, please see the View Part page.
You can also transfer stock from warehouses and users. For more information on how to transfer stock between warehouses and users, please see the Transfer Inventory section.
Once you are on the "Inventory" tab, click on the Plus Sign button in the top right-corner:
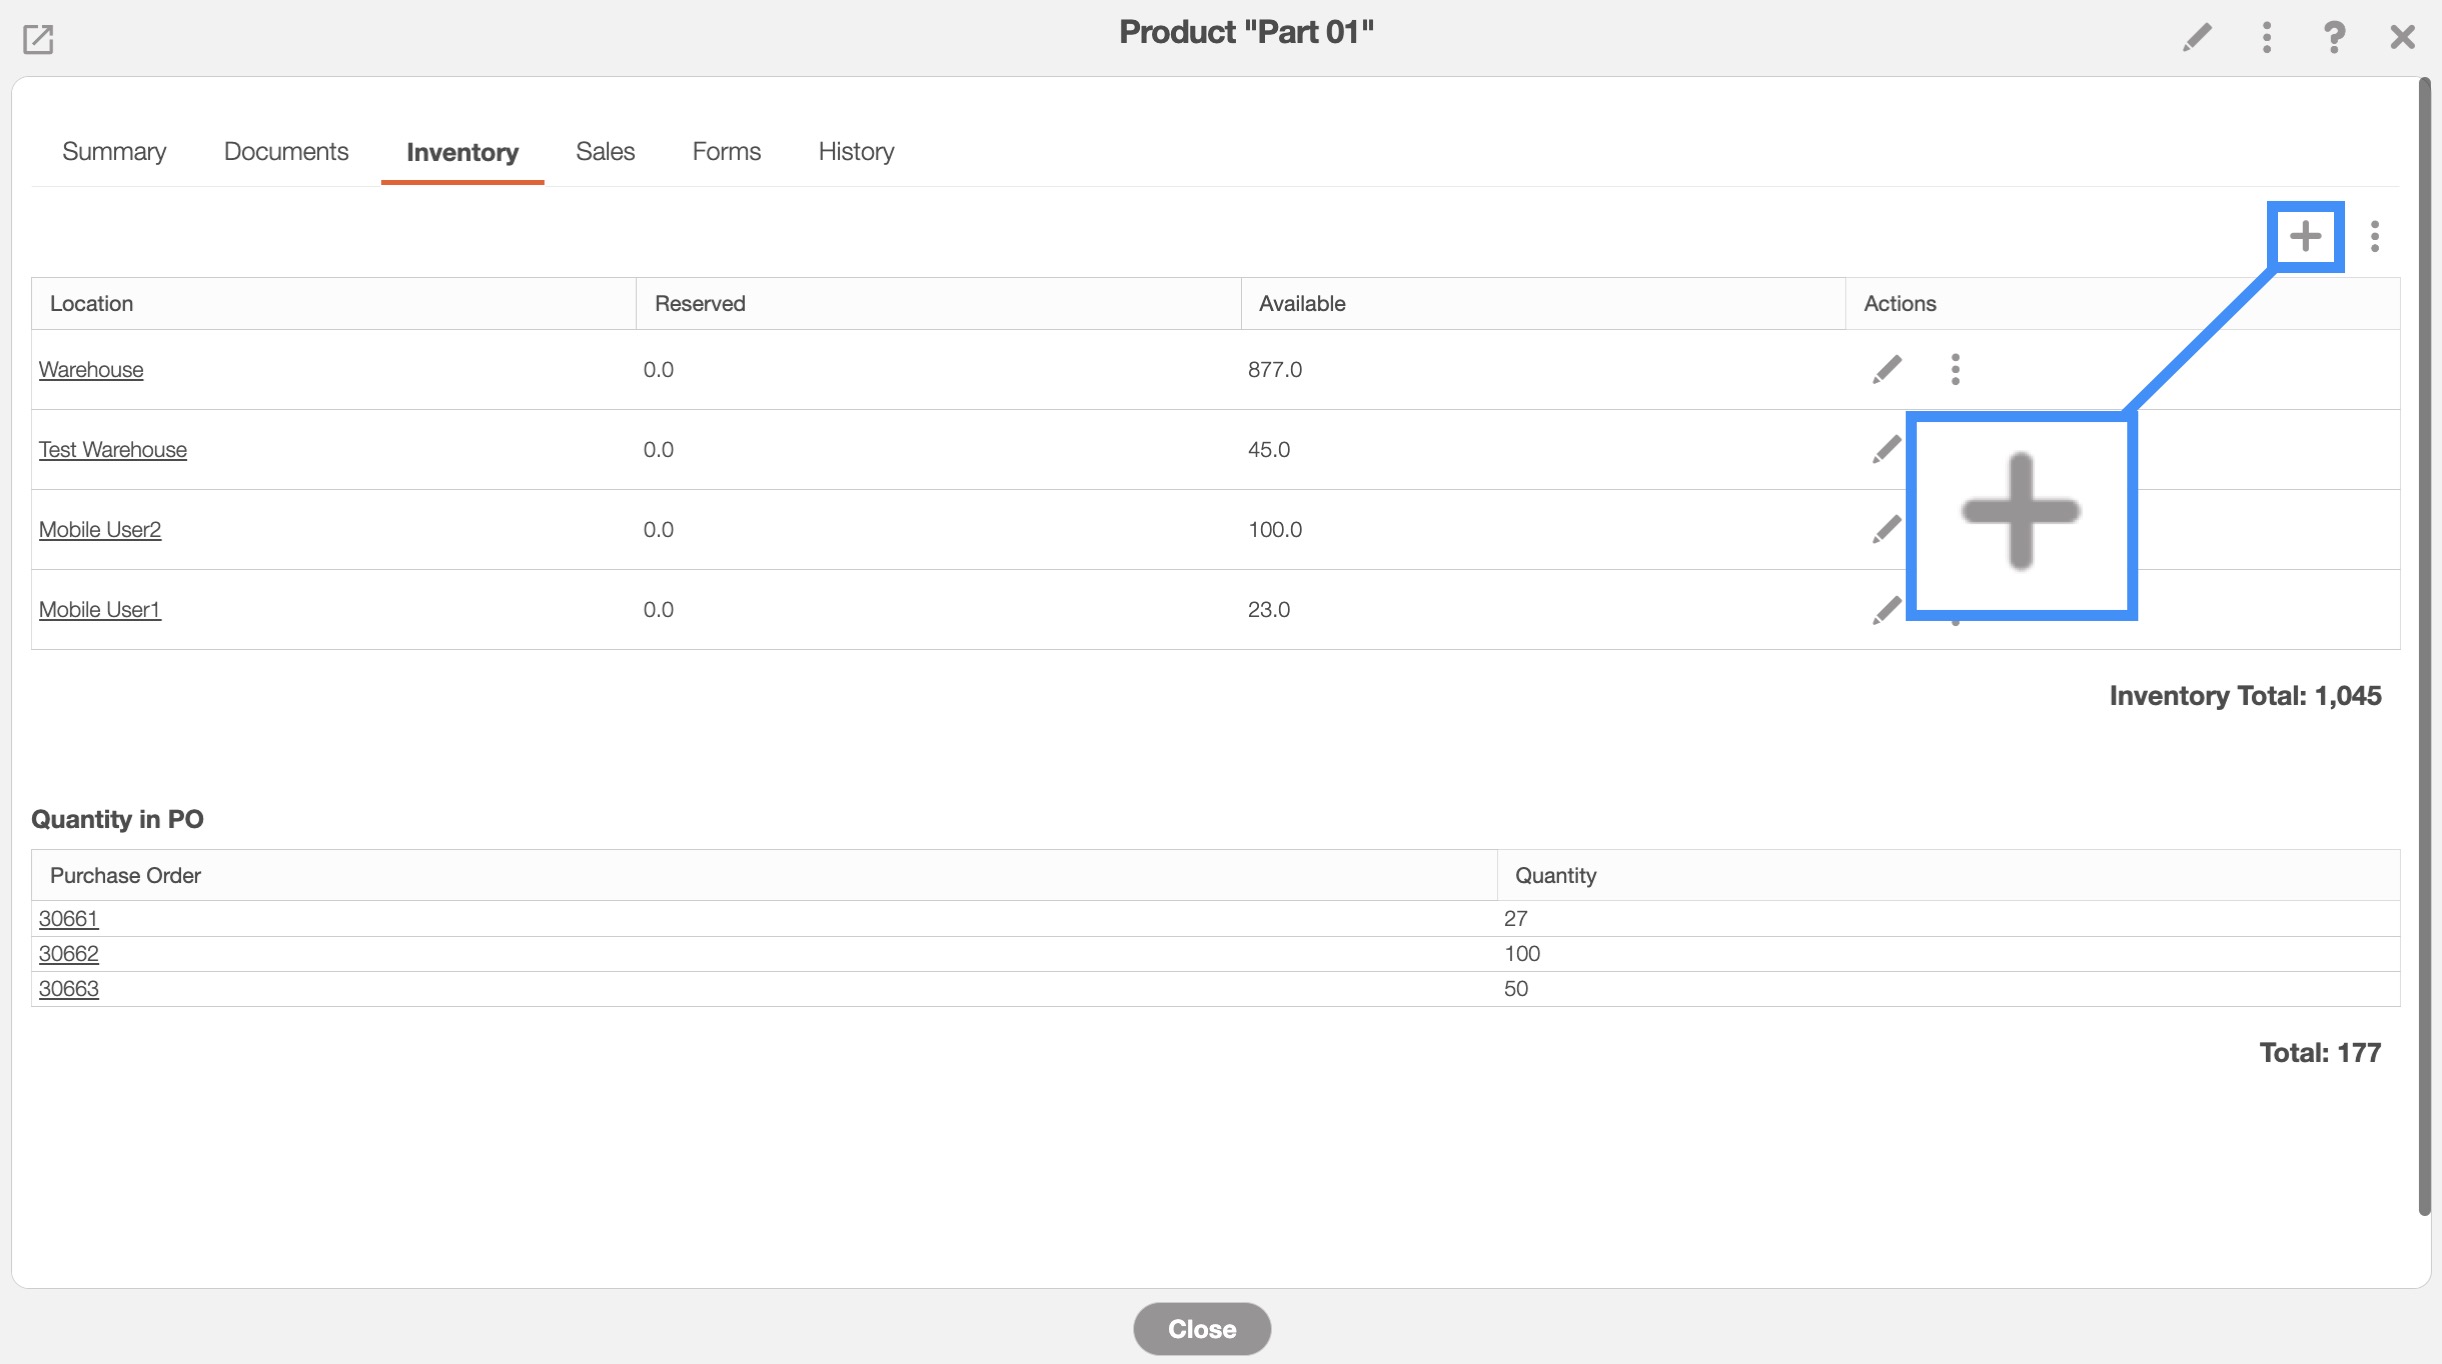
You will also be able to add inventory to a warehouse from the Inventory "Summary," "Users Inventory," and "Warehouses Inventory" tabs.
You can either right-click on the desired part or click on the Individual Actions button and from the drop-down select the "Add to Warehouse" option:

Regardless of how you add stock to your warehouse, the Add Inventory To Warehouse pop-up window will then appear:
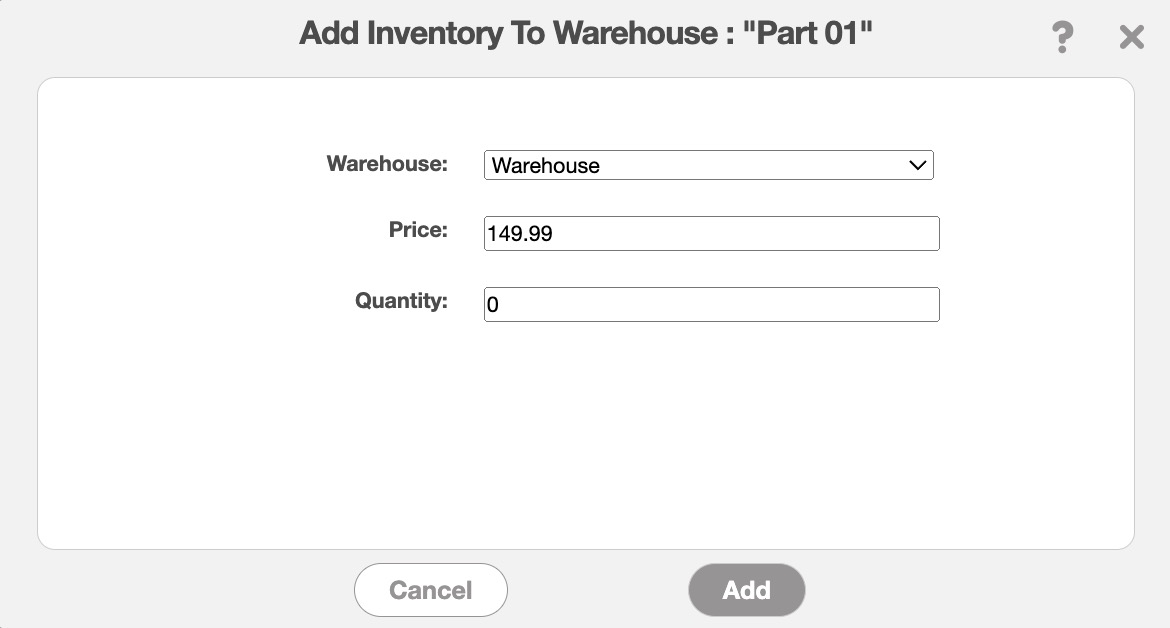
In this pop-up window, you can:
Select the warehouse that the part or product quantity will be stored at.
The price the part or product is being sold at from the specified warehouse.
And quantity amount being stored at the specified warehouse.
Once you are satisfied with the information entered, click on the Add button to confirm that addition of the parts or products into the specified warehouse.
You can also transfer stock from warehouses and users. For more information on how to transfer stock between warehouses and users, please see the Transfer Inventory section.
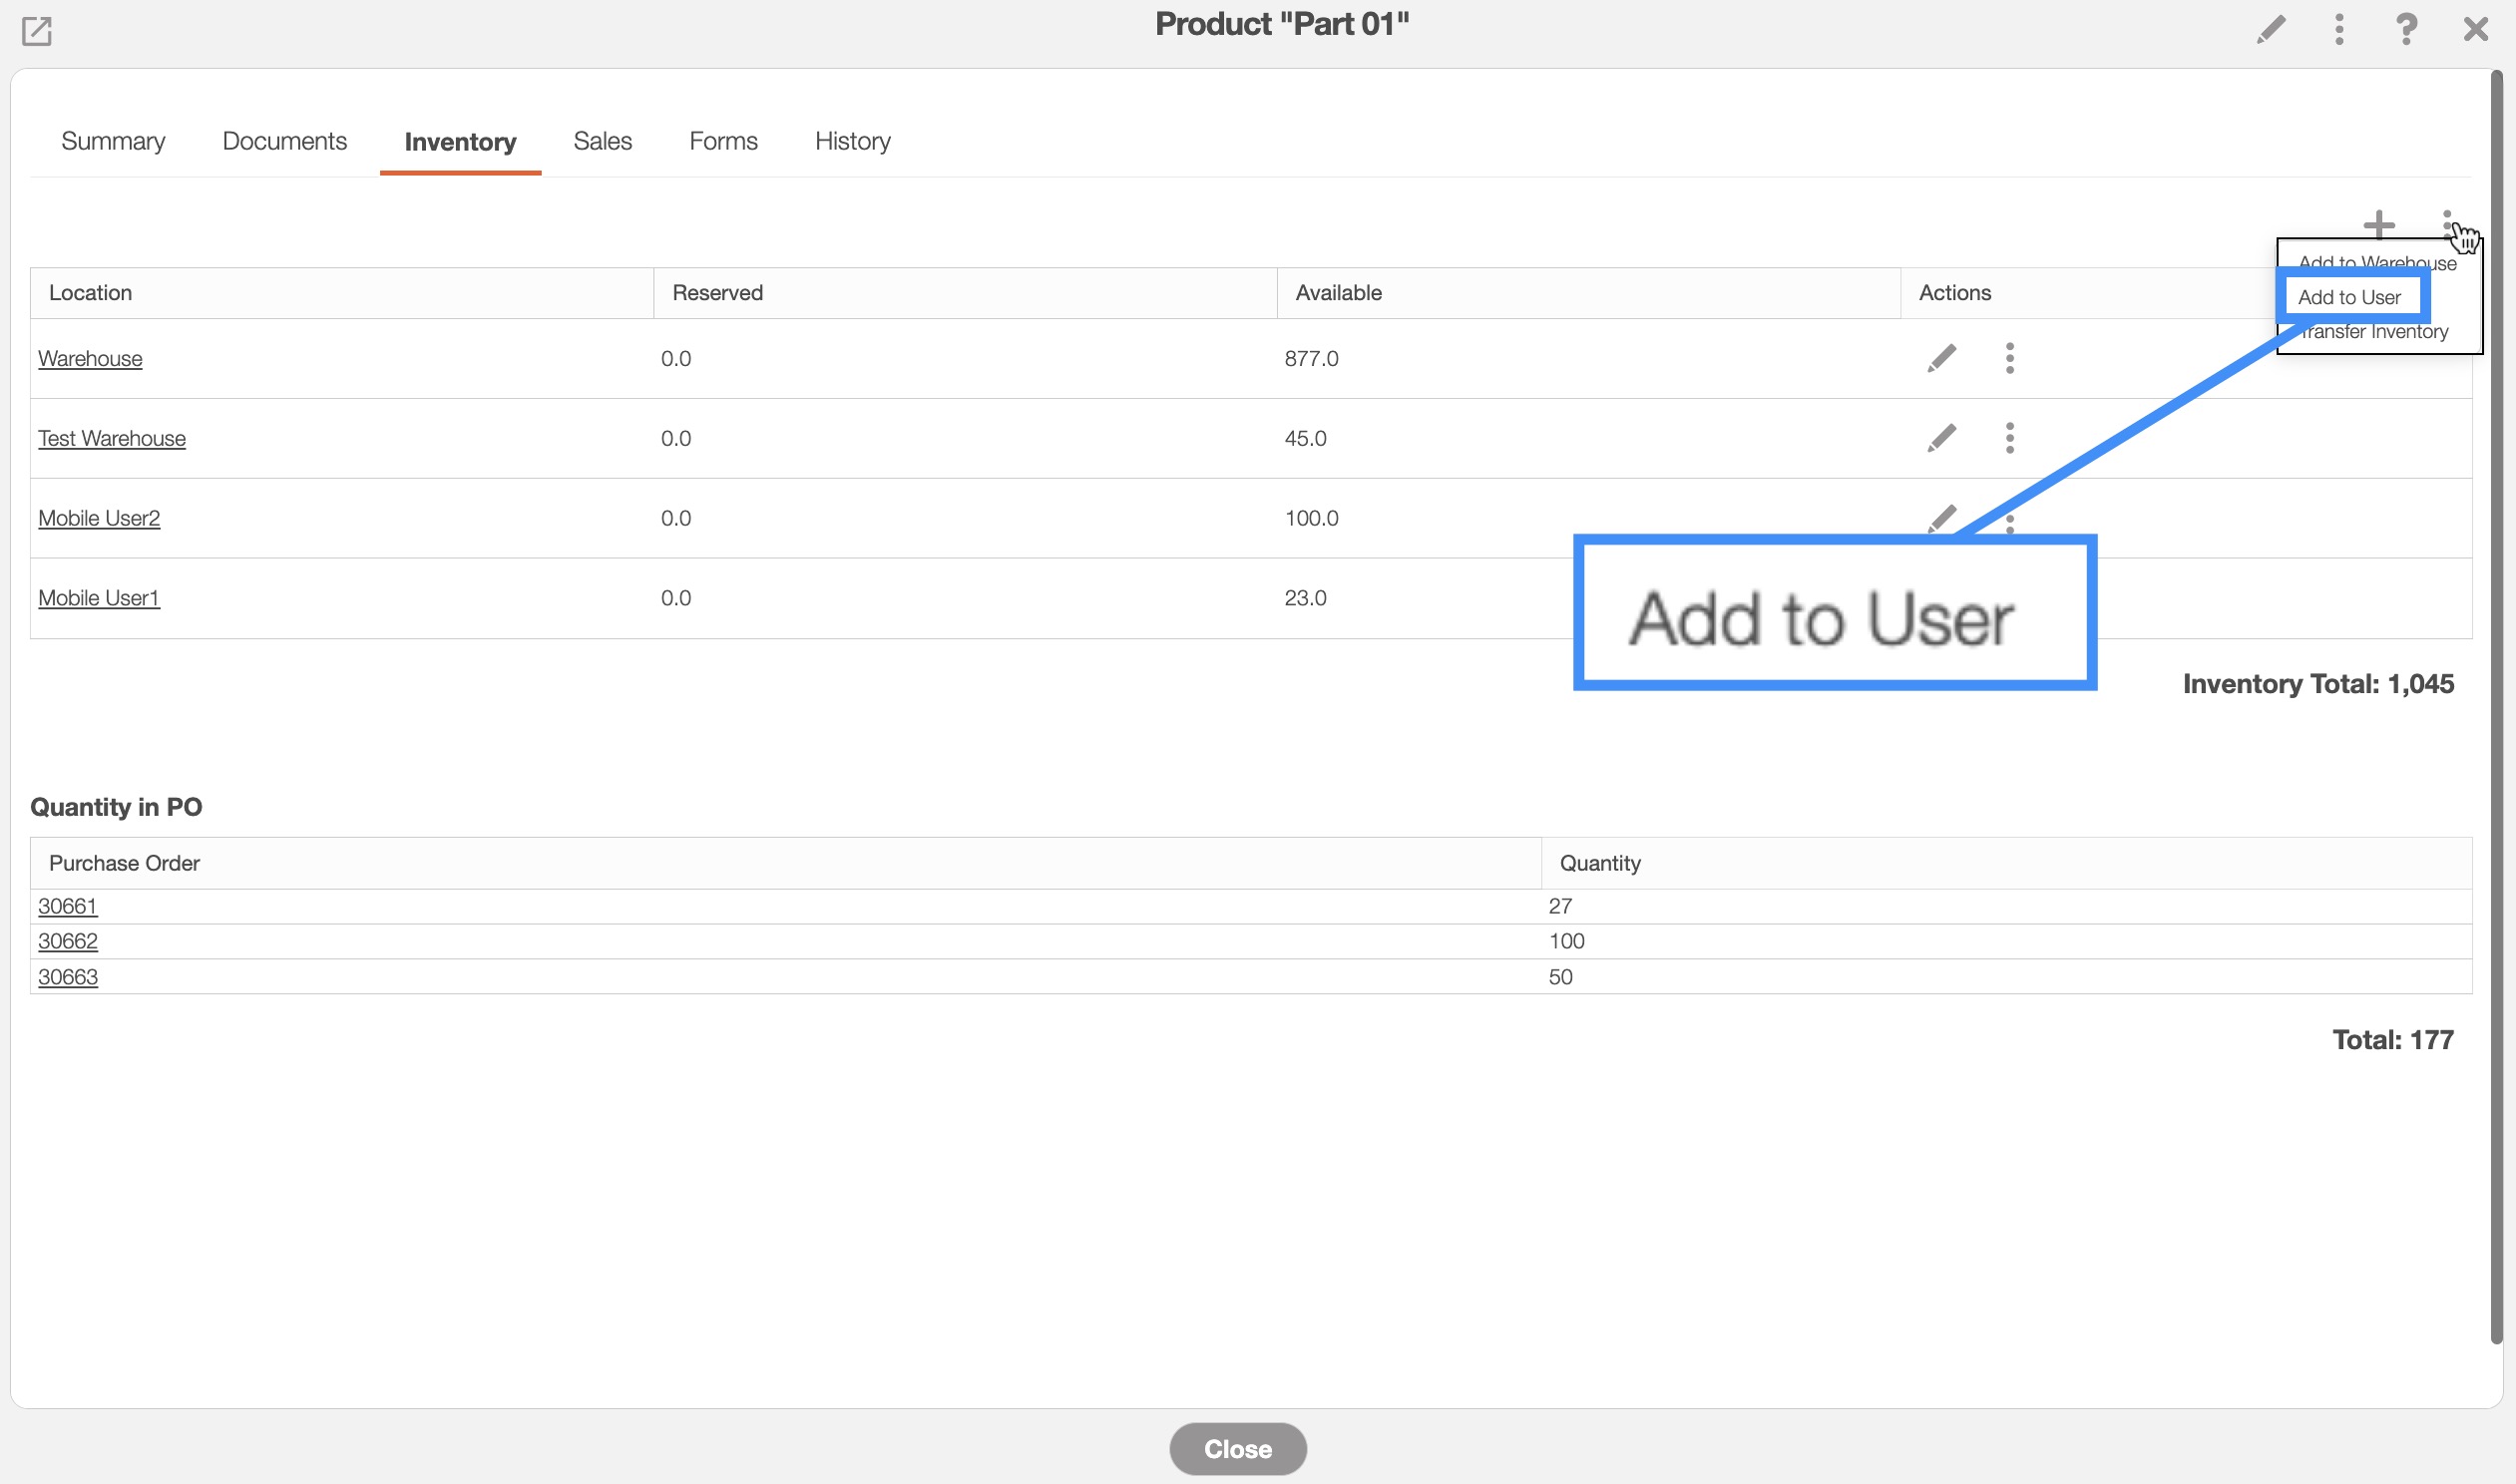
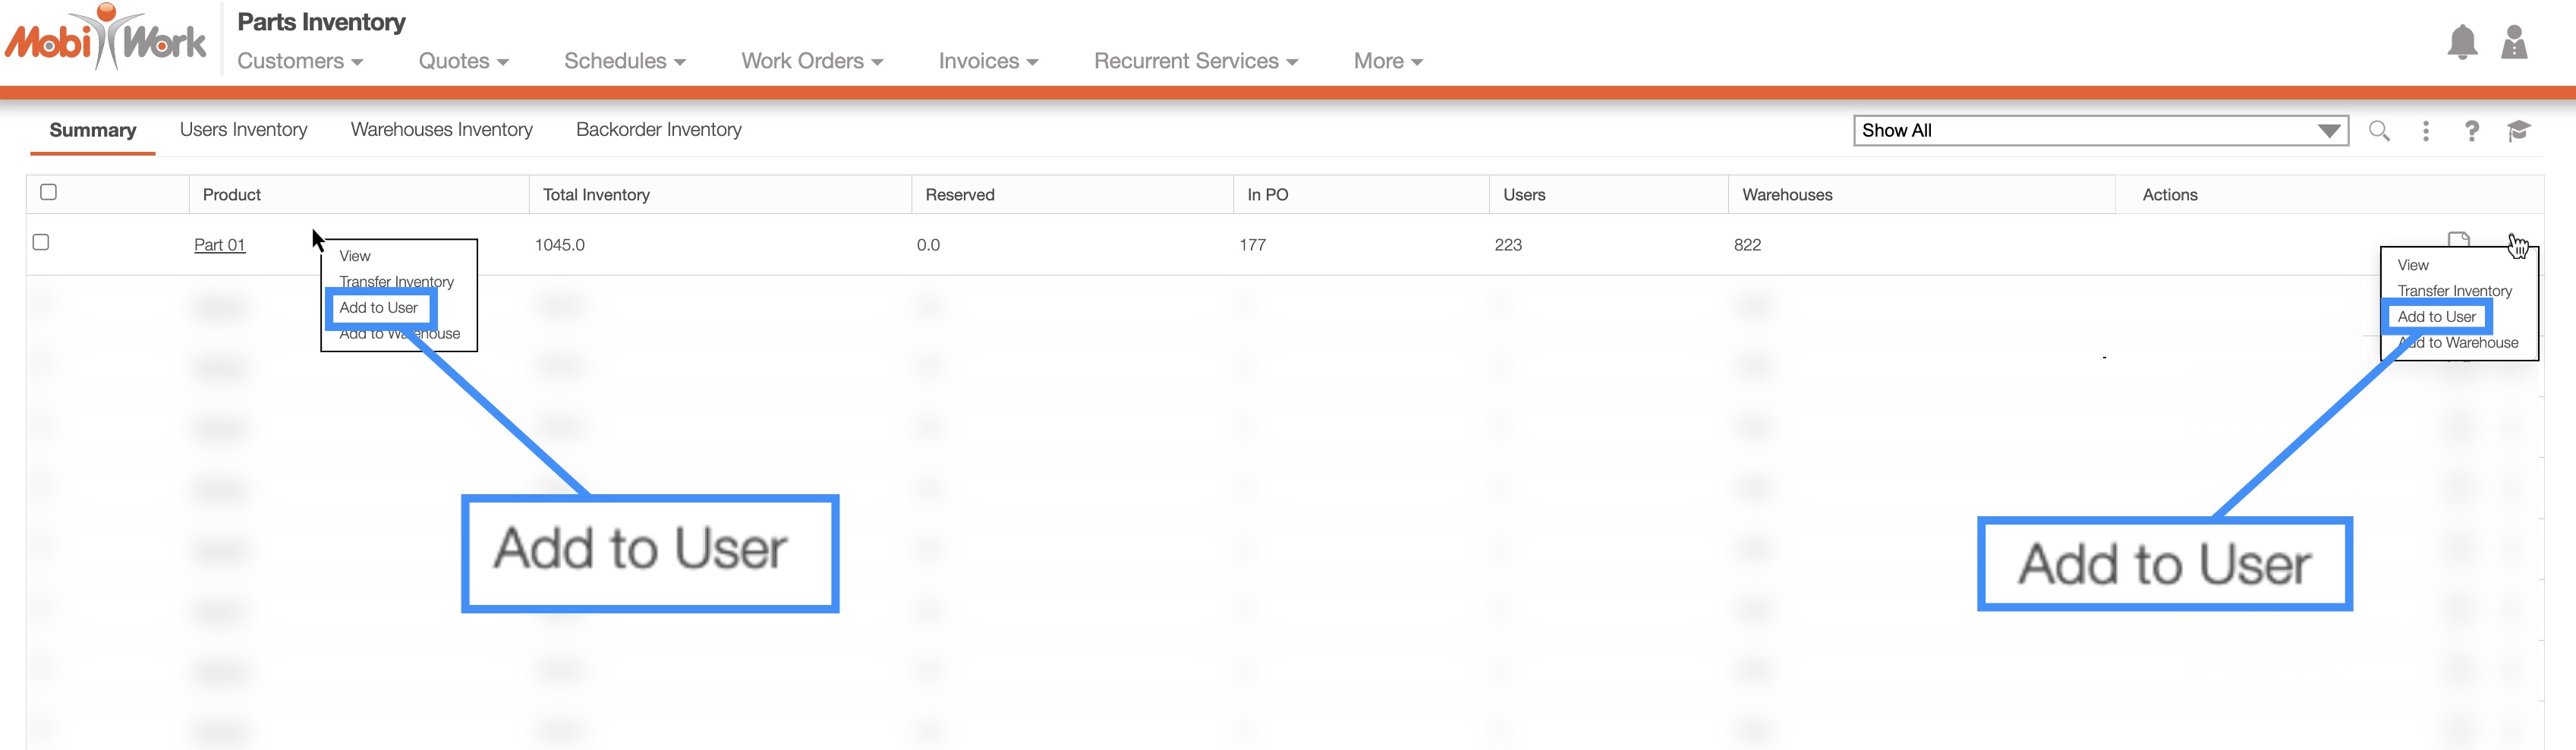
Once you are on the "Inventory" tab, click on the Individual Actions button in the top right-corner; from the drop-down select the "Add to User" option.
You will also be able to add inventory to a user from the Inventory "Summary," "Users Inventory," and "Warehouses Inventory" tabs.
You can either right-click on the desired part or click on the Individual Actions button and from the drop-down select the "Add to User" option:
Regardless of how you add stock to a user, the Add Stock To User pop-up window will then appear.
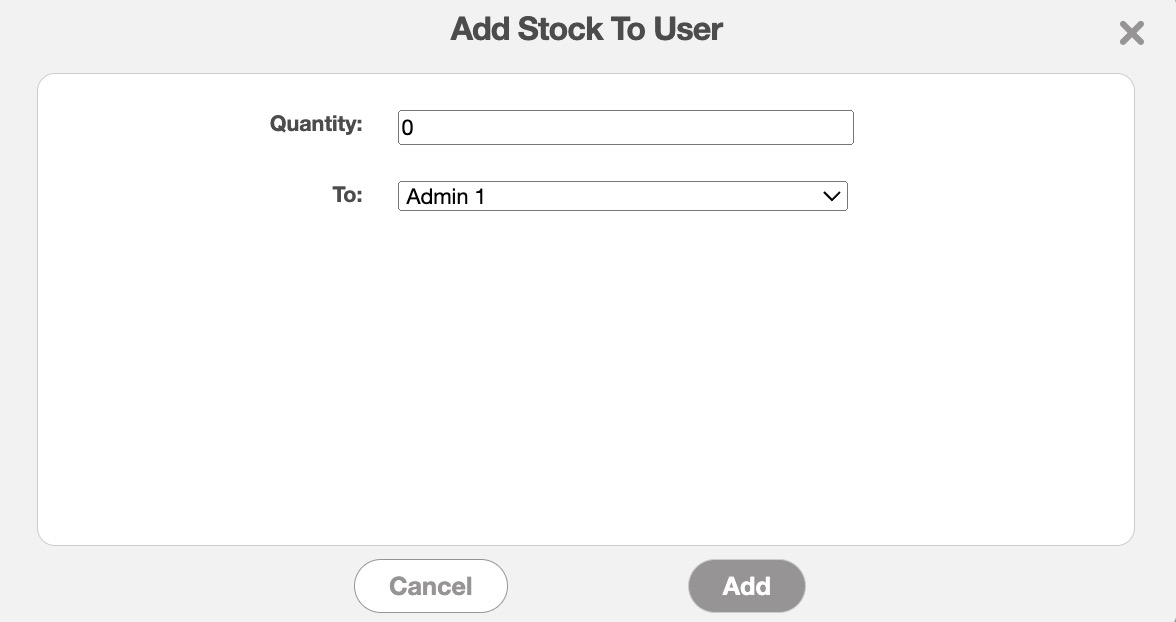
Please note that this action will not add additional inventory of the part or service; rather, it will transfer existing stock to the selected user.
In the Add Stock To User pop-up window you can:
Input the quantity that the user will be holding.
Also, you will be able to specify the user that will possess the part or service.
Once you are satisfied with the information entered, click on the Add button to confirm the addition of parts or products into the user's inventory.
You can also transfer stock from warehouses and users. For more information on how to transfer stock between warehouses and users, please see the Transfer Inventory section.
There are several different ways to transfer stock between warehouses or users. You can transfer stock from the specified View Part pop-up window or through Inventory tabs:
![]()
Once you are on the "Inventory" tab, you can transfer inventory through the following actions:
By right-clicking on the selected part or product, and clicking on the "Transfer Inventory" action from the drop-down.
By clicking on the Individual Actions button and selecting the "Transfer Inventory" action from the drop-down.
Or by clicking the Individual Actions button in the top-right corner, then select the "Transfer Inventory" option from the drop-down menu.
You will also be able to transfer inventory to a warehouse or user from the Inventory "Summary," "Users Inventory," and "Warehouses Inventory" tabs.
You can either right-click on the desired part or click on the Individual Actions button and from the drop-down select the "Add to Warehouse" option:
![]()
Regardless of how you transfer stock in MobiWork, the Transfer Inventory pop-up window will then appear:
In the Transfer Inventory pop-up window, you can:
![]()
Input the quantity that will transfer to the user or warehouse.
As well as the stock's point of origin and its destination.
Once you are satisfied with the information entered, click on the Add button to confirm the transfer of the parts or products to the desired user or warehouse.