FleetNet Connector
Adding the FleetNet Connector
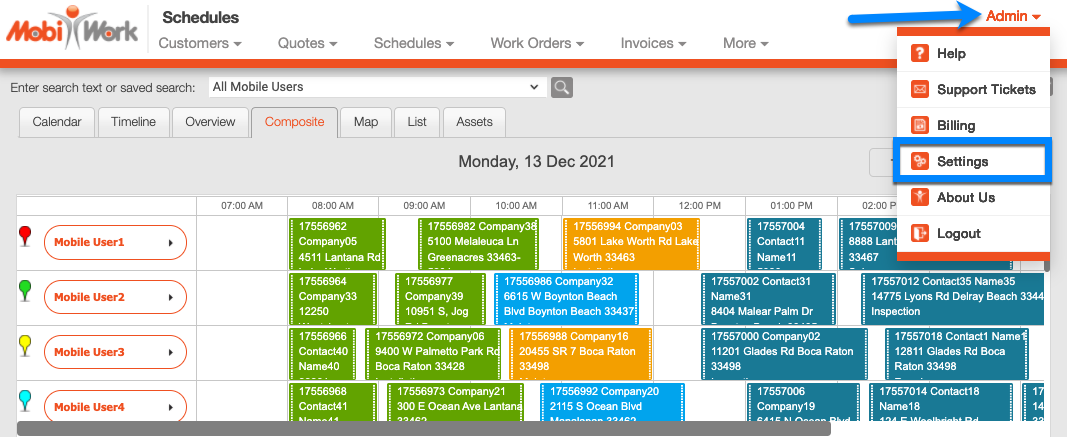
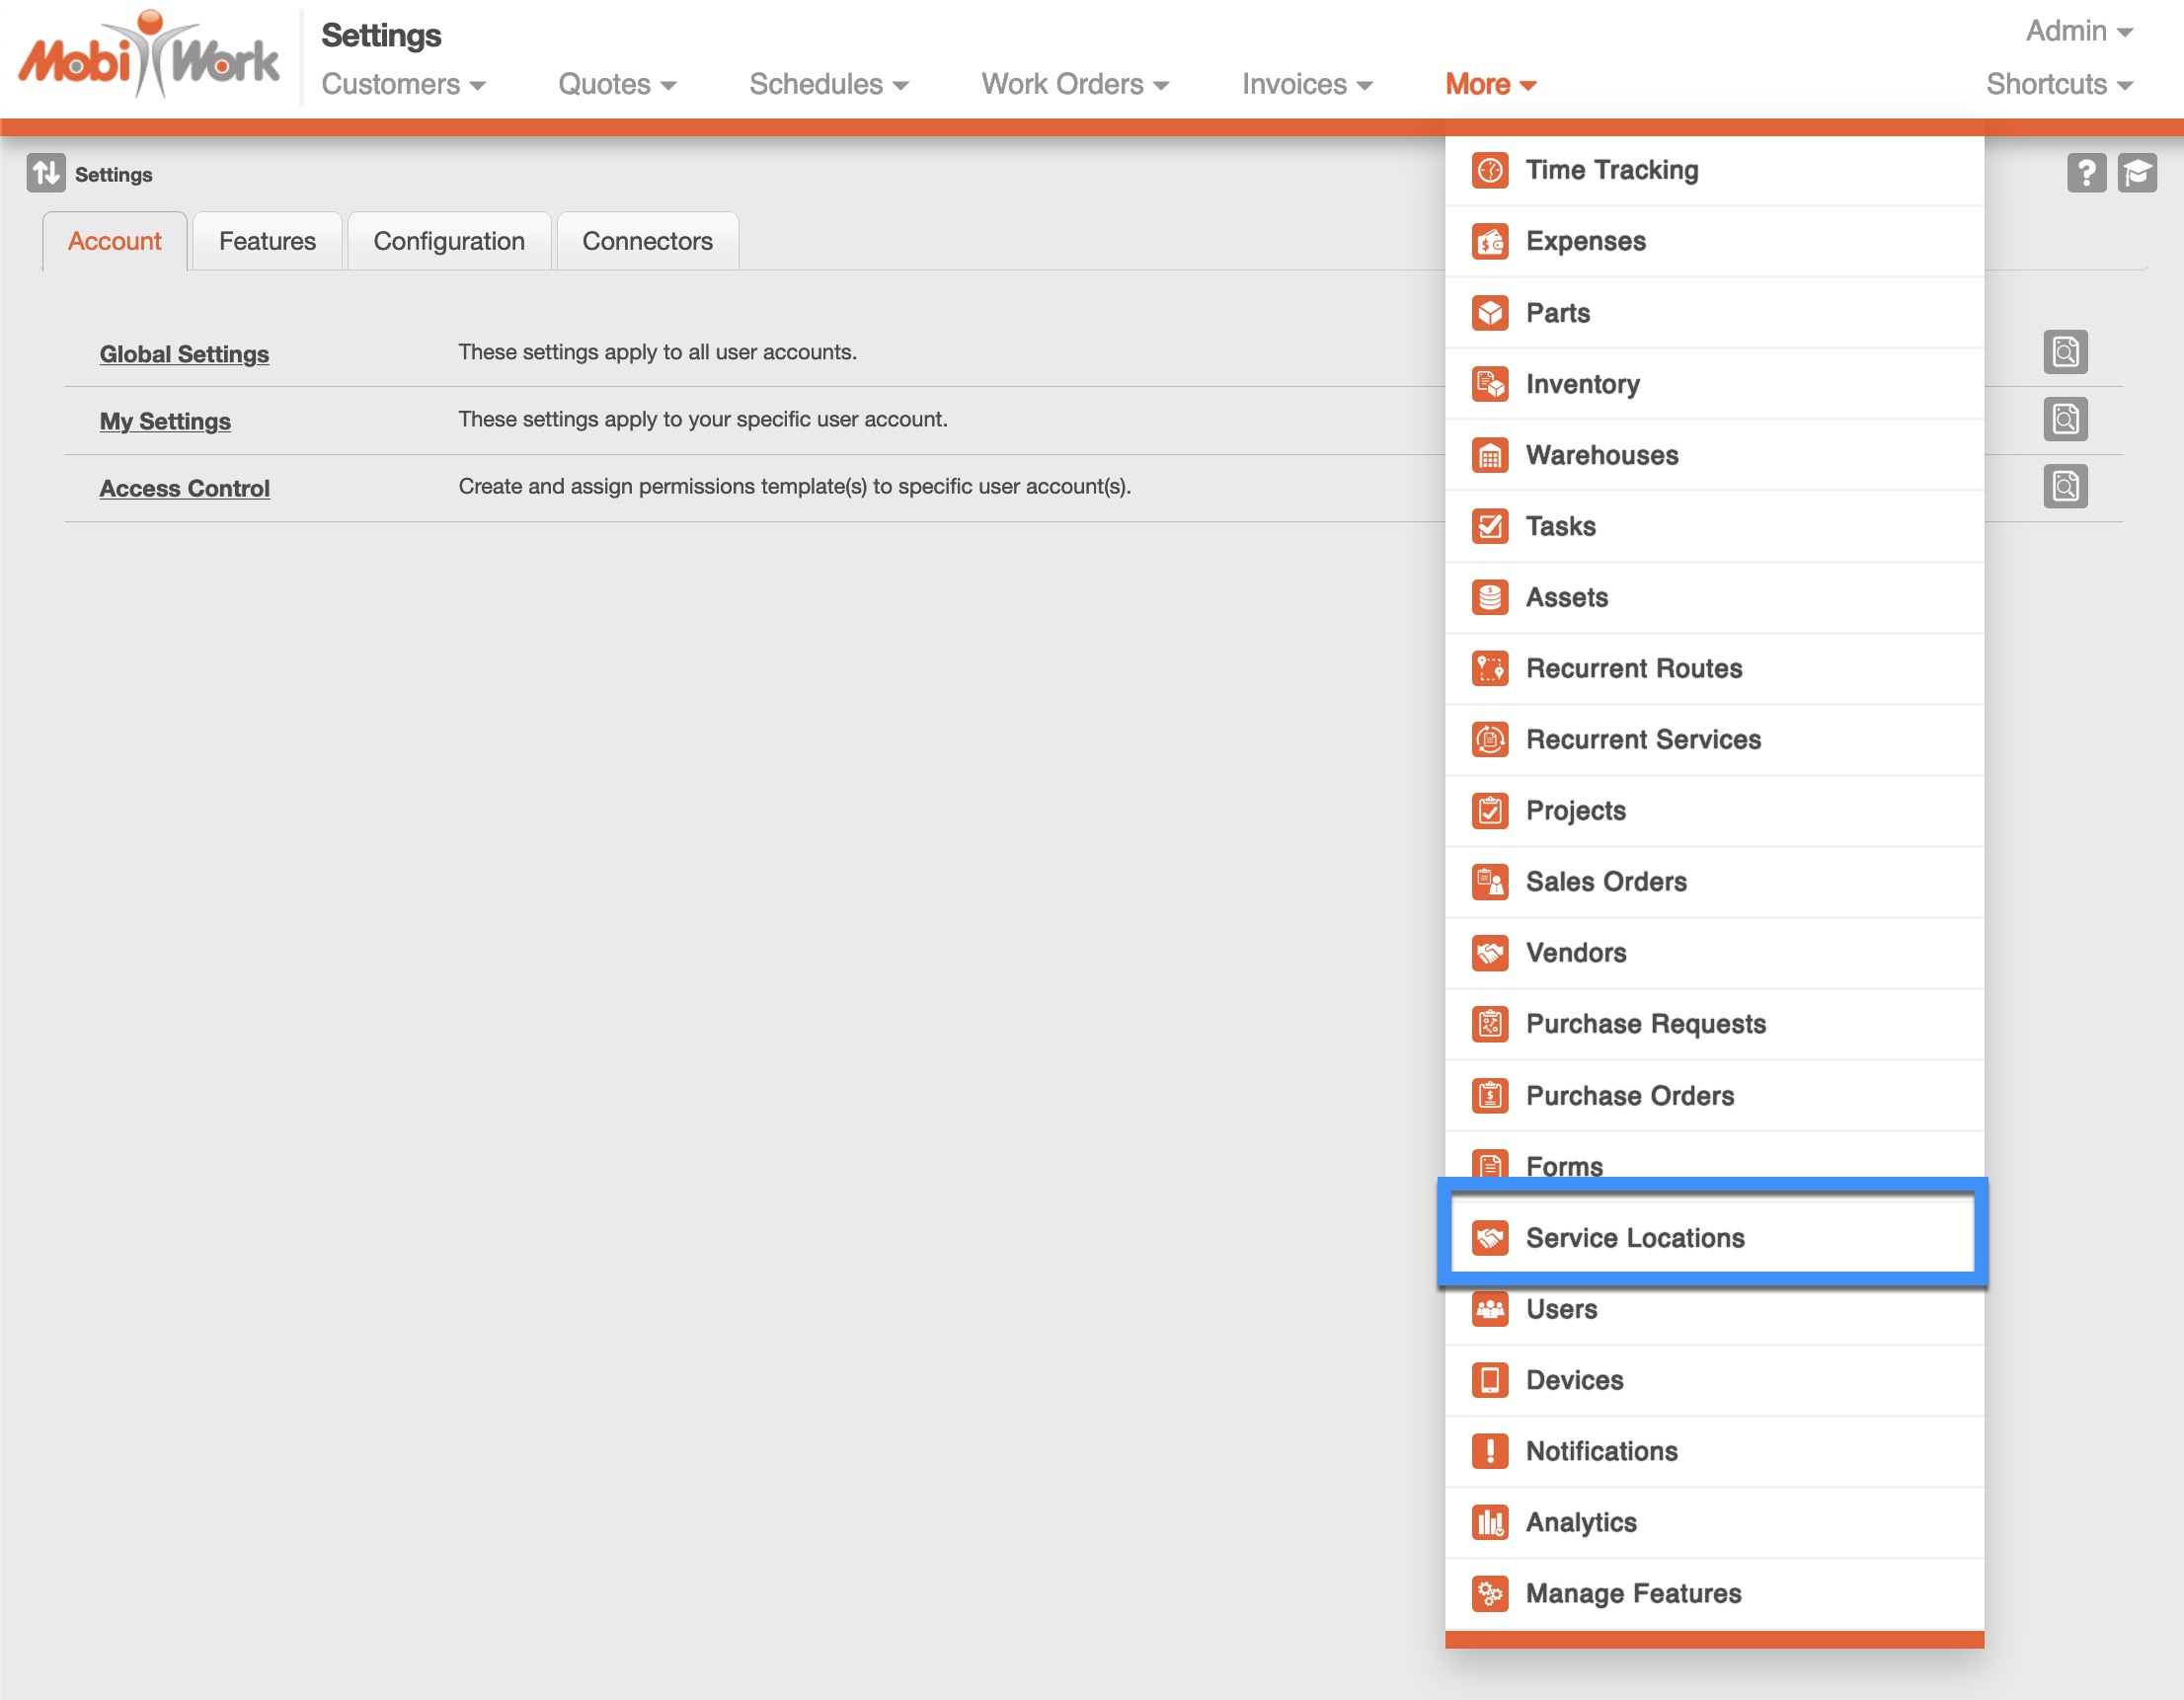
- Navigate to your MobiWork account Settings through your User drop-down, located in the top right corner.
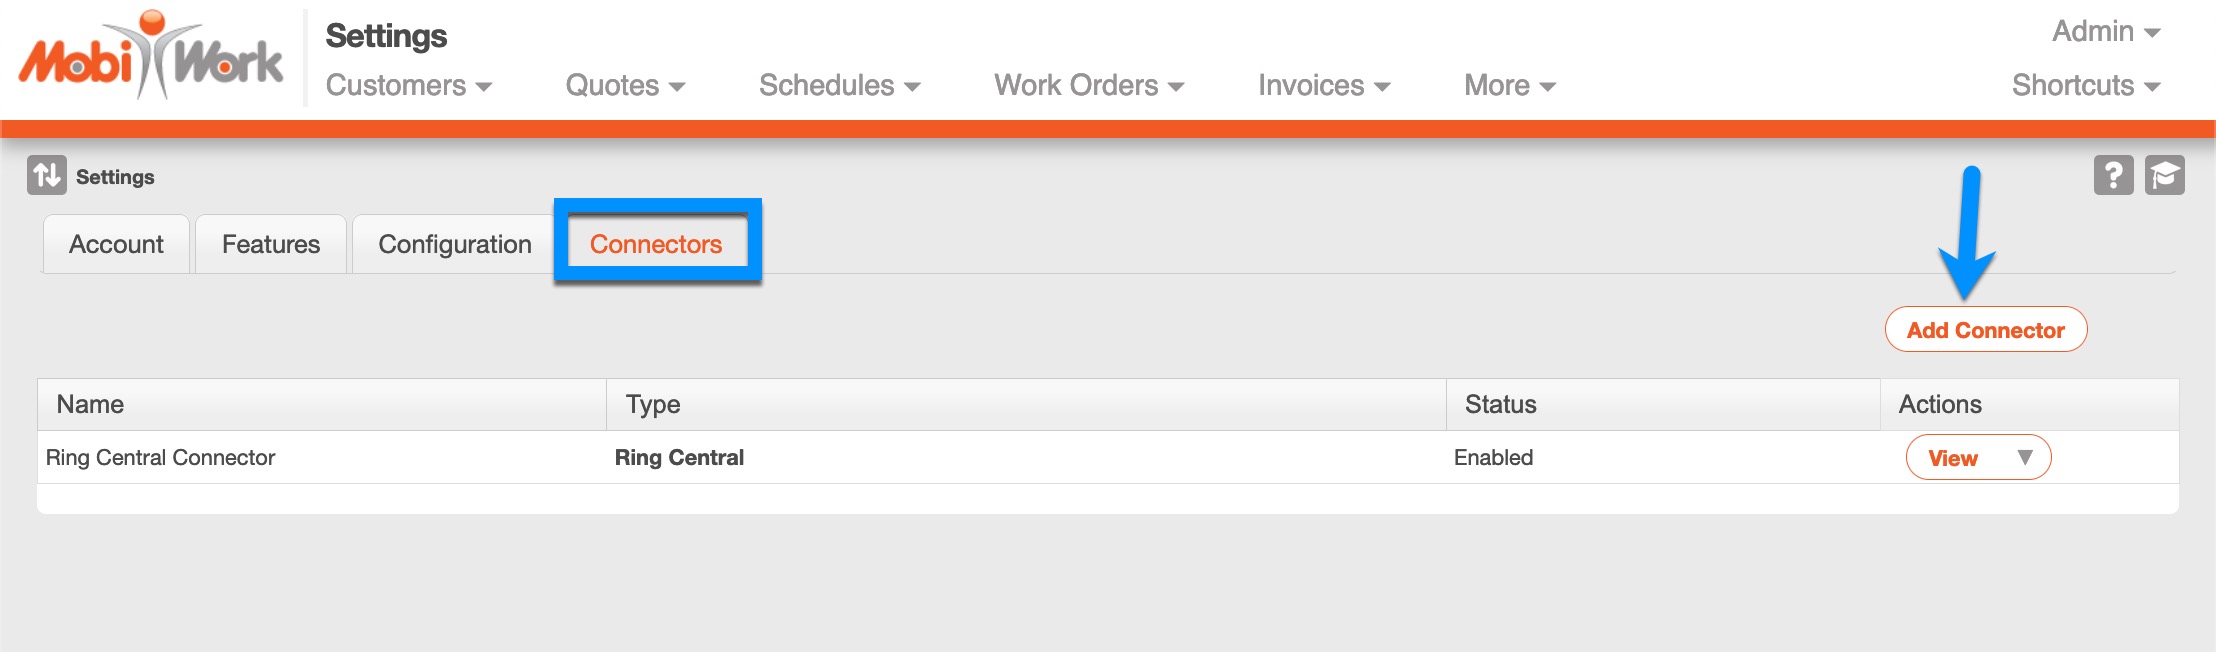
- Choose the Connectors tab and click Add Connector.
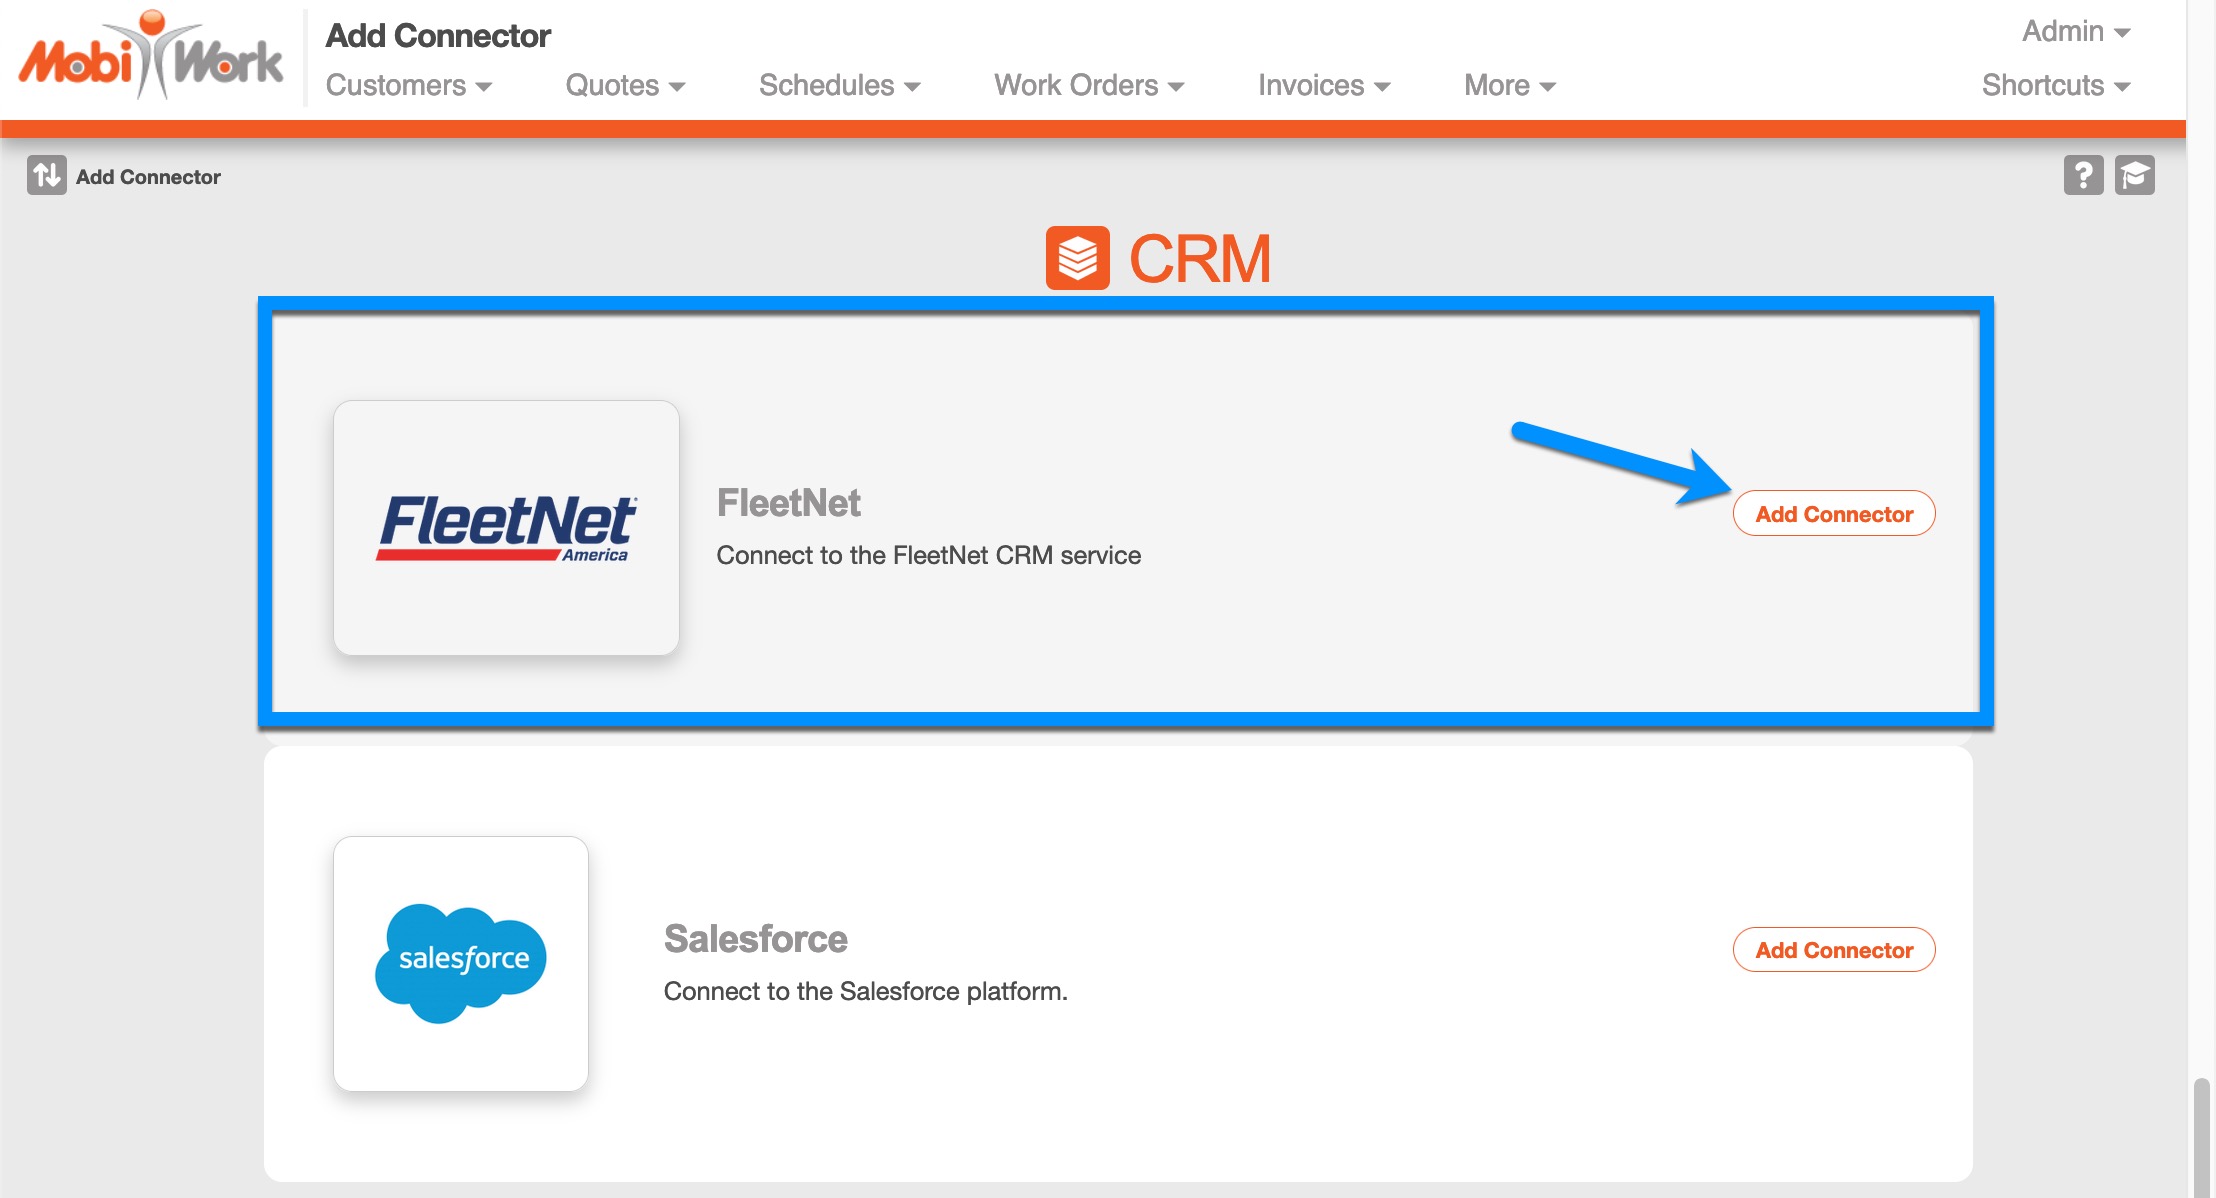
- From the provided list, locate the CRM connector "FleetNet".
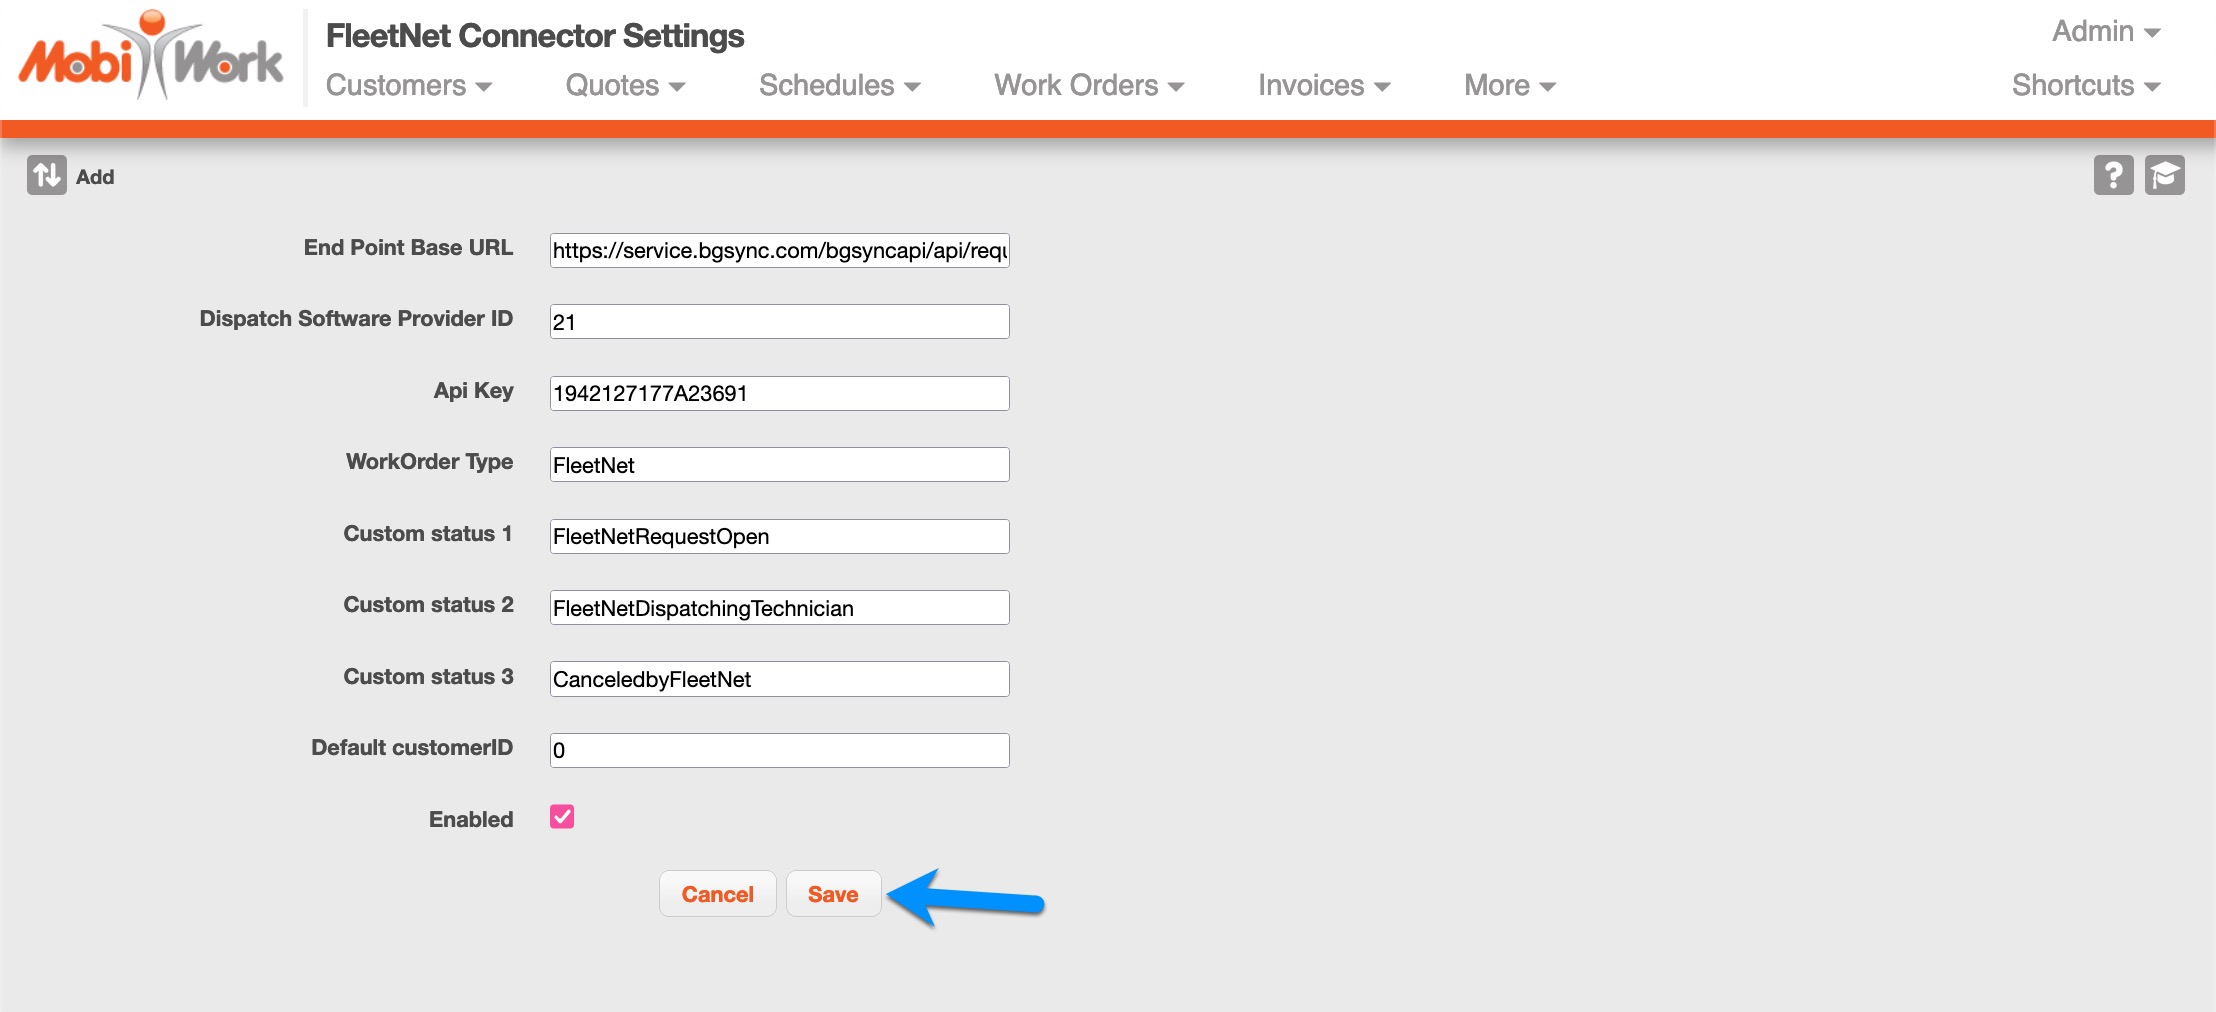
- On the next page, without making any changes, click Save.
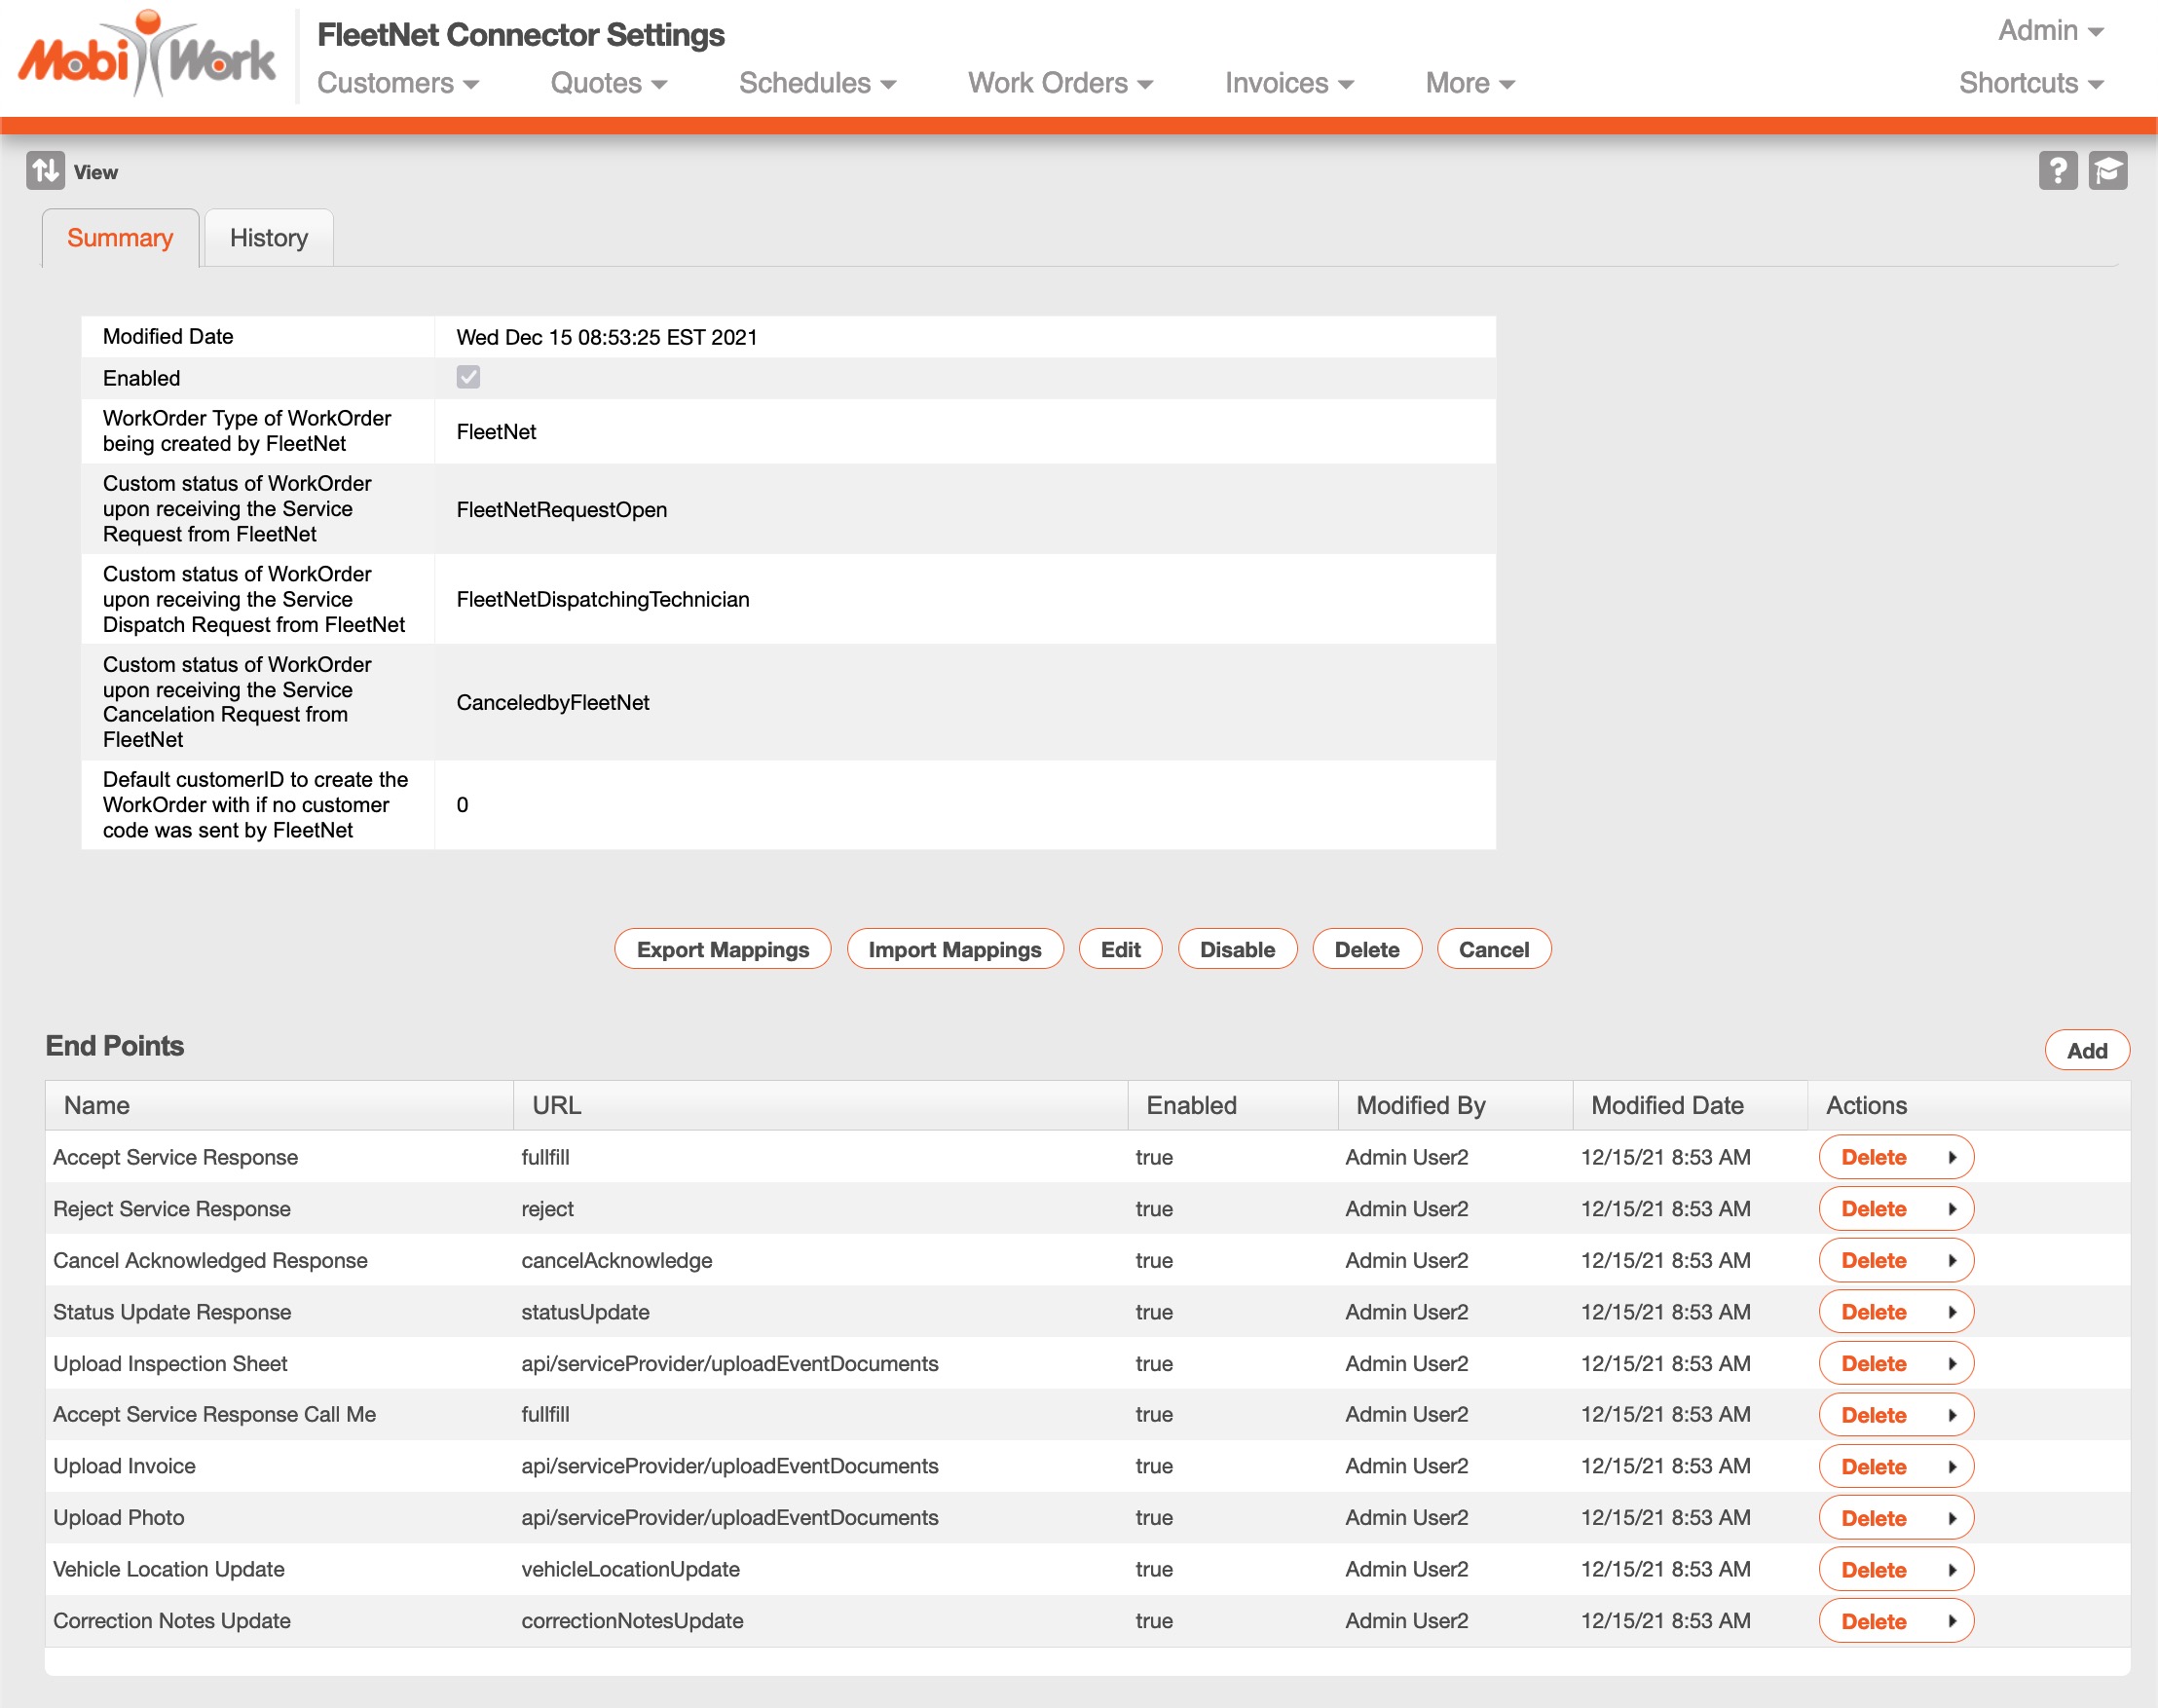
- You will be presented with the FleetNet Connector Settings page.
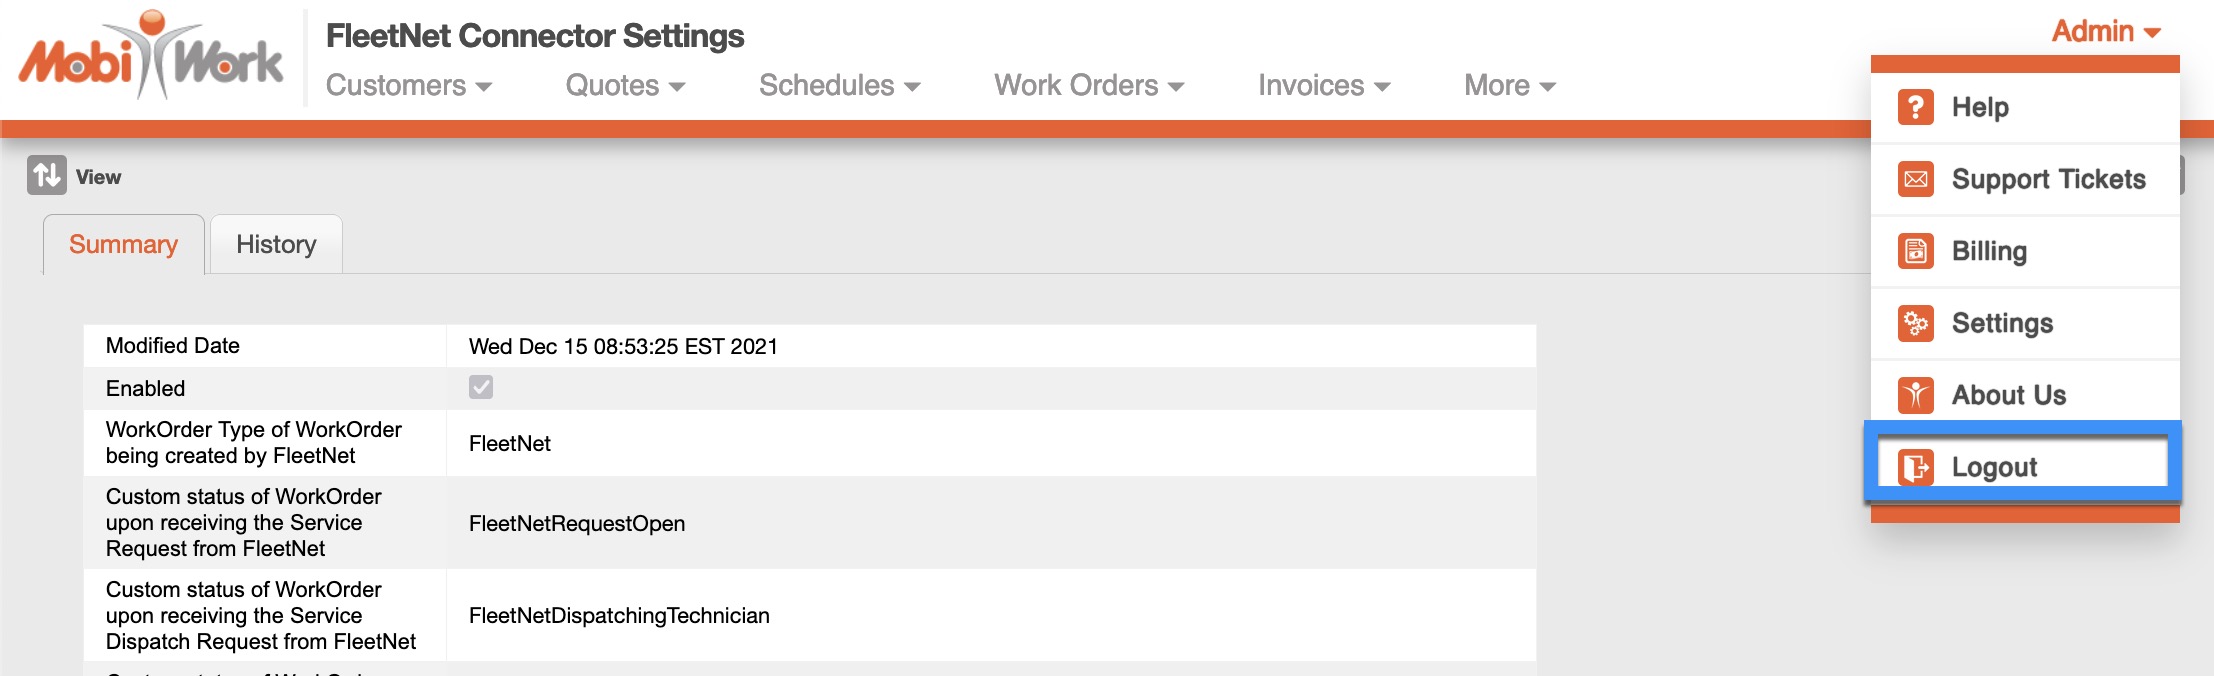
- In order to see the new "Service Locations" generic entity, users must first Logout of MobiWork (through the User drop-down) and then log back in.
- Next, begin adding your Service Locations (See topic below for Adding Service Locations for FleetNet).
Adding Service Locations for FleetNet
Service Locations can be added manually by hand, one-by-one, or through an Excel import/export template.
Adding Service Locations: One-by-One
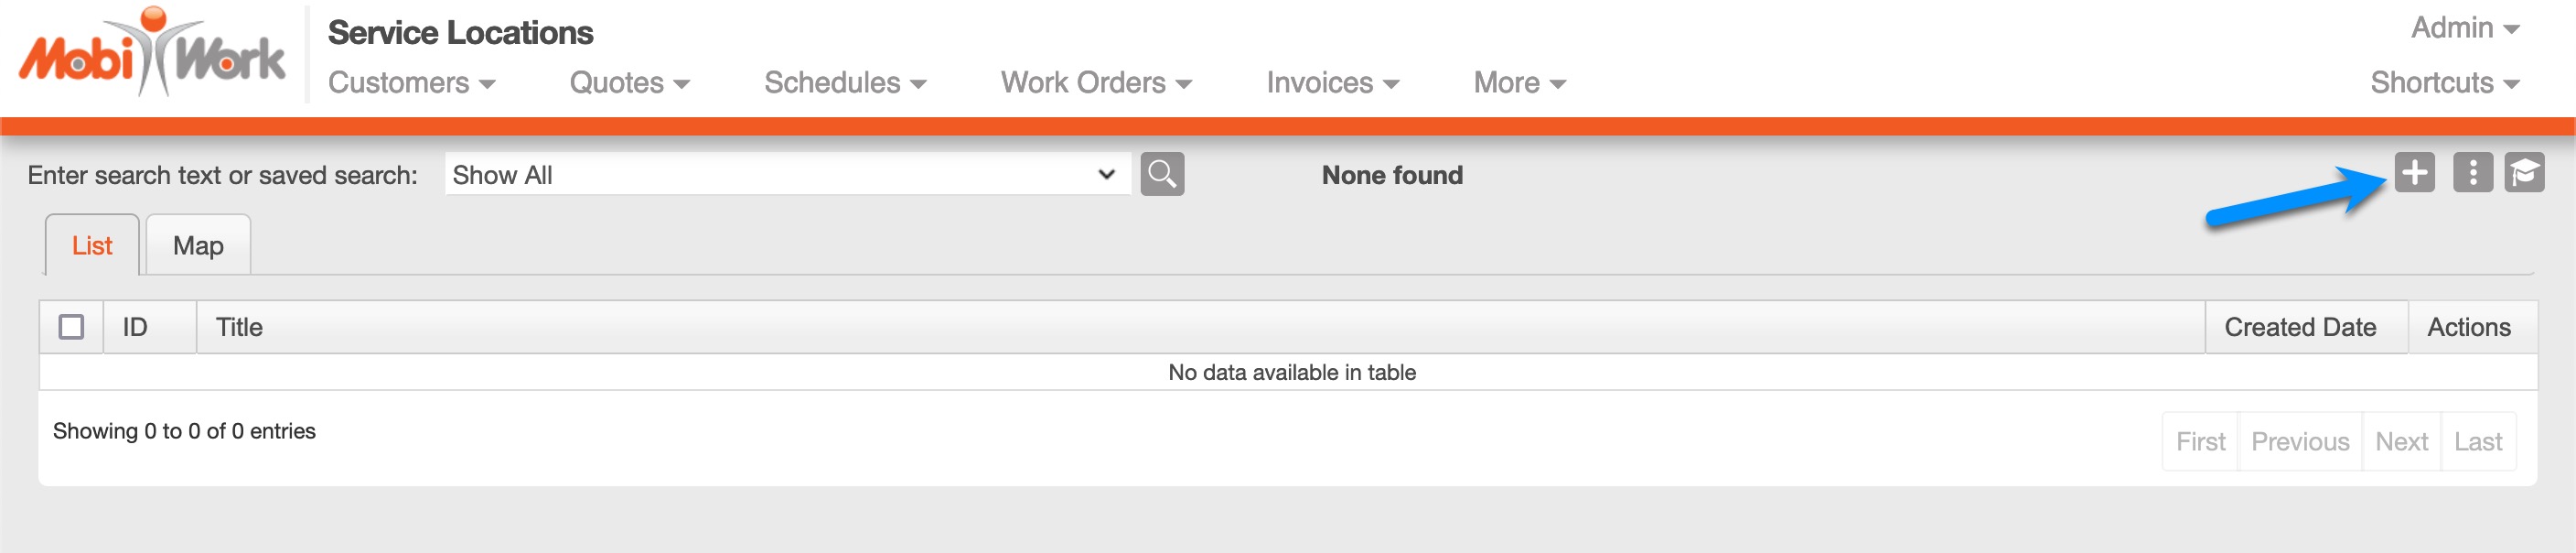
- Navigate to the Service Locations generic entity.
- Choose the (+) Add button to add a new Service Location.
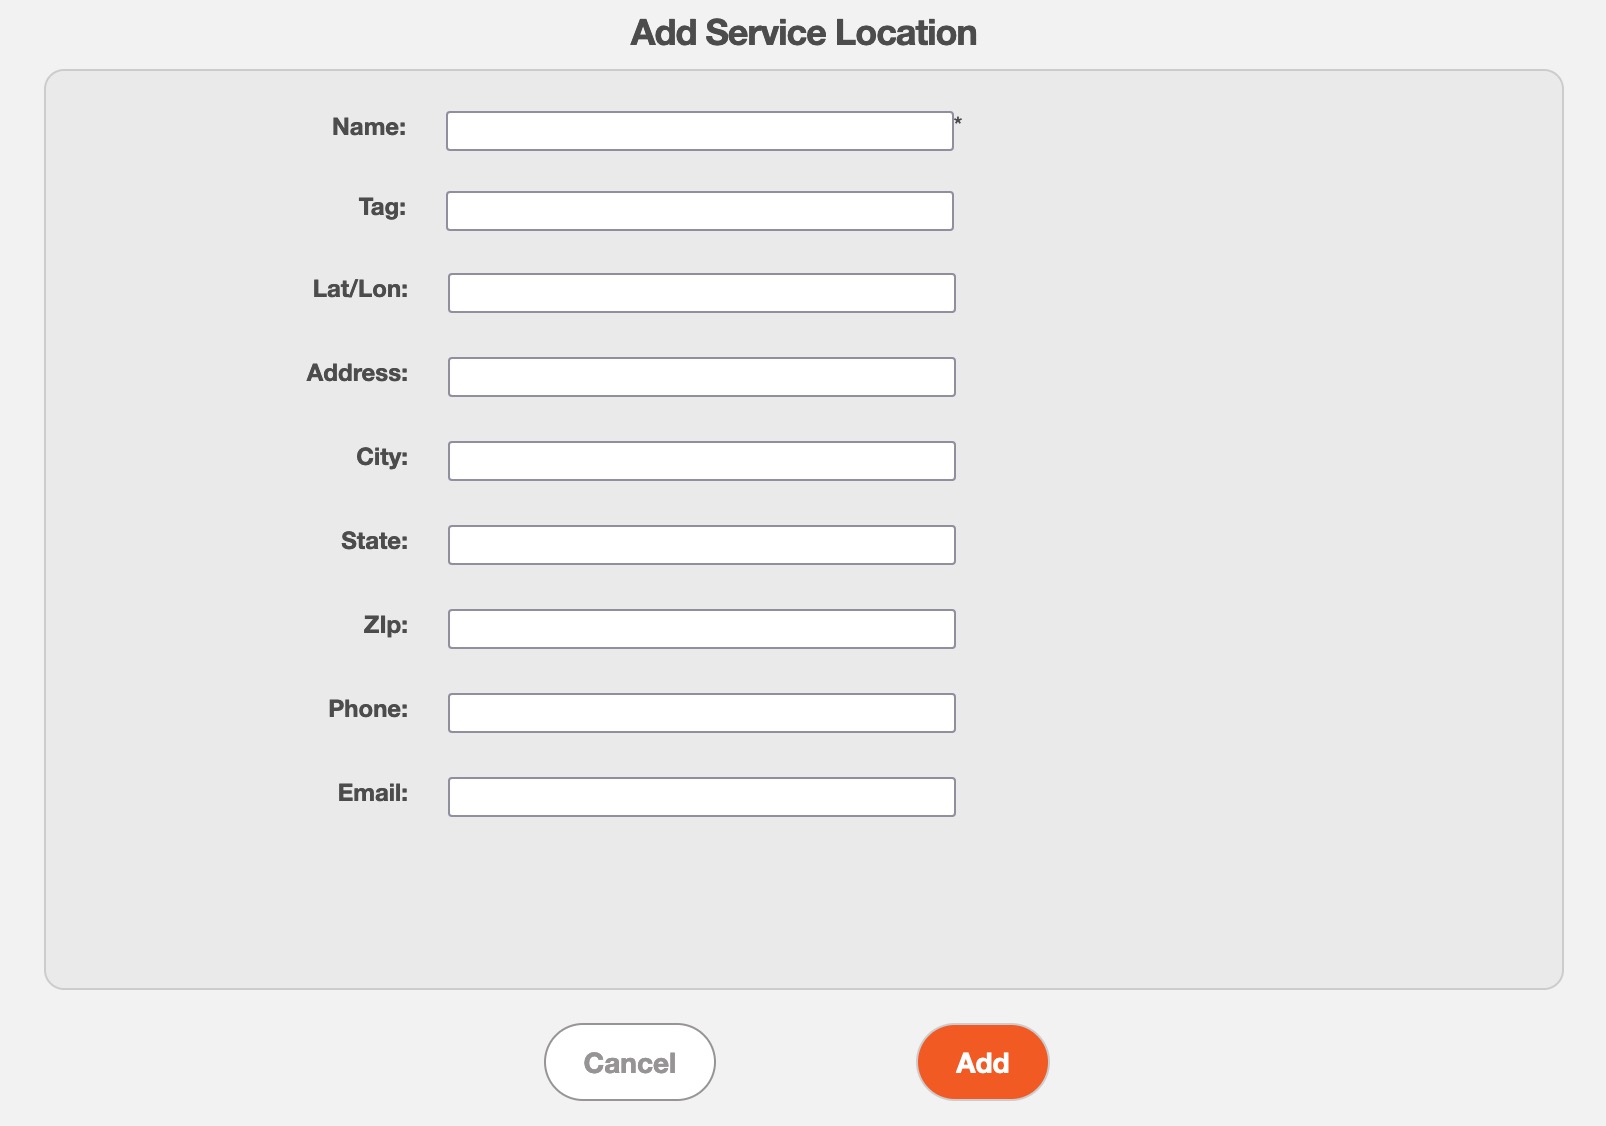
- Fill in the necessary details of the new Service Location.
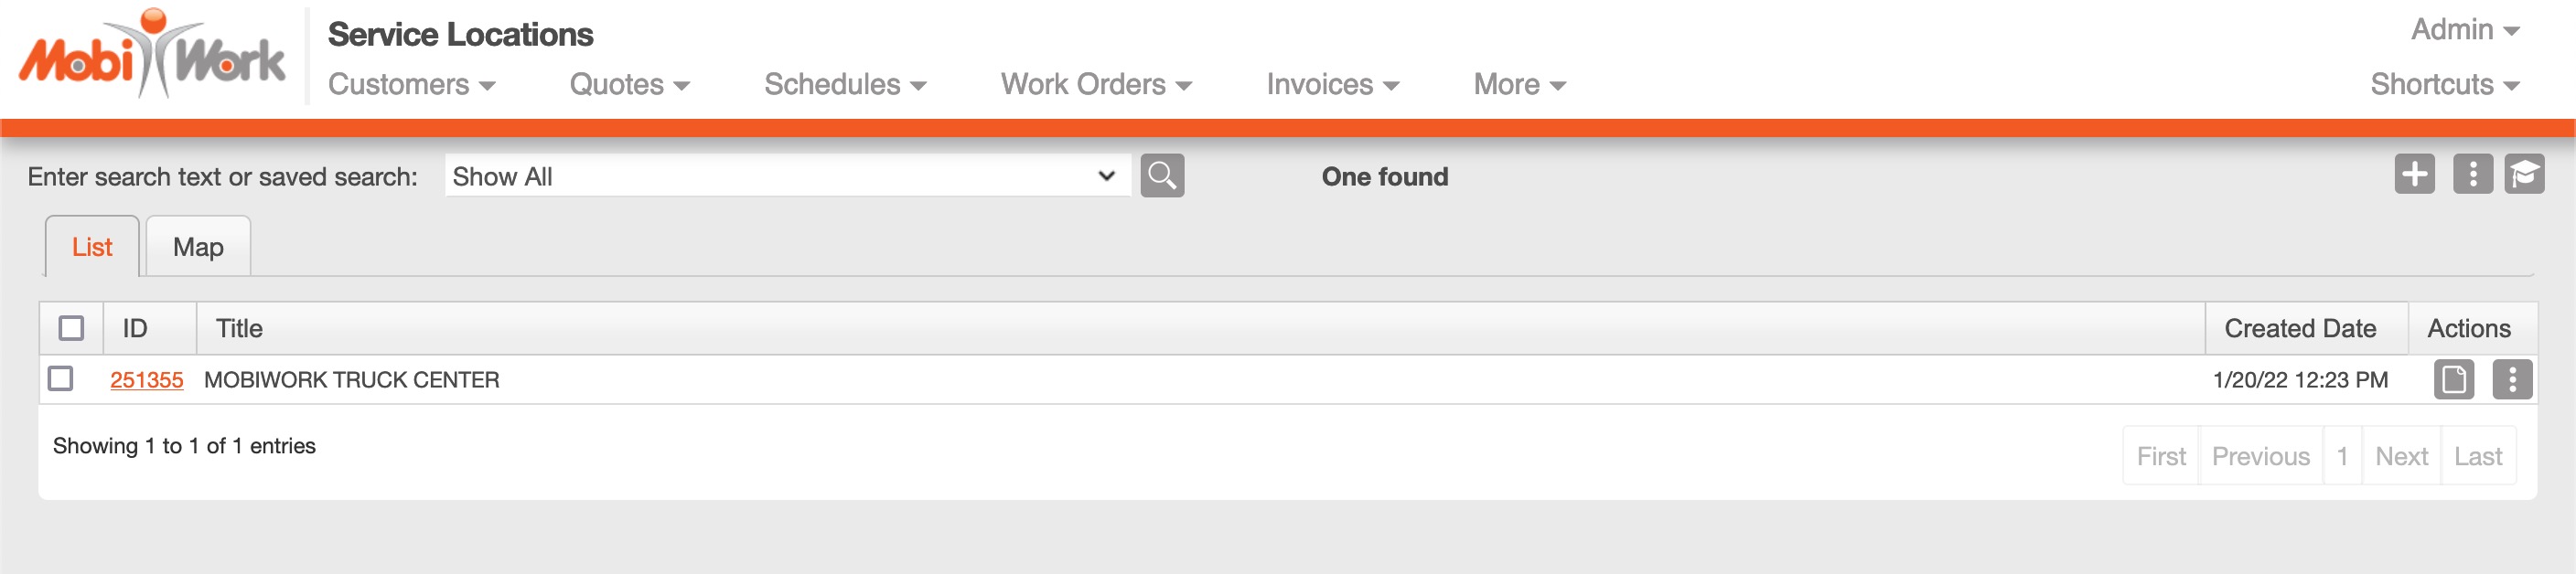
- Click Add when finished.
- This will automatically send FleetNet the Location ID for the Service Location to indicate that the ID can now be used by the client.
Adding Service Locations: Import/Export Template
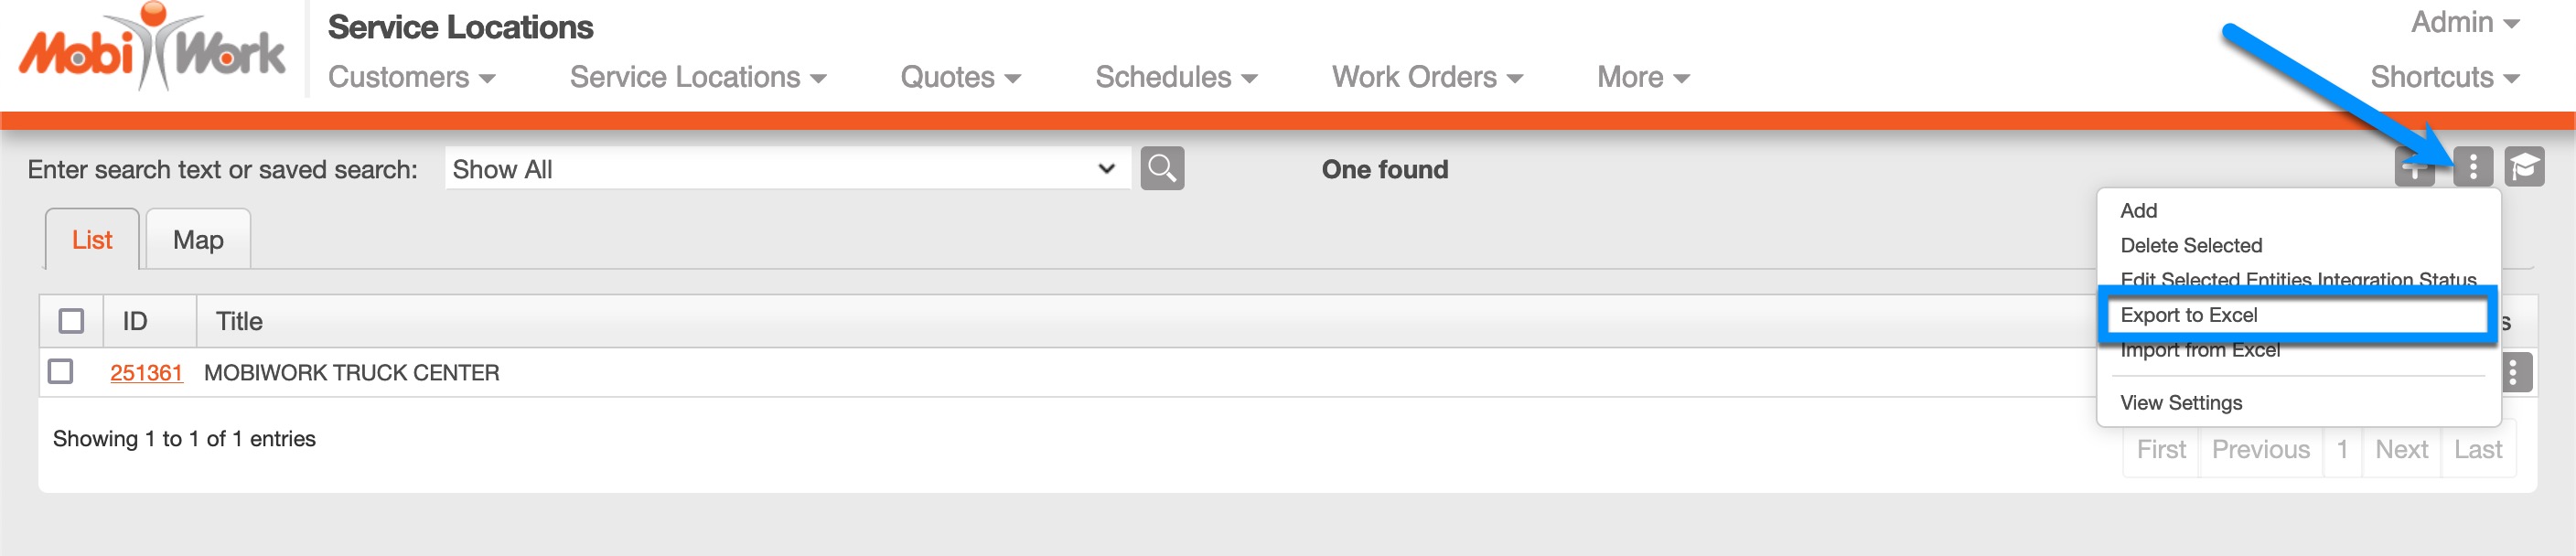
- Navigate to the Service Locations generic entity.
- Choose the More Actions button and select Export to Excel.
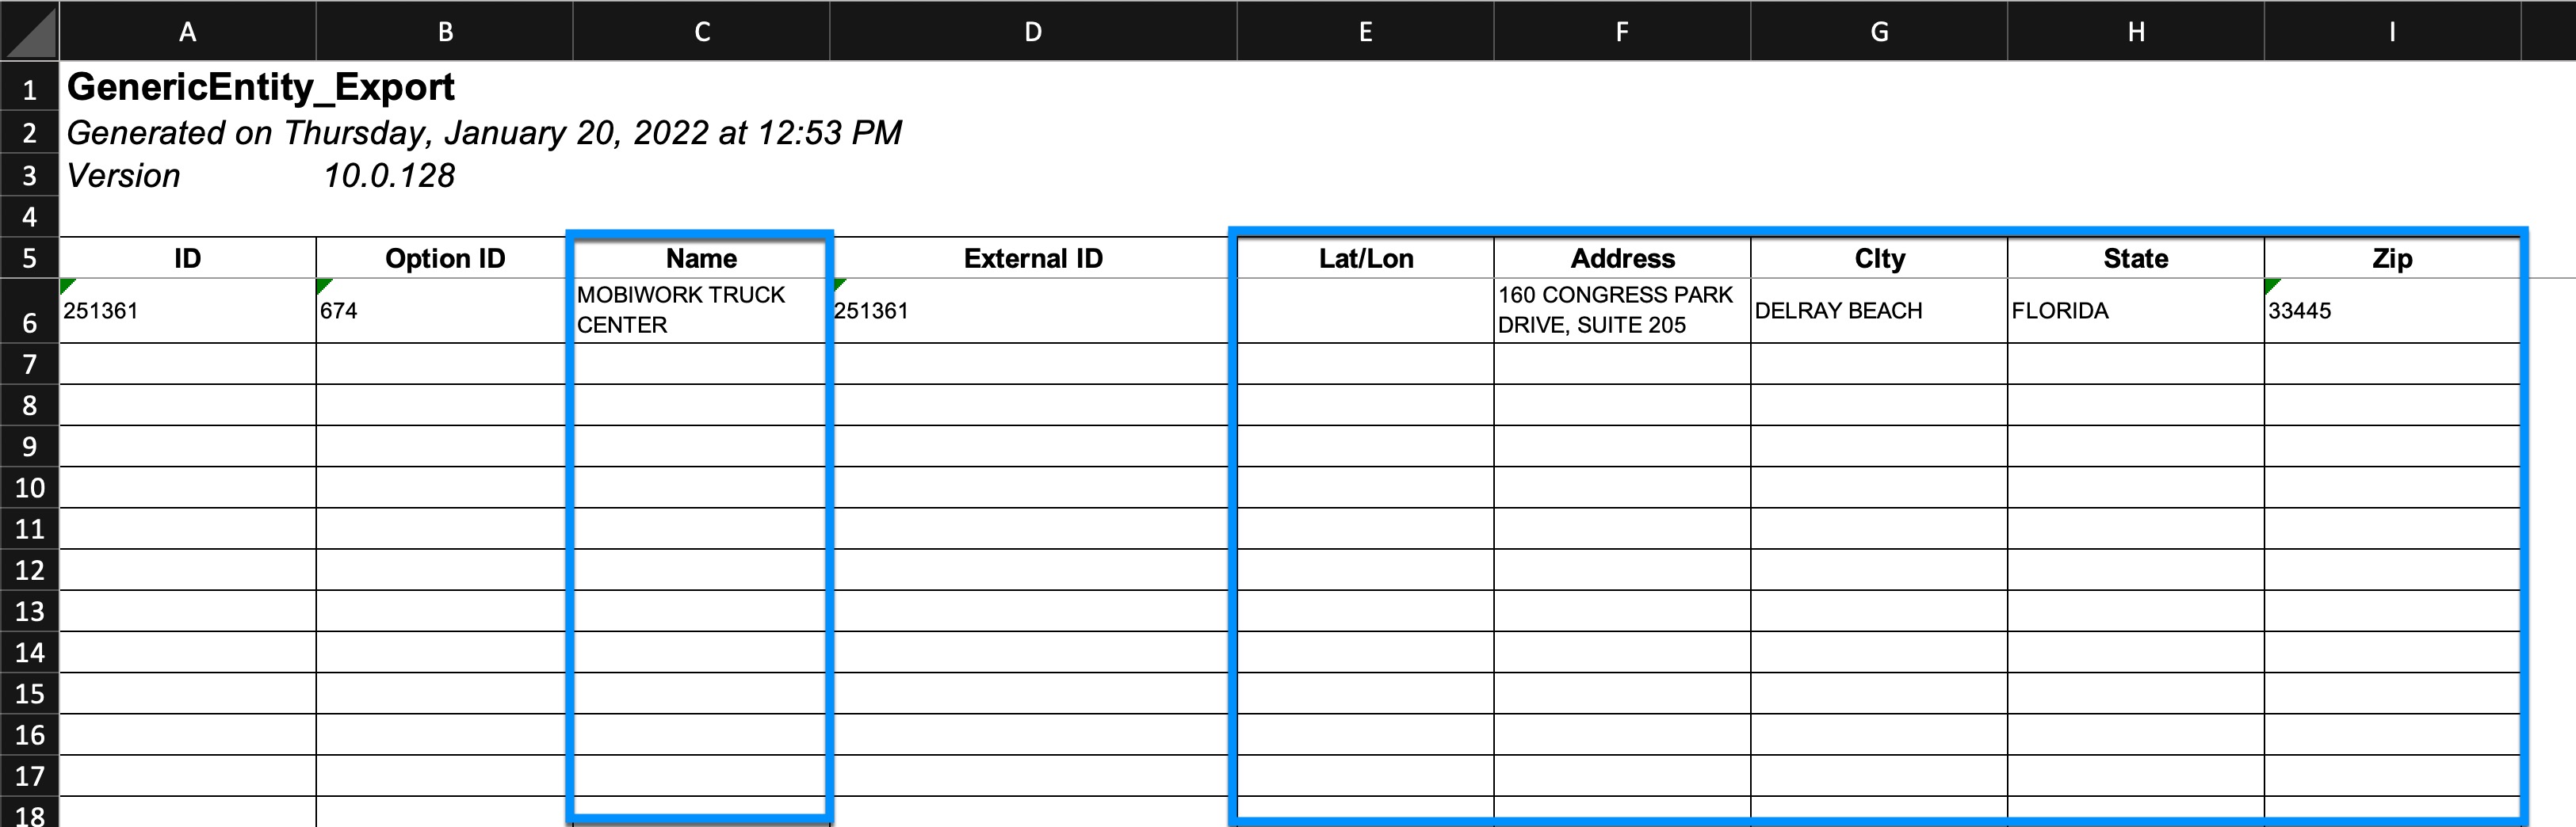
- Your web browser will download a GenericEntity_Export.xlsx Excel file; Open it.
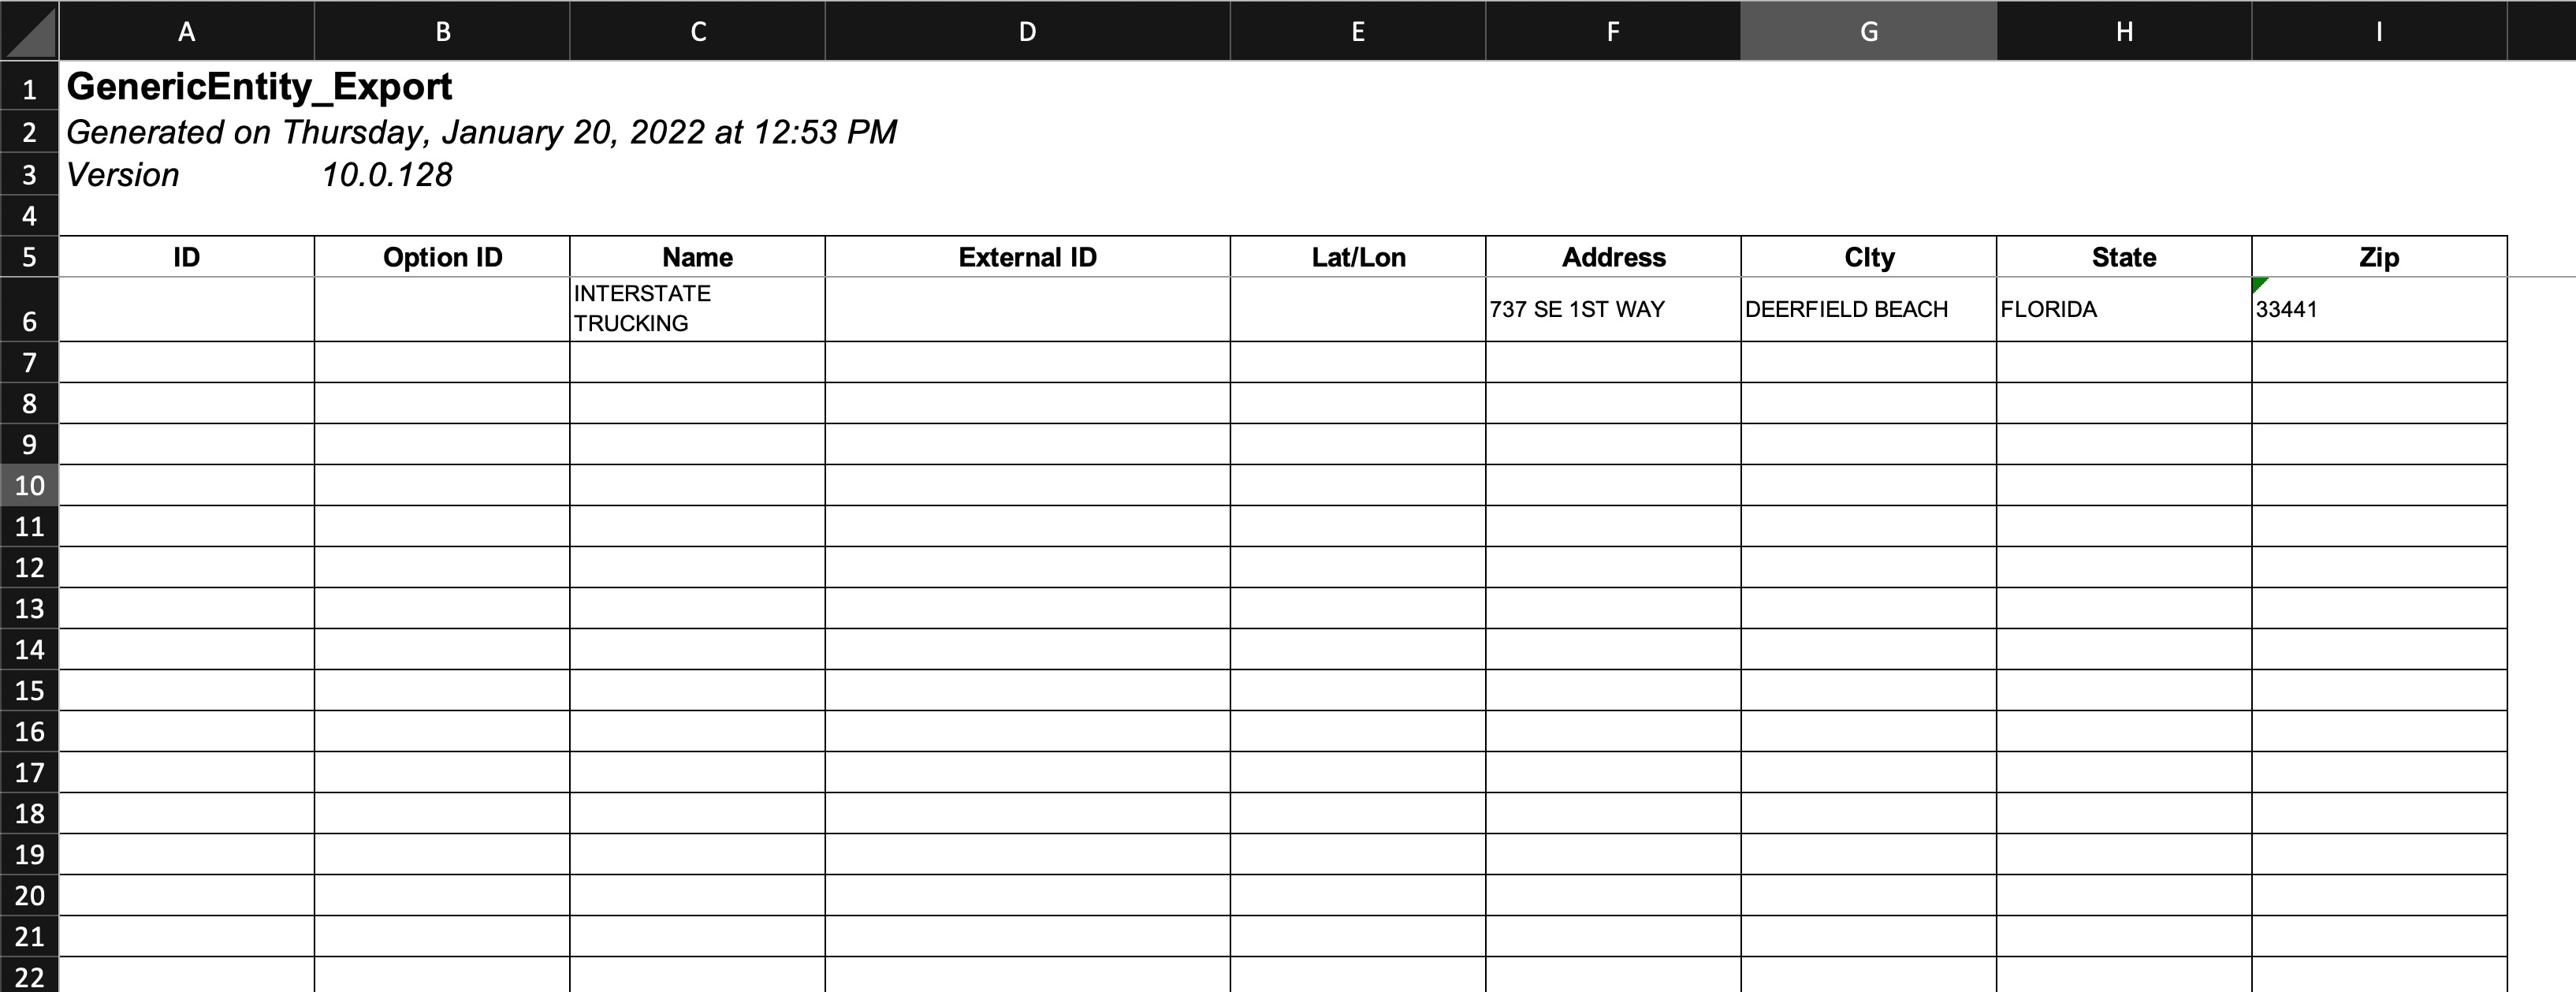
- Following the same format as any other import/export file in MobiWork, fill in all the information for every Service Location that needs to be added based on the column headers.
- ID: Leave this blank; MobiWork will fill in this information after import.
- Option ID: Leave this blank; MobiWork will fill in this information after import.
- Name: (required) - The name you will be giving the Service Location.
- External ID: Leave this blank; MobiWork will fill in this information after import.
- Lat/Lon: (optional) - Add the latitude/longitude coordinates of the location.
- Address: The address of the Service Location.
- City: The city of the Service Location.
- State: The state of the Service Location.
- Zip: The zip code of the Service Location.
- Once you have added all your information to the Excel file, Save it.
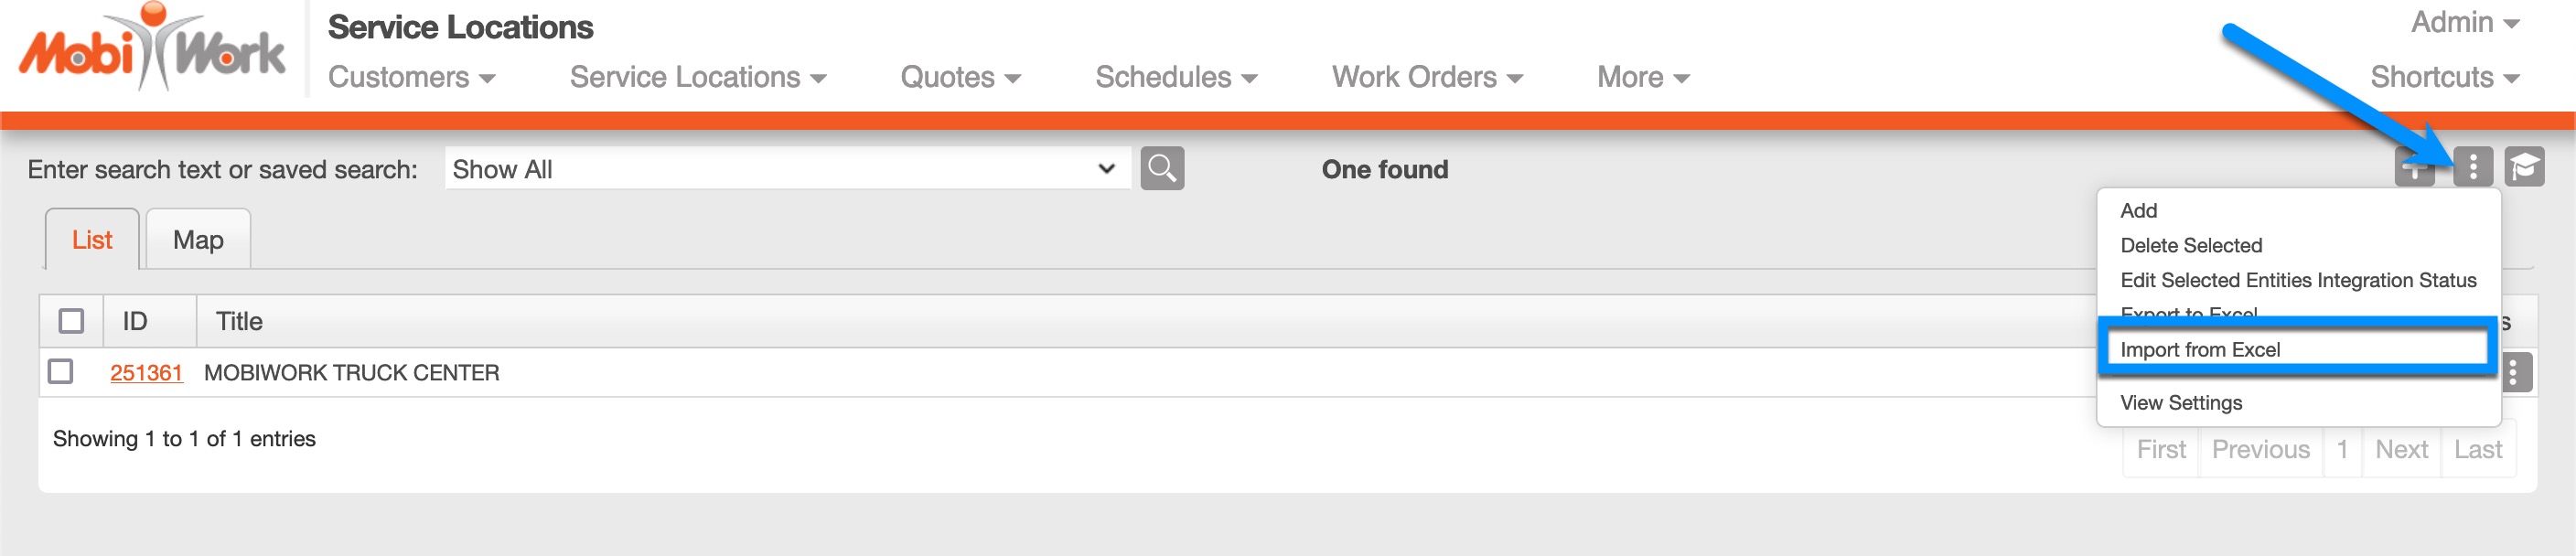
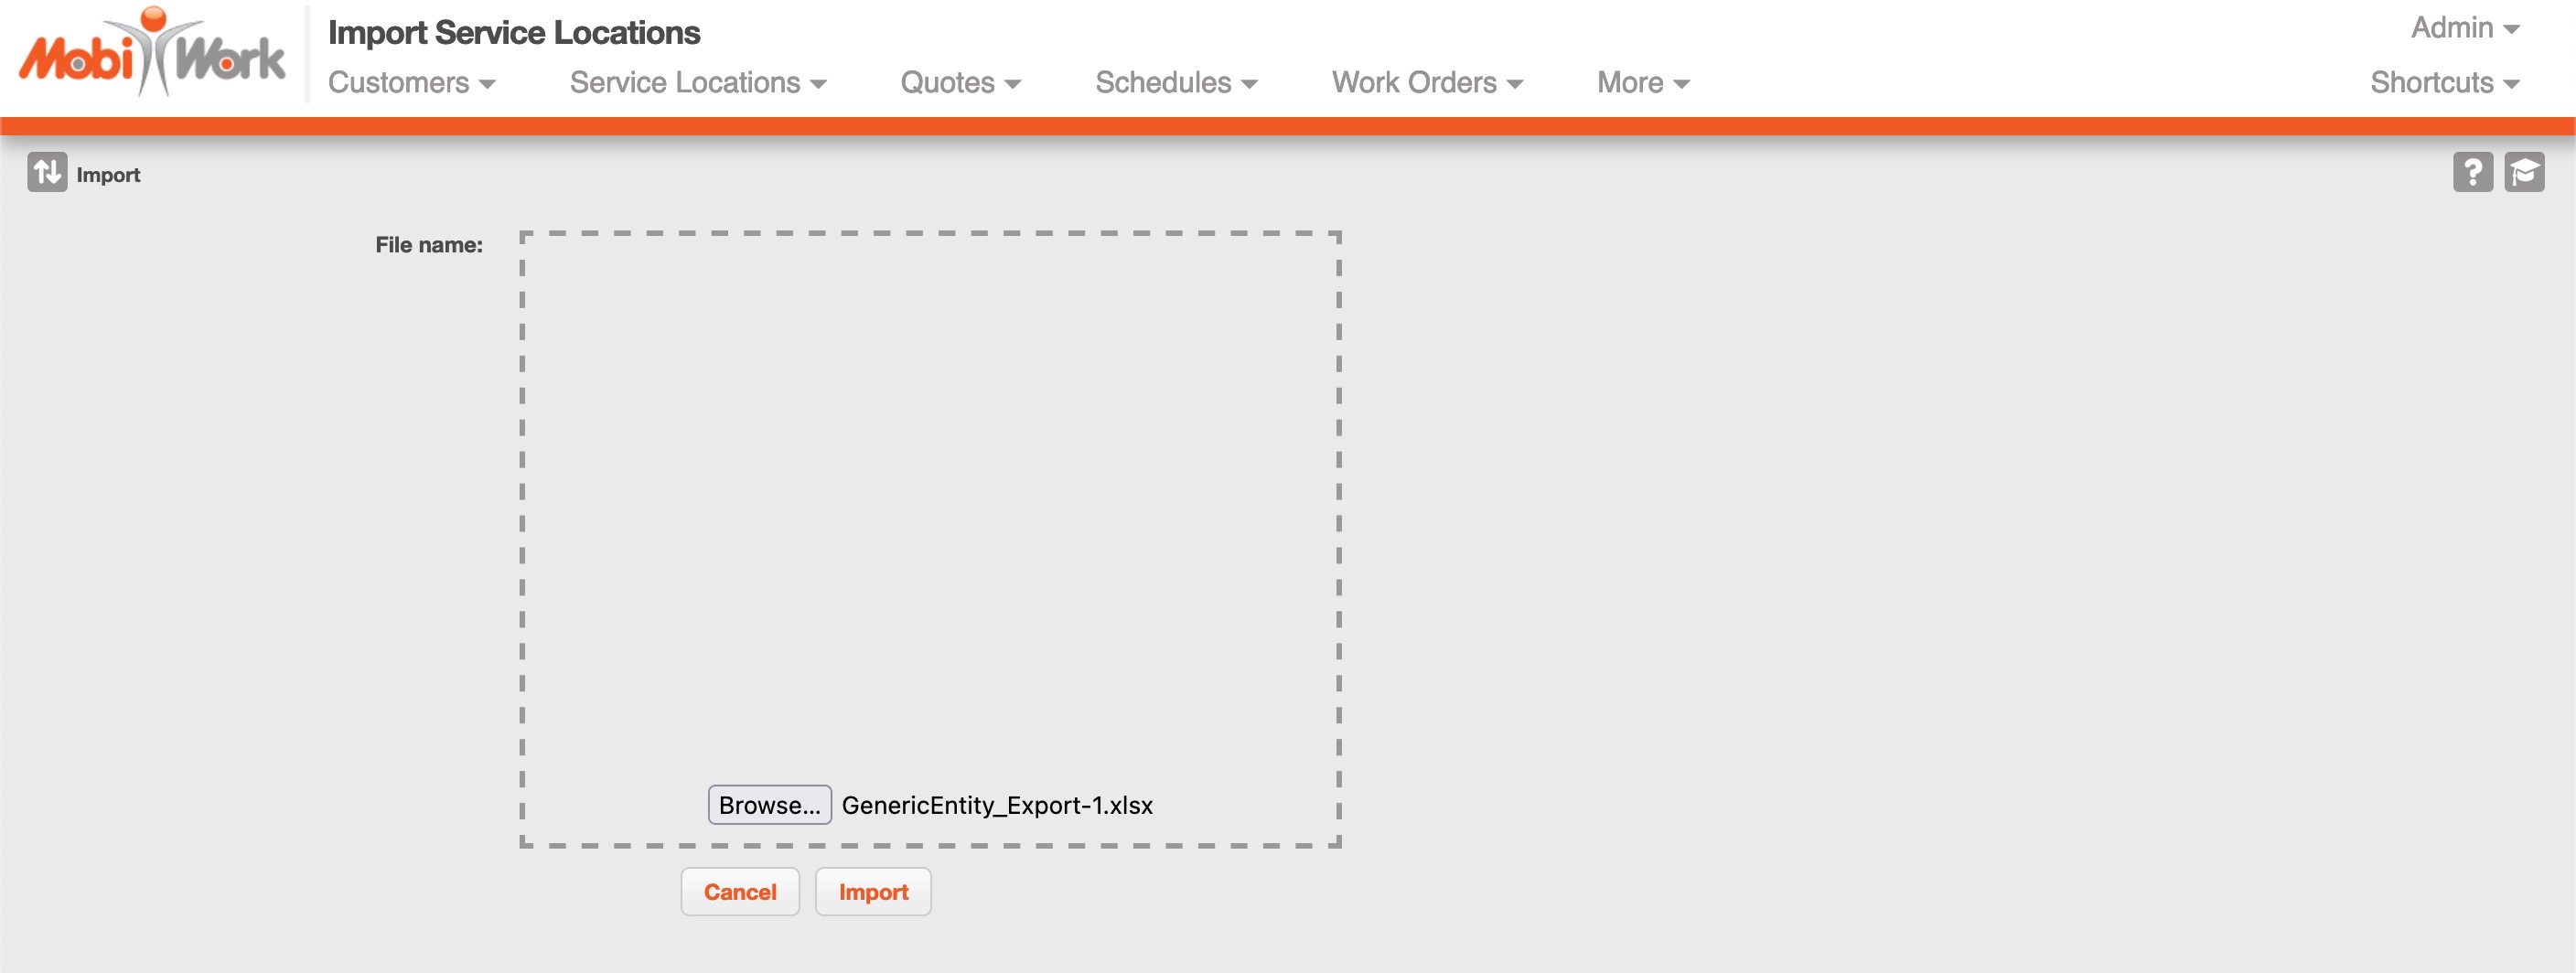
- Back in MobiWork, again choose the More Actions button, now selecting Import From Excel.
- Using the Browse button, find your spreadsheet and attach it or simply drag-&-drop your file into the outlined field shown.
- Choose Import.
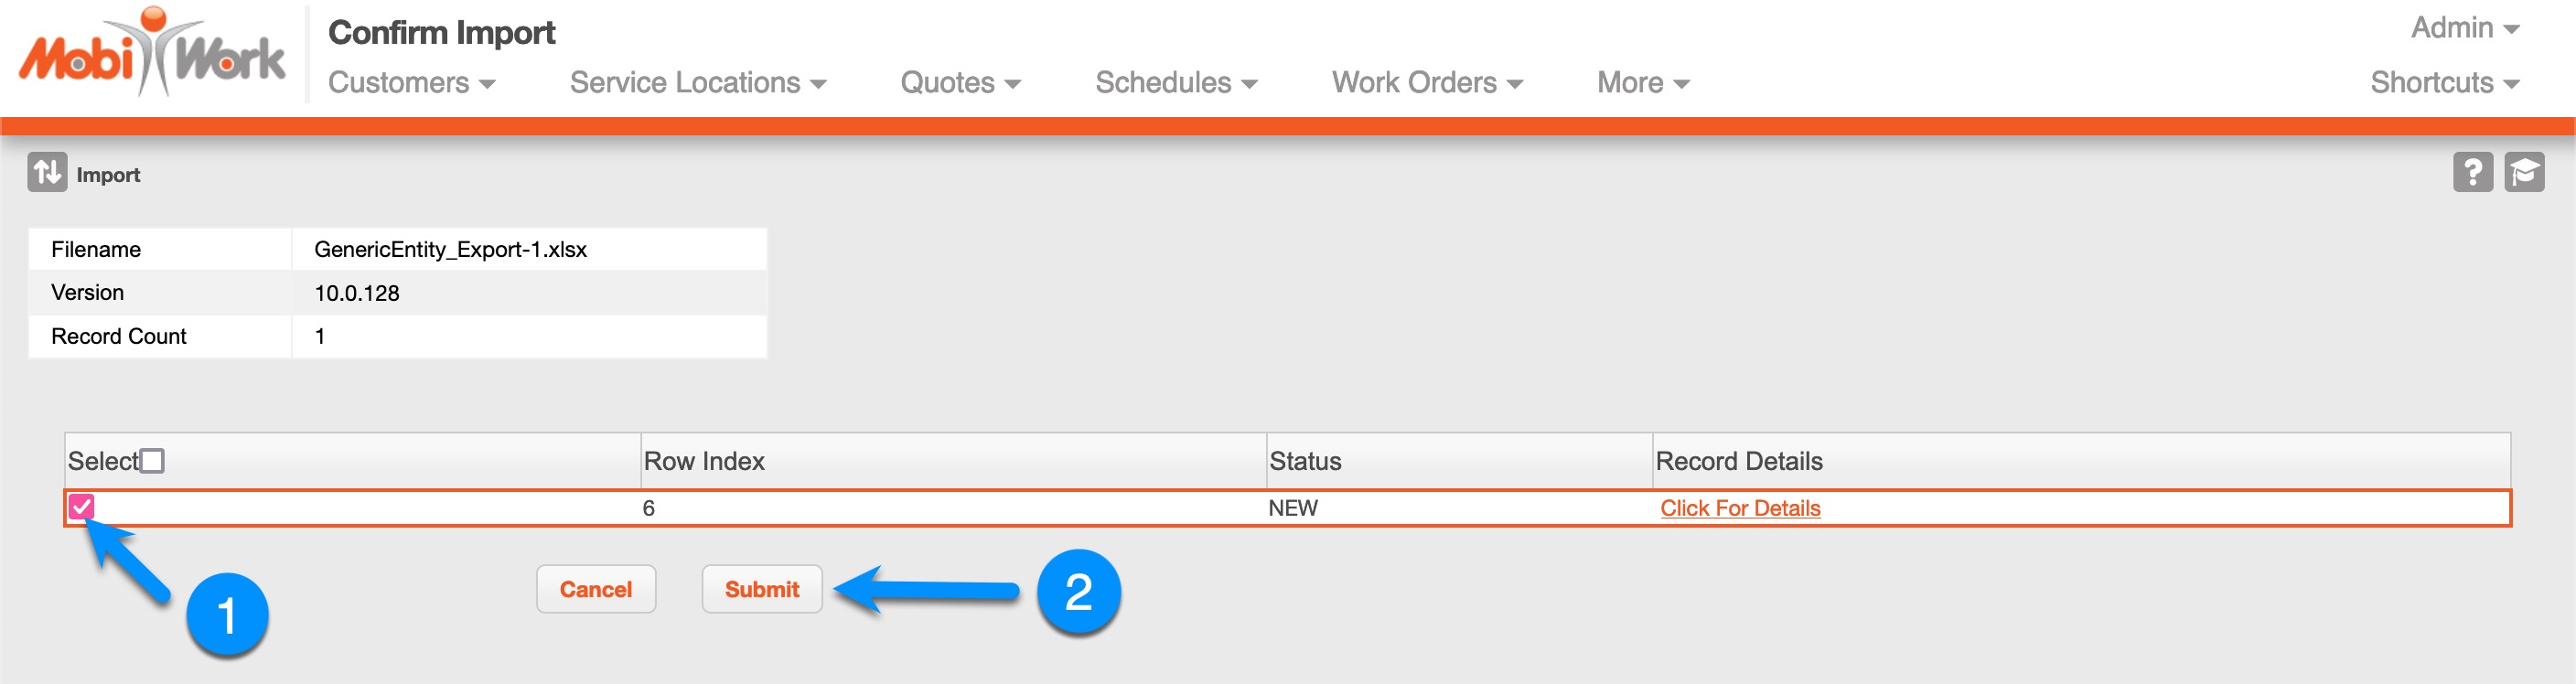
- Review the list of Service Locations recognized by MobiWork. If everything looks good, click Submit to bring in your list of service locations.
- IMPORTANT: Only click the Submit button one time. Clicking more than once may result in duplicate entries.
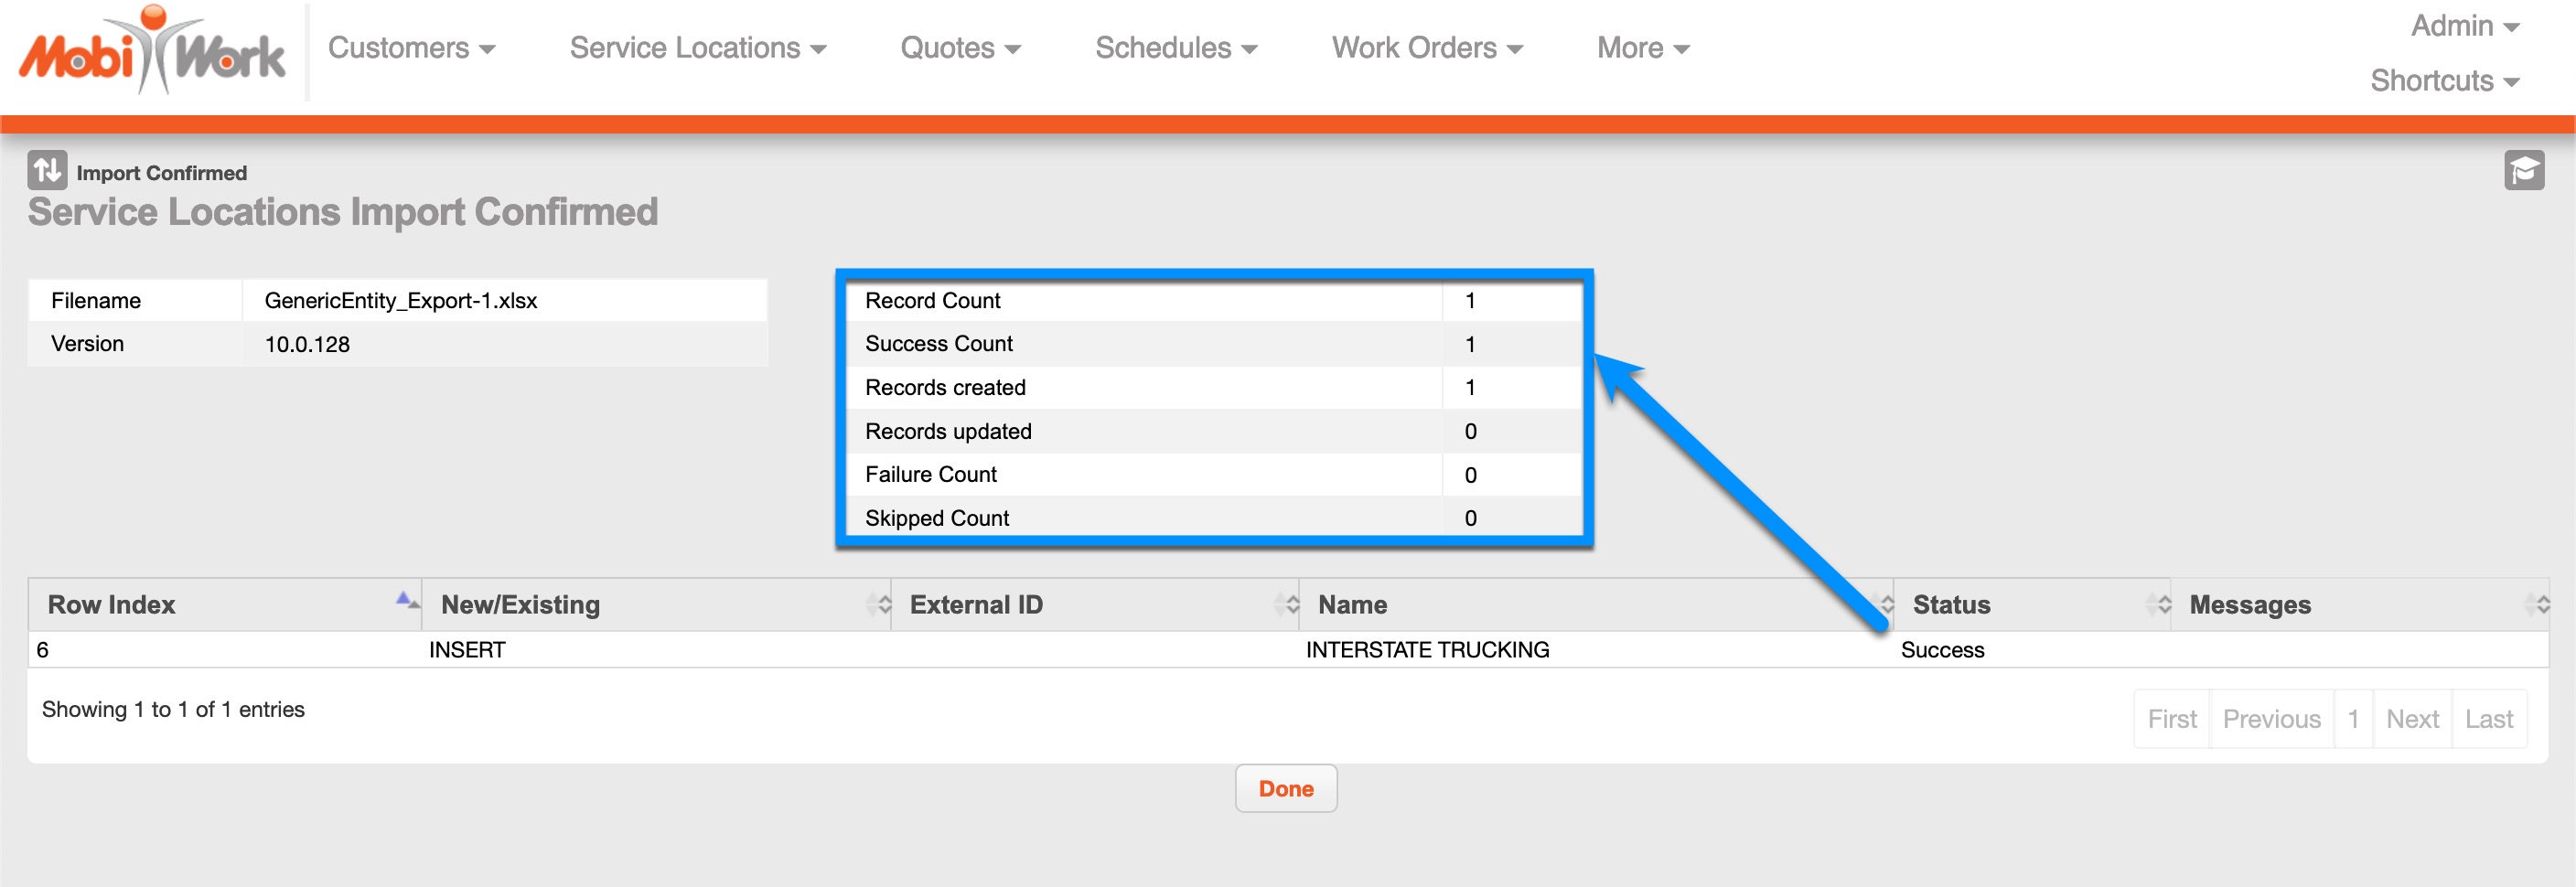
- You should now see a "Service Locations Import Confirmed" page showing you the results of your import.
- You'll see an overall recap of the import at the top (showing how many locations were created, skipped, etc.), along with a breakdown of each entry's results on the bottom.
- If only some of your imported records are shown, use the page navigation buttons on the lower right of the records to move to other pages or records.
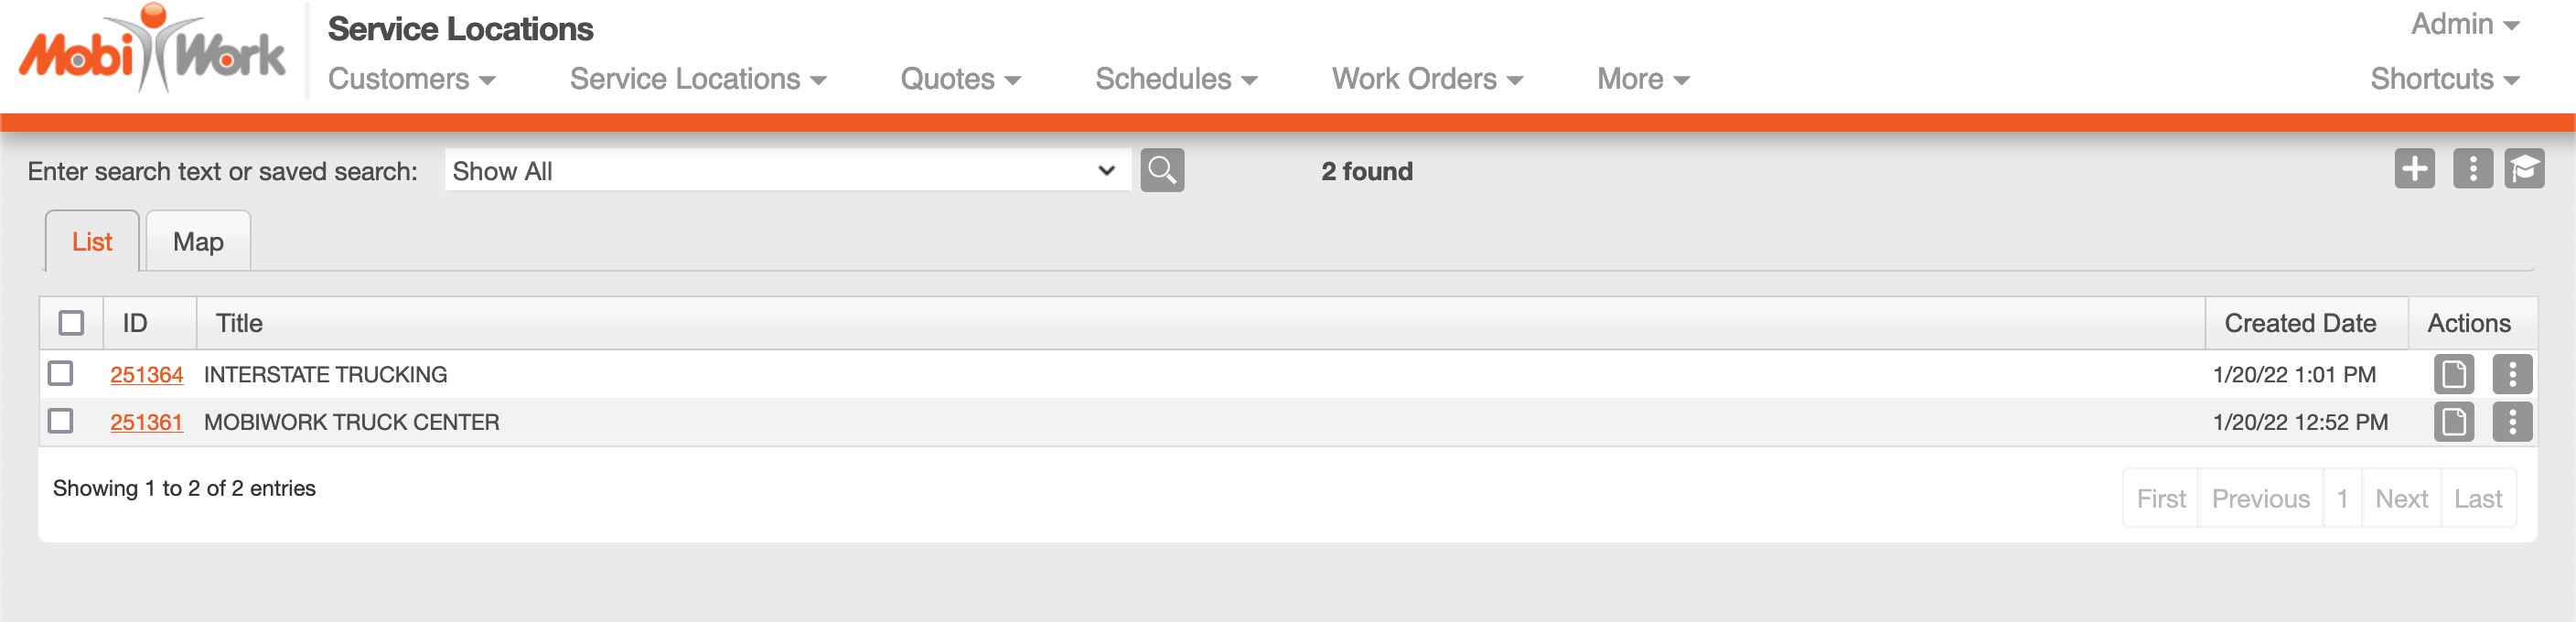
- Click Done to return to the list of Service Locations; you'll see the results of the import reflected here.
Using the FleetNet Connector
Once setting up the FleetNet Connector, learn how FleetNet work orders are created and managed.
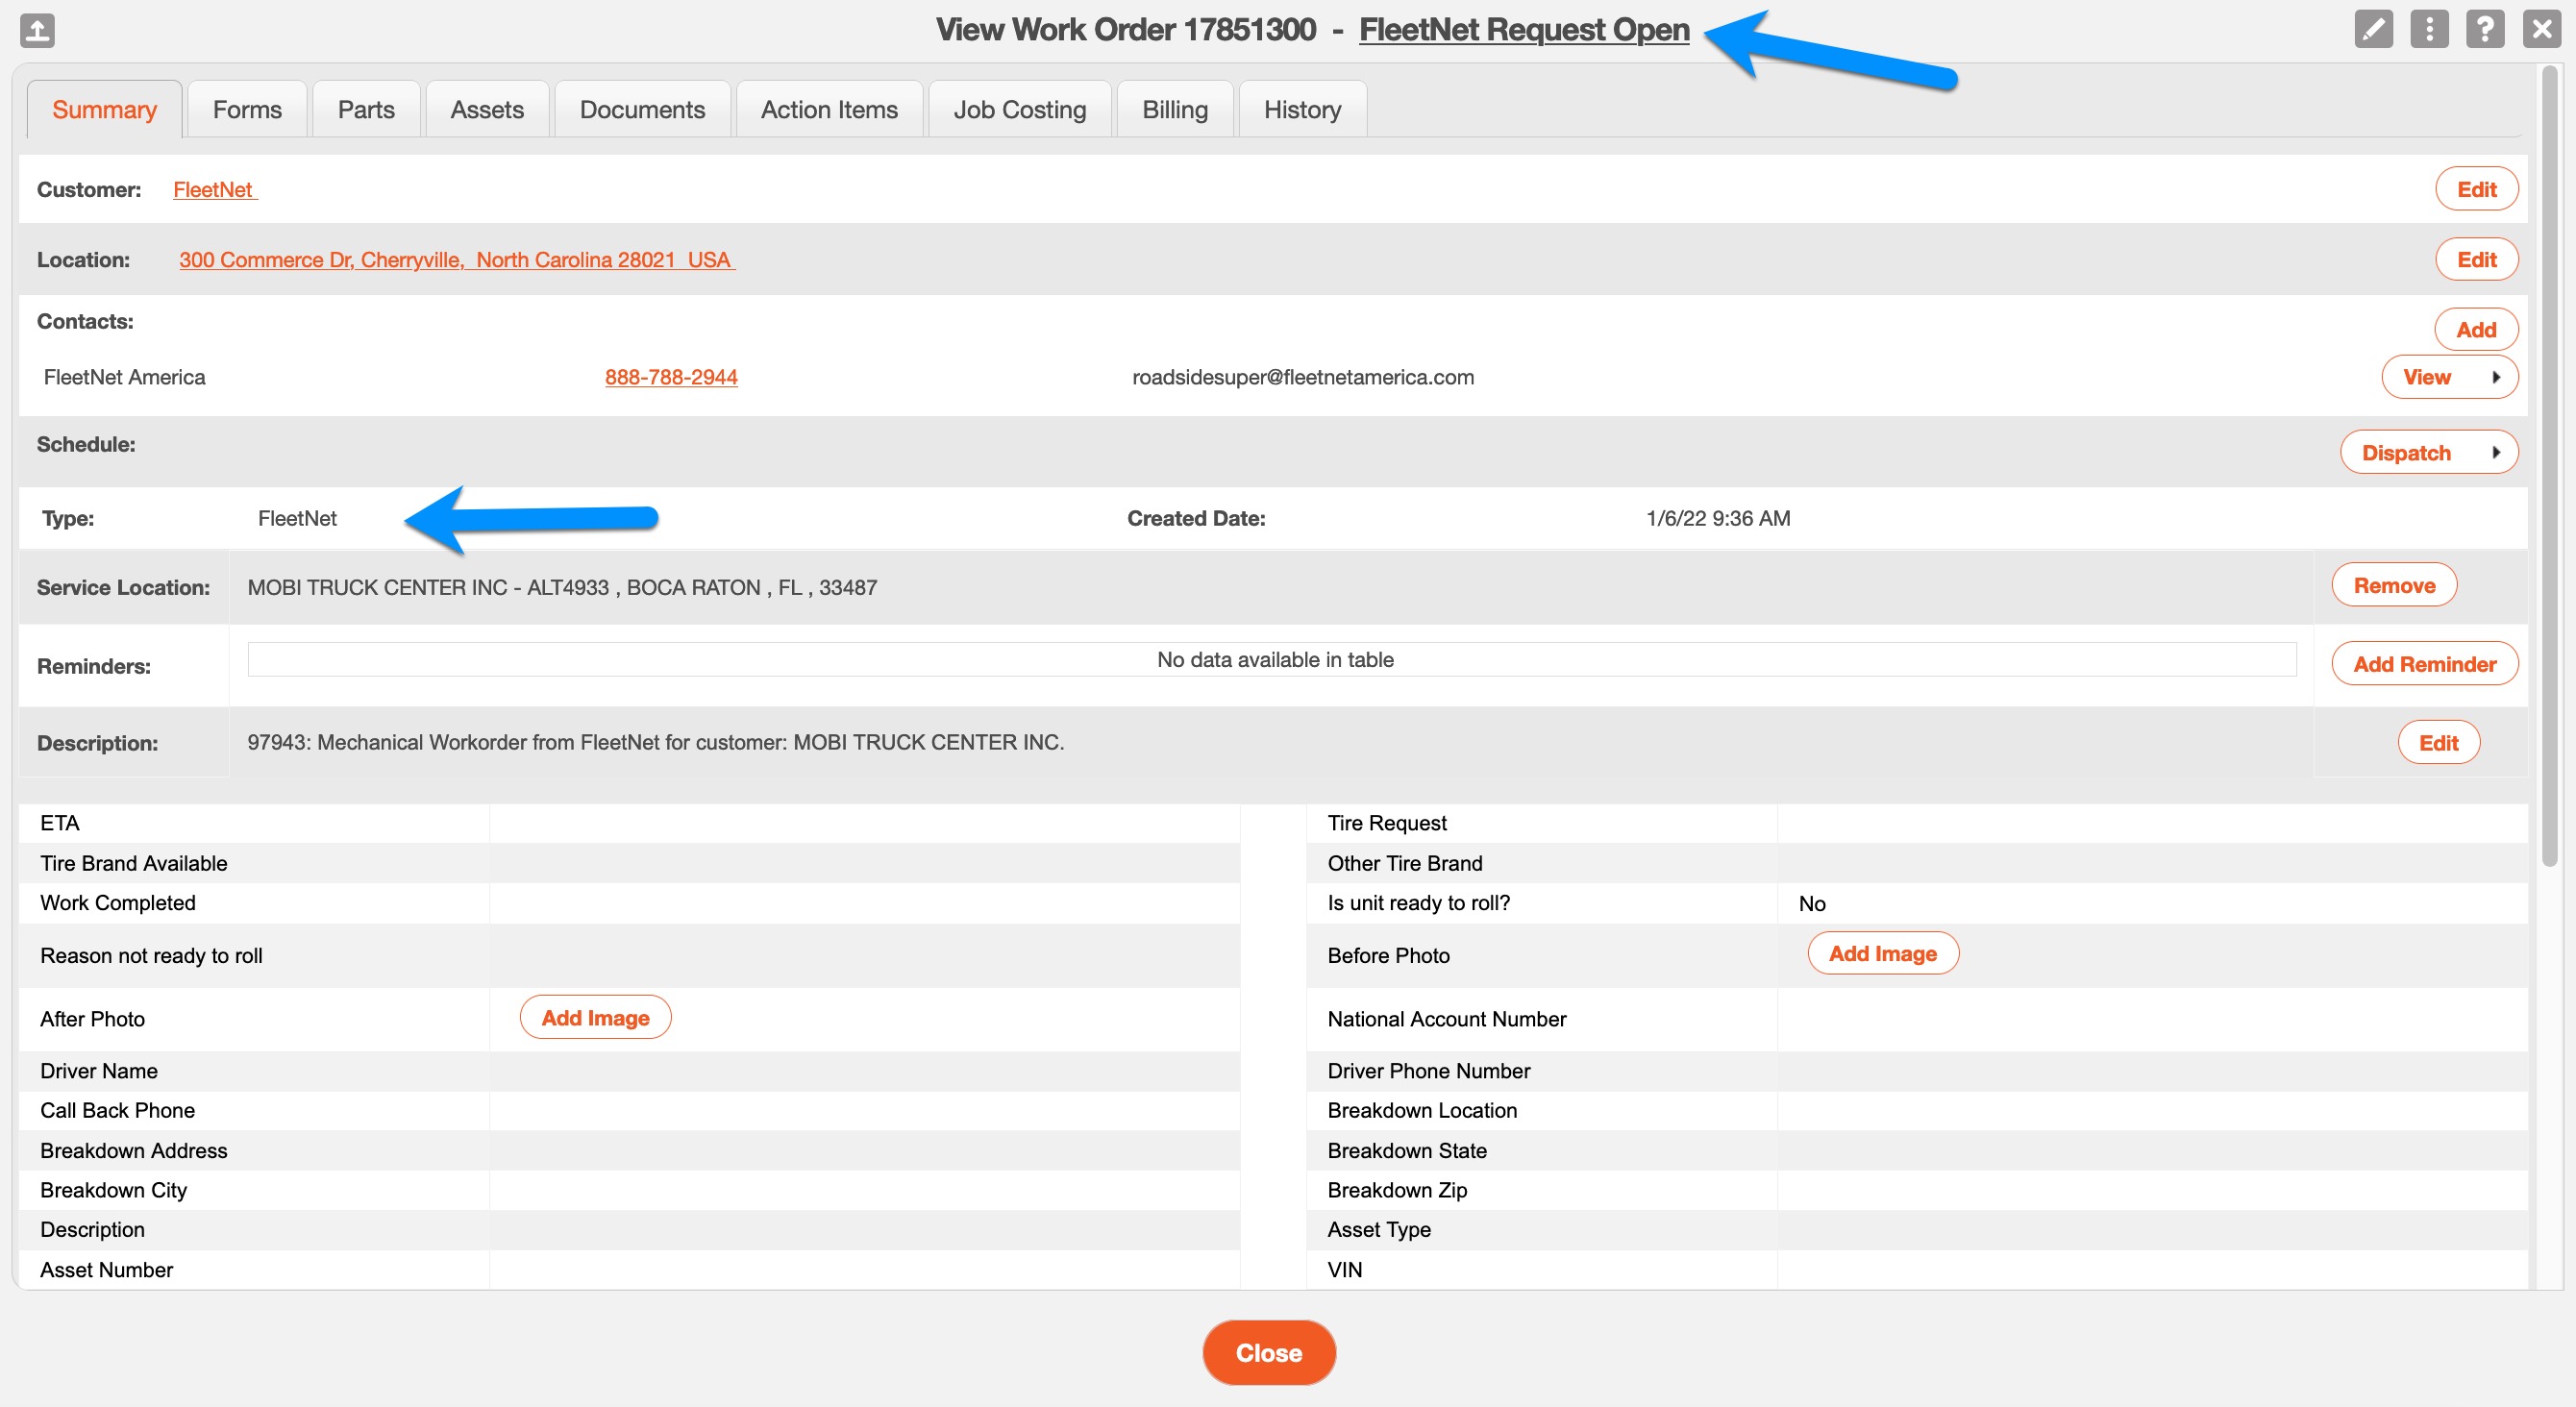
- To start, FleetNet will send providers a service request.
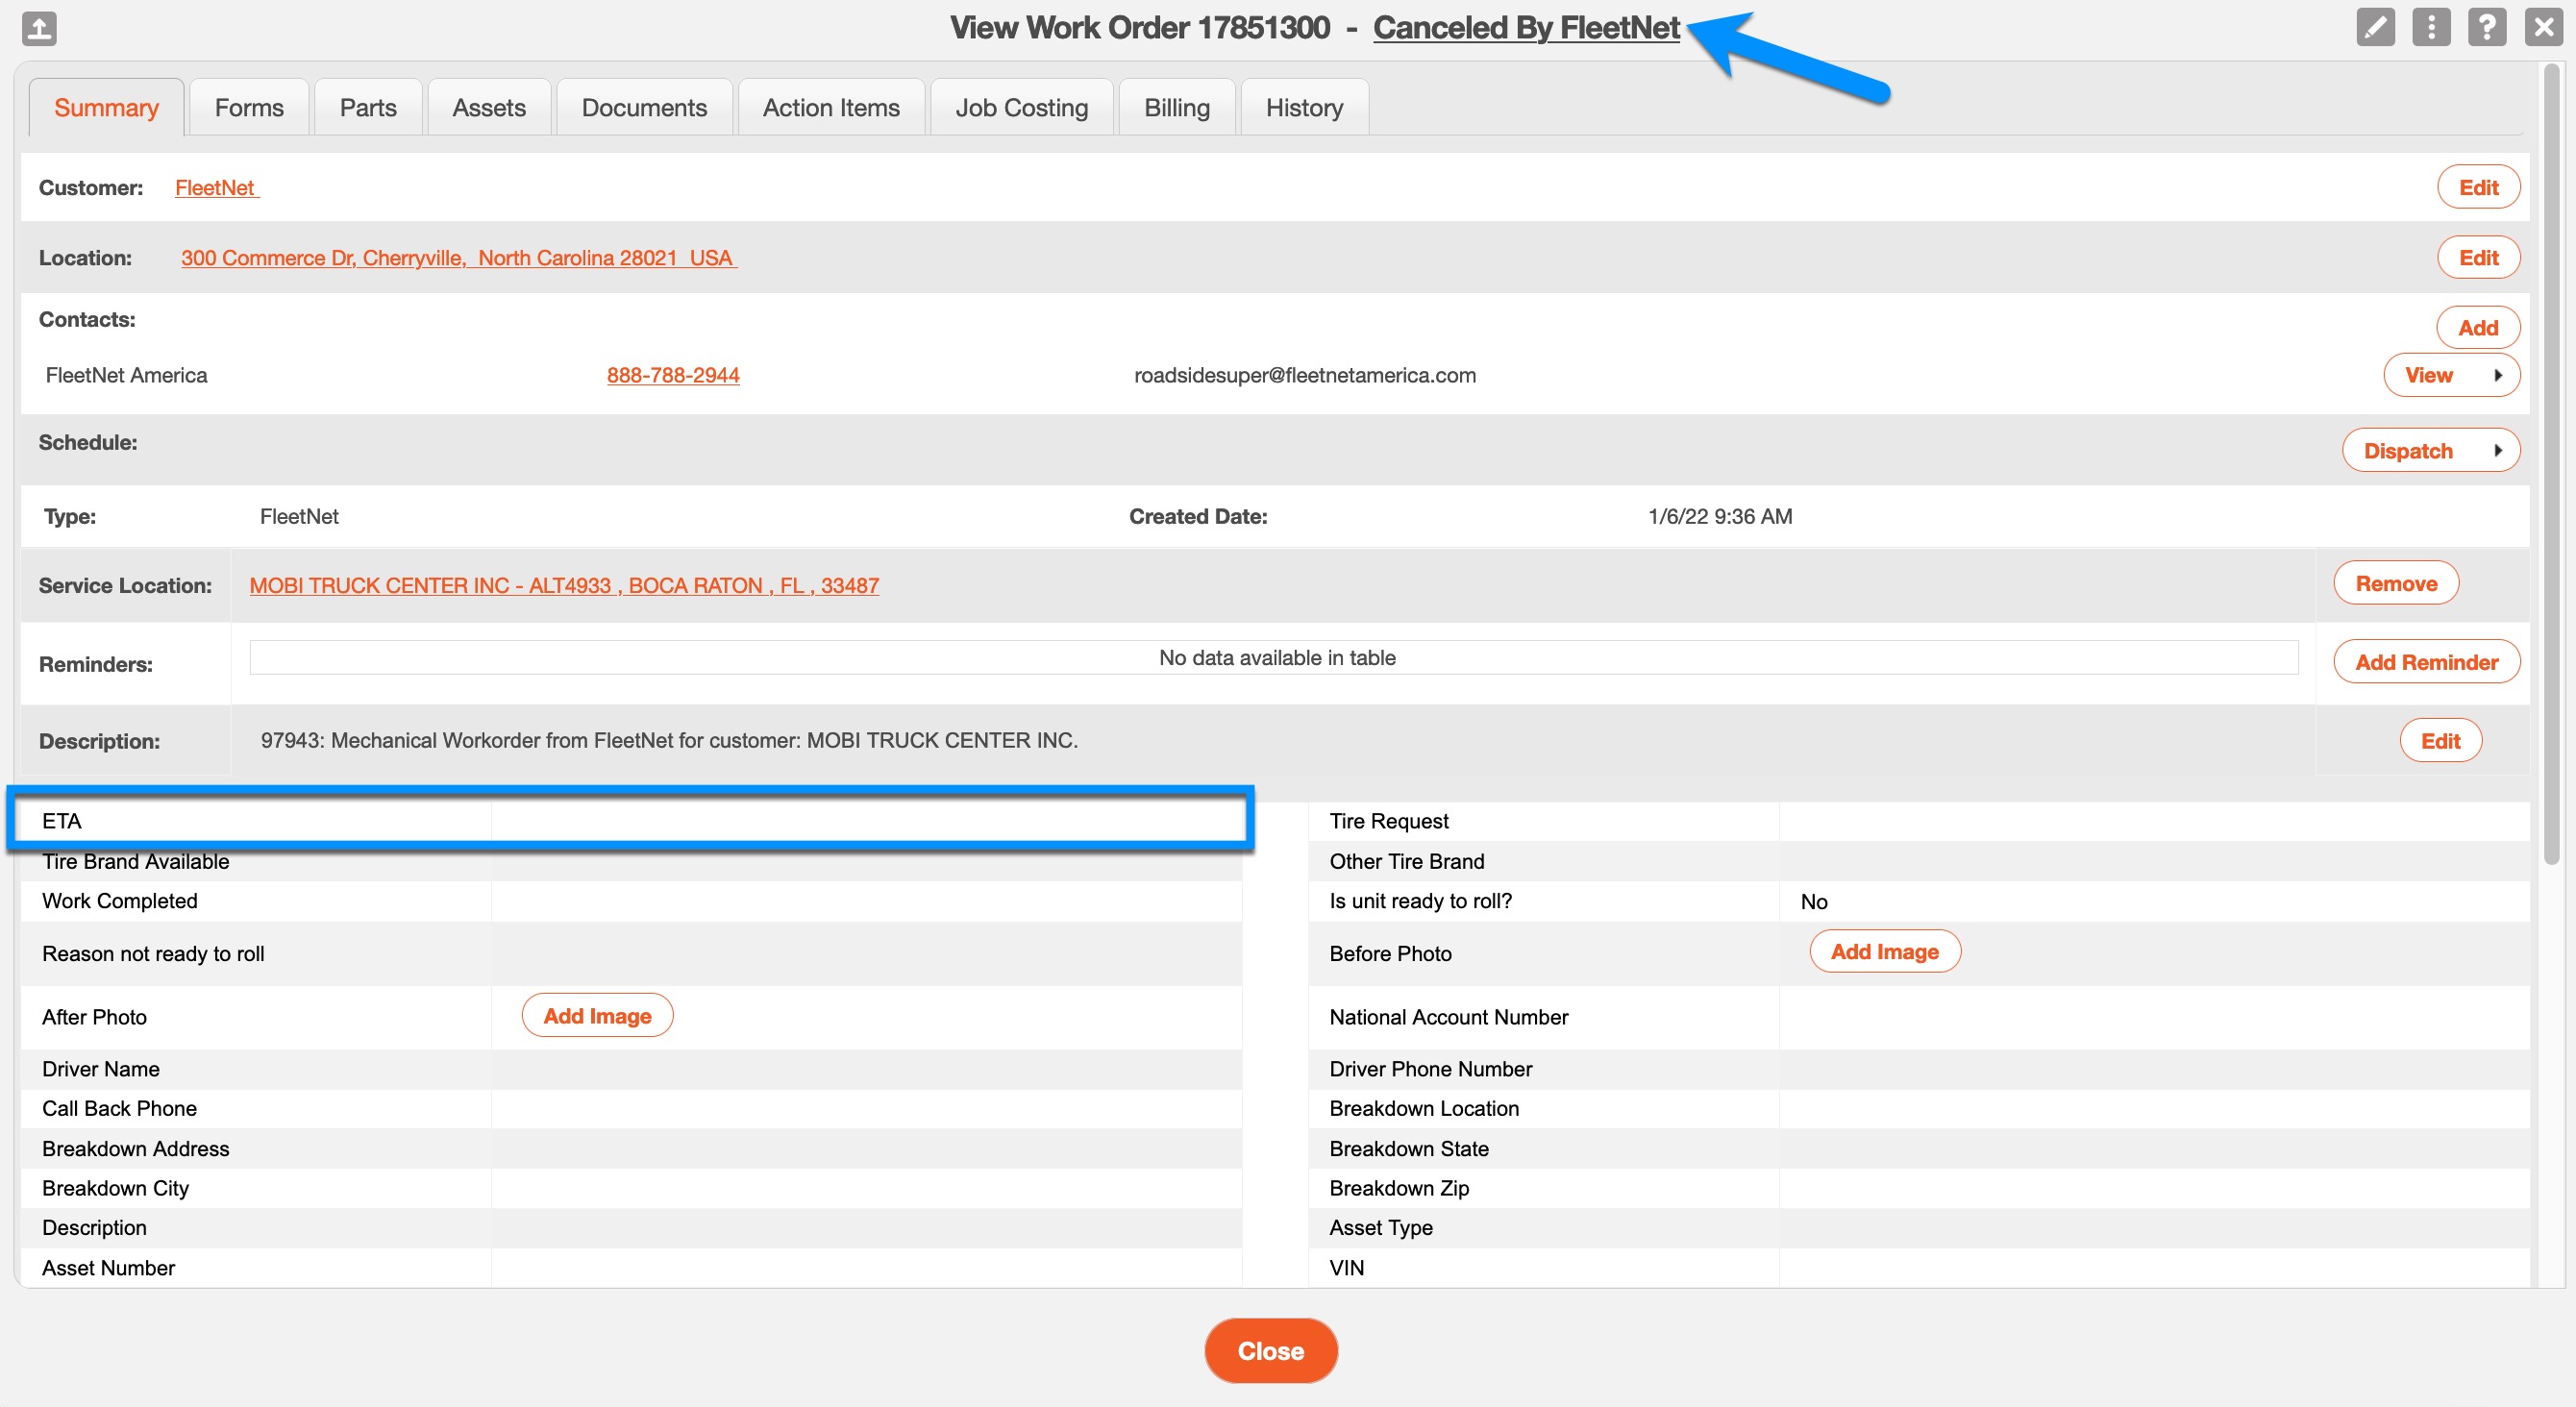
- Once the request is sent, a FleetNet work order is created with the custom status of "FleetNet Request Open".
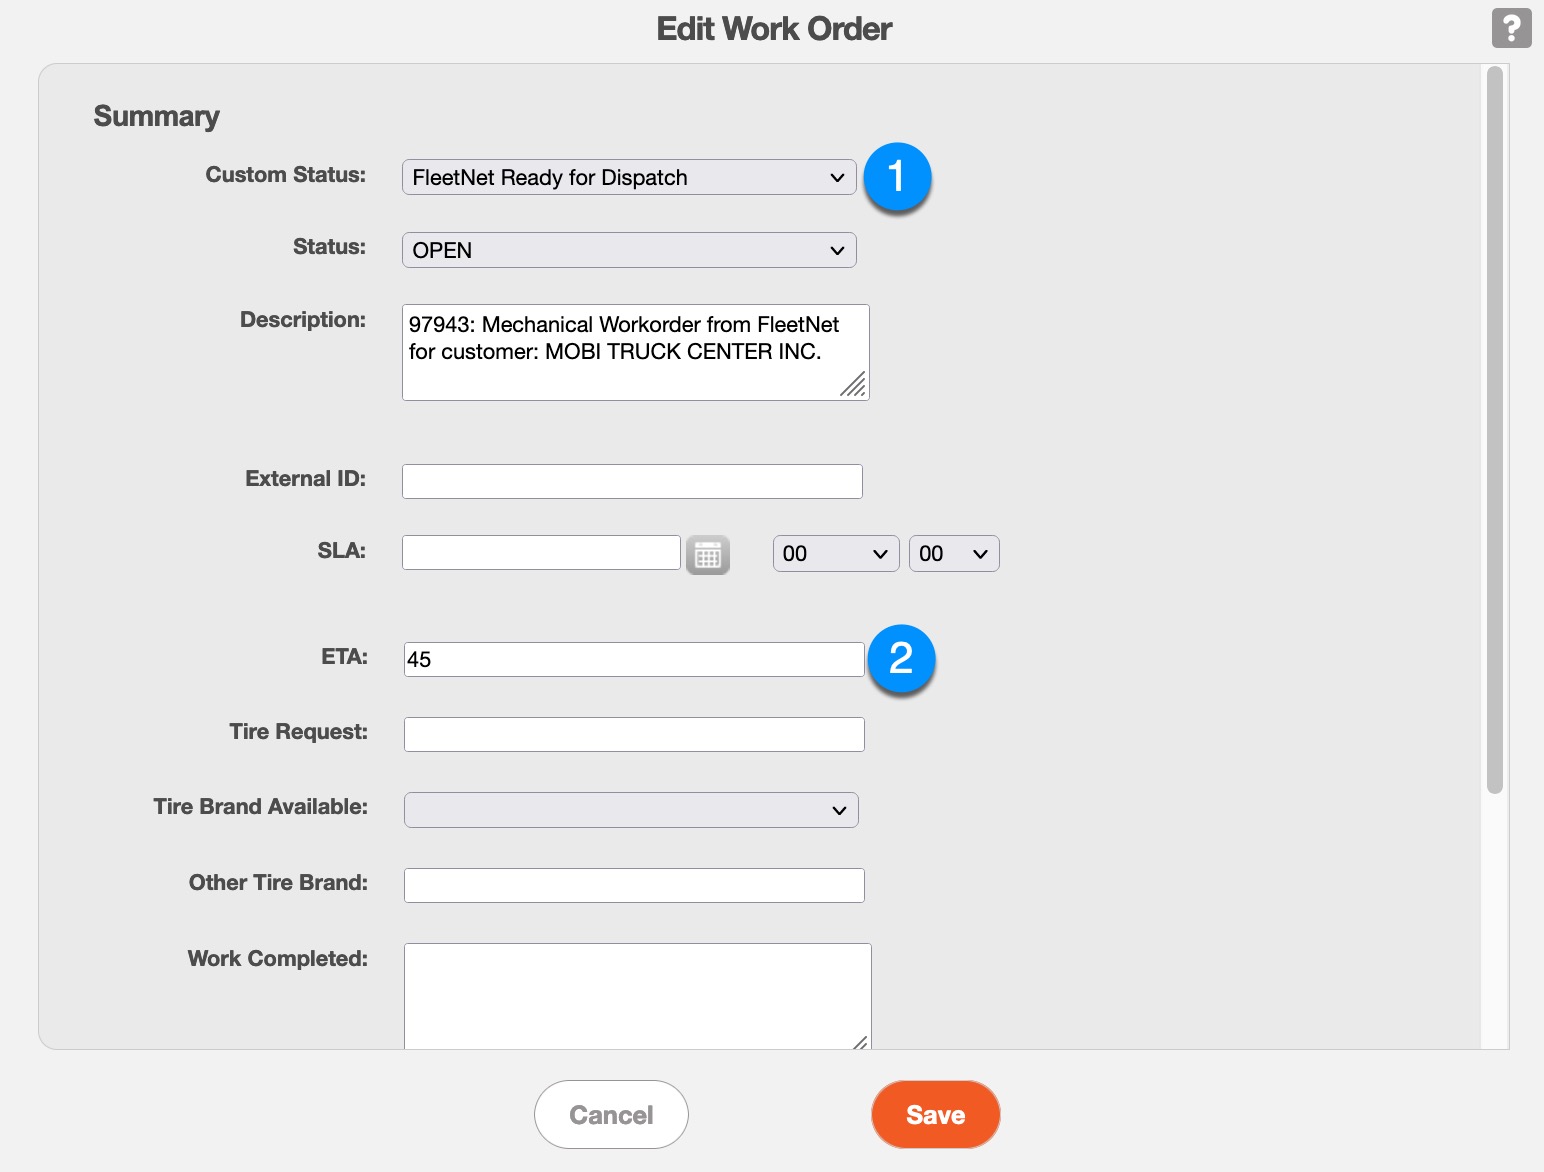
- The provider must reply within 10 minutes if they want to accept this job. To accept, the client must do the following:
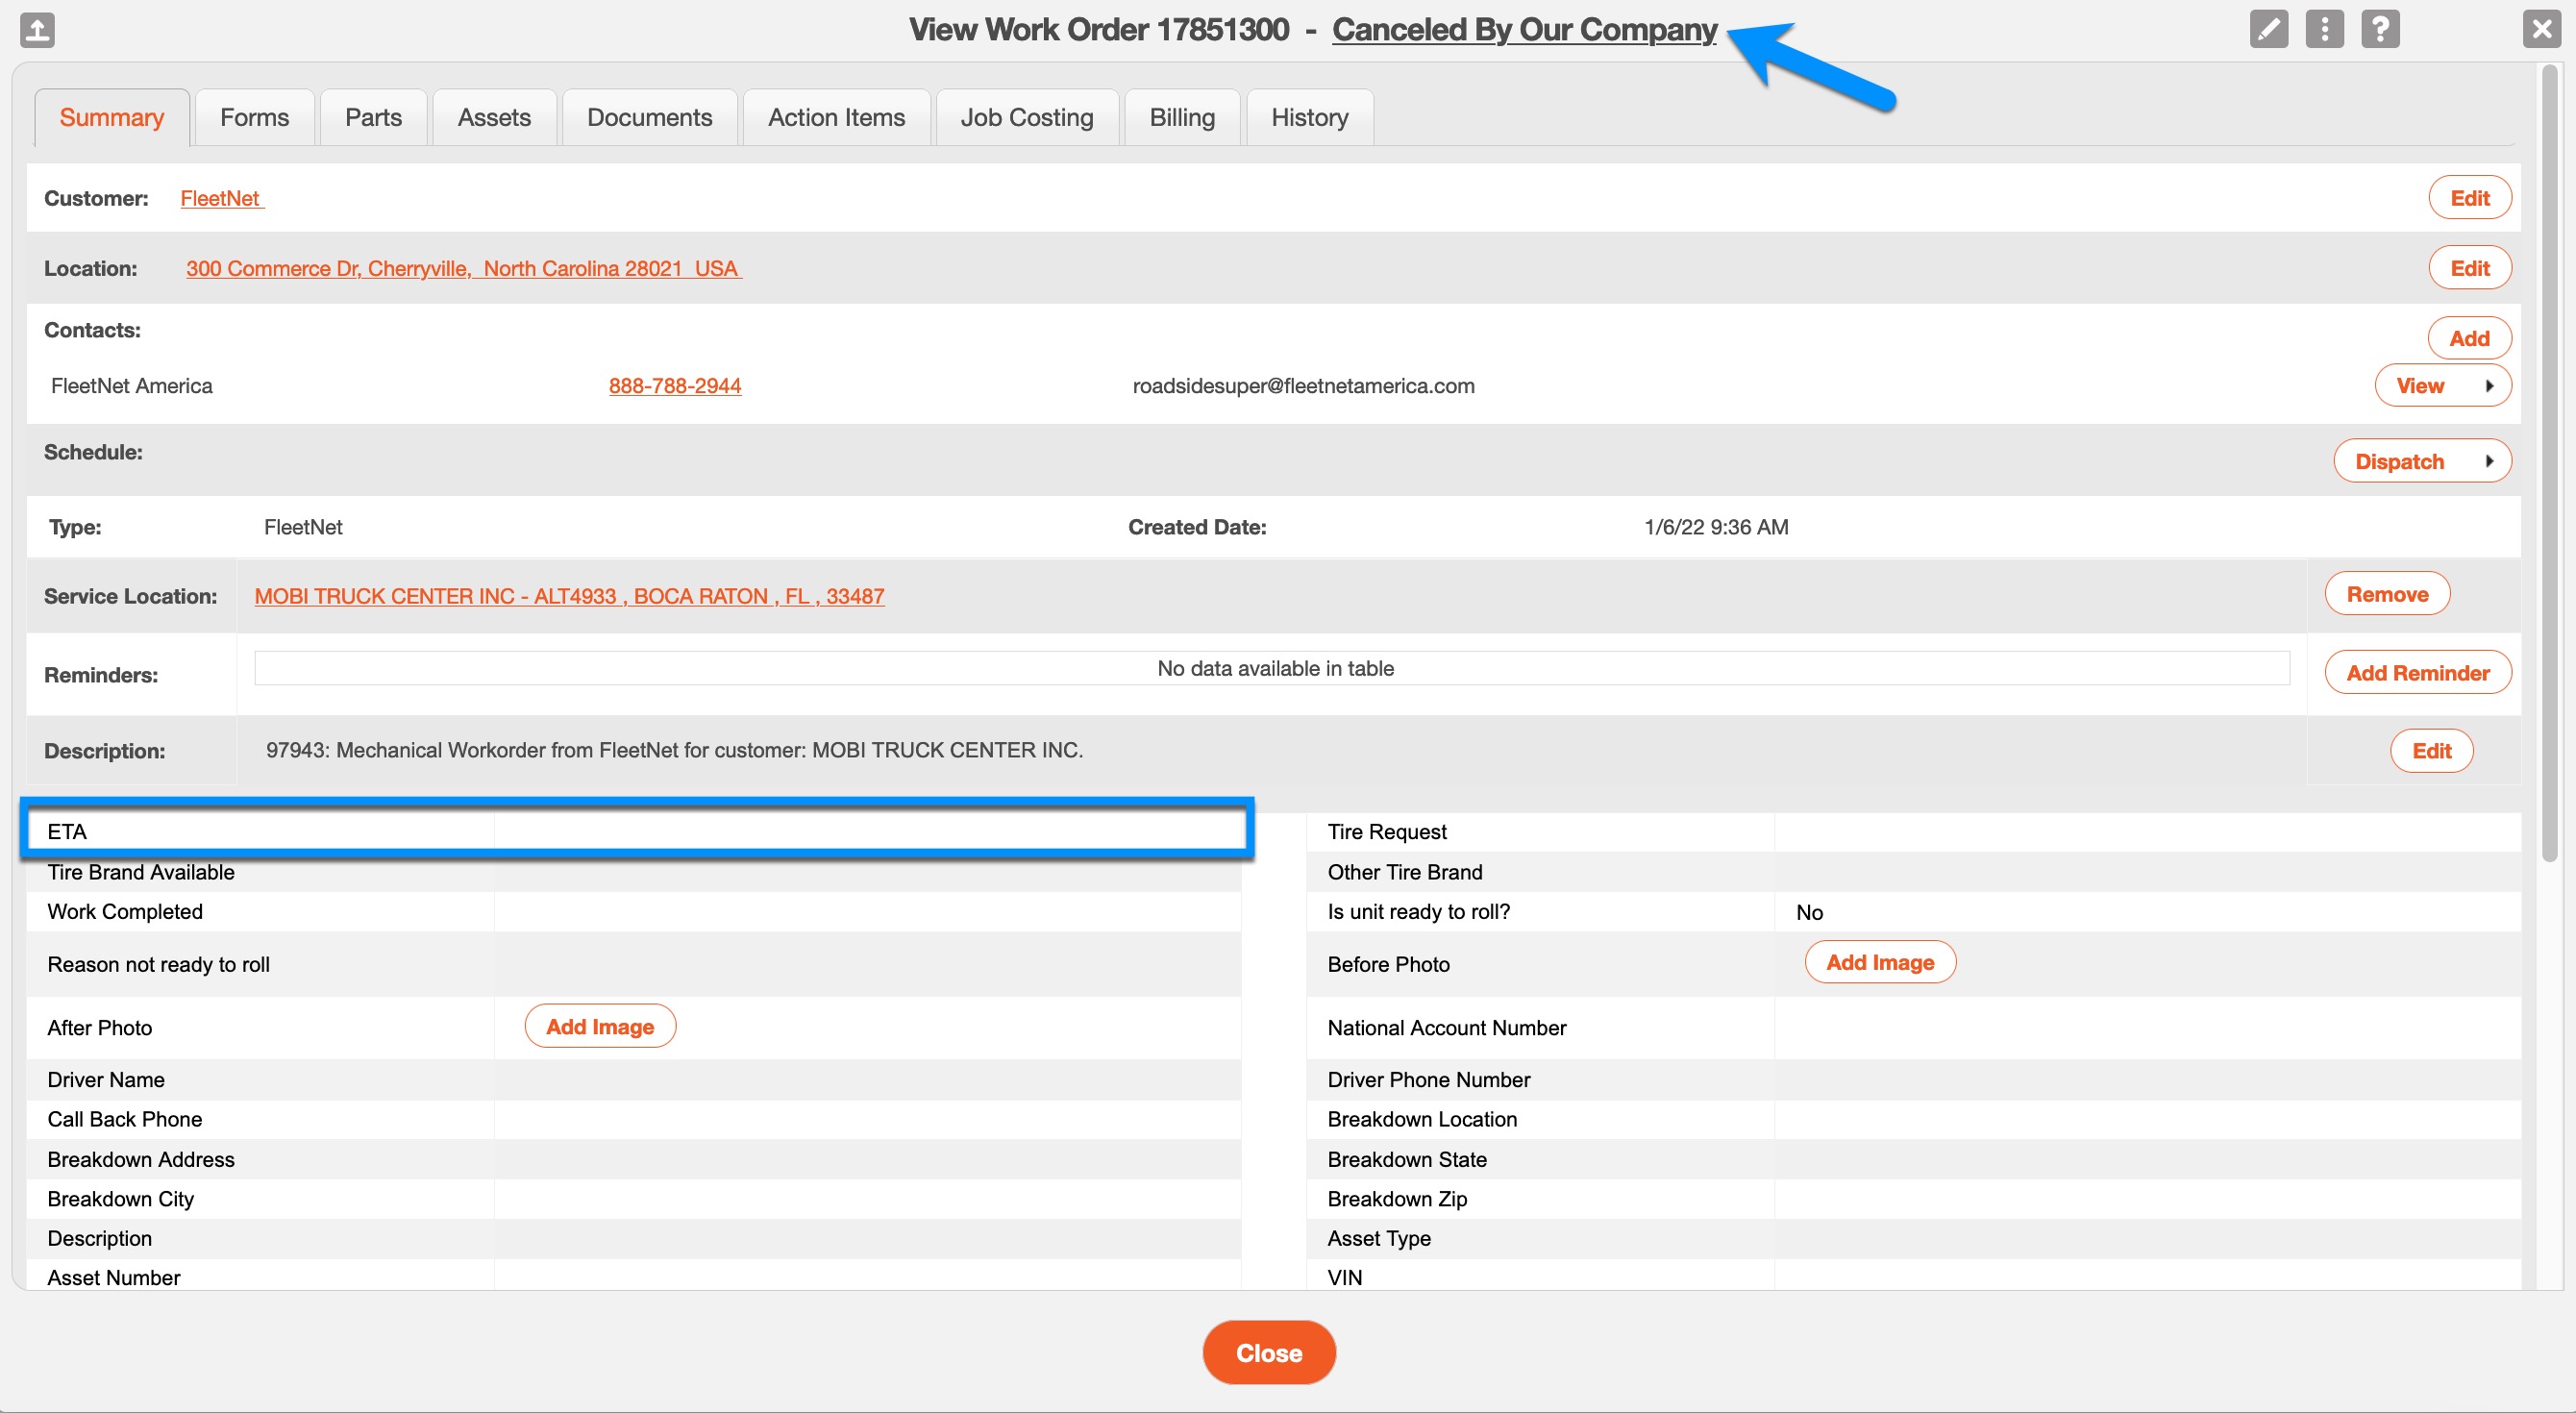
- Must edit the custom field labeled ETA with how long it will take to action this job (in minutes).
- Must change the custom status of the work order to "FleetNet Ready to Dispatch".
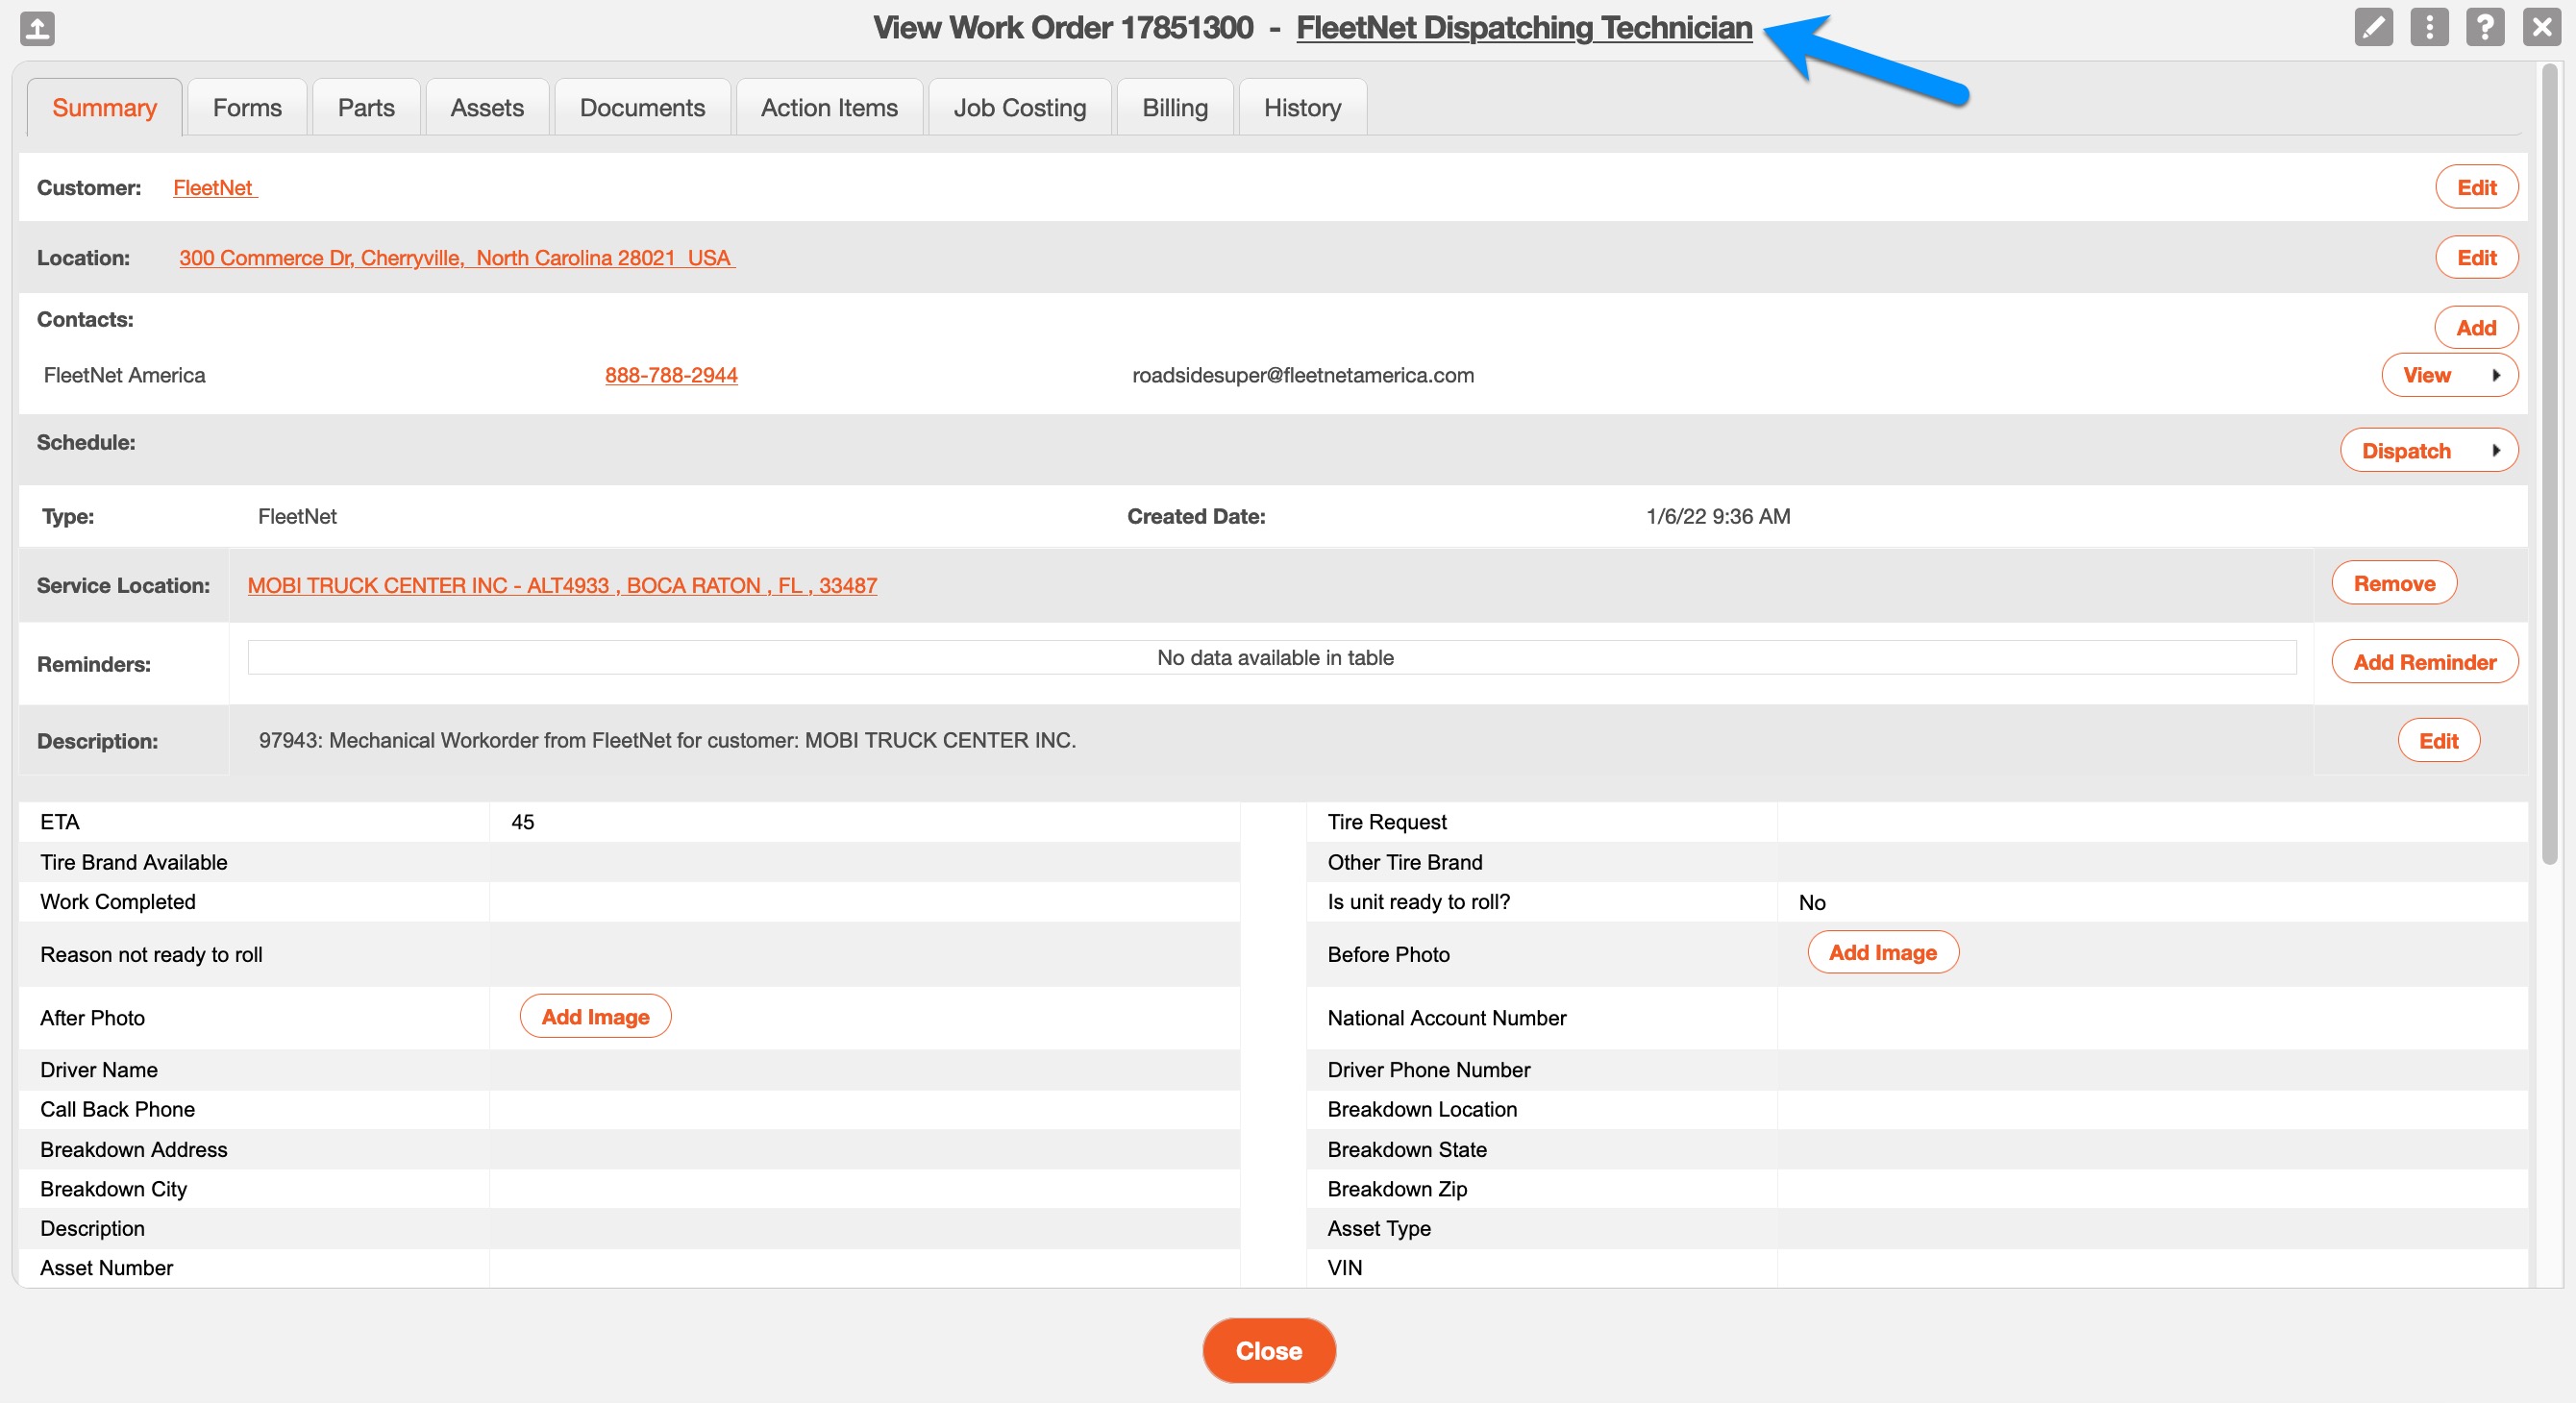
- FleetNet will either choose to accept or decline your response:
- If accepted, FleetNet will change the work order custom status to "FleetNet Dispatching Technician".
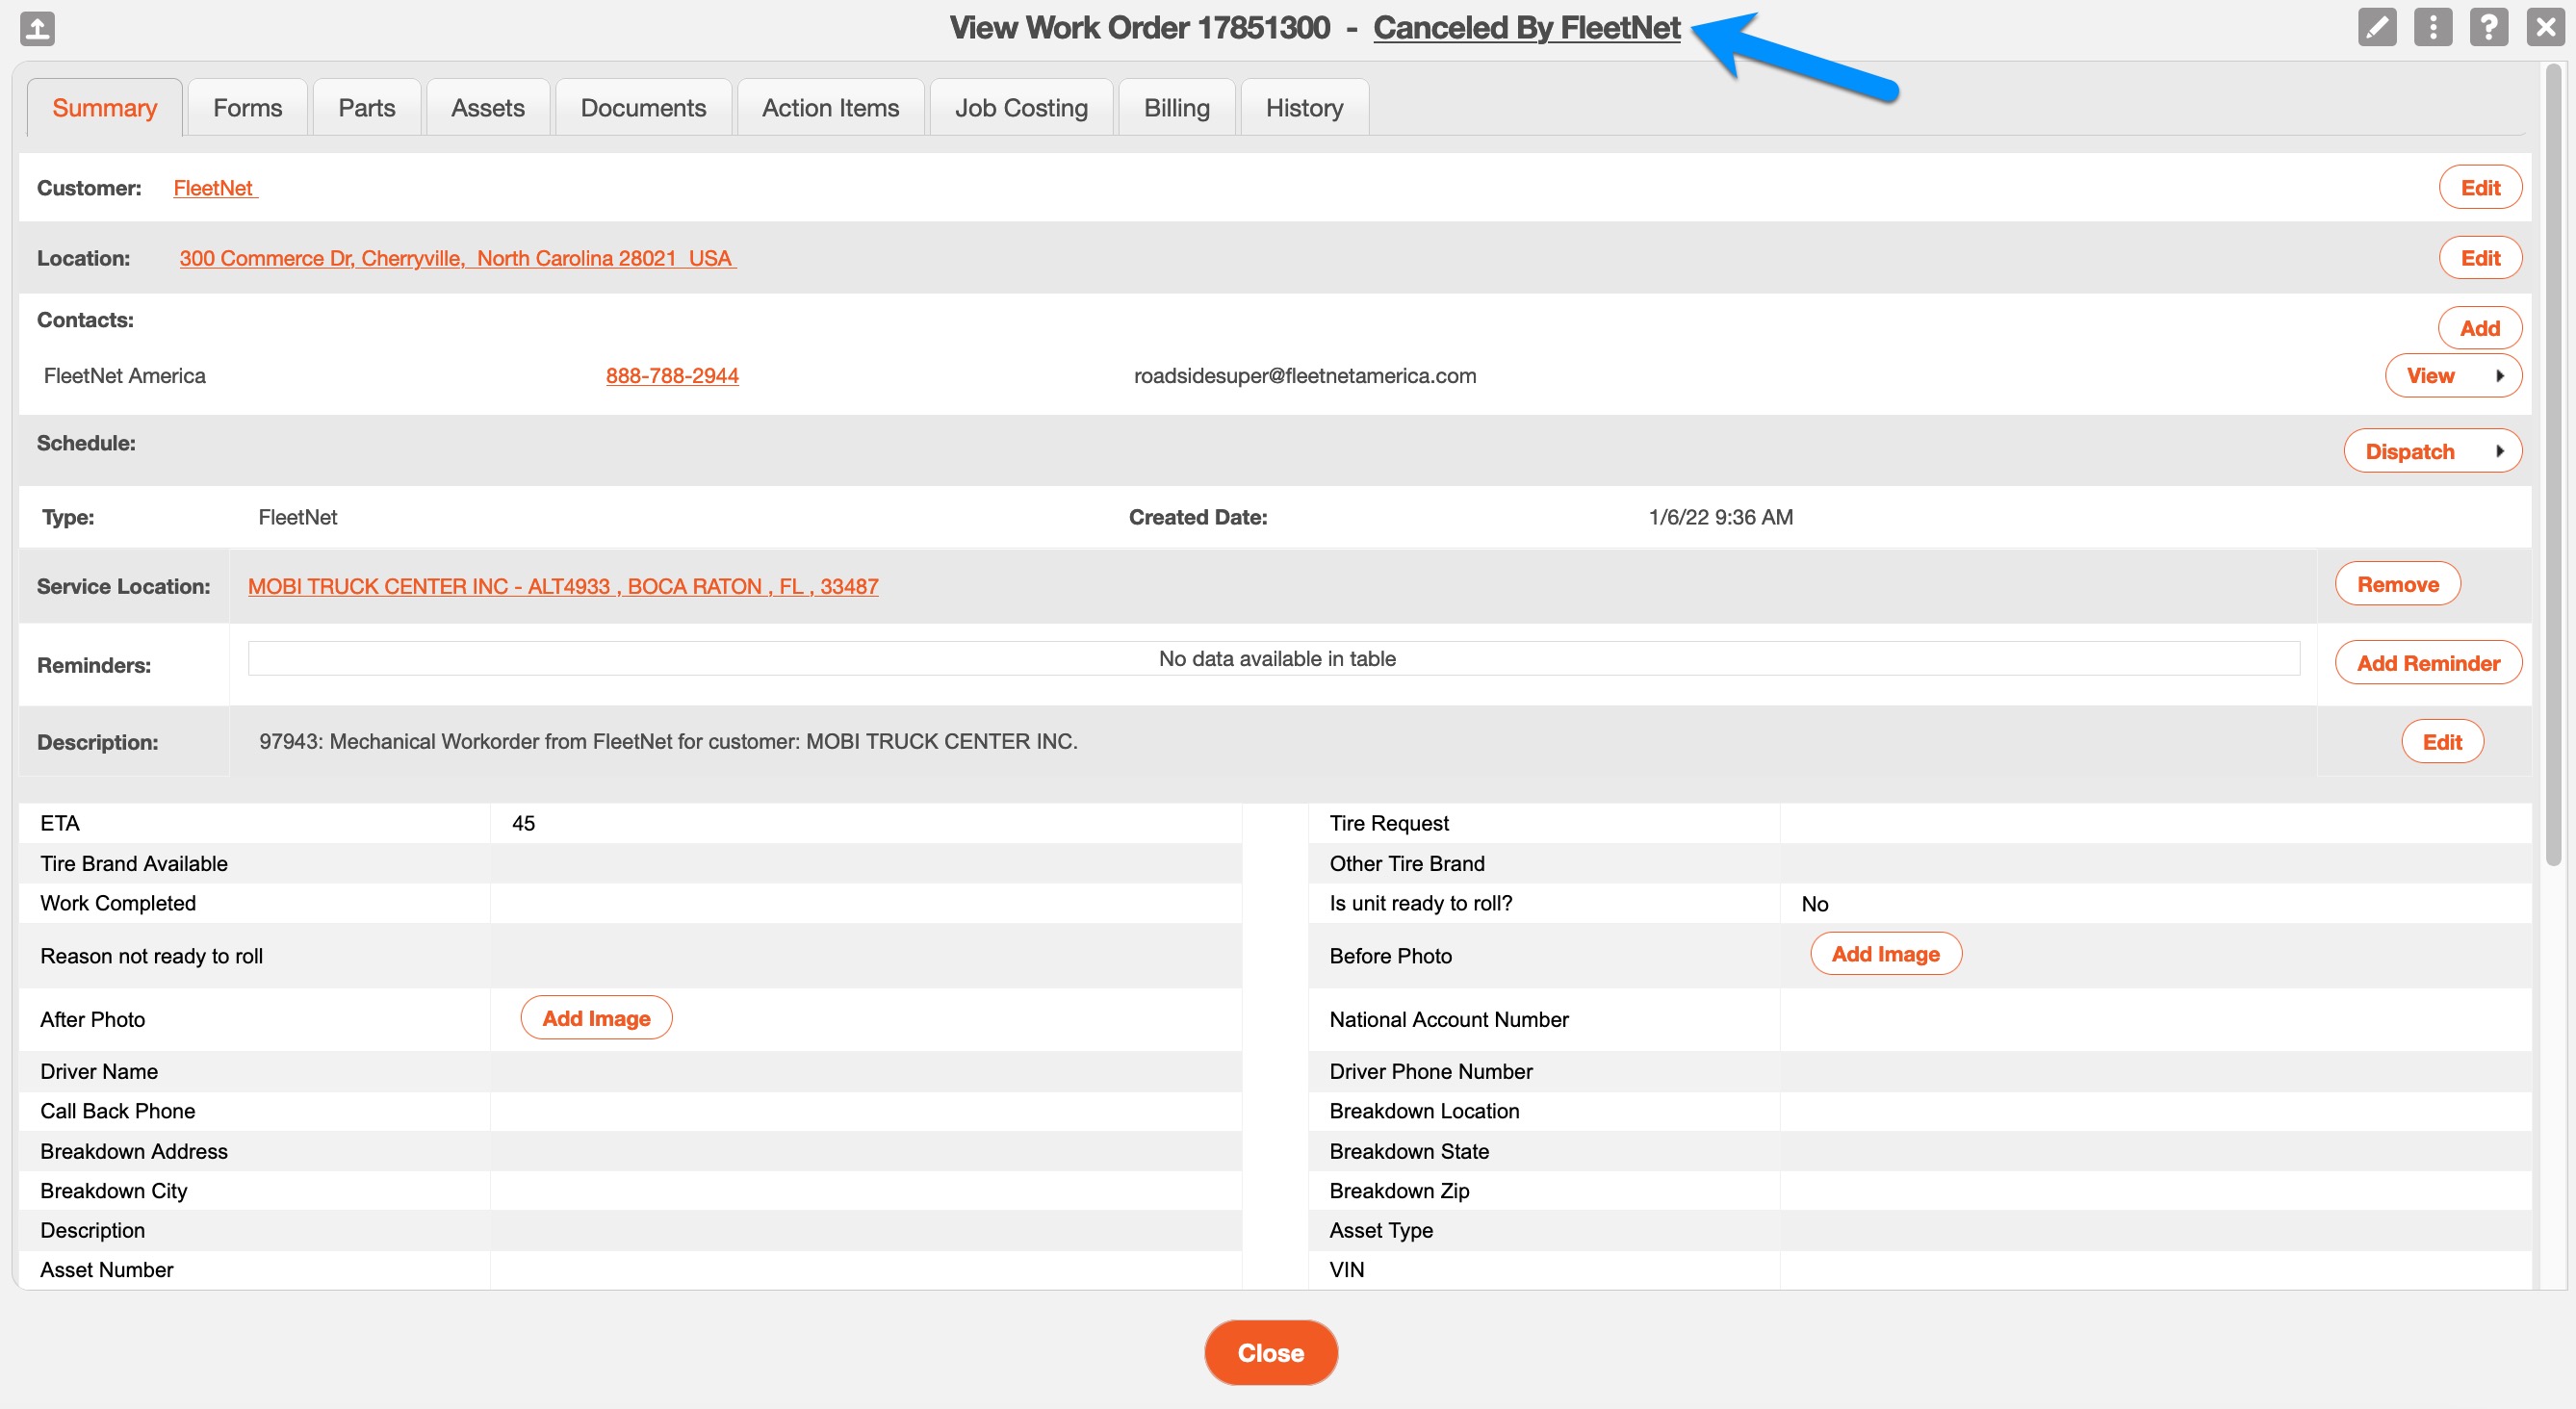
- If declined, FleetNet will change the work order custom status to "Canceled by FleetNet".
- If your proposed ETA is accepted by FleetNet, the client must then assign/dispatch and start the job.
KEEP IN MIND:
- Service requests can be sent to multiple providers by FleetNet; FleetNet chooses the one with the best ETA provided to them.
- If the client takes longer than 10 minutes to respond, FleetNet will automatically cancel the service request and mark the custom status as "CanceledbyFleetNet".
- Clients can choose to decline FleetNet service requests if they do not have a technician available for the job by changing the custom status to "Canceled by Our Company" and not filling out the ETA field.