In MobiWork, there are several different ways you can add a purchase order. You can add new purchase orders from the "Add Purchase Order" option from your MobiWork menu or through the View Work Order pop-up window. The following subsections will highlight how to access the add purchase order actions.
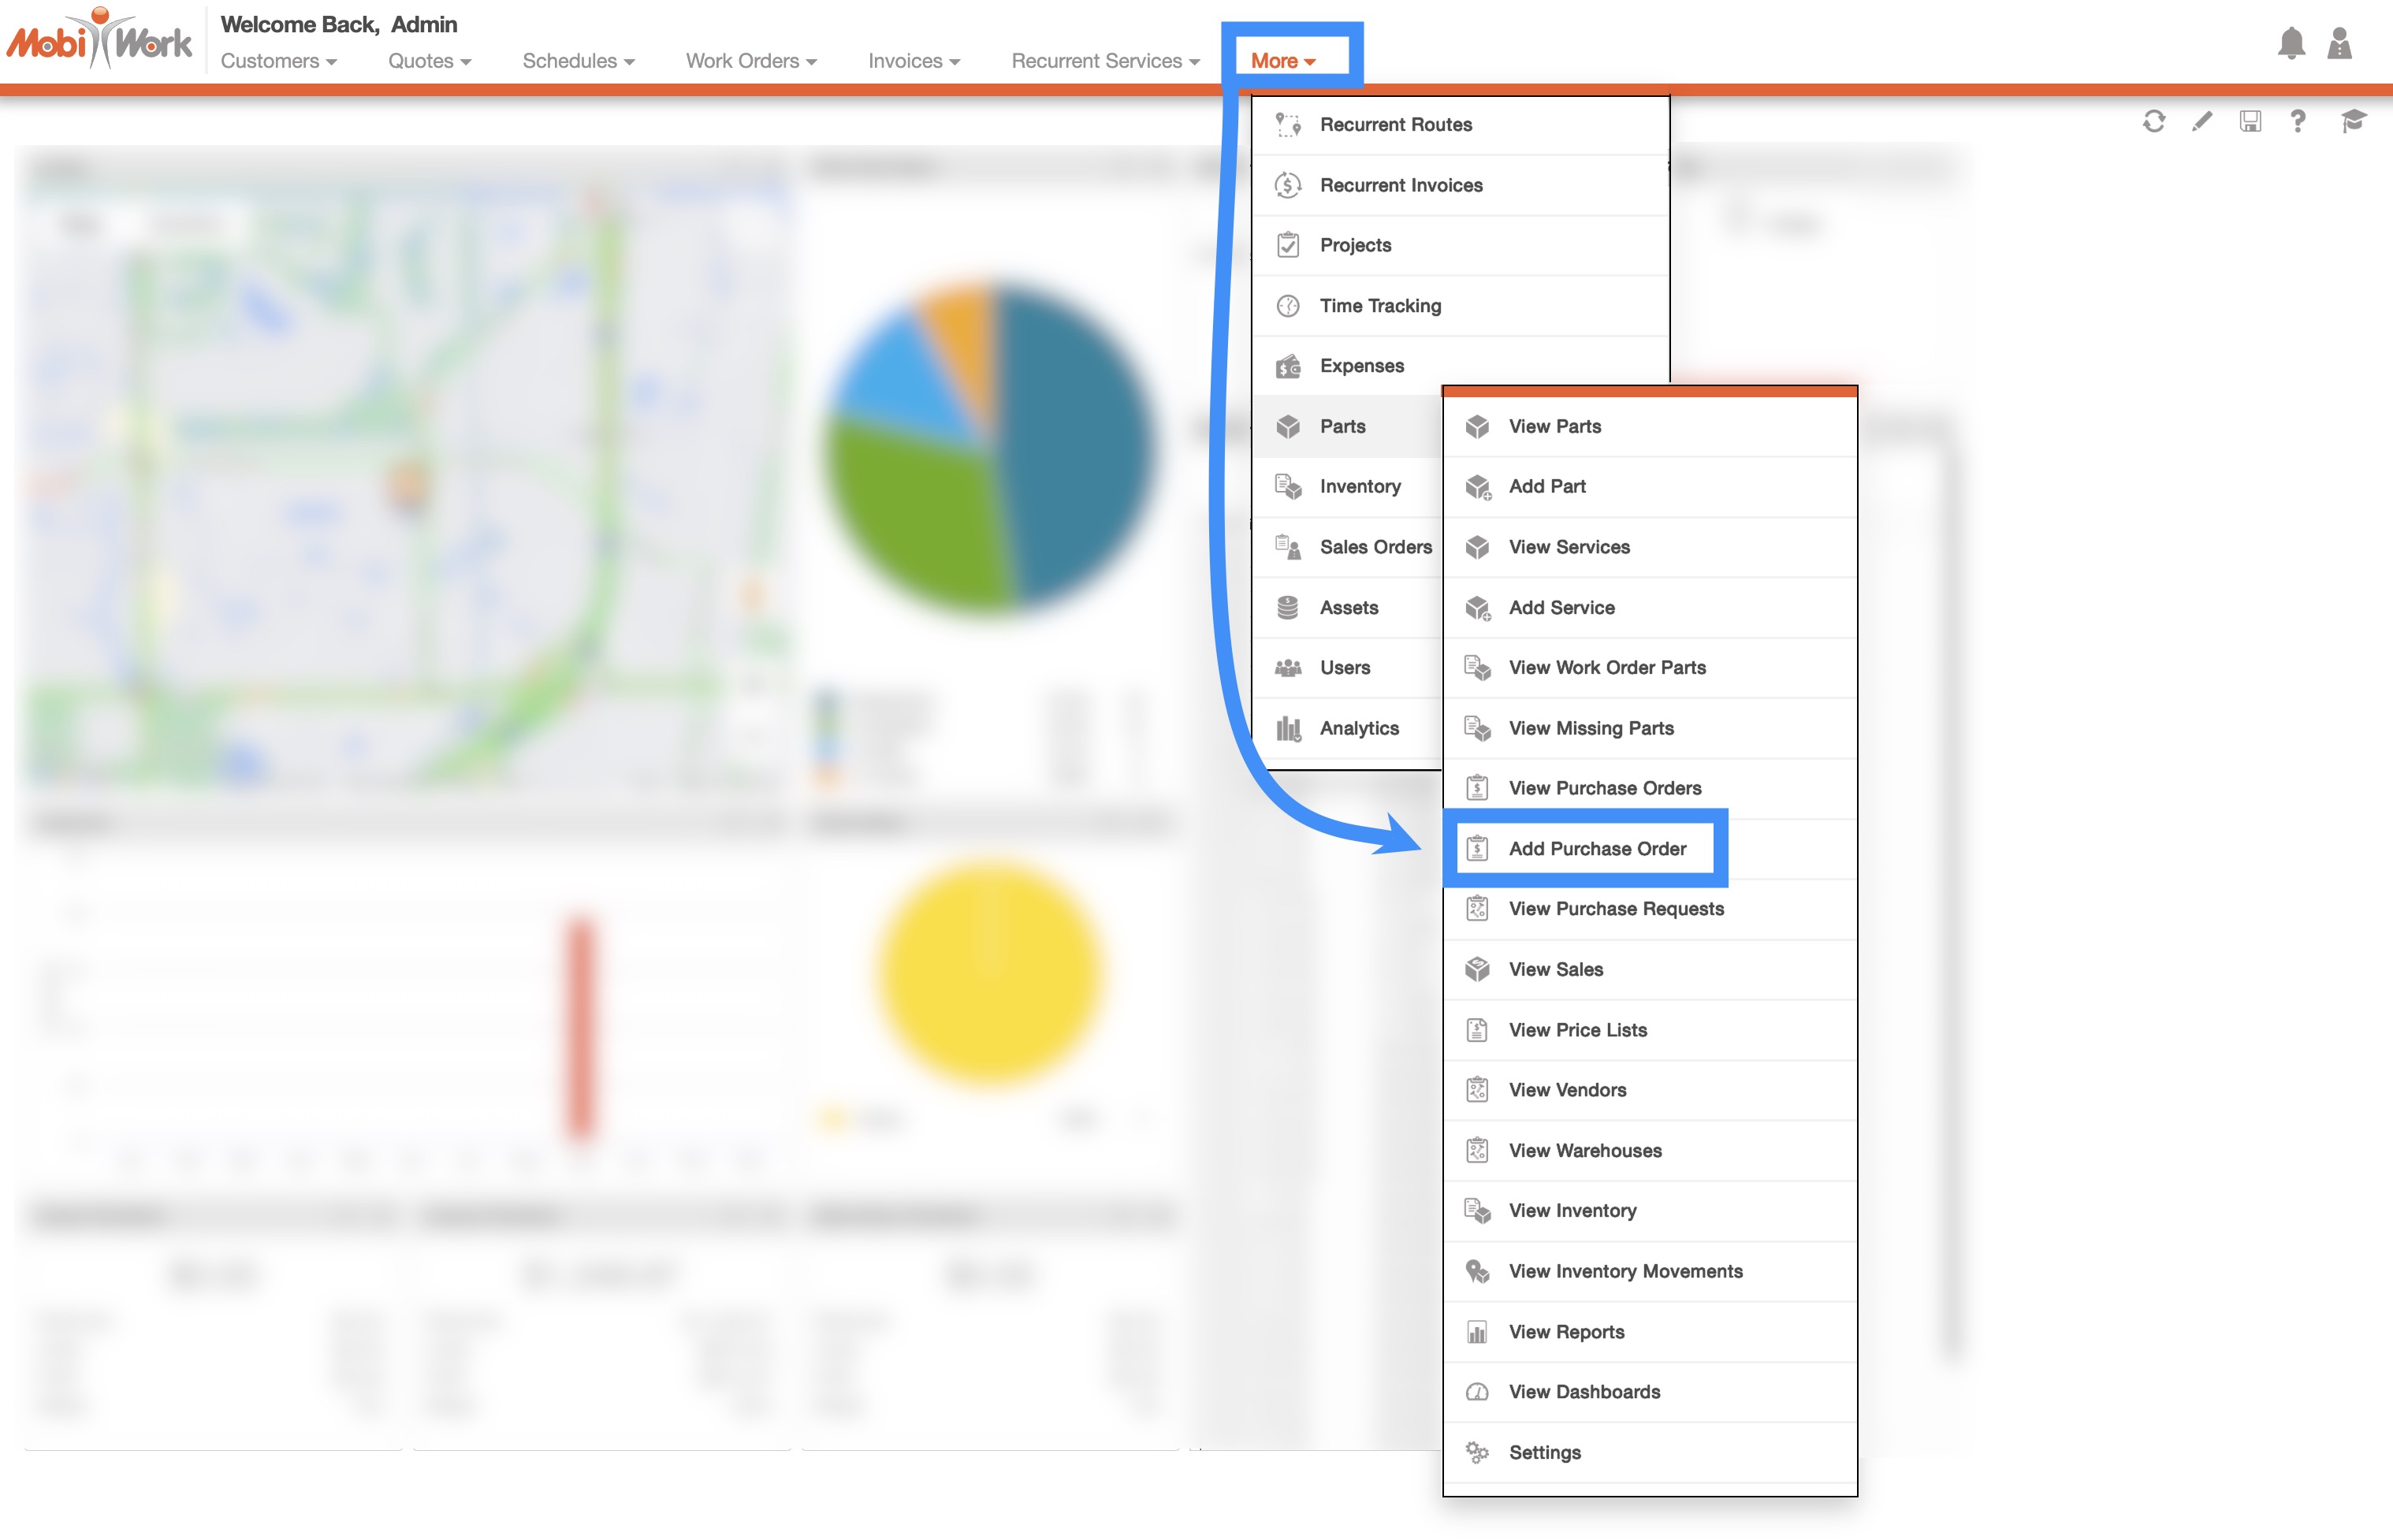
From the Parts Drop-Down
- The fastest and easiest way to add a new purchase order is by accessing the drop-down menu from the Parts feature located in your MobiWork menu:
Select the "Add Purchase Order" option from the drop-down.
The Add Purchase Order pop-up window will then appear.
From the Purchase Orders' More Actions
The easiest way to access the View Purchase Order pop-up window is through the Purchase Orders feature page. For more information on how to access the Purchase Orders feature page, please see the Purchase Orders feature page.
On the Purchase Orders feature page, you will also be able to import your purchase orders from Excel:
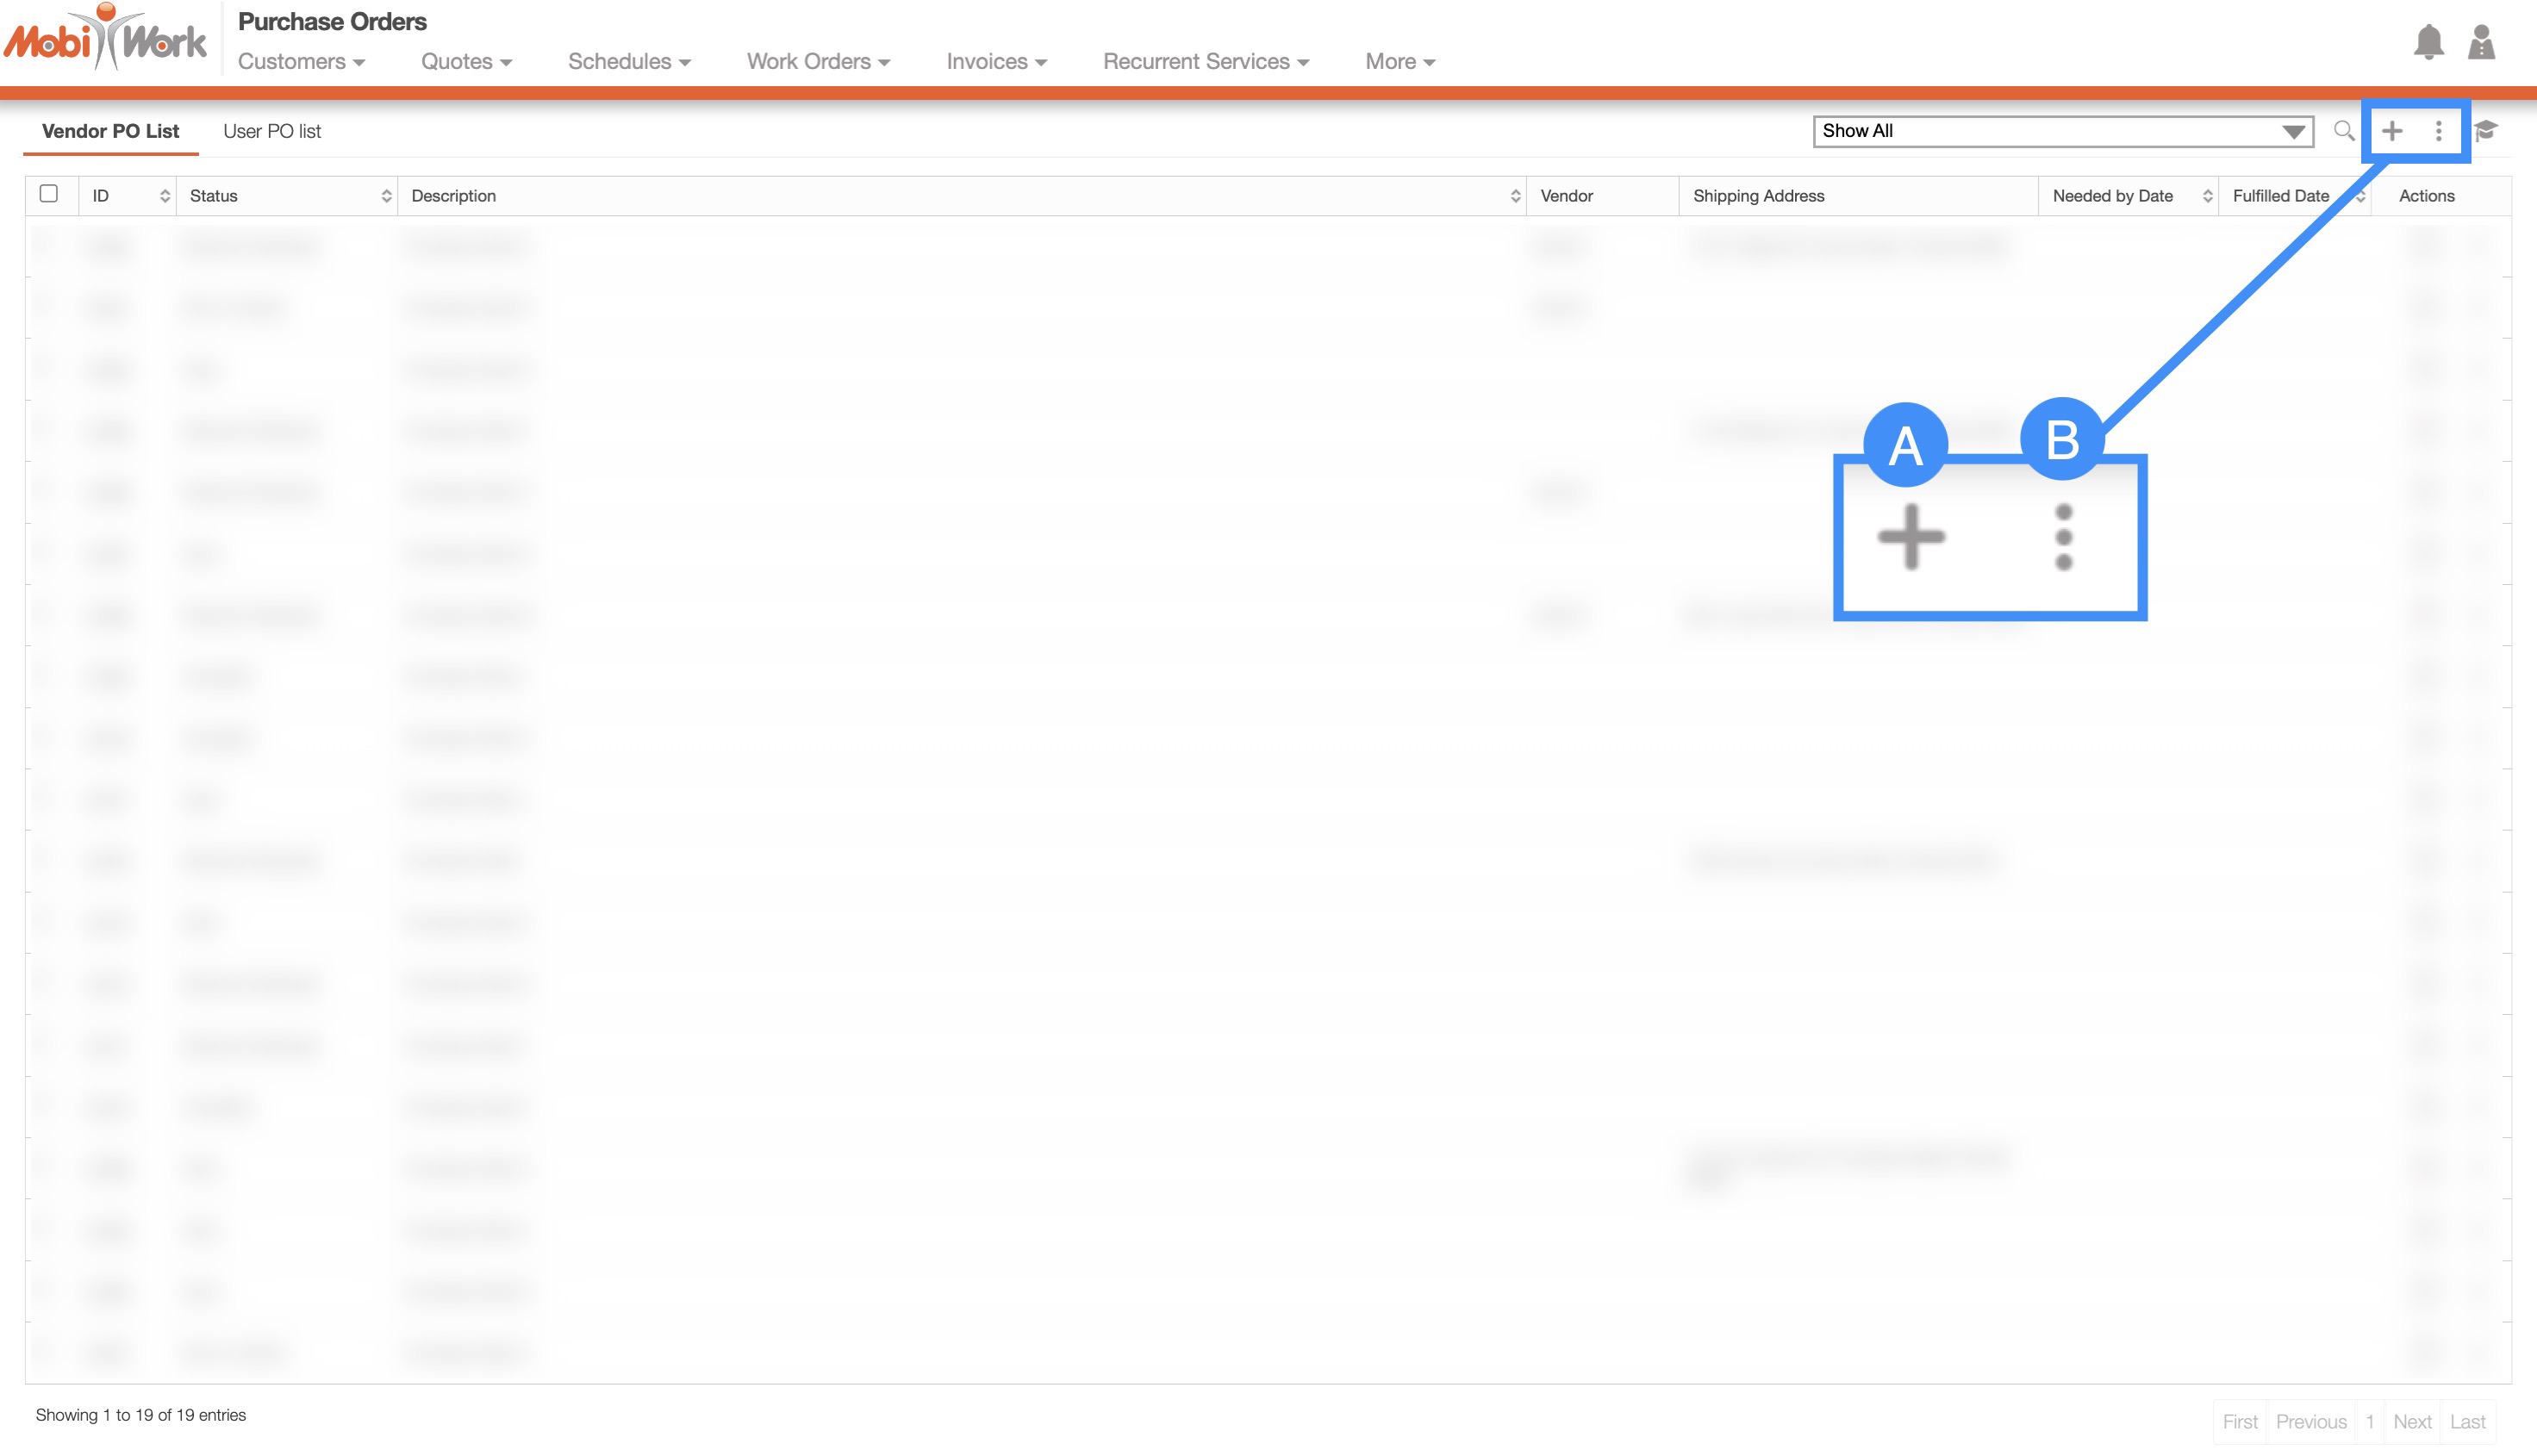
Plus Sign- Adds a new purchase order.
More Actions- Allows you to access the import drop-down actions.
For more information on how to import your purchase order, please see the Add Multiple Purchase Orders or the Edit Multiple Purchase Orders page.
To add a new purchase order from the Purchase Orders feature page, please see the steps below:
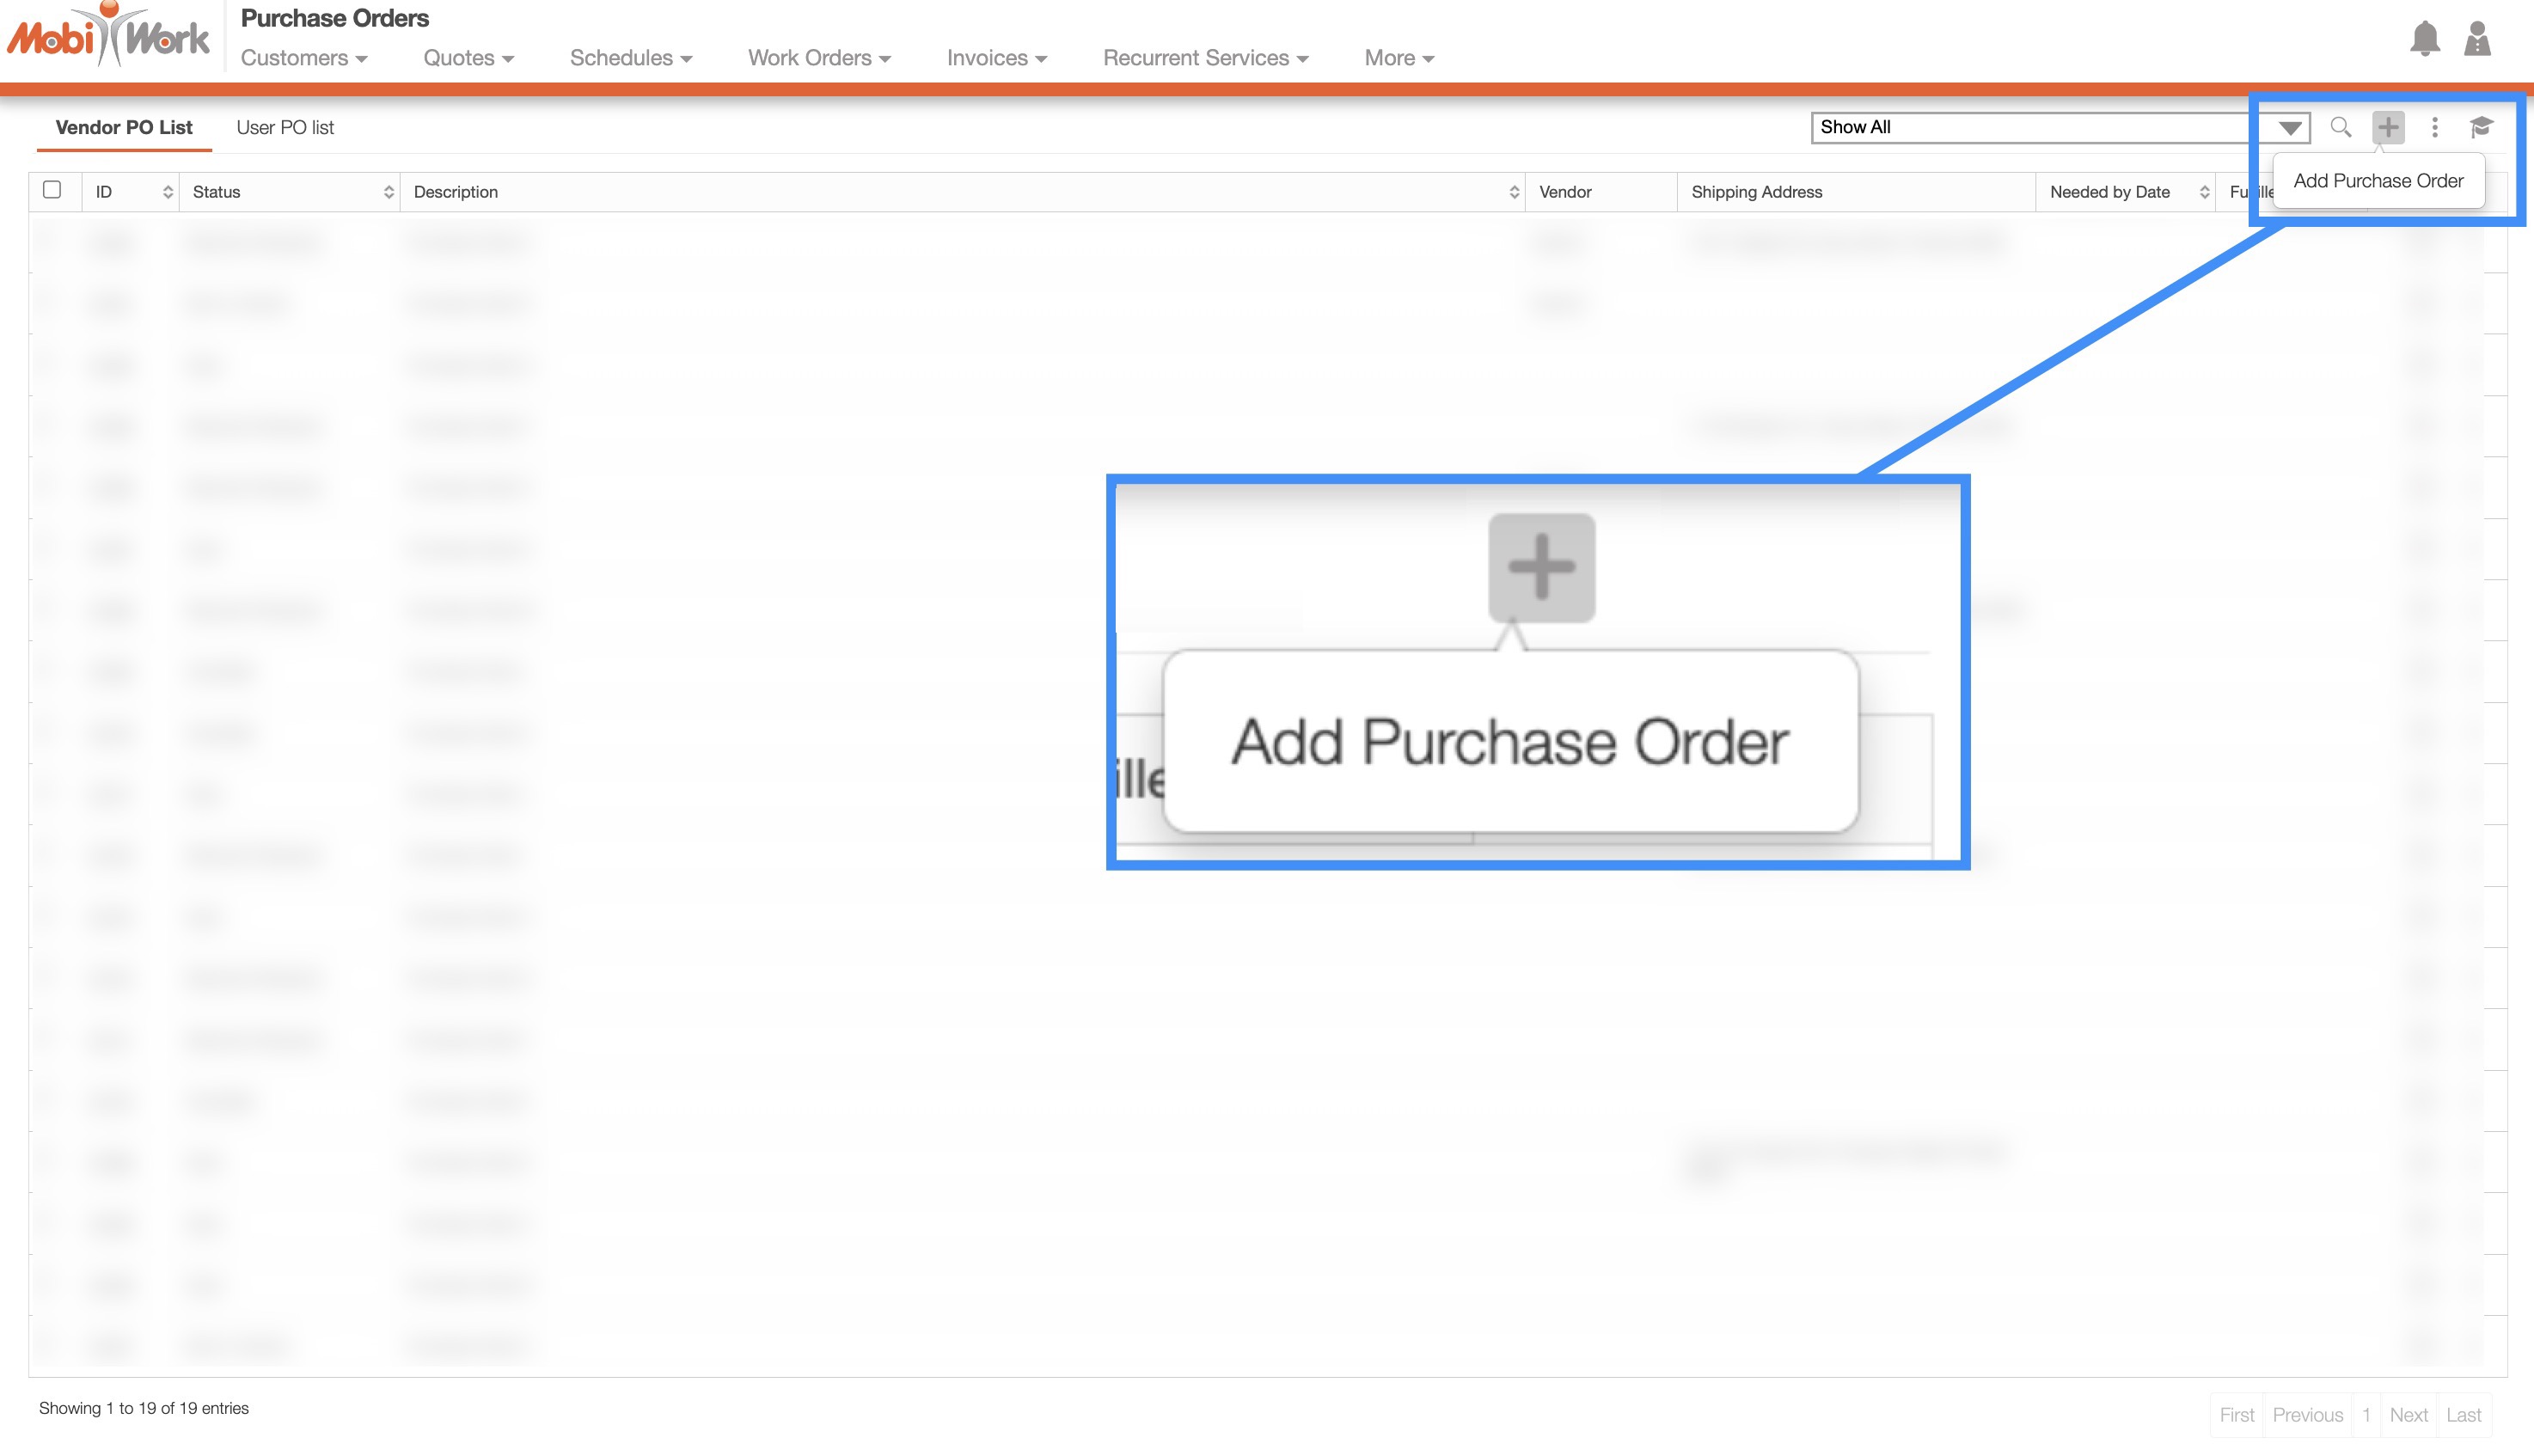
Once you are on any of the Purchase Orders tabs, click on the Plus Sign to add a new purchase order:
The Add Purchase Order pop-up window will then appear.
View Work Order Pop-up Window
You will also be able to create a purchase order from the View Work Order pop-up window. For more information on how to access the View Work Order pop-up window, please see the View Work Order page.
Once you have opened the View Work Order pop-up window, click on Individual Actions button and from the drop-down that appears select the "Create Purchase Order" option:
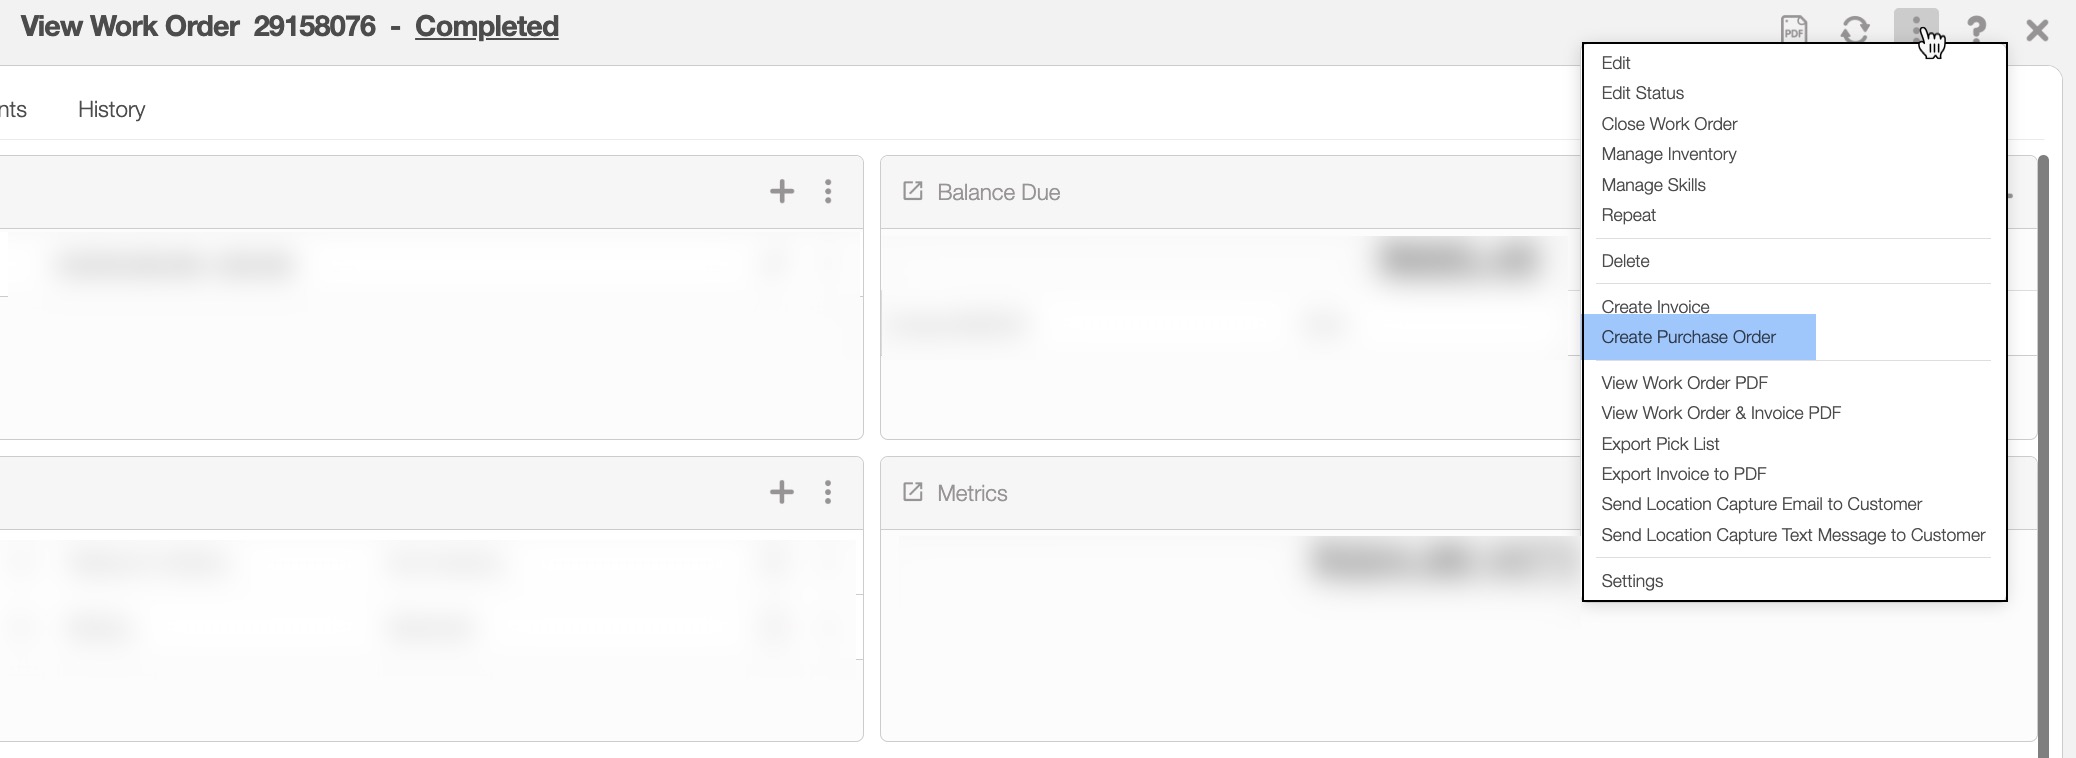
The Add Purchase Order button will then appear.
You will also be able to add a purchase order from the "Parts and Services" panel of the View Work Order pop-up window.
In this panel, you can click on the Individual Actions button and then select the "Manage Inventory" option from the drop-down:
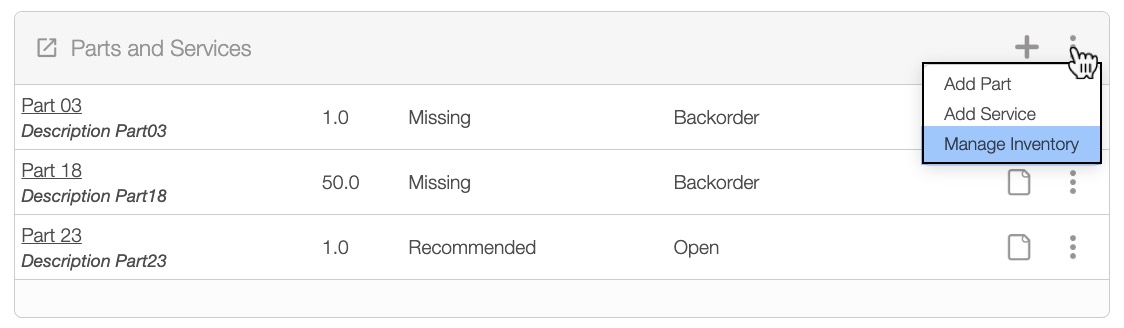
The Manage Inventory pop-up window will then appear:

In this pop-up window you can create a purchase order by:
Marking off the desired parts you would like to create the purchase order for
Clicking on the Individual Actions button and selecting the "Add Purchase Order" option from the drop-down.
The Add Purchase Order button will then appear.
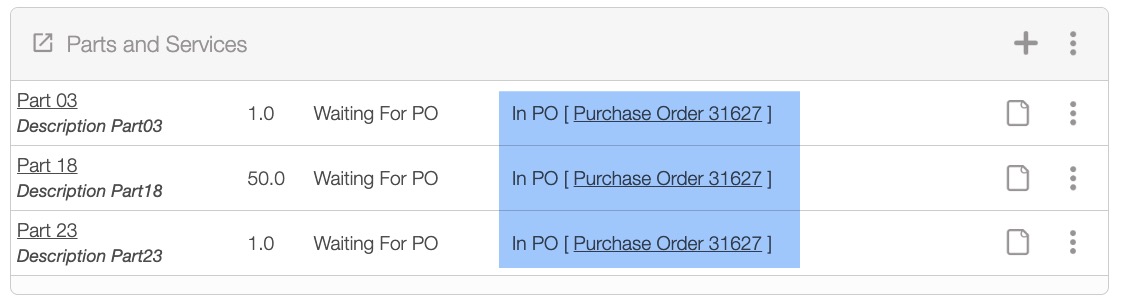
The selected parts in the "Parts and Services" panel will then have a link directing you to the View Purchase Order pop-up window:
View Quote Pop-up Window
You will also be able to create a purchase order from the View Quote pop-up window. For more information on how to access the View Purchase Order pop-up window, please see the View Quote page.
Once you have opened the View Quote pop-up window, click on Individual Actions button and from the drop-down that appears select the "Create Purchase Order" option:
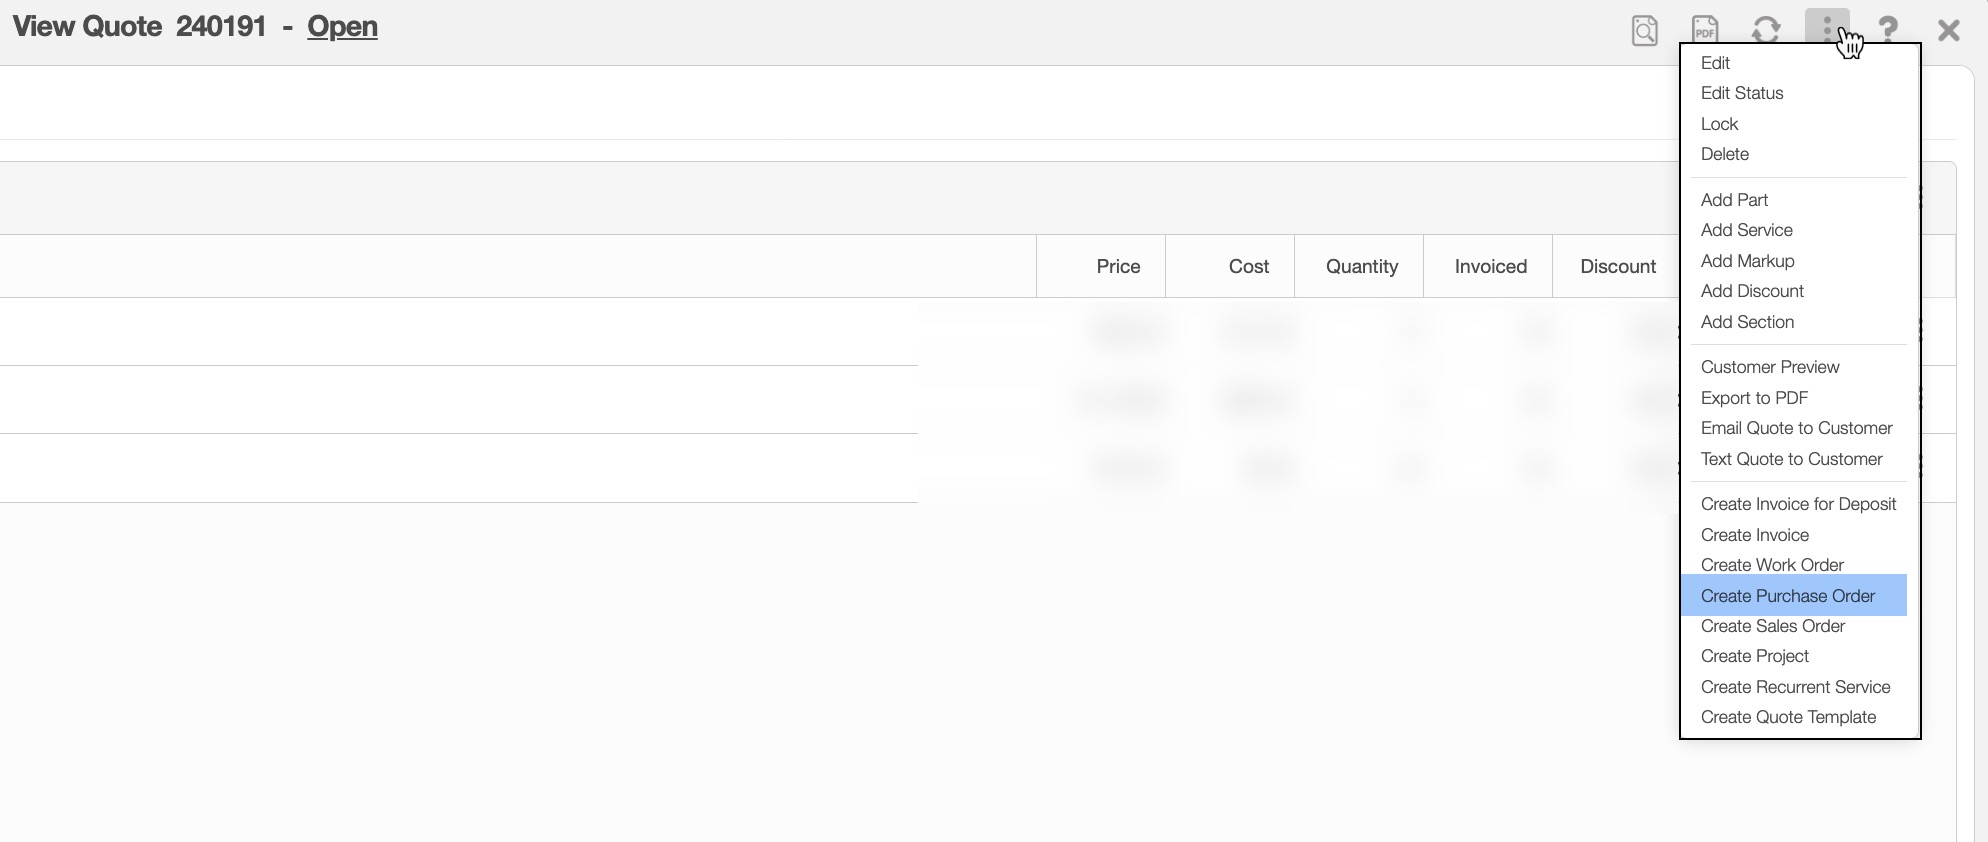
The Add Purchase Order button will then appear.
Regardless of the method that you choose to add a purchase order, the Add Purchase Order pop-up window will appear. From this window you will be able to input the shipping address, purchase order type, the designated vendor, and more:
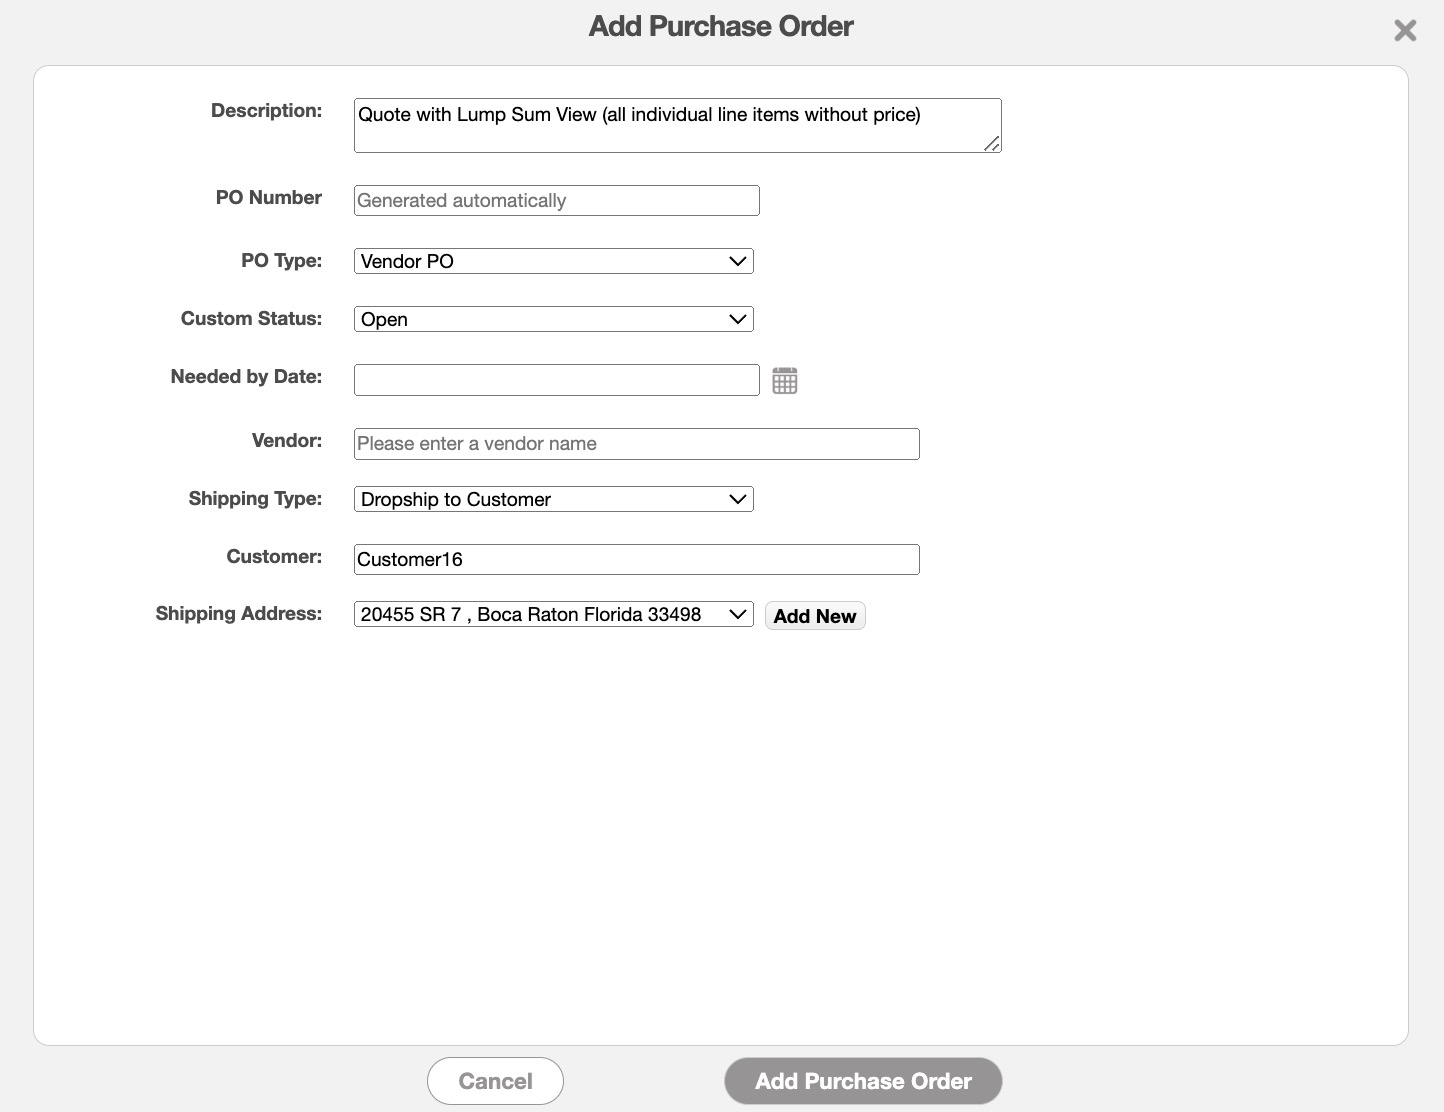
Enter the following information into your purchase order:
The title or description associated with the purchase order.
The purchase order type (this can be either a vendor or user type).
The status of the purchase order.
The date the purchase order is needed by.
The vendor responsible for fulfilling the purchase order.
How the purchase order will be delivered.
The destination address where the ordered parts or products are to be delivered
Once you are satisfied with the information entered, click on the Add button to create the purchase order.
Please note that after creating the purchase order, you will still need to populate the ordered items. For more information on how to add parts and products to the purchase order please see the Add Parts to Purchase Order subsection.
The terms listed in the Add Purchase Order pop-up window are defined below:
| Name: | Description: |
|---|---|
| "Description" | The title or description associated with the purchase order. |
| "PO Number" | The unique identification number assigned to the purchase order. |
| "PO Type" | Specifies the type of purchase order; you can select either a vendor or a user type. |
| "Custom Status" | The status of the purchase order. The status can be "Open," "Sent to Vendor," "Shipment Received," or "Cancelled." |
| "Needed By Date" | The required date by which the purchase order must be fulfilled. |
| "Vendor" | The vendor responsible for fulfilling the purchase order. |
| "Shipping Type" | The method chosen for delivering the items, such as dropship to customer, ship to warehouse, or ship to project. |
| "Customer" | The client or entity for whom the purchase order is being processed, or who will ultimately receive the goods or services from the vendor. |
| "Shipping Address" | The destination address where the ordered parts or products are to be delivered (this can include your warehouse or the customer's address). |
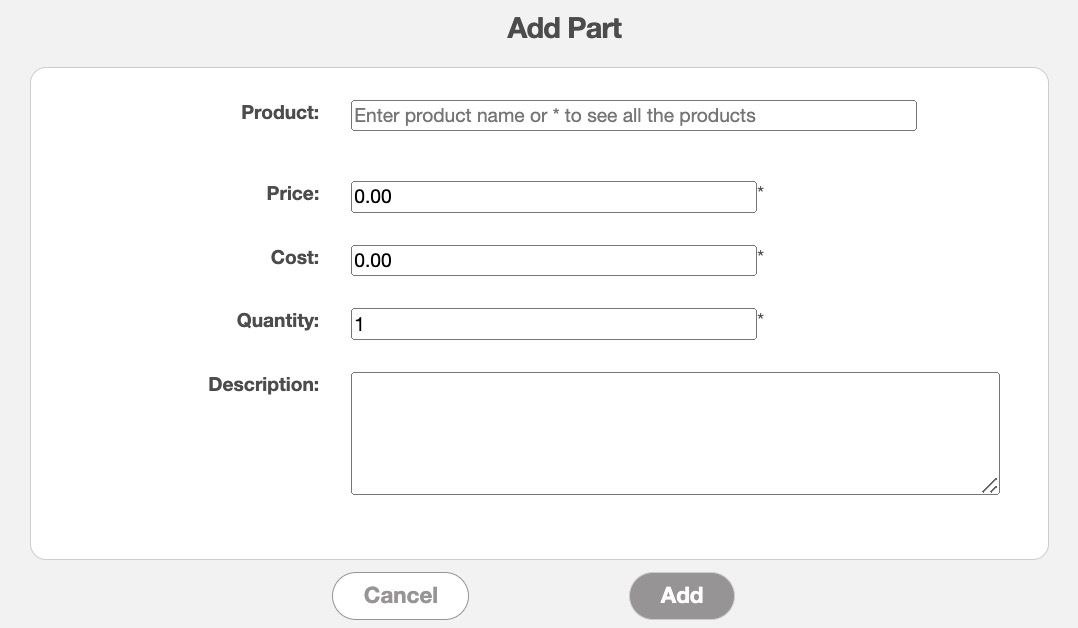
To add parts to a purchase order, you will first need to access the View Purchase Order pop-up window.
Once you are on this pop-up window, click on the Add Part button from the "Line Items" subsection:

The pop-up window will then appear, and you will be able to add the product as well as adjust the price, cost, quantity, and description for the purchase order.
Once you are satisfied with the information entered, click the Add button:
The parts will then be listed on the "Line Items" subsection; from this subsection you will be able to edit or delete the items listed for the purchase order.