You can access the Payments feature page by hovering over the Invoices feature from your MobiWork menu and clicking on the "View Payments" option:
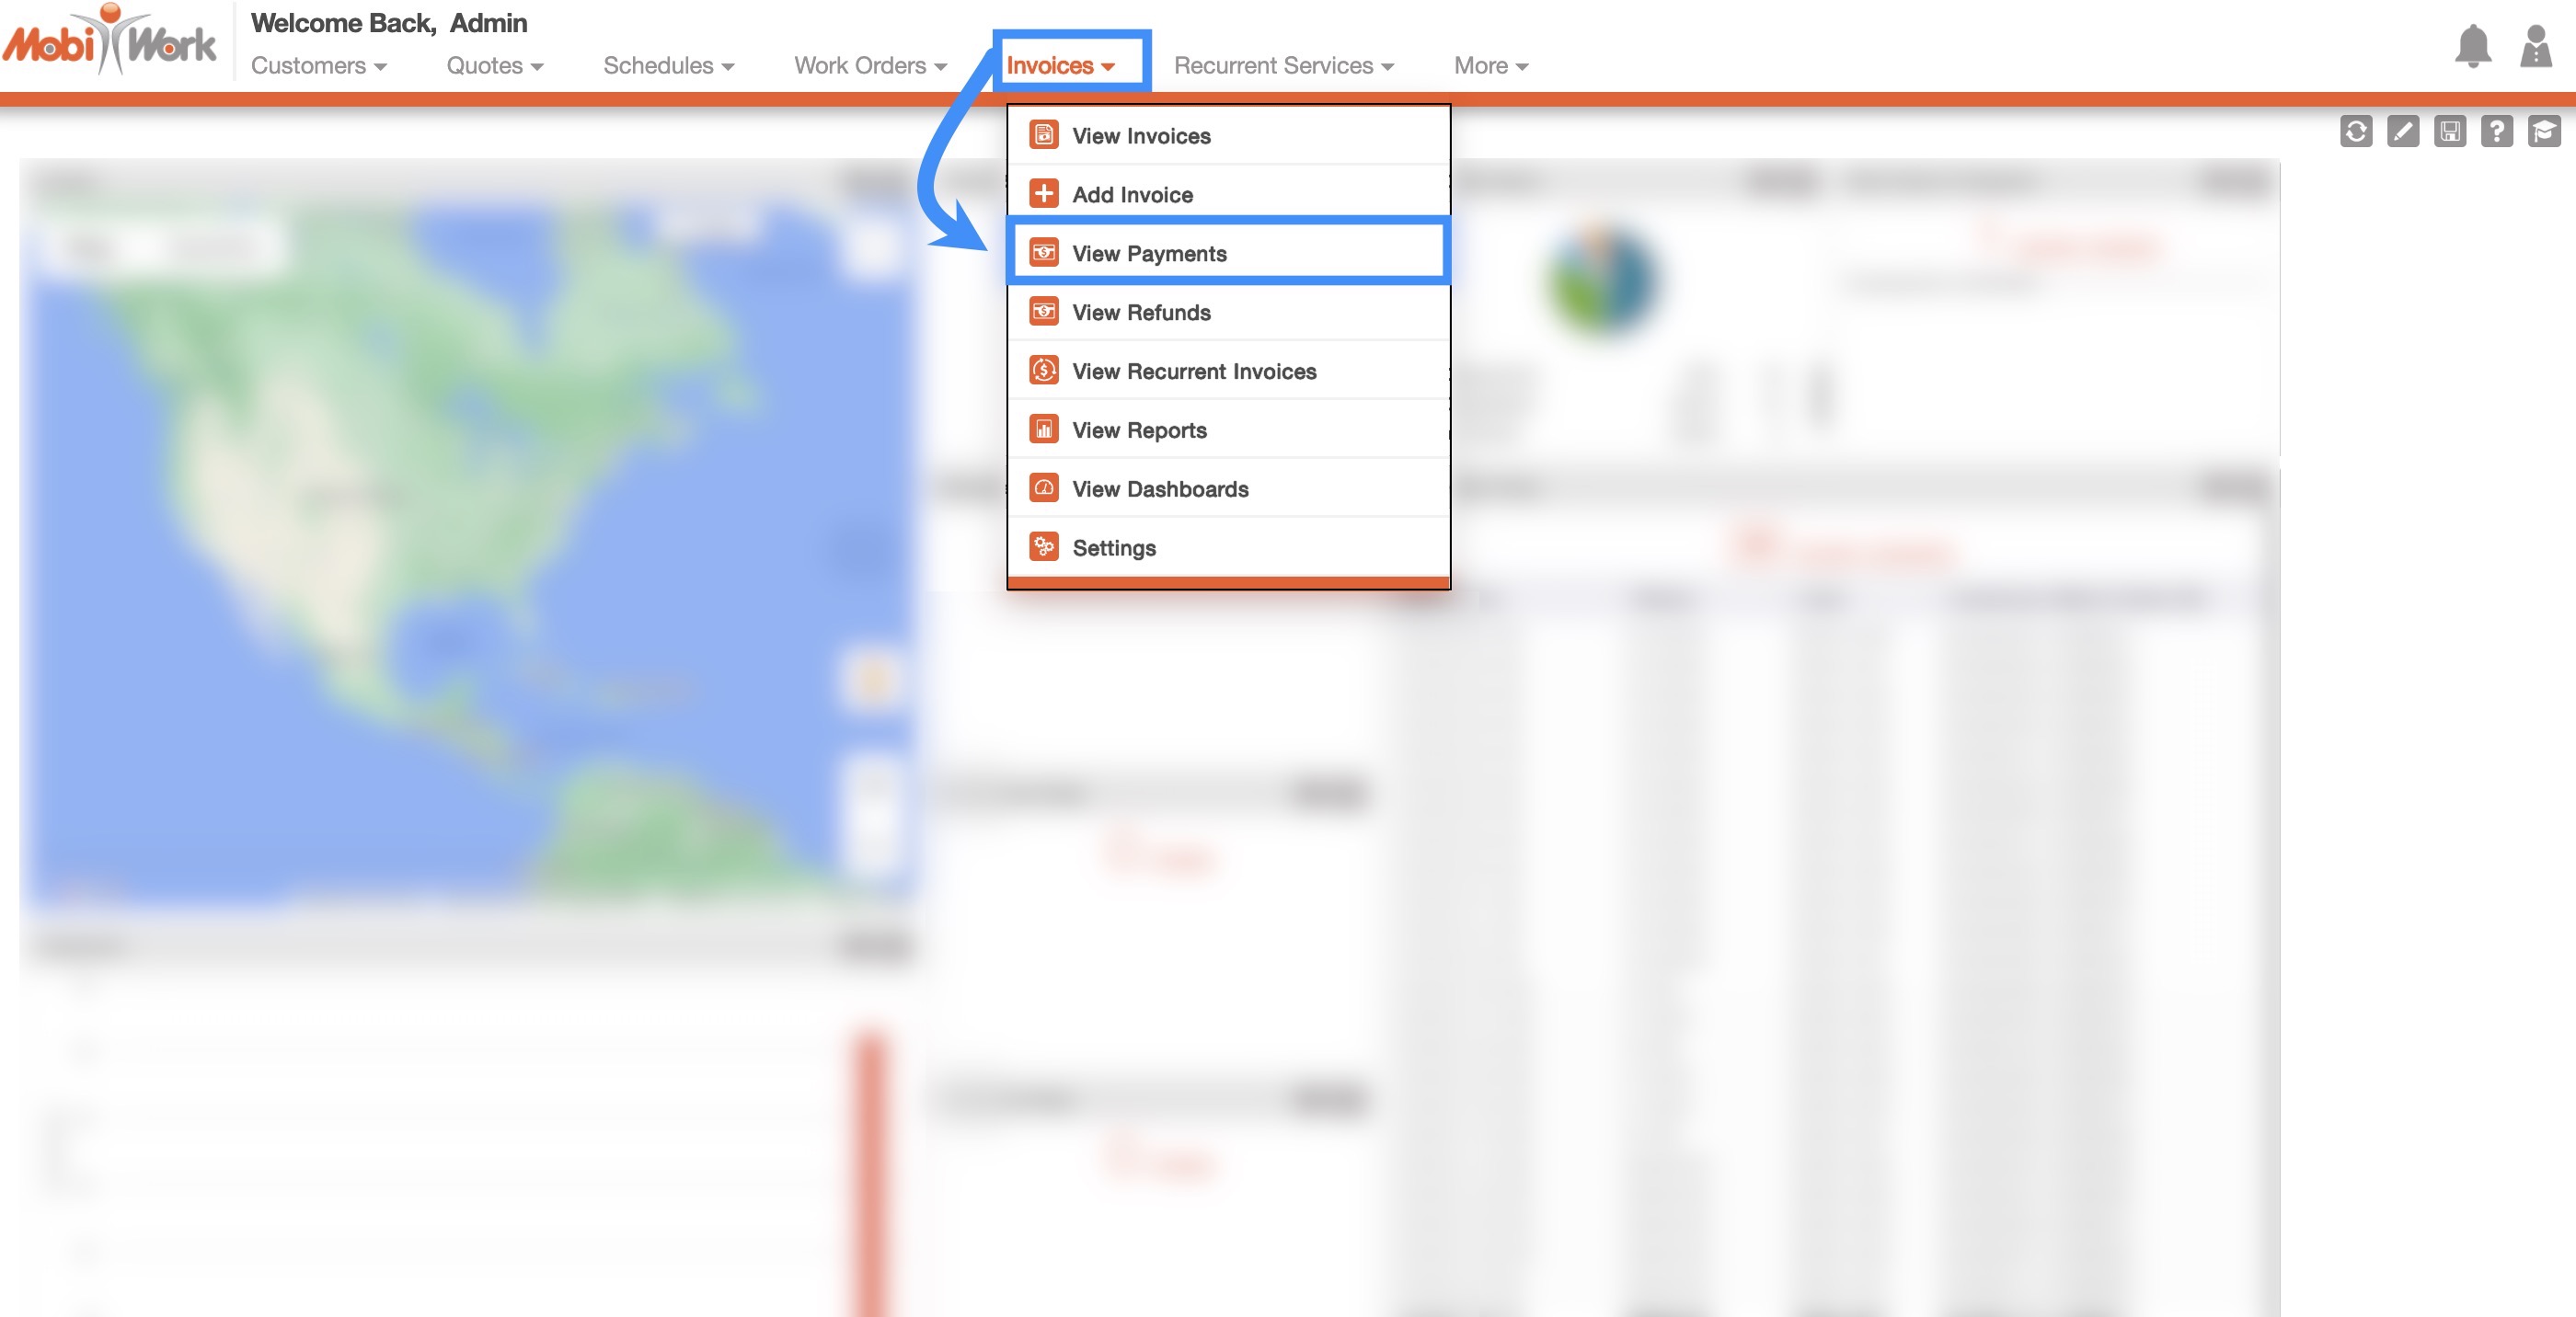
Please note that only paid invoices (i.e., the balance was paid in full, or a portion of the balance was paid) will be displayed on the Payments feature page. If your invoice does not have a payment, then the invoice will not appear on the Payments feature page.
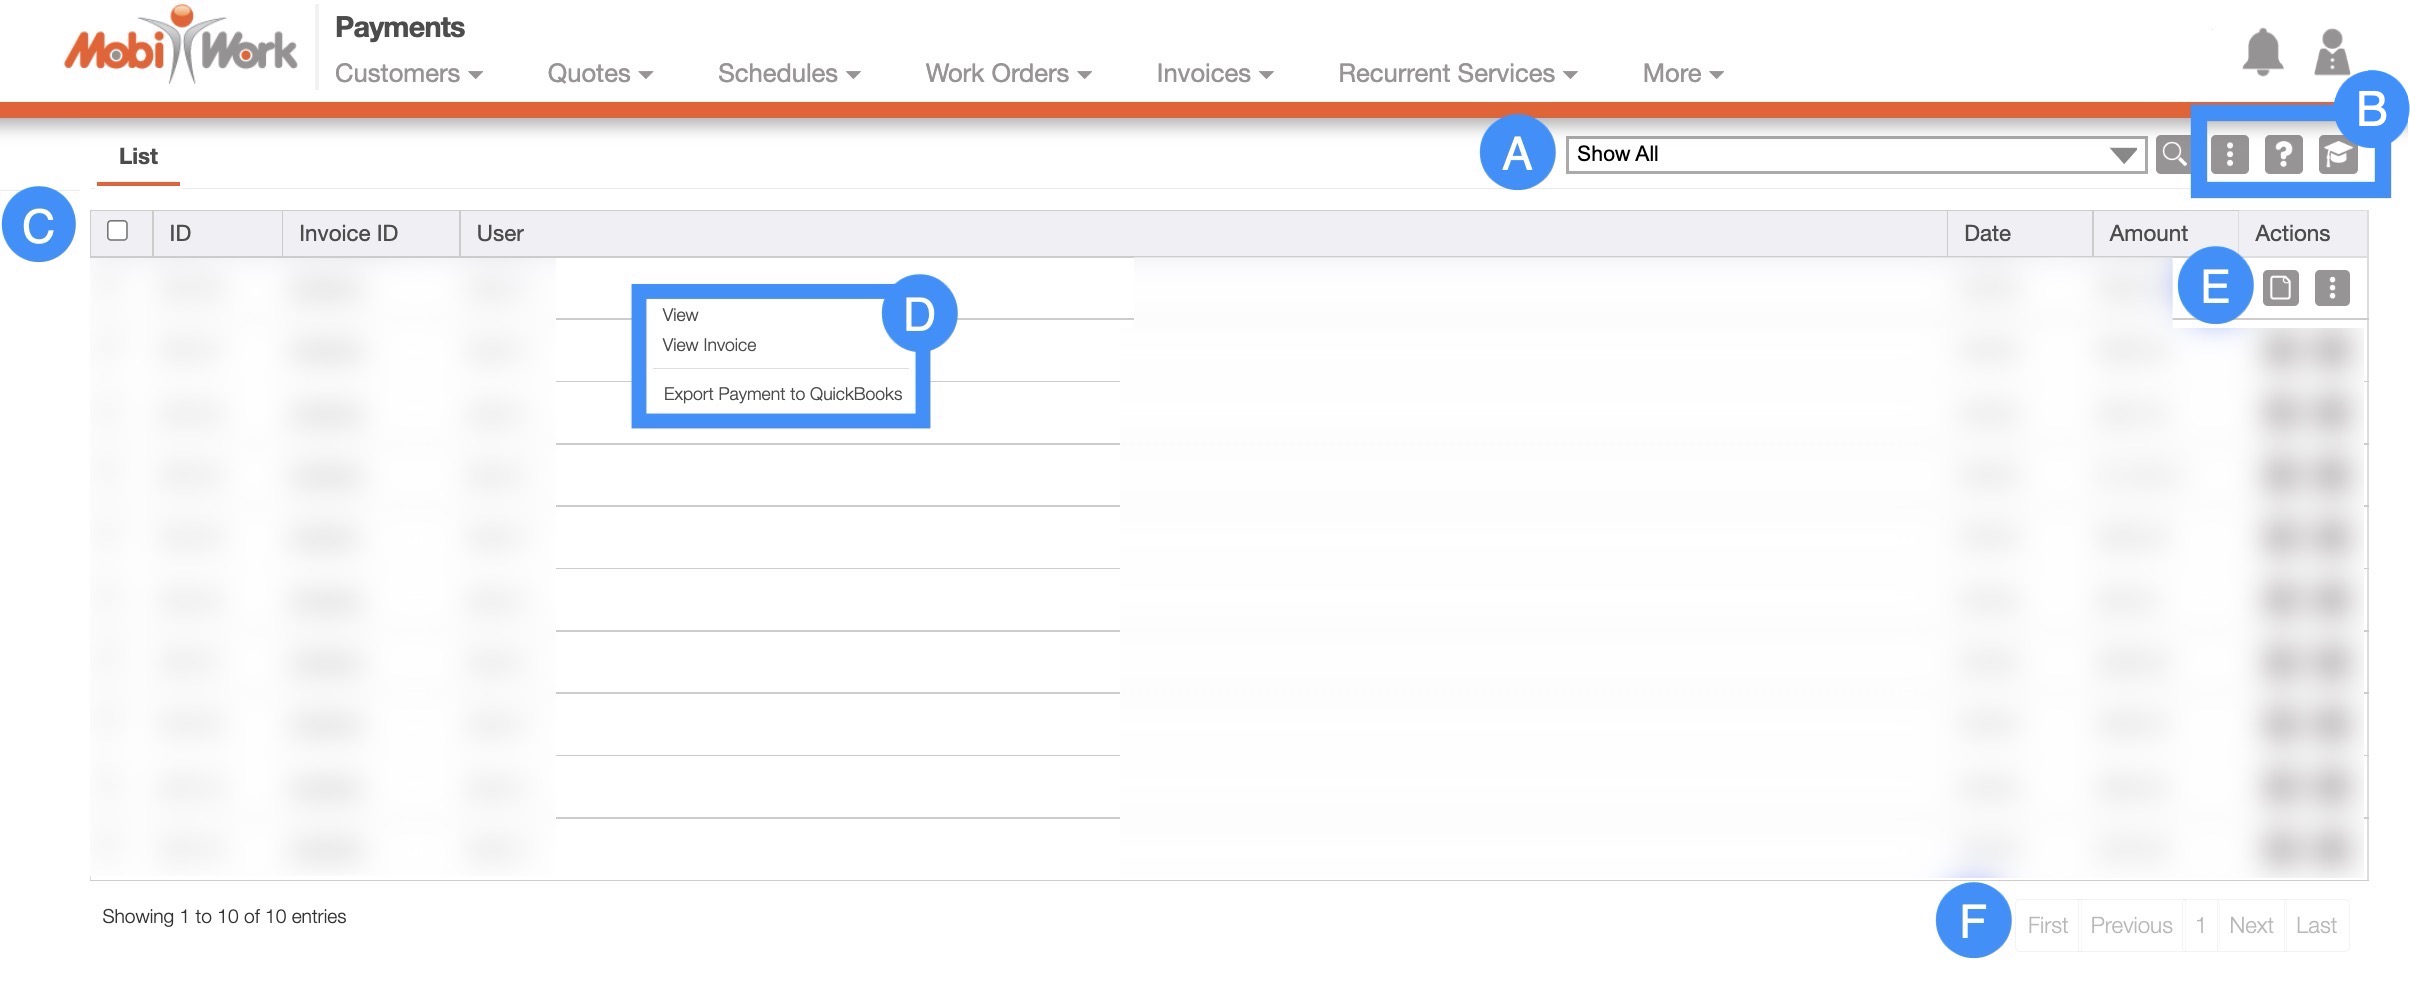
The Payments "List" tab is the default tab you will be brought to once you access the Payments feature page; from this page you can see all the payments associated with your invoices.
Below is a list of the main features that are located on the "List" tab:
Free-Text Search
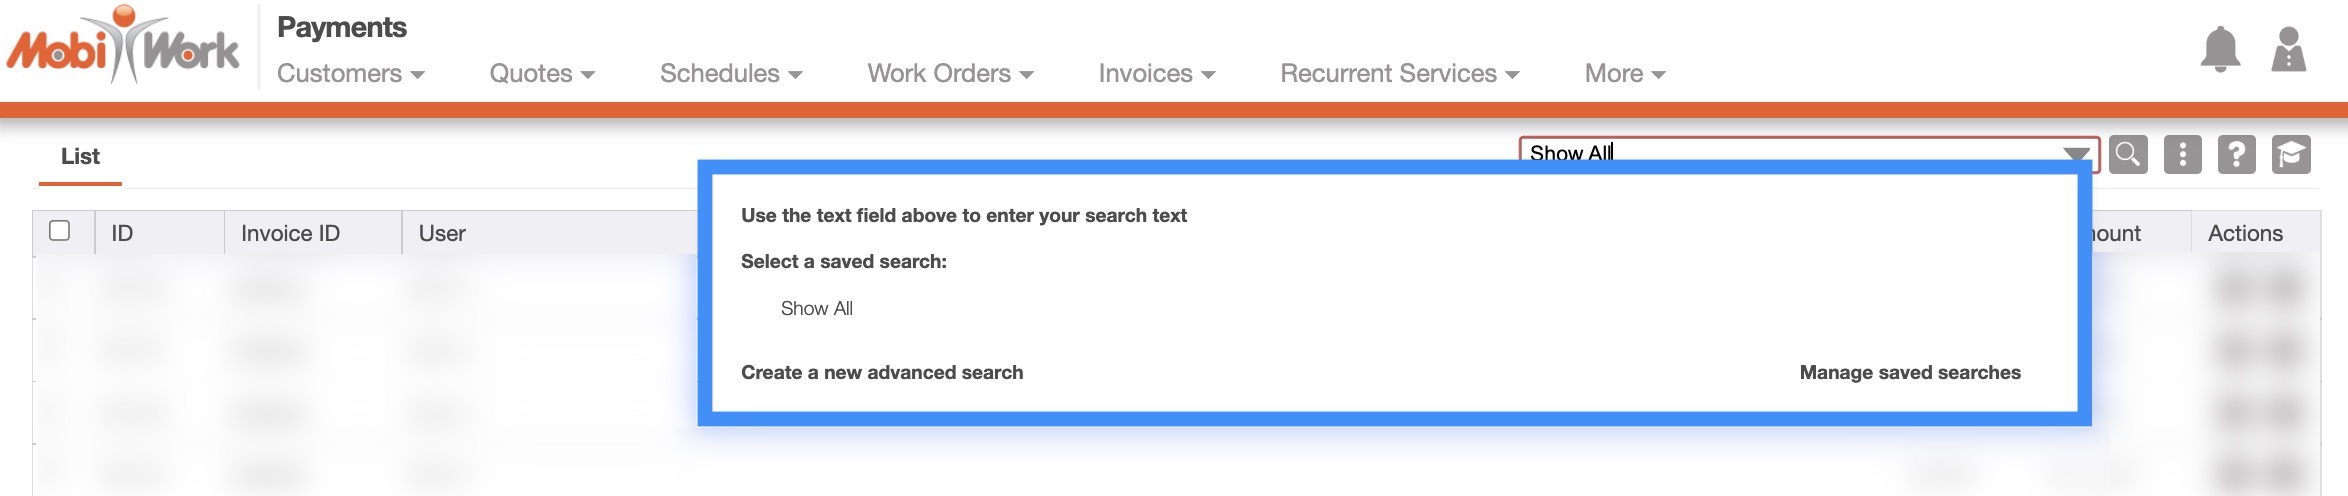
You can type in the search bar (free-text search) to locate a specific invoice or payment. Once you click in the search bar, the search drop-down menu will automatically appear. You can use the search drop-down menu or continue typing your own search parameters:

When typing in the search bar, the drop-down menu will provide some helpful search criteria. With free-text search you will also be able to search by:
Payment ID
Invoice ID
If the number of payments surpasses the number range, the subsequent number of payments will be found on the next page:
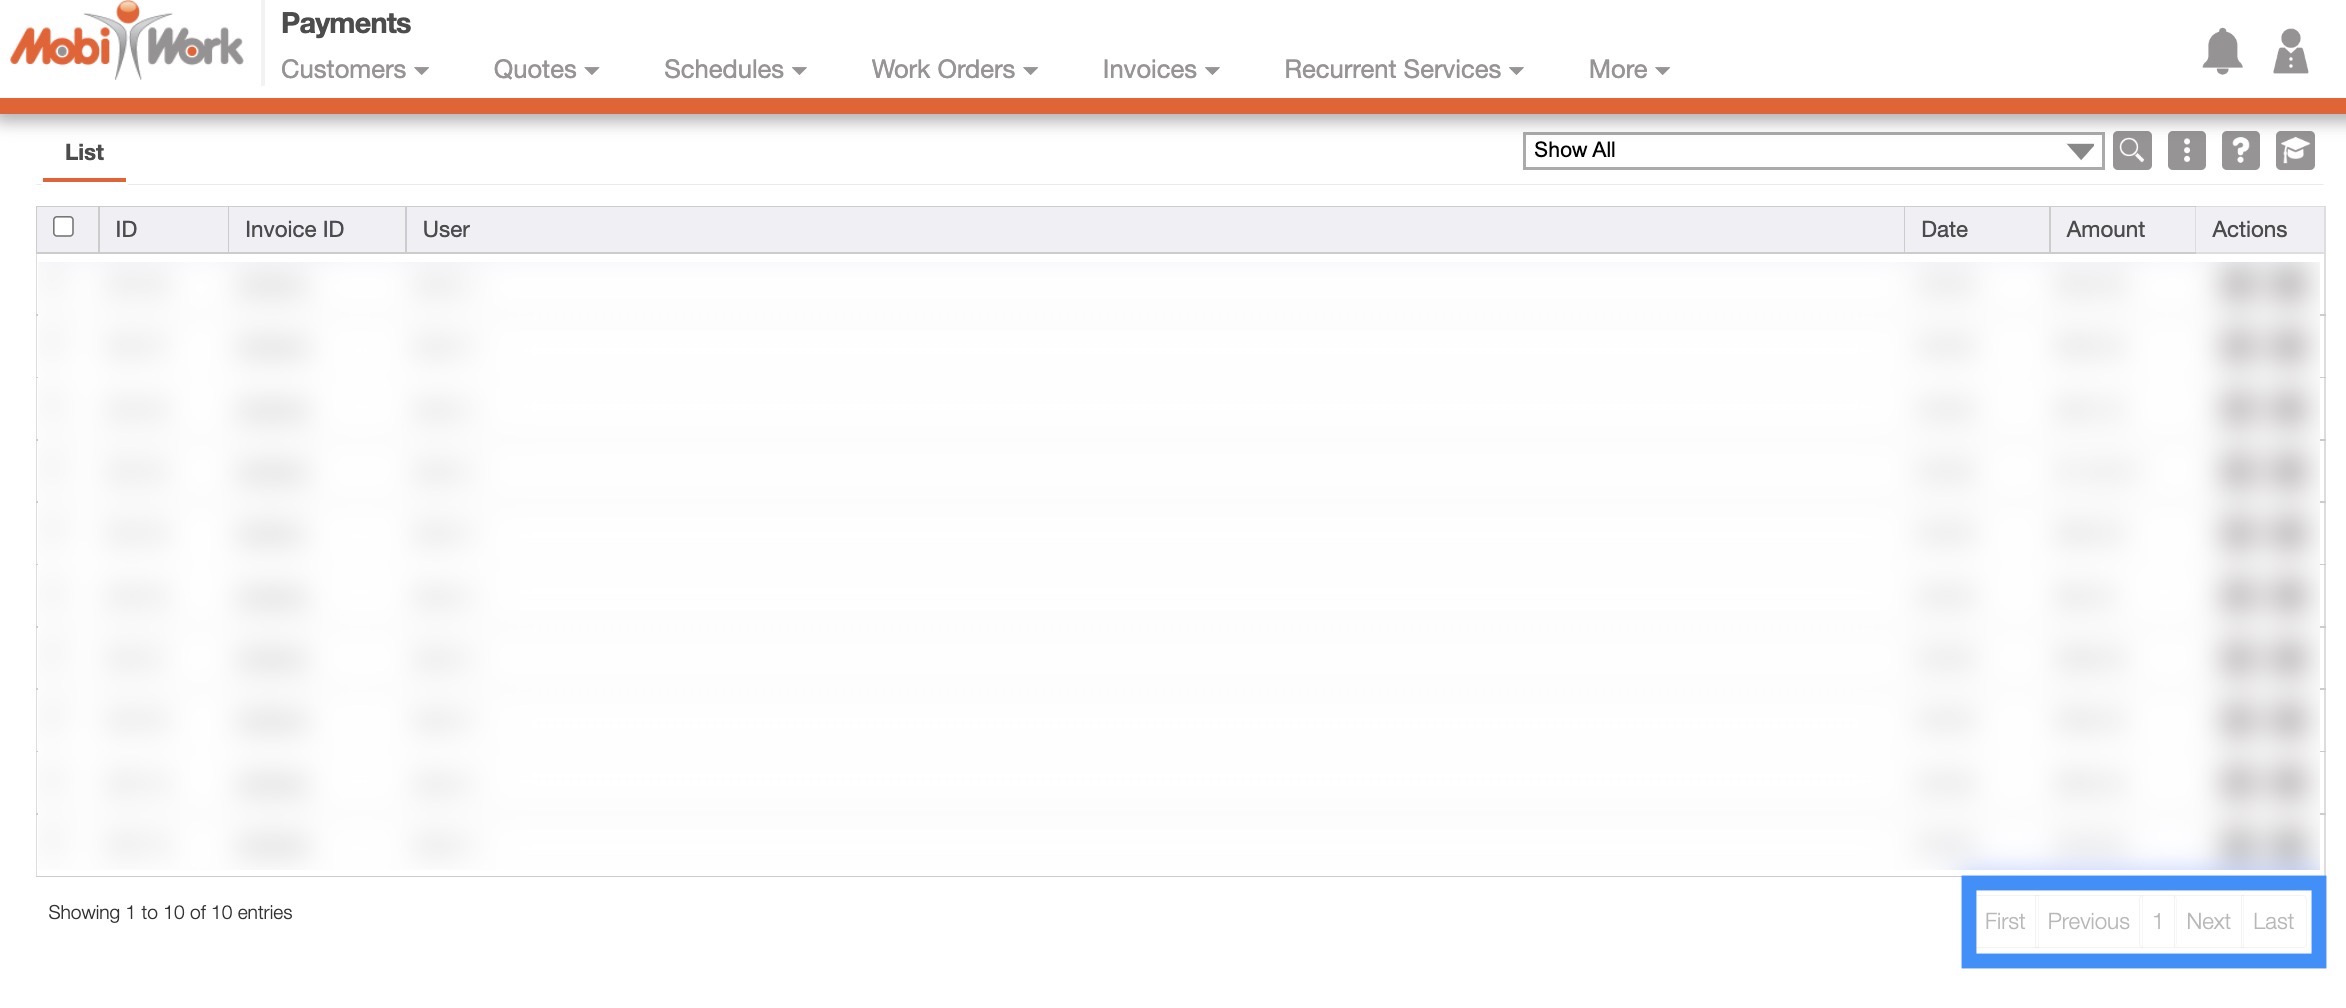
To navigate through these pages, use the First, Previous, Next, and Last buttons located towards the bottom of the Payments section.
Predefined Saved Searches
Saved searches are a powerful search tool where the search-criteria has been saved for future use; to access the saved searches drop-down, click in the search bar.
The default saved search for Payments is the "Show All" search. These saved searches will appear in the drop-down menu and can also be used for dashboards and reports.
By default, MobiWork provides the "Show All" saved search for you to use:
You can access this saved search by clicking on the "Search Area" and selecting the desired "Predefined Saved Search" from the drop-down menu.
If you would like to view all your payments, click on the "Show All" option from the drop-down menu:

New Search
To create a new saved search, select the "Create a New Advanced Search" option from the drop-down menu:

After clicking on "Create a New Advanced Search," a pop-up window will appear where you can enter your data in the appropriate fields. If you would like to exit from this pop-up window you can click on the esc button from your keyboard.
Please note that once you name a new saved search, you will be unable to rename it (instead you would need to delete your saved search and create a new one).
Once you have finished inputting the required information, you can save the search, make it available to all users, or make it your default search:
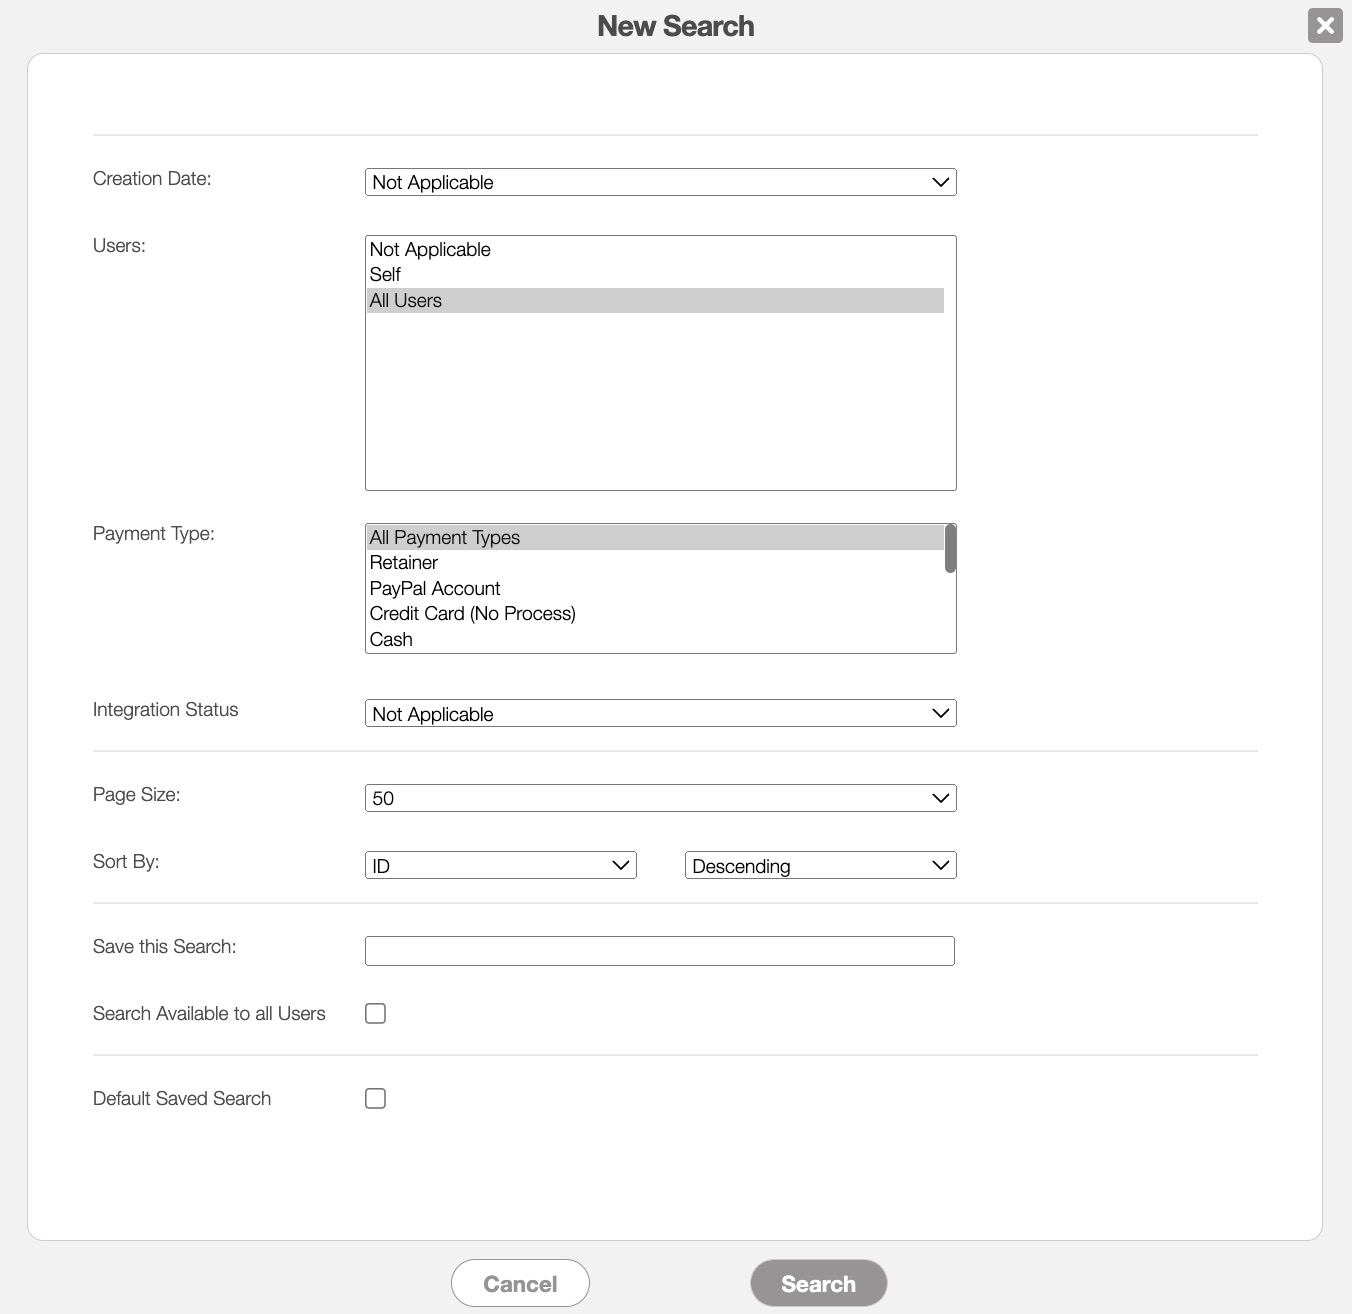
Further definitions for all the terms in the New Search pop-up window can be found below:
| Name: | Description: |
|---|---|
| "Creation Date" | When the payment was made to the invoice. |
| "Users" | The user who added the payment to the invoice. |
| "Payment Type" | How the payment was issued (i.e., can be retainer, PayPal account, credit card [no process], cash, check, credit card, EFT [electronic funds transfer], wire transfer, customer credit, or/and voucher payment). |
| "Integration Status" | The status of integrating with a third-party software solution such as QuickBooks. Includes the options: Not Applicable, Not Ready for Integration, Integrated, Ready for Integration, and Not Integrated. |
| "Page Size" | The number of results per page. |
| "Sort By" | Sorts your search in ascending or descending order by: ID or Created Date. |
| "Save This Search" | Allows the search parameters to be saved under a name to be reused in the future. |
| "Search Available to all Users" | Allows the search to be available to all users. |
| "Default Saved Search" | Sets the saved search as the default view when accessing the search feature in the future. |
Manage Saved Searches
Any new searches that are added can be managed or edited in the Manage Saved Searches pop-up window:

To manage, edit, or remove any saved searches you can access the "Manage Saved Searches" option in the drop-down menu; the Manage Saved Searches pop-up window will then appear:
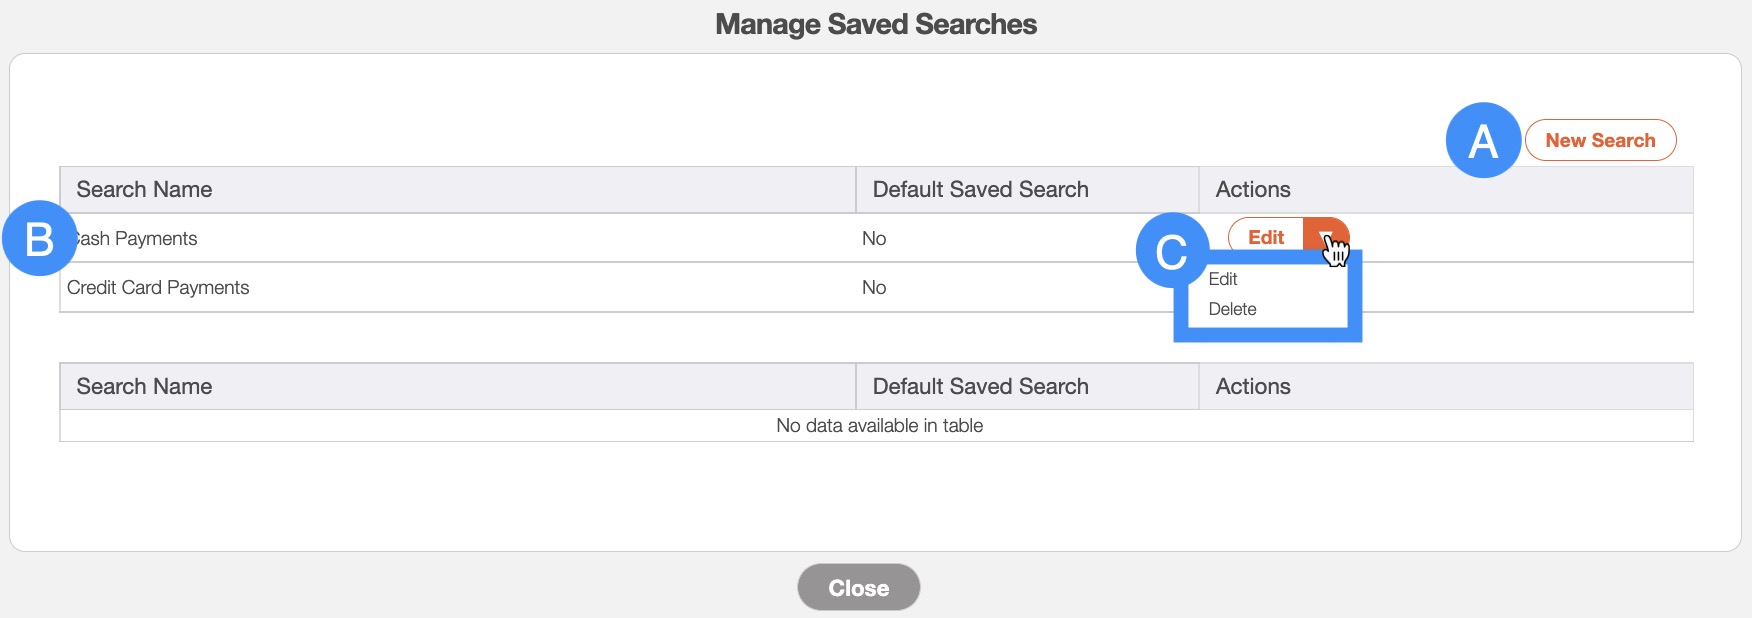
You can add a new saved search by clicking the New Search button in the top right of the pop-up window.
You can rearrange the order of the saved searches by clicking, then dragging & dropping the selected Search.
You can edit or delete a selected saved search by using the drop-down menu under the "Actions" column.
If you would like to easily close this pop-up window, you can click on the esc button from your keyboard.
The "List" tab will display the data associated with the payment and will allow you to perform actions on the selected payment.
List Tab Columns
In the "List" tab, the columns are structured to display specific data related to each individual payment.
These columns are organized as: "ID," "Invoice ID," "User," "Date," "Amount," and "Actions:"

The corresponding rows under the column headings will display the relevant payment data.
The checkboxes (multiple selection area) found to the left of the "ID" column, will allow you to select either one or multiple payments to view the payment details, view the initial invoice, sync with QuickBooks, etc.:
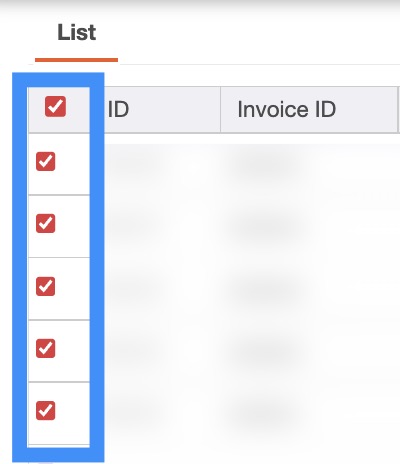
By clicking the topmost checkbox in the column heading you will select all the payments.
The "List" tab column headings are defined as:
| Name: | Description: |
|---|---|
| "ID" | The payment ID |
| "Invoice ID" | The invoice ID |
| "User" | The user who uploaded the payment |
| "Date" | The date that the payment was created |
| "Amount" | The payment amount |
| "Actions" | The View icon and the Individual Actions button can be found here; these buttons will allow you to perform actions on a payment. |
List Tab Individual Actions
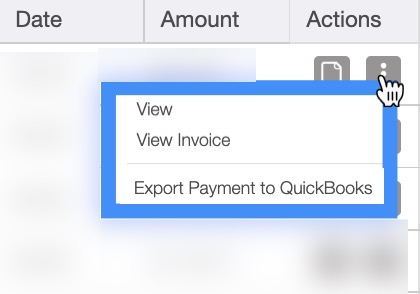
When selecting a payment and clicking on the Individual Actions button (the three vertical dots under the "Actions" column) you will be able to view the payment details, view the invoice, or export the payment to QuickBooks.
Any actions that are done with the Individual Actions button will only apply to the selected payment:
The View icon found under the "Actions" column will allow you to quickly access the View Payment pop-up window of the selected payment:
![]()
The options that are displayed when you select the Individual Actions button are also available under the right-click actions.
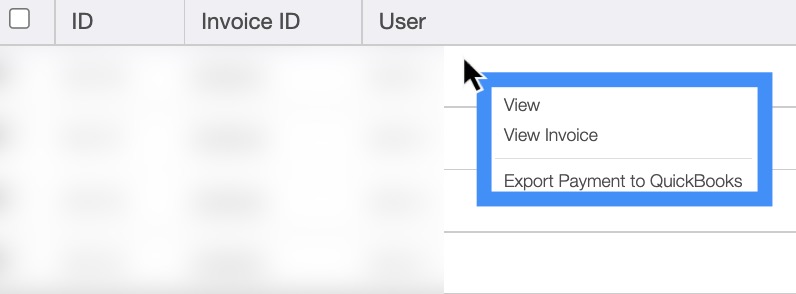
List Tab Right-Click Actions
When right-clicking with your mouse on a device in the "List" tab, you will be able to view the payment details, view the invoice, or export the payment to QuickBooks.
The options that are displayed when you right-click on a payment are also available when you select the Individual Actions button.
Any actions that are done with the right-click actions will only apply to the selected payment:
The definitions for the actions found in the Individual Actions and when you right-click in the "List" tab are below:
| Name: | Description: |
|---|---|
| "View" | Opens the View Payment pop-up window |
| "View Invoice" | Opens the View Invoice pop-up window. |
| "Export to QuickBooks" | Exports the payment to QuickBooks (this is a one-way sync from MobiWork to QuickBooks) |
The "Global Actions" section is located at the top-right of your "List" tab:

The "Global Actions" section includes:
The More Actions button (represented by the three vertical dots) which will allow you to export information to Excel and allow you to edit the payment status
The Question Mark button which will direct you to the respective MobiWork Features page
The Graduation Cap which will activate the Onboarding Assistant

After clicking on the vertical three dots in the top-right corner, the More Actions drop-down menu will appear.
From the More Actions drop-down menu, you can select various actions that will help to manage your payments.
These actions can be performed on a single payment or on multiple payments.
The complete list of actions found in the More Actions drop-down menu are defined below:
| Name: | Description: |
|---|---|
| "Edit Selected Payments Integration Status" | The status of integrating with a third-party software solution such as QuickBooks. Includes the options: Not Applicable, Not Ready for Integration, Integrated, Ready for Integration, and Not Integrated. |
| "Export to Excel" | Exports the payment to an Excel document. |
| "Export to QuickBooks" | Exports the payment to QuickBooks (this is a one-way sync from MobiWork to QuickBooks). |