There are several different ways that you can add an expense into MobiWork. The following subsections will highlight the different ways you can add an expense.
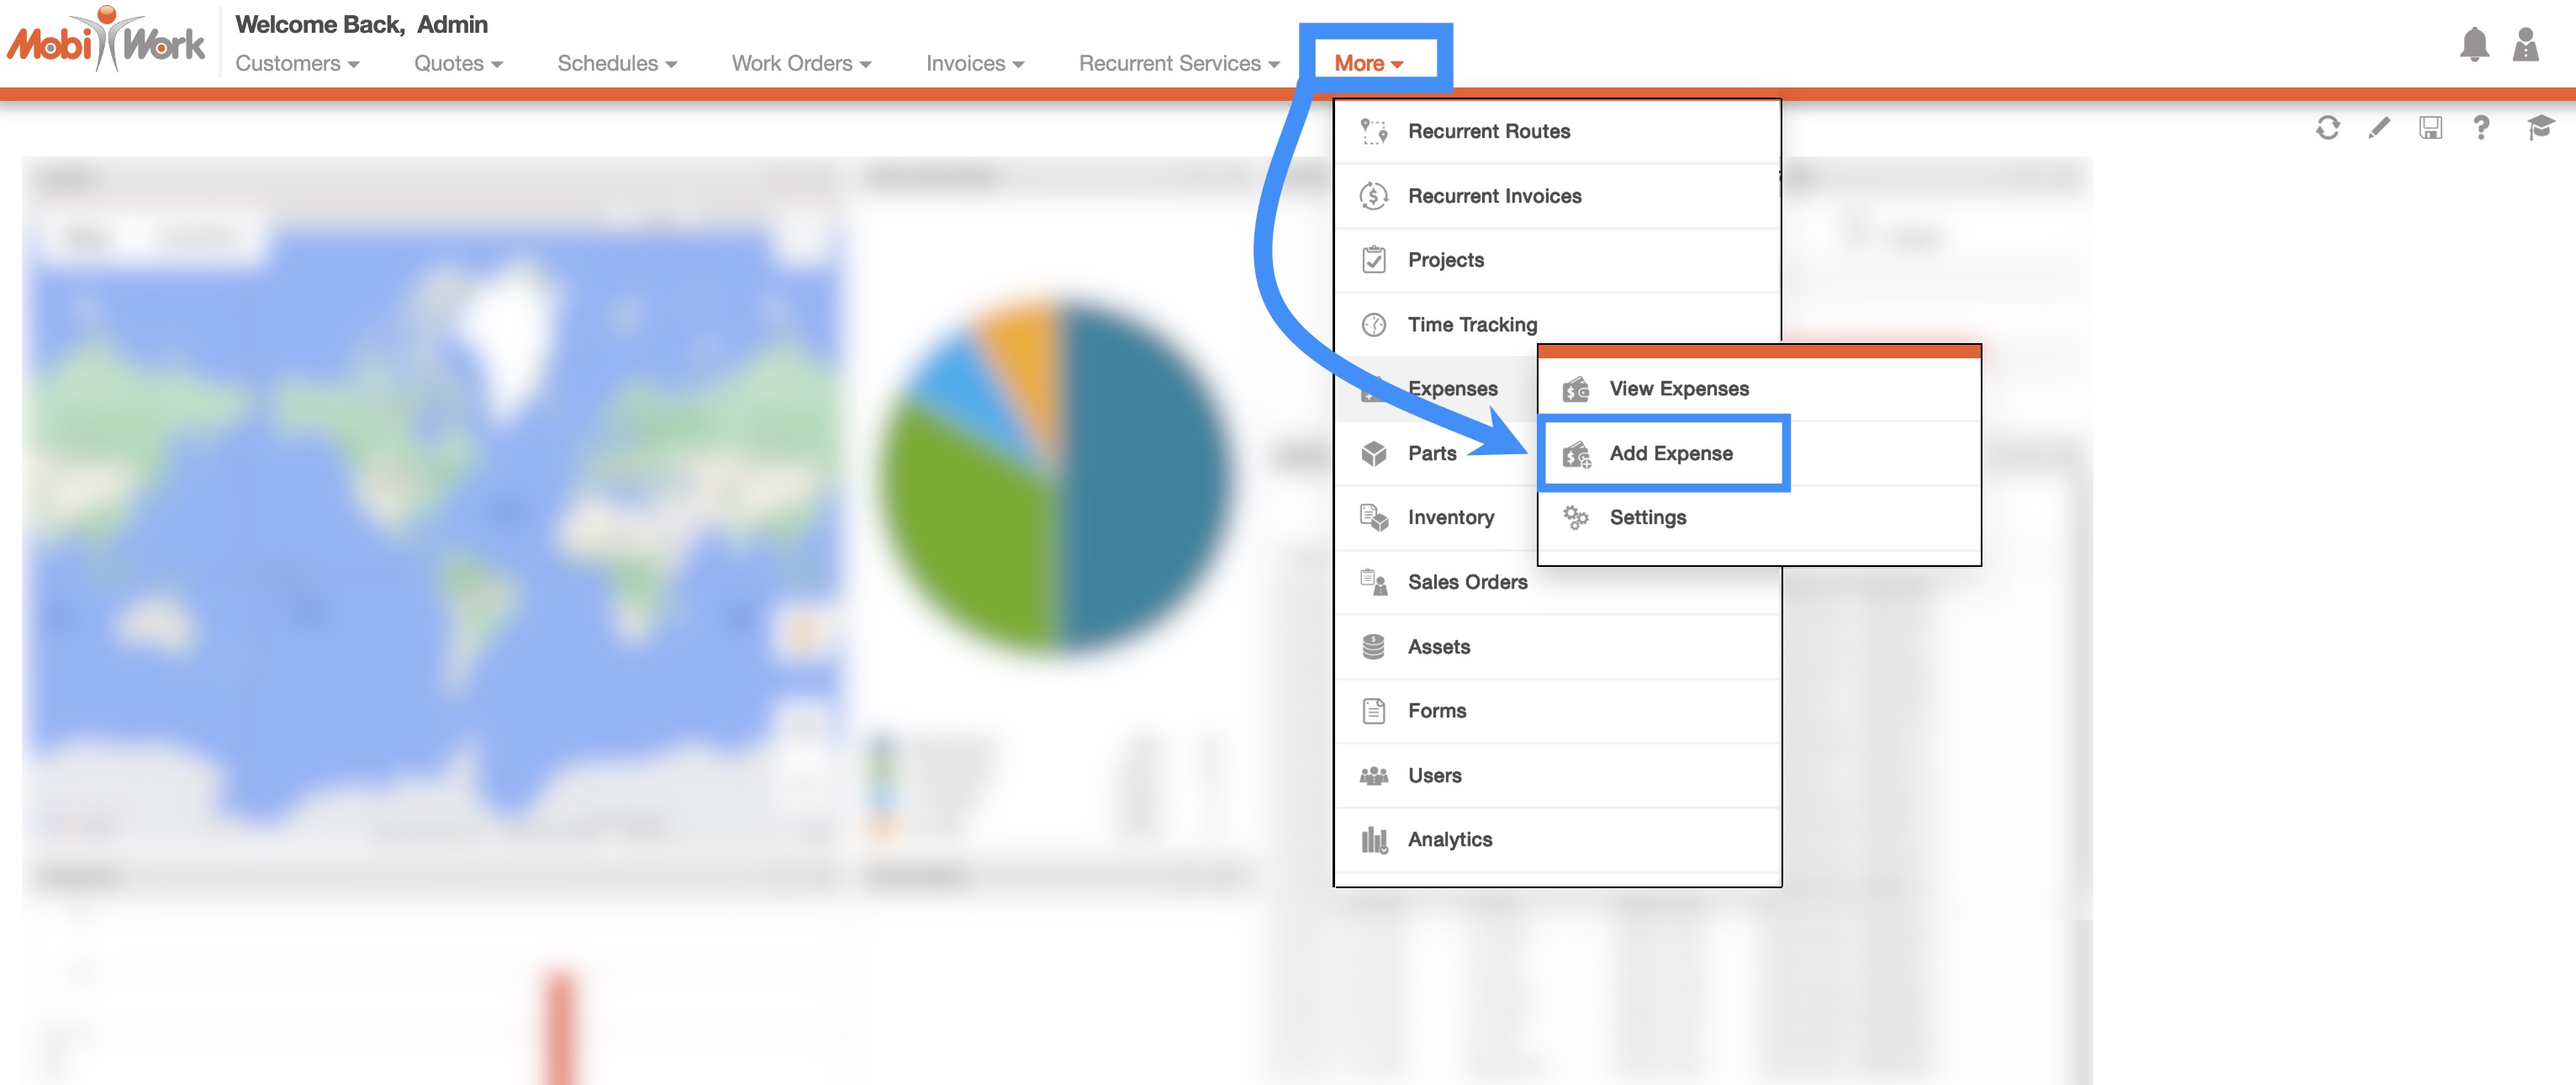
From the Expense Drop-Down
- The fastest and easiest way to add a new expense is by accessing the drop-down menu from the Expense feature located in your MobiWork menu:
Select the "Add Expense" option from the drop-down.
The Add Expense pop-up window will then appear.
From the Expense's More Actions
On the Expenses feature page, you will be able to add an expense by clicking on the Plus Sign button; you will also be able to import your expenses from Excel:
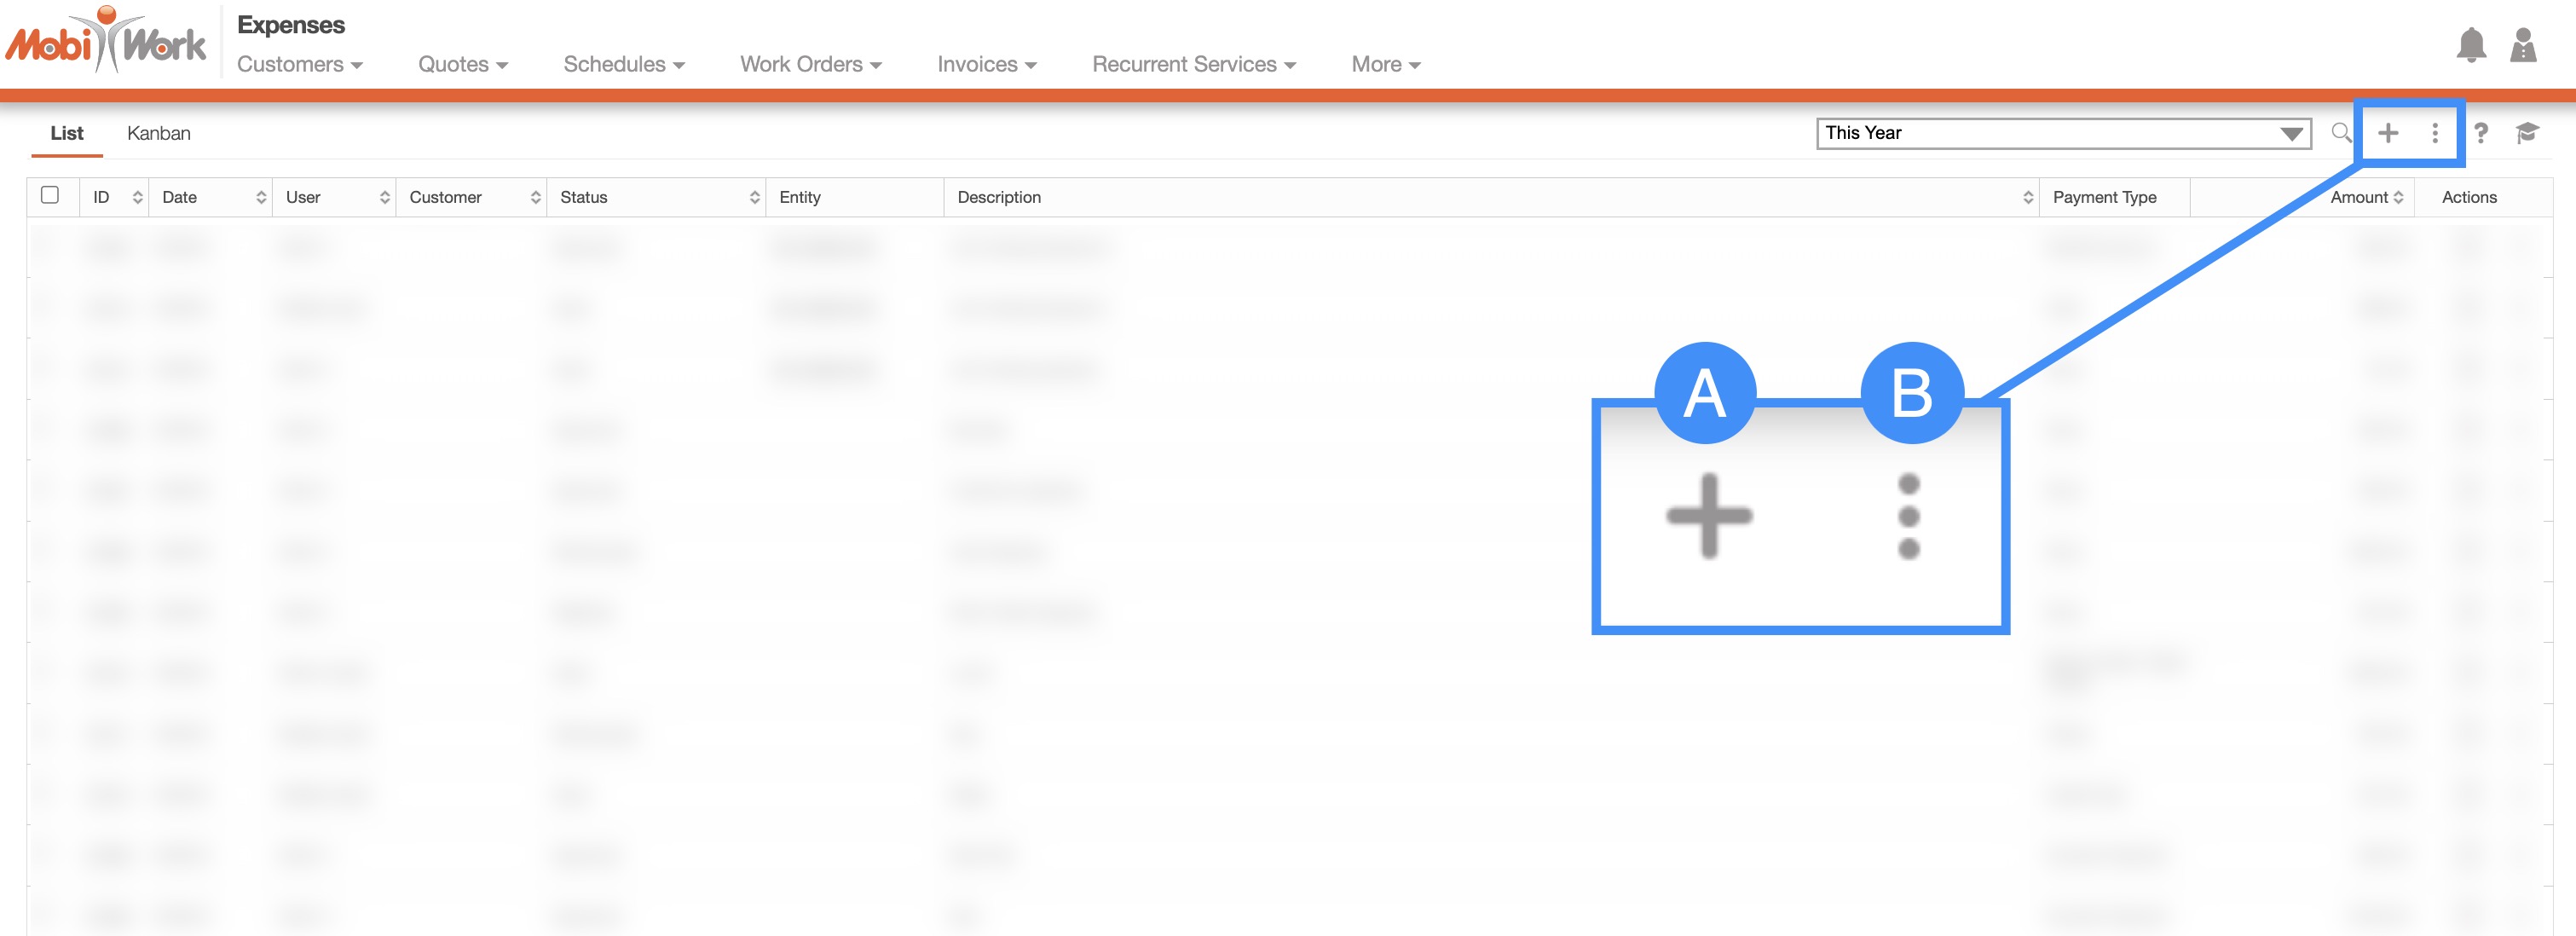
Plus Sign- Adds a new expense.
More Actions- Allows you to access the import drop-down action.
For more information on how to import your expenses, please see the Add Multiple Expenses or the Edit Multiple Expenses page.
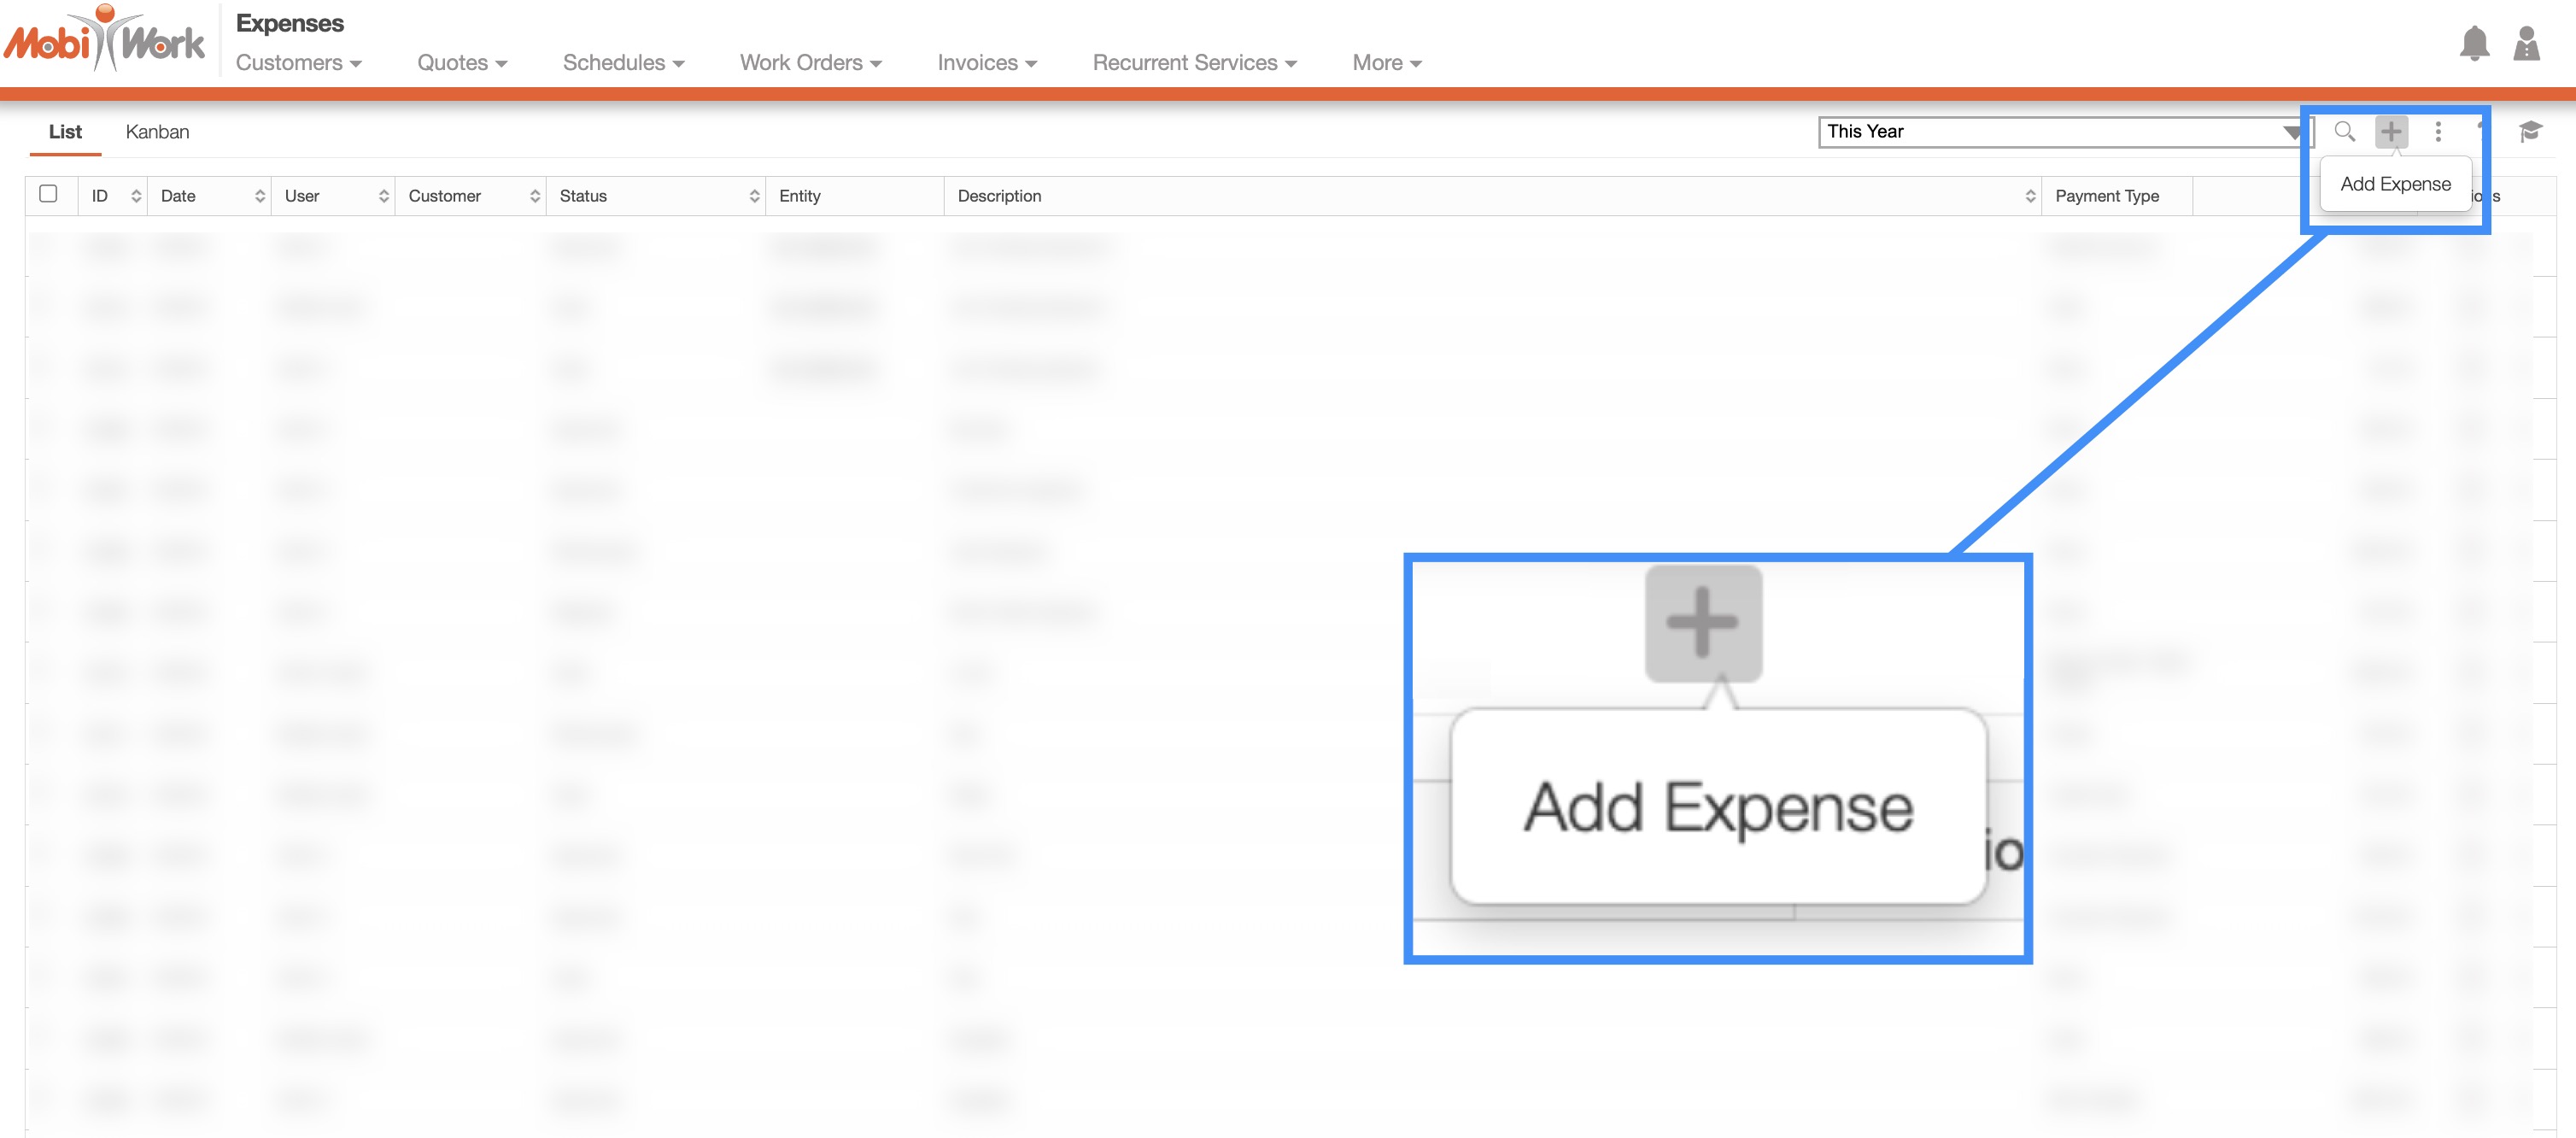
To add a new expense from the Expenses feature tabs, please see the steps below:
- Once you are on any of the tabs, click on the Plus Sign button to add a new expense:
The Add Expense pop-up window will then appear.
Work Order Job Costing Tab
You can also add an expense from the "Job Costing" tab in the View Work Order pop-up window:

From this tab, you can click on the Plus Sign to add a new expense.
Regardless of the method that you choose to add an expense, the Add Expense pop-up window will appear:
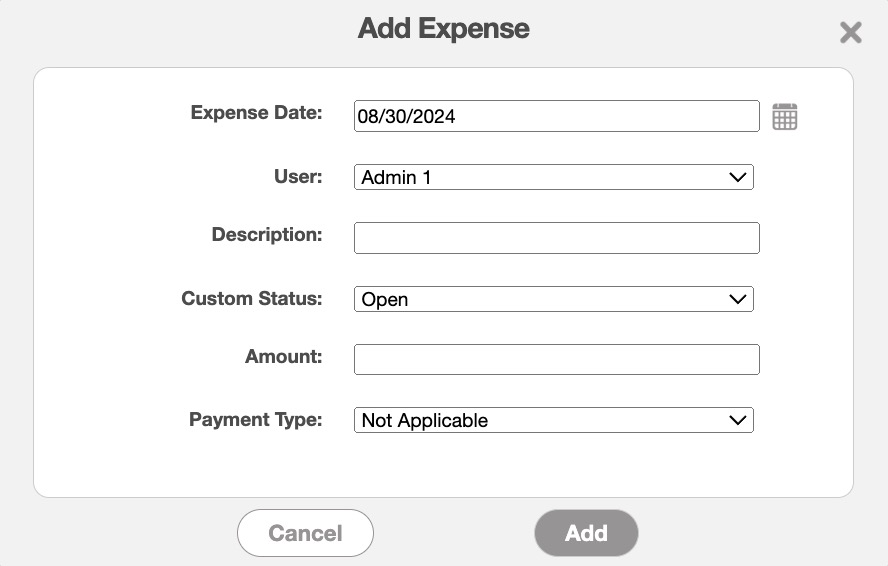
In the Add Expense pop-up window input the following:
The date that the reimbursement is due for the expense.
The user the expense is intended for.
The description of the expense.
The custom status of the expense.
The reimbursement amount.
And payment type the user used to initially pay the expense.
The terms found in the Add Expense pop-up window are defined below:
| Name: | Description: |
|---|---|
| "Expense Date" | The due date of the expense. |
| "User" | The user the expense is intended for. |
| "Description" | The expense description. |
| "Custom Status" | The custom status of the expense. |
| "Amount" | The amount owed for the expense. |
| "Payment Type" | The method the user initially used to cover the payment. |