There are several different ways you can access the View Recurrent Route page in MobiWork.
The following sections demonstrate some common methods of how to access the View Recurrent Route page from your MobiWork web platform.
Recurrent Route List Tab
The easiest way to access the View Recurrent Route page is through the Recurrent Route "List" tab. For more information on how to access the Recurrent Route "List" page, please see the Recurrent Routes List page.
Once you are on the Recurrent Route feature page, there are three different ways to access the View Recurrent Route pop-up window:
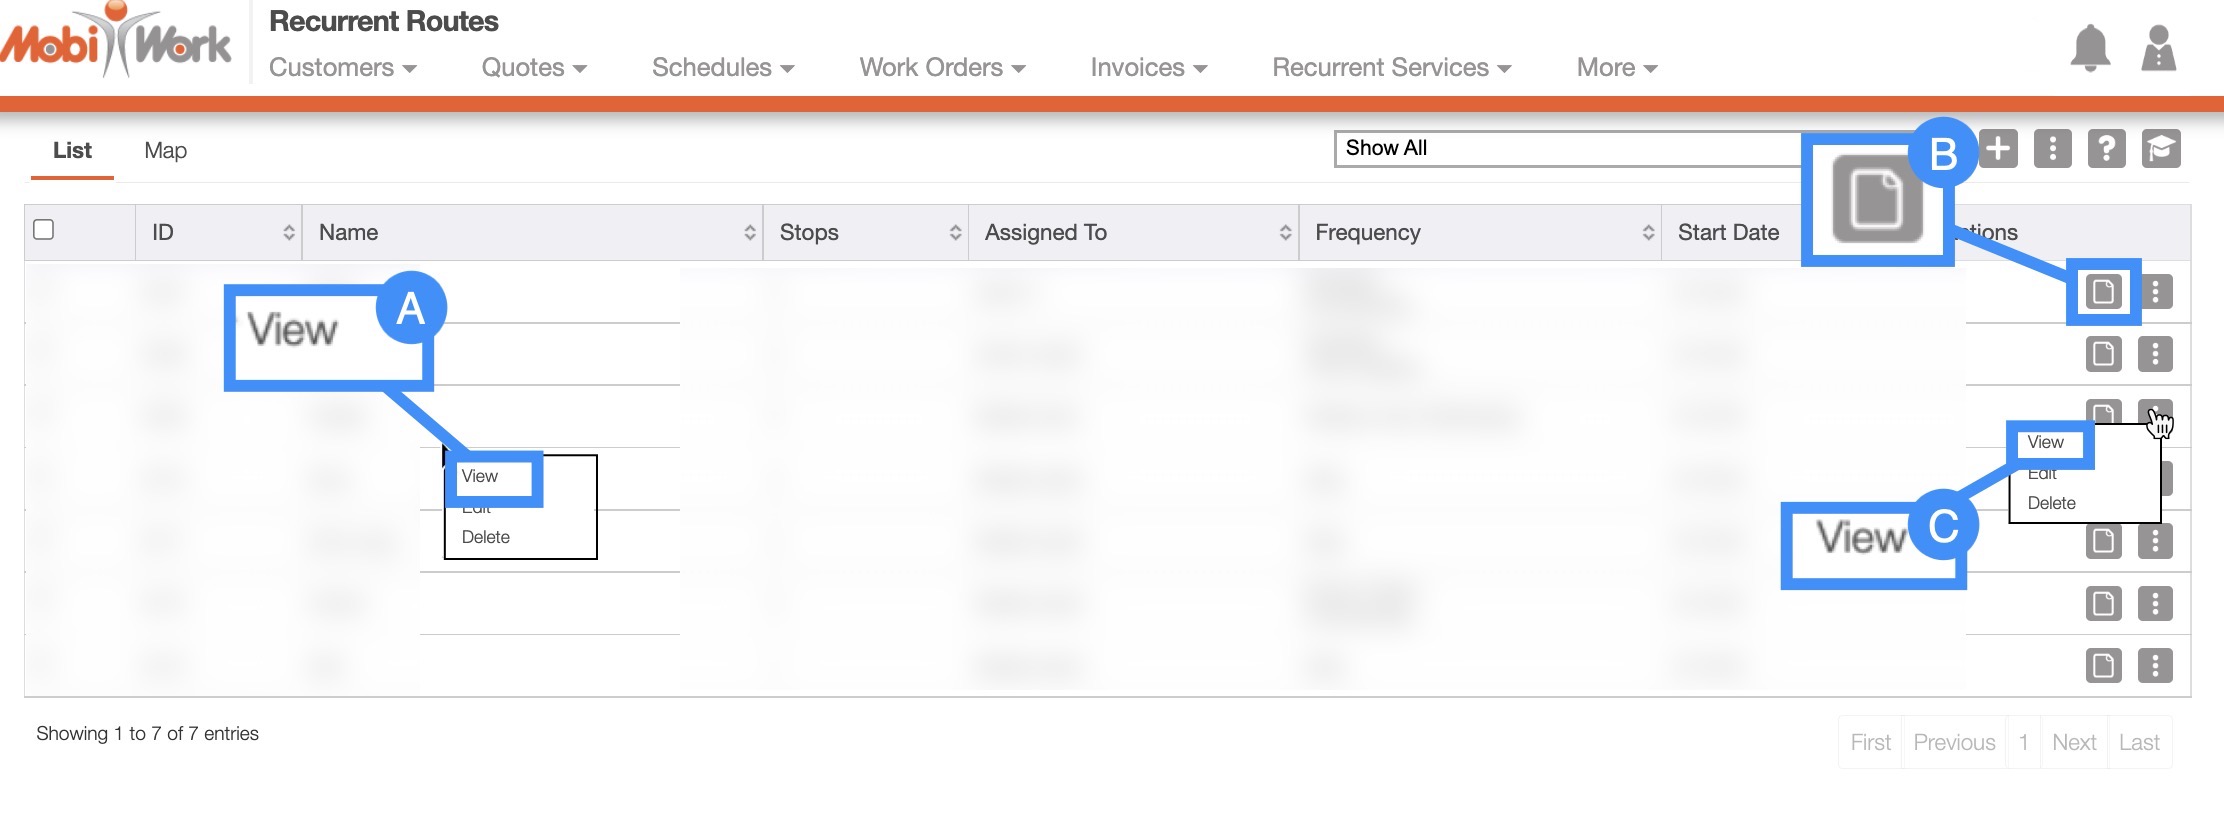
Right-click on the selected recurrent route and click on the "View" option from the drop-down.
Select the View Icon under the "Actions" column.
Click on the "View" option from the Individual Actions drop-down.
Recurrent Route Map Tab
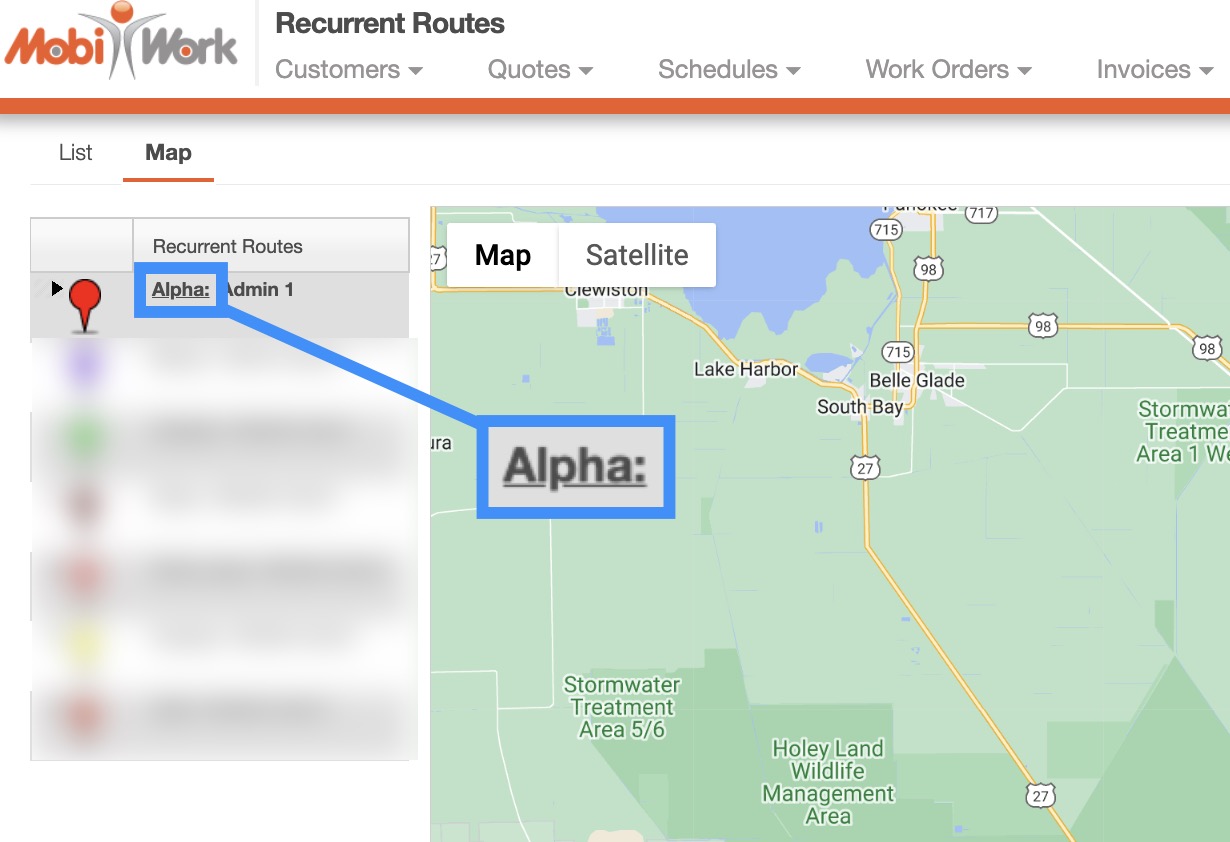
You can also access the View Recurrent Route page through the Recurrent Route "Map" tab. For more information on how to access the Recurrent Route "Map" tab, please see the Recurrent Routes List page.
Once you are on this tab, click on the desired recurrent route's name from the "Recurrent Route" panel to access the View Recurrent Route page:
Regardless of the way that you access the View Recurrent Route page, you will be redirected to the page. On the View Recurrent Route page, you will be able to view the user assigned to the route, all the stops associated with the route, reminders, and more:

The following subsections will go into detail about the sections found on the View Recurrent Route page.
Information Section
The first section on the View Recurrent Route page, is the "Information" section; this section will contain all the pertinent user and frequency information regarding the recurrent route:
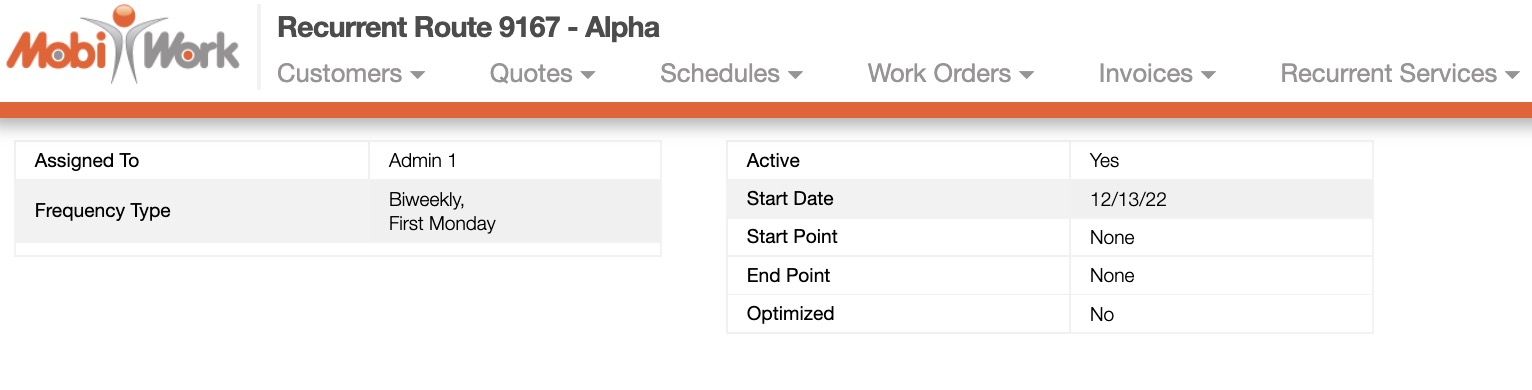
The "Information" section will also allow you to:
View the user assigned to the recurrent route
See how often the recurrent route is repeated
See if the recurrent route is active
View the date the recurrent route is set to begin
View the address of inception and destination address
And to verify if the route has been optimized for travel
The terms found in the "Information" section are defined below:
| Name: | Description: |
|---|---|
| "Assigned To" | The user assigned to the recurrent route. |
| "Frequency Type" | How often the recurrent route will be completed. |
| "Active" | If active, will allow you to create future (new) work orders. |
| "Start Date" | The date that the recurrent route is set to begin. |
| "Start Point" | The starting address of the recurrent routes (e.g., the office). |
| "End Point" | The final address of the recurrent routes (e.g., the final customer's home). |
| "Optimized" | Indicates if route has been optimized (i.e., the miles driven will be minimized). |
Reminders Section
The second section found on the View Recurrent Route page, is the "Reminders" section; in this section you can add reminders for your users regarding the recurrent route. The date and time will automatically have the current date/time; however, you can adjust this as desired:

To add a reminder, click the Add Reminder button and the Add Reminder pop-up window will appear:
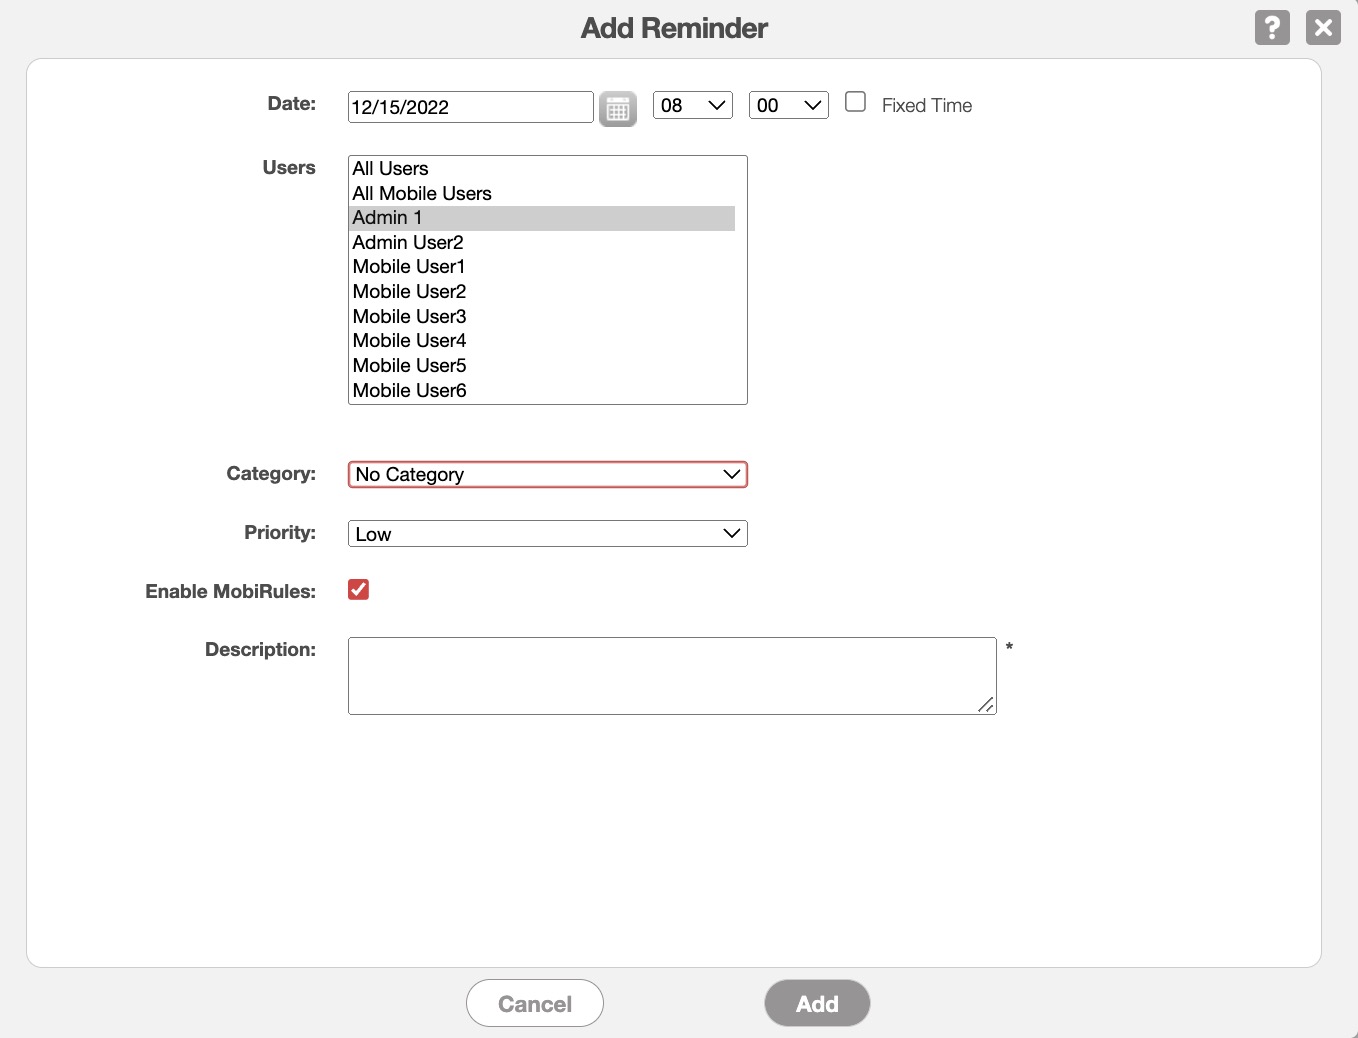
In the Add Reminder pop-up window input the:
Users that the reminder is intended for
Category that the reminder should fall under
Priority of the reminder (e.g., low, high, etc.)
And the text description of the reminder
Once you are satisfied with the information entered, click the Add button.
The terms found in the "Reminders" section are defined below:
| Name: | Description: |
|---|---|
| "Description" | The text description of the reminder. |
| "Assigned To" | The user the reminder is assigned to. |
| "Expiration Date" | The date and time the reminder expires. |
| "Actions" | Will allow you to view, edit, or delete the reminder |
Stops Section
The third section found on the View Recurrent Route page, is the "Stop" section; in this section you will be able to see all the stops that compose the recurrent route:

The stops will be listed in the order that the user will visit them, and will also display the customer's name, full address, work order type, and more.
The "Stop" section is the main component of the View Recurrent Route page. With the More Actions button you will be able to:
Add additional stops (e.g., customers) to the recurrent route
Change the route to selected stops
Optimize the route for efficiency
Display the destinations visually on a map
Delete selected stops on the recurrent route
The "Stop" section will also allow you to:
Edit the stops that comprise the recurrent route
Create a duplicate recurrent route with the same stops that can be used for another user (Clone Route)
And publish the updated recurrent route so that the changes are official
The terms found in the "Stop" section are defined below:
| Name: | Description: |
|---|---|
| "Stop" | The order in which the user will visit the stop (i.e., 1 is the first stop that the user will visit, 2 is the second stop, and so on and so forth) |
| "Customer" | The customer referenced in the specified route stop |
| "Type" | Displays the work order type |
| "Title" | The description of the work order generated. |
| "Actions" | Will allow you to view, edit, or delete the reminder |
| "Actions" | Will allow you to view, edit, or delete the specified route stop |