There are several different ways you can access the Settings page:
- You can directly access the Settings page, by hovering over the Users feature, and clicking on the "Settings" option:
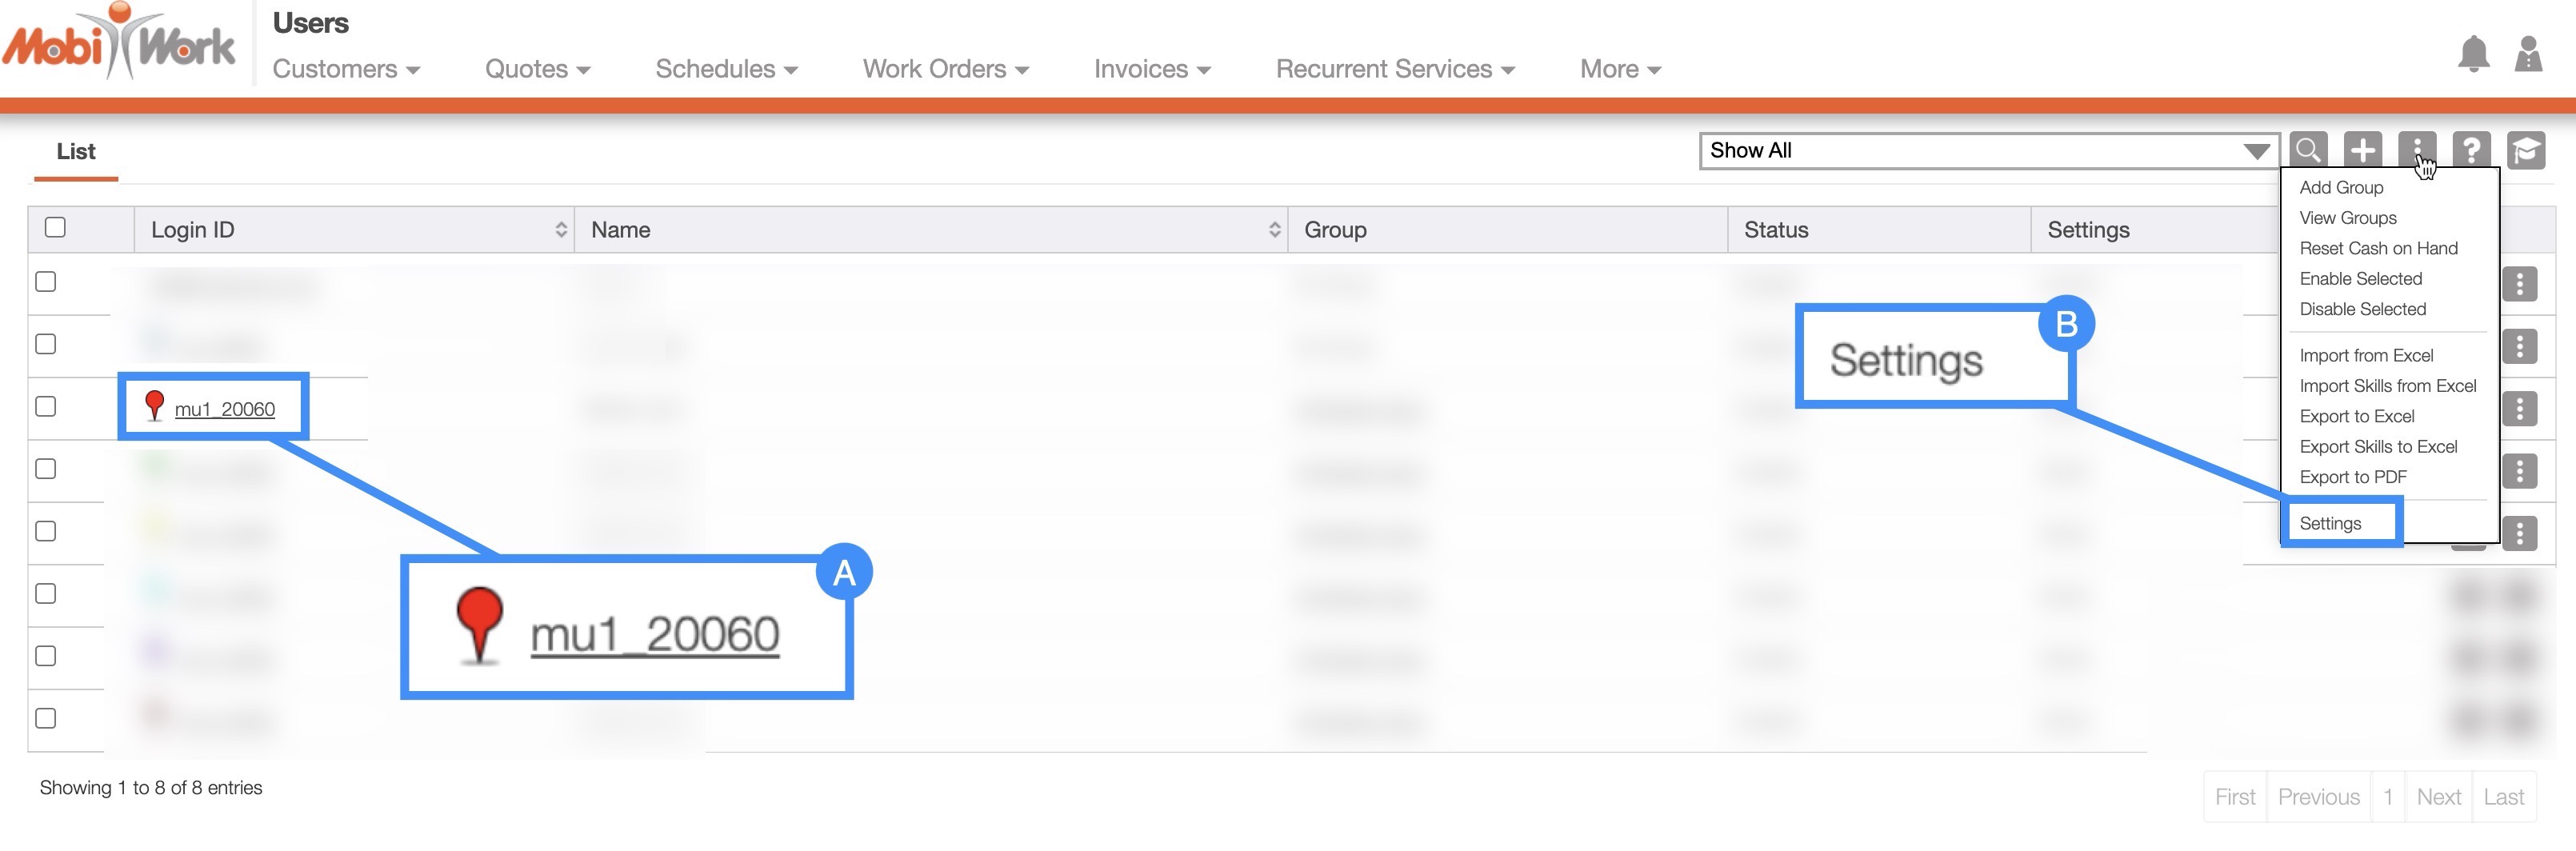
- From the "List" tab there are two different ways you can access the Settings page. For more information on how to access the "List" tab, please see the User List page:
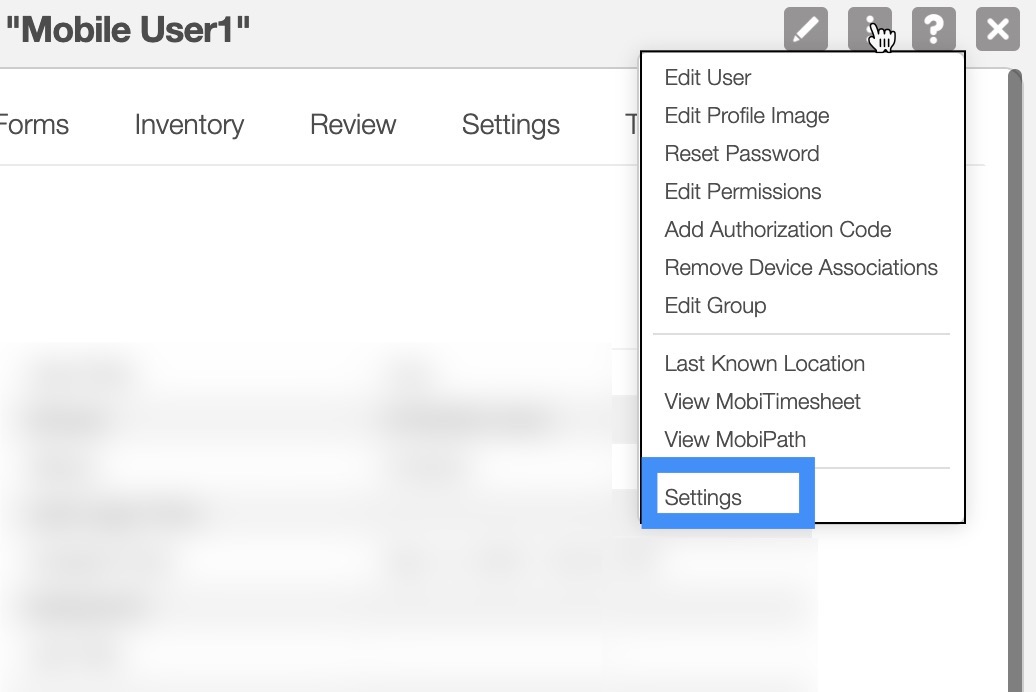
- By clicking on the Customer ID and accessing the View User pop-up window and from the Individual Actions drop-down selecting the "Settings" option:
By clicking on the More Actions button located at the top-right of the User feature page, and from the drop-down selecting the "View Settings" option

Once you are on the Settings page there will be a number of different sections:
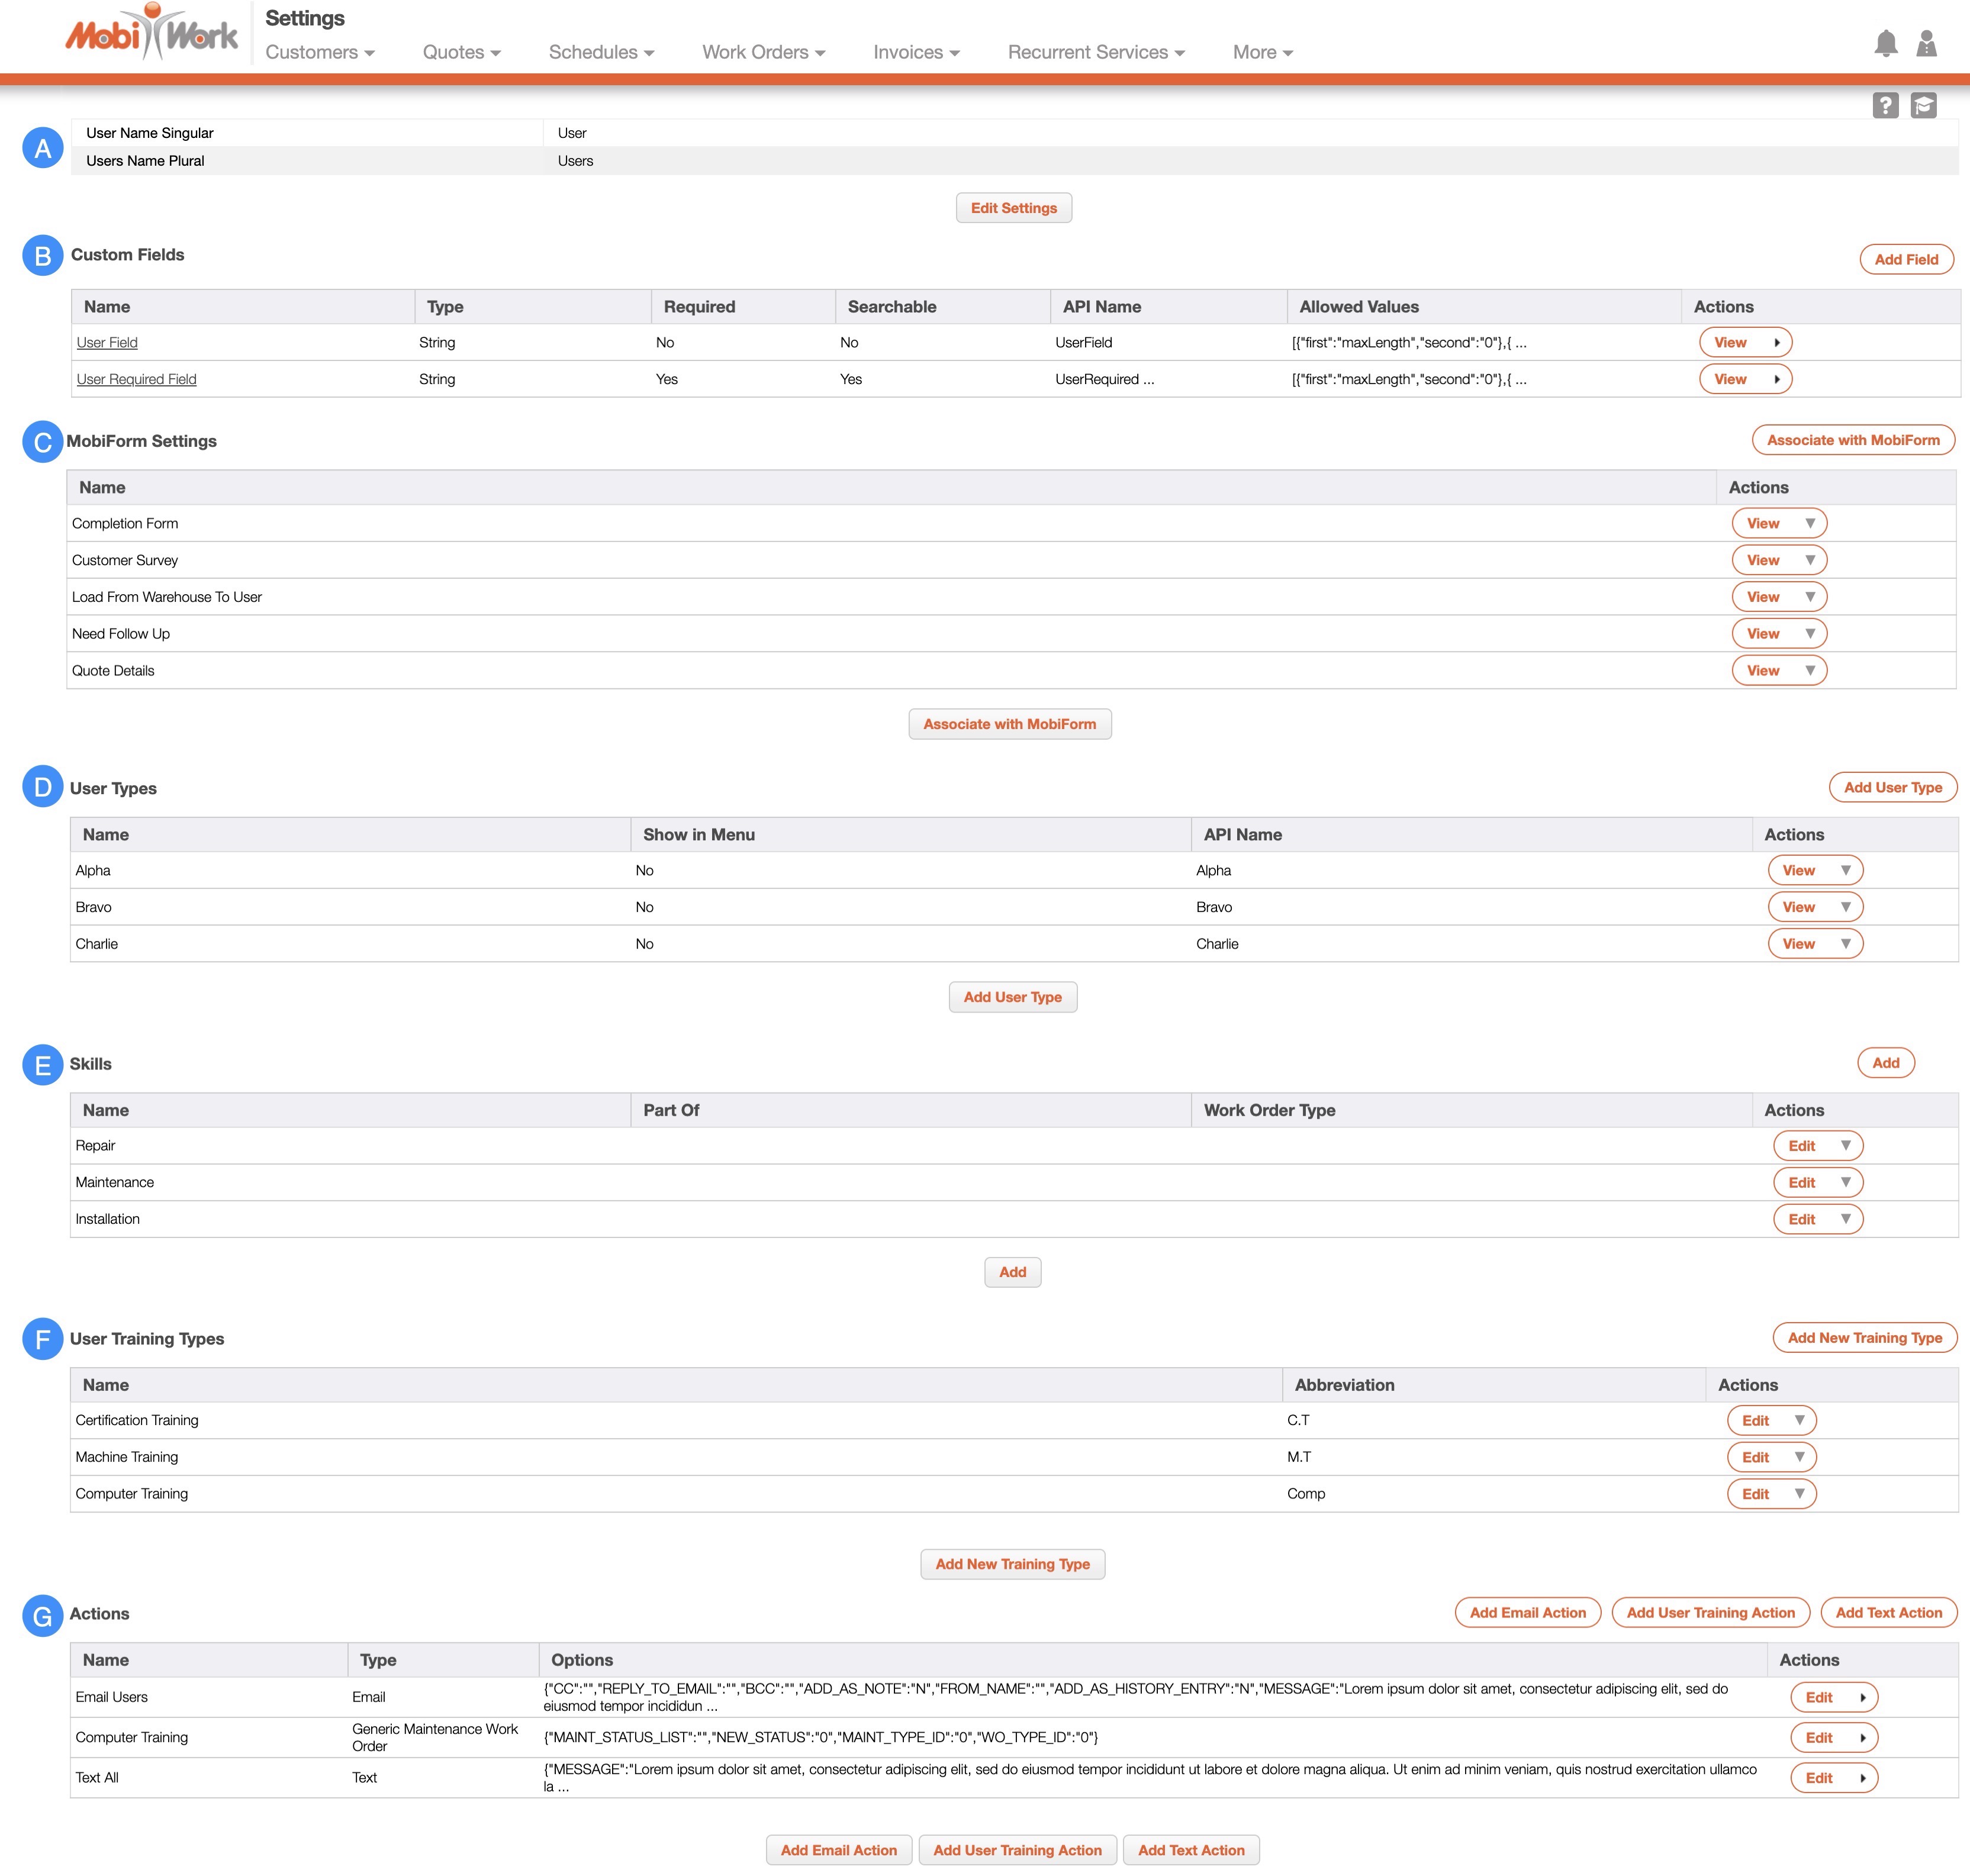
The "Users Settings" section will display both the singular and plural versions of how you refer to your MobiWork users (e.g., employee / employees, technician / technicians, etc.):

You can update the term by clicking on the Edit Settings button and then entering the desired user(s) terms:
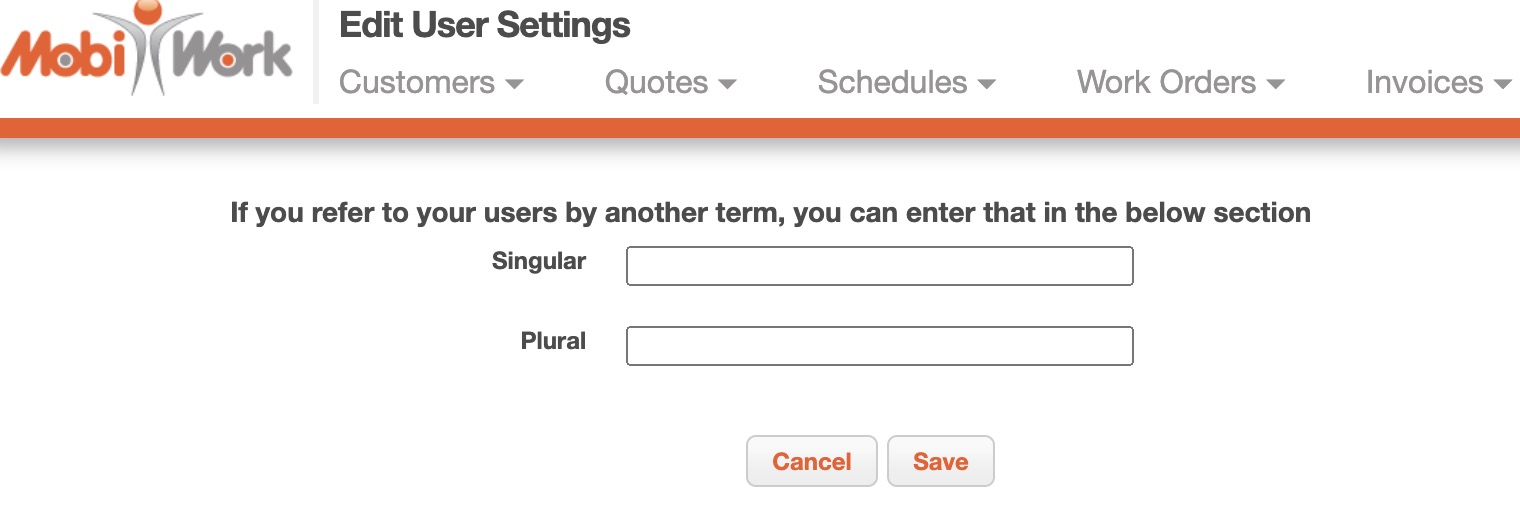
Once you are satisfied with the new term, click the Save button.
The "Custom Fields" section will allow you to add additional fields for your users. These fields will appear when you add, edit, view, or import/export your users.
The custom fields that you add can be searchable, appear once, be open ended, be required or optional, or can be visible or hidden to the customer:

The list of terms found in the "Custom Fields" section are defined below:
| Name: | Description: |
|---|---|
| "Name" | The name of the custom field. |
| "Type" | The type of custom field which include string, number, decimal, date, yes/no, multiple choice, QR code, signature, header, image capture, notes, phone number, phone number plus extension, SSN, time field, text area, vertical separator, vertical spacing, multiple QR code, customer field, product field, user field, project field, asset field, store field, dynamic header, and multiple option dropdown. |
| "Required" | Indicates if the custom field is required to fill or not. |
| "Searchable" | If checked, the custom field will become searchable within the New Search pop-up window. (It will not be searchable in the Free Text Search bar). |
| "API Name" | The API name of the custom field. It is used in the Reporting section and configuring PDFs. It does not change after it is created. |
| "Allowed Values" | Shows the configuration information; only provides value during troubleshooting. |
| "Actions" | Will allow you to view, edit, or delete the selected custom field. |
To add additional custom fields, click on the Add Field button; you will then be redirected to the Add Field page where you can input the desired type of field:
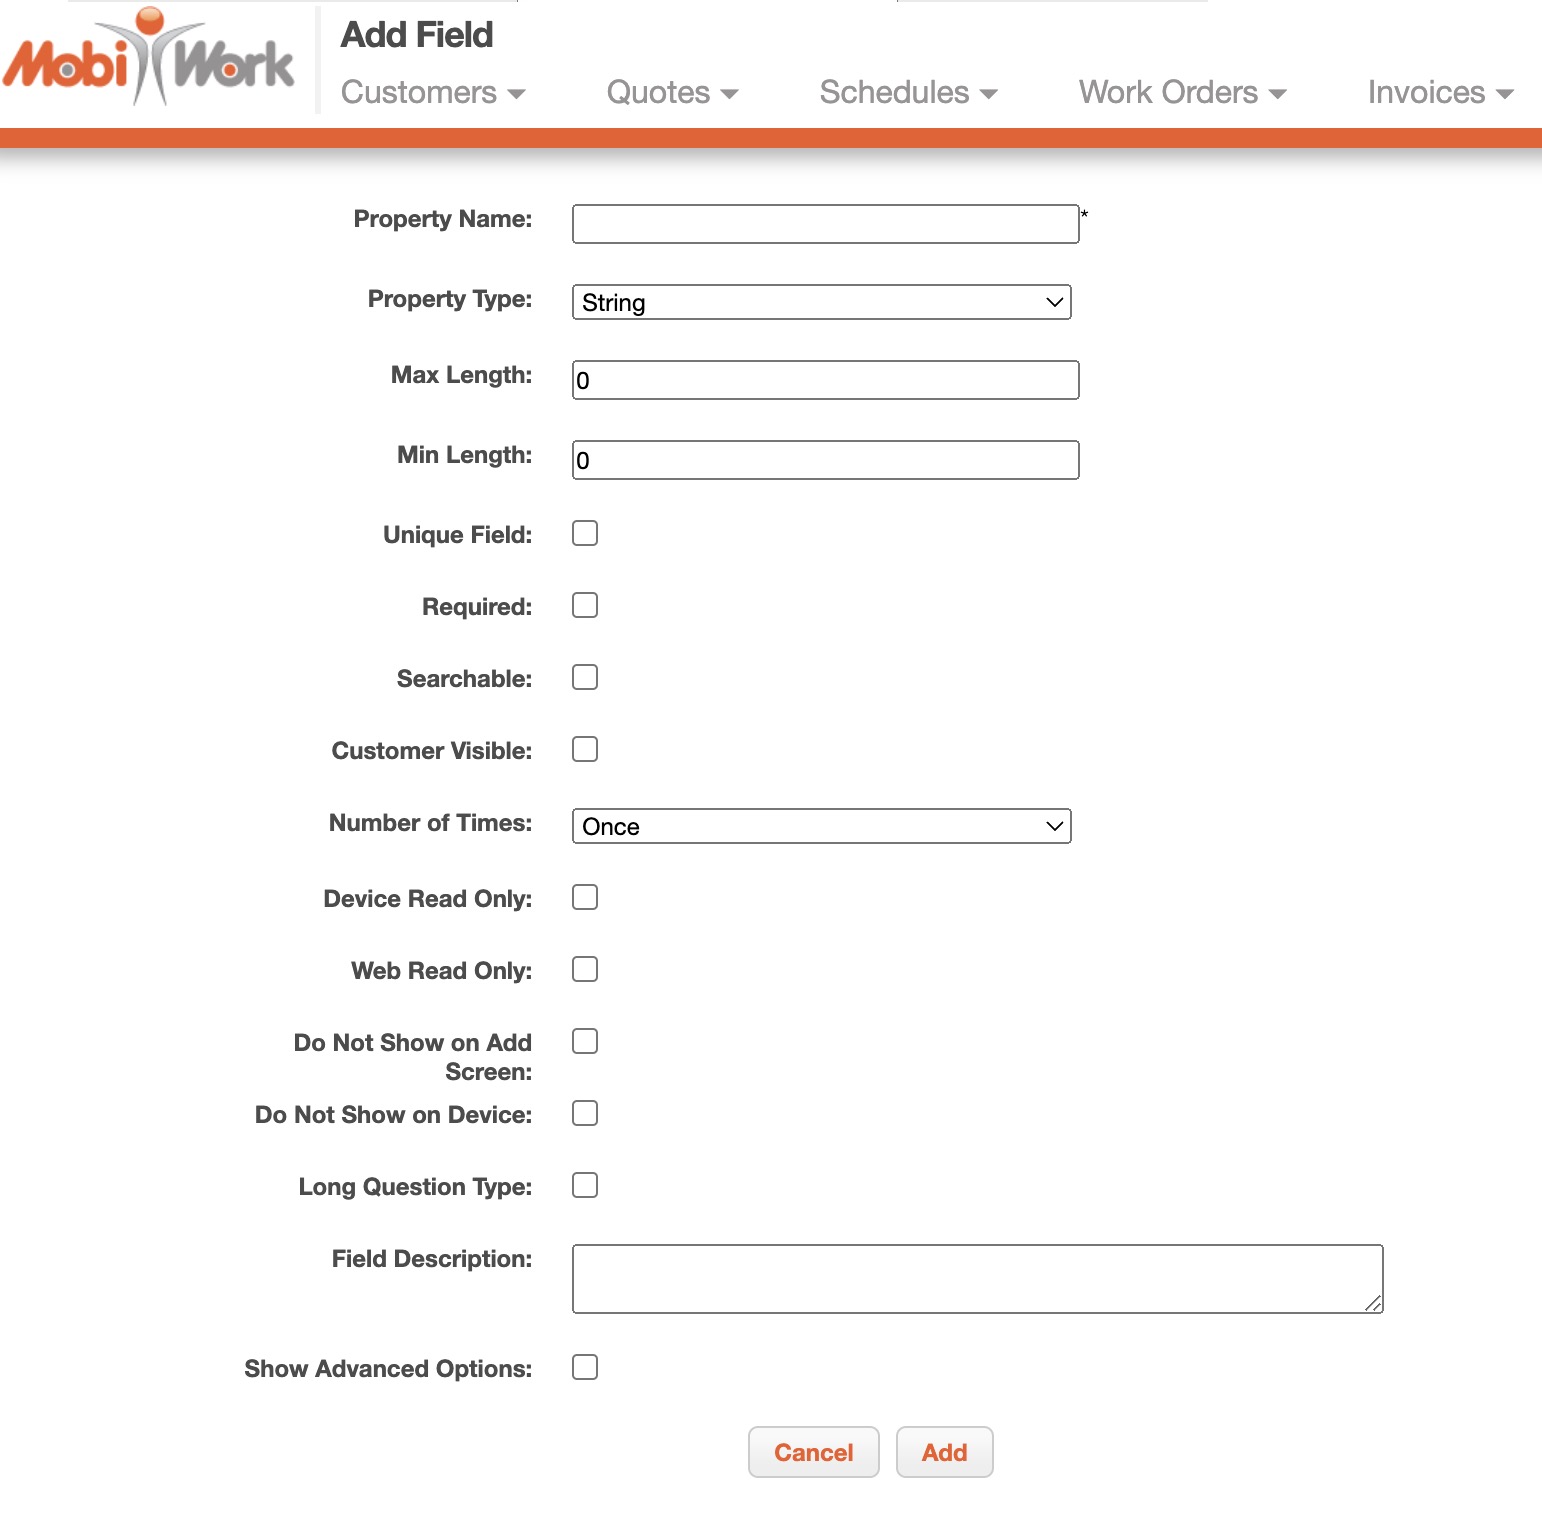
Once you are satisfied with the parameters of the new field, click the Add button to finalize.
The terms found when you add a new custom field are defined below:
| Name: | Description: |
|---|---|
| "Property Name" | The name of the custom field. |
| "Property Type" | is the type of custom field, including the following: |
| ------------------------------------------------------- | --------------------------------------------------------------------------------------------------------------------- |
| "String" | a field where the user can enter text; The field supporting limiting the number of characters that can be entered. |
| "Number" | a number field that does not accept decimals; The maximum and minimum number for the field can be defined. |
| "Decimal" | a number field that does accept decimals; The maximum and minimum number for the field can be defined. |
| "Date" | a field that allows the selection of the date from a pop-up calendar of a 3-field layout; It can be specified whether the current date will automatically appear and cannot be edited. |
| "Yes/No" | a yes/no field indicated by a checkbox. |
| "Multiple Choice" | a multiple option field where the values within it can be specified within "Select Values" by placing a comma between each value; You have the ability to indicate if the first value is invalid (i.e: you can give instructions as the first value, such as Select One:). |
| "QR Code" | a field that captures barcode/QR code data (for the device only). |
| "Signature" | a field to capture signatures (for the device only). |
| "Header" | a bold label that does not allow input. |
| "Image Capture" | an image capturing field that allows photos to be taken or existing images uploaded from the mobile device gallery into the field; It can be specified to not allow images from the device gallery. |
| "Notes" | adds notes to the notes list for the entity; For example, if a form is filled for a work order, then the Note Field content will be added to the work order notes list. |
| "Phone Number" | a phone number field that can be indicated if the phone number will appear in one or three fields. |
| "Phone Number + Extension" | a phone number field that allows an extension to be added; It can be indicated if the phone number plus extension will appear in one or four fields. |
| "SSN" | allows the user to input the Social Security Number within 3 fields (###-##-#### format). |
| "Time Field" | Allows you to specify a 12- or 24-hour time format |
| "Text Area" | a larger text field for multiple sentences, notes, etc. |
| "Vertical Separator" | a vertical line separator between fields. |
| "Vertical Spacing" | places spacing between rows between fields. |
| "Multiple QR Code" | allows the scanning and input of multiple QR codes continuously in this field. |
| "Customer Field" | allows the selection of the customers (available in the permissions) to appear in the field. |
| "Product Field" | allows the selection of the Products (available in the permissions) to appear in the field. |
|
|
|
| "User Field" | allows the selection of the users available in the permissions to appear in this field; Default to Device User will display the user who is logged in on the device within the field. |
| "Project Field" | allows the selection of the projects available in the permissions to appear in the field. |
| "Asset Field" | allows the selection of the assets available in the permissions to appear in the field. |
| "Store Field" | allows the selection of the stores available in the permissions to appear in the field. |
| "Dynamic Header" | allows you to show the data from the associated work order or customer (such as work order description, customer's name, etc.). |
| "Multiple Option Dropdown" | is a dropdown where you can select multiple options. |
| "Document Field" | allows you to upload a document in the field, such as PDF, image, video, etc. |
| "External URL" | a string field that hyperlinks to the URL added in the field. |
| ------------------------------------------------------- | --------------------------------------------------------------------------------------------------------------------- |
| "Required" | Indicates if the custom field is required to fill or not. |
| "Searchable" | If checked, the custom field will become searchable within the New Search pop-up window. (It will not be searchable in the Free Text Search bar). |
| "Customer Visible" | will allow customers to view the form field on the Customer Portal. |
| "Number of Times" | include once, which will show the form field one time, or multiple open-ended, which will add the form field multiple times. |
| "Device Read Only" | means the field cannot be edited on the device. |
| "Web Read Only" | means the field cannot be edited on the web. |
| "Long Question Type" | is for the label of the field; It is a user interface setting which gives more space for the label on the device. |
| "Field Description" | are any comments that describe the field. |
| "Show Advanced Options" | includes the following fields outlined below: |
| "QuickBooks Field Name" | only applies to customer forms/custom fields; This refers to the name of the corresponding field in QuickBooks, which is used during the import/sync. |
| "Label CSS" | is a web only feature that allows the entered HTML CSS attributes to be applied to the field label. |
| "Initial Value for this Field" | sets the initial value of this field when the form is added/opened on the device (This needs to be configured by the MobiWork Professional Services Team). |
MobiForms are fields where user-associated data can be organized and stored (e.g., a customer survey for the user); these forms are associated with a specified user and can be completed by the user.
Users and field workers will be able to view these MobiForms at their own discretion. To add a new MobiForm, click on the Associate With MobiForm button:

Once you click on the Associate With MobiForm button, you will be redirected to the Add MobiForm page. From this page: use the drop-down to select the name of the Mobiform, the location, where it should display, etc.:
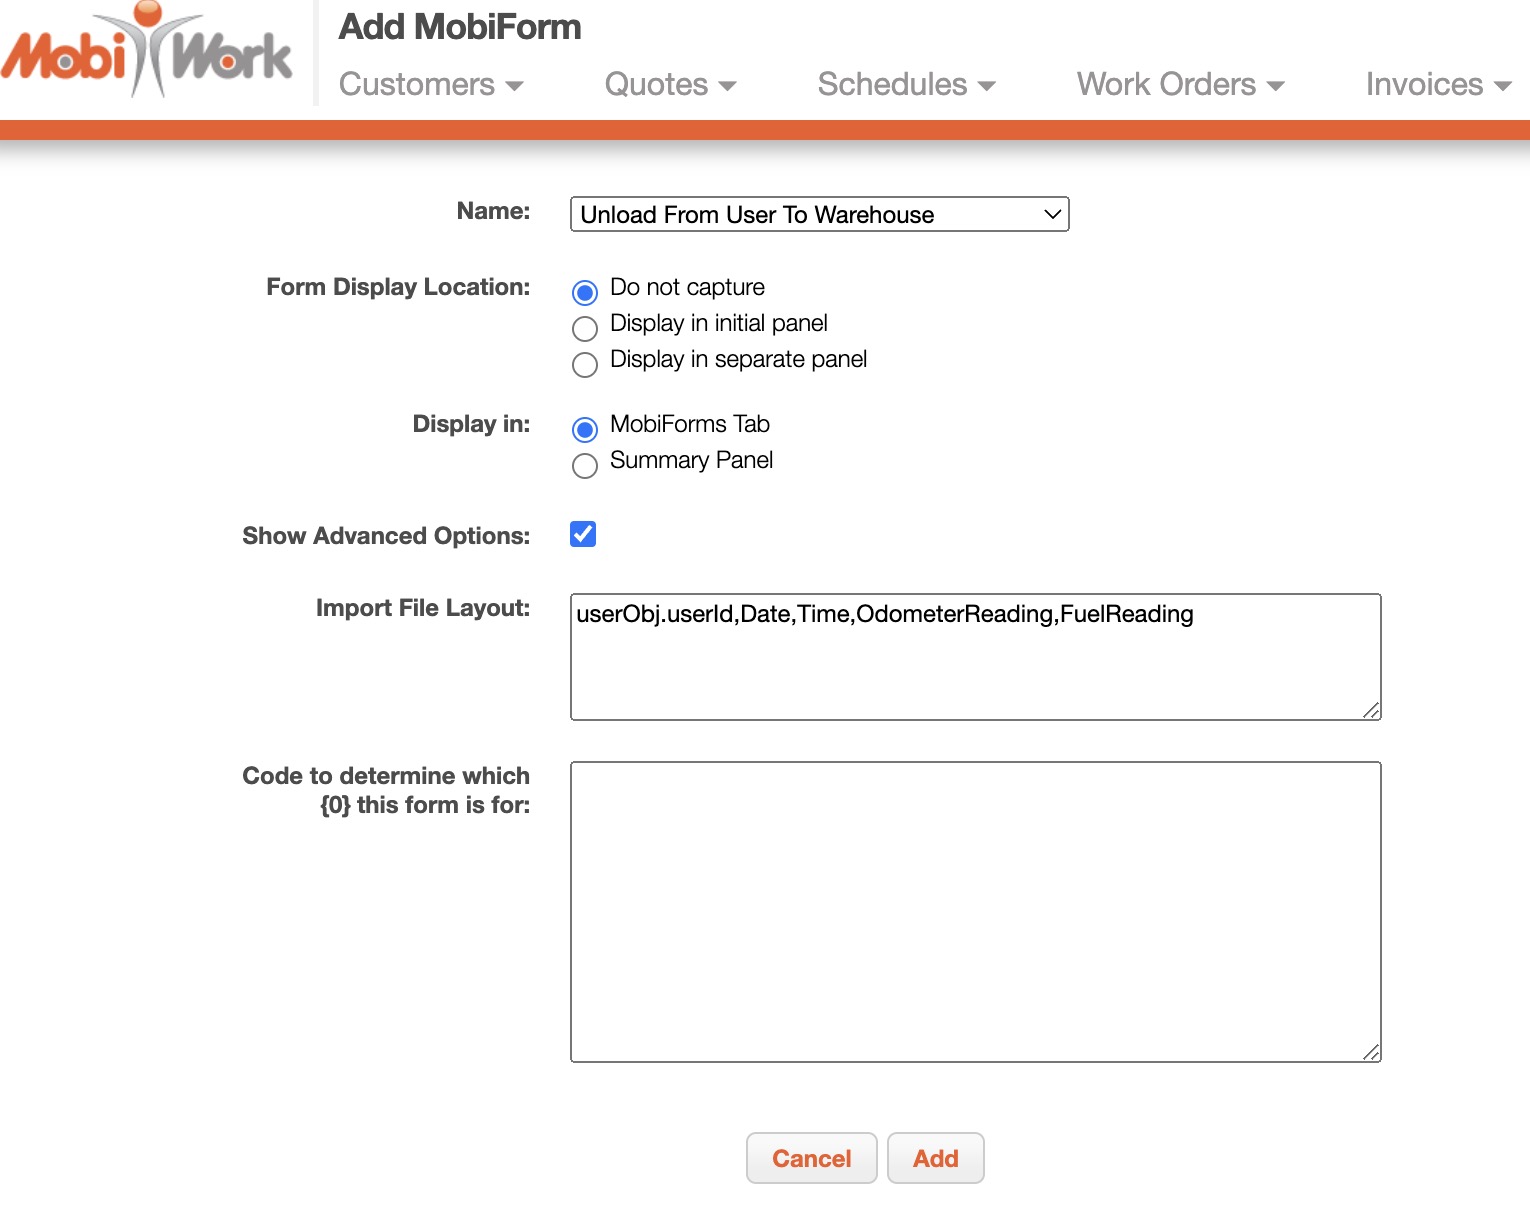
When you are satisfied with the data that the new MobiForm contains, click the Add button.
The terms found when you add a new MobiForm are defined below:
| Name: | Description: |
|---|---|
| "Name" | The name and type of MobiForm |
| "Form Display Location" | Select how information should be captured. Options include- Do not Capture, Display in Initial Panel, and Display in Separate Panel. |
| "Display In" | Select where the form should be displayed (either in the Summary tab or MobiForms tab of the View User pop-up window) |
| "Show Advanced Options" | Click on Show Advanced Options to access the ability to modify the file layout and code to determine which user the form is applicable for |
| "Import File Layout" | The file layout for importing forms |
| "Code to Determine Which {0} This Form is for:" | The code that will determine which user the form is applicable for |
The User Types section will allow you to add a classification or a group for selected users; this will help in organizing and managing a specific group of users:

To add a new User Type, click on the Add User Type button. The Add User Type pop-up window will then appear; enter the name of the user type and if you would like the listed User Type to display in the User tab drop-down from the More tab:
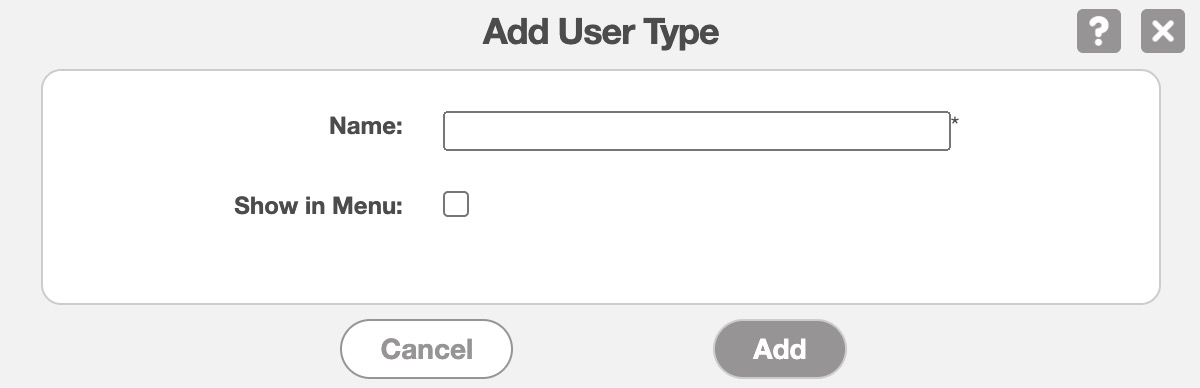
Once you are satisfied with the name, click the Add button to finalize.
The terms found in the "User Types" section are defined below:
| Name: | Description: |
|---|---|
| "Name" | The name of the classification of users |
| "Show in Menu" | If the selected User Type will display in the User tab (from the More tab of your MobiWork menu) |
| "API Name" | The API name of the user type. It is used in the Reporting section and configuring PDFs. It does not change after it is created. |
| "Actions" | Allows you to view, edit, or delete the selected user type |
The "Skills" section will allow you to add skills for your company database. Skills are a major component of what is needed by users to complete a work order:

For more information about skills, please see the User Skills section.
The terms for the "Skills" section are defined below:
| Name: | Description: |
|---|---|
| "Name" | The name of the skill |
| "Part Of" | The specified skill acts as a subset of an umbrella skill |
| "Work Order Type" | The work order type needed for this skill |
| "Actions" | Allows you to edit, or delete the selected user skill |
The "User Training Types" section are routine services that are performed on users; these training types will appear in the View User pop-up window, the "List" tab, and the user dashboard.
You can set up the user training types, so that they will alert the specified user of imminent training dates:

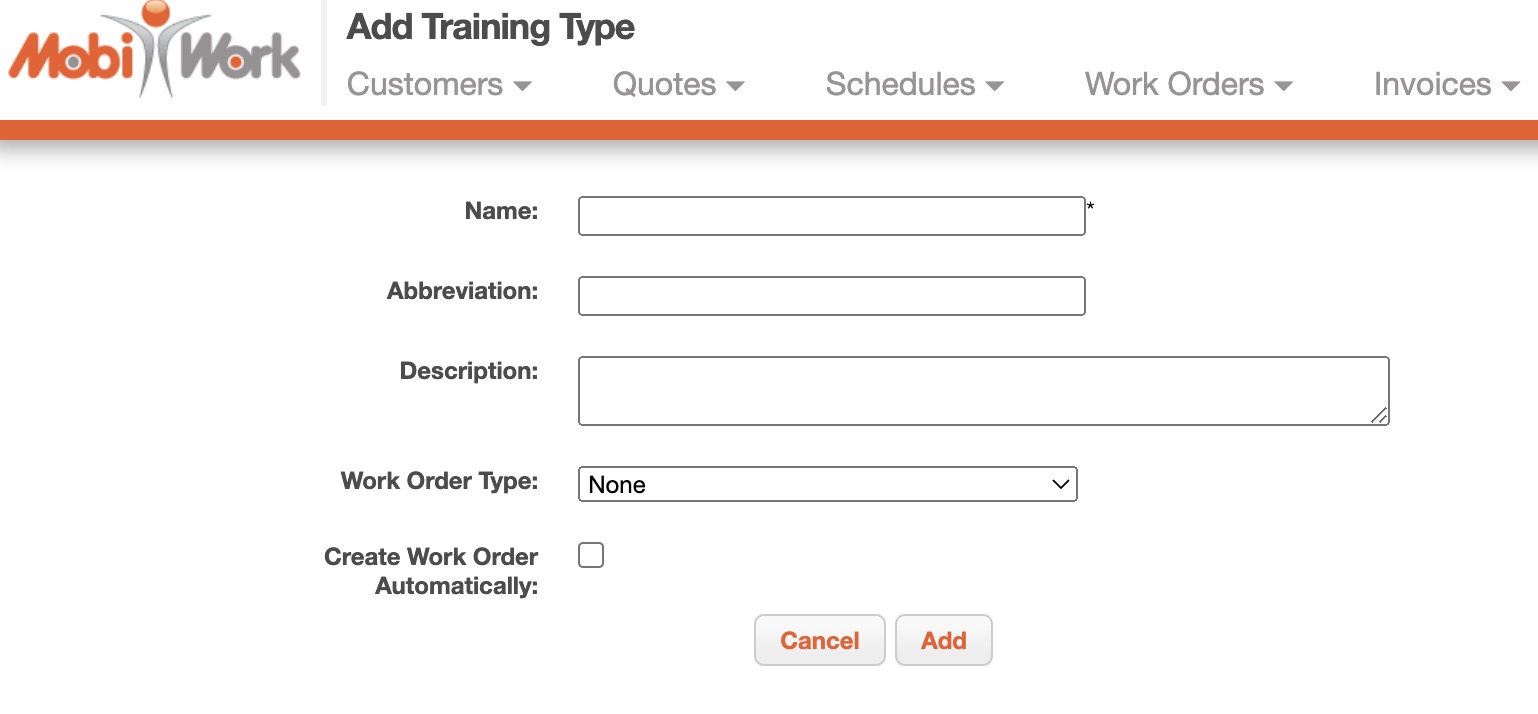
To add a new training type, click on the Add New Training Type button. Once you click on this button, you will be redirected to the Add Training Type page.
On this page, enter the name of the training type, the abbreviation of the name, a description of the type of training, the work order types associated with the training type, and if you would like to have a work order automatically created when training is implemented:
The terms for the "User Training Types" section are defined below:
| Name: | Description: |
|---|---|
| "Name" | The name of the Training Type |
| "Abbreviation" | The abbreviation of the user training type name |
| "Actions" | Will allow you to edit or delete the selected User Training Type |
Actions are a convenient way to perform complex actions on one or more users at once (e.g., sending messages or updates to your users, creating a user training, etc.).
These actions will appear in drop-down actions from the "List" tab, the View User pop-up window and in the device:

There are various actions can choose from; you can add an email, add a text message, or add a user training action.
The columns found in the "Actions" section are defined below:
| Name: | Description: |
|---|---|
| "Name" | The name of the action |
| "Type" | The method in which the action will be performed (e.g., an email action will send out an email, a text message action will send out a text, etc.). |
| "Options" | Shows the configuration information; only provides value during troubleshooting |
| "Actions" | Allows you to edit or delete the action |
Add an Email Action
To add a new email action, click on the Add Email Action button; the Add Action pop-up window will then appear:
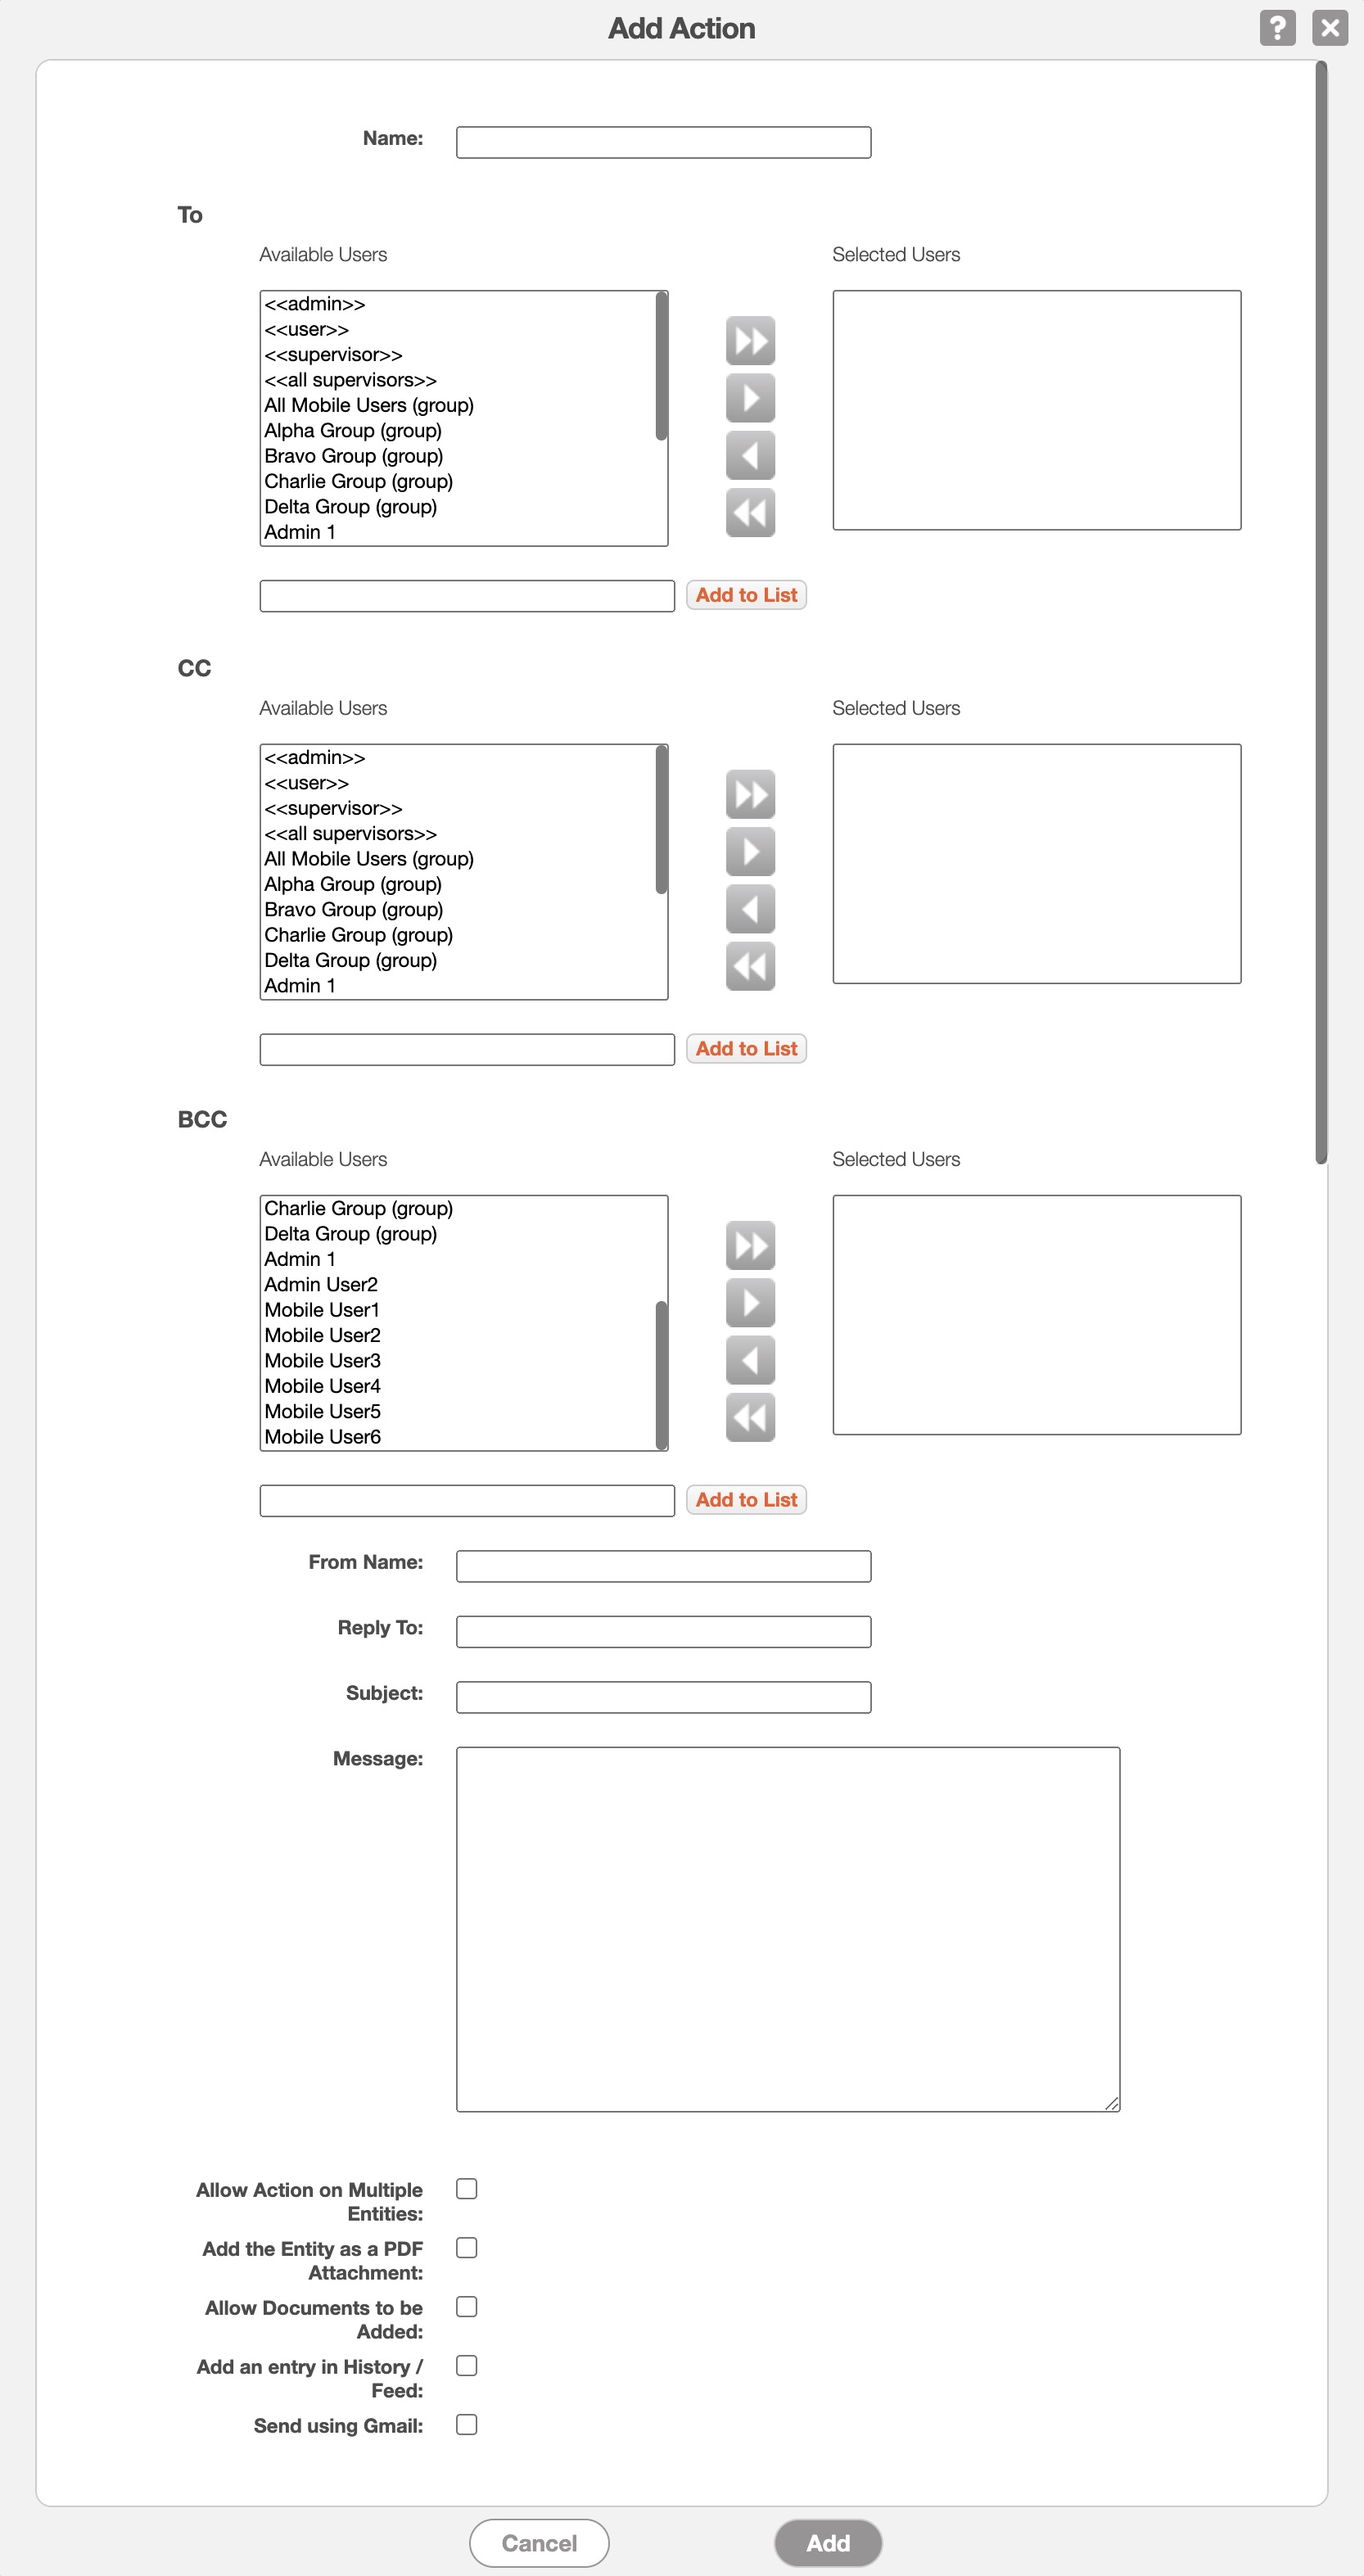
Enter the required information and once you are satisfied click on the Add button to save the new action:
Name- What the email action will be called henceforth.
To- Who will be the recipients of the email message.
CC- Who will be carbon-copied on the email message (receives a copy of the email and is visible to other recipients).
Change Entity Status to- Once the email is sent the entity status will change to the status listed in the drop-down.
From Name- The sender of the email message.
Reply To- The recipient of the email message.
Subject- The subject title of the email message.
Message- The message body of the email message.
Allow Action on Multiple Entities- If checked, the email action can be performed on multiple users.
Add Entity as a PDF Attachment- If checked, will add the entity information as a PDF attachment.
Allow Documents to be Added- If checked, documents can be added to the email action.
Add a Note to the Entity- If checked, will add a note to the entity.
Send using Gmail- If checked, the email will be sent using Gmail.
Change Entity Status to- Once the email is sent the entity status will change to the status listed in the drop-down.
Add User Training Action
To add a new user training action, click on the Add User Training Action button; the Add Action pop-up window will then appear:
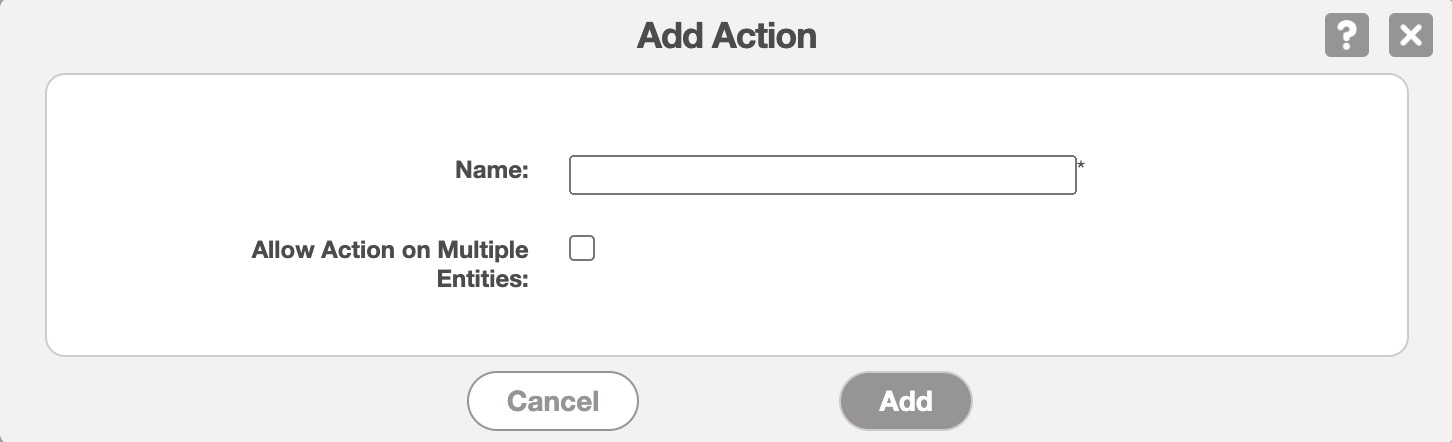
Enter the required information and once you are satisfied click on the Add button to save the new action.
Add a Text Action
To add a new text action, click on the Add Text Action button; the Add Action pop-up window will then appear:
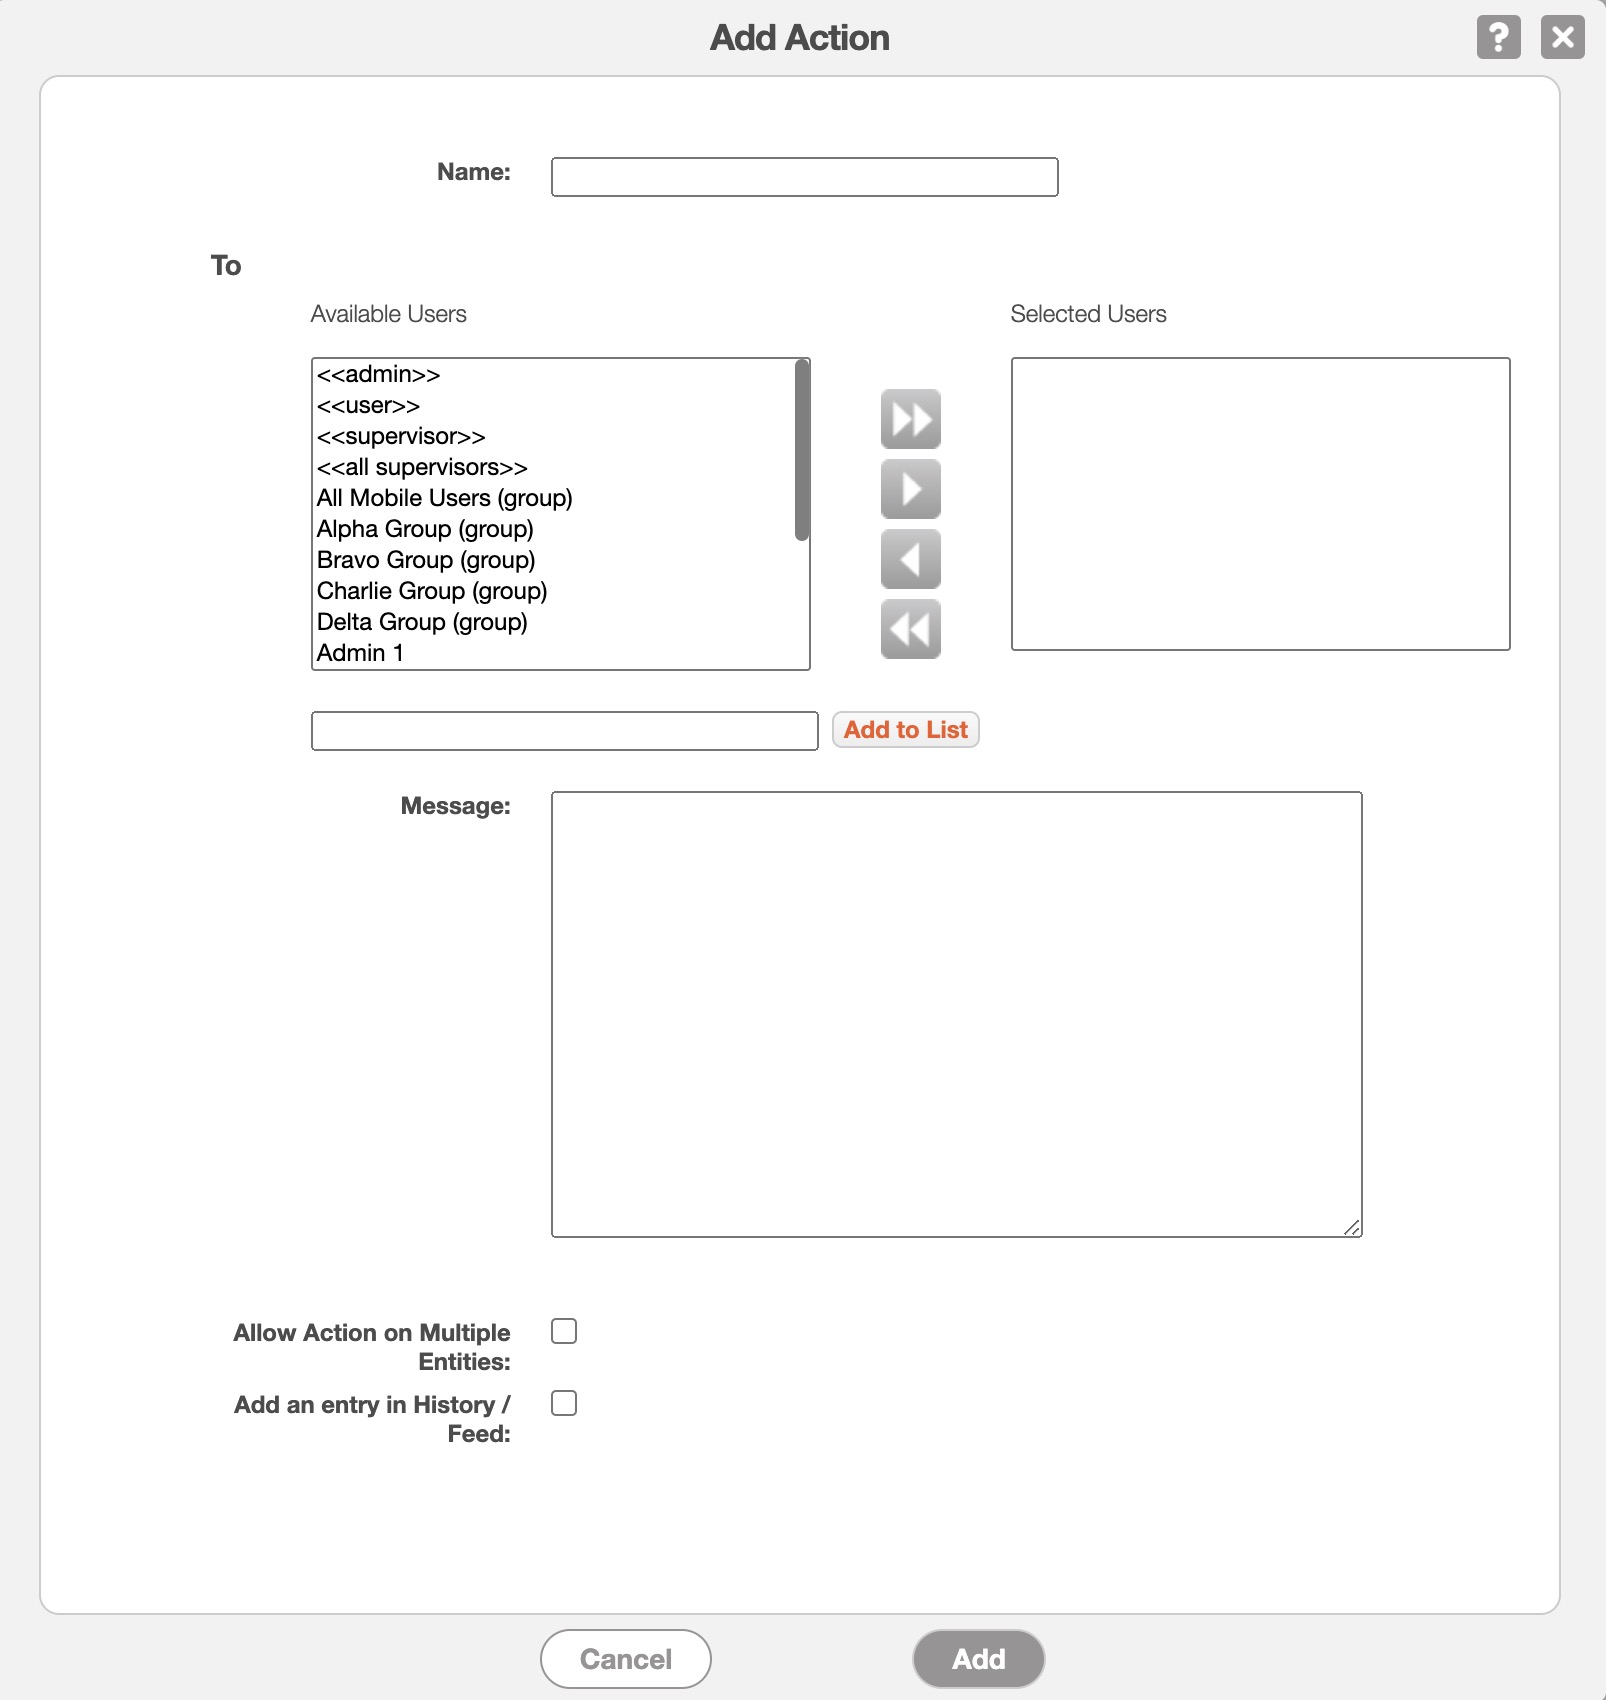
Enter the required information and once you are satisfied click on the Add button to save the new action:
Name- What the text action will be called henceforth.
To- Who will be the recipients of the text message.
Message- The message body of the text message.
Allow Action on Multiple Entities- If checked, the text action can be performed on multiple quotes.
Add a Note to the Entity- If checked, will add a note to the entity.