You can add a vendor in MobiWork through the More Actions from the Vendor List page. For more information on how to access this page, please see the Vendor List page:
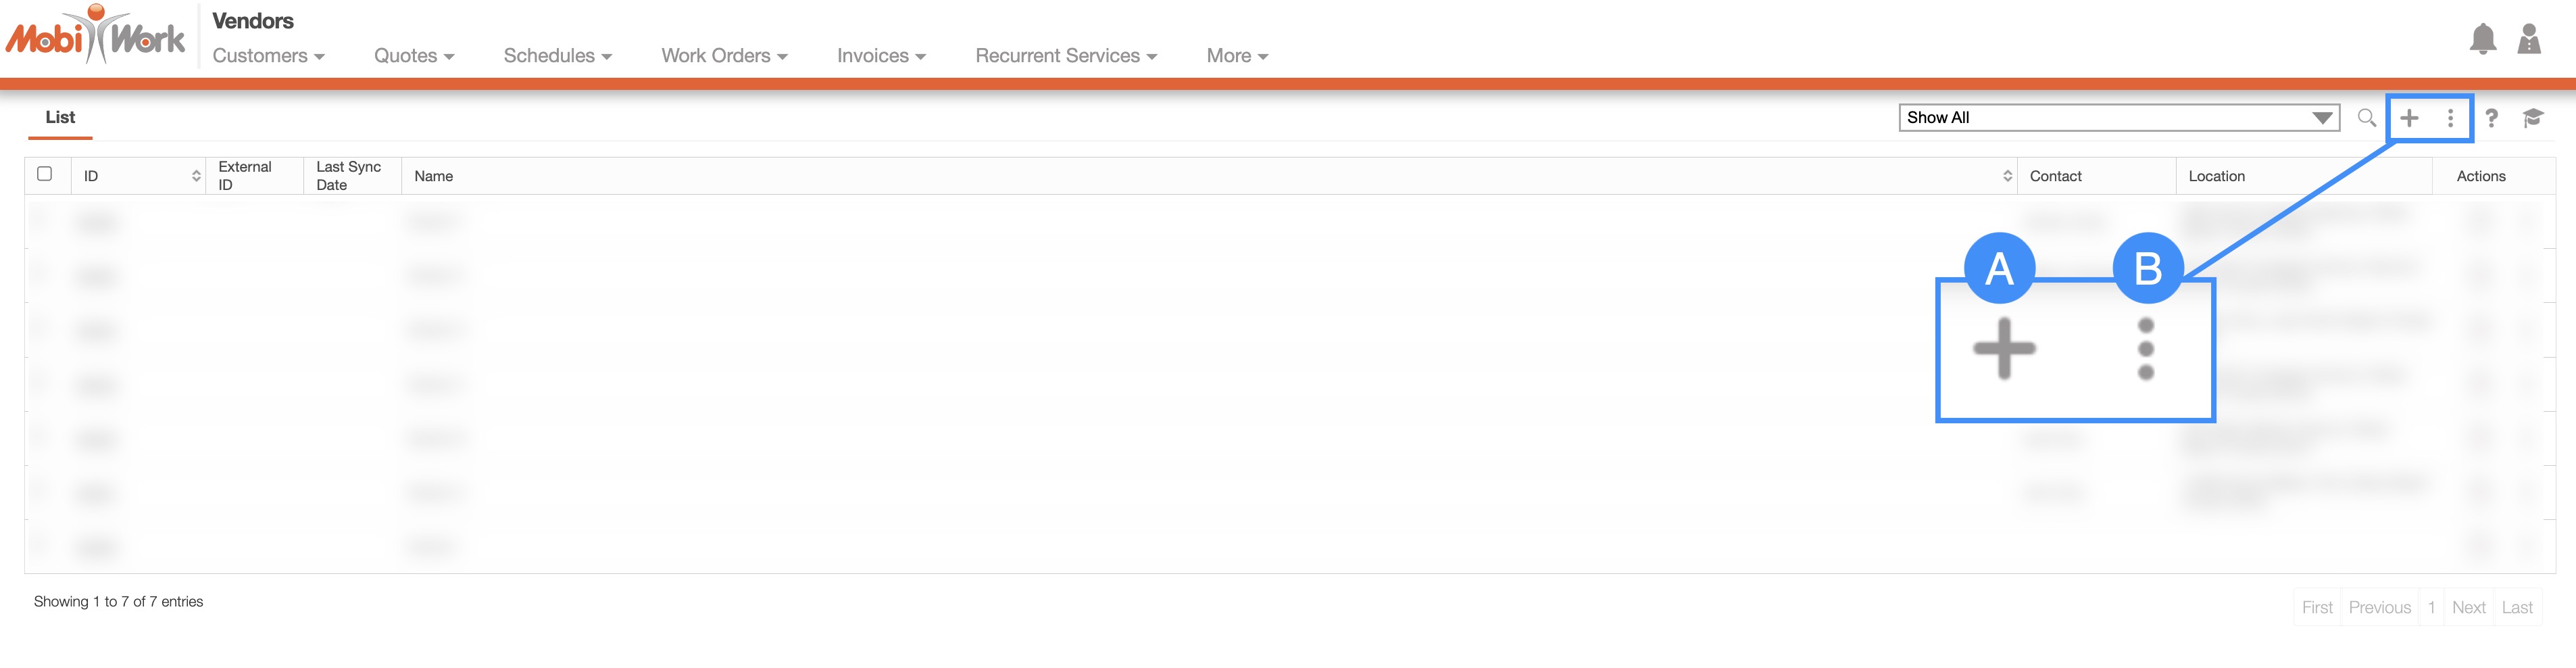
Plus Sign- Adds a new vendor.
More Actions- Allows you to access the import drop-down actions. For more information on how to import your vendors, please see the Add Multiple Vendors or the Edit Multiple Vendors page.
To add a new vendor from the Vendor List page, please see the steps below:
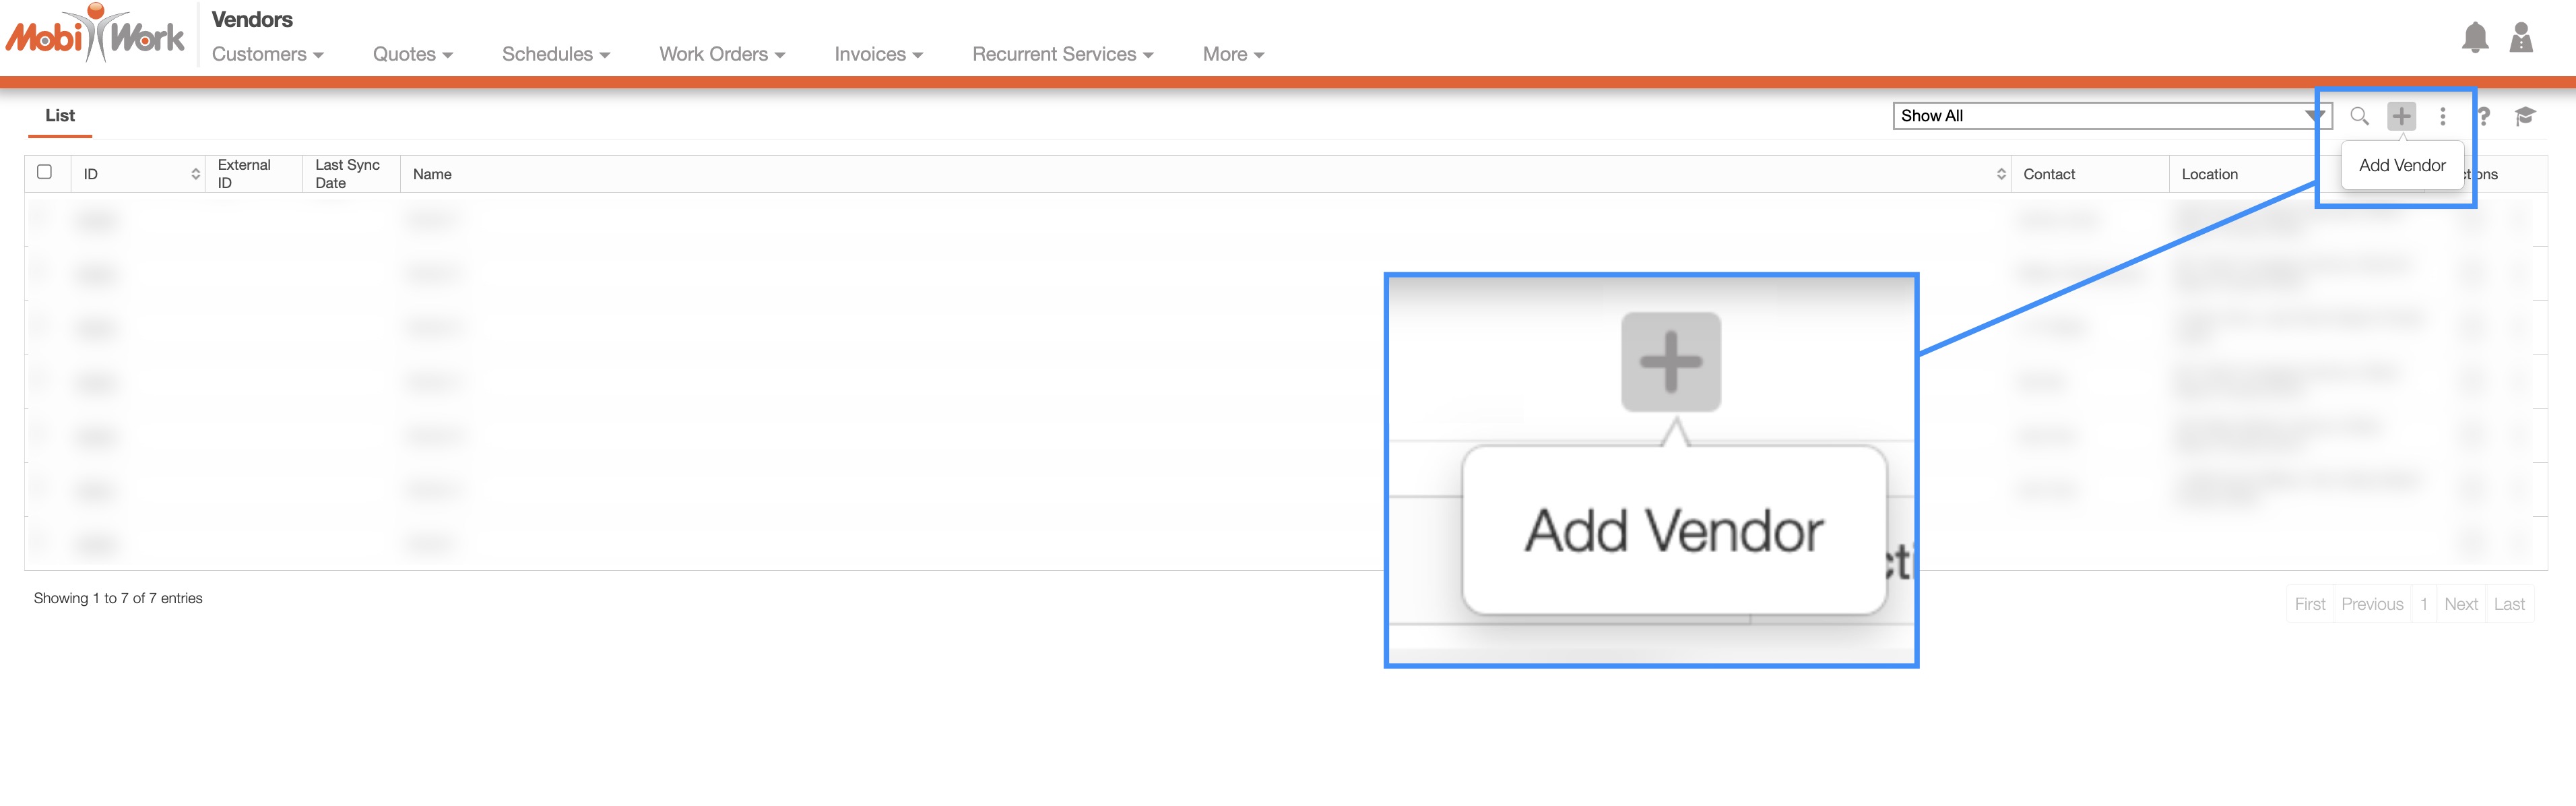
Once you are on the Vendor List page, click on the Plus Sign to add a new vendor:
The Add Vendor pop-up window will then appear.
From the Add Vendor pop-up window you will be able to input the name, address, and more regarding the new vendor:
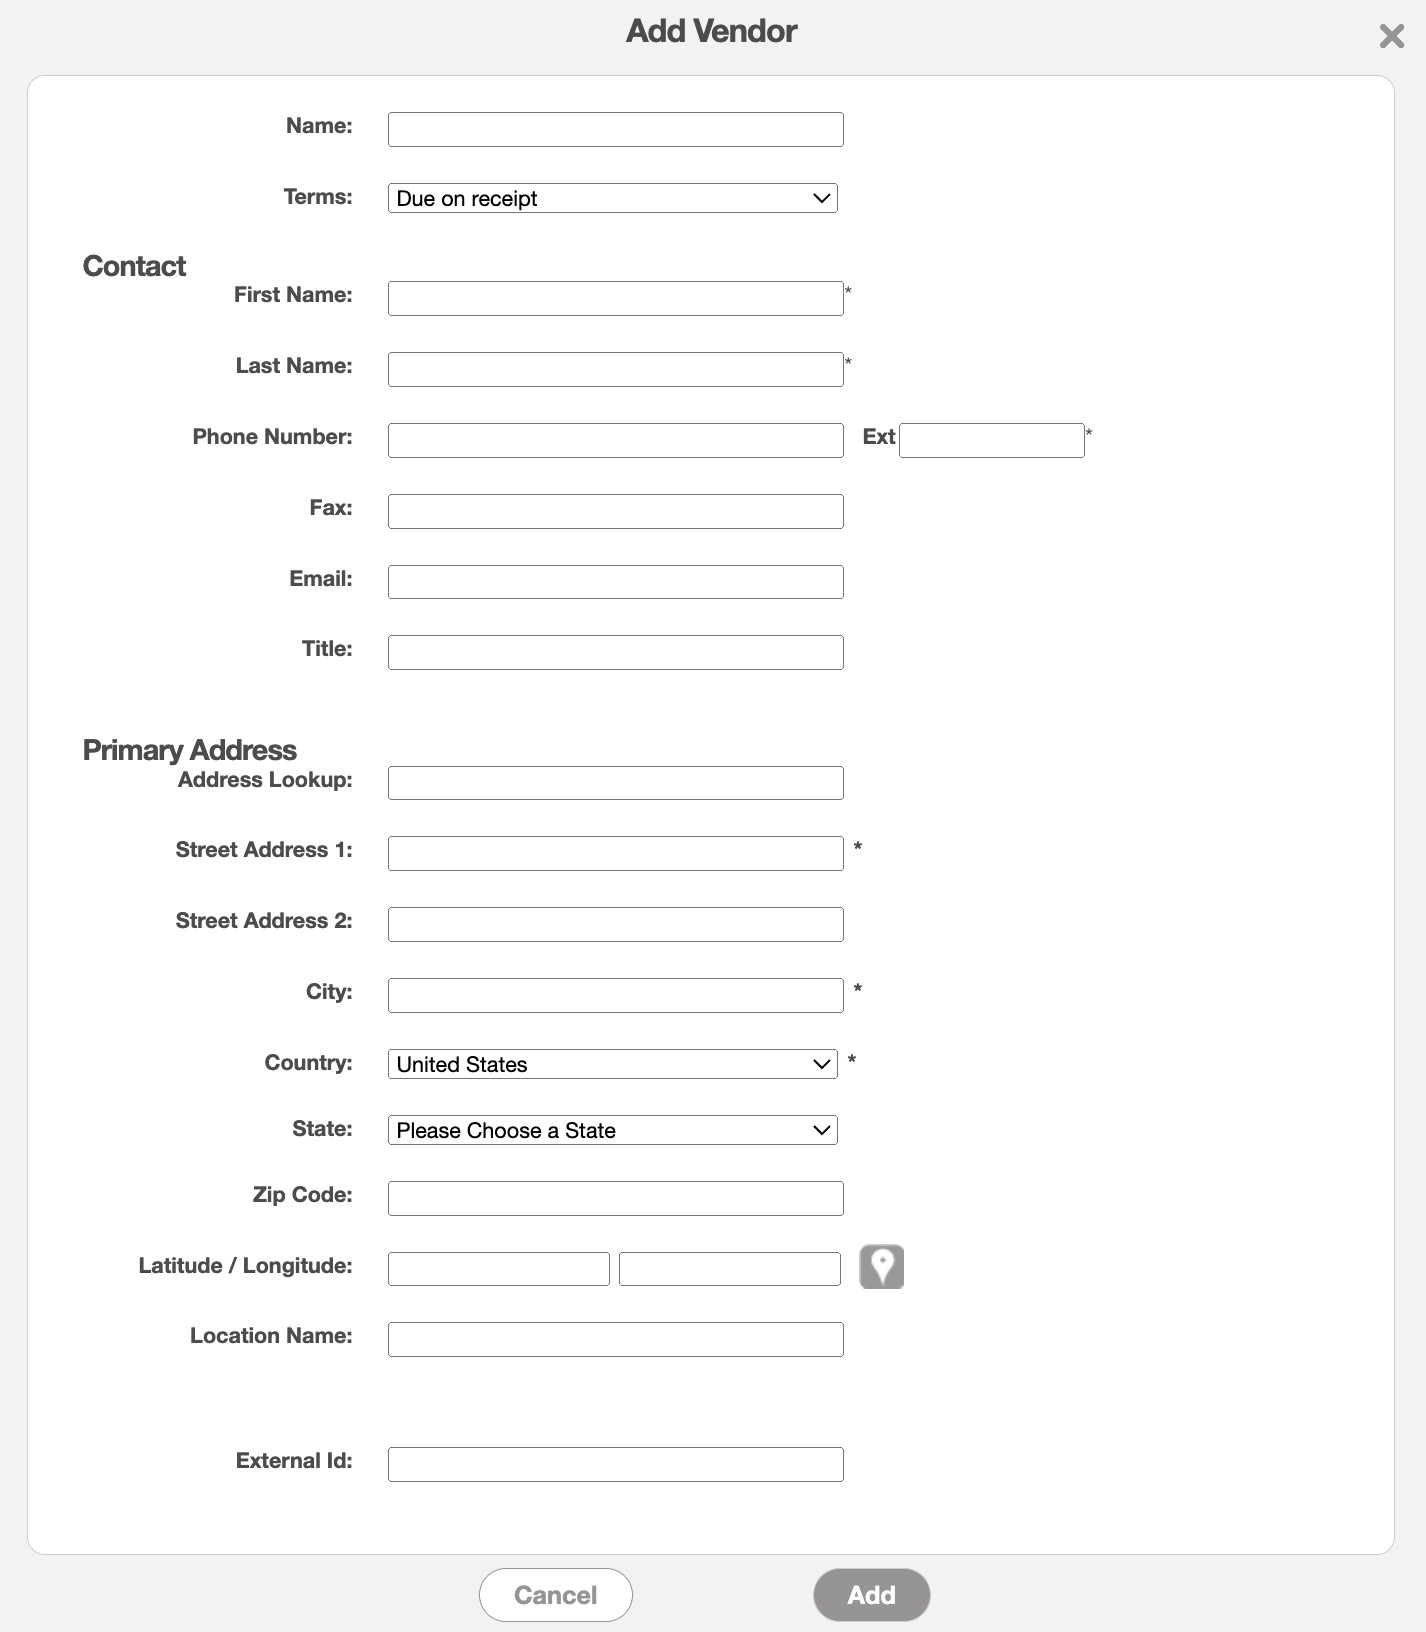
Enter the appropriate information in the specified fields; please note that the fields with an asterisk (*) are required. Input the following information when adding a new vendor:
The full name of the vendor organization as registered in your system.
The agreed payment terms between your company and the vendor, such as due dates or grace periods.
The first and last name of the primary contact person at the vendor.
The phone number, fax number, email address, and honorific (e.g., Mr., Ms., Dr.) for the vendor's main contact.
The full address of the vendor's primary office location.
The terms listed in the Add Vendor pop-up window are defined below:
| Name: | Description: |
|---|---|
| "Name" | The registered or business name of the vendor as stored in MobiWork. |
| "Terms" | The payment terms established with the vendor, such as net 30 or net 60 days. |
| "First Name" | The given name of the main contact person for the vendor. |
| "Last Name" | The surname of the main contact person for the vendor. |
| "Phone Number" | The direct phone number for reaching the vendor's primary contact. |
| "Fax" | The fax line for the main contact at the vendor's address. |
| "Email" | The email address associated with the primary vendor contact. |
| "Title" | The honorific or professional title (e.g., Mr., Mrs., Dr.) of the vendor's primary contact person. |
| "Address Lookup" | Allows you to input the entered address as well as offer suggestions. |
| "Street Address" | The specific street address where the vendor's main office is located. |
| "City" | The city associated with the vendor's primary address. |
| "Country" | The country where the vendor's primary office is based. |
| "State" | The state or province for the vendor's main address. |
| "Zip Code" | The postal or zip code for the vendor's location. |
| "Latitude/Longitude" | The GPS coordinates for the vendor's primary location. |
| "Location Name" | A label used to identify or name the vendor's location. |
| "External ID" | The external ID (outside of MobiWork) of the customer; this ID will work as an additional identifier for your vendor. |