To export your payments into an Excel or a QuickBooks format you will first need to access the Payments feature page. Please see the Payments List page for more information on how to access this page:
Export to QuickBooks
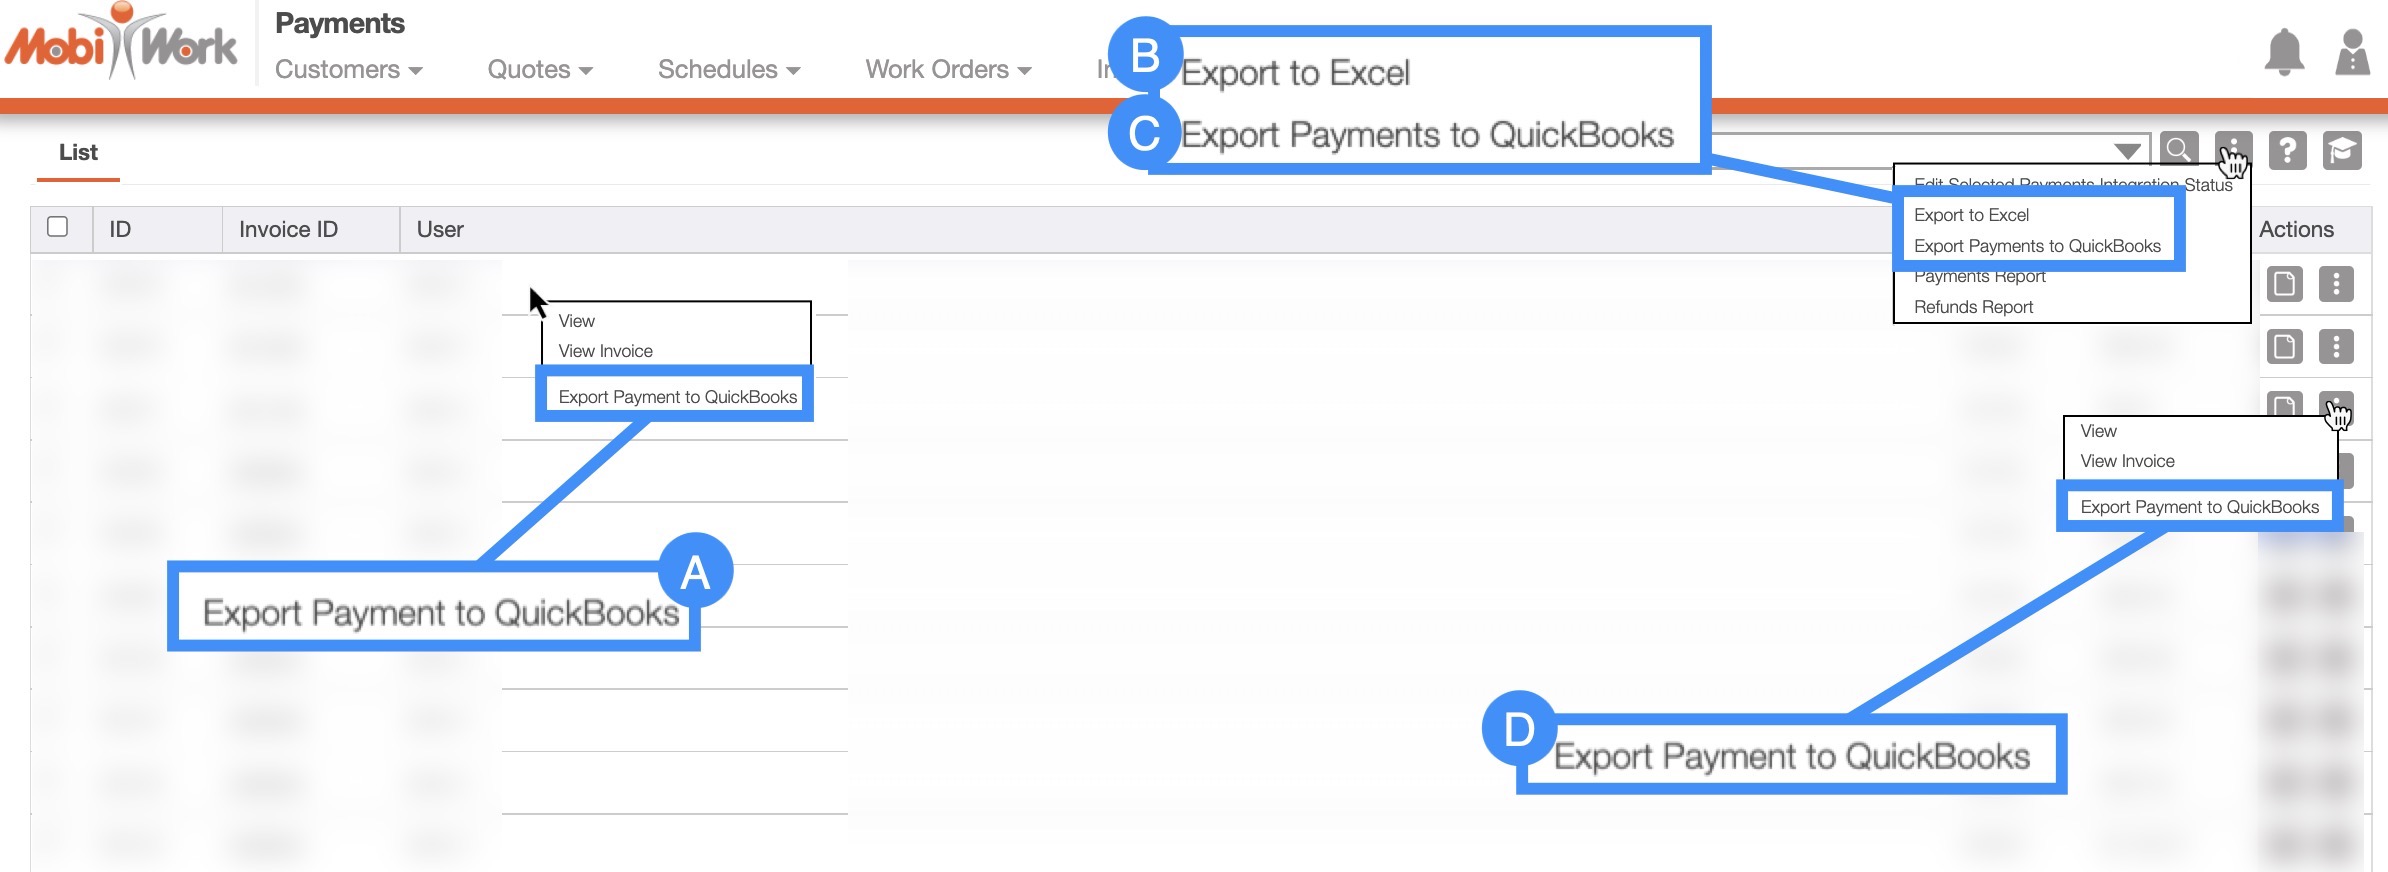
Right-click the selected payment and select the "Export Payment to QuickBooks" option from the drop-down.
Click on the More Actions button and from the drop-down click on the "Export Payment to QuickBooks" option.
Select the Individual Actions button under the "Actions" column and select the "Export Payment to QuickBooks" option from the drop-down
Export to Excel
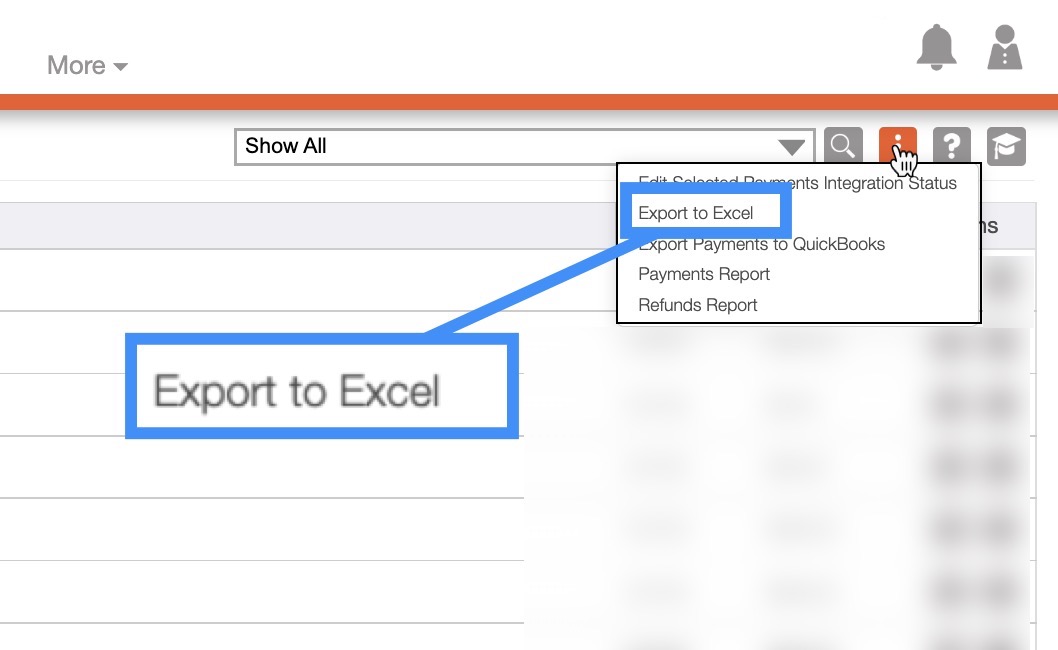
Click on the More Actions button and from the drop-down click on the "Export to Excel" option.
To export your payments to QuickBooks, you will first need to set up a connector with MobiWork. For more information on how add a QuickBooks connector please see the Connect With An Existing Software Solution and QuickBooks Desktop pages.
Please note, that you will only be able to export your payments from the Payments feature page, and not from the View Invoice pop-up window.
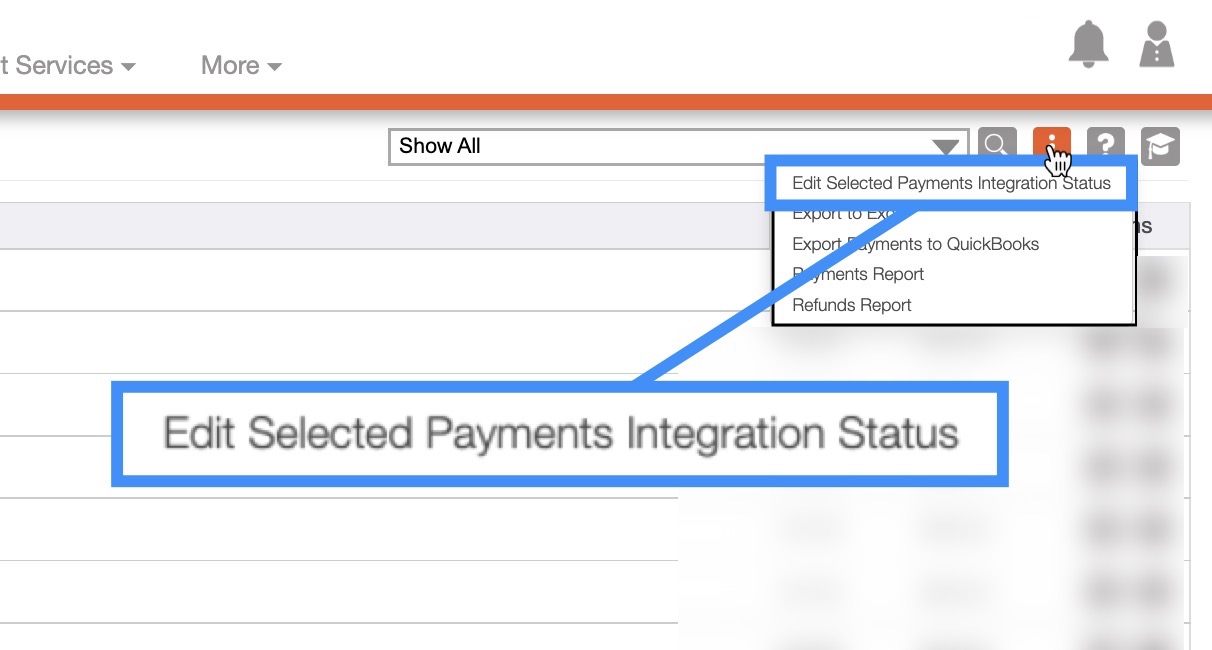
Payments will only sync from MobiWork to QuickBooks if the status is marked as "Ready For Integration" in MobiWork. To indicate if a payment is ready to sync to QuickBooks, click on the "Edited Selected Payments Integration Status" option from the More Actions drop-down:
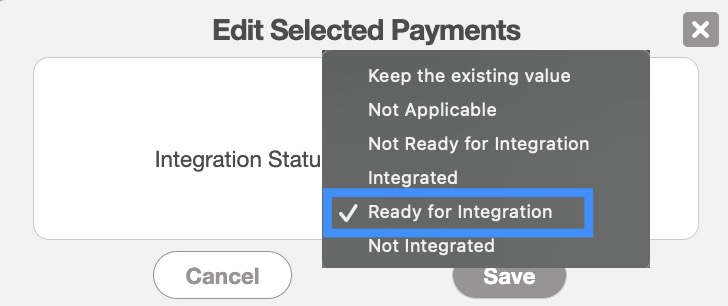
In the Edit Selected Payments pop-up window that will appear, select the "Ready For Integration" status:
Note: The payments entered in MobiWork can only be pushed 1-way to QuickBooks; in other words, QuickBooks payments cannot be exported to MobiWork.
To export this file from the Payments, feature page:
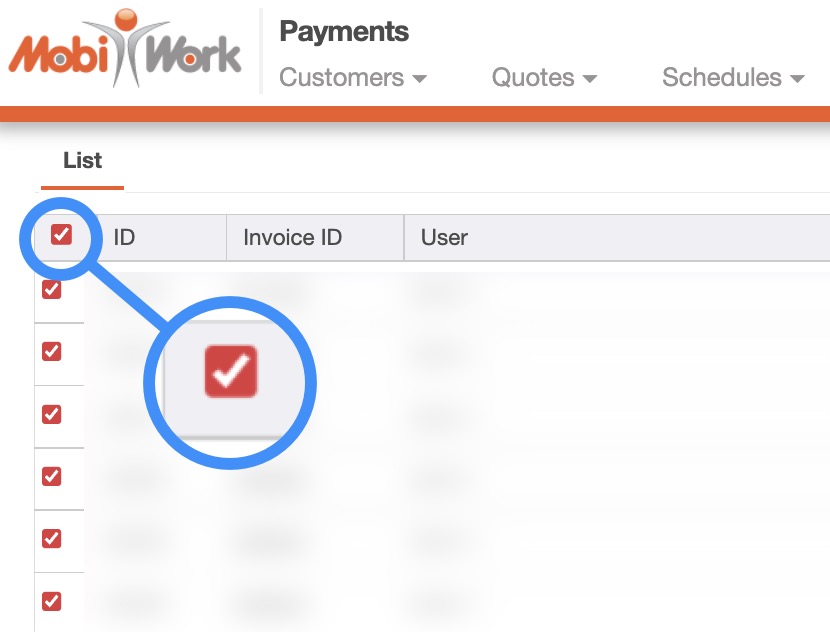
- Select the payments that you would like to export to Excel:
Please note that if you would like to export all your payments into Excel you can click on the topmost checkbox (Multiple Selection Area) located in the "List" column. Likewise, if you do not select any entries ALL records will be exported:
Click on the More Actions button and from the drop-down menu select the "Export to Excel" option:
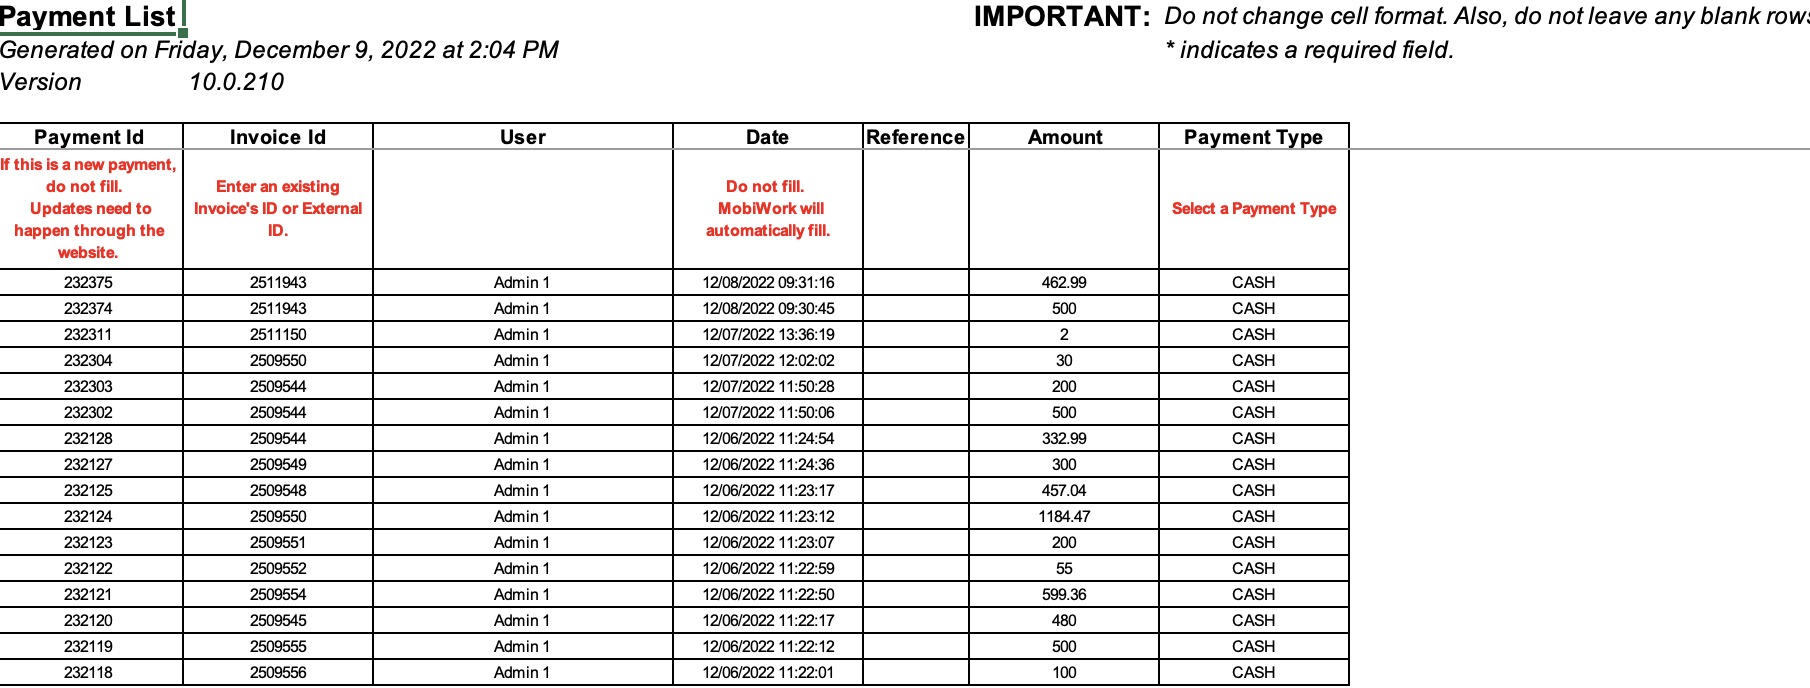
The Excel file will automatically download, and you will be able to locate it in your computer's Download folder.
This Excel file will display the payment ID, invoice ID, user name, etc. in an easy-to-read format. You can then use Excel file to easily navigate through your company's payments: