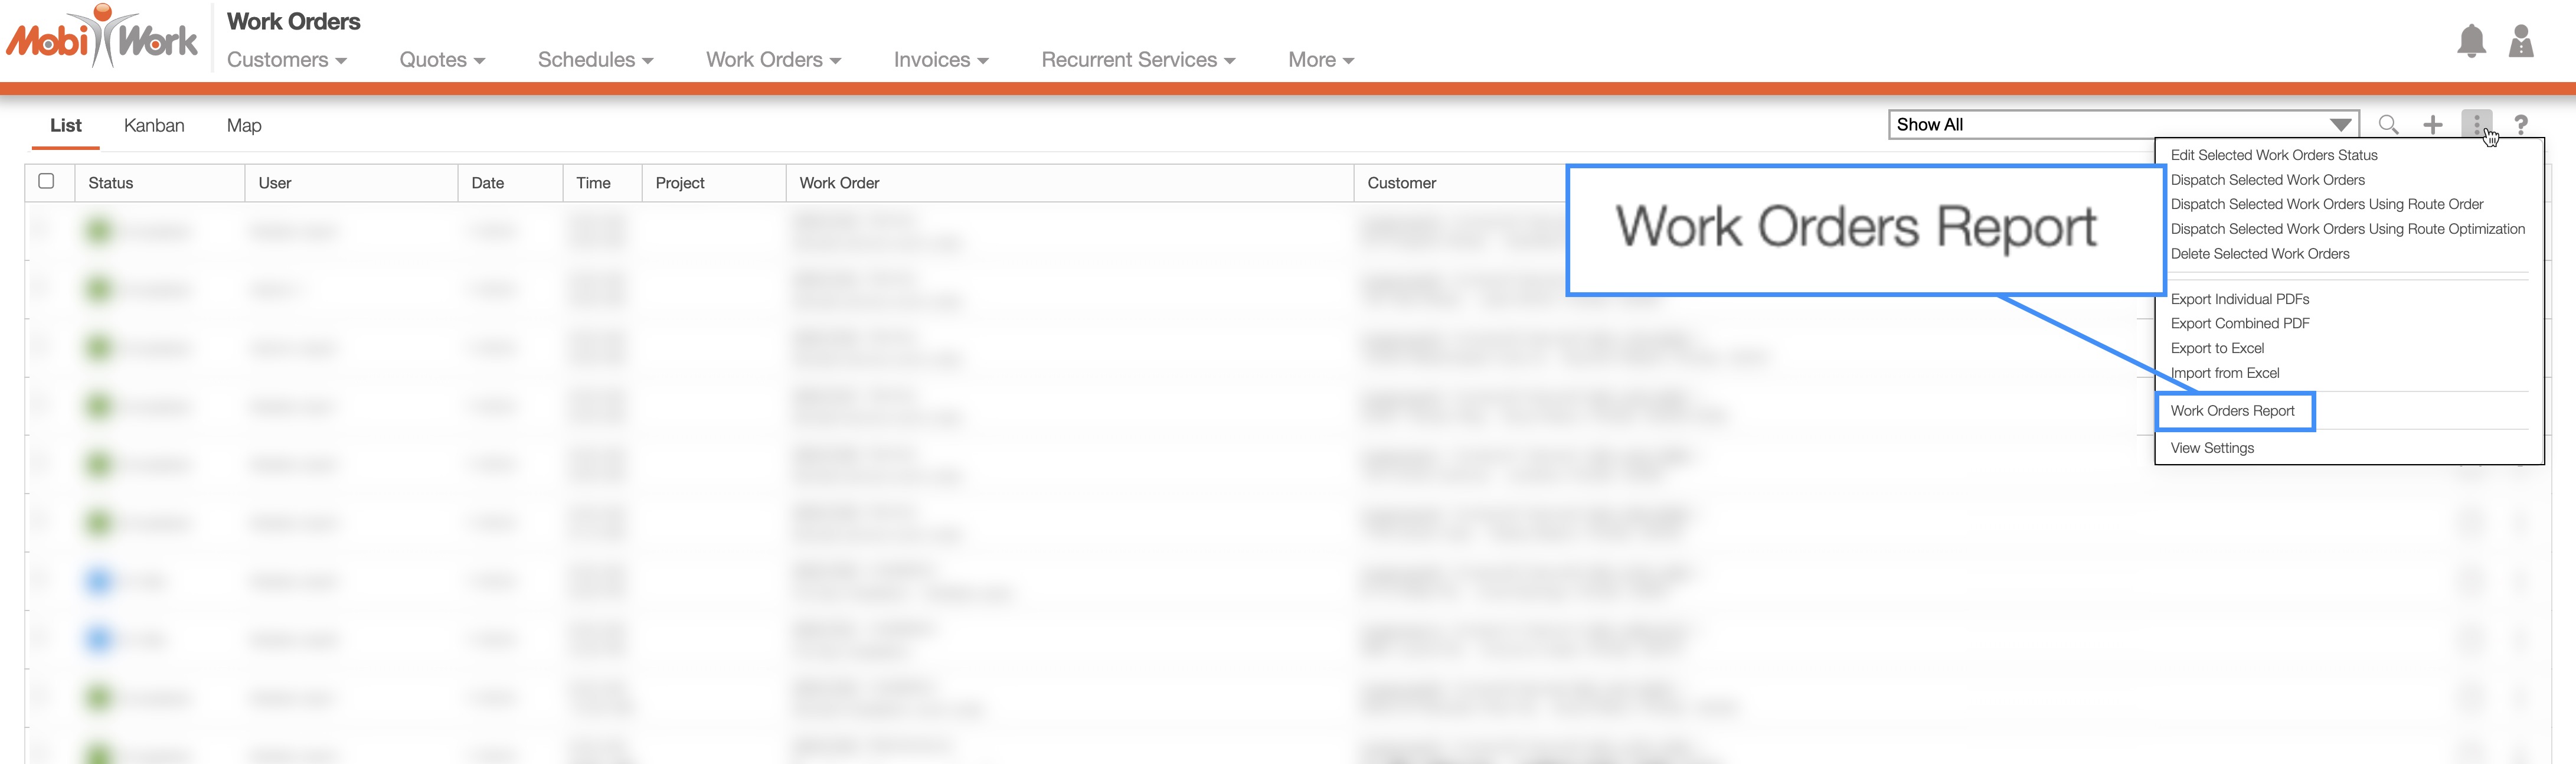
In MobiWork, you can quickly identify customers with assigned work orders by using the Work Order Report. To pull a work order report, first access the Work Order feature page.
Click on the More Actions button, then select the "Work Orders Report" option from the drop-down menu:
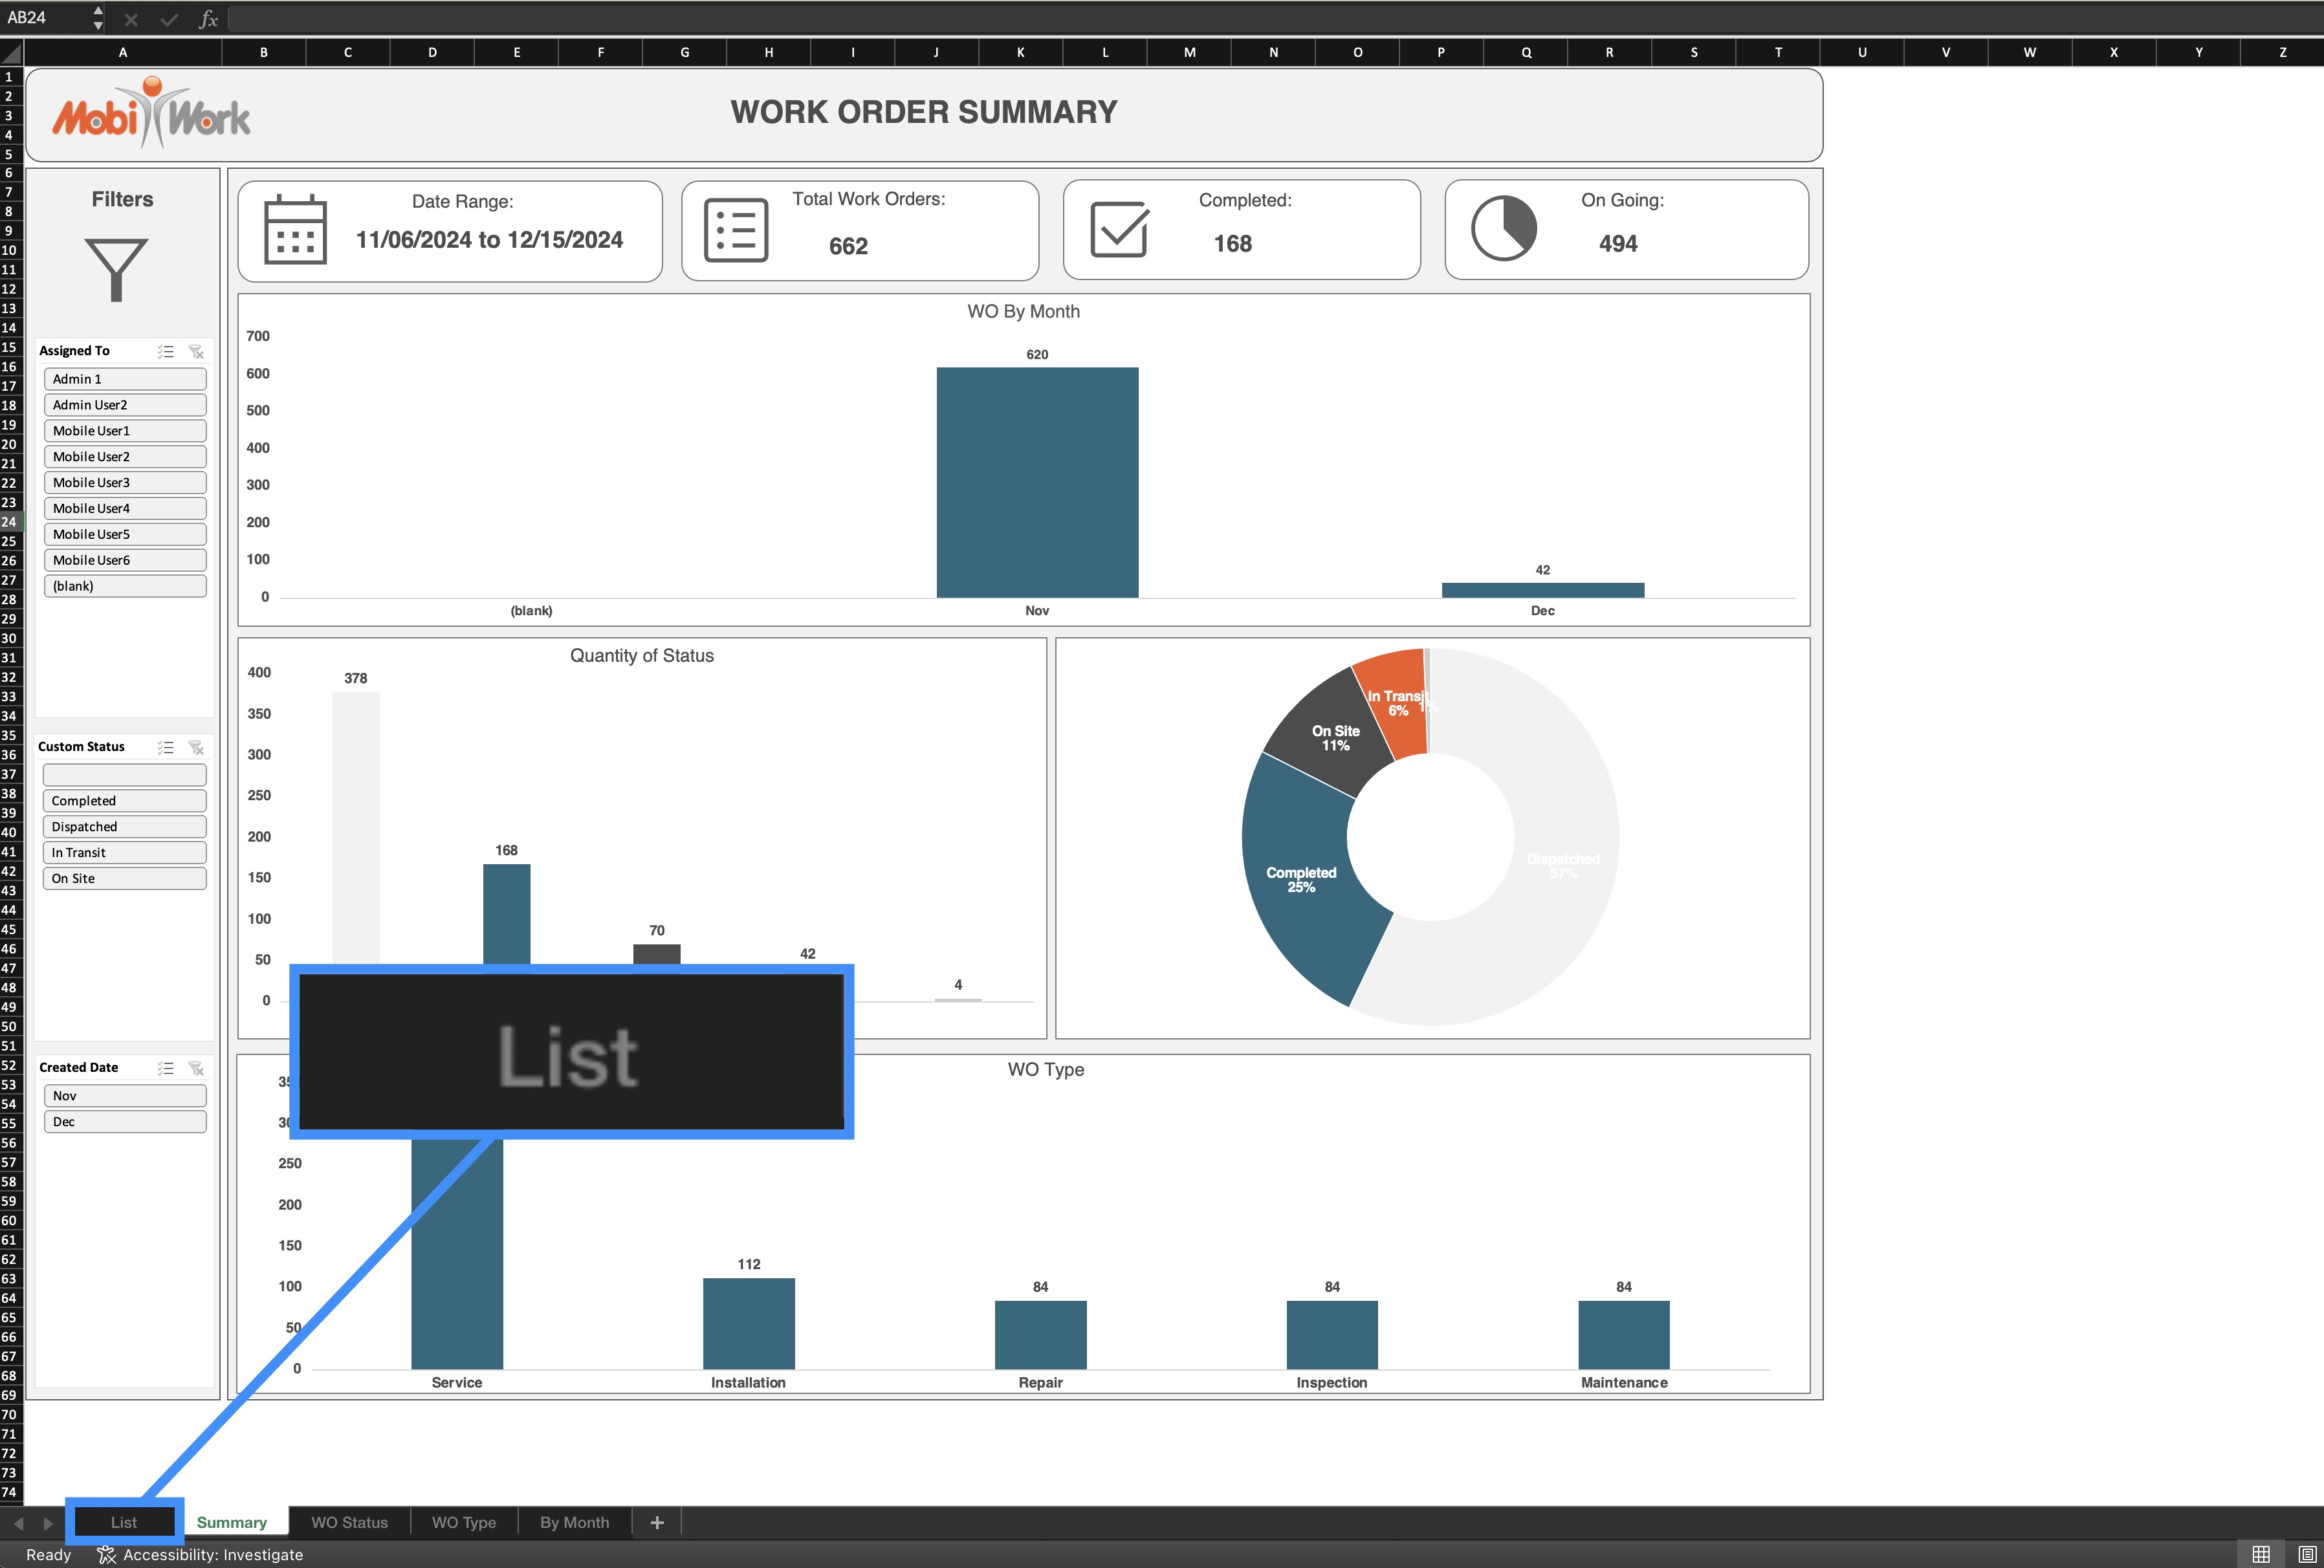
The Excel file will automatically be exported to your computer's download folder. Open the Excel report and navigate to the "List" tab to view detailed work order data:
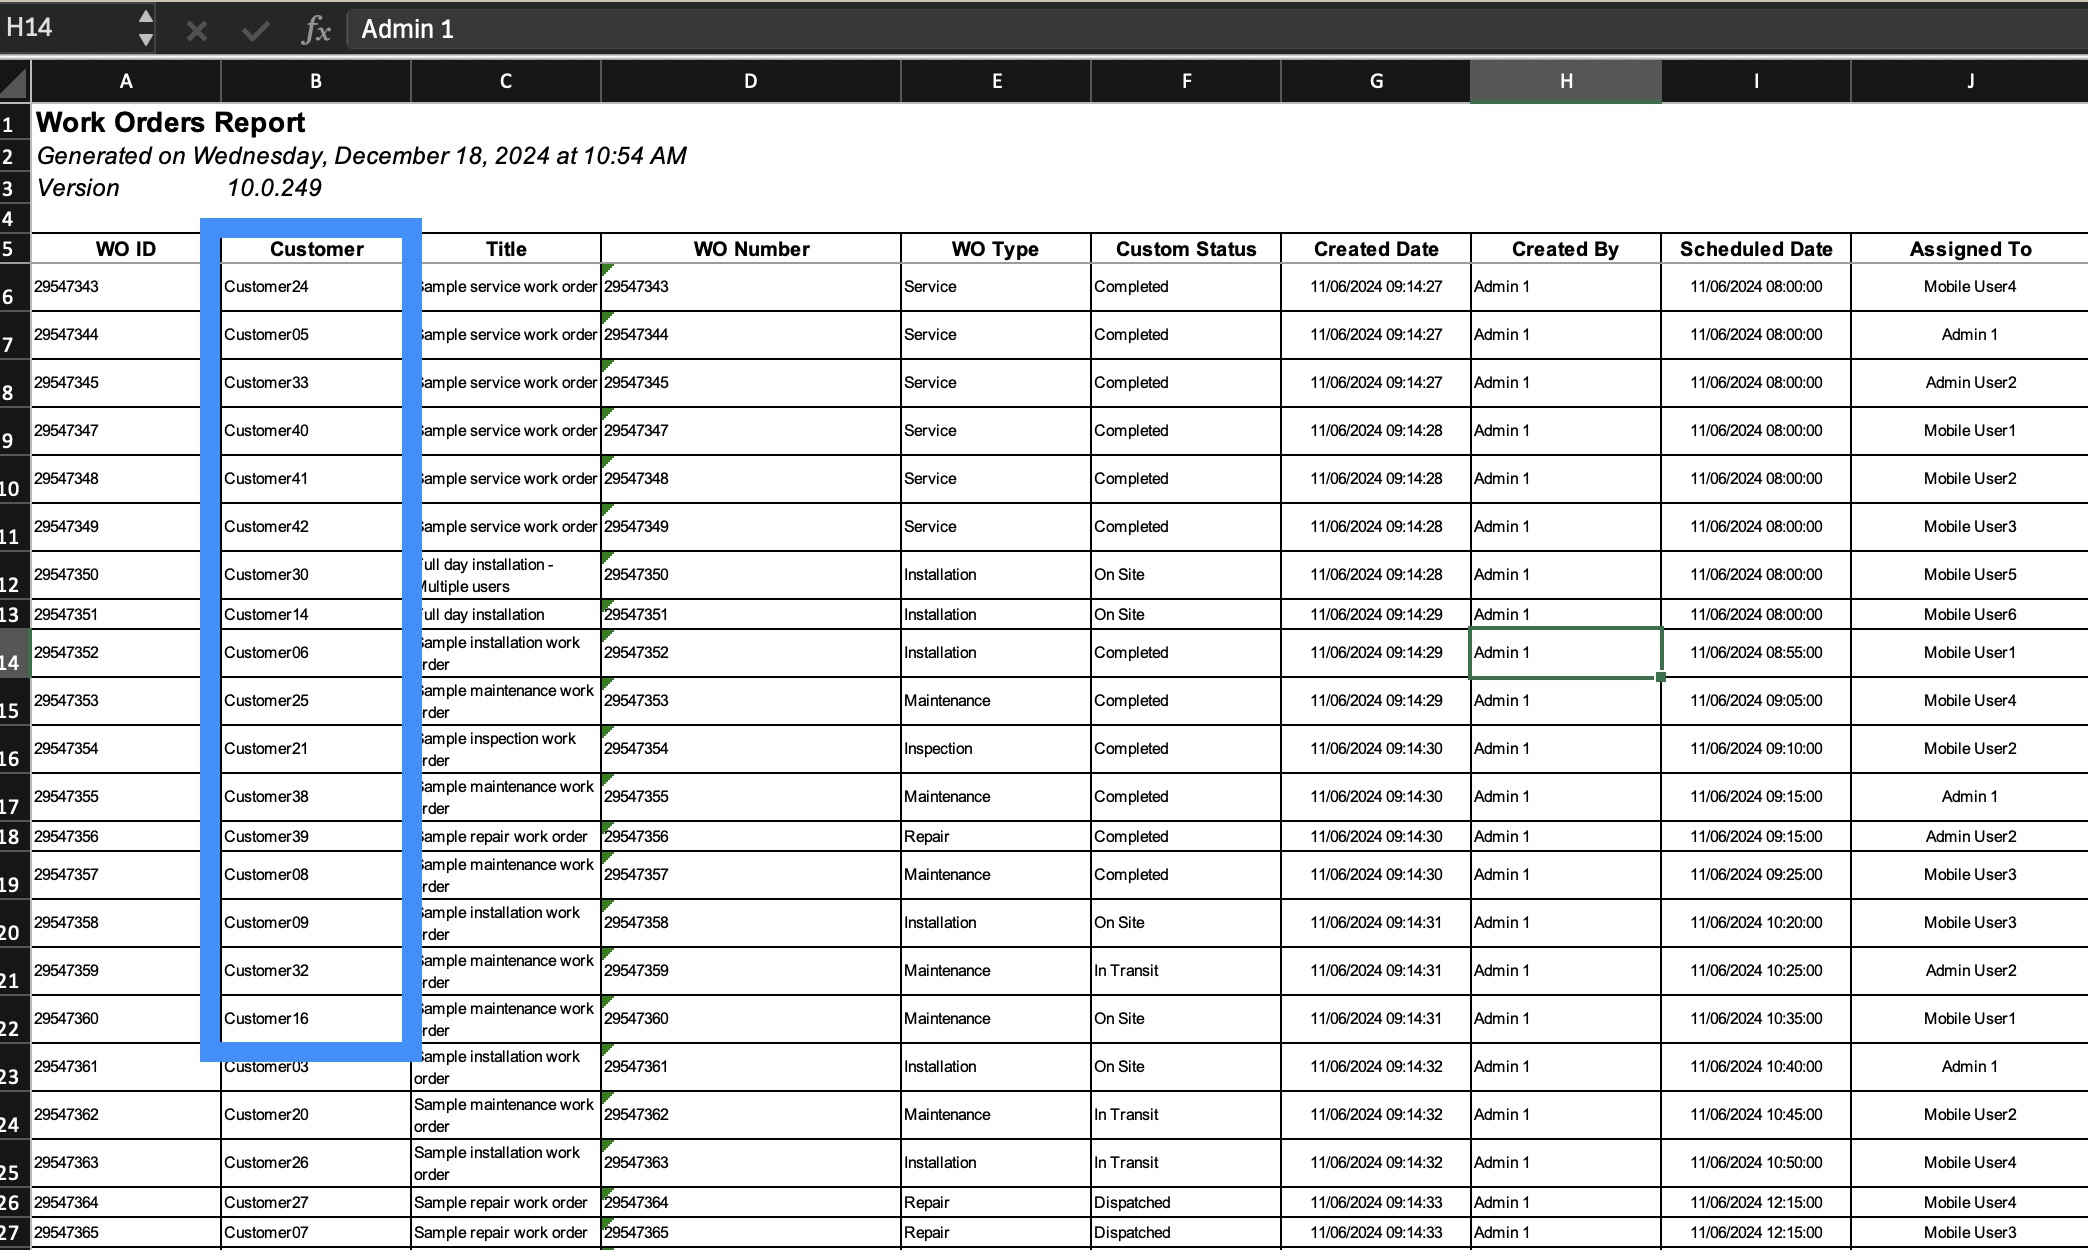
In "Column B" you will find the full list of customers associated with each work order:
For more information on how to locate this action and the Work Order feature page, please the Work Order List page.
When using the "Map" view within the Schedules feature, you can select multiple work orders by clicking a dispatched work order and choosing the "Select" option:
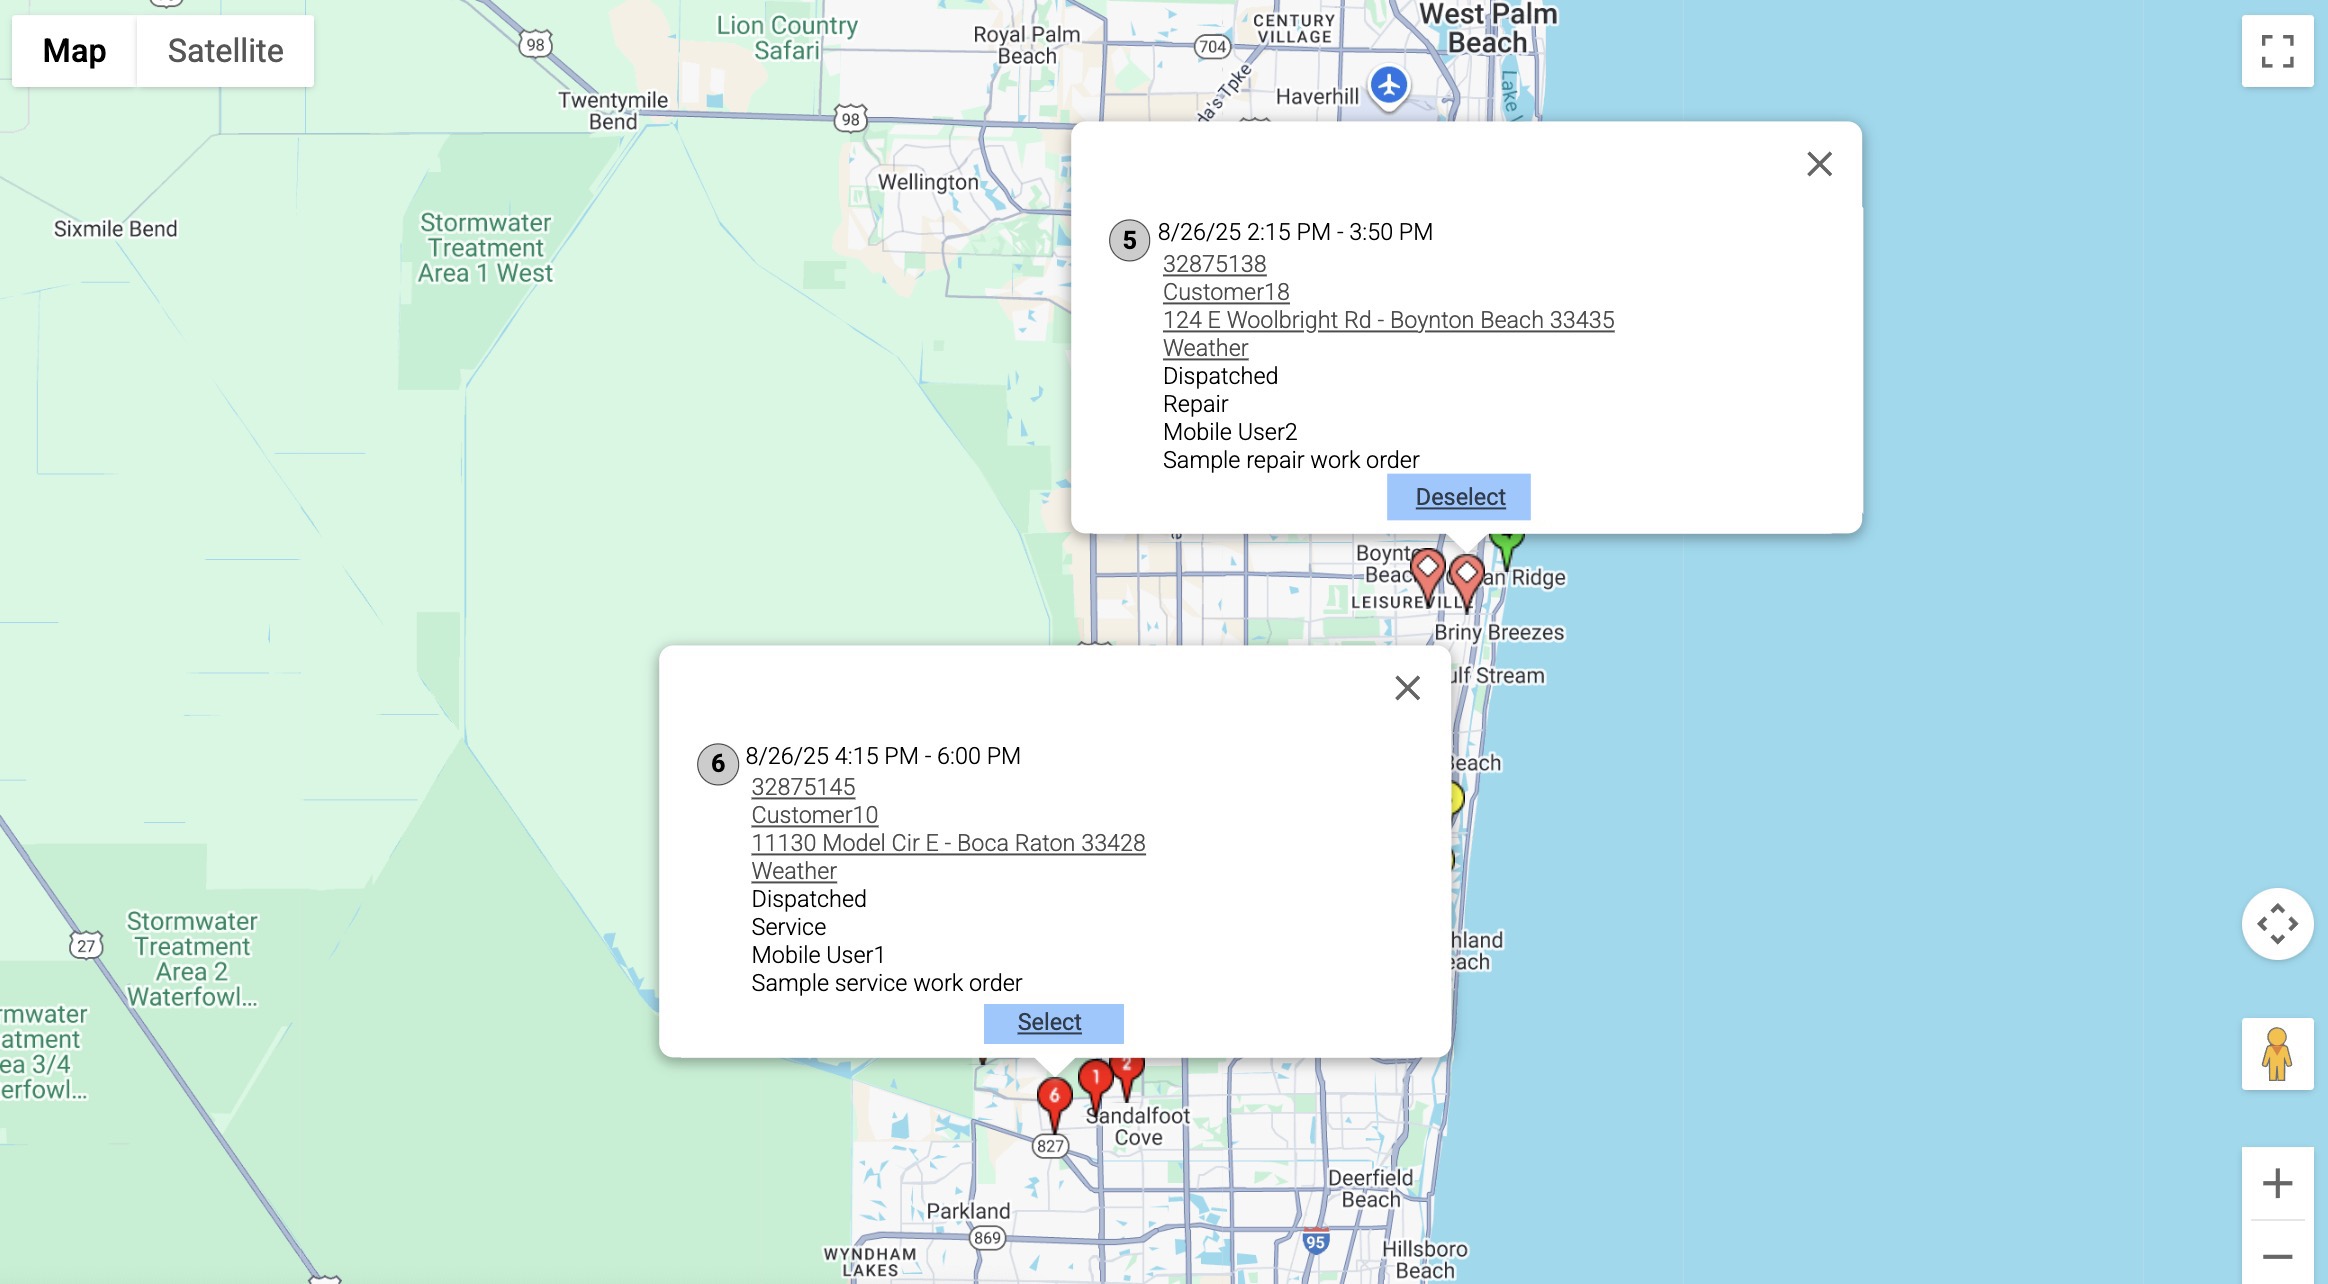
Clicking on another dispatched work order will also allow you to select it. To deselect a work order, simply click on the "Deselect" option. Selected icons will change to light red with a white dot, making it easy to see which work orders are included. Once selected, you can perform mass actions on these work orders, such as dispatching.
Note: Like the "Map" view on the Schedules feature, the Customers "Map" tab will also allow you to select multiple customers and perform various actions on them.
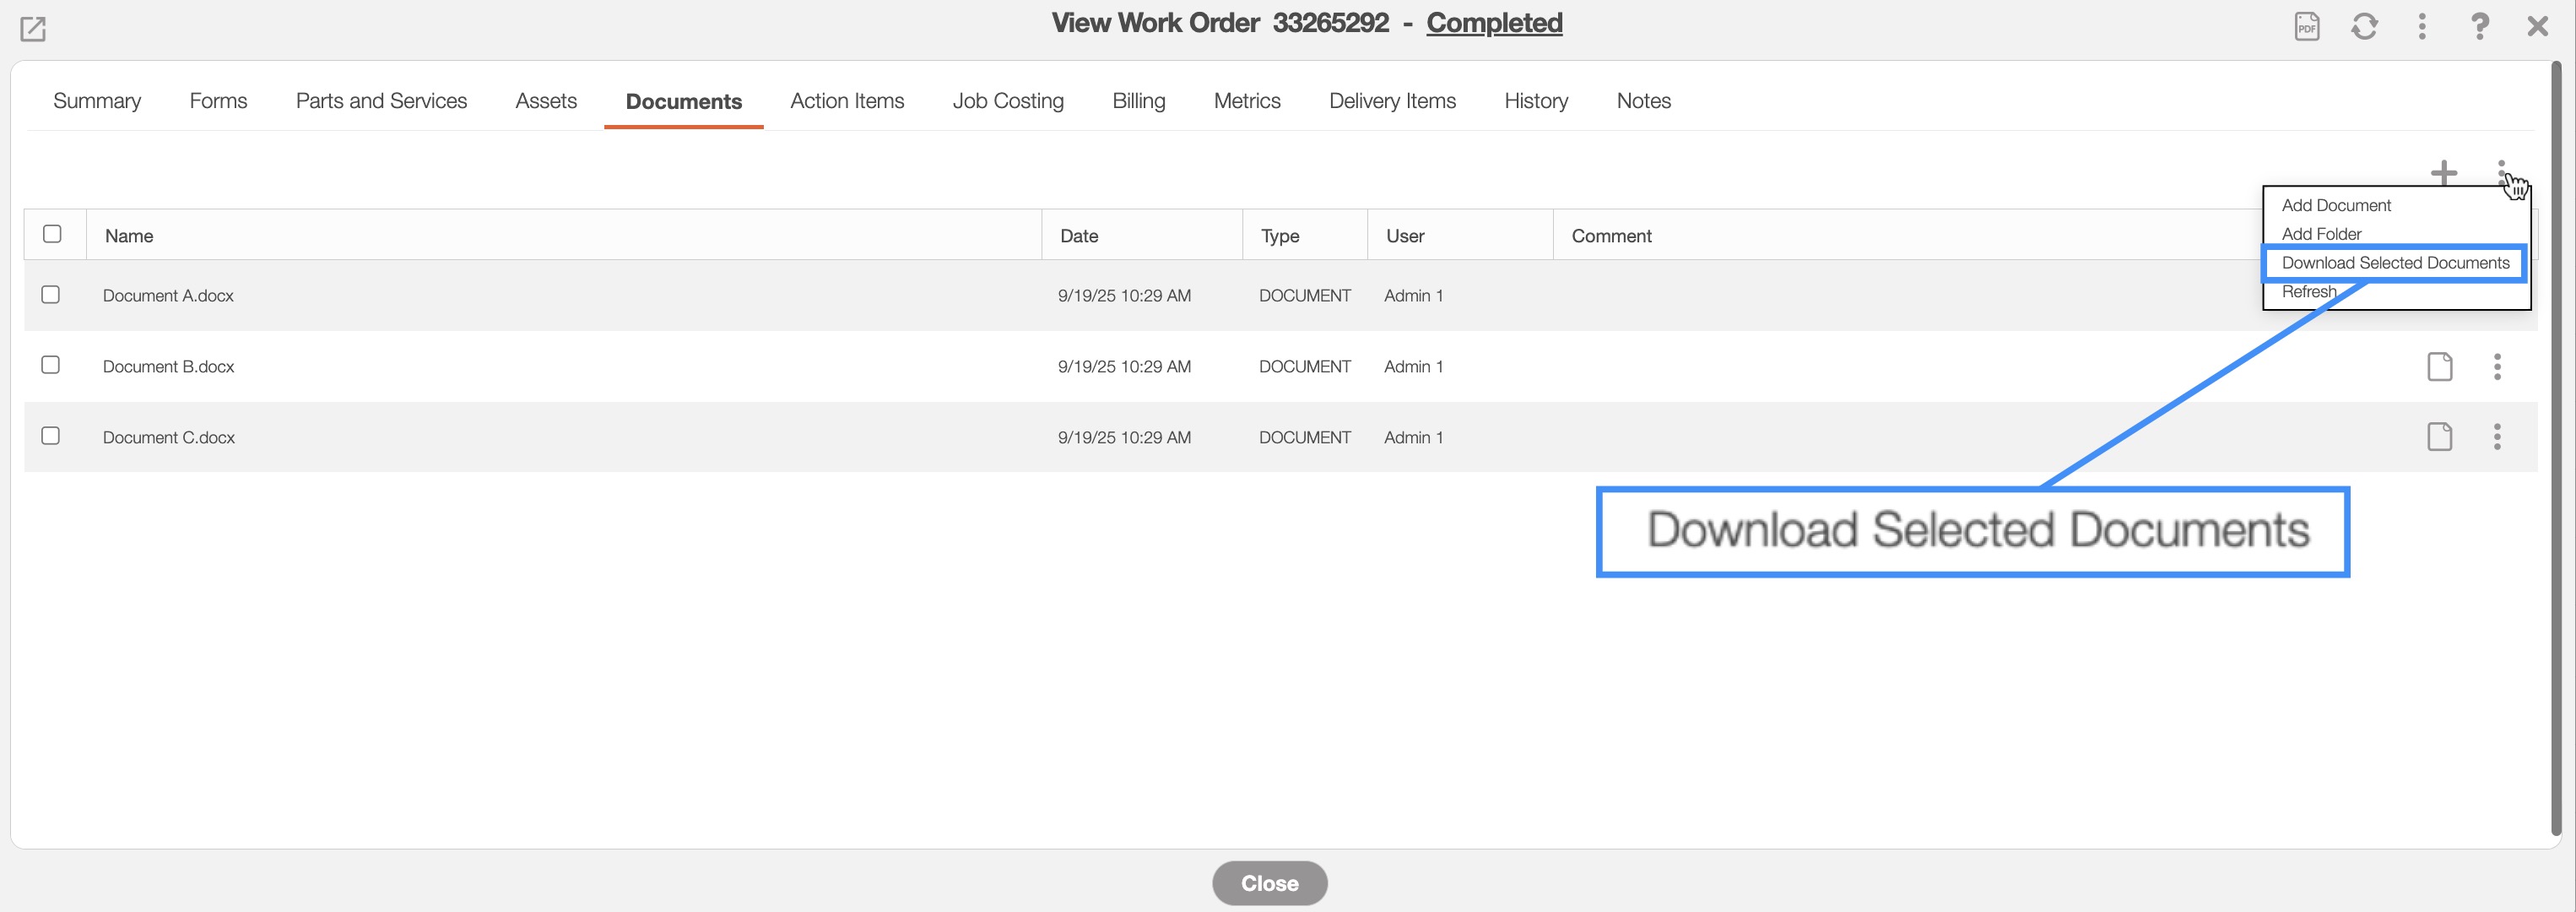
On the "Documents" tab in the View Work Order pop-up window, you will be able to download multiple selected documents simultaneously:
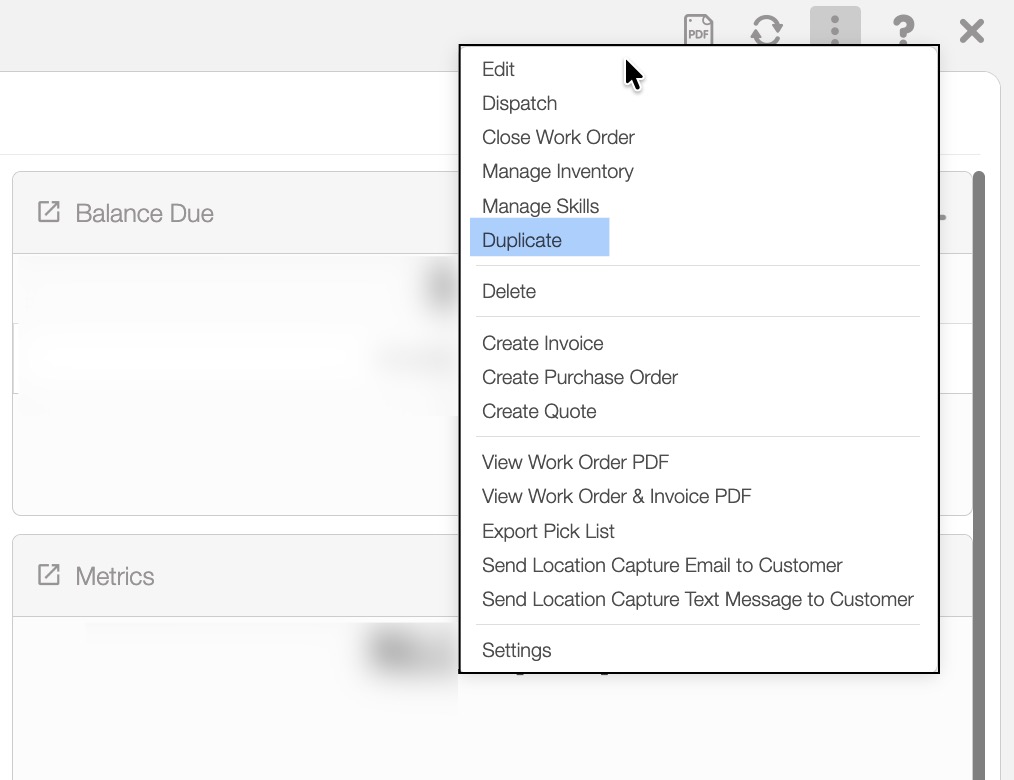
Within the work order feature, you have the option to set a work order to repeat. To initiate a duplicate work order, simply right-click on the work order and select the "Duplicate" action, or choose it from the Individual Actions button.
Alternatively, you can access the View Work Order pop-up window and select "Duplicate" option from the Individual Actions drop-down menu:
Once selected, the Duplicate Work Orders pop-up window will appear. The selected dates will appear as dark gray:
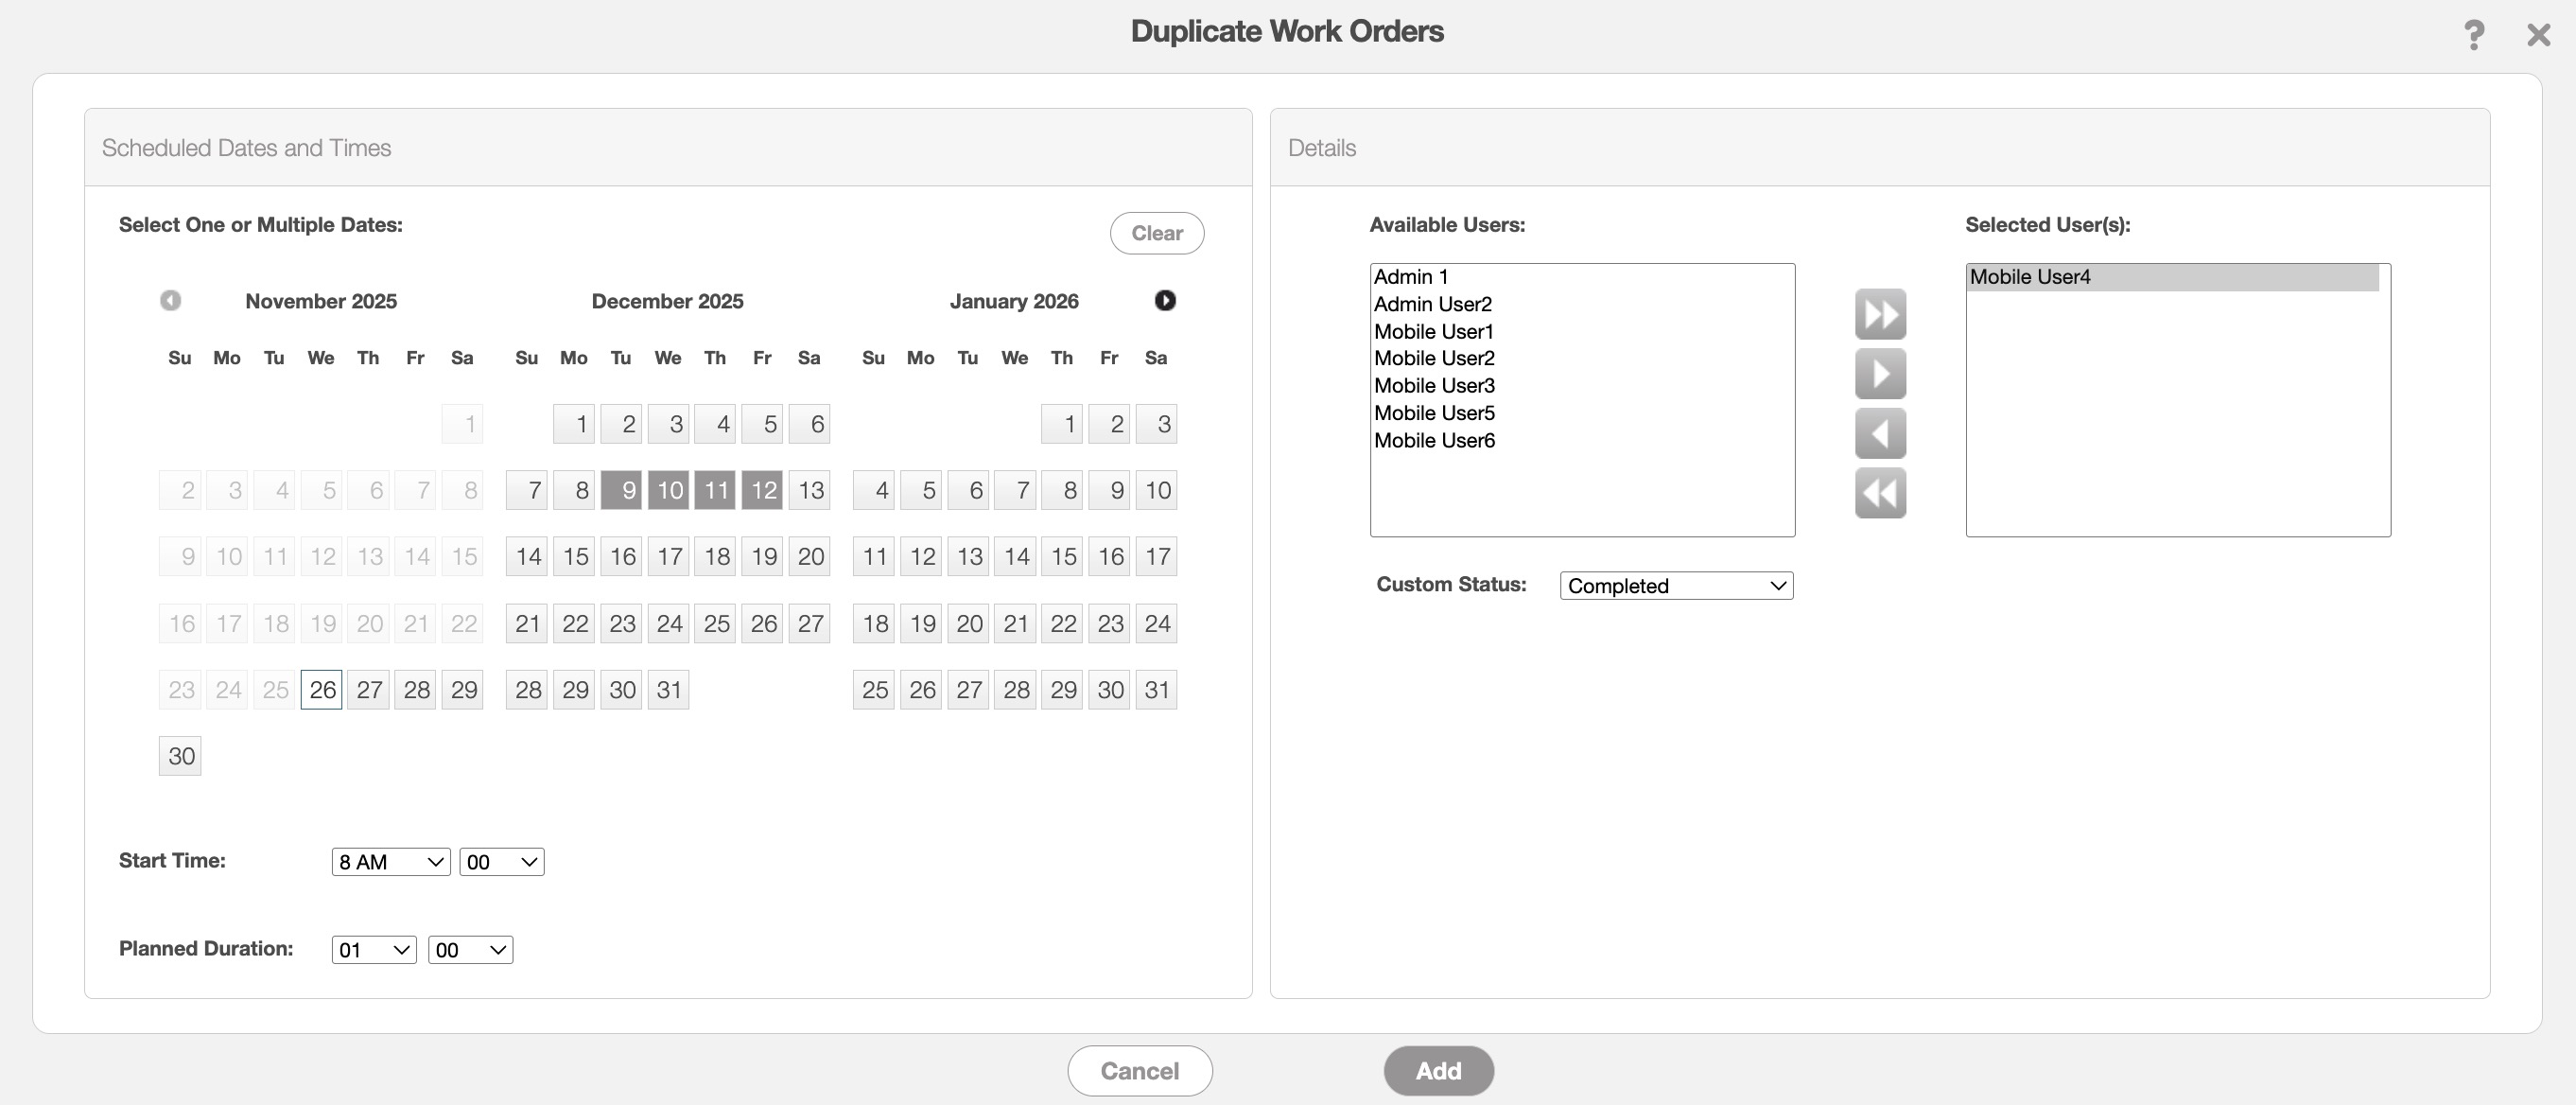
In this pop-up window you can select the following:
The date range for the repeated work order.
The work order start time.
The expected length of how long it will take to complete the work order (the left-most drop-down menu corresponds to the hour, while the right-most indicates the minutes).
And the assigned users.
Once you are satisfied with the entered data, click the Add button to generate the work orders. Please note that a work order will be generated for each selected day. For instance, if you choose to repeat the work order for the first work week in June, five work orders will be generated.
Unlike recurrent services, where work orders repeat automatically on a set schedule, the duplicate work order function generates a single instance of the work order for the specified date(s).
In other words, after adding the specified date(s) for the repeat work order, they will not continuously reoccur. If you need to set up a reoccurring work order on a regulated schedule (e.g., every week, month, year, etc.), please see the Recurrent Services feature.
Note: Please note that a duplicating work order will generate a normal invoice while a recurrent service will utilize the recurrent invoice feature.
If you need to clear the selected dates when duplicating a work order in the Duplicate Work Orders pop-up window, you will be able to easily do so by clicking on the Clear button:
![]()
This button allows you to clear multiple selected dates at once, eliminating the need to remove them individually.
For more information on how to access the Duplicate Work Order pop-up window, please see the subsection, Duplicate Work Order page.
In the Work Order Settings page you will be able to adjust the order of work order types. To rearrange the order of the work order types, simply drag and drop the desired type to the new position:
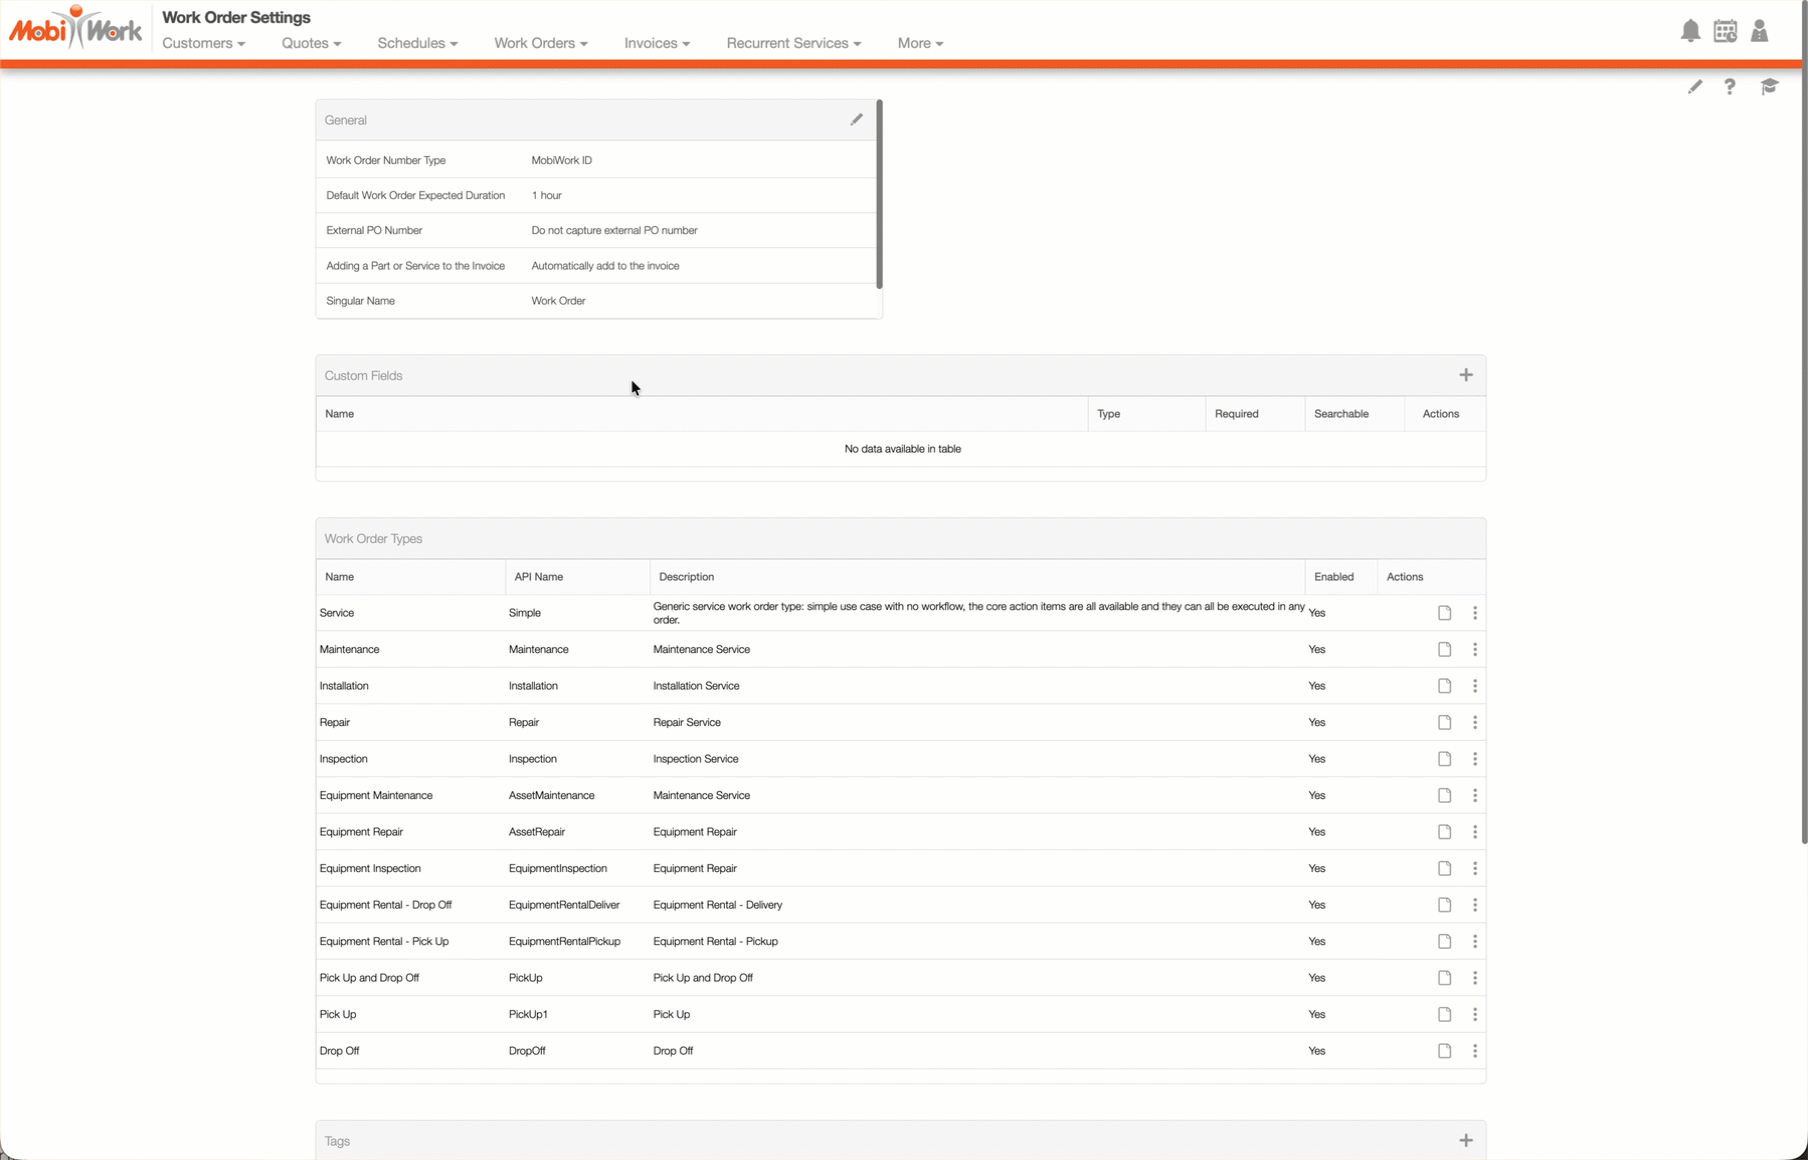
Once the work order types are rearranged according to your specifications, the system will default to your preferred work order type. So when you add a new work order, the top-most work order type will be the first one displayed; thus, helping streamline the process of creating new work orders and saving you time.
Note: To ensure the changes take effect, please log out and then log back in.
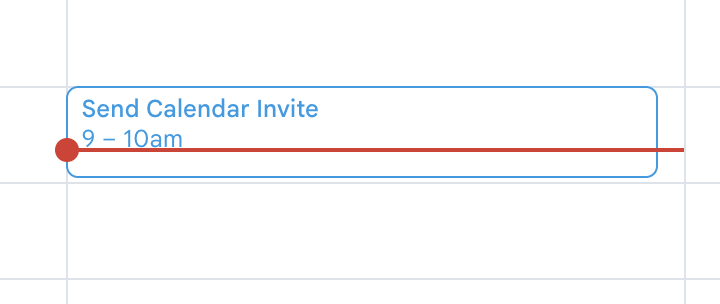
Any major updates to your work orders can automatically synced to your Google calendar; thus, allowing you to keep track of all work order status changes as well as your inbox throughout the day:
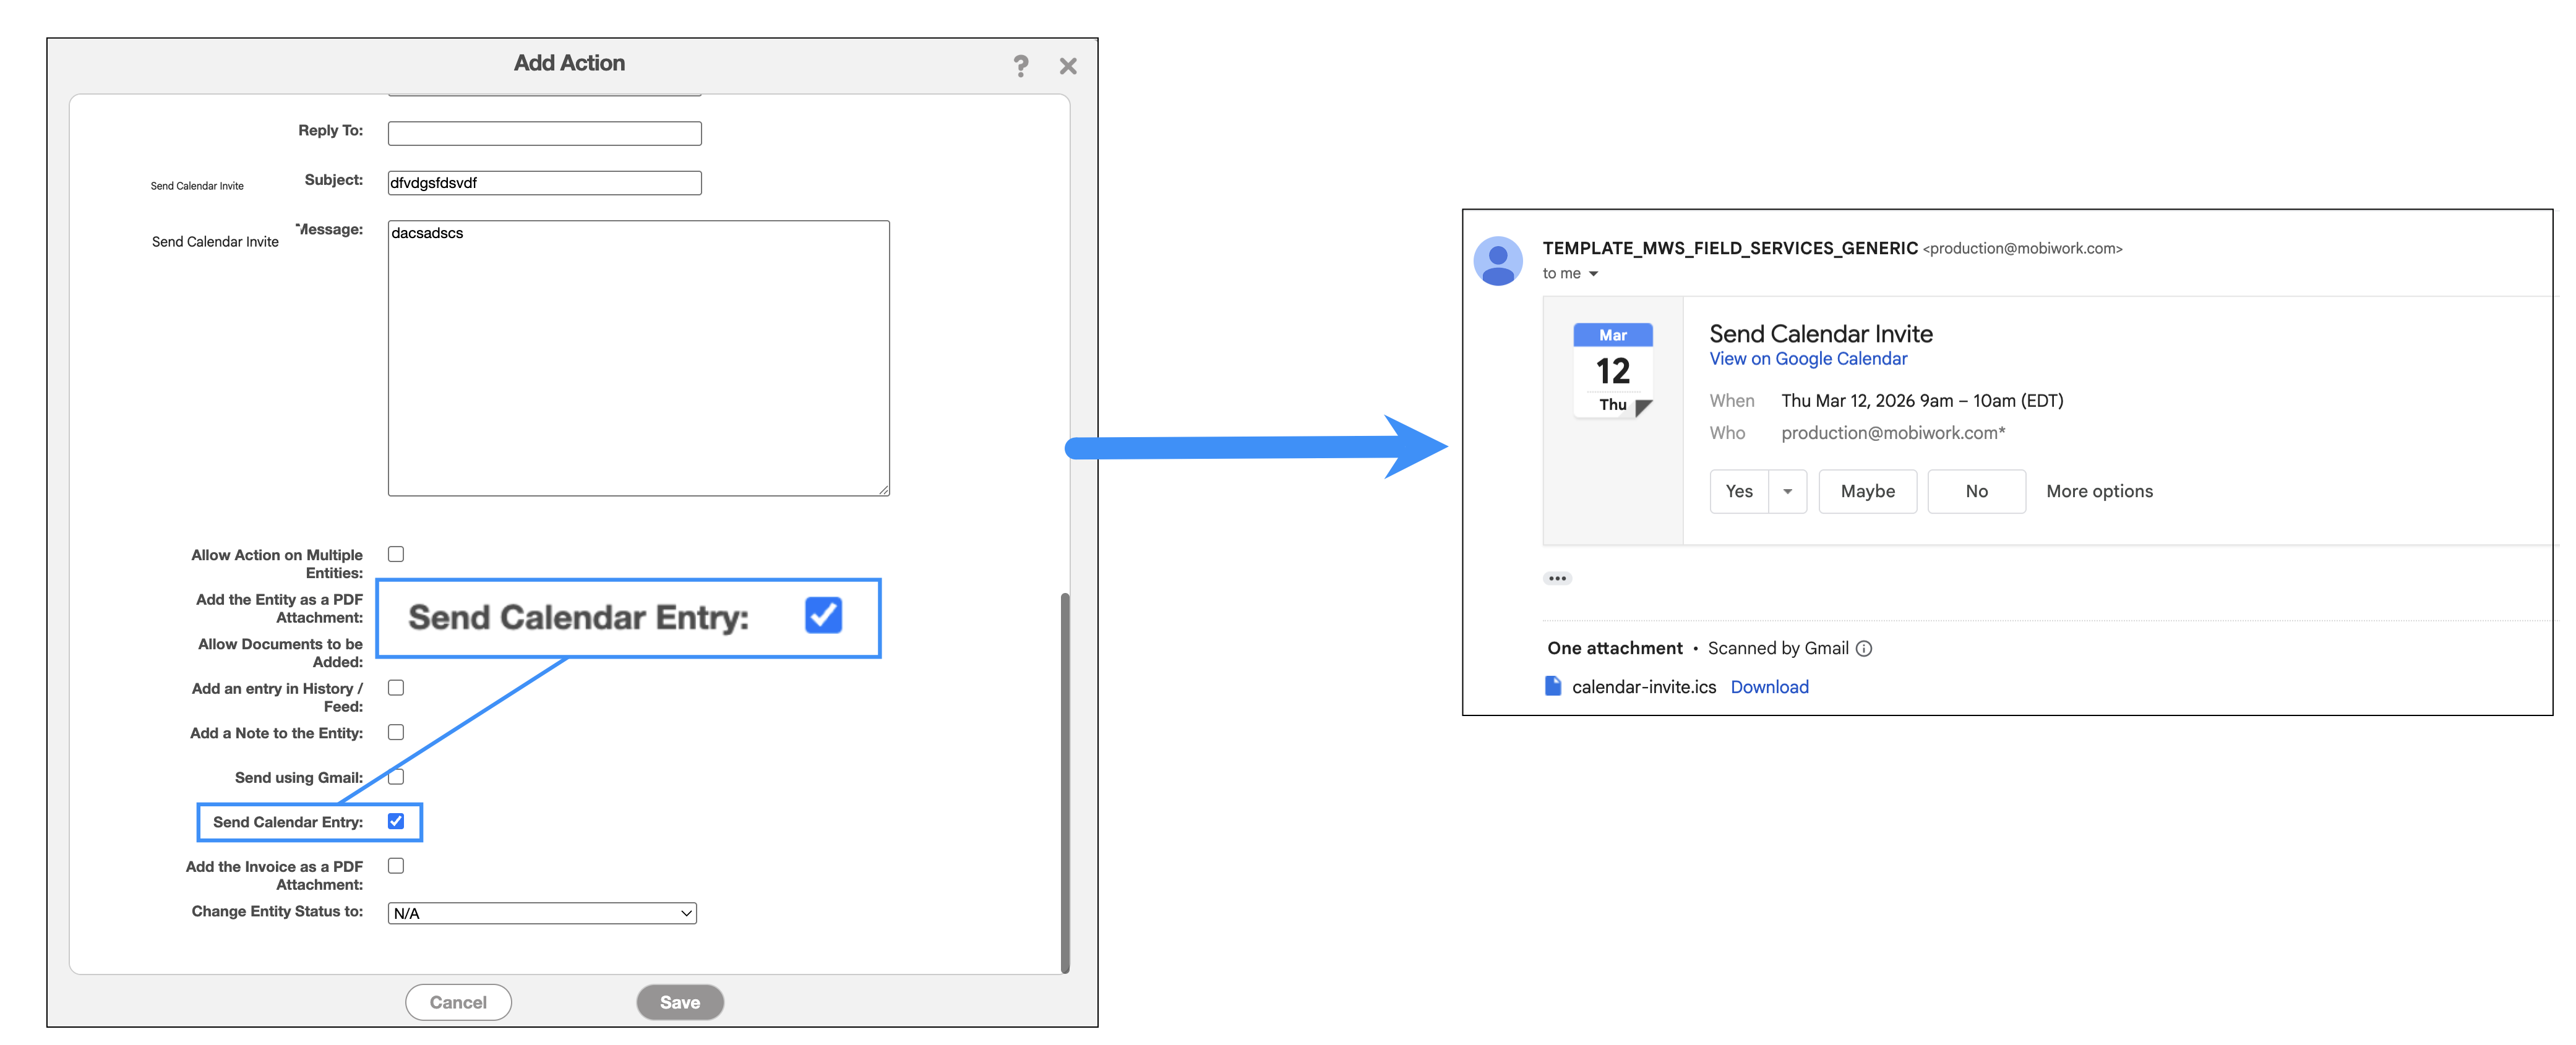
First, ensure that the email action "Send Calendar Invite" is enabled in the action. Once this checkbox is marked, then the action will allow you to send an email which will create a calendar entry on the recipient's side.
Then, once a work order is assigned/scheduled or unassigned, you can use the designated action to email the calendar update. This process is also compatible with any work orders created by recurrent services.
Note: When deleting a scheduled event, the action will only succeed if an "Unassigned Work Order" MobiRule is configured. If this MobiRule is not in place, the scheduled event cannot be deleted. Please contact us for more information.
Please note that this integration will only sync data one way; any updates to the work order status will only transfer from MobiWork to your selected calendar, not vice versa:
If you would like access to this functionality in your MobiWork account, please contact us for more information and configuration.
To ensure that the sync permissions are set up corrrectly and that your are recieving the work order calendar updates, please verify that your Google calendar is properly configured:
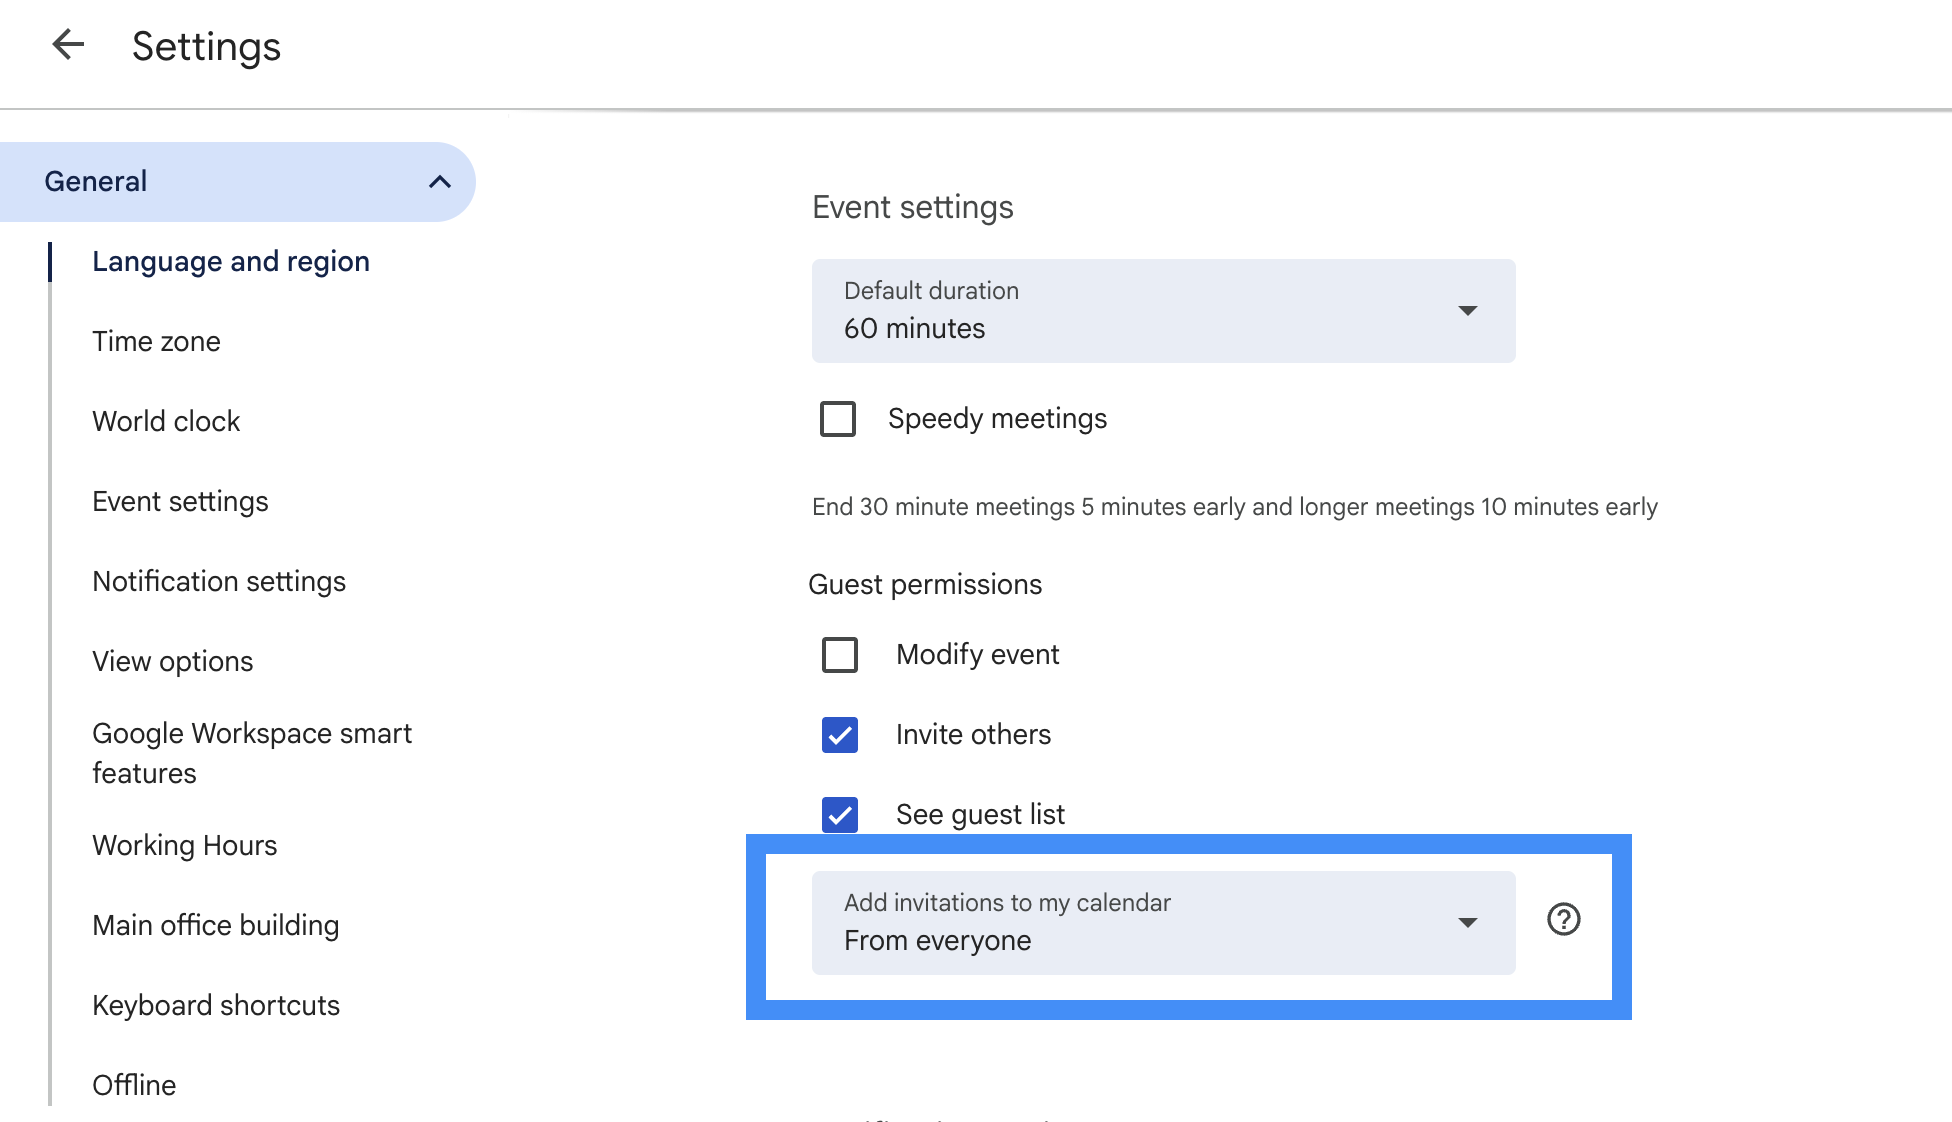
In the Google calendar settings, locate the "Guest Permissions" subsection. In the drop-down for "Add Invitations to My Calendar" ensure that the option is set to "From Everyone."