- Overview
- Account Settings
- Assets
- Connectors Framework
- Overview
- QuickBooks Online
- QuickBooks Desktop Web Connector
- Azure AD
- Salesforce Integration
- FleetNet Connector
- Avalara Connector
- Inbound REST API
- Outbound REST API
- Mailchimp Connector
- Text Messaging Connector
- Clearent Connector
- Stripe Connector
- HubSpot Connector
- UKG Connector
- Paylocity Connector
- UKG Connector
- Gusto Connector
- iSolved Payroll Connector
- Customer Portal
- Customers
- Dashboards
- Devices
- Dispatching
- Forms
- Inventory
- Invoices & Billing
- Locations
- Payments
- Parts
- Projects
- Quotes
- Recurrent Routes
- Recurrent Services
- Reports
- Sales Orders
- Schedule
- Services
- Tasks
- Text Messaging
- Time Tracking
- Users
- Work Orders
In MobiWork there are different modes that you can use to dispatch your work orders depending on specific criteria that you need for a work order (e.g., a user with a specific skillset).
In order to access the different dispatch modes, you will first need to access the Dispatch Work Order pop-up window. For more information on how to access this window, please see the How to Access the Dispatch Feature page.
Regardless of how you choose to access the Dispatch Work Order pop-up window:
From the "List View" section in the Schedule "Calendar" tab
From the "List View" section in the Schedule "Timeline" tab
From the "List View" section in the Schedule "Overview" tab
From the "List View" section in the Schedule "Composite" tab
From the Schedule "Map" tab
Or from the Work Order "List" tab
The Dispatch Work Order pop-up window will appear. In this pop-up window you will be able to select your desired dispatch mode from the "Dispatch Mode" drop-down:
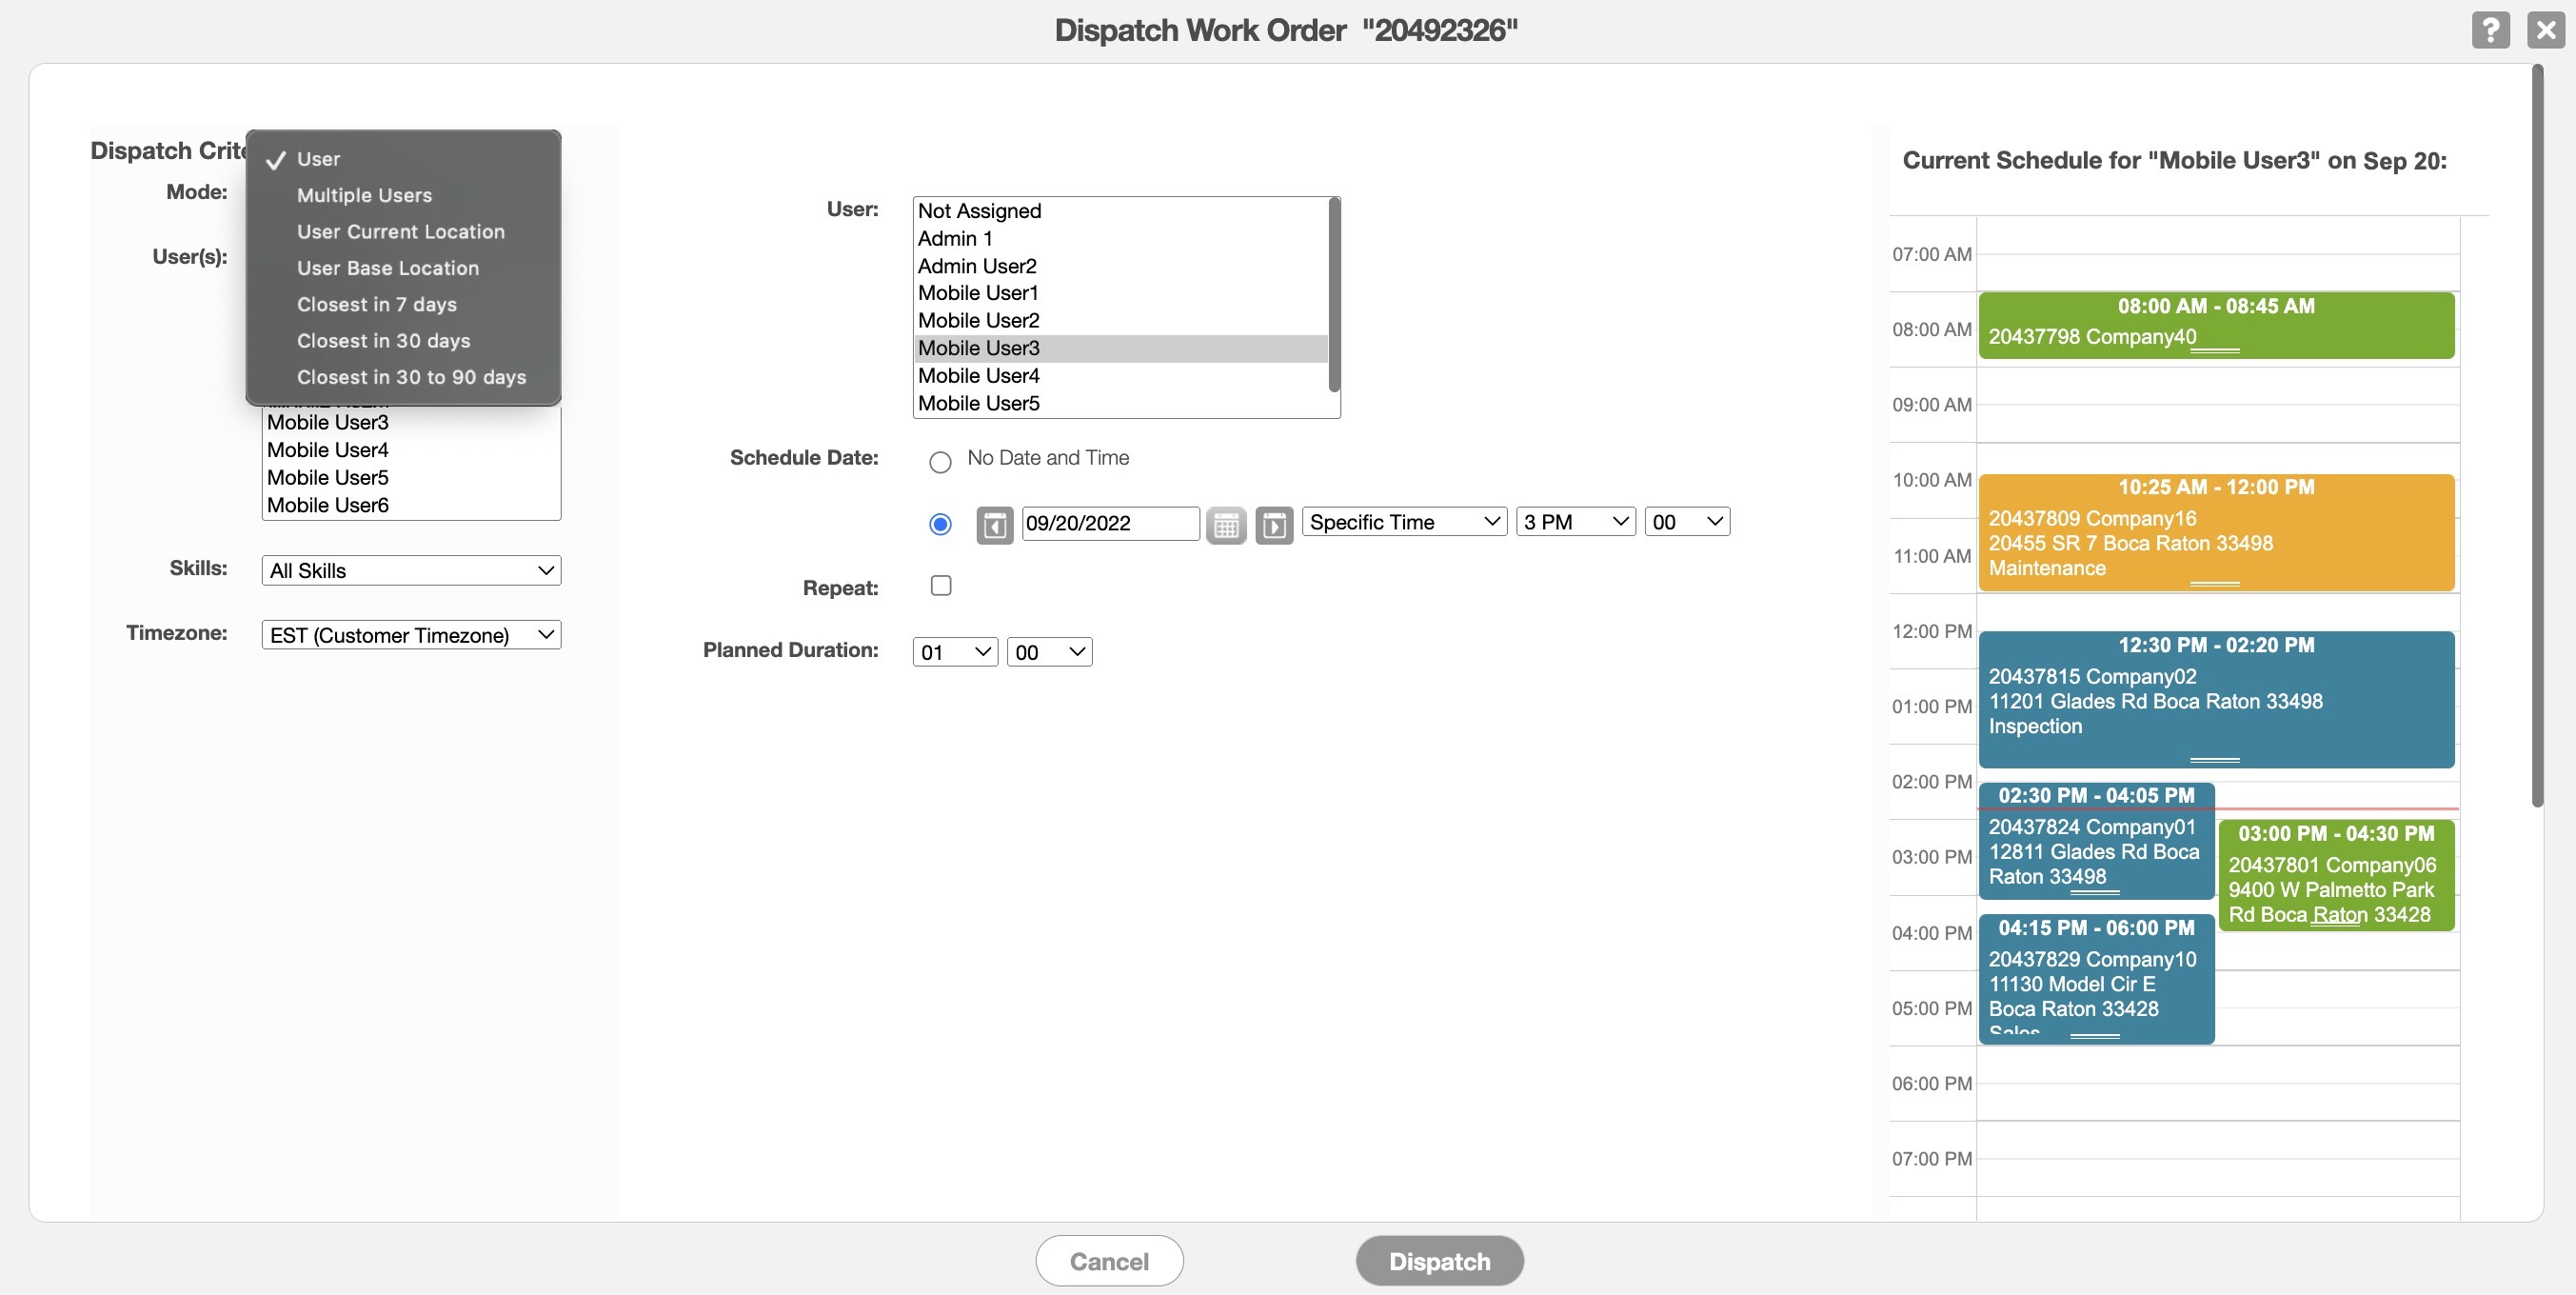
The "User" dispatch is the default mode of the Dispatch Work Order pop-up window. From this pop-up window you will be able to assign a single user to a work order:
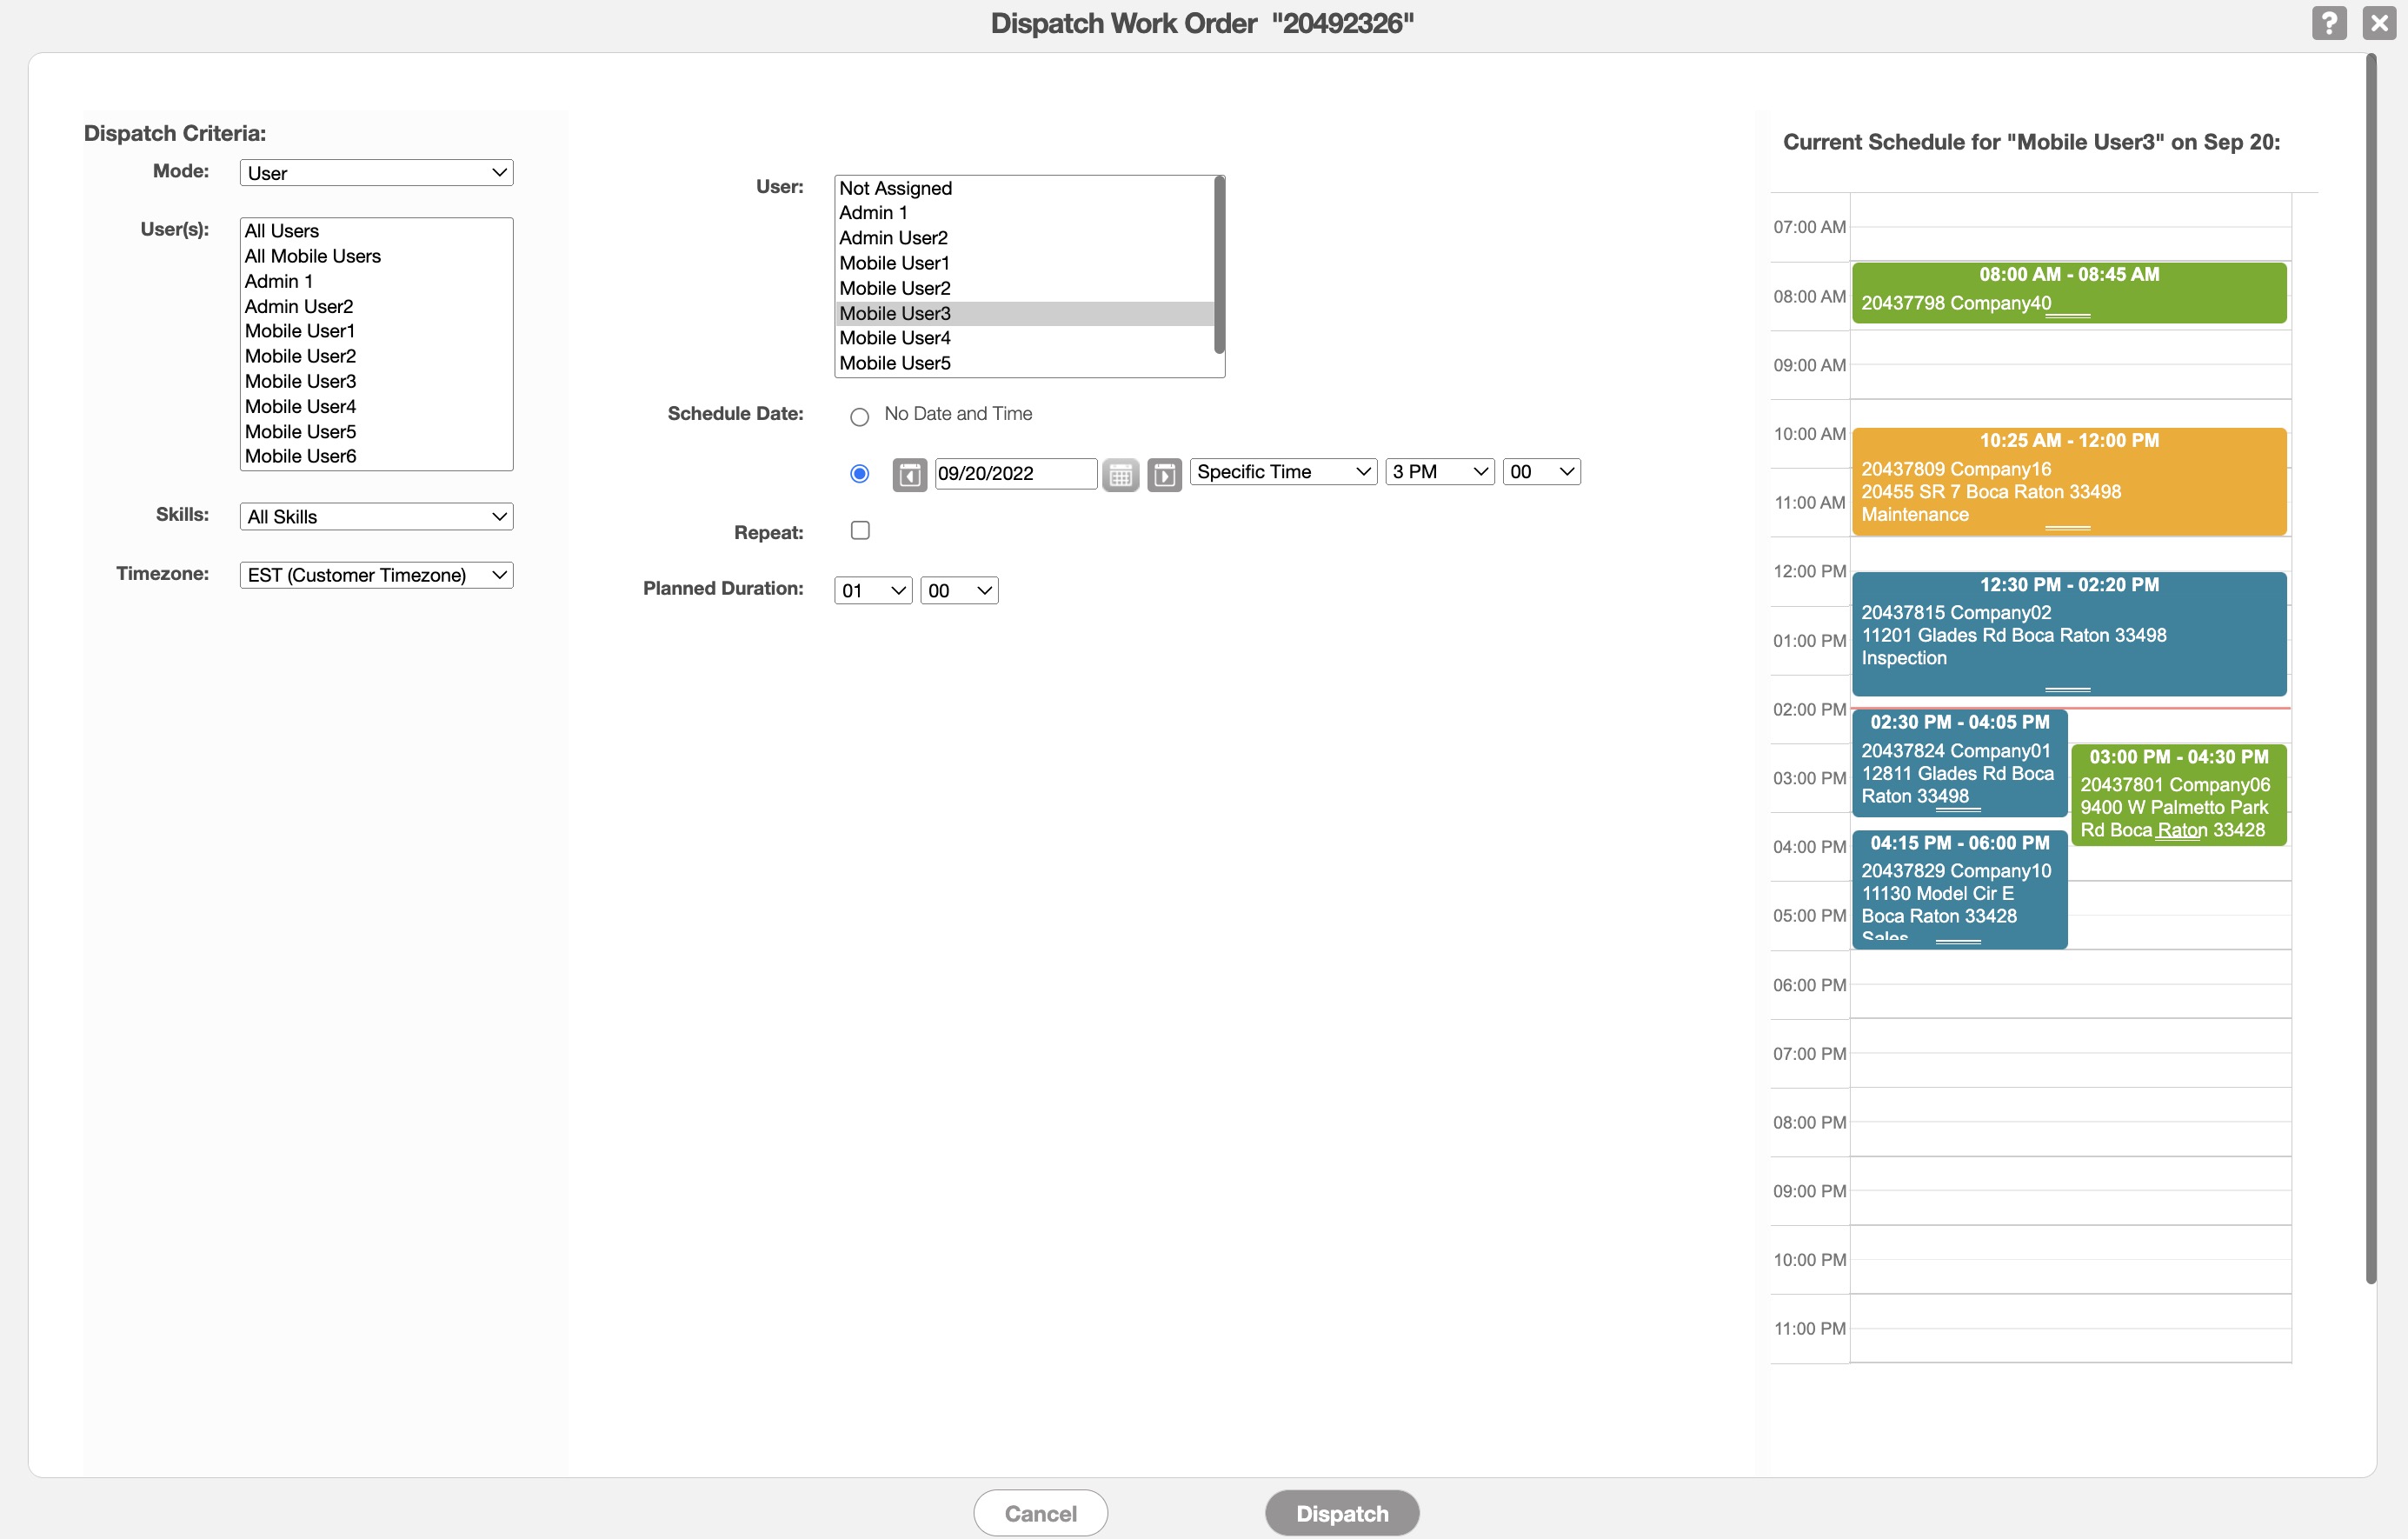
In the "User(s)" selection, click on the user you would like assigned to the work order. Once you are satisfied with the user and the rest of the dispatch data click the Dispatch button.
The time zone drop-down will automatically use the time zone where the customer resides; you can modify the time zone selected by choosing a new time zone from the drop-down.
The "Multiple Users" dispatch mode will allow you to dispatch multiple users to a single work order:
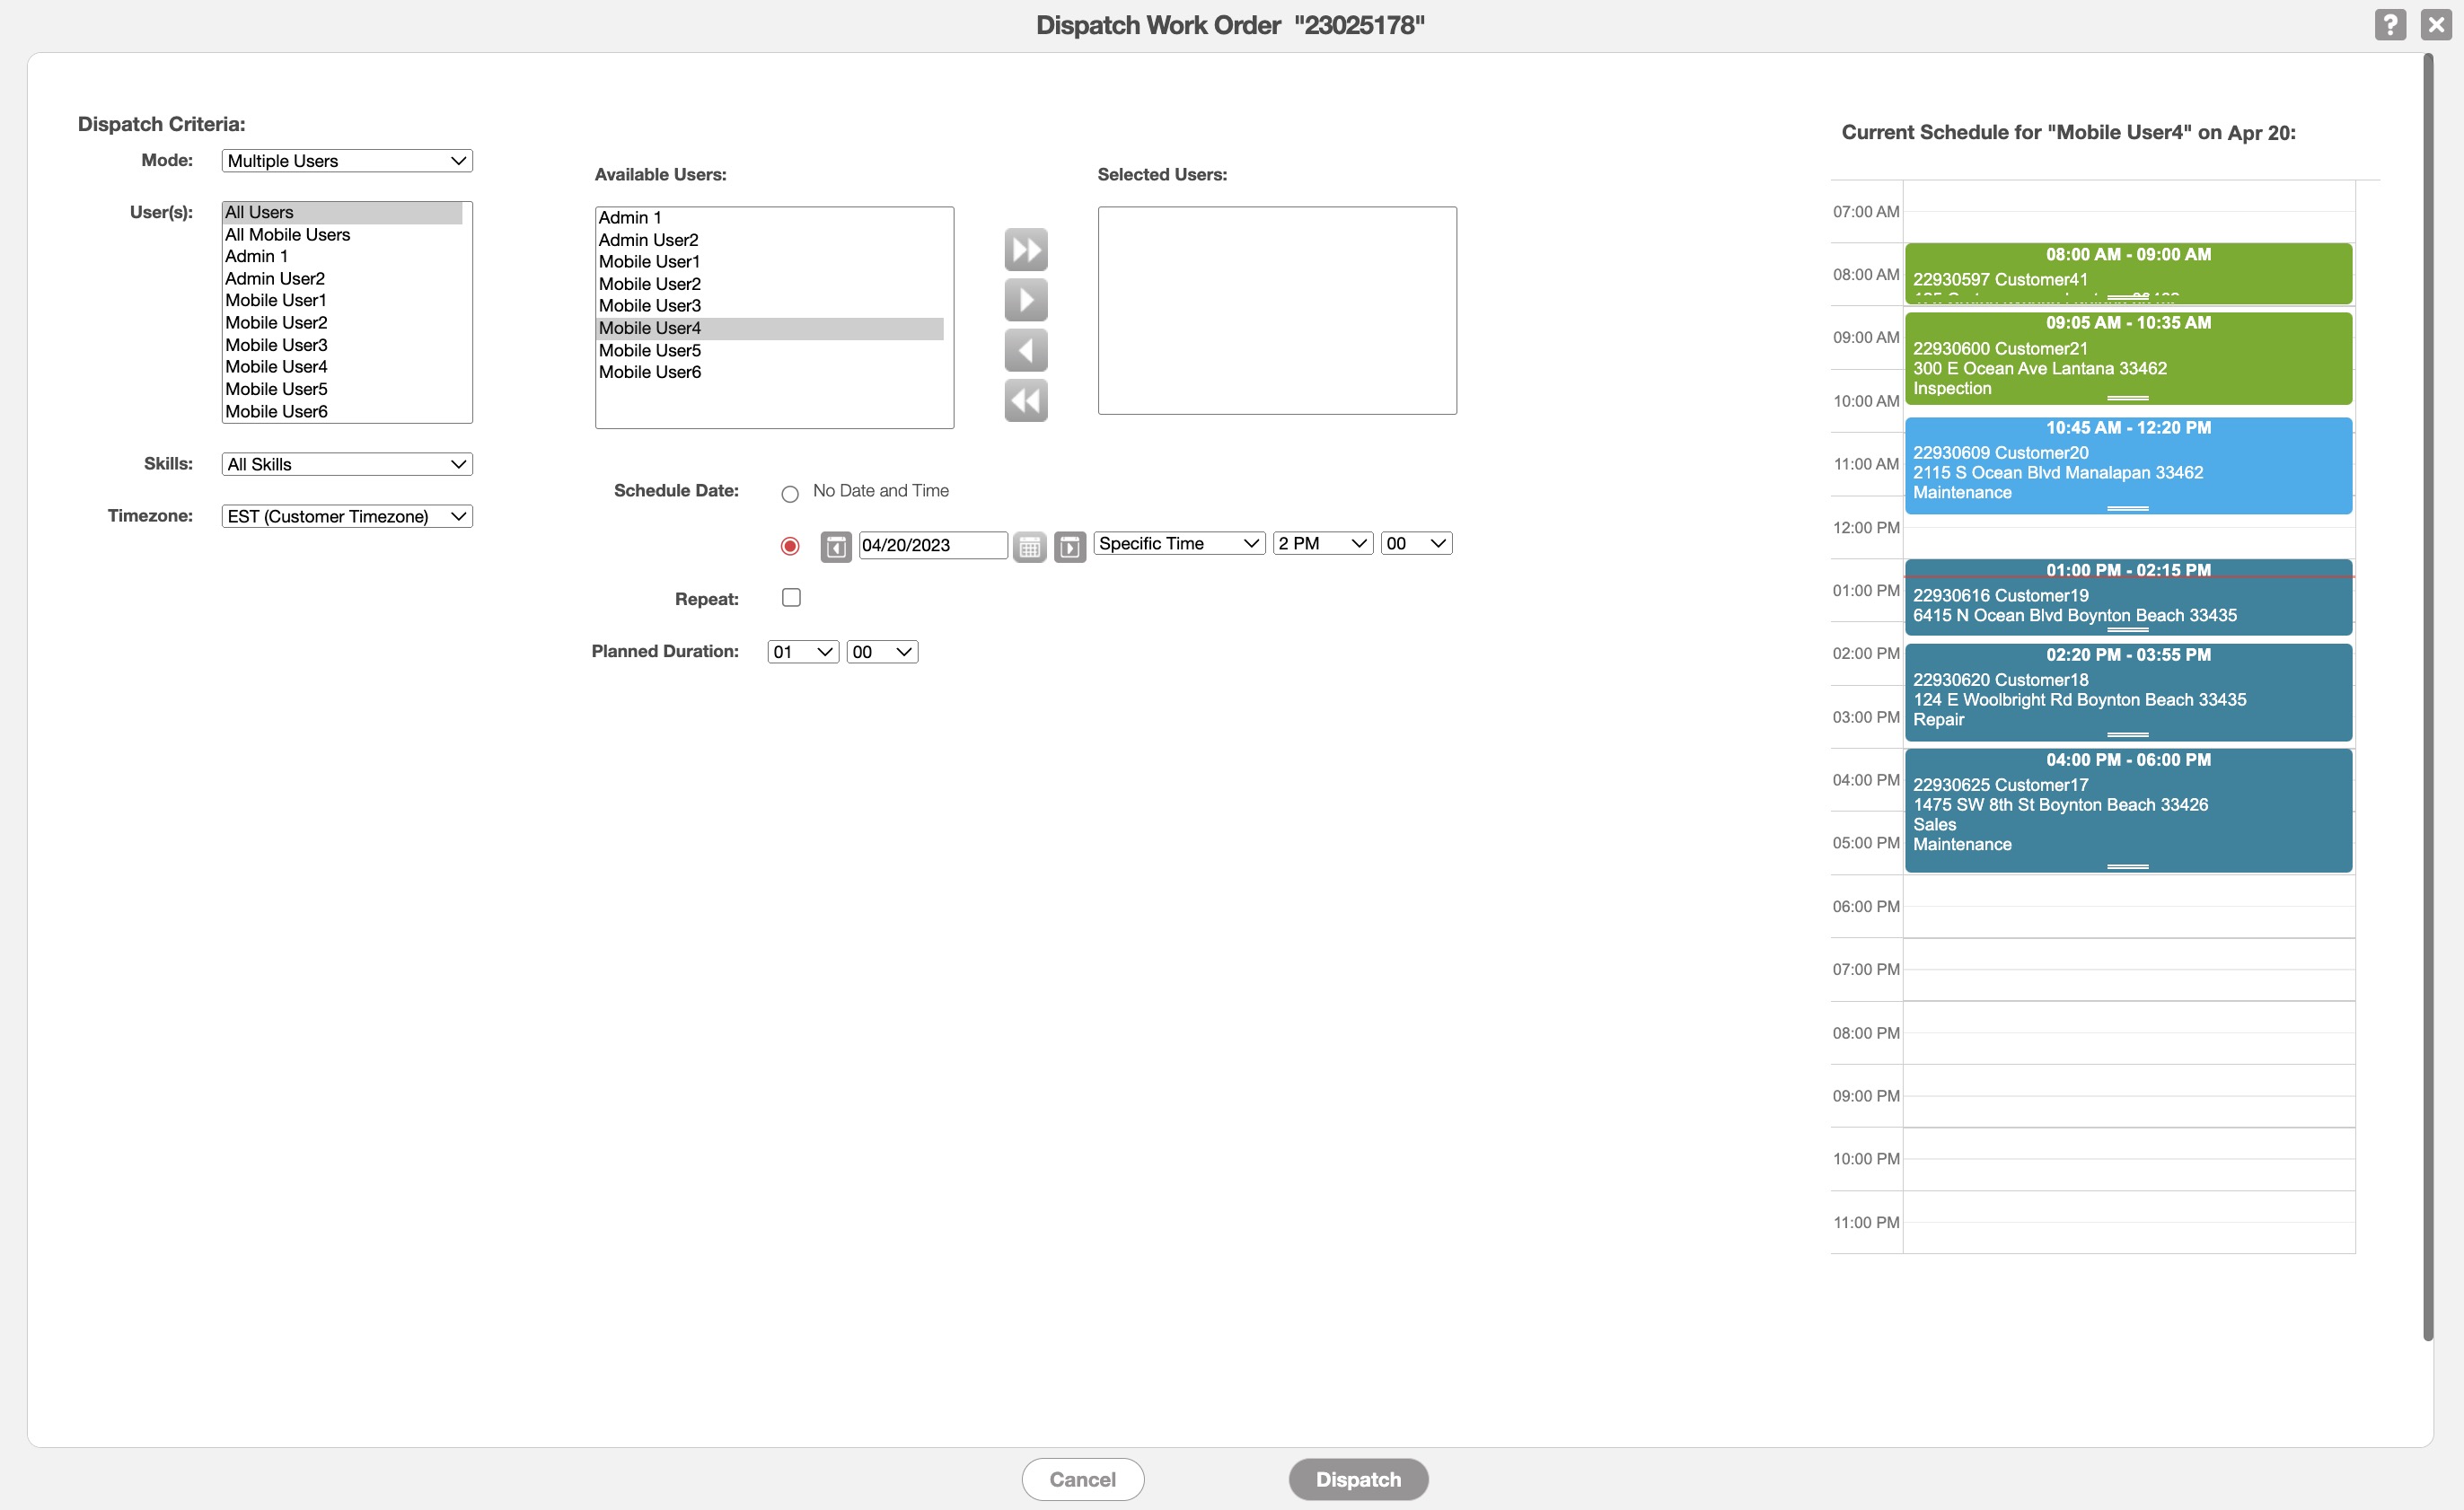
To highlight more than one user click the Command Key (Mac) or Control Key (Windows) on your keyboard. While you are holding down on the appropriate keyboard button, click on the desired users you would like to assign to the work order.
The time zone drop-down will automatically use the time zone where the customer resides; you can modify the time zone selected by choosing a new time zone from the drop-down.
The "User Current Location" mode will allow you to automatically find the user closest to the work order. This mode is ideal for any emergency:
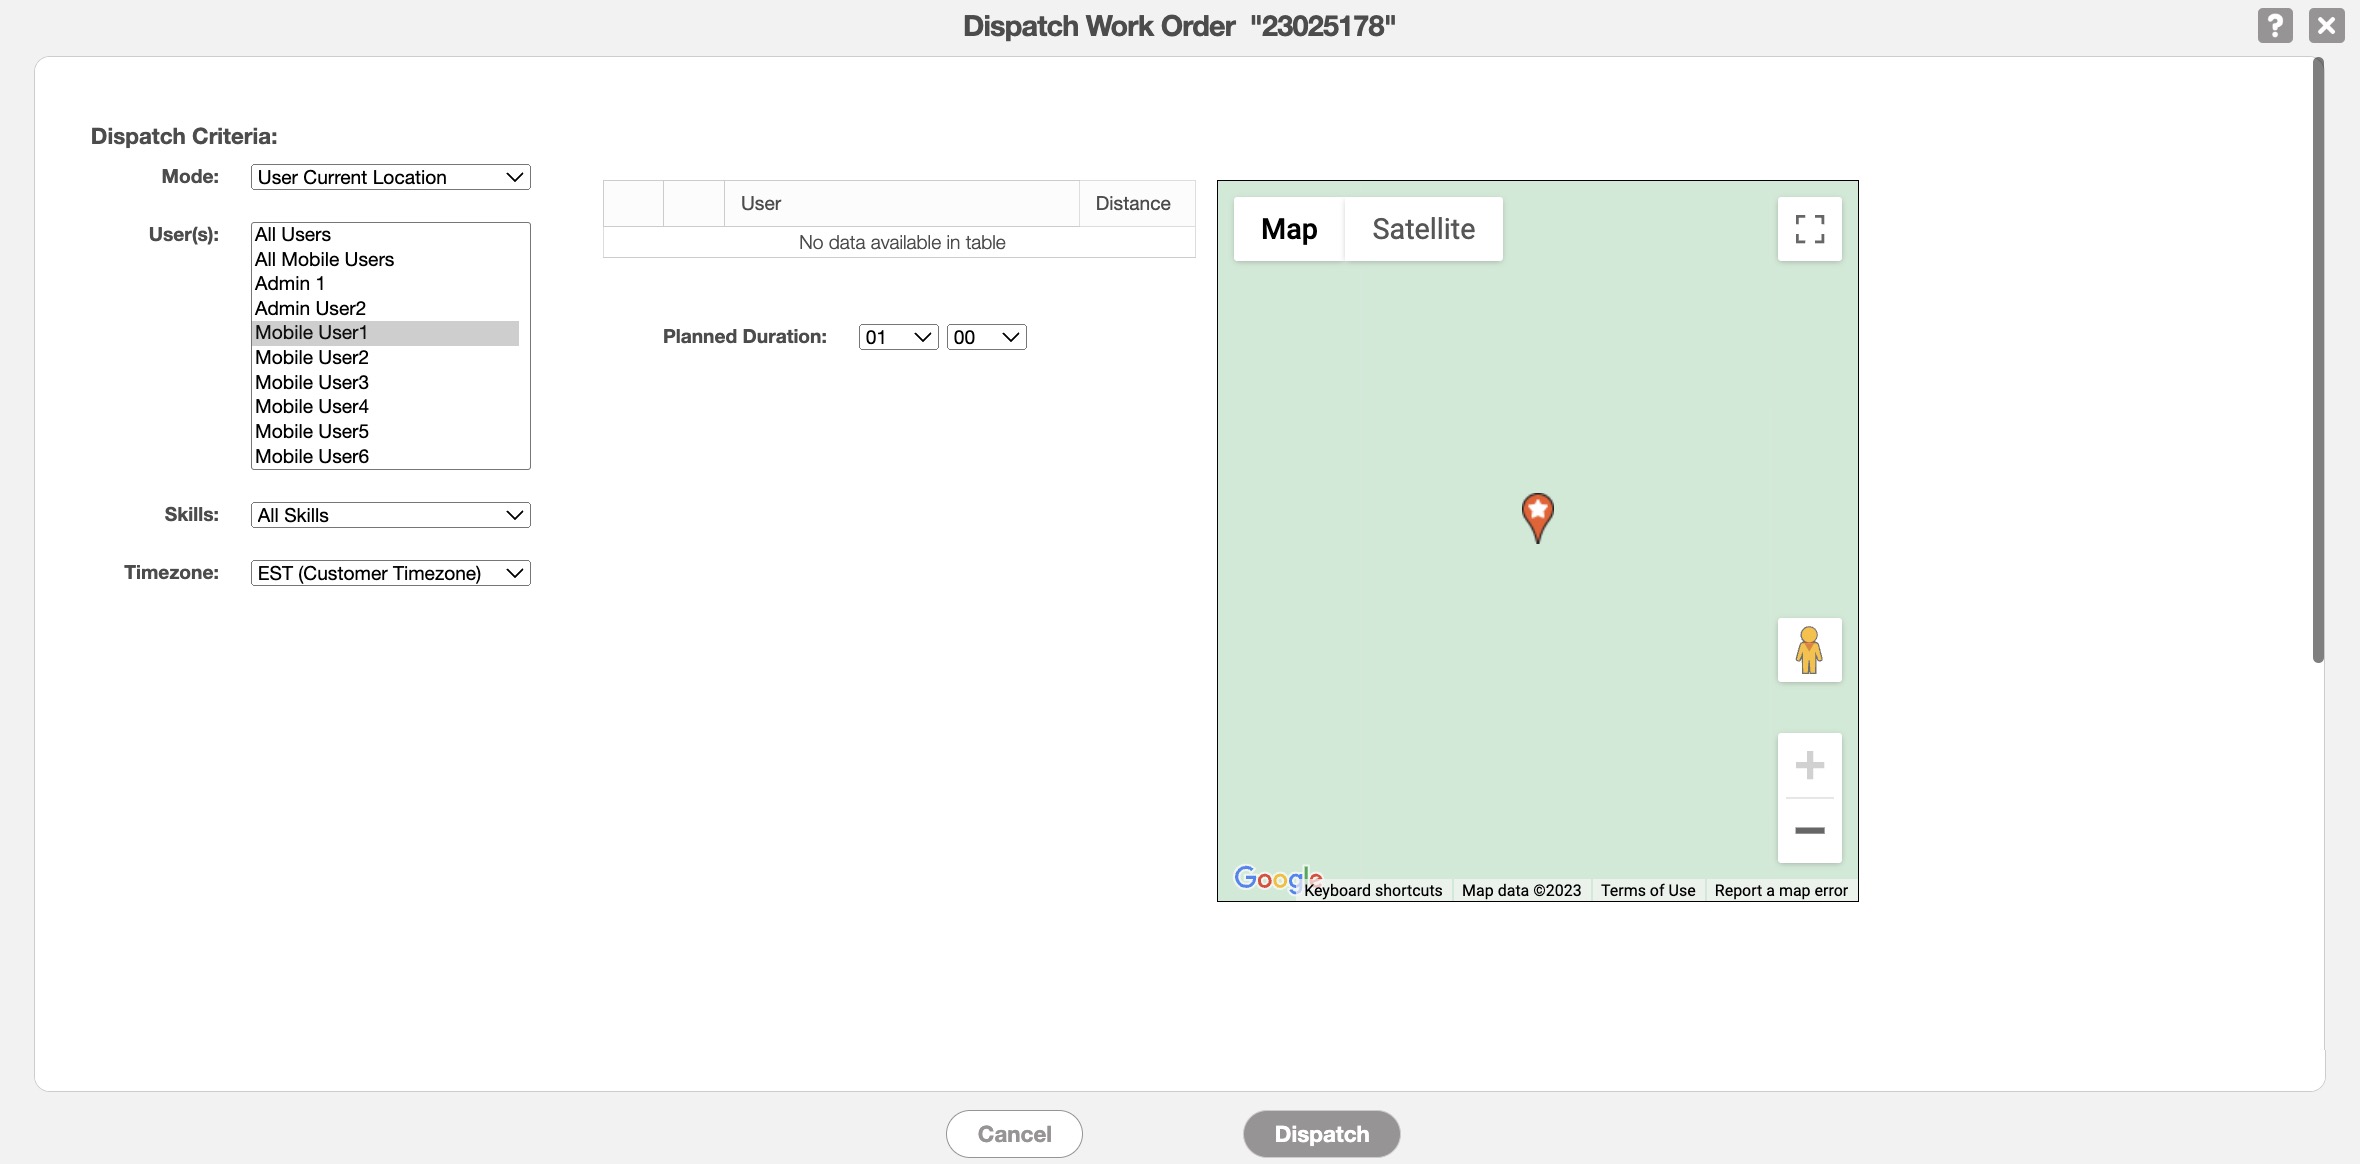
Once you select the closest user and input the planned duration of the work order, click the Dispatch button.
The time zone drop-down will automatically use the time zone where the customer resides; you can modify the time zone selected by choosing a new time zone from the drop-down.
The "User Base Location" mode will allow you to dispatch users directly from the office location closest to the work order site:
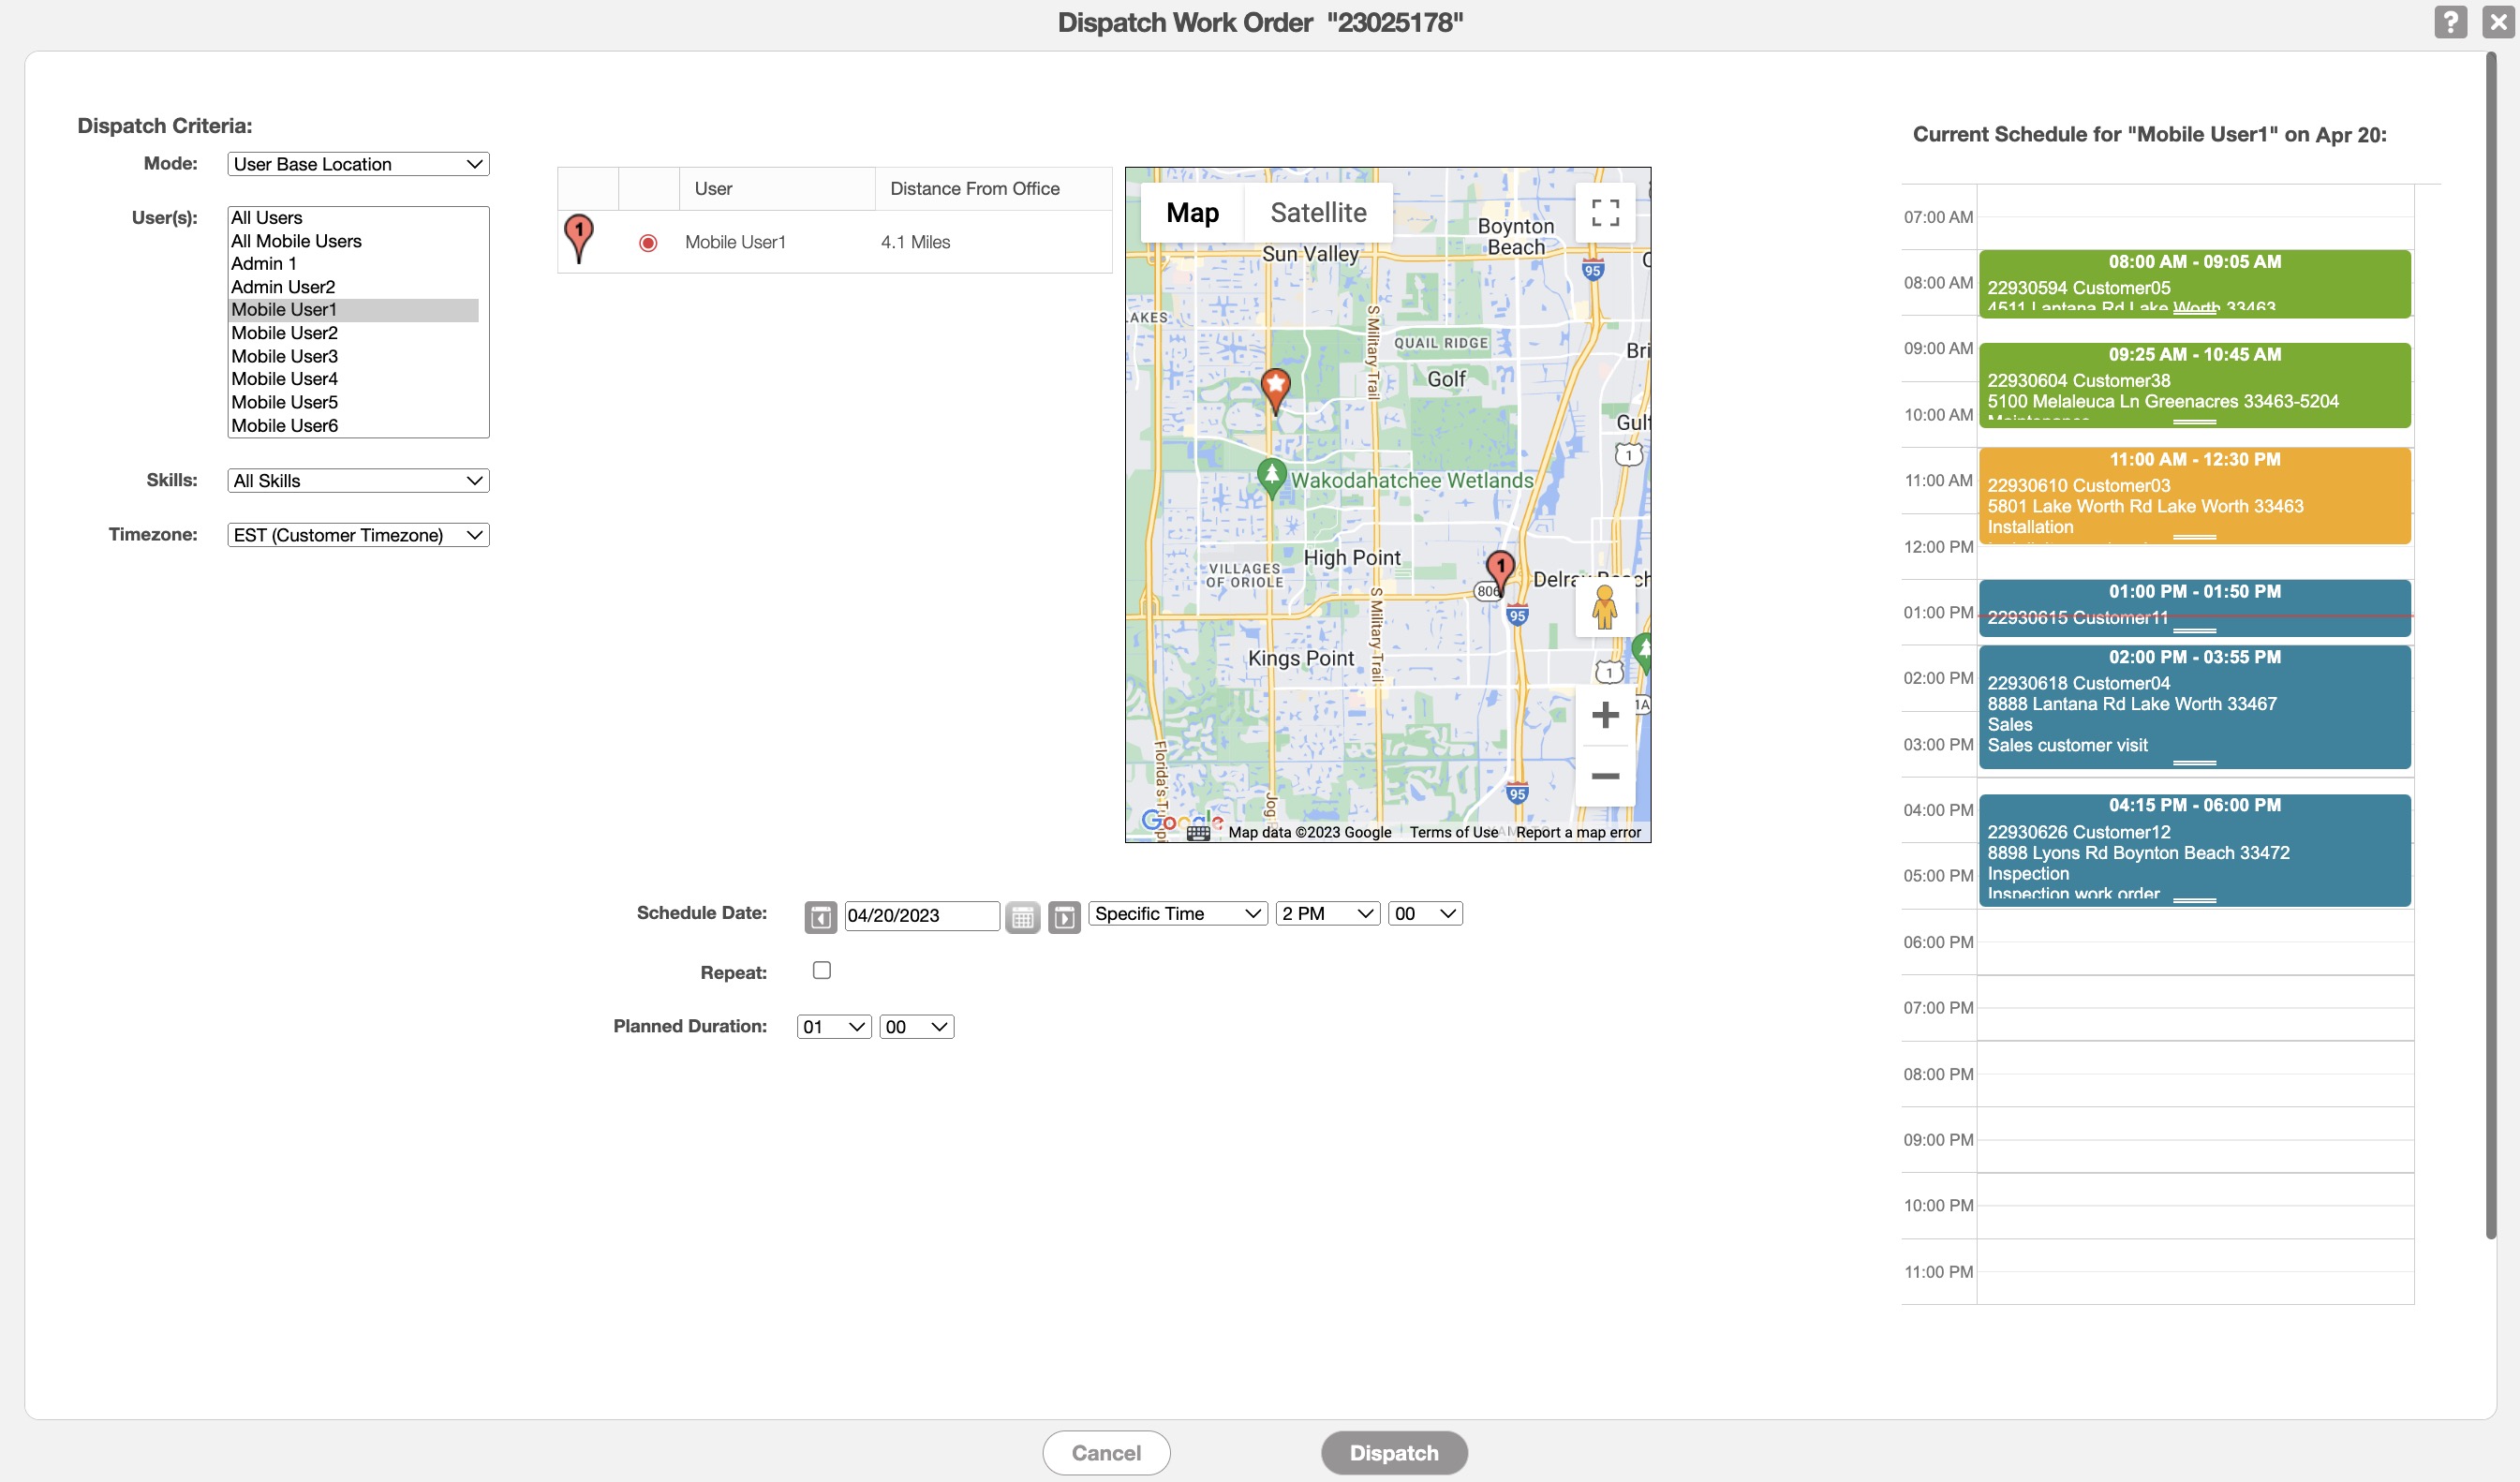
Once you select the closest user to the work order location and input the rest of the dispatch data click the Dispatch button.
Note: The base location is derived from the listed address on the User profile. For more information about the User profile please see the Users page.
The time zone drop-down will automatically use the time zone where the customer resides; you can modify the time zone selected by choosing a new time zone from the drop-down.
The "Closest in 7 Days" mode will allow you to view the schedule of all your users within the next seven days. You can then dispatch the user closest to the work order location within that time frame:
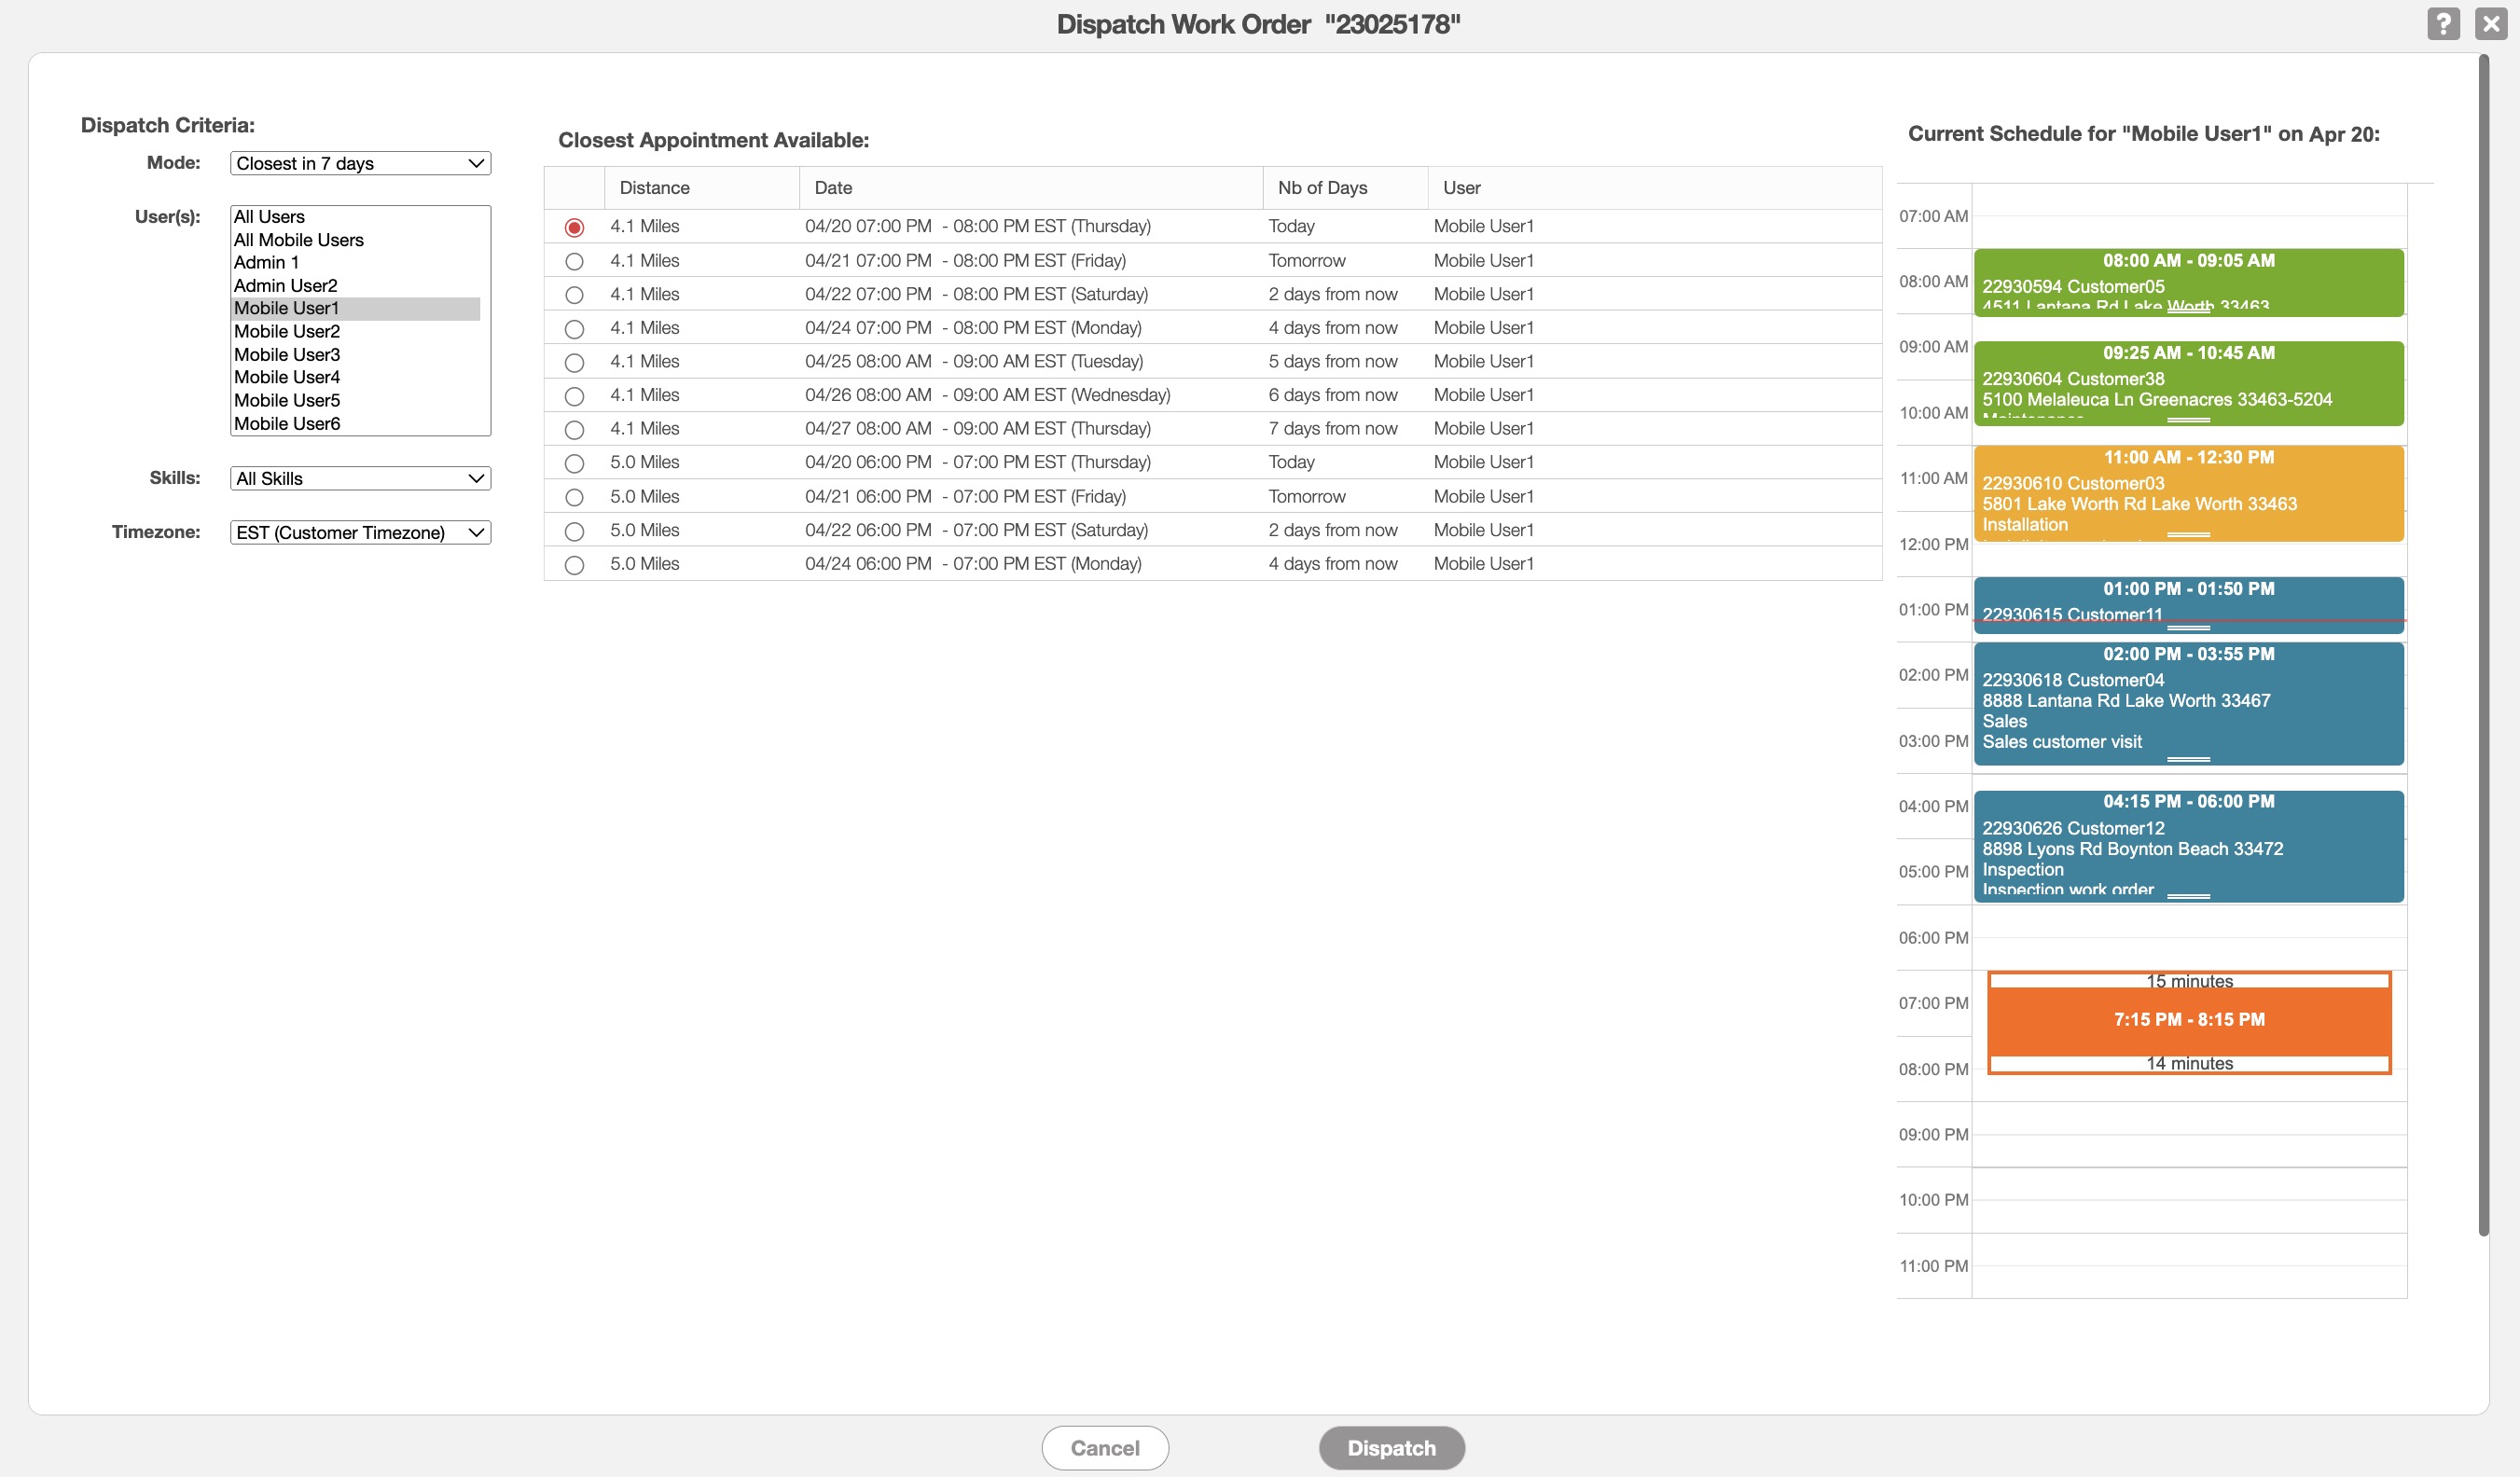
Once you have selected the desired user, click on the Dispatch button to finalize.
The time zone drop-down will automatically use the time zone where the customer resides; you can modify the time zone selected by choosing a new time zone from the drop-down.
The "Closest in 30 Days" mode will allow you to view the schedule of all your users within the next thirty days. You can then dispatch the user closest to the work order location within that time frame:
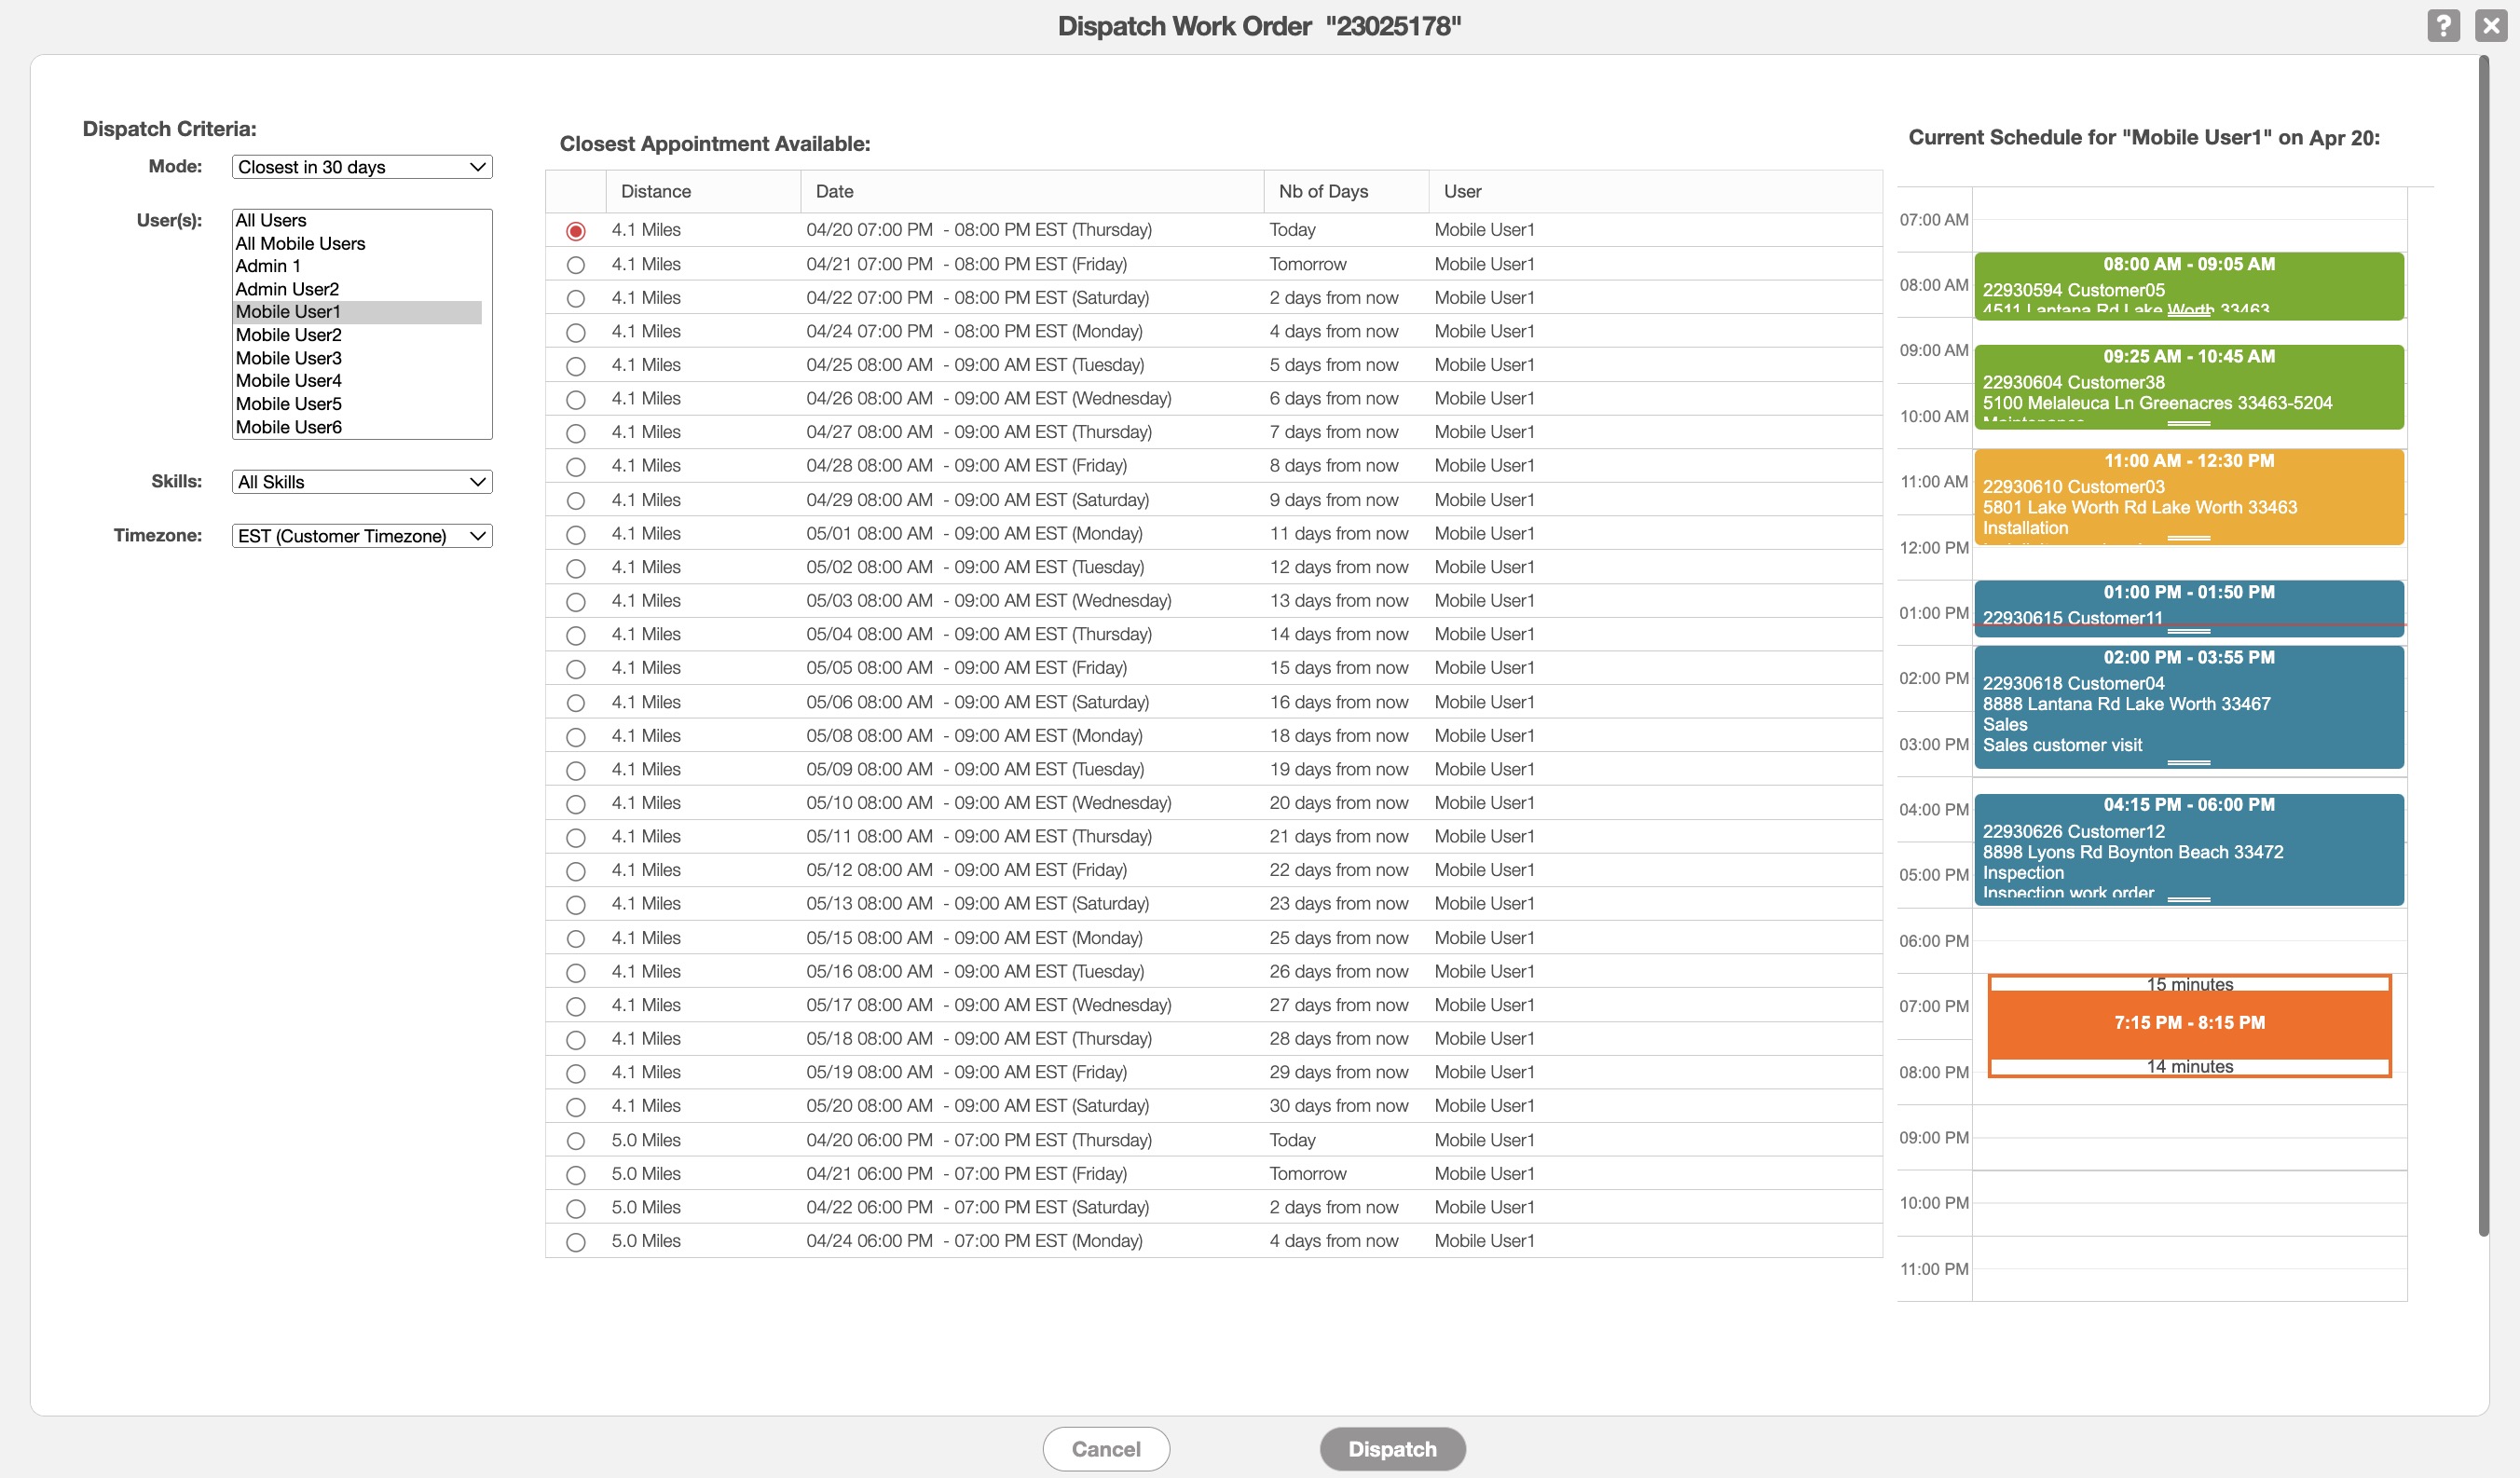
Once you have selected the desired user, click on the Dispatch button to finalize.
The time zone drop-down will automatically use the time zone where the customer resides; you can modify the time zone selected by choosing a new time zone from the drop-down.
The "Closest in 30 to 90 Days" mode will allow you to view the schedule of all your users within the next thirty to ninety days. You can then dispatch the user closest to the work order location within that time frame:
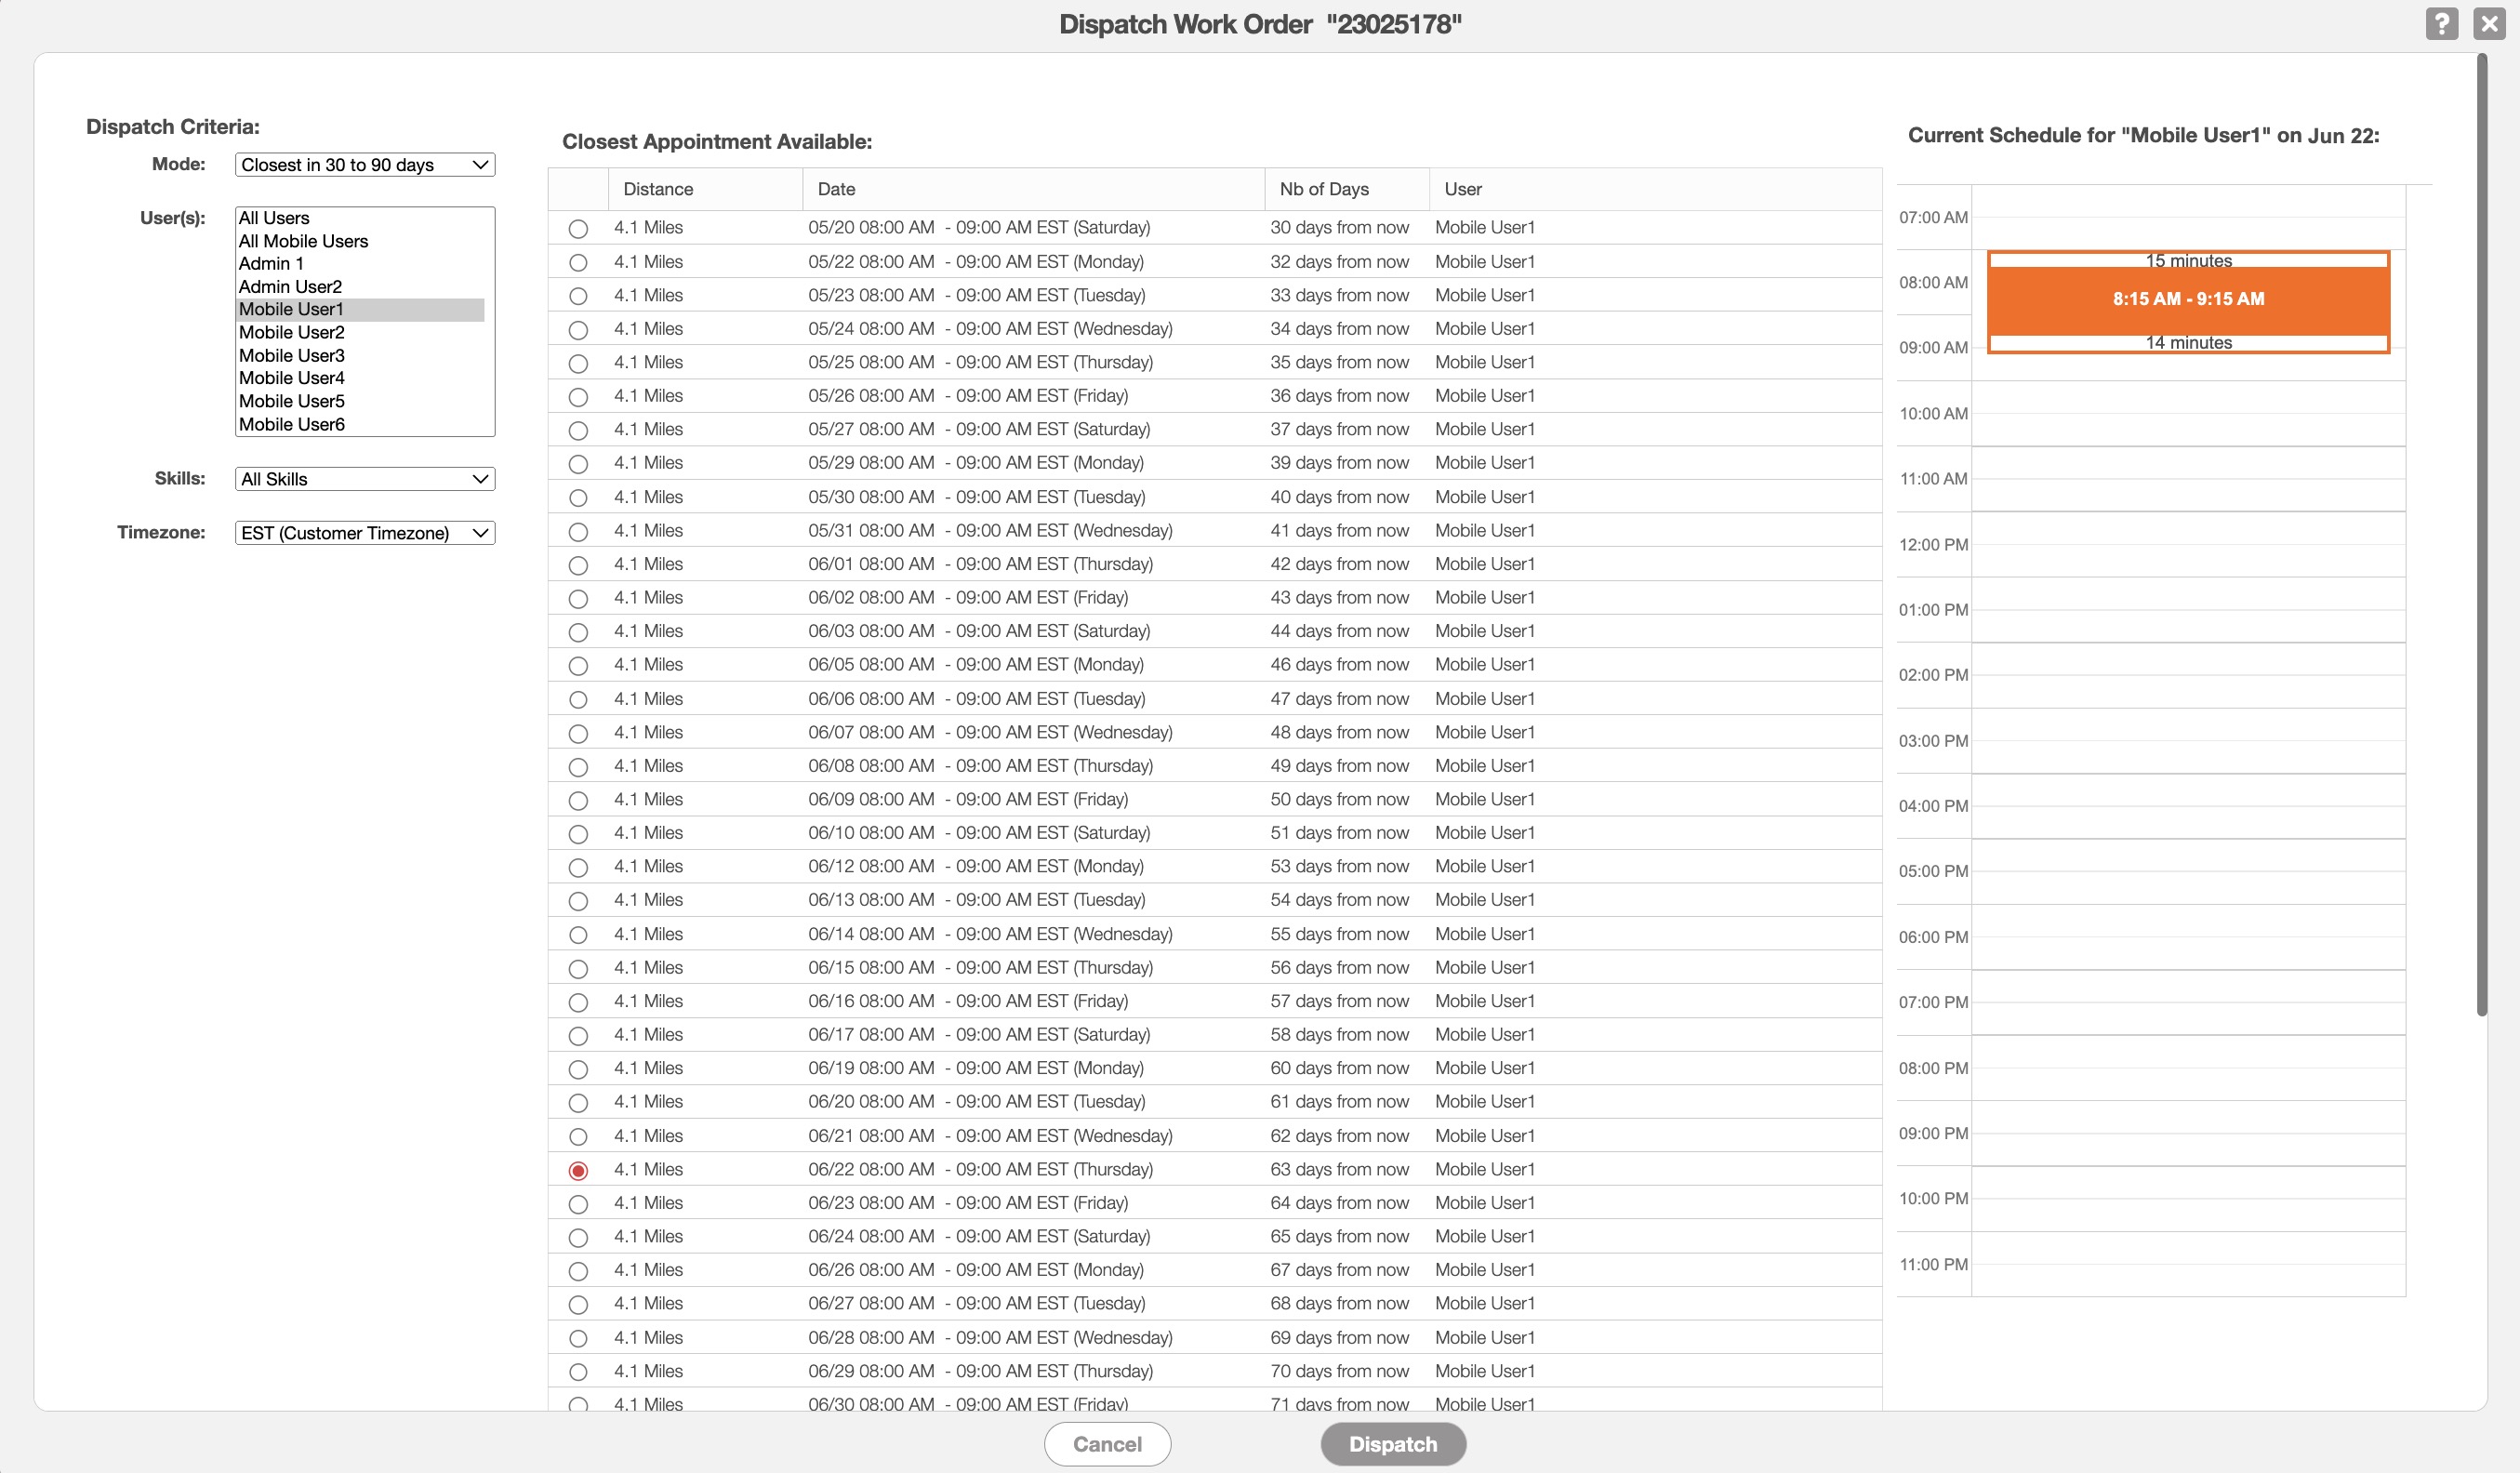
Once you have selected the desired user, click on the Dispatch button to finalize.
The time zone drop-down will automatically use the time zone where the customer resides; you can modify the time zone selected by choosing a new time zone from the drop-down.
The "Skills" field will allow you to find the user with the appropriate skill set (e.g., technical skills, certifications, insurance policy, etc.) closest to the work order location. Simply select the desired skill and the appropriate user will be displayed in the "Available Users" field:
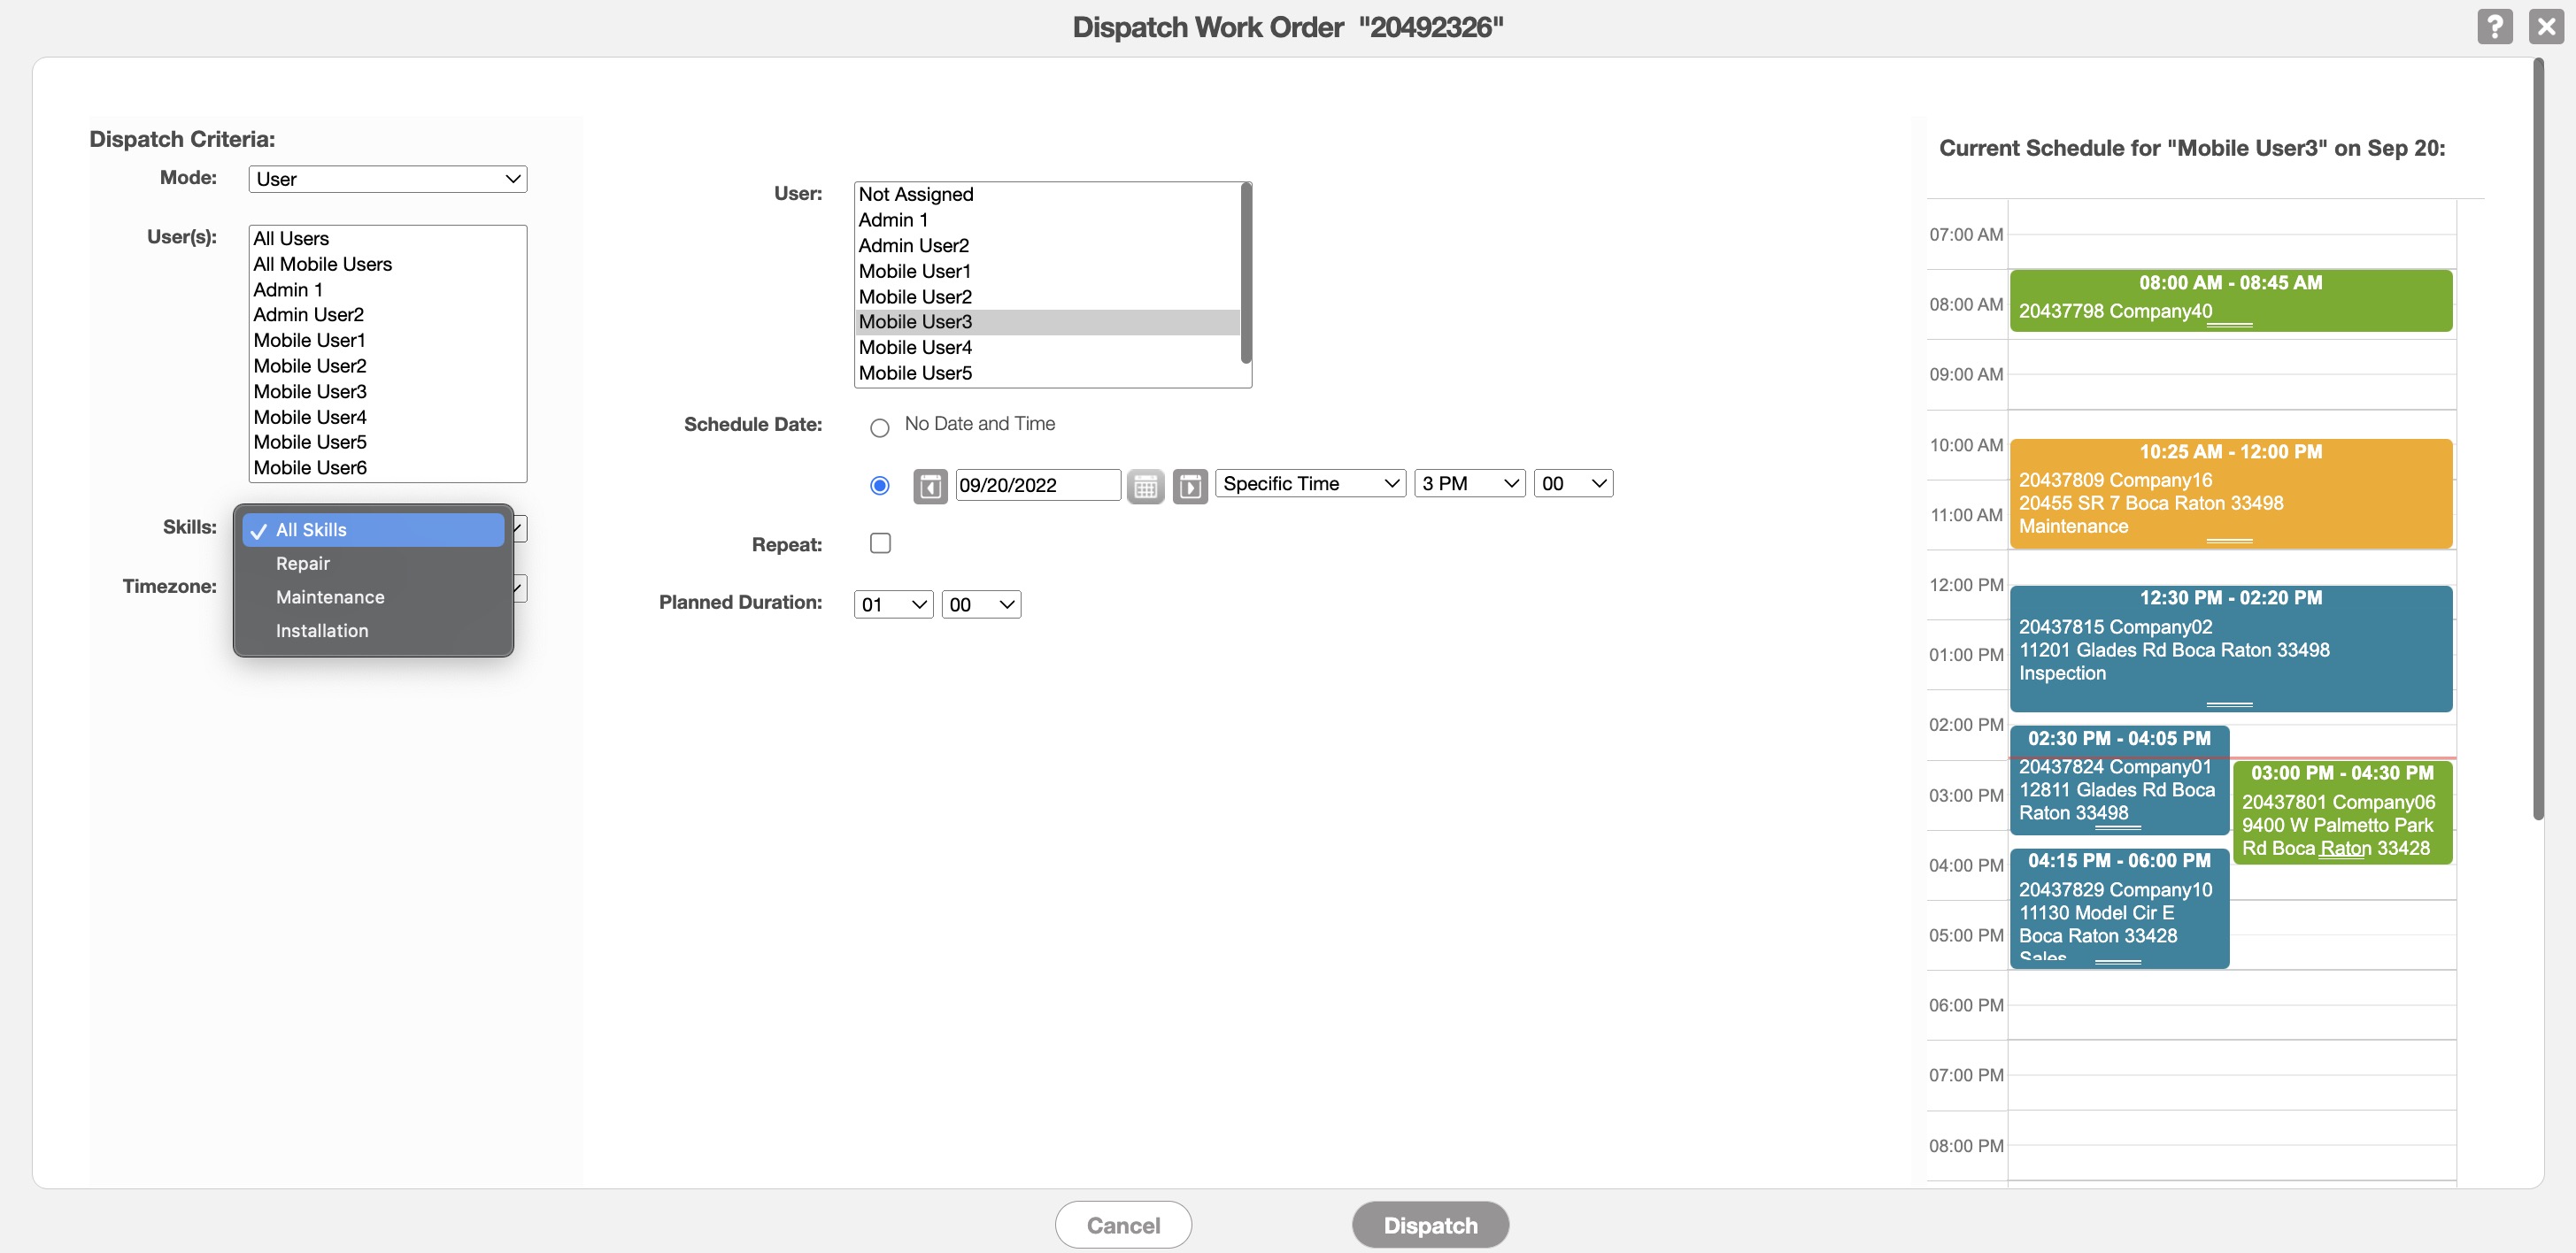
Once you have selected the user with the desired skill set, click on the Dispatch button to finalize. When work orders are dispatched by skill, MobiWork will display technicians with at least one matching skill from the list, even if they have multiple skills associated with their profile.
Set Up User Skills
To set up your users with the appropriate skills for dispatching, you will need to:
Navigate to your Users Settings page. For more information on how to access this page, please see the Users page.
Under the "Skills" section, use the Add button to add specific skills, certifications, etc. to your MobiWork account:
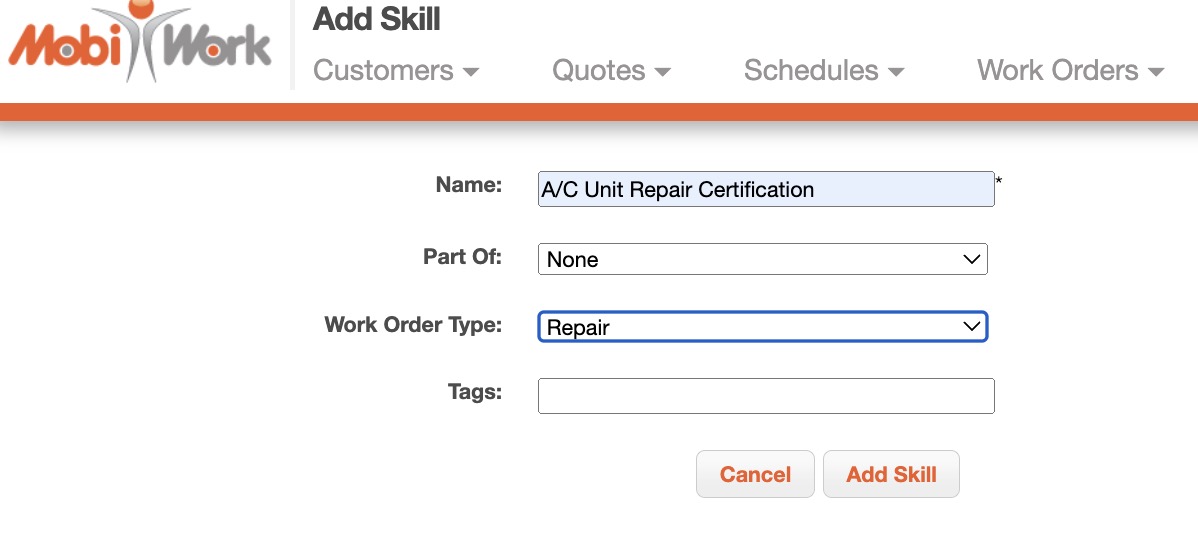
Enter the name, the type of work order the skill is associated with, and any tags. When done, click on the Add Skill button:
- Note: You can assign a set of skills to a particular work order. For example, you might add a machine unit certification as a specific skill required for an installation work order. In this case, the specific skill acts as a subset of a broader skill category.
Once you have the skills set up in the User Settings page, you should then navigate to the View User Profile. In this pop-up window select the "Skills" tab:
- Click the Edit Skills button to bring up the list of skills you can associate with the user:
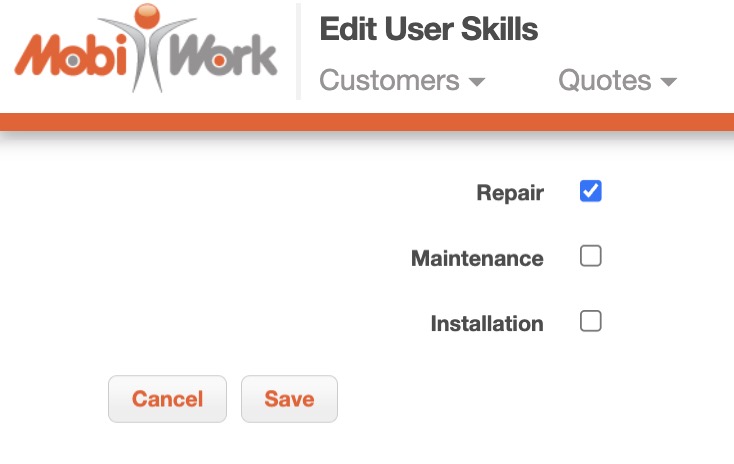
Select the skills you would like to associate with the user and then when you are finished, click the Save button:


If you have any questions or need further assistance, please let us know. We'd be happy to help!
