Step 1: Request QWC file from MobiWork
MobiWork will send you an email with the MobiWork Desktop Web Connector file and password. Below is a sample email that you will receive from us:
Subject New QBD Client: (Your Company Name)
Contact Name,
Please find the QWC file attached.
The password is: XXXXXX
Please let me know if you have any questions.
Thank you
Step 2: Place File on Server
Place the received attachment on your QuickBooks Desktop Connector server or computer.
Once you confirm that QuickBooks Desktop is running, double-click to install the file:
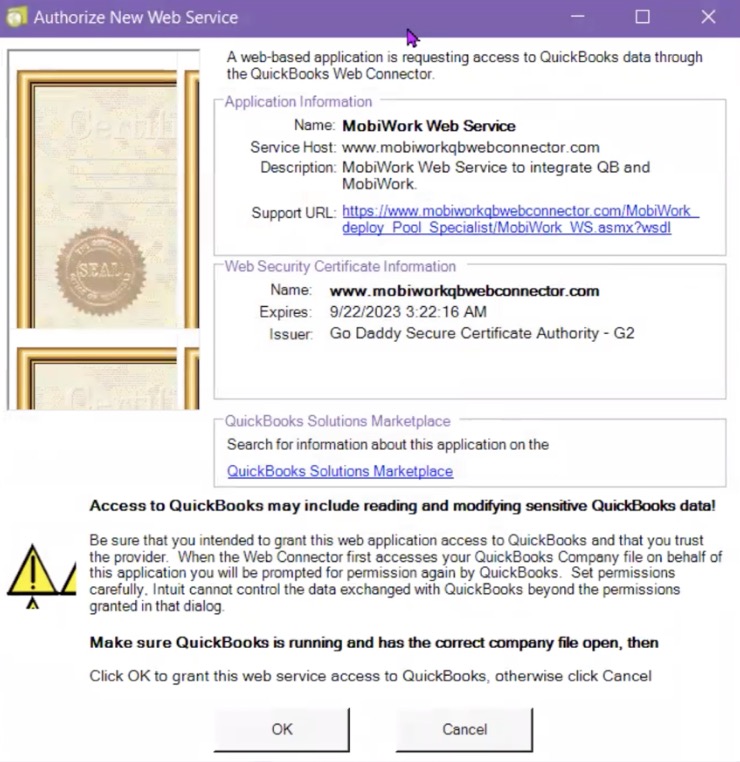
Step 3: Authorize New Web Service
In the Authorize New Web Service pop-up window that appears, click on the Ok button:
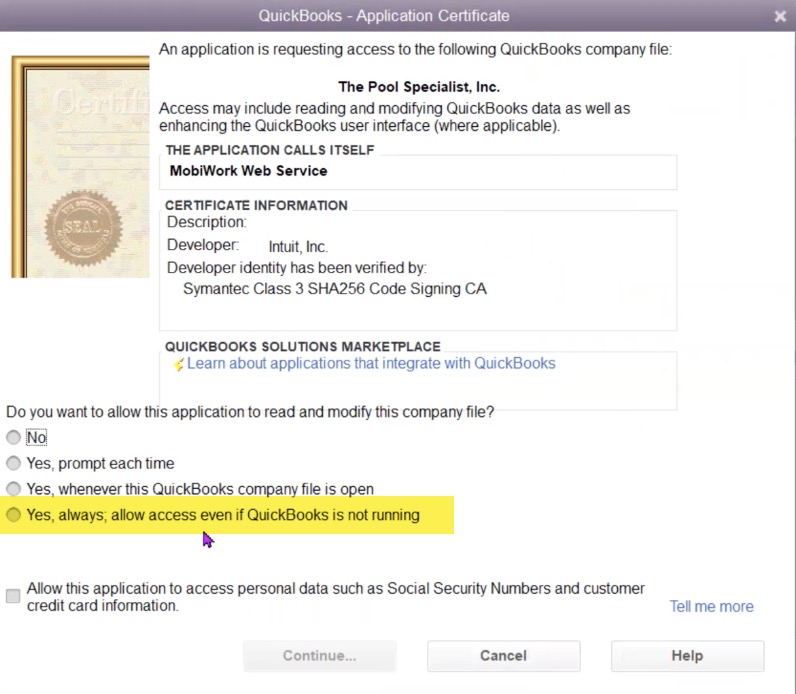
Step 4: QuickBooks Application Certificate
For the QuickBooks Application Certificate pop-up window that appears, select the "Yes, always, allow access even if QuickBooks is not running" option:
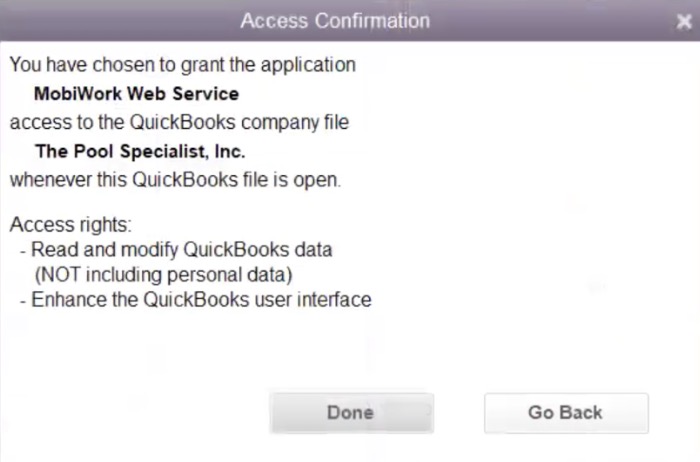
Step 5: Access Confirmation
In the Access Confirmation pop-up window, click on the Done button:
The QuickBooks Desktop Web Connector pop-up window will then appear:
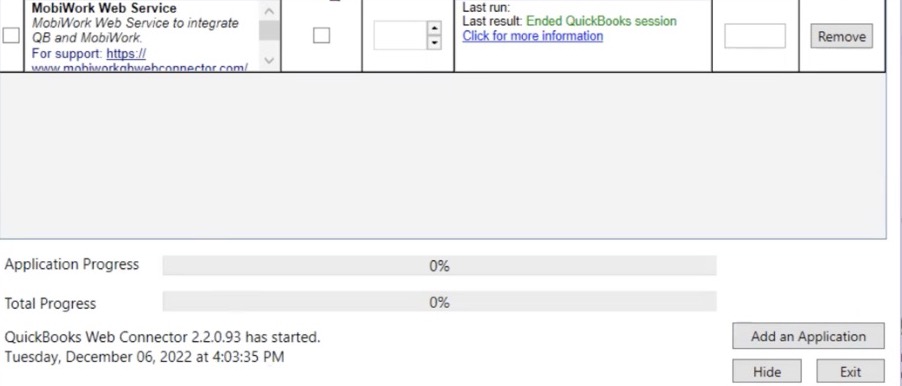
Step 6: QuickBooks Desktop Web Connector Pop-up Window
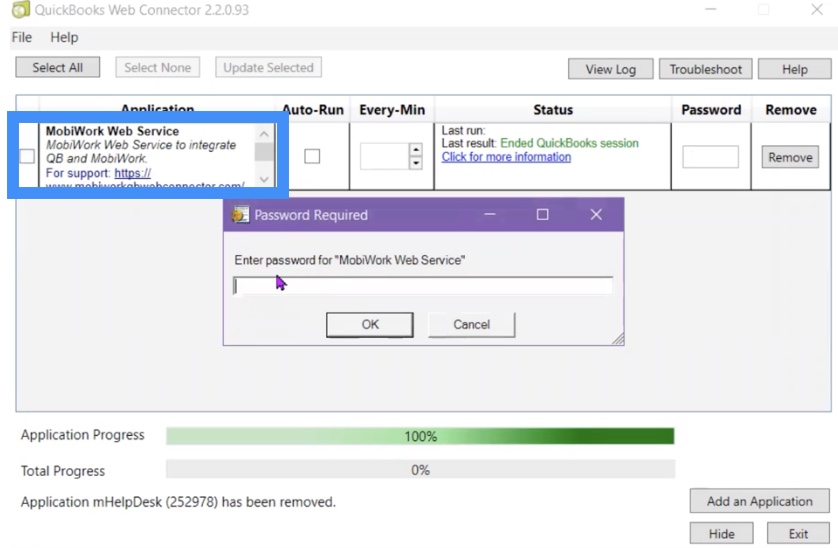
In the QuickBooks Desktop Web Connector pop-up window, click on the "MobiWork Web Service" option:
This will prompt you to input the password.
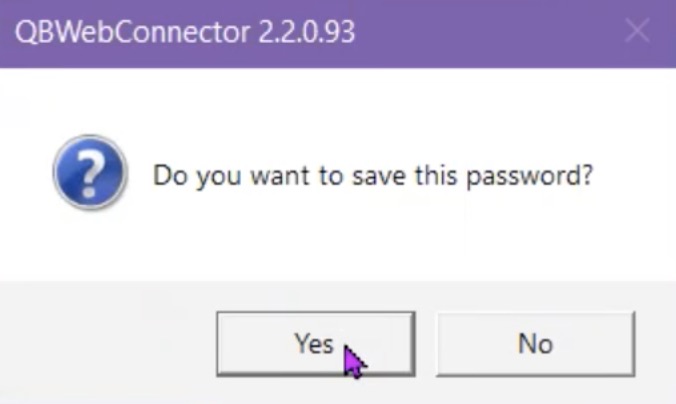
- After entering the password and clicking on the Ok button, you will be asked if you would like to save the password:
- Click the Yes button to save the password. If you select the No button, you will then be prompted for the password everytime you run the integration.
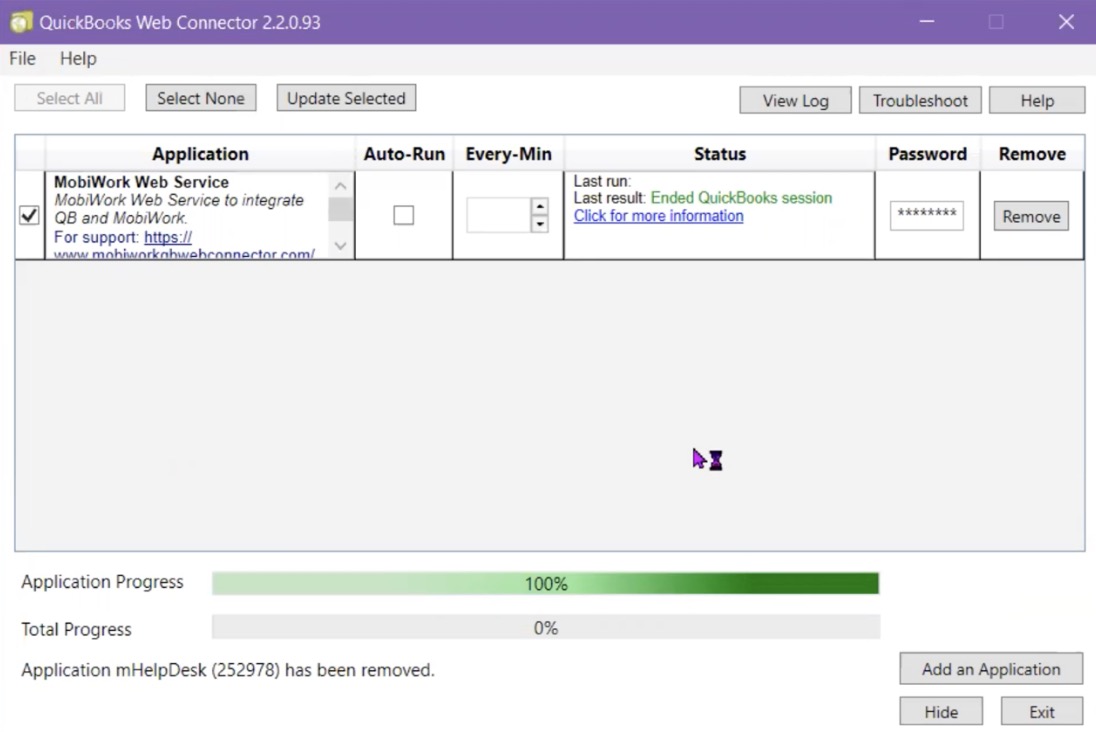
- Once you have successfully entered the password, you will be able to fill in the checkmark for the MobiWork Web Service:
- Make sure that the "Auto-Run" option is NOT checked, so that the application can run manually. Setting the connector to autorun, can implement/cause unwanted or accidental changes.
Note: Please note that the password requested here can be found in the email you received from MobiWork (please see Step 1).
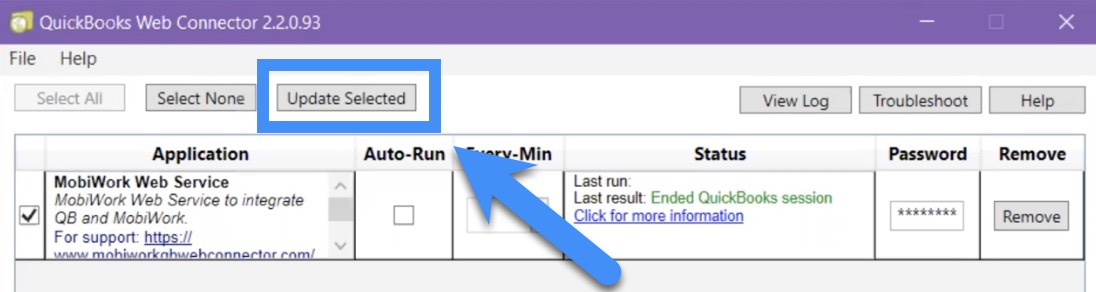
Step 7: Upload Selected Items
Click on the "Update Selected" option (located on the top of the QuickBooks Desktop Web Connector 2.2.0.93 pop-up window). This will download your customers, parts, and services:
Depending on the number of customers, parts, and services you have to download, this process could run for a while.
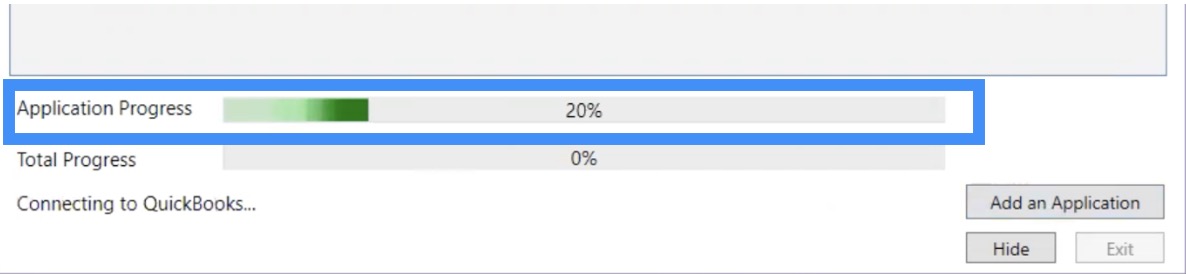
- You can watch the progress of the data pull by viewing the "Application Progress" bar and reading the notifications below the total progress bar:
- Customers Note: You can log into your MobiWork account, select the Customers feature and watch as the customers post into your account. You can scroll to the bottom of the page to see the number of customers that have imported and continue to refresh the page to determine how many customers are importing per second:
Note: Both active and inactive customers will be pulled into MobiWork.

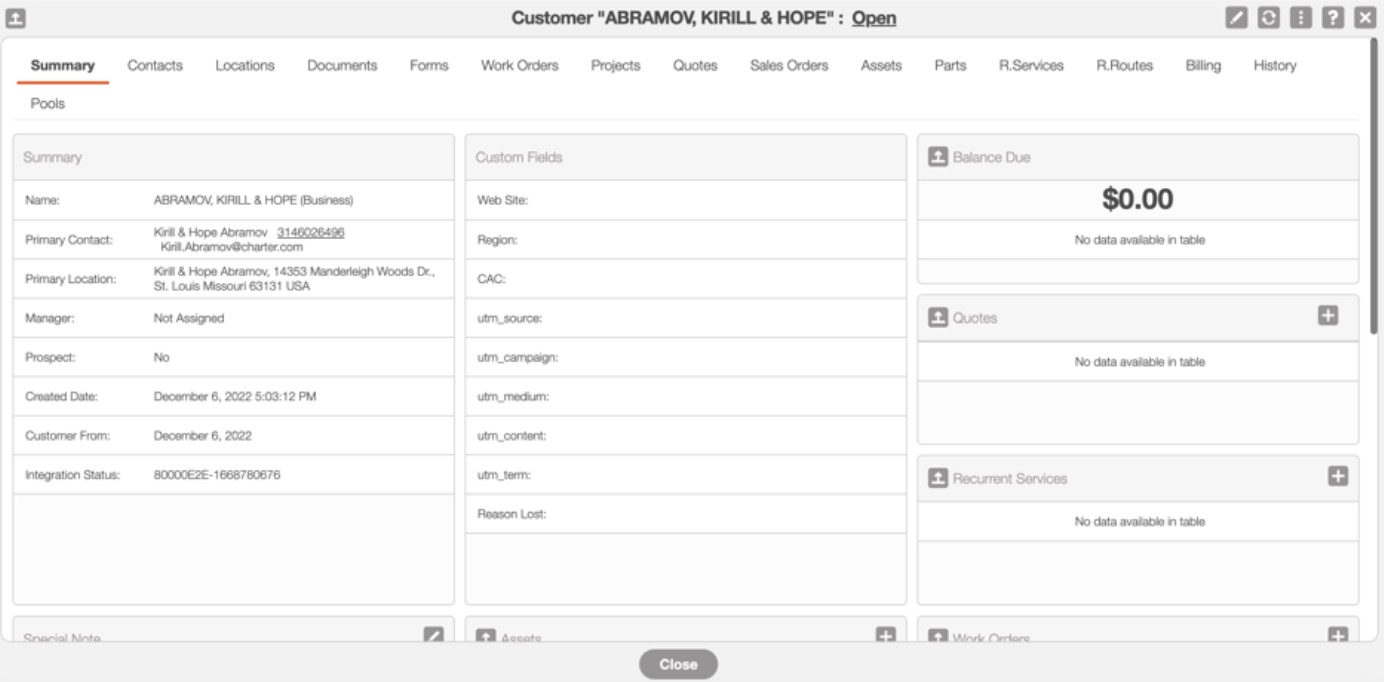
Step 8: Confirm Import
Once the import is complete, please confirm that all the customers, parts, and services have imported successfully from QuickBooks Desktop Web Connector.
All the imported customers, parts, and services will have an "Integration Status ID" and or an "External ID" that confirms the data was pulled from QuickBooks Desktop Web Connector.
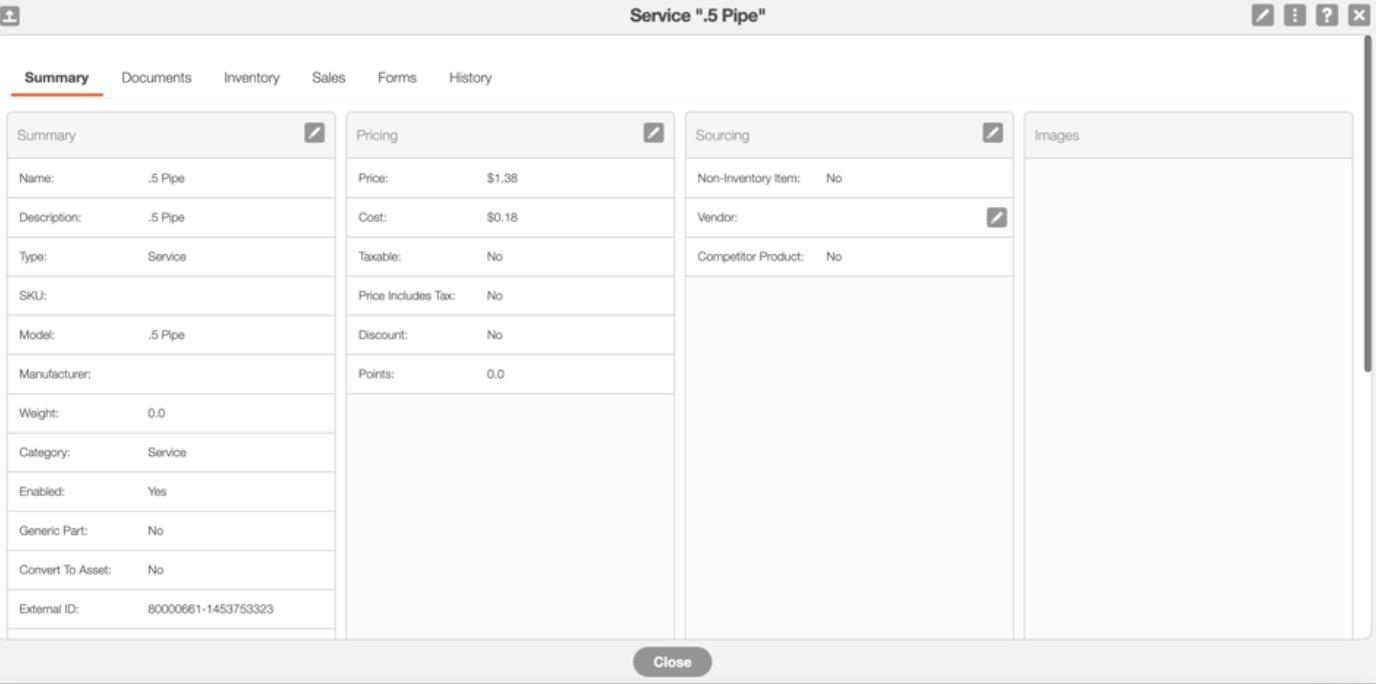
The examples below shown an imported customer and part from QuickBooks Desktop:
View Customer Pop-up Window:
View Part Pop-up Window:
The subsections below will go into more detail regarding some of the more common troubleshooting errors that you might encounter.
Error Code 1039
If you receive the error, "QBWC1039: There was a problem adding the application. Check QWCLog.txt for details. Error connecting to QuickBooks. Error message received from QuickBooks was
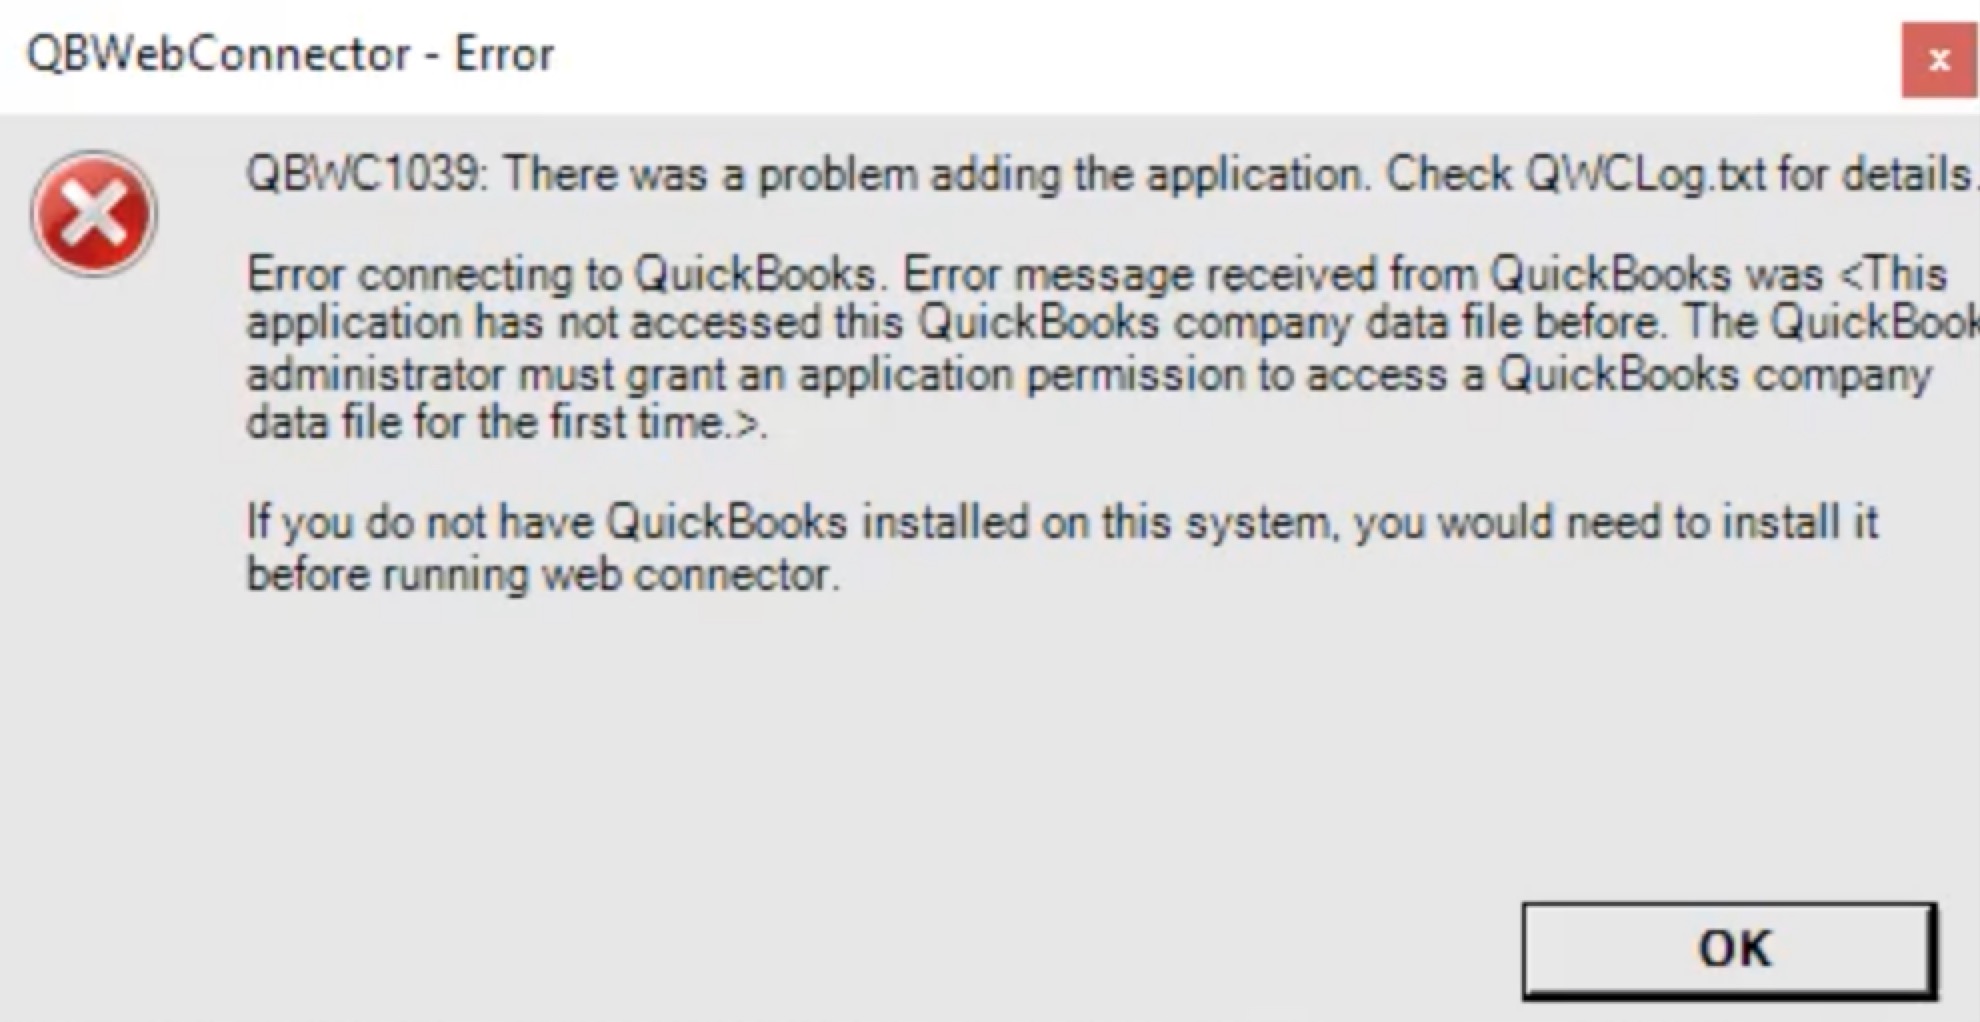
To resolve this issue, ask the user to log in using the admin credentials on their system first, before attempting to use their own login credentials.
If the error reads, "There was a problem adding the application. Check QWCLog.txt for details. Error connecting to QuickBooks Error message received from QuickBooks was
Error Code 1048 and 1051
If you receive the error, "QBWC1048: QuickBooks Web Connector could not verify the web application server certificate. / QBWC: The new application was not added," this means that a third-party hosting issue is blocking the QuickBooks Web Connector certificate:
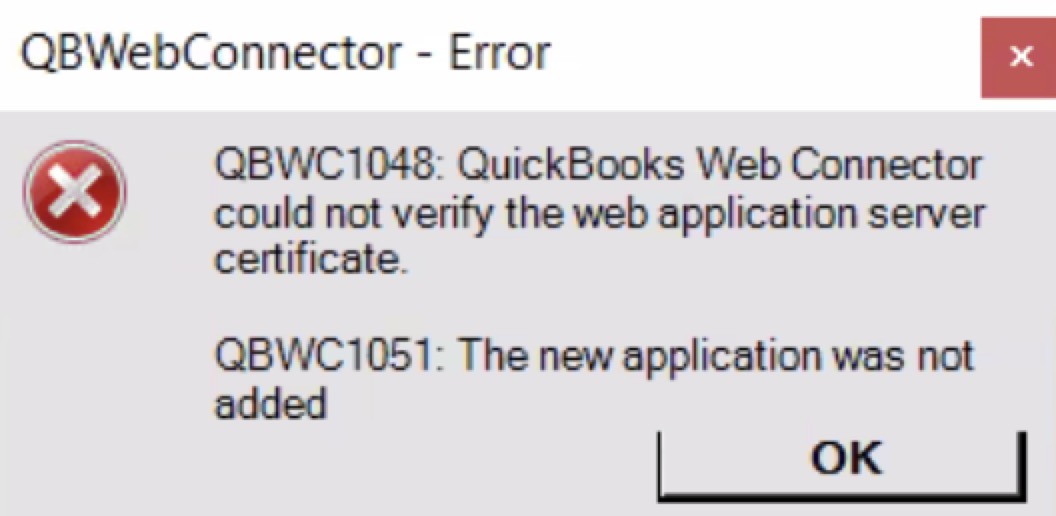
To fix this error, you may need to whitelist MobiWork or access security settings on your host firewall.
Invalid Argument
If you receive the error, "The specified record does not exist in the list," this means that the account number entered in the MobiWork QuickBooks Desktop account settings does not match the account number in QuickBooks:

To fix this error, please ensure that the number in the MobiWork QuickBooks Desktop account settings matches the account number of the desired item, service, etc. in QuickBooks.
Invalid Reference
The error, "There is an invalid reference to QuickBooks Account in the item inventory," means there was no account number entered in the MobiWork Item settings:

To fix this error, please ensure that the designated text field in the MobiWork Item settings section has the matching account number of the desired item, service, etc. from QuickBooks.
Saving an Invoice Error
The error, "There was an error when saving [an] invoice. QuickBooks error message: The transaction is empty," means the invoice has no line items to push to QuickBooks Desktop:

To resolve this issue, please add line items to your invoice. For more information on how to add line items to your invoice, please see the Add an Invoice section.
Could Not Find Term
The error, "Error: Could not find in QuickBooks a sales term that matches: "6," Please add the matching sales term in QuickBooks," means there is no existing term in QuickBooks that matches the MobiWork term.
To resolve this issue, please create the term in QuickBooks.
Saving an Invoice Error
The error, "There was an error when saving [an] invoice. QuickBooks error message: The transaction is empty," means the invoice has no line items to push to QuickBooks Desktop:
To resolve this issue, please add line items to your invoice. For more information on how to add line items to your invoice, please see the Add an Invoice section.
Installation Errors
The error, "QBWC1039: There was a problem adding the application..." that there is more than one instance of QuickBooks Desktop open:
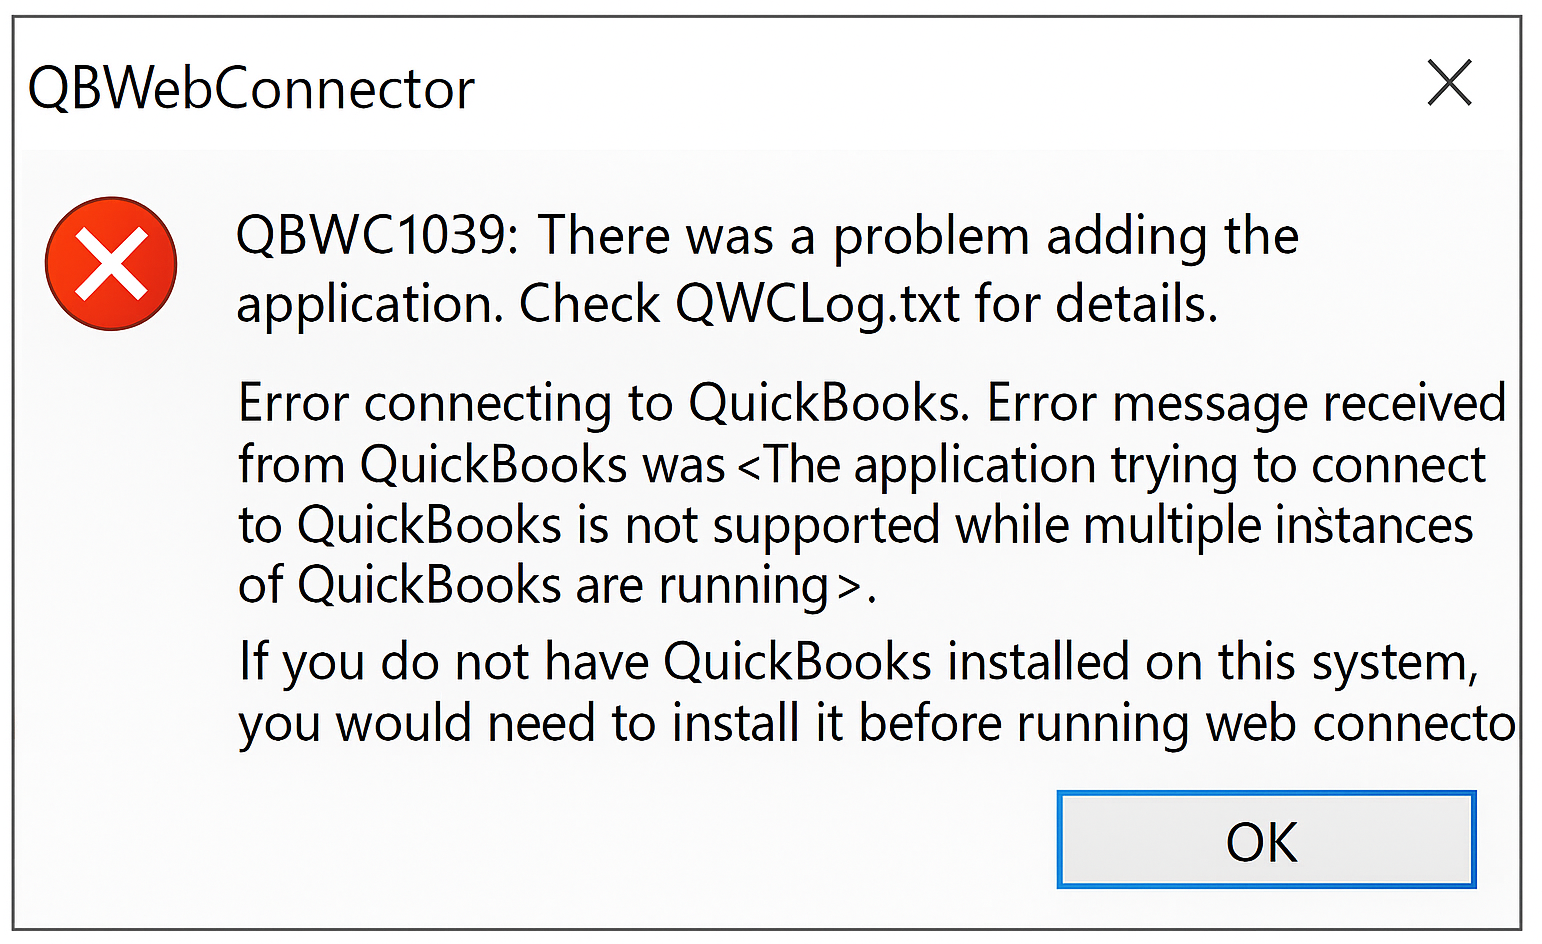
To resolve this issue, close out of one of the QuickBooks Desktop applications.
Re-push Payment
MobiWork does not allow the re-pushing or re-syncing of payments that have already been sent to QuickBooks Desktop.
If the payment already exists in QuickBooks Desktop, the payment will be skipped and thus will not be pushed in subsequent syncs. When this occurs, the following error message is displayed: