There are a variety of different ways that you can add a new asset into MobiWork. The subsections below will expound upon the different ways you can add a new asset.
Add an Asset
To add a new asset, please see the methods listed in the sections below:
From the Assets' Drop-Down
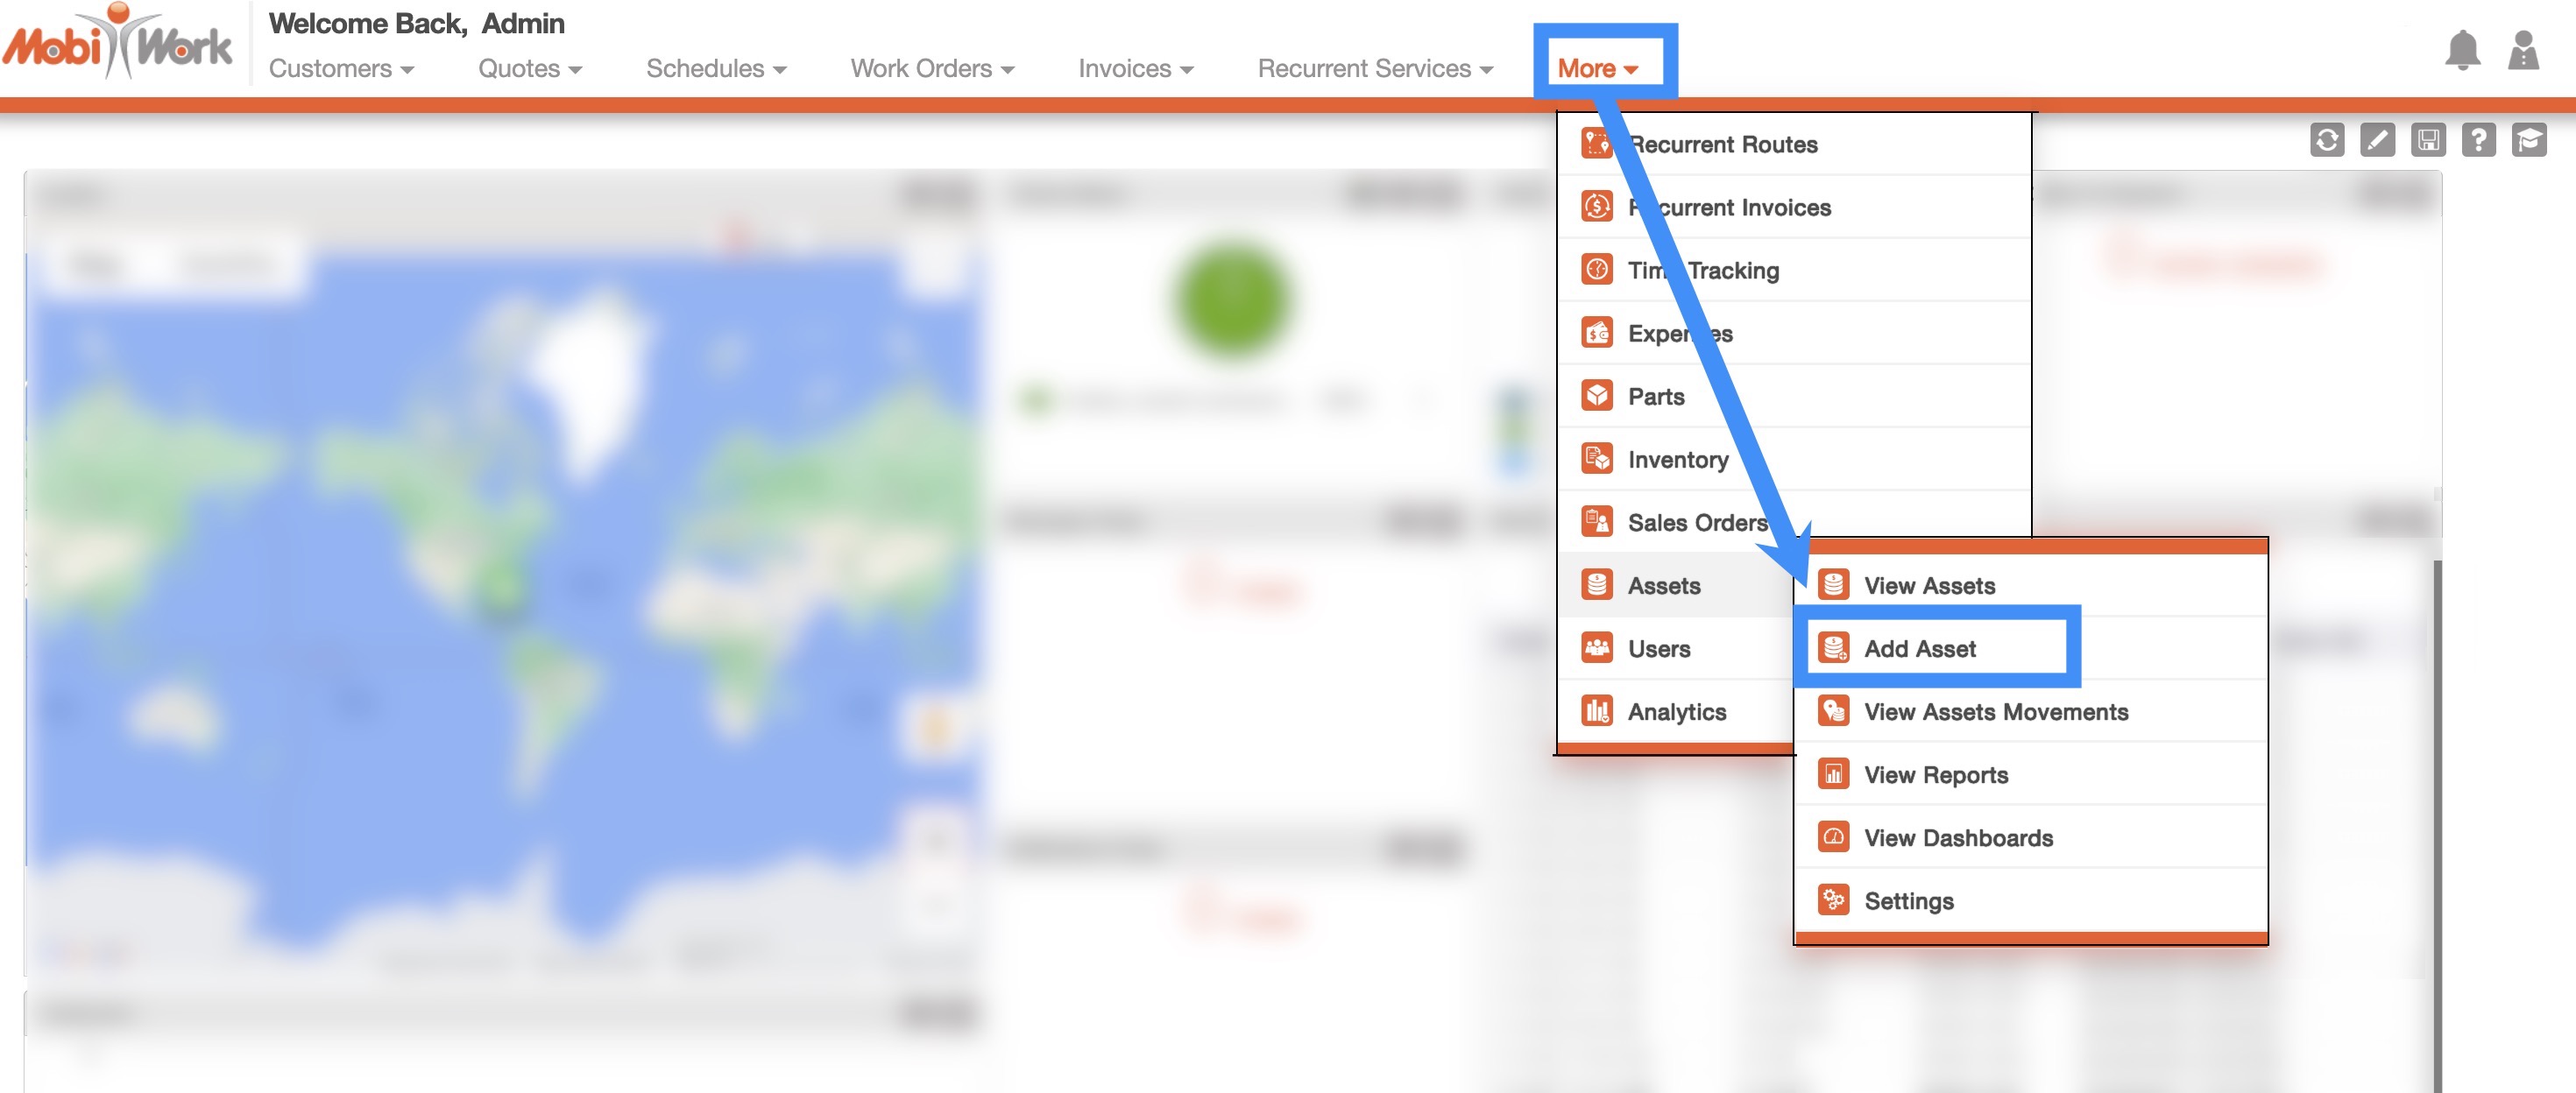
The fastest and easiest way to add a new asset is by accessing the drop-down menu from the Assets feature located in your MobiWork menu:
Select the "Add Asset" option from the drop-down.
The Add Asset pop-up window will then appear.
From the Assets' More Actions
On the Assets feature page, you will also be able to import your assets from Excel:

Plus Sign- Adds a new asset.
More Actions- Allows you to access the import drop-down actions.
For more information on how to import your assets, please see the Add Multiple Assets or the Edit Multiple Assets page.
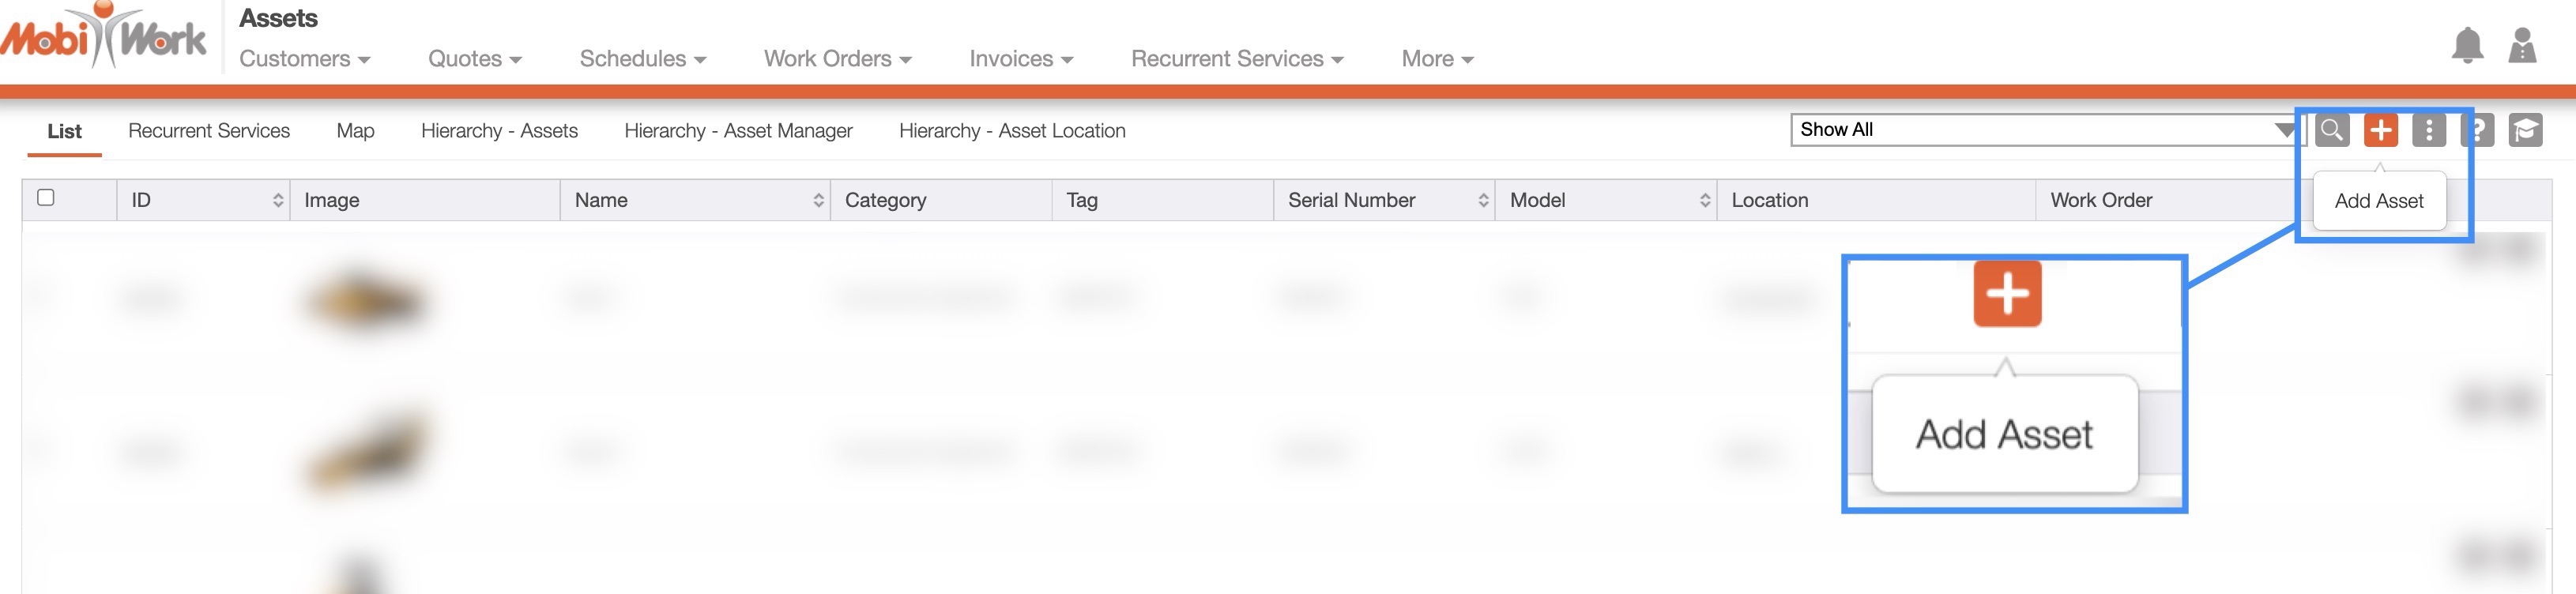
To add a new asset from the Assets feature page, please see the steps below:
Once you are on any of the Asset tabs, click on the Plus Sign to add a new asset:
The Add Asset pop-up window will then appear.
Convert a Part to an Asset
To convert a part to an asset you will first need to access the Add Part pop-up window or the Edit Part pop-up window. For more information on how to access these windows, please see the Add Part page or the Edit Part page:
Enable an Asset
You will be able to enable an asset through the Assets feature page. For more information how to access this page, please see the Asset List page.
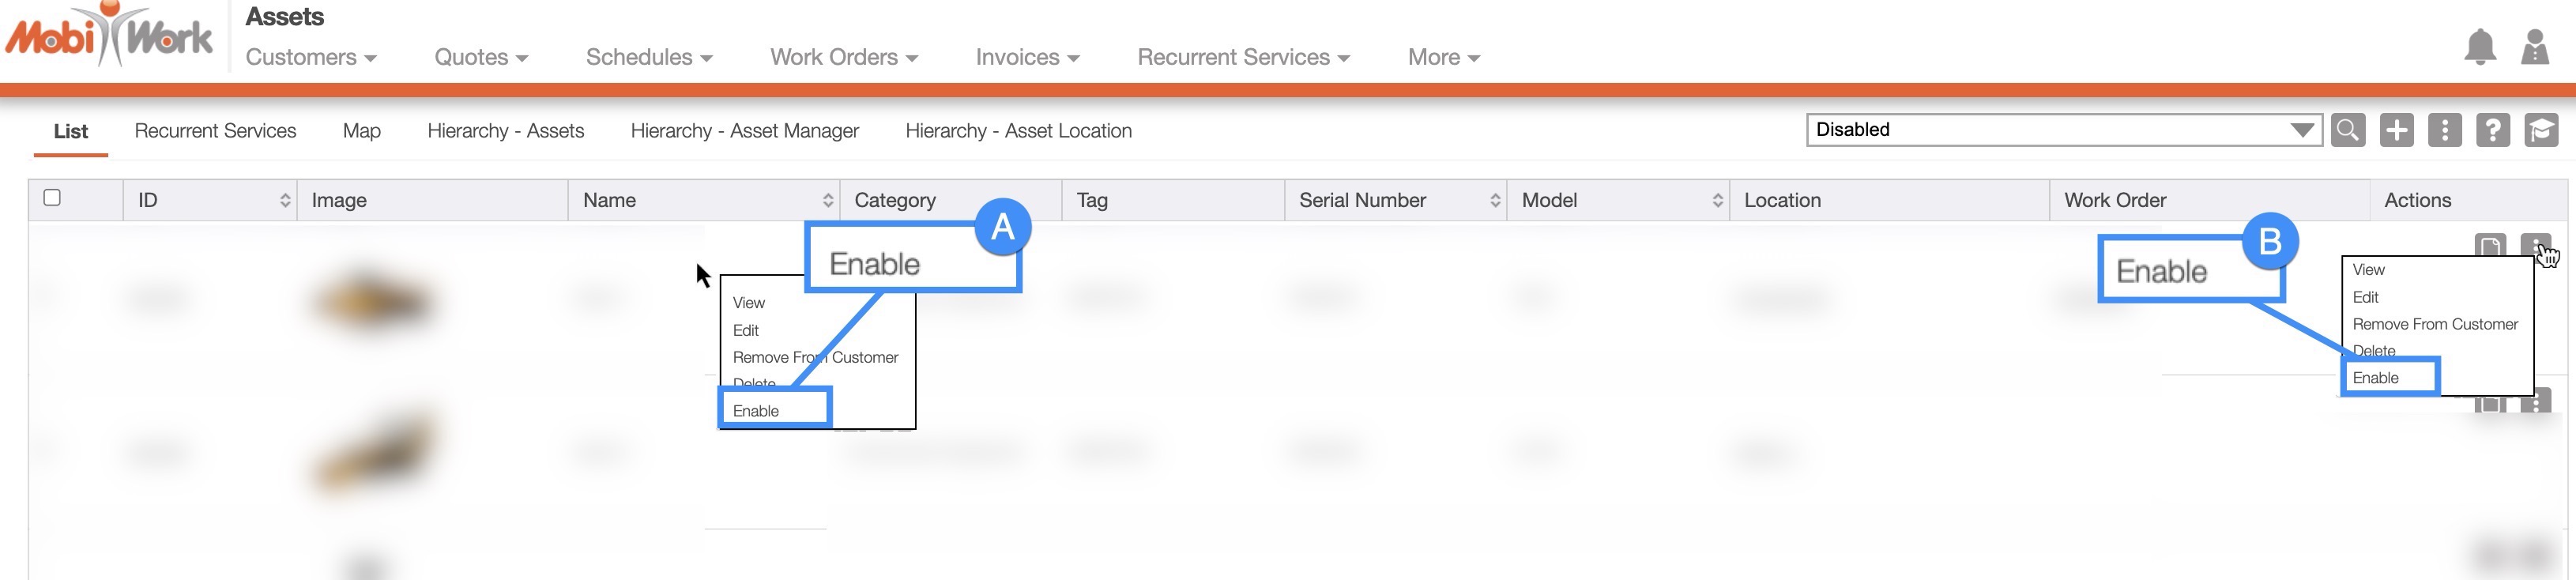
When you are on the Assets feature page, please make sure that the "Disabled" predefined search is selected. Once this is done, there are three different ways you can enable an asset:
Clicking on the Asset ID to open the View Asset pop-up window
- In the upper right-corner of the View Asset pop-up window, you will see the Individual Actions button. Once you click on it, from the drop-down select the "Enable" option:
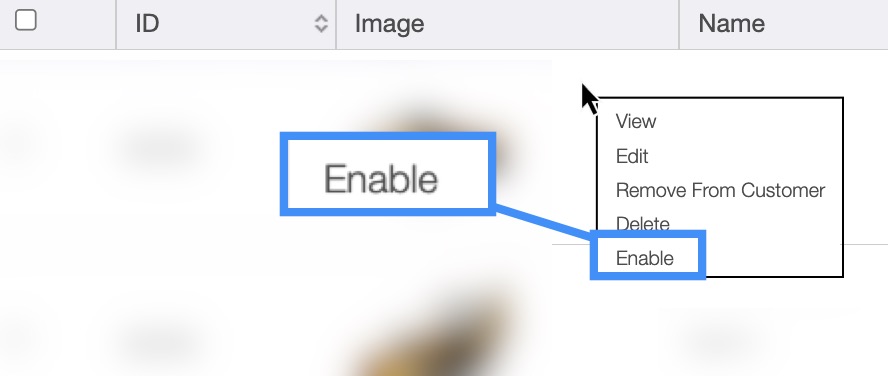
Right-click on an asset to open the right-click options and from the drop-down, select the "Enable" option. (The options that are displayed when you right-click on an asset are also available when you select the Individual Actions button.)
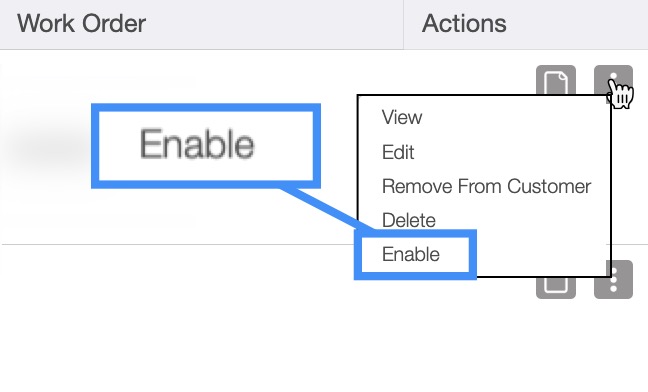
Click on the Individual Actions (the three vertical dots) and from the drop-down select the "Enable" option. (The options that are displayed from the Individual Actions button are the same as when you right-click on an asset.)

Regardless of the method that you choose to add an asset, the Add Asset pop-up window will appear. From this window you will be able to input the serial number, the name of the asset, the manufacturer, and more:
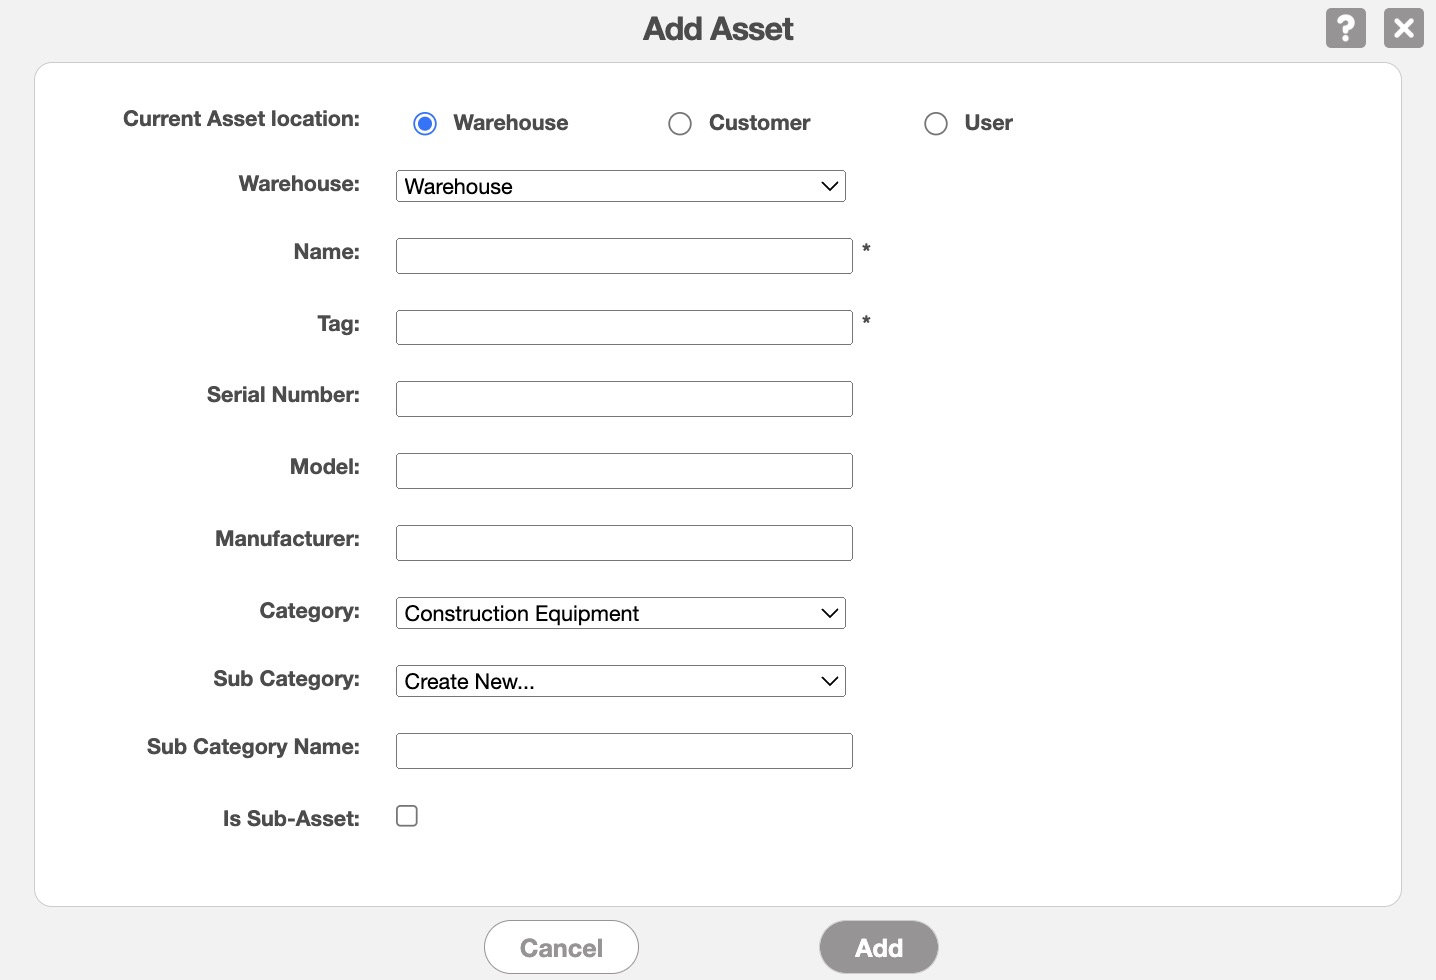
Note: You will be able to add the image for the asset after adding the asset to MobiWork. Please see the Add Asset Image section for more information on how to accomplish this.
The terms listed in the Add Asset pop-up window are defined below:
| Name: | Description: |
|---|---|
| "Current Asset Location" | Select the current location where the asset is stored (e.g., Warehouse, Customer, or User) |
| "Warehouse/Customer/User Drop-Down" | Will vary depending on what is selected for the Current Asset Location. This field indicates the specific name of the warehouse, customer, or user where the asset is stored |
| "Name" | The name of the asset |
| "Tag" | |
| "Serial Number" | The serial number of the asset |
| "Model" | The model number of the asset |
| "Manufacturer" | The company or entity responsible for producing or creating the asset. |
| "Category" | The category that the asset is classified under |
| "Subcategory" | A more specific classification that falls under the primary category, providing further organization for the asset. |
| "Subcategory Name" | The subcategory name of the asset |
| "Is Sub-Asset" | If checked, indicates that the asset is a sub-asset or a child asset of a parent asset. |
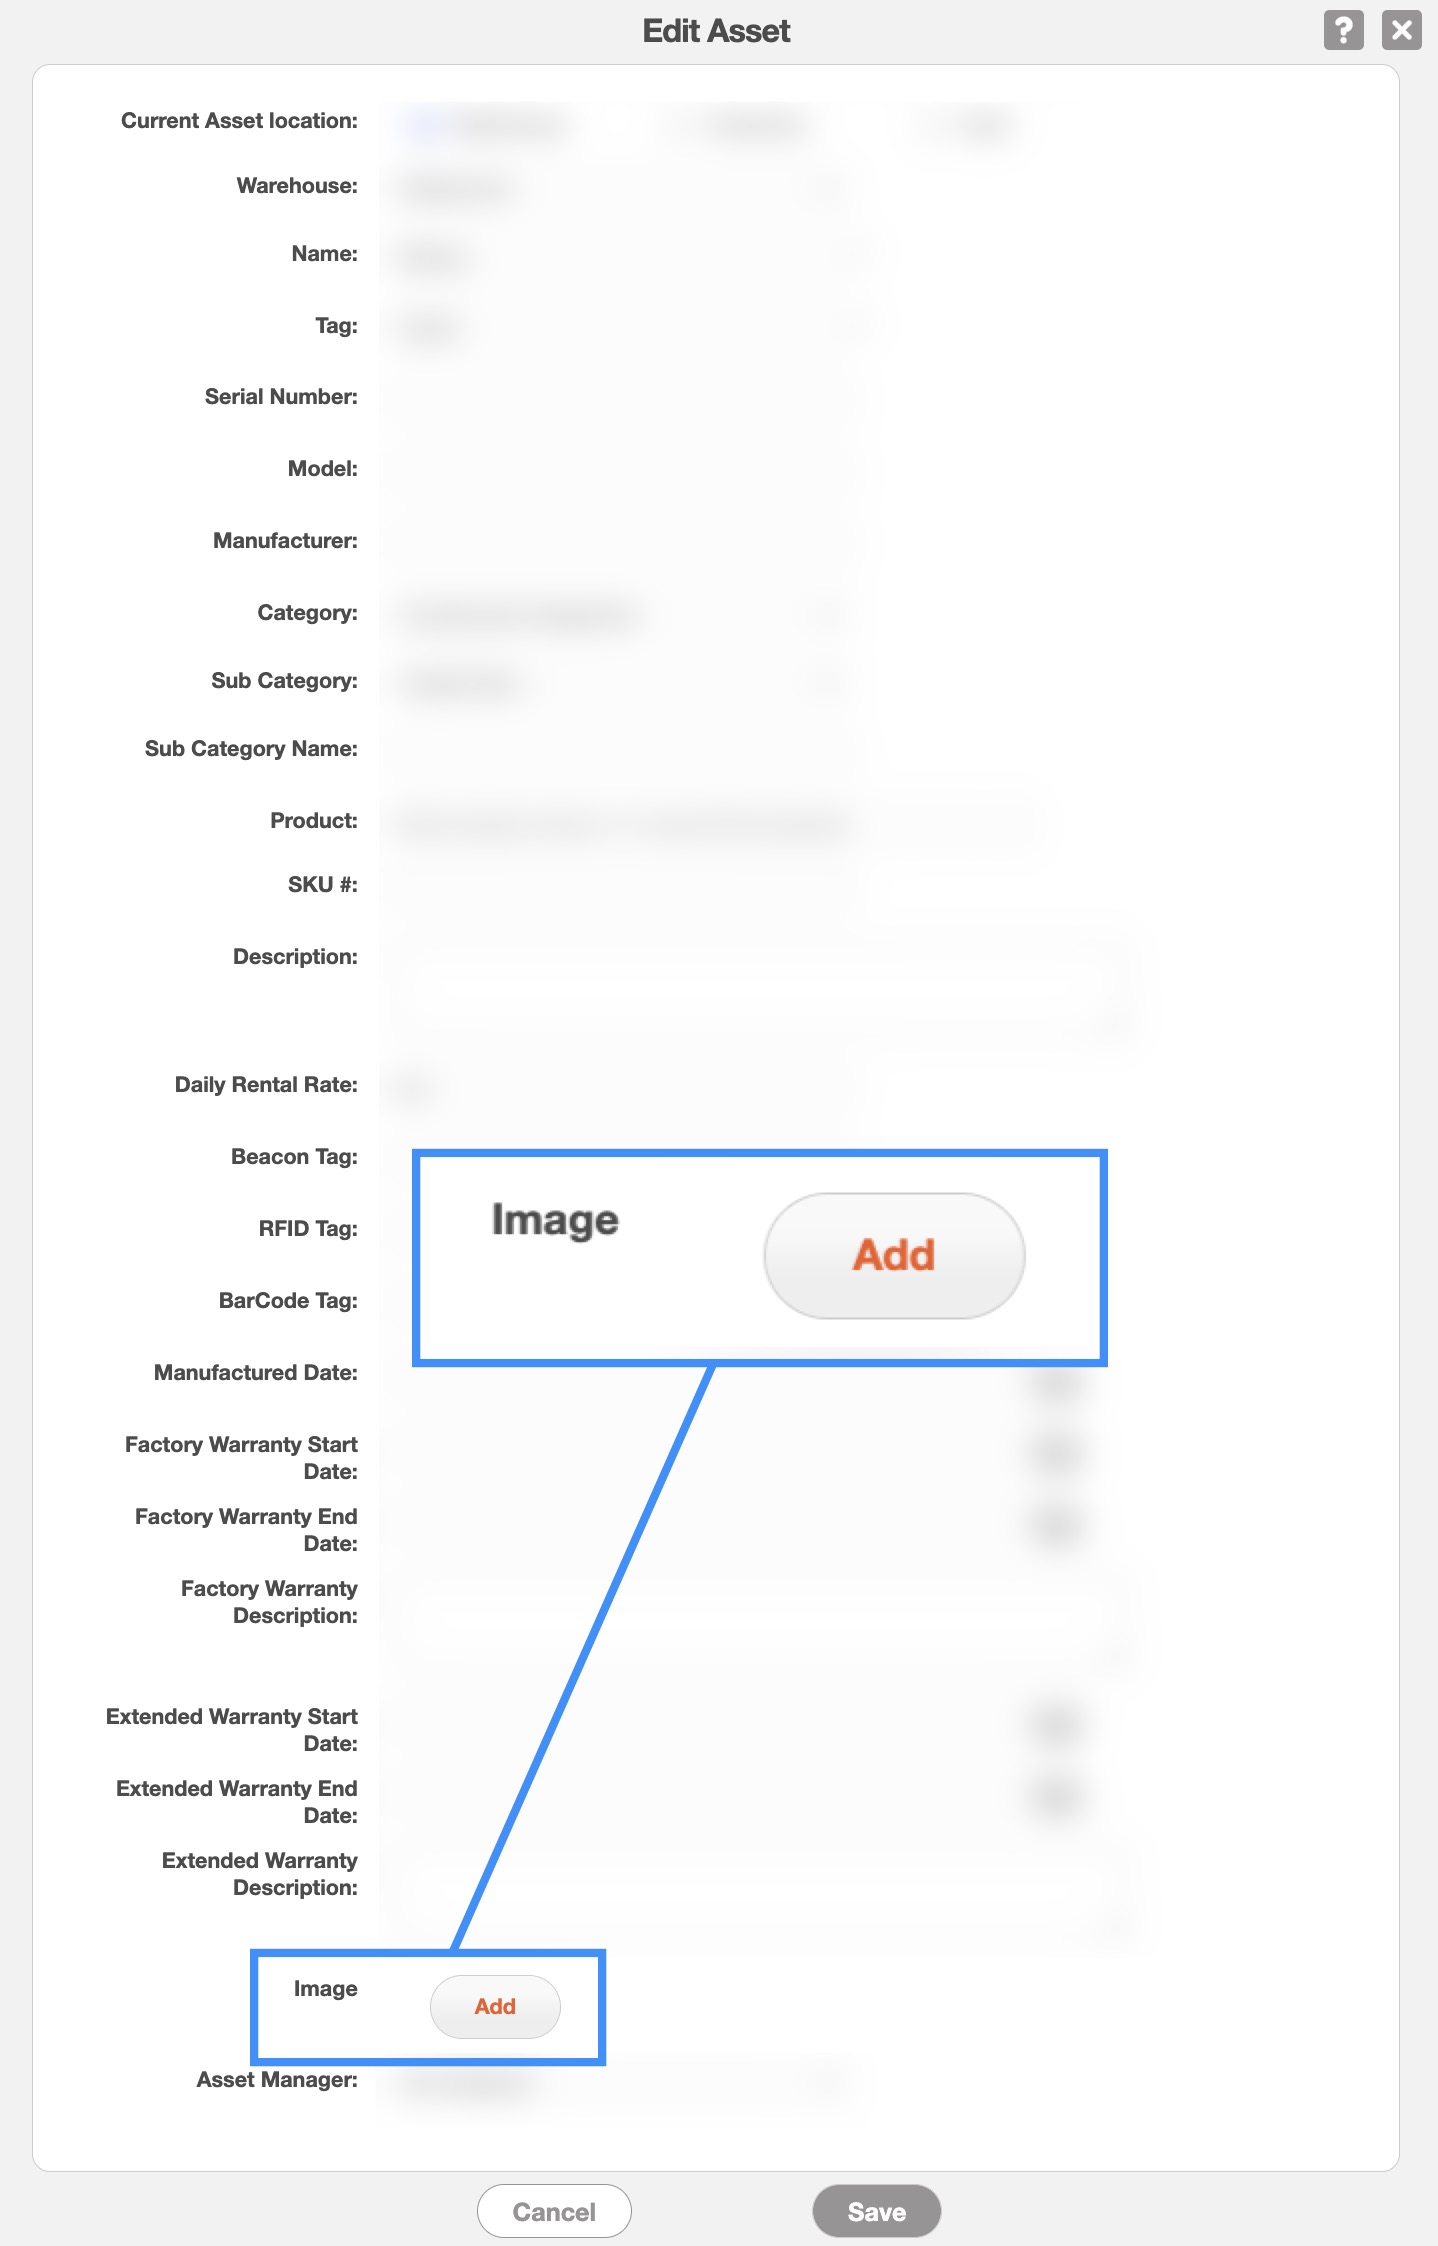
To add an image to an asset, you will first need to add the asset through the Add Asset pop-up window. Only after doing so, will you be able to upload the asset image.
Once the asset is ready for an image, you will need to access the Edit Asset pop-up window. Please see the Edit Asset for more information on how to access this window.
In the Image section of the Edit Asset pop-up window, click on the Add button:
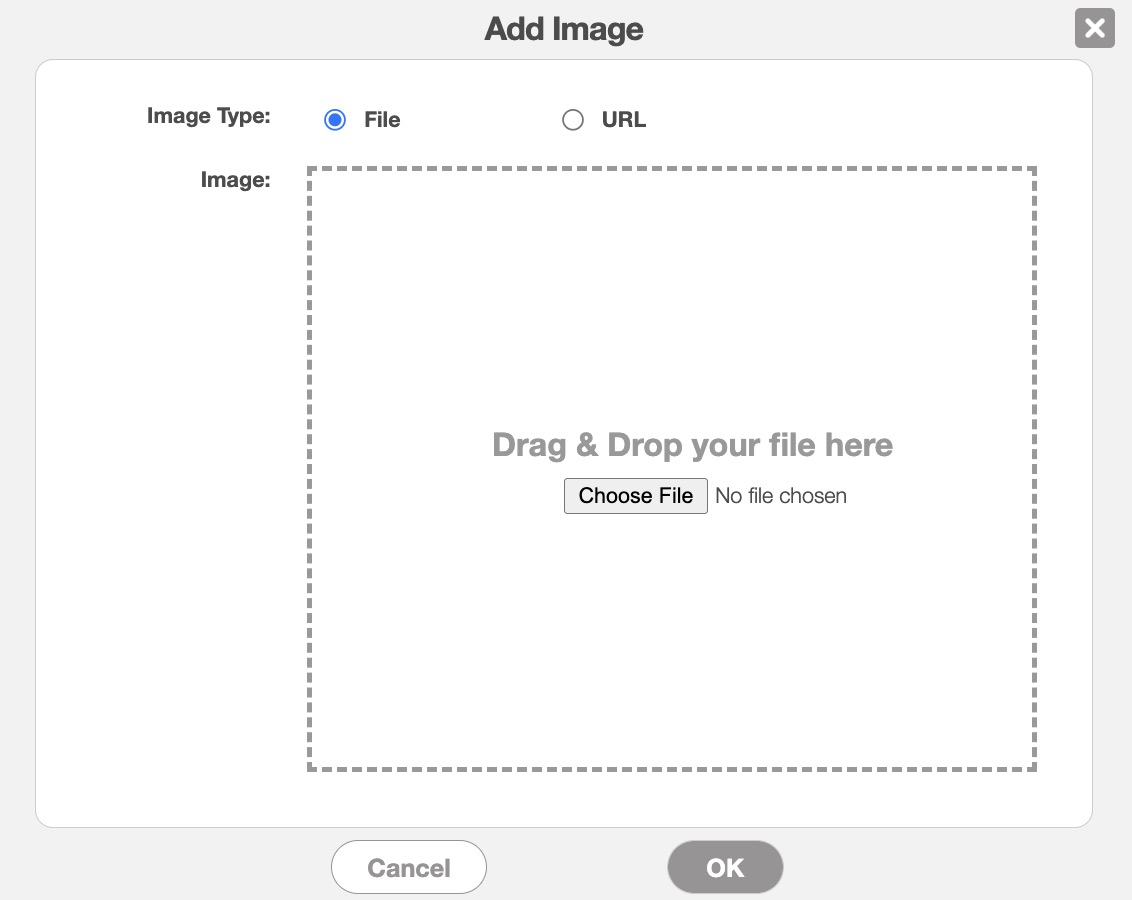
The Add Image pop-up window will then appear. Upload the desired image by drag & dropping the file, searching your computer for the image, or inserting the URL of the image. Once you are satisfied, click the Ok button:
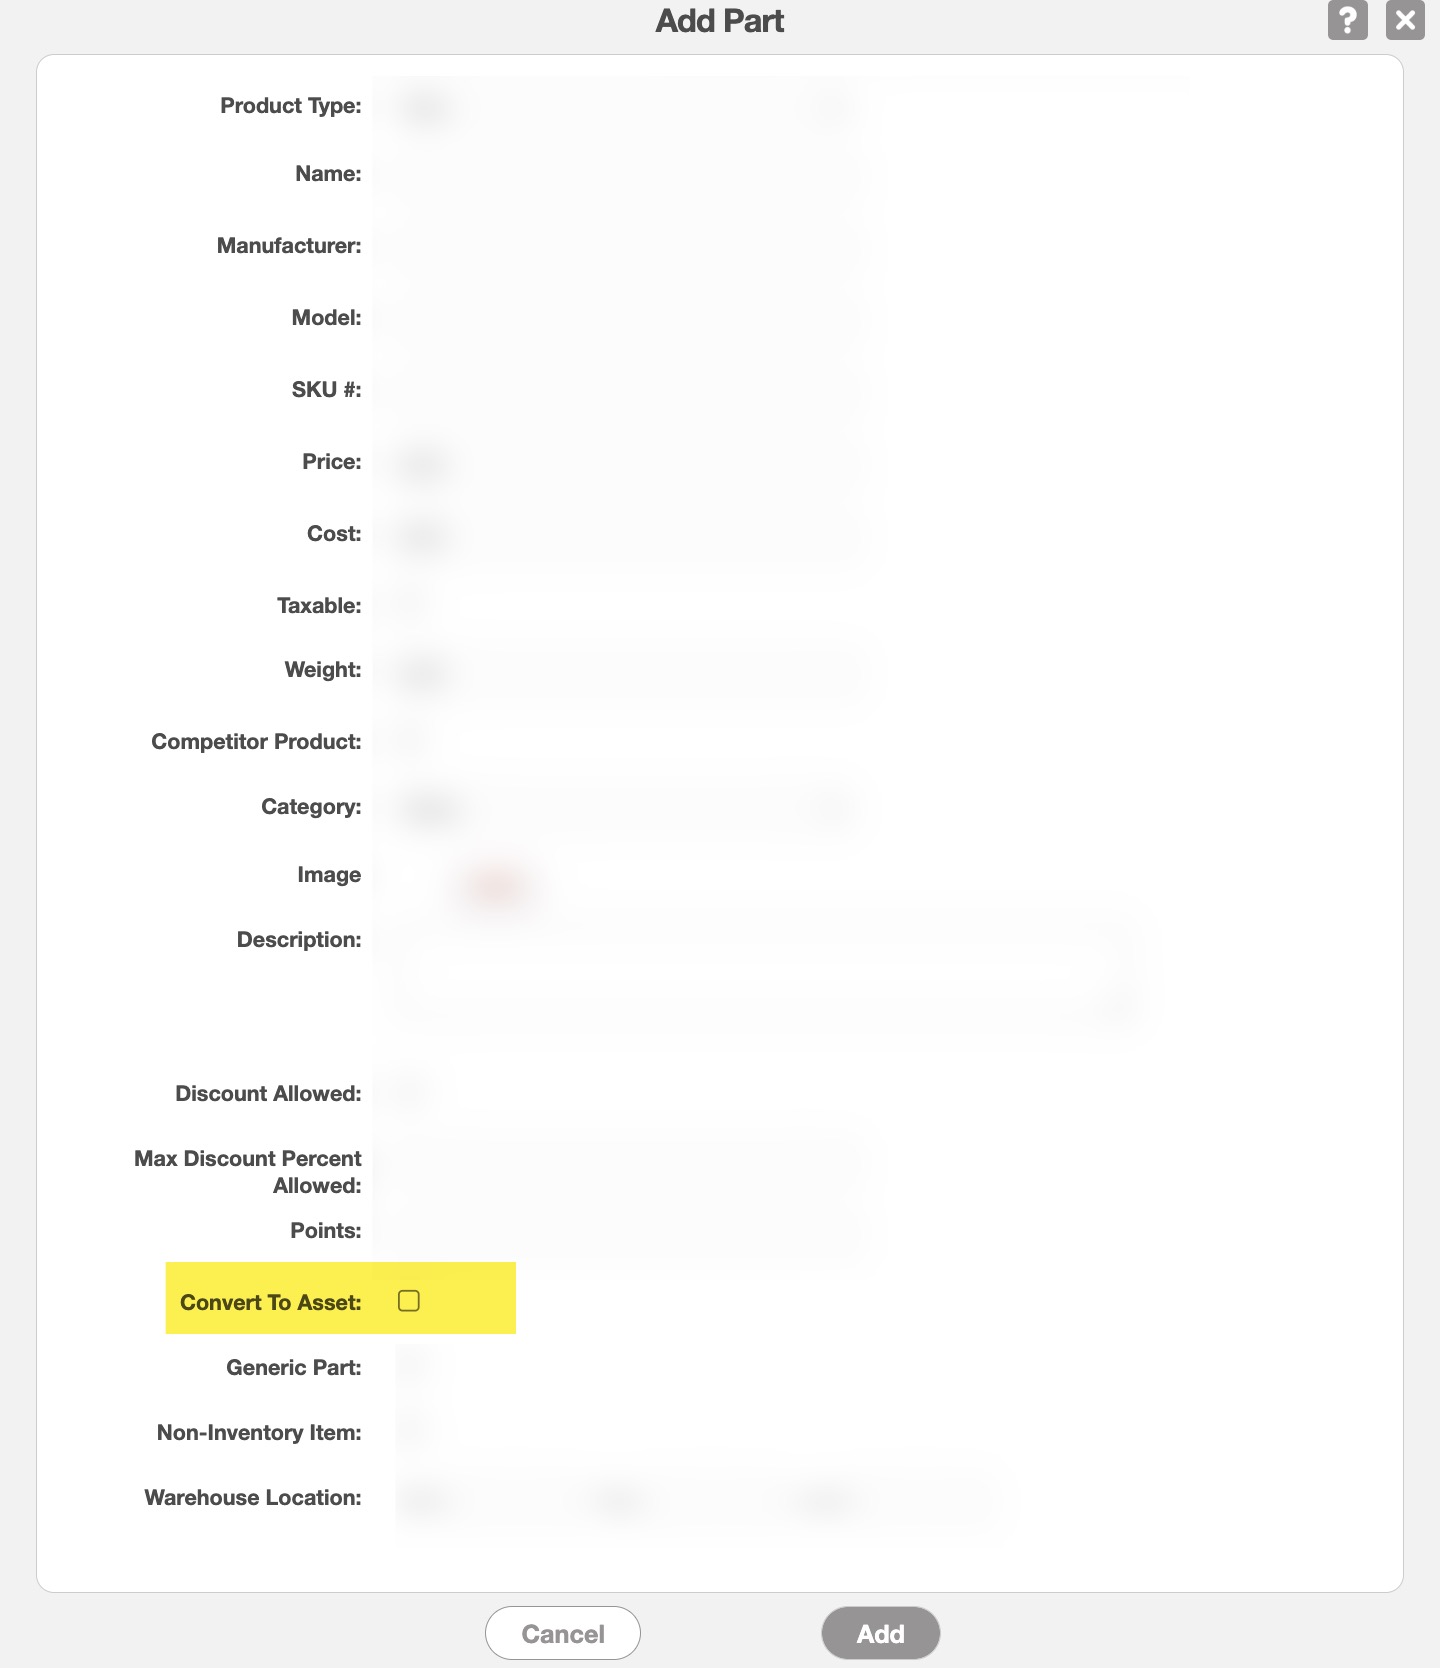
To convert a part to an asset, you will first need to access the Add Part pop-up window or the Edit Part pop-up window.
Regardless of the method that you choose to convert the part to an asset, you will need to scroll to the "Convert To Asset checkbox" and click on it:
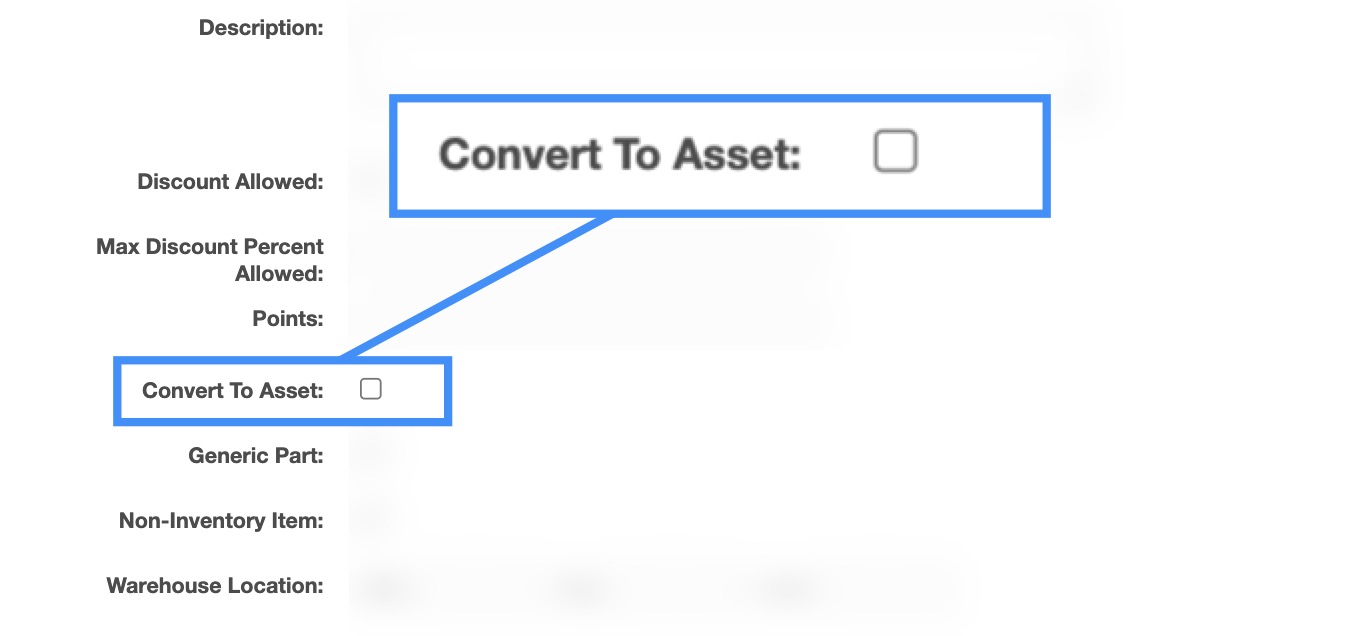
Once you are finished inputting the necessary details, and the "Convert to Asset" checkbox has been marked click the Save button. The part will then automatically be made into both an asset and a part.
Regardless of how you decide to enable an asset:
- Selecting the desired Asset ID and once the View Asset pop-up window appears, clicking on the Individual Actions button to select the "Enable" option:
Right-clicking on the selected asset and choosing the "Enable" option from the drop-down:
Or clicking on the Individual Actions button and from the drop-down selecting the "Enable" option:
The selected asset will then be automatically activated within the system.