- Overview
- Account Settings
- Assets
- Connectors Framework
- Overview
- QuickBooks Online
- QuickBooks Desktop Web Connector
- Azure AD
- Salesforce Integration
- FleetNet Connector
- Avalara Connector
- Inbound REST API
- Outbound REST API
- Mailchimp Connector
- Text Messaging Connector
- Clearent Connector
- Stripe Connector
- HubSpot Connector
- UKG Connector
- Paylocity Connector
- UKG Connector
- Gusto Connector
- iSolved Payroll Connector
- Customer Portal
- Customers
- Dashboards
- Devices
- Dispatching
- Forms
- Inventory
- Invoices & Billing
- Locations
- Payments
- Parts
- Projects
- Quotes
- Recurrent Routes
- Recurrent Services
- Reports
- Sales Orders
- Schedule
- Services
- Tasks
- Text Messaging
- Time Tracking
- Users
- Work Orders
With MobiWork you can easily update either a single asset or with multiple assets; this section will highlight how to access the edit feature and how to effectively edit your assets.
There are several ways you can edit an asset within MobiWork. You can edit the asset through the View Work Order pop-up window, the View Customer pop-up window, and through the Assets feature page.
Asset List Page
The most direct way to update an asset is through the Assets feature page. For more information on how to access this page, please see the Asset List section for more information.
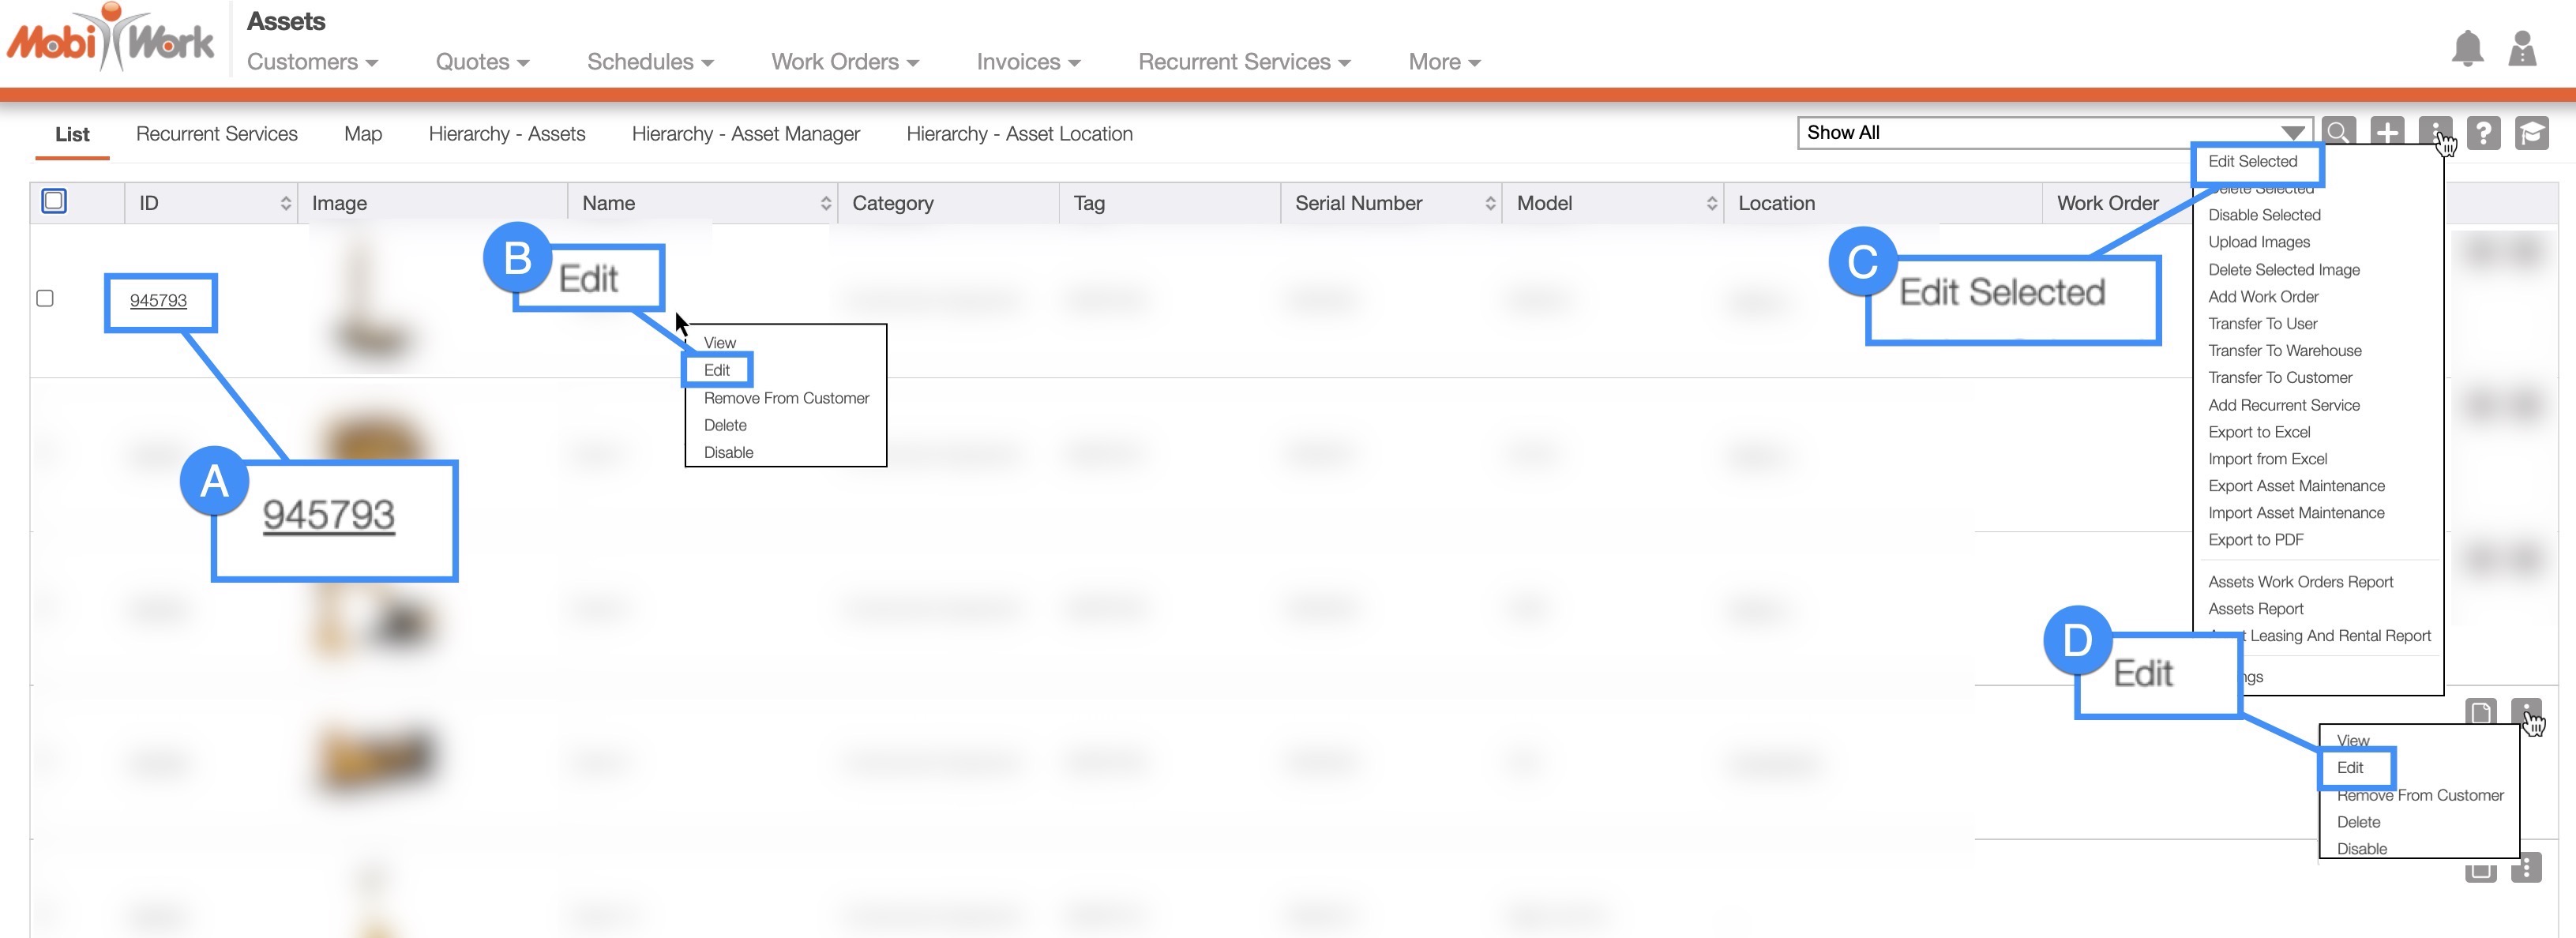
Once, you are on the Assets feature page, there are several different ways you can edit an asset:
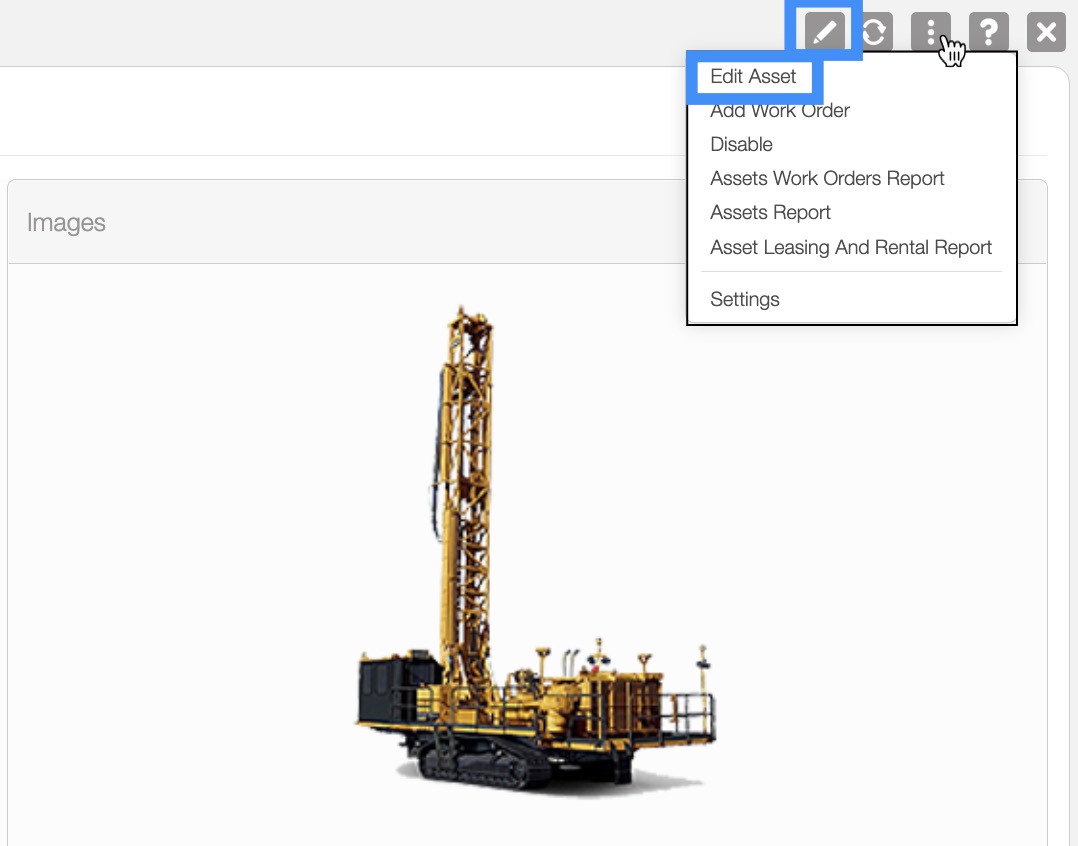
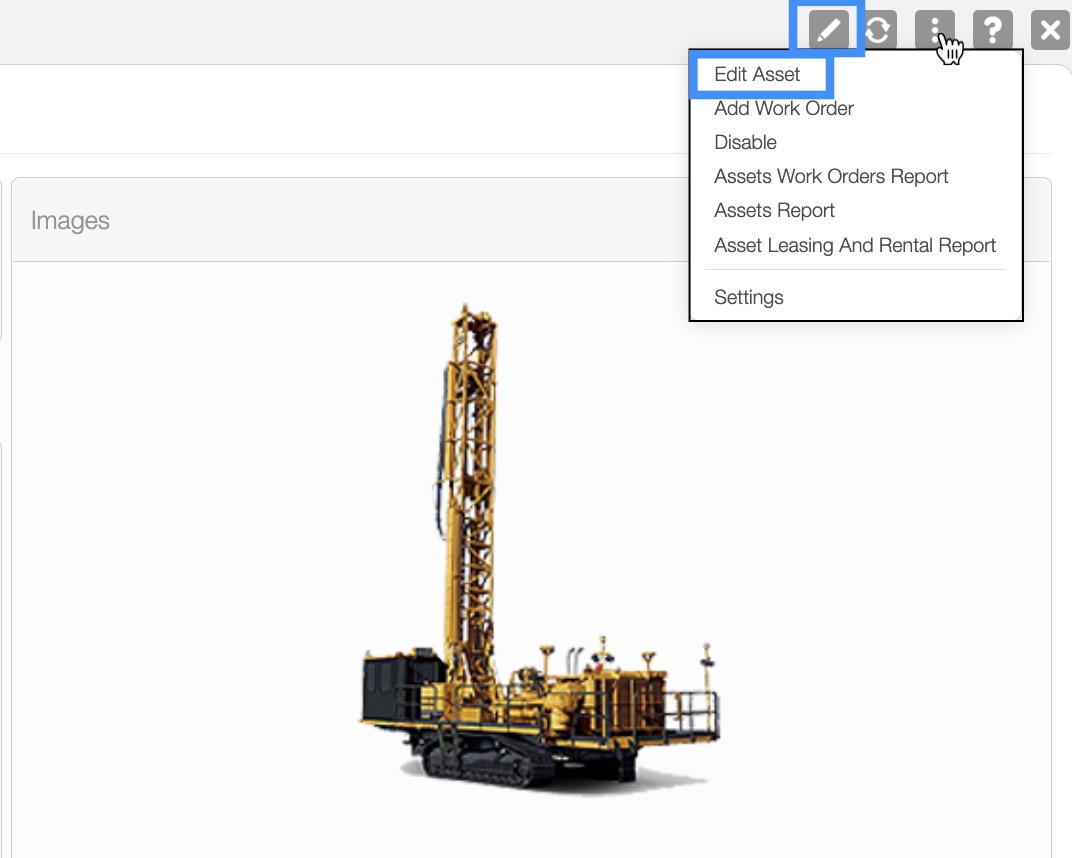
Click on the Asset ID to open the View Asset pop-up window. Then click on the Individual Actions button and from the drop-down select either the Pencil icon or the "Edit" option:
Please note that there are several ways that you can access the View Asset pop-up window. Please see the View Asset page for the different ways that you can open the View Asset pop-up window.
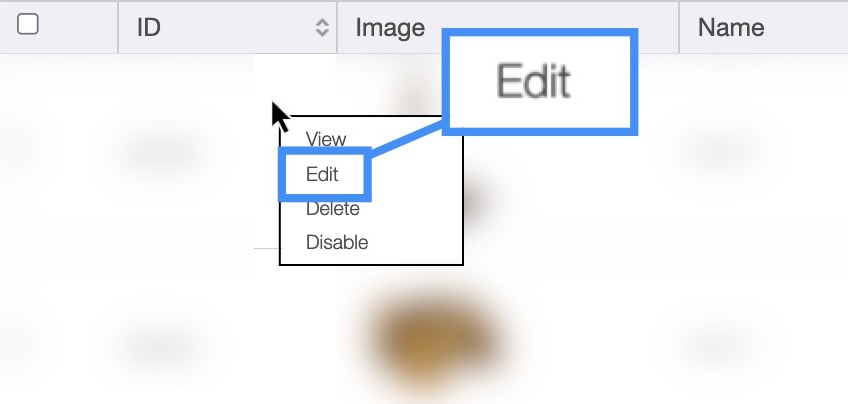
Right-click on an asset to open the right-click drop-down and select the "Edit" option. (The options that are displayed when you right-click on an asset are also available when you select the Individual Actions button.)
Select the More Actions button from the "Global Actions" section. Please note that this option will give you the ability to edit multiple assets at once.
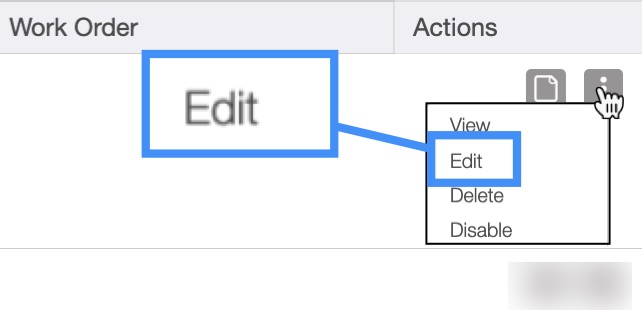
Click on the Individual Actions button (the three vertical dots) from the "Actions" column and select the "Edit" option. (The options that are displayed from the Individual Actions button are the same as when you right-click on an asset.)
Customers
To see how to access the View Customer pop-up window, please see the View Customer page:
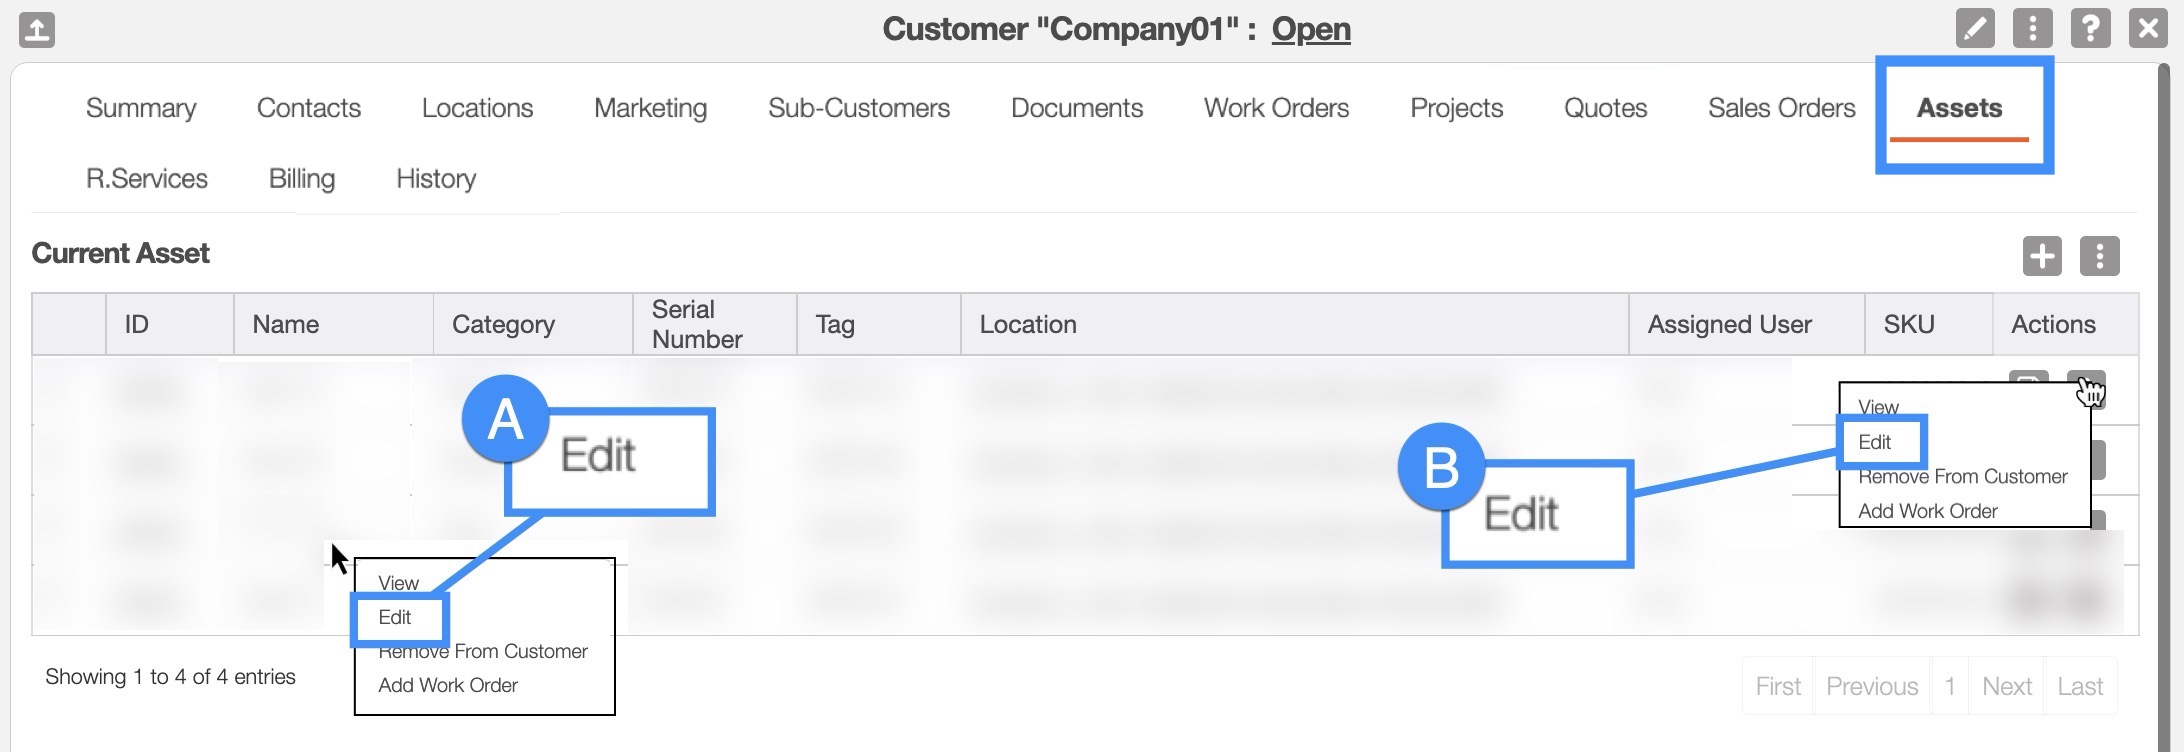
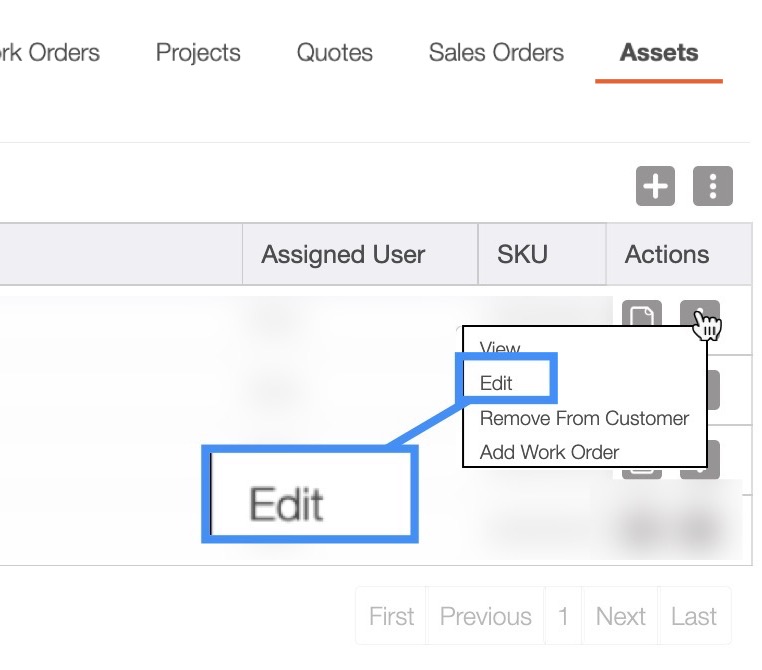
Once you open the View Customer pop-up window select the "Assets" tab. On the "Assets" tab click on the Individual Actions button and from the drop-down select the "Edit" option:
Right-click on an asset to open the right-click drop-down and select the "Edit" option. (The options that are displayed when you right-click on an asset are also available when you select the Individual Actions button.)
Click on the Individual Actions button (the three vertical dots) from the "Actions" column and select the "Edit" option. (The options that are displayed from the Individual Actions button are the same as when you right-click on an asset.)
The Edit Asset pop-up window will then appear.
Work Orders
To see how to access the View Work Orders pop-up window, please see the View Work Orders page:
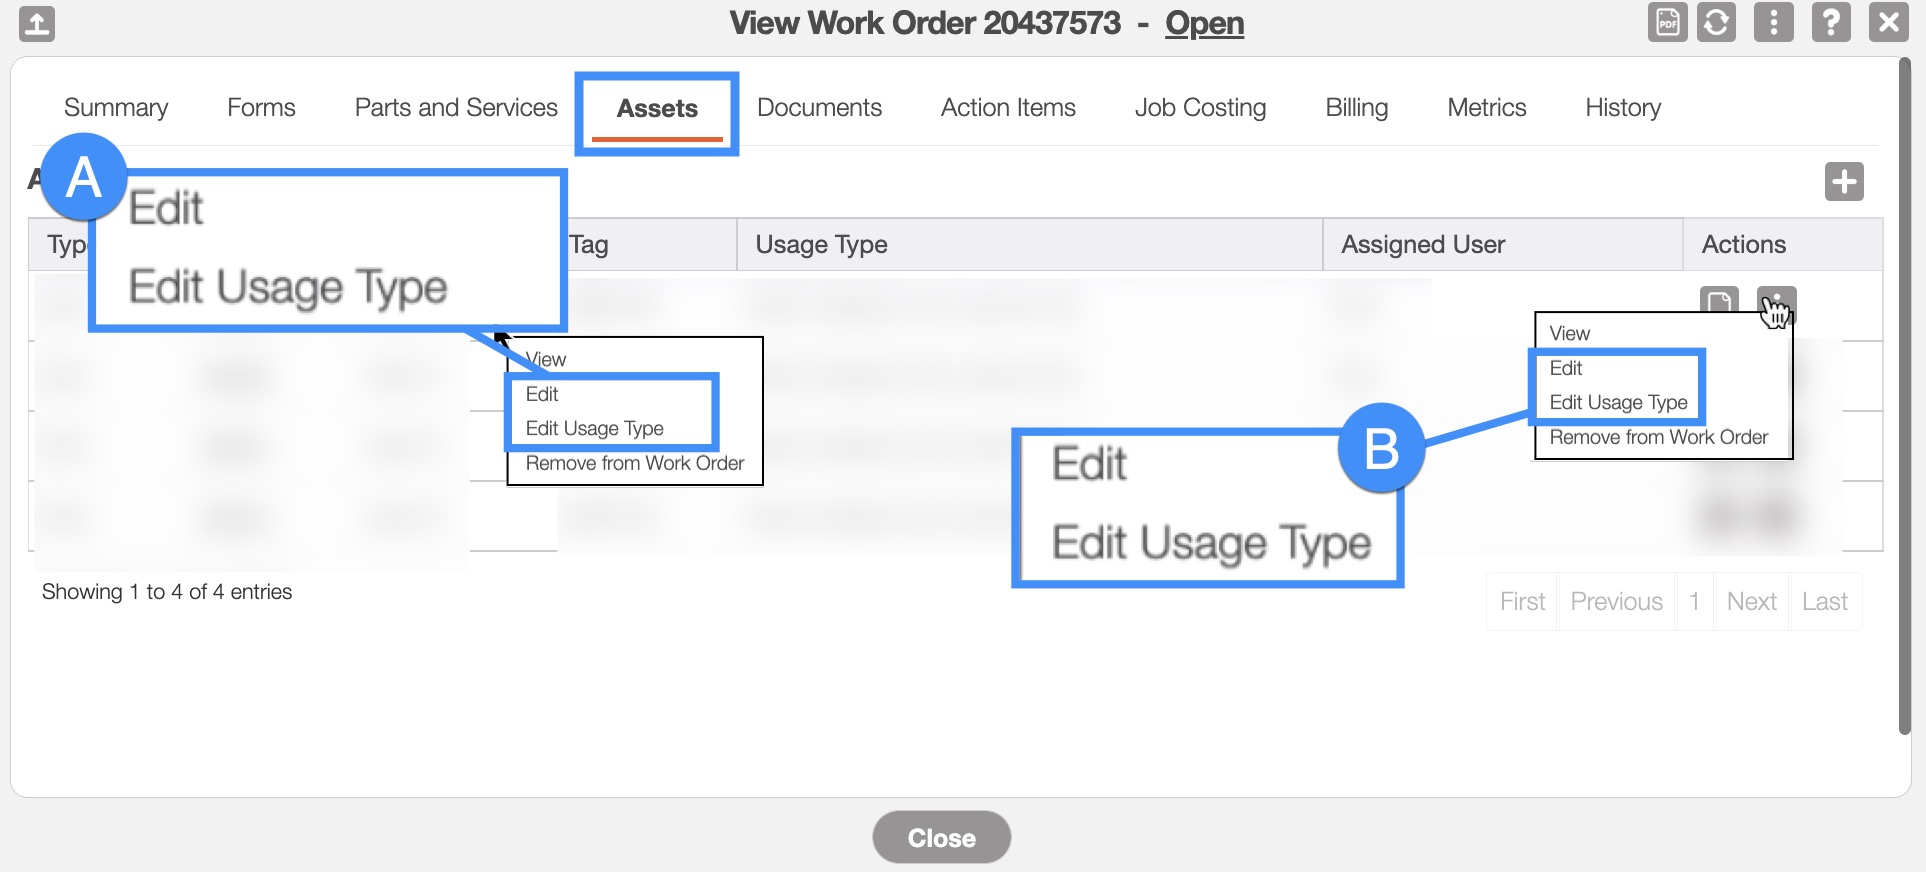
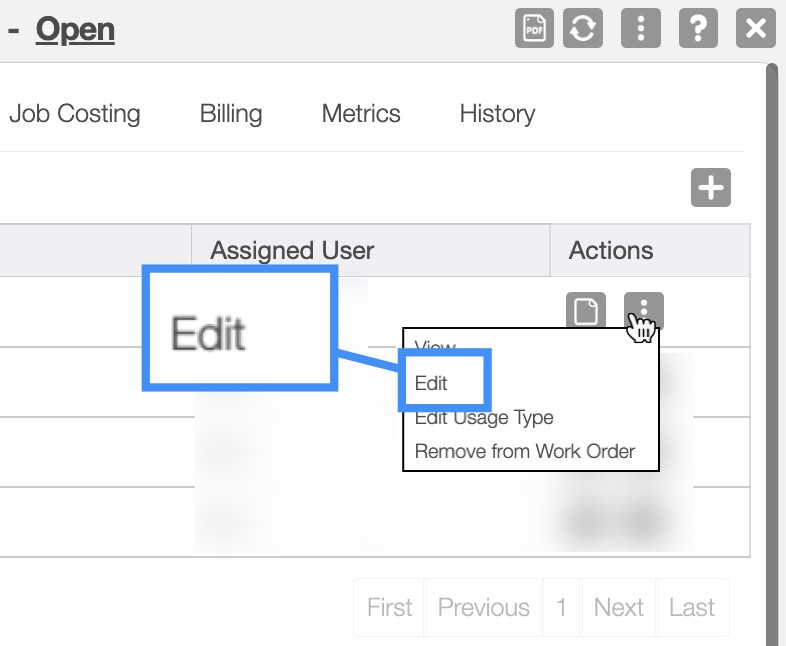
Once you open the View Work Orders pop-up window select the "Assets" tab. On the "Assets" tab click on the Individual Actions button and from the drop-down select the "Edit" option:
- The "Edit Usage" option is only applicable to work orders and will allow you to edit how the asset will be delivered to the desired location.
Right-click on an asset to open the right-click drop-down and select the "Edit" option. (The options that are displayed when you right-click on an asset are also available when you select the Individual Actions button.)
Click on the Individual Actions button (the three vertical dots) from the "Actions" column and select the "Edit" option. (The options that are displayed from the Individual Actions button are the same as when you right-click on an asset.)
The Edit Asset pop-up window will then appear.
There are several different ways to edit a single asset. The section, How to Access the Page, will illustrate how to navigate to the methods listed below:
Clicking on the Asset ID of a specific asset to open the View Asset pop-up window and selecting the "Edit" option from the drop-down:
Right-clicking on the "Asset List" tab and selecting the "Edit" option from the drop-down menu:
Clicking on the Individual Actions of a specific asset and selecting the "Edit" option from the drop-down menu:
Clicking on the "Edit" option (either from the Individual Actions or by right-clicking) from the Customer's "Asset" tab:
Clicking on the "Edit" option (either from the Individual Actions or by right-clicking) from the Work Order's "Asset" tab:
Edit an Asset Pop-up Window
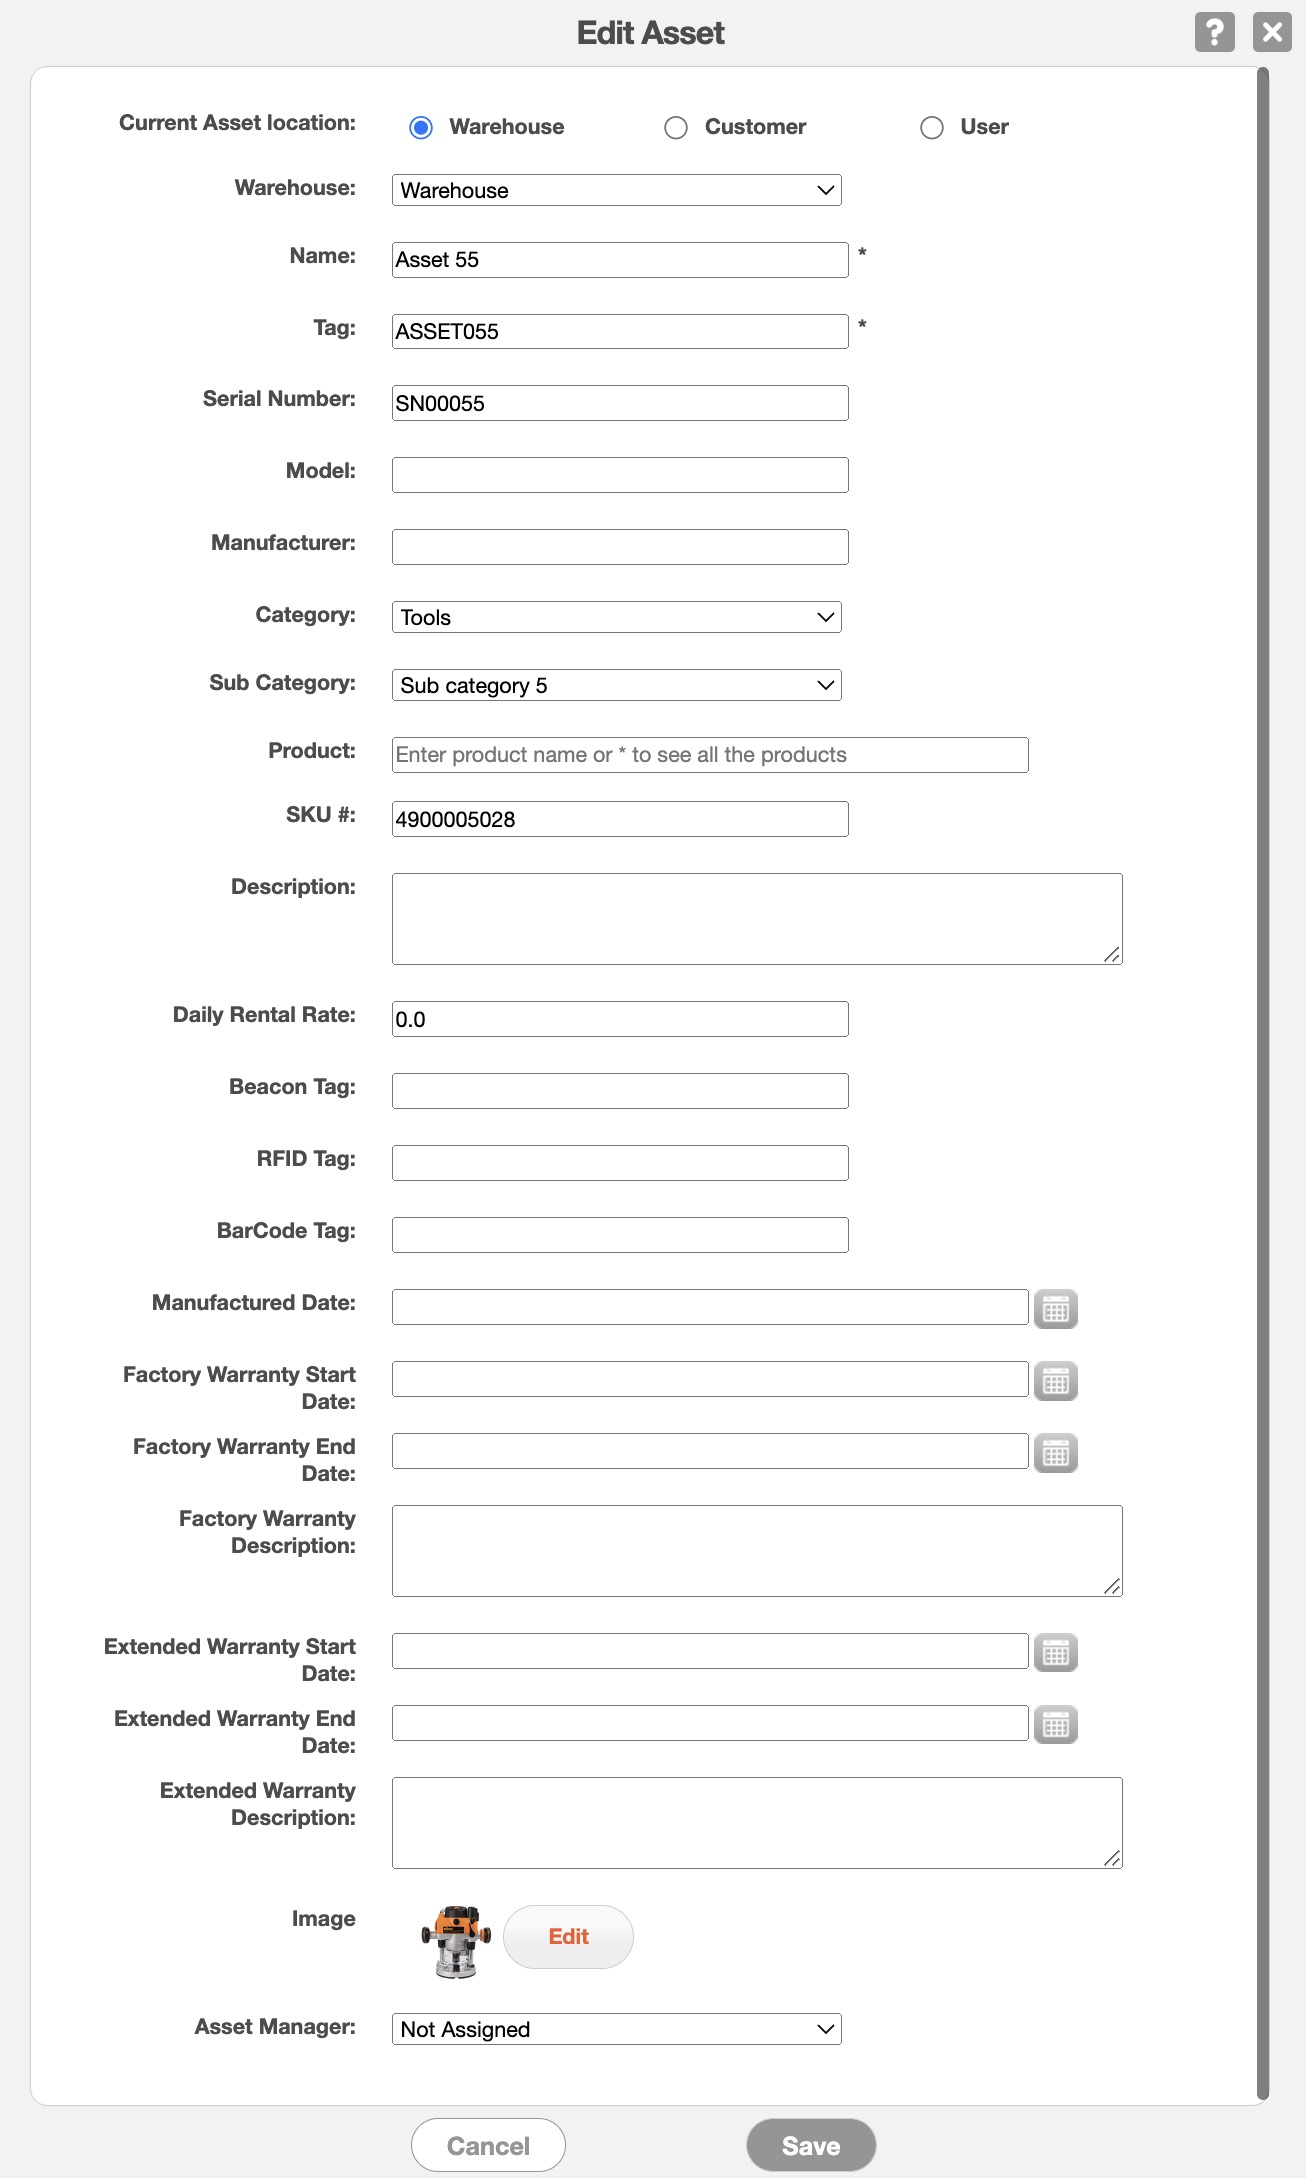
Regardless of how you choose to edit a single asset, the Edit Asset pop-up window will then appear.
In this window you can update the current location of the asset, the description of the asset, upload the asset image, input the daily rental rates for asset usage, and more:
Note: Please note that the max number of characters for the Asset Description field is 50 characters.
The terms found in the Edit Asset pop-up window are defined below:
| Name: | Description: |
|---|---|
| "Current Asset Location" | Select the current location where the asset is stored (e.g., Warehouse, Customer, or User) |
| "Warehouse/Customer/User Drop-Down" | Will vary depending on what is selected for the Current Asset Location. This field indicates the specific name of the warehouse, customer, or user where the asset is stored |
| "Name" | The name of the asset |
| "Tag" | |
| "Serial Number" | The serial number of the asset |
| "Model" | The model number of the asset |
| "Manufacturer" | The company or entity responsible for producing or creating the asset. |
| "Category" | The category that the asset is classified under |
| "Subcategory" | A more specific classification that falls under the primary category, providing further organization for the asset. |
| "Product" | The product associated with the asset |
| "SKU #" | The stock keeping unit of the asset; this can be used to store the barcode number. |
| "Description" | The description of the asset |
| "Daily Rental Rate" | The daily rental rate to rent the asset |
| "Beacon Tag" | The beacon tag of the asset |
| "RFID Tag" | The Radio-frequency identification tag of the asset; this can be used to store the barcode number. |
| "BarCode Tag" | The barcode tag of the asset |
| "Manufactured Date" | The manufactured date of the asset |
| "Factory Warranty Start Date" | The start date that the warranty begins for the asset |
| "Factory Warranty End Date" | The end date that the warranty terminates for the asset |
| "Factory Warranty Description" | The warranty description of the asset |
| "Extended Warranty Start Date" | The date that the extended warranty for the asset starts |
| "Extended Warranty End Date" | The date that the extended warranty for the asset ends |
| "Extended Warranty Description" | The extended warranty description of the asset |
| "Image" | The associated image that represents that asset |
| "Asset Manager" | The user assigned to oversee the asset |
MobiWork allows you to edit multiple assets in two different ways. Within MobiWork you can edit the value of multiple assets at once or you can import an Excel file with the changes.
With More Actions
You can access the More Actions button through the Assets feature page. For more information on how to access this page, please see the Asset List page for more information:
Check off the desired assets you would like to edit; if you would like to edit all your assets you can click on the topmost checkbox (Multiple Selection Area) located in the Assets feature page column:
- Click on the More Actions button and from the drop-down select the "Edit Selected" option:
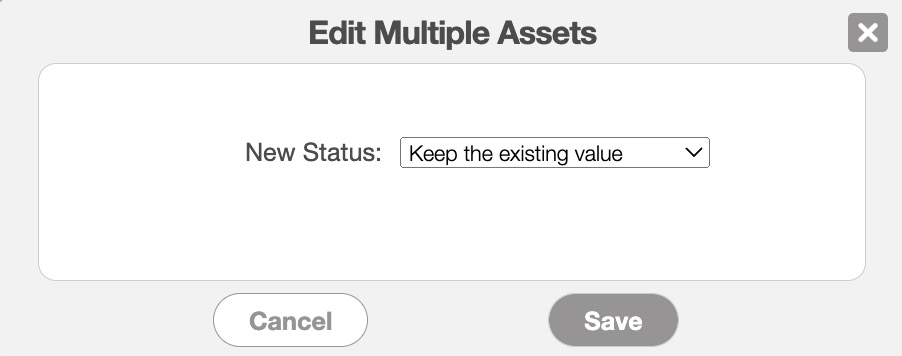
Once you click on the "Edit Selected" option the Edit Selected Assets pop-up window will appear:
From the pop-up window, select the new value.
Once you have selected the new values from the drop-down, click on the Save button.

With Excel
You can also edit assets in bulk through Excel; this process will enable you to update more than just the value of the assets:
First, you would first need to select the desired assets and use the "Export to Excel" option. For more information on how to export assets, please see the Import and Export Assets page:
Once you have the exported file, you can make the changes directly to the Excel document:
Once you are done updating your assets, you can import the Excel file back into MobiWork. For more information on how to import assets, please see the Import and Export Assets page.

If you have any questions or need further assistance, please let us know. We'd be happy to help!
