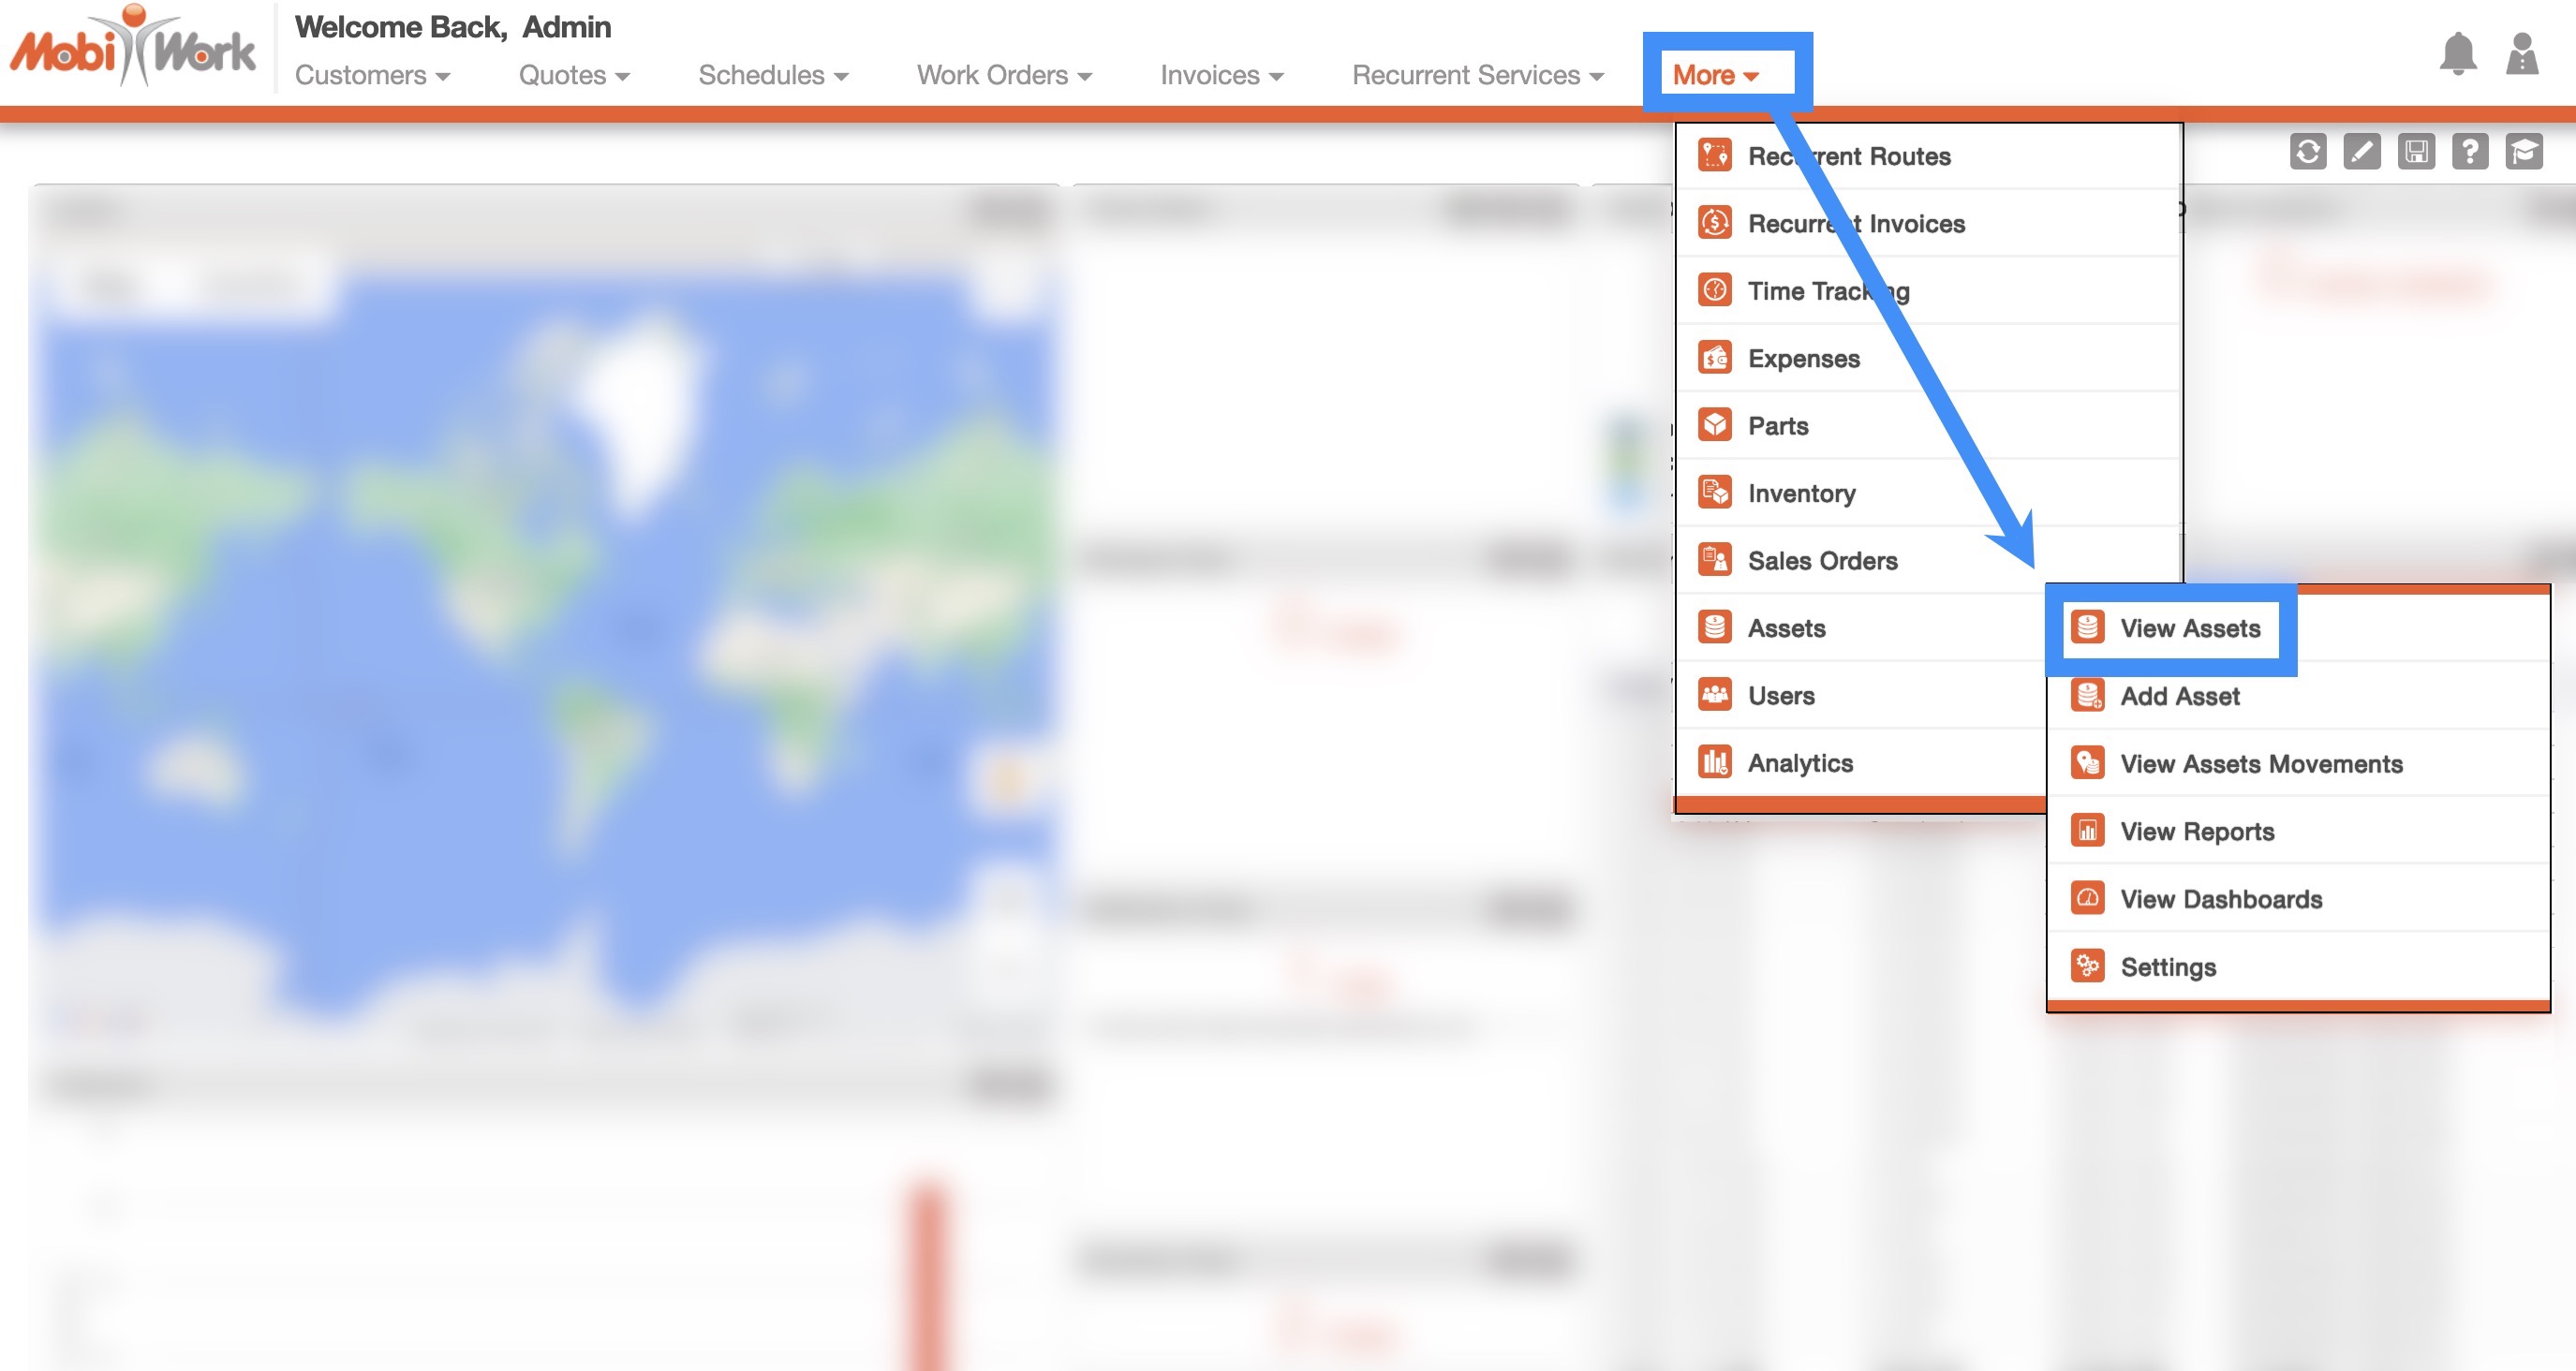
You can access the Assets feature page by hovering over the Assets feature from your MobiWork menu and clicking on the "View Assets" option:
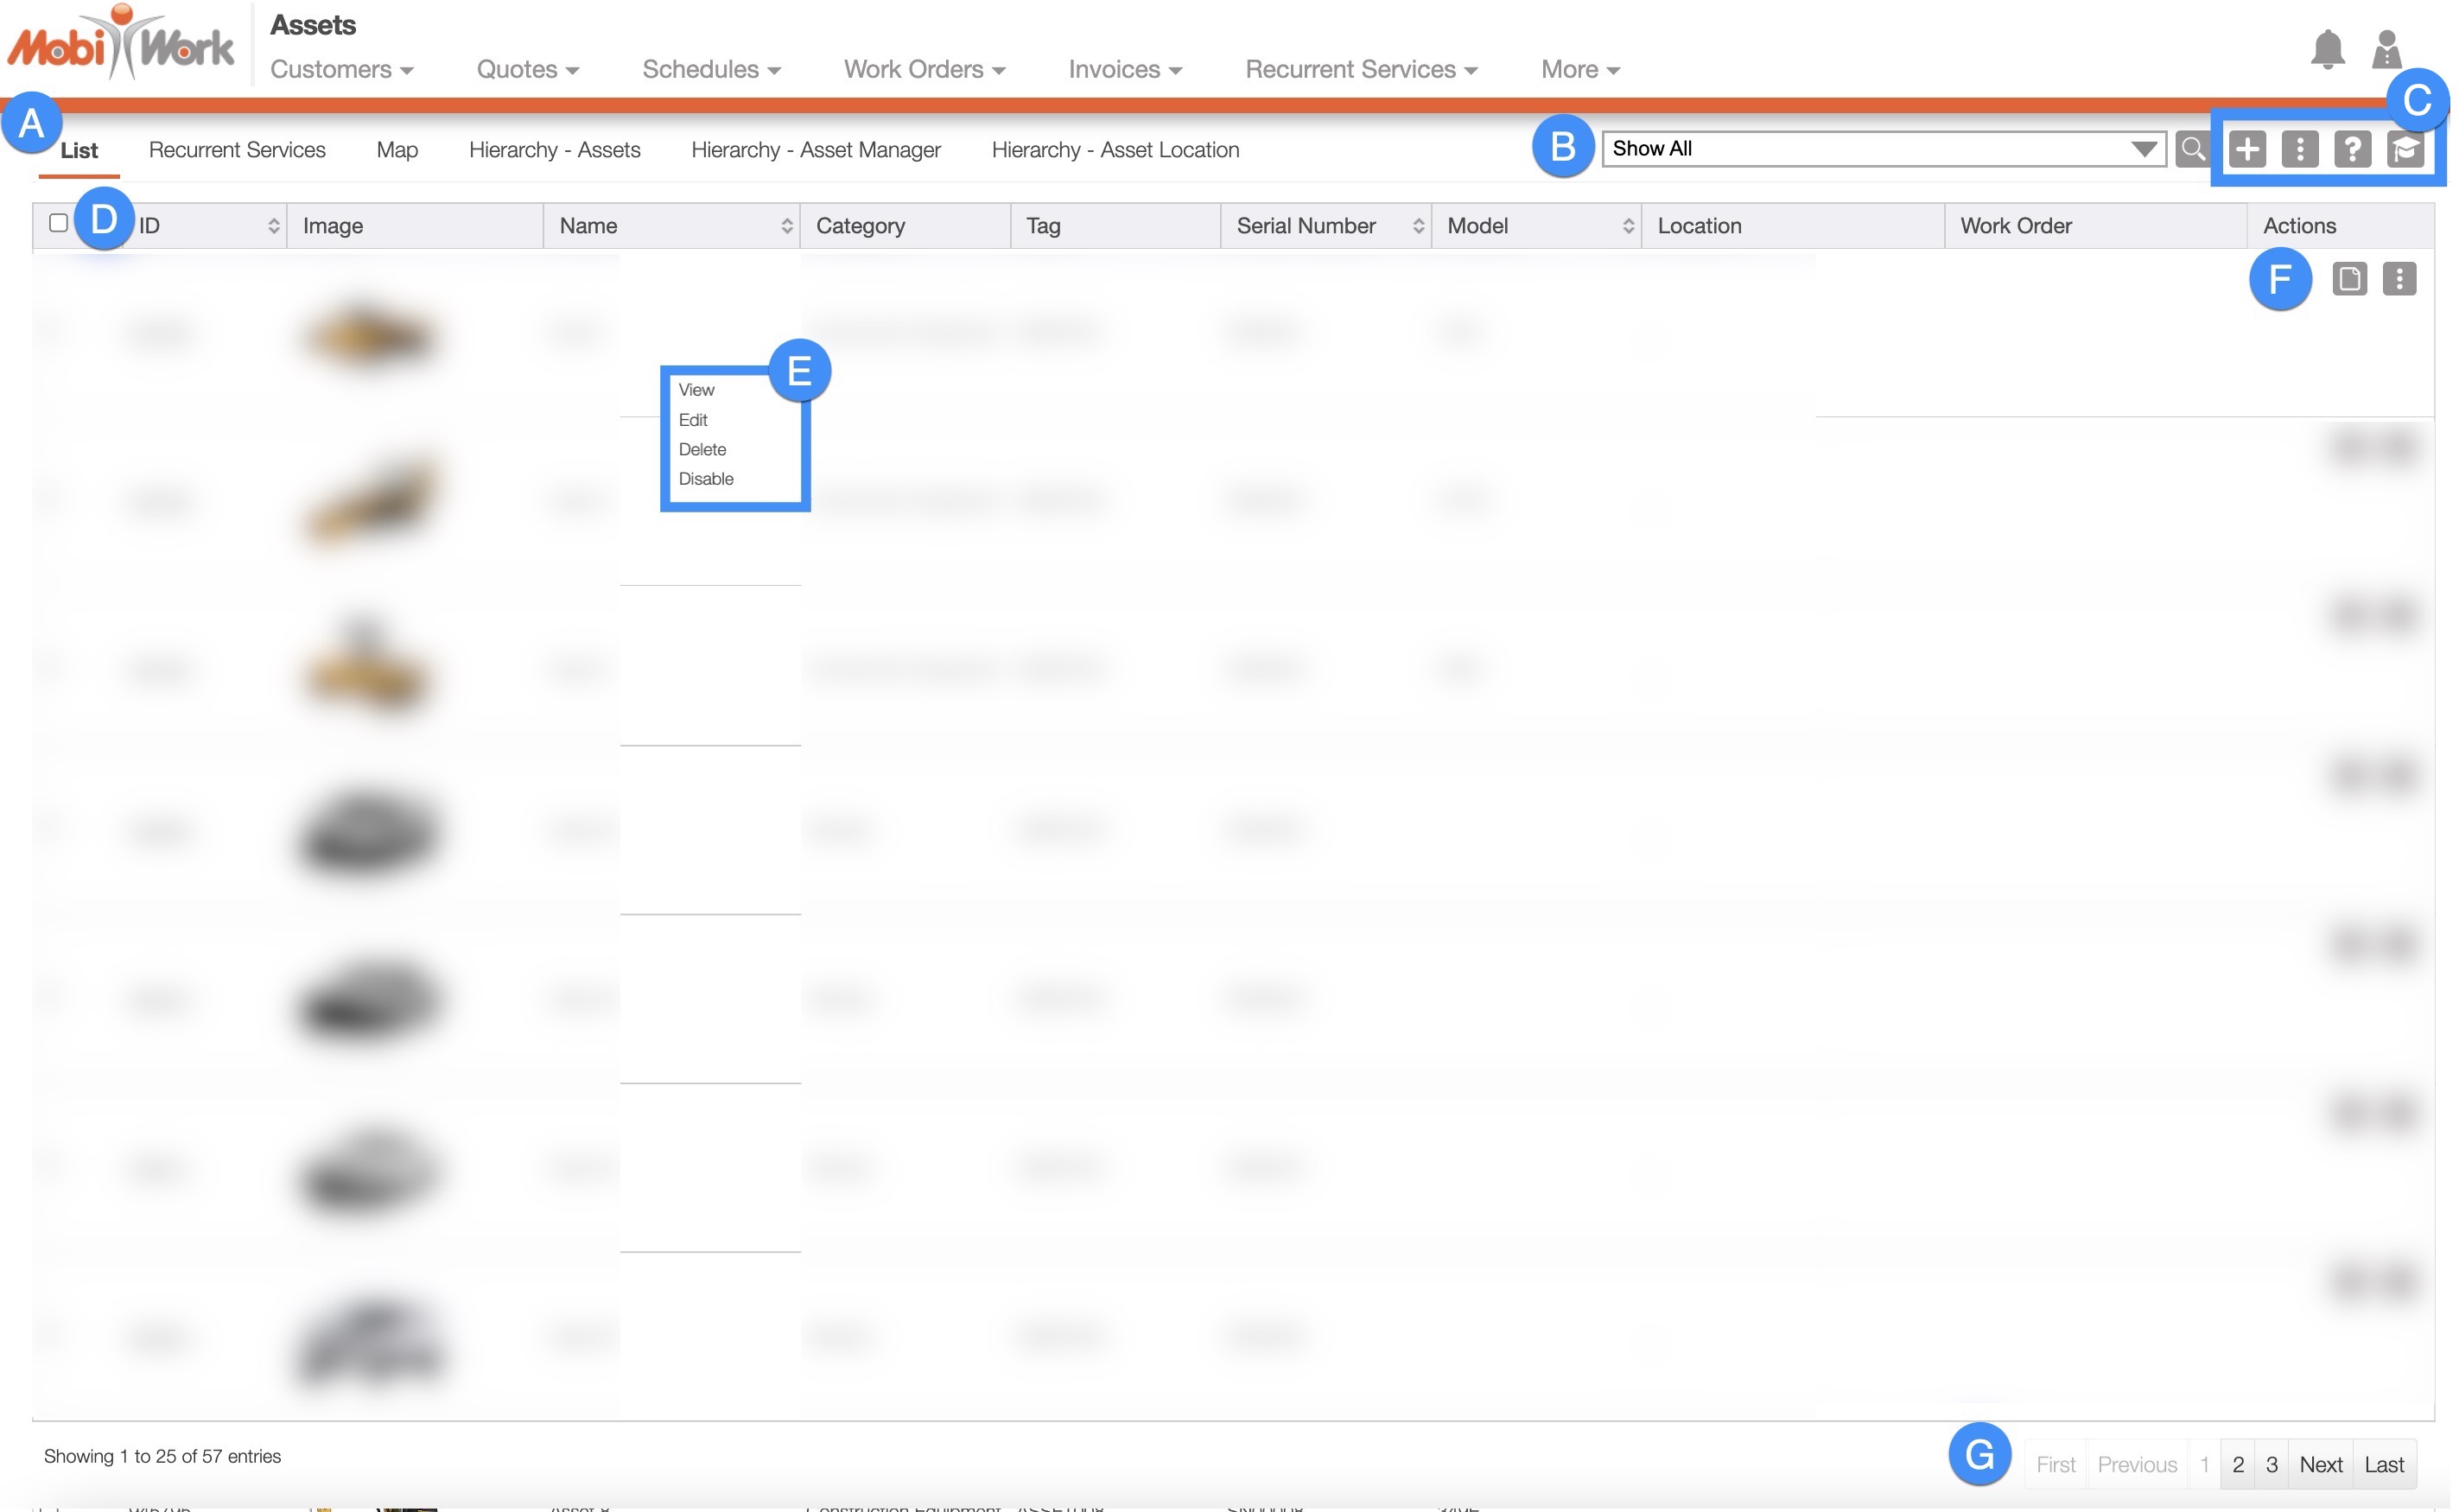
The "Assets List" tab is the default tab you will be brought to once you access the Assets feature; from this page you can navigate to other tabs and see all your asset data summarized on one page.
Some features (e.g., the Search Area, Global Actions, etc.) can be found in all the tabs. Below is a list of the main features that are located on the "Assets List" tab:
Free-Text Search
You can type in the search bar (free-text search) to locate a specific asset. Once you click in the search bar, the search drop-down menu will automatically appear. You can use the search drop-down menu or continue typing your own search parameters:

When typing in the search bar, the drop-down menu will provide some helpful search criteria. With free-text search you will also be able to search by:
Serial Number
Model Number
Name
If the number of assets surpasses the number range, the subsequent number of assets will be found on the next page:
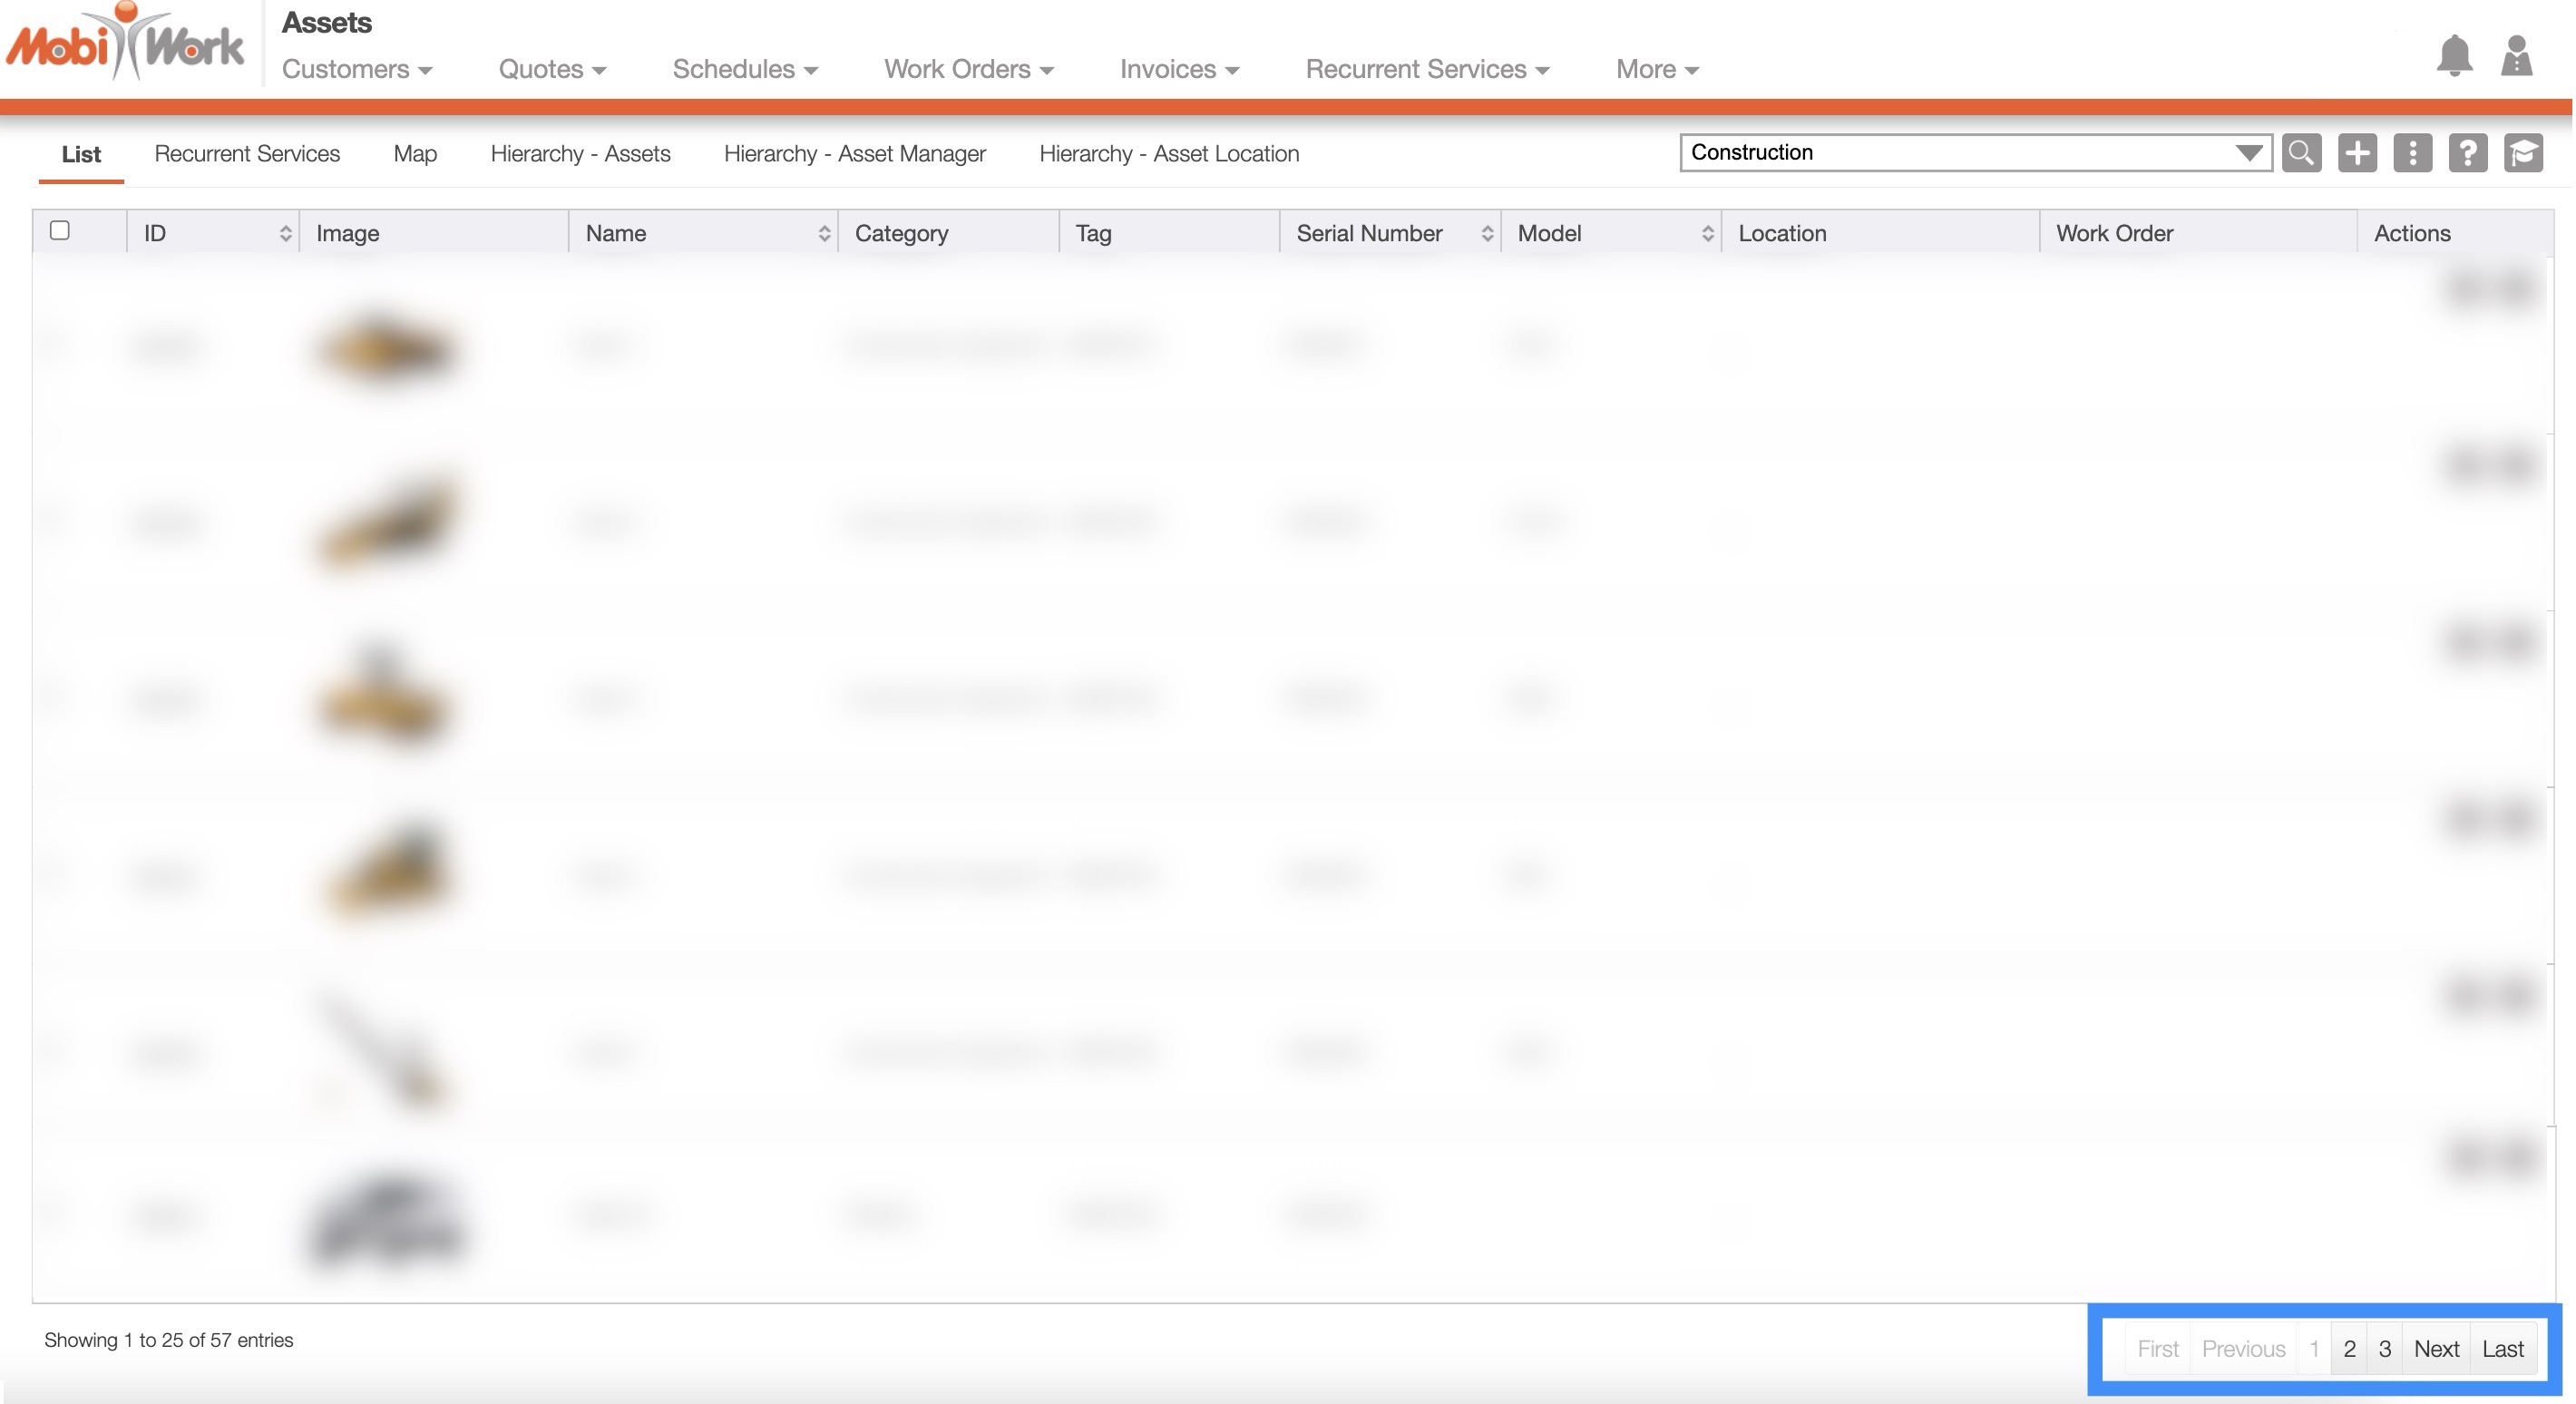
To navigate through these pages, use the First, Previous, Next, and Last buttons located towards the bottom of the Assets feature.
Predefined Saved Searches
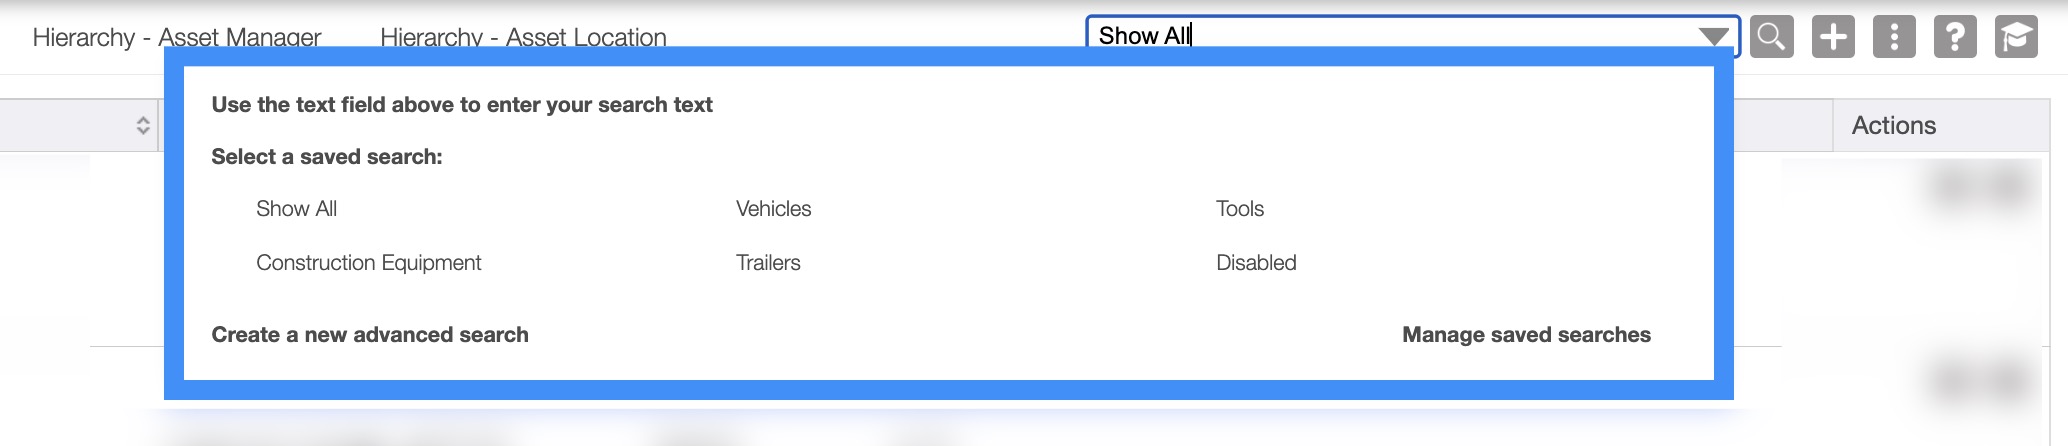
Saved searches are a powerful search tool where the search-criteria has been saved for future use; to access the saved searches drop-down, click in the search bar.
These saved searches will appear in the drop-down menu and can also be used for dashboards and reports.
By default, MobiWork provides several saved searches for you to use, which are organized by status and category (e.g., Disabled, Tools, Trailers, etc.):
The list of statuses that can be used in predefined searches are below:
Vehicles
Tools
Construction Equipment
Trailers
Disabled
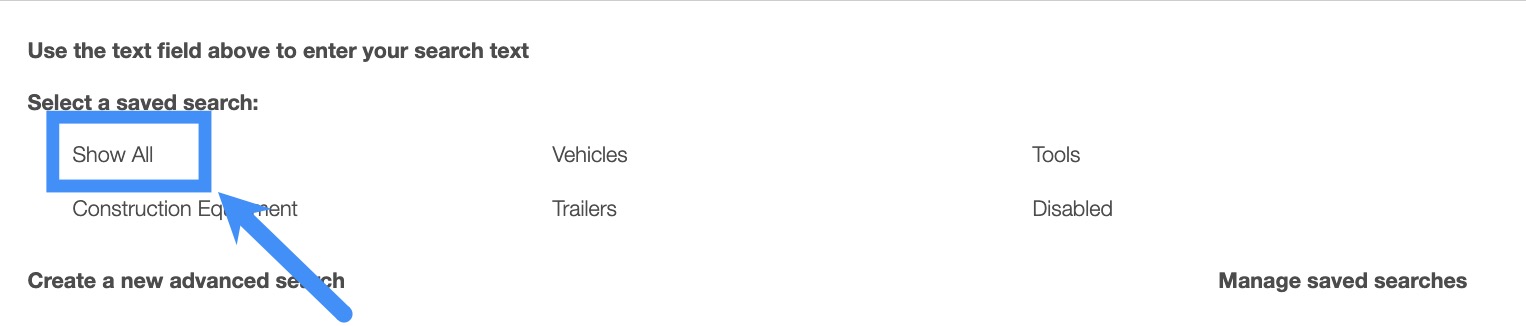
You can access any of these saved searches by clicking in the search bar and selecting your desired saved search from the drop-down menu.
If you would like to view all your assets, click on the "Show All" option from the drop-down menu:
Please note that once you name a new saved search, you will be unable to rename it (instead you would need to delete your saved search and create a new one).
New Search
To create a new saved search, select the "Create a New Advanced Search" option from the drop-down menu:
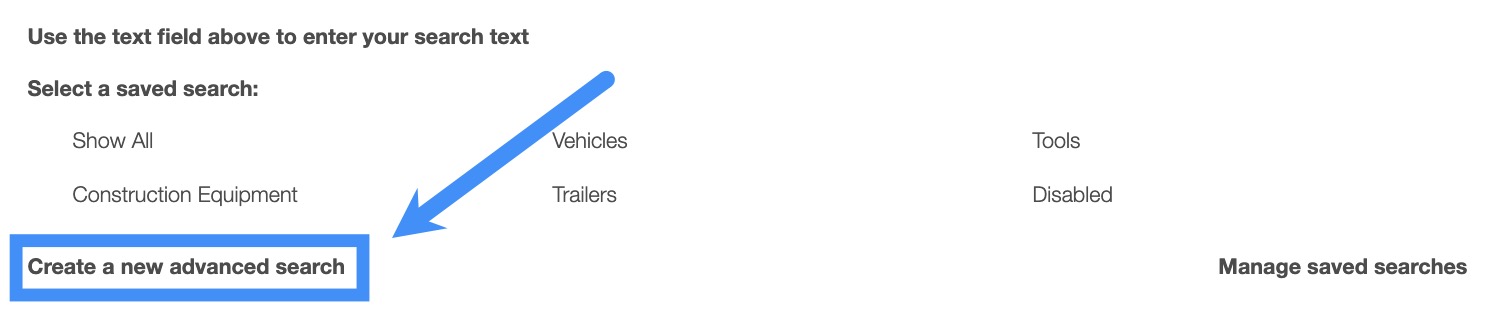
After clicking on "Create a New Advanced Search," a pop-up window will appear where you can enter your data in the appropriate fields. If you would like to exit from this pop-up window you can click on the esc button from your keyboard.
Please note that once you name a "New Search" you will be unable to rename it (instead you would need to delete your saved search and create a new one).
Once you have finished inputting the required information, you can save the search, make it available to all users, or make it your default search:
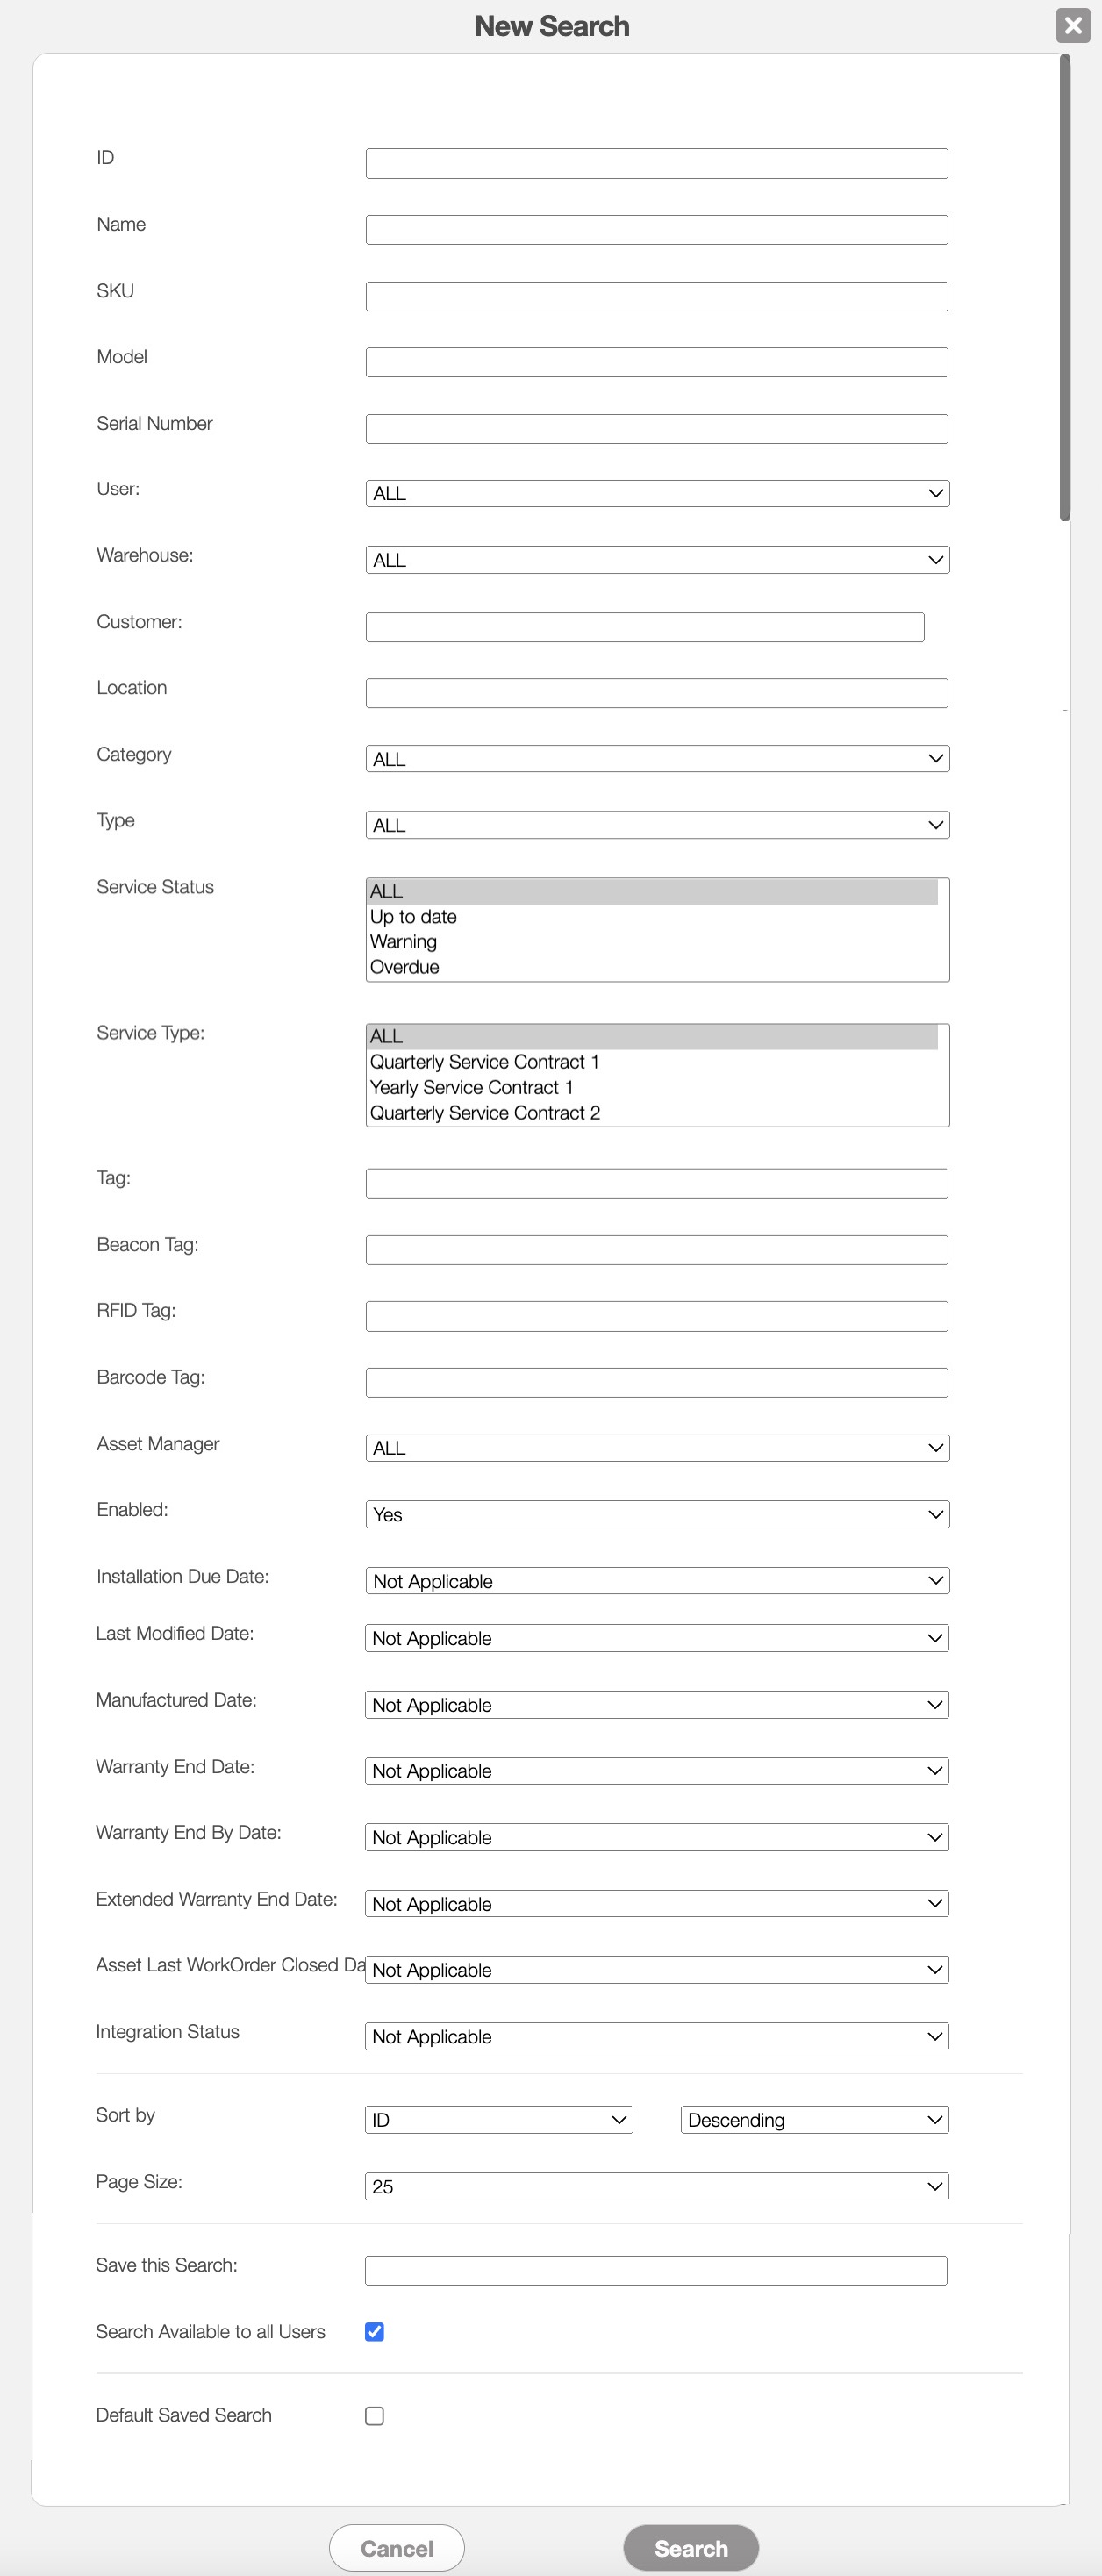
Further definitions for all the terms in the New Search pop-up window can be found below:
| Name: | Description: |
|---|---|
| "ID" | The ID number of the asset. |
| "Name" | The name of the asset. |
| "SKU" | The Stock Keeping Unit (SKU) number used to track and identify the asset in inventory systems, often associated with barcode scanning. |
| "Model" | The model type of the asset |
| "Serial Number" | The serial number of the asset. |
| "User" | The user associated with the asset. |
| "Warehouse" | The warehouse where the assets are stored. |
| "Customer" | The customer associated with the asset. |
| "Location" | The location where the asset is currently stored. |
| "Category" | The category that the asset is classified under. |
| "Type" | The asset type is the type category that the asset is listed as; this can be updated in the Assets Settings page. |
| "Service Status" | Indicates whether the asset is operational, under maintenance, in need of repair, or any other relevant status. |
| "Service Type" | The type of recurrent service that the assets are used for. |
| "Tag" | Tags act as a visual indicator of a custom status or category, thus improving organizational clarity with the ability to identify specified tagged invoices at a glance. With the saved search feature, you can locate a specific tag. |
| "Beacon Tag" | The beacon tag of the asset. |
| "RFID Tag" | The Radio-frequency identification tag of the asset; this can be used to store the barcode number. |
| "RFID Tag" | The Radio-frequency identification tag of the asset; this can be used to store the barcode number. |
| "BarCode Tag" | The barcode tag of the asset. |
| "Assigned To" | The user assigned to oversee the asset. |
| "Enabled" | The asset status is listed as active, and as such it will show up by default on the Assets feature page. |
| "Installation Due Date" | The scheduled or anticipated date by which the asset is expected to be fully installed and operational. |
| "Manufactured Date" | The manufactured date of the asset. |
| "Warranty End Date" | The end date that the warranty terminates for the asset. |
| "Warranty End By Date" | The specified date on which the warranty coverage for that asset expires. |
| "Extended Warranty End Date" | The expiration date of an extended warranty or service contract that extends the coverage beyond the standard warranty period provided by the manufacturer. |
| "Asset Last Work Order Close Date" | The date when the most recent work order associated with a particular asset was closed or completed. |
| "Sort By" | Sorts your search in ascending or descending order by: ID, created date, name, and last name. |
| "Page Size" | The number of results per page. |
| "Save this Search" | Allows the search parameters to be saved under a name to be reused in the future. |
| "Search Available to all Users" | Allows the search to be available to all users. |
| "Default Search" | Makes the specified search the default saved search. |
| "Work Order" | The work order that the asset is associated with. |
| "Actions" | Allows you to view, edit, delete, or disable the asset. |
Manage Saved Searches
Any new searches that are added can be managed or edited in the Manage Saved Searches pop-up window:

To manage, edit, or remove any Saved Searches you can access the "Manage Saved Searches" option in the drop-down menu; the Manage Saved Searches pop-up window will then appear:
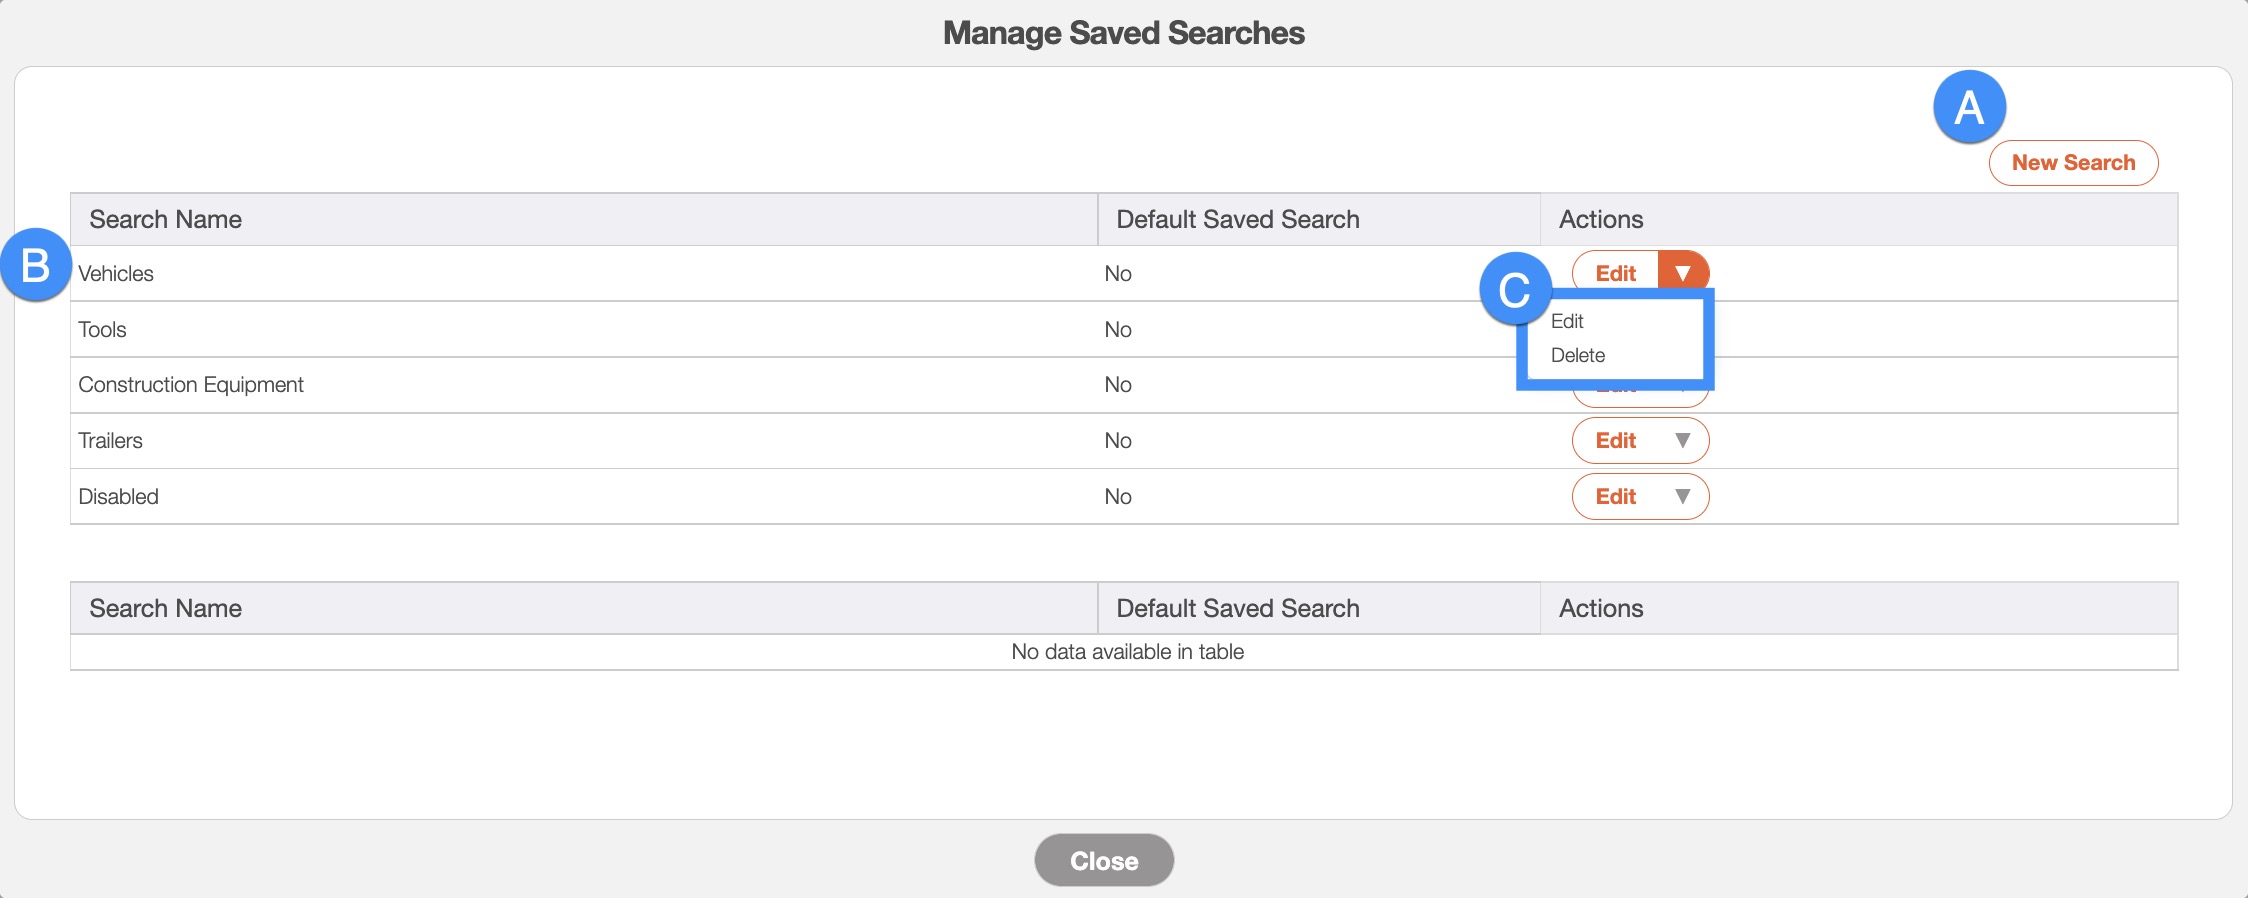
You can add a new saved search by clicking the New Search button in the top right of the pop-up window.
You can rearrange the order of the saved searches by clicking, then dragging & dropping the selected Search.
You can edit or delete a selected saved search by using the drop-down menu under the "Actions" column.
If you would like to easily close this pop-up window, you can click on the esc button from your keyboard.
Tabs are located under the MobiWork logo. You can change the way that the information is displayed by clicking on the desired tab:

There are six tabs that you can toggle between on the Assets feature. They are the "List," "Recurrent Services," "Map," "Hierarchy- Assets," "Hierarchy- Asset Manager," and "Hierarchy- Asset Location" tabs.
The "List" tab will display your assets' ID, an image icon of the asset, the work order associated with the asset and more:

The "List" tab is the default view when you click on the Assets feature.
List Tab Columns
In the "List" tab, the columns are structured to display specific data related to each individual asset.
These columns are organized as: "ID," "Image," "Name," "Category," "Tag," "Serial Number," "Model," "Location," "Work Order," and "Actions:"

The corresponding rows under the column headings will display the relevant asset data.
The checkboxes (multiple selection area) found to the left of the "ID" column, will allow you to select either one or multiple assets to manage, edit, remove, etc.:
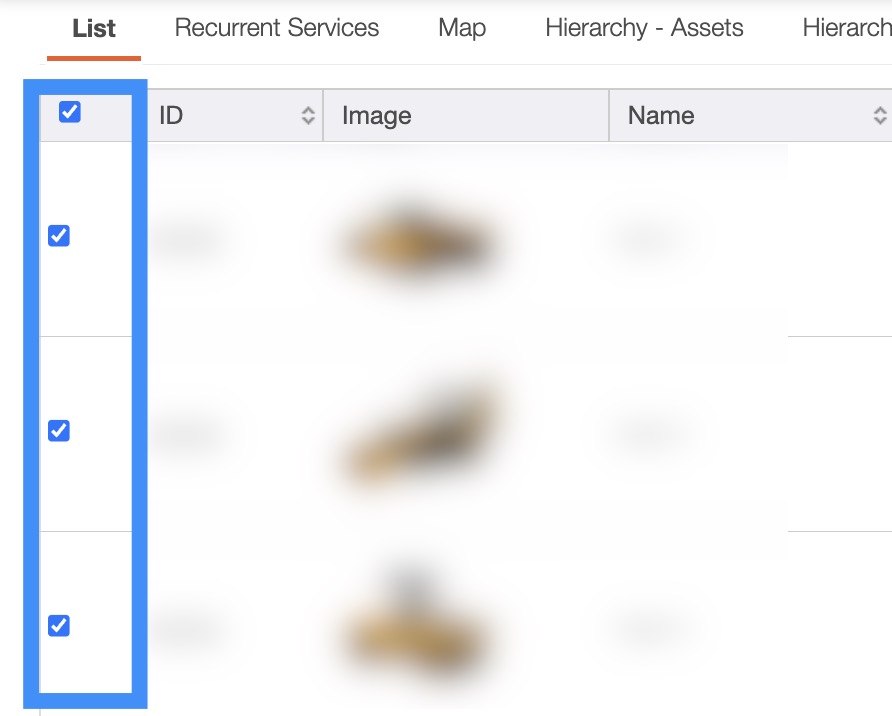
By clicking the topmost checkbox in the column heading you will select all the assets.
The "List" tab column headings are defined as:
| Name: | Description: |
|---|---|
| "ID" | The ID number of the asset. |
| "Image" | The image icon of the asset. |
| "Name" | The name of the asset |
| "Category" | The category that the asset is classified under. |
| "Tag" | Tags act as a visual indicator of a custom status or category, thus improving organizational clarity with the ability to identify specified tagged invoices at a glance. With the saved search feature, you can locate a specific tag. |
| "Serial Number" | The serial number of the asset. |
| "Model" | The model type of the asset |
| "Location" | The location where the asset is stored. |
| "Work Order" | The work order that the asset is associated with. |
| "Actions" | The View icon and the Individual Actions button can be found here; these buttons will allow you to perform actions on an asset. |
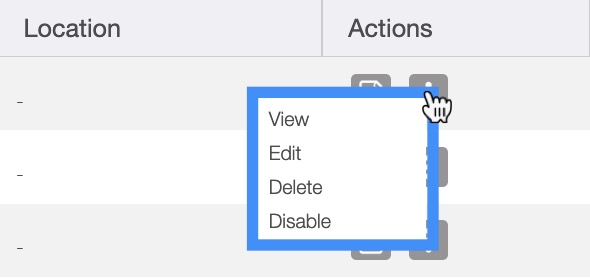
List Tab Individual Actions
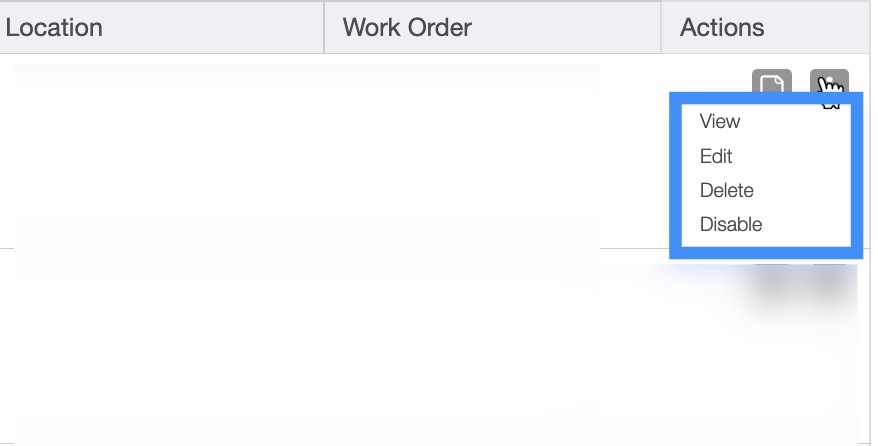
When selecting an asset and clicking on the Individual Actions button (the three vertical dots under the "Actions" column) you will be able to view, edit, delete, and disable the selected asset. If the asset is associated with a customer, you can also remove them from the customer.
Any actions that are done with the Individual Actions button will only apply to the selected asset:
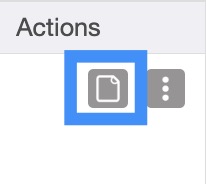
The View icon found under the "Actions" column will allow you to quickly access the View Asset pop-up window of the selected asset:
The options that are displayed when you select the Individual Actions button are also available under the right-click actions.
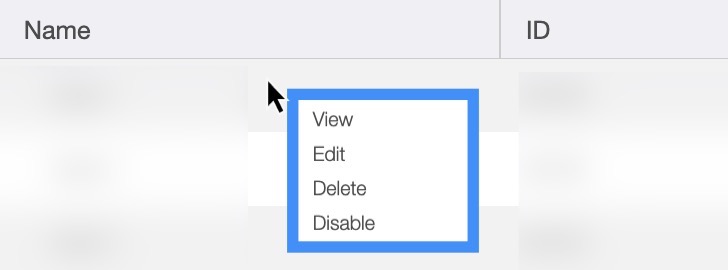
List Tab Right-Click Actions
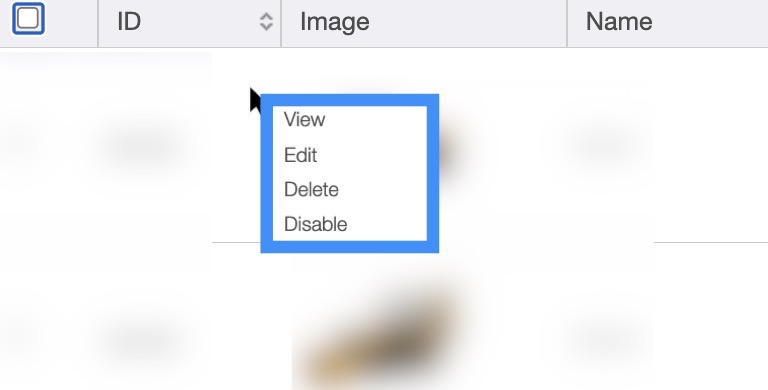
When right-clicking with your mouse on an asset in the "List" tab, you will be able to view, edit, delete, and disable the selected asset. If the asset is associated with a customer, you can also remove them from the customer.
The options that are displayed when you right-click on an asset, are also available when you select the Individual Actions button.
Any actions that are done with the right-click actions will only apply to the selected asset:
The definitions for the actions found in the Individual Actions and when you right-click in the "List" tab are below:
| Name: | Description: |
|---|---|
| "View" | Opens the View Asset pop-up window. |
| "Edit" | Edits the selected asset. |
| "Remove From Customer" | Removes the asset from the associated customer. This action will only appear if the asset is assigned to a customer. |
| "Delete" | Deletes the selected asset. This is a non-reversible action in which the asset and all entities associated with it including work orders, invoices, and forms will be deleted. Disable is recommended over deleting unless there is certainty that the items associated with the asset can be deleted. |
| "Disable" | Disables the selected asset, so that it won't show up on the asset list by default. |
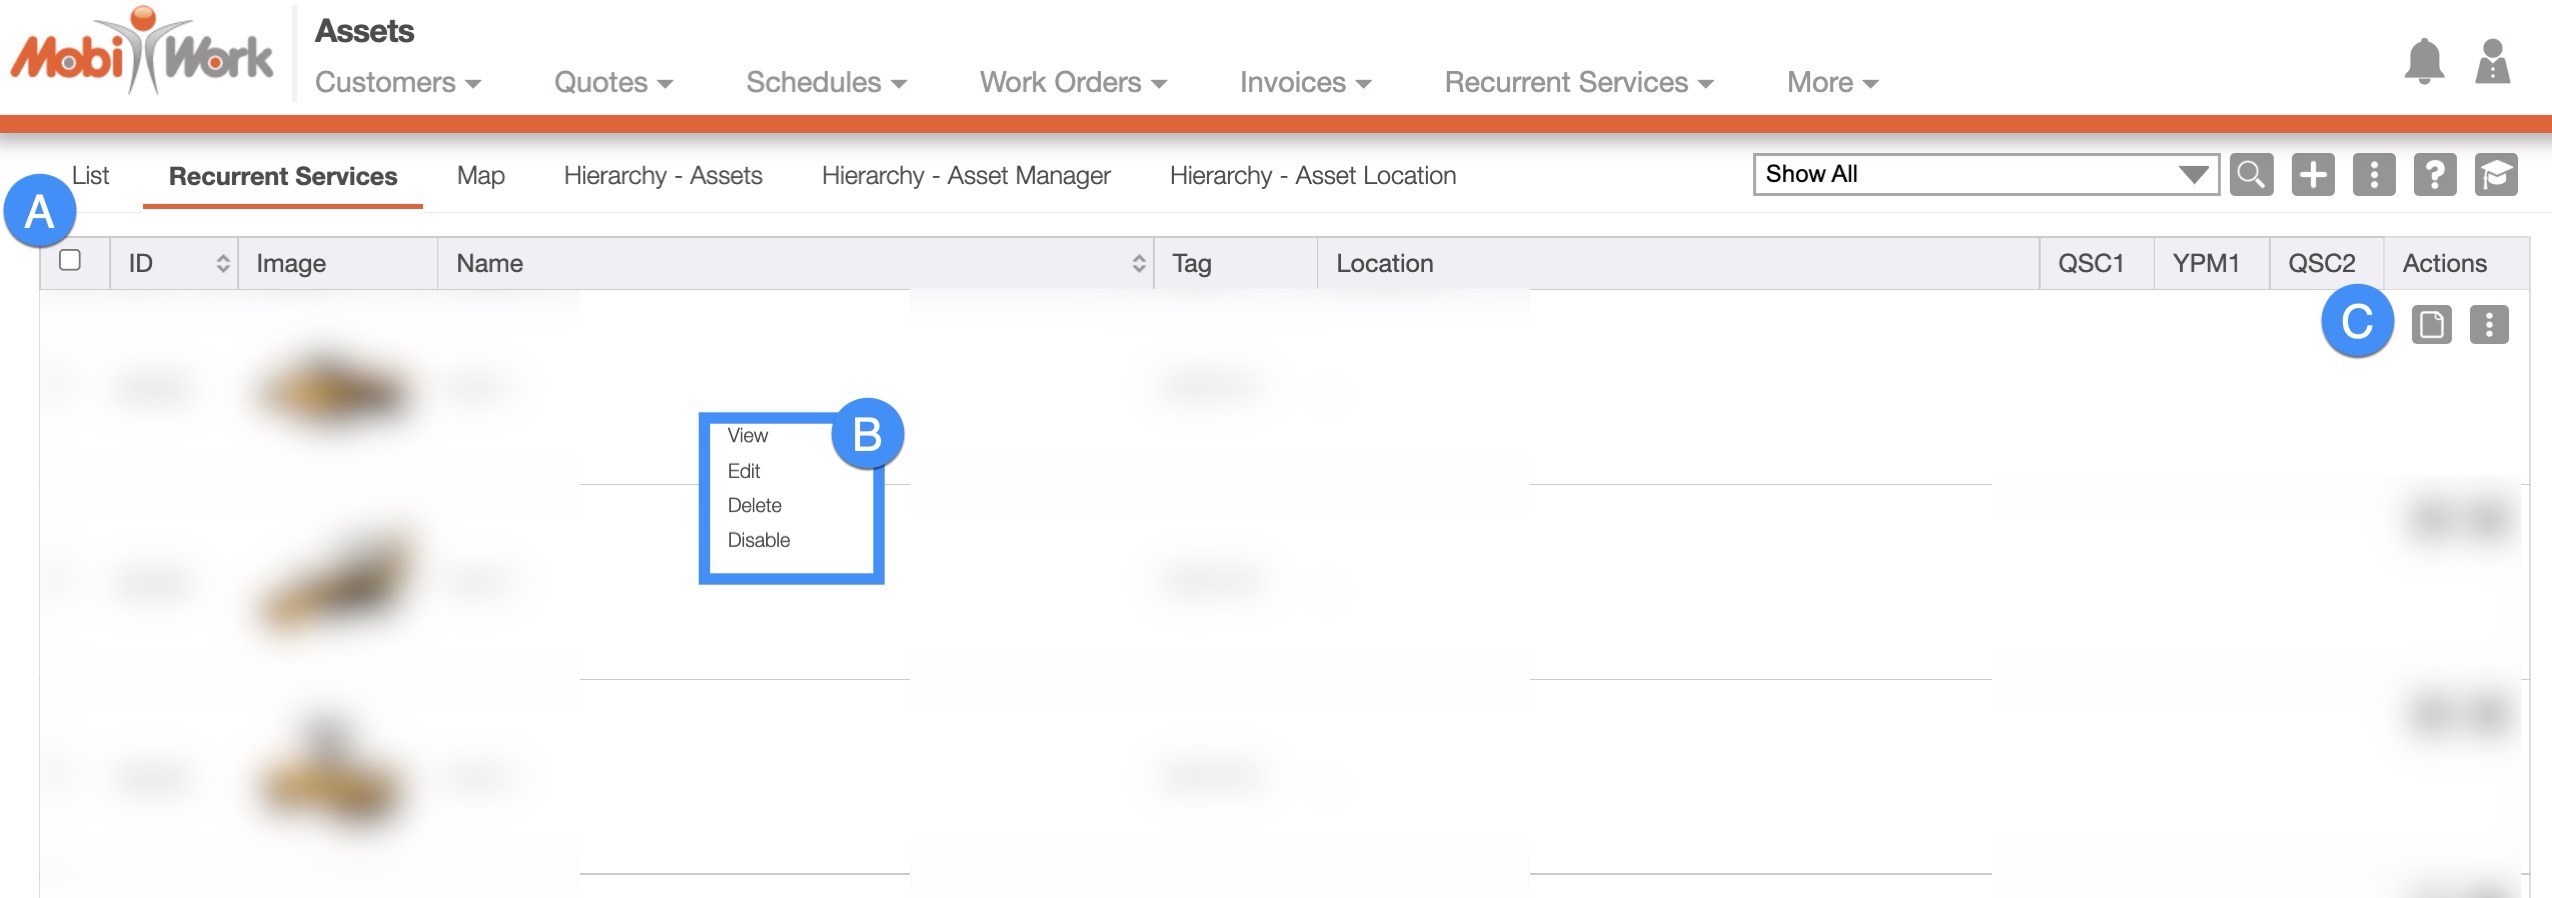
The "Recurrent Services" tab will display assets that are associated with recurrent appointments:

This tab will display your assets' ID, an image icon of the asset, the asset's tag, and more.
Recurrent Services Tab Layout
Recurrent Services Tab Columns
In the "Recurrent Services" tab, the columns are structured to display specific data related to each individual asset.
These columns are organized as: "ID," "Image," "Name," "Tag," "Location," and "Actions:"

The corresponding rows under the column headings will display the relevant asset data.
The checkboxes (multiple selection area) found to the left of the "ID" column, will allow you to select either one or multiple assets to manage, edit, remove, etc.:
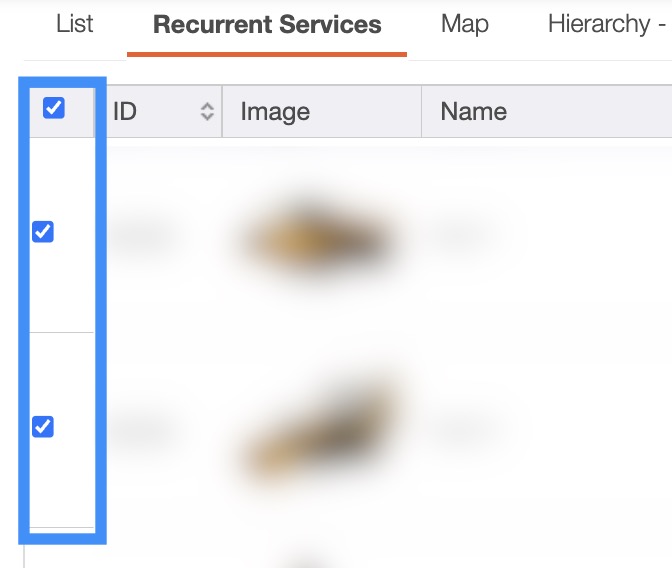
By clicking the topmost checkbox in the column heading you will select all the assets.
The "Recurrent Services" tab column headings are defined as:
| Name: | Description: |
|---|---|
| "ID" | The ID number of the asset. |
| "Image" | The image icon of the asset. |
| "Name" | The name of the asset. |
| "Tag" | Tags act as a visual indicator of a custom status or category, thus improving organizational clarity with the ability to identify specified tagged invoices at a glance. With the saved search feature, you can locate a specific tag. |
| "Location" | The location where the asset is stored. |
| "Actions" | The View icon and the Individual Actions button can be found here; these buttons will allow you to perform actions on an asset. |
Recurrent Services Tab Individual Actions
When selecting an asset and clicking on the Individual Actions button (the three vertical dots under the "Actions" column) you will be able to view, edit, delete, and disable the selected asset. If the asset is associated with a customer, you can also remove them from the customer.
Any actions that are done with the Individual Actions button will only apply to the selected asset:
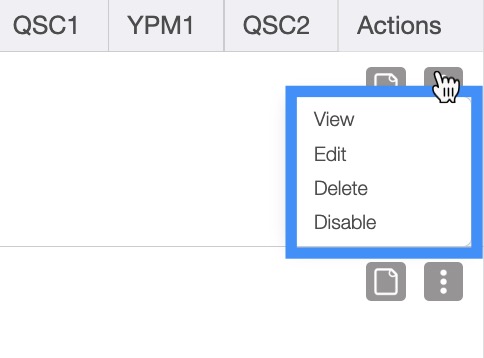
The View icon found under the "Actions" column will allow you to quickly access the View Asset pop-up window of the selected asset:
The options that are displayed when you select the Individual Actions button are also available under the right-click actions.
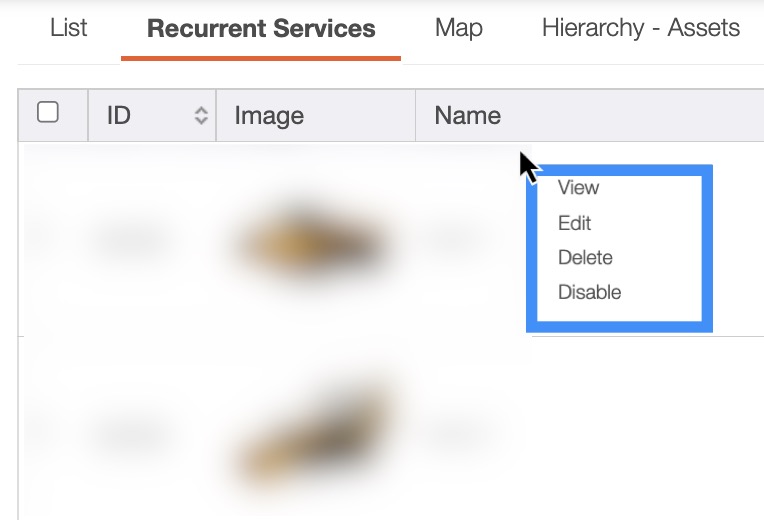
Recurrent Services Right-Click Actions
When right-clicking with your mouse on an asset in the "Recurrent Services" tab, you will be able to view, edit, delete, and disable the selected asset. If the asset is associated with a customer, you can also remove them from the customer.
The options that are displayed when you right-click on an asset, are also available when you select the Individual Actions button.
Any actions that are done with the right-click actions will only apply to the selected asset:
The definitions for the actions found in the Individual Actions and when you right-click in the "Recurrent Services" tab are below:
| Name: | Description: |
|---|---|
| "View" | Opens the View Asset pop-up window |
| "Edit" | Edits the selected asset |
| "Remove From Customer" | Removes the asset from the associated customer. This action will only appear if the asset is assigned to a customer. |
| "Delete" | Deletes the selected asset. This is a non-reversible action in which the asset and all entities associated with it including work orders, invoices, and forms will be deleted. Disable is recommended over deleting unless there is certainty that the items associated with the asset can be deleted. |
| "Disable" | Disables the selected asset, so that it won't show up on the asset list by default. |
The "Map" tab will visually display all your assets (represented by pins) on a map. MobiWork utilizes the same map system that is utilized in Google Maps; the buttons and functions will work the same way:
If you click on a pin, you will be able to view the asset details of the selected pin (i.e., the address of the asset's location).
Map Tab Layout
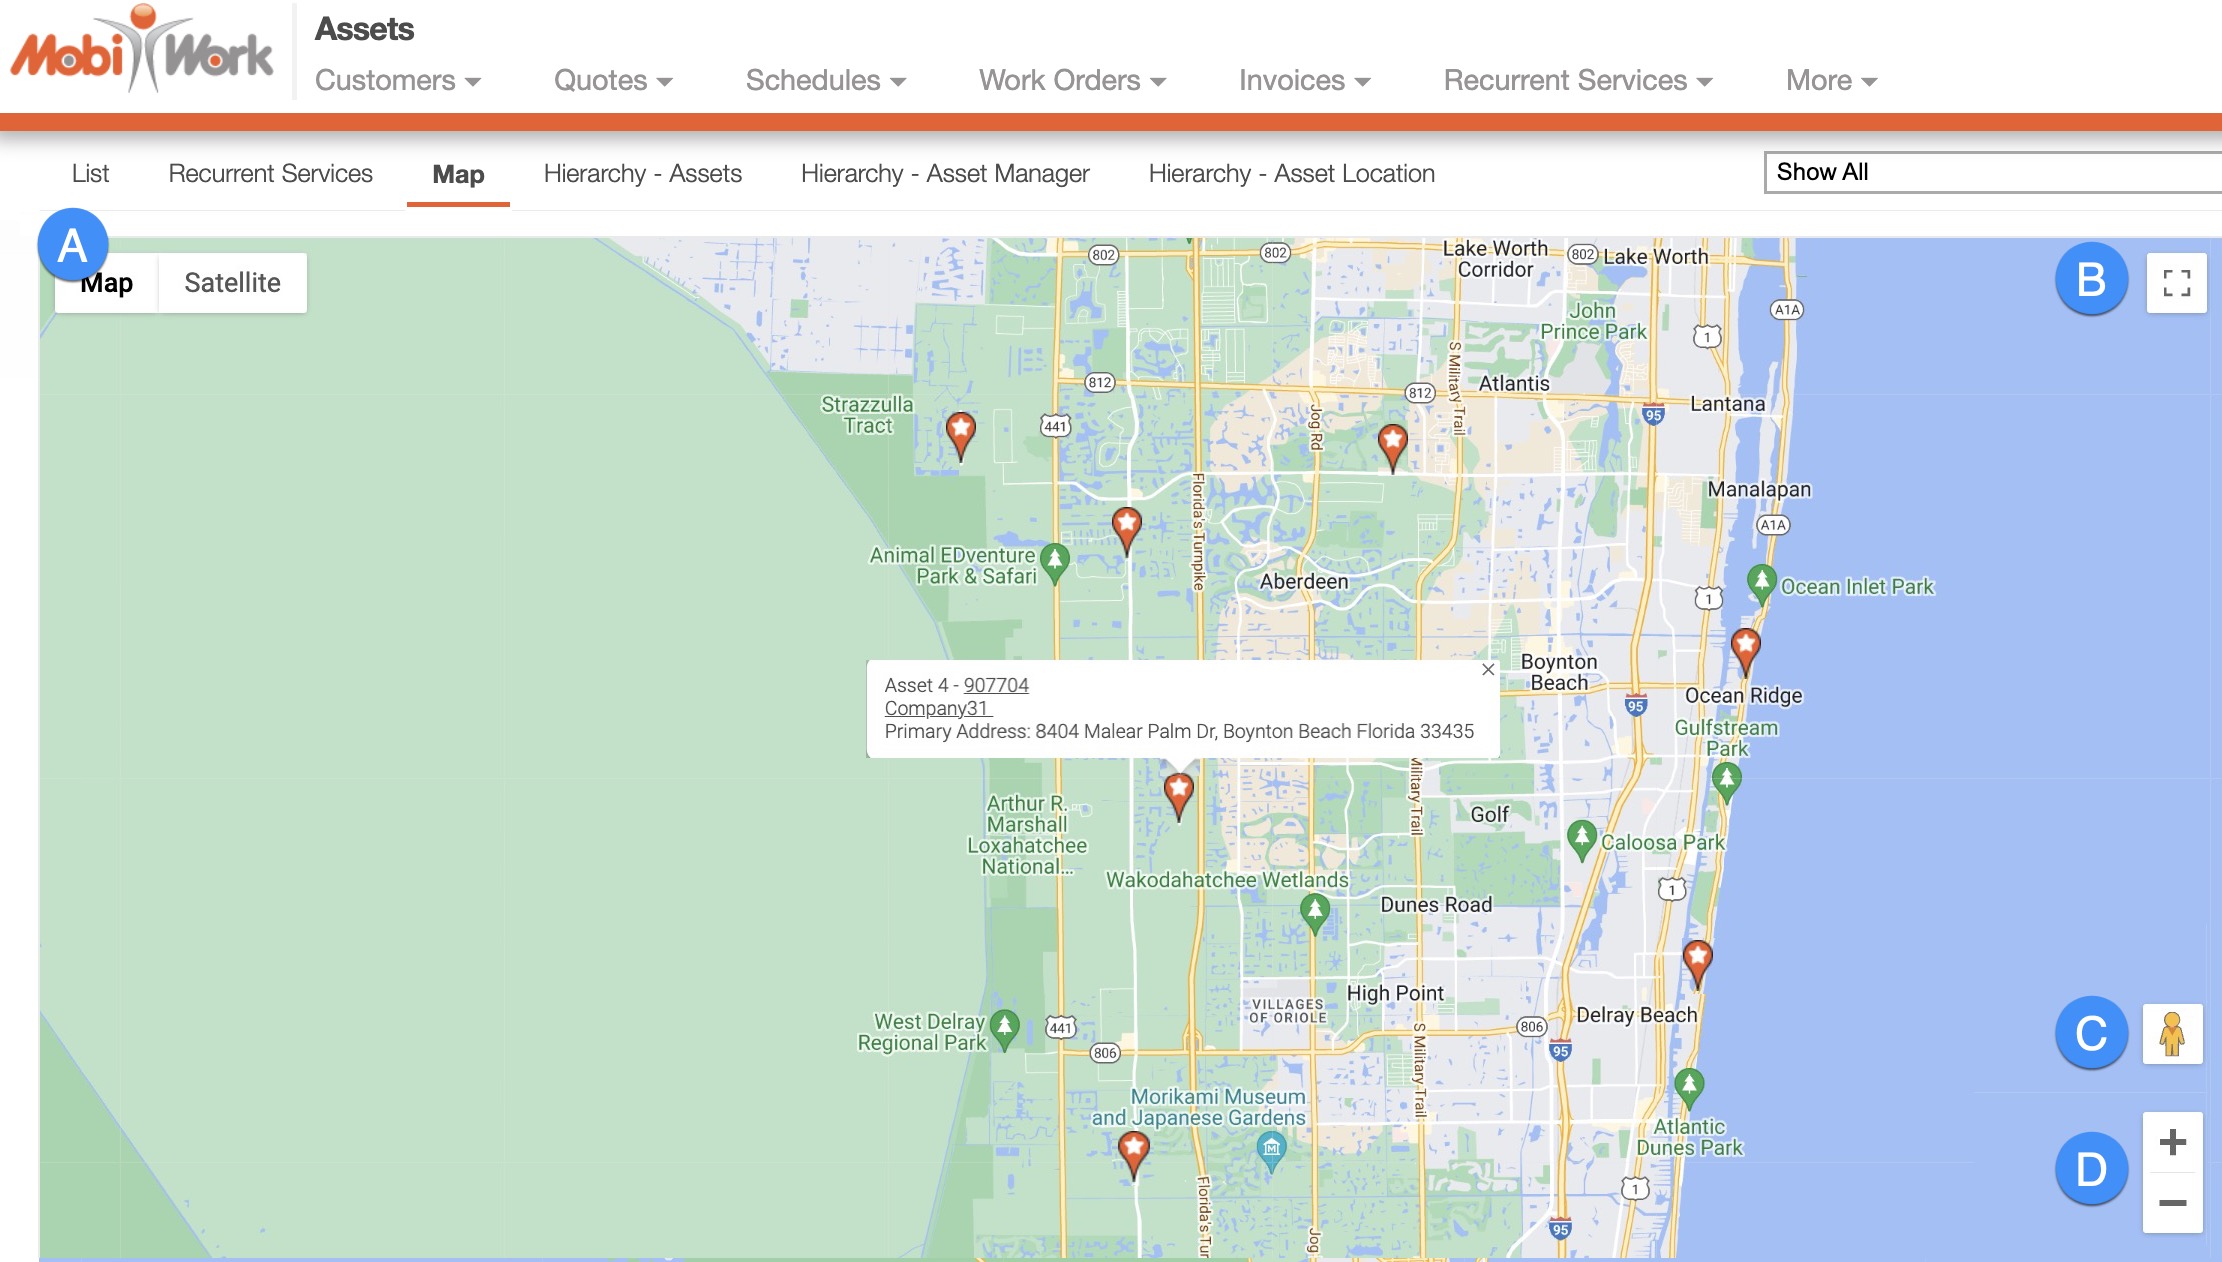
You can switch the view from the standard map-view to a satellite view.
You can have the map fill the entire screen for a better view of the region.
You can use the yellow person icon to view an area in street view.
You can either increase the zoom on the map or decrease it by toggling the Plus and Minus buttons.
The "Hierarchy- Assets" tab will organize your assets in alphabetical order by name. It will also display the asset ID, asset category, serial number, and more:

This tab will list the assets in a hierarchical format; thus, visually depicting which assets are stratified under a main asset.
Hierarchy- Assets Layout

Hierarchy- Assets Columns
In the "Hierarchy- Assets" tab, the columns are structured to display specific data related to each individual asset.
These columns are organized as: "Name," "ID," "Category," "Serial Number," "SKU," "Location," and "Actions:"

The corresponding rows under the column headings will display the relevant asset data.
The "Hierarchy- Assets" tab column headings are defined as:
| Name: | Description: |
|---|---|
| "Name" | The name of the asset. |
| "ID" | The ID number of the asset. |
| "Category" | The category that the asset is classified under. |
| "Serial Number" | The serial number of the asset. |
| "SKU" | The Stock Keeping Unit (SKU) number used to track and identify the asset in inventory systems, often associated with barcode scanning. |
| "Location" | The location where the asset is stored. |
| "Actions" | The View icon and the Individual Actions button can be found here; these buttons will allow you to perform actions on an asset. |
Hierarchy- Assets Individual Actions
When selecting an asset and clicking on the Individual Actions button (the three vertical dots under the "Actions" column) you will be able to view, edit, delete, and disable the selected asset. If the asset is associated with a customer, you can also remove them from the customer.
Any actions that are done with the Individual Actions button will only apply to the selected asset:
The View icon found under the "Actions" column will allow you to quickly access the View Asset pop-up window of the selected asset:
The options that are displayed when you select the Individual Actions button are also available under the right-click actions.
Hierarchy- Assets Right-Click Actions
When right-clicking with your mouse on an asset in the "Hierarchy- Assets" tab, you will be able to view, edit, delete, and disable the selected asset. If the asset is associated with a customer, you can also remove them from the customer.
The options that are displayed when you right-click on an asset, are also available when you select the Individual Actions button.
Any actions that are done with the right-click actions will only apply to the selected asset:
The definitions for the actions found in the Individual Actions and when you right-click in the "Hierarchy- Assets" tab are below:
| Name: | Description: |
|---|---|
| "View" | Opens the View Asset pop-up window |
| "Edit" | Edits the selected asset |
| "Remove From Customer" | Removes the asset from the associated customer. This action will only appear if the asset is assigned to a customer. |
| "Delete" | Deletes the selected asset. This is a non-reversible action in which the asset and all entities associated with it including work orders, invoices, and forms will be deleted. Disable is recommended over deleting unless there is certainty that the items associated with the asset can be deleted. |
| "Disable" | Disables the selected asset, so that it won't show up on the asset list by default. |
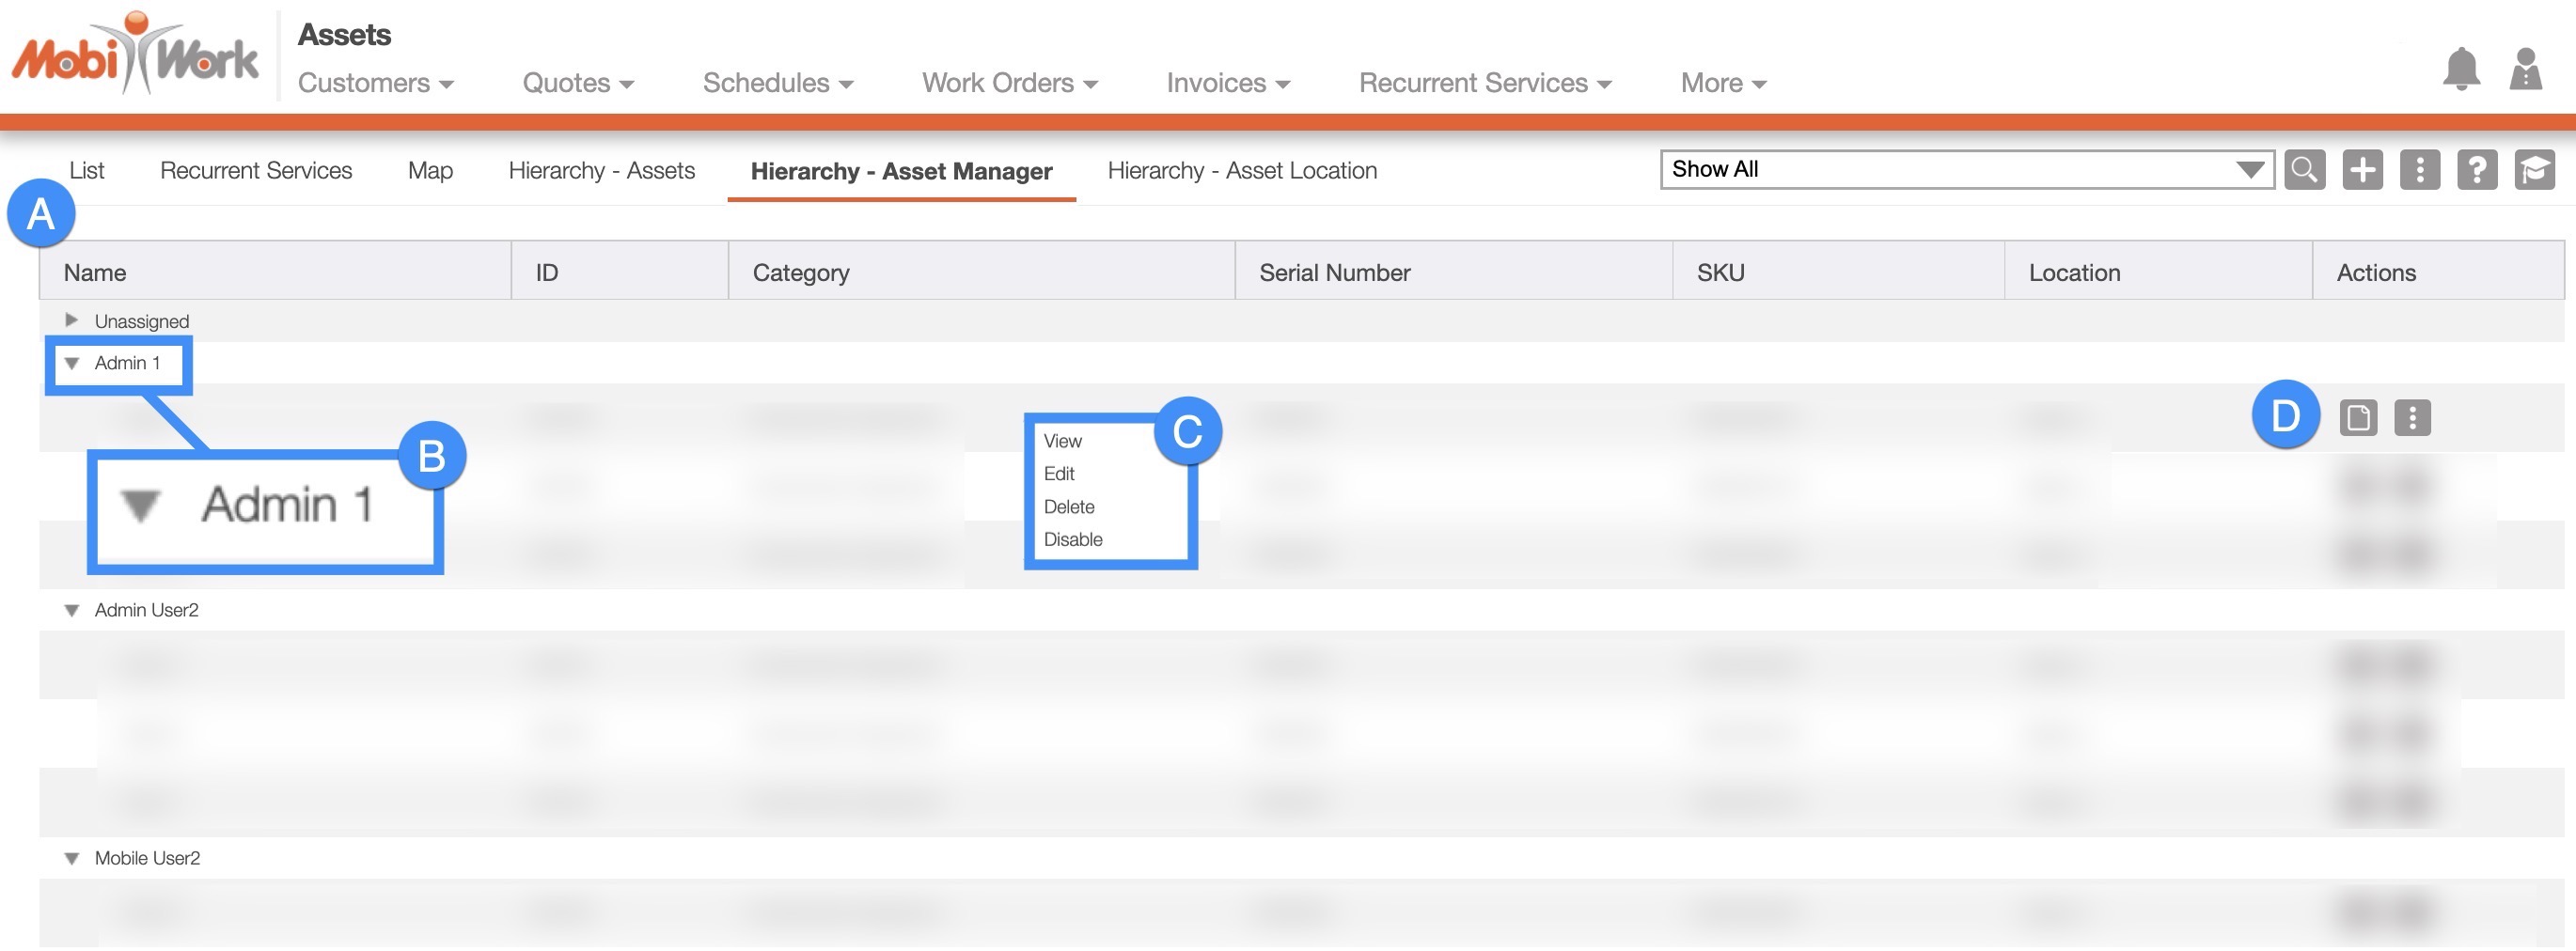
The "Hierarchy- Asset Manager" tab will display assets that are associated with specific users. This tab will list the assets in a hierarchical format; thus, visually depicting which assets are stratified under a main asset:

These assets will be grouped by the user's name. This tab will also display your assets' ID, category, serial number, SKU, location, and Actions.
Hierarchy- Asset Manager Layout
Hierarchy- Asset Manager Columns
In the "Hierarchy- Asset Manager" tab, the columns are structured to display specific data related to each individual asset.
These columns are organized as: "Name," "ID," "Category," "Serial Number," "SKU," "Location," and "Actions:"

The corresponding rows under the column headings will display the relevant asset data.
The "Hierarchy- Asset Manager" tab column headings are defined as:
| Name: | Description: |
|---|---|
| "Name" | The name of the asset |
| "ID" | The ID number of the asset. |
| "Category" | The category that the asset is classified under. |
| "Serial Number" | The serial number of the asset. |
| "SKU" | The Stock Keeping Unit (SKU) number used to track and identify the asset in inventory systems, often associated with barcode scanning. |
| "Location" | The location where the asset is stored. |
| "Actions" | The View icon and the Individual Actions button can be found here; these buttons will allow you to perform actions on an asset. |
Hierarchy- Asset Manager Assigned Asset Grouping
The assets in this tab will be organized by the user that they are assigned to. You can collapse or expand the list of assets by clicking on the triangle next to the assigned user:
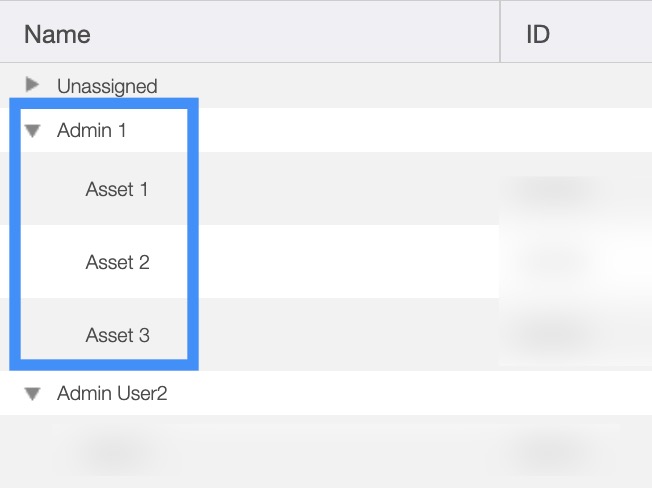
When expanding the list of assets assigned to a user, you will be able to view all the assets that the user manages.
Hierarchy- Asset Manager Individual Actions
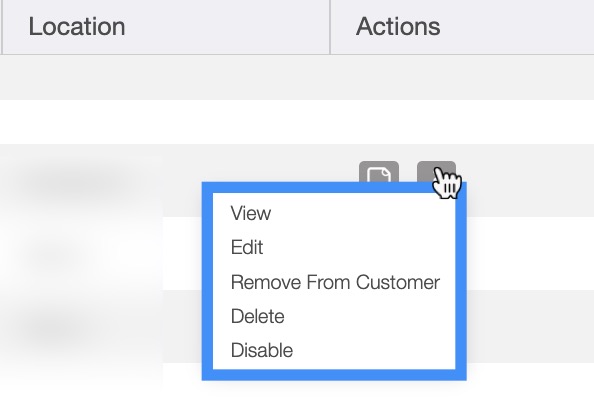
When selecting an asset and clicking on the Individual Actions button (the three vertical dots under the "Actions" column) you will be able to view, edit, delete, and disable the selected asset. If the asset is associated with a customer, you can also remove them from the customer.
Any actions that are done with the Individual Actions button will only apply to the selected asset:
The View icon found under the "Actions" column will allow you to quickly access the View Asset pop-up window of the selected asset:
The options that are displayed when you select the Individual Actions button are also available under the right-click actions.
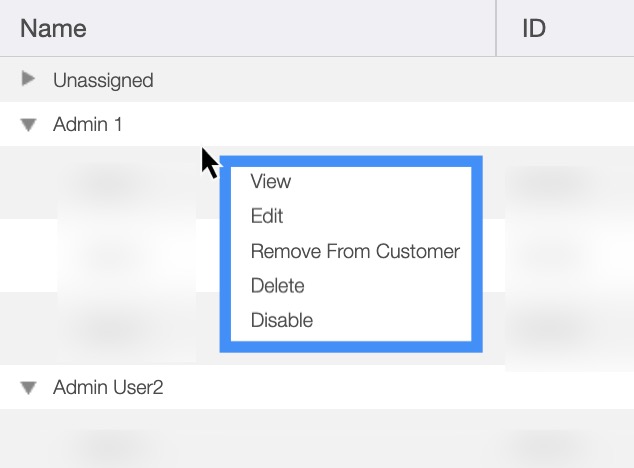
Hierarchy- Asset Manager Right-Click Actions
When right-clicking with your mouse on an asset in the "Hierarchy- Asset Manager" tab, you will be able to view, edit, delete, and disable the selected asset. If the asset is associated with a customer, you can also remove them from the customer.
The options that are displayed when you right-click on an asset, are also available when you select the Individual Actions button.
Any actions that are done with the right-click actions will only apply to the selected asset:
The definitions for the actions found in the Individual Actions and when you right-click in the "Hierarchy- Asset Manager" tab are below:
| Name: | Description: |
|---|---|
| "View" | Opens the View Asset pop-up window |
| "Edit" | Edits the selected asset |
| "Remove From Customer" | Removes the asset from the associated customer. This action will only appear if the asset is assigned to a customer. |
| "Delete" | Deletes the selected asset. This is a non-reversible action in which the asset and all entities associated with it including work orders, invoices, and forms will be deleted. Disable is recommended over deleting unless there is certainty that the items associated with the asset can be deleted. |
| "Disable" | Disables the selected asset, so that it won't show up on the asset list by default. |
The "Hierarchy- Asset Manager" tab will display assets that are associated with specific locations (e.g., warehouse). This tab will list the assets in a hierarchical format; thus, visually depicting which assets are stratified under a main asset:

These assets will be grouped by the location. This tab will also display your assets' ID, category, serial number, SKU, location, and Actions.
Hierarchy- Asset Location Layout

Hierarchy- Asset Location Columns
In the "Hierarchy- Asset Location" tab, the columns are structured to display specific data related to each individual asset.
These columns are organized as: "Name," "ID," "Category," "Serial Number," "SKU," "Location," and "Actions:"

The corresponding rows under the column headings will display the relevant asset data.
The "Hierarchy- Assets Location" tab column headings are defined as:
| Name: | Description: |
|---|---|
| "Name" | The name of the asset. |
| "ID" | The ID number of the asset. |
| "Category" | The category that the asset is classified under. |
| "Serial Number" | The serial number of the asset. |
| "SKU" | The Stock Keeping Unit (SKU) number used to track and identify the asset in inventory systems, often associated with barcode scanning. |
| "Location" | The location where the asset is stored. |
| "Actions" | The View icon and the Individual Actions button can be found here; these buttons will allow you to perform actions on an asset. |
Hierarchy- Asset Location Assigned Asset Grouping
The assets in this tab will be organized by the user, customer, or warehouse that they are assigned to and the correlated location. You can collapse or expand the list of assets by clicking on the triangle next to the assigned user, customer, or warehouse:
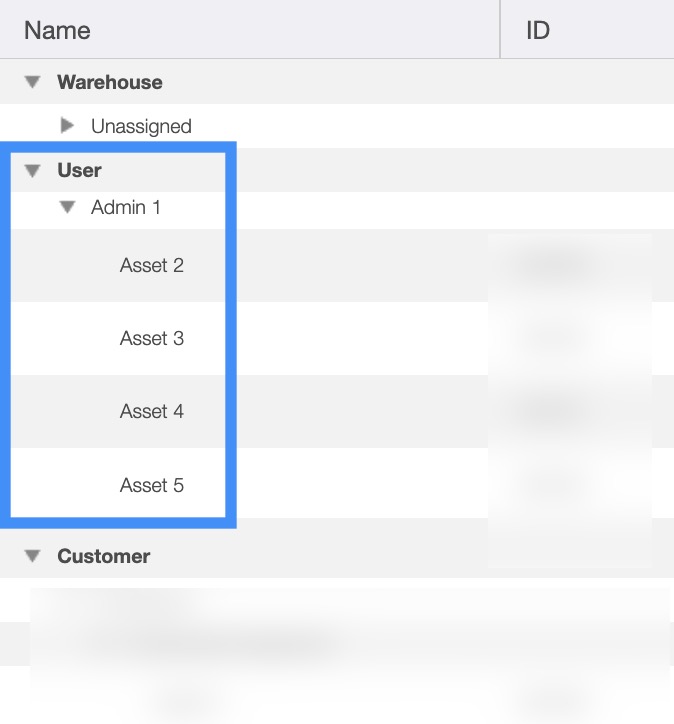
When expanding the list of assets assigned to a user, customer, or warehouse, you will be able to view all the assets that they manage.
Hierarchy- Asset Location Individual Actions
When selecting an asset and clicking on the Individual Actions button (the three vertical dots under the "Actions" column) you will be able to view, edit, delete, and disable the selected asset. If the asset is associated with a customer, you can also remove them from the customer.
Any actions that are done with the Individual Actions button will only apply to the selected asset:
The View icon found under the "Actions" column will allow you to quickly access the View Asset pop-up window of the selected asset:
The options that are displayed when you select the Individual Actions button are also available under the right-click actions.
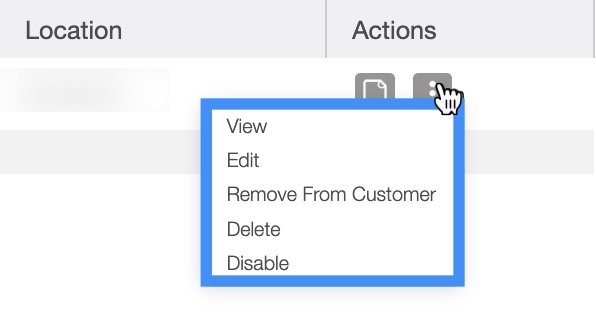
Hierarchy- Asset Location Right-Click Actions
When right-clicking with your mouse on an asset in the "Hierarchy- Asset Location" tab, you will be able to view, edit, delete, and disable the selected asset. If the asset is associated with a customer, you can also remove them from the customer.
The options that are displayed when you right-click on an asset, are also available when you select the Individual Actions button.
Any actions that are done with the right-click actions will only apply to the selected asset:

The definitions for the actions found in the Individual Actions and when you right-click in the "Hierarchy- Asset Location" tab are below:
| Name: | Description: |
|---|---|
| "View" | Opens the View Asset pop-up window |
| "Edit" | Edits the selected asset |
| "Remover From Customer" | Removes the asset from the associated customer. This action will only appear if the asset is assigned to a customer. |
| "Delete" | Deletes the selected asset. This is a non-reversible action in which the asset and all entities associated with it including work orders, invoices, and forms will be deleted. Disable is recommended over deleting unless there is certainty that the items associated with the asset can be deleted. |
| "Disable" | Disables the selected asset |
The "Global Actions" section is located at the top-right of your Assets tabs; regardless of the tab that you are on, the "Global Actions" section will remain in the top-right corner:
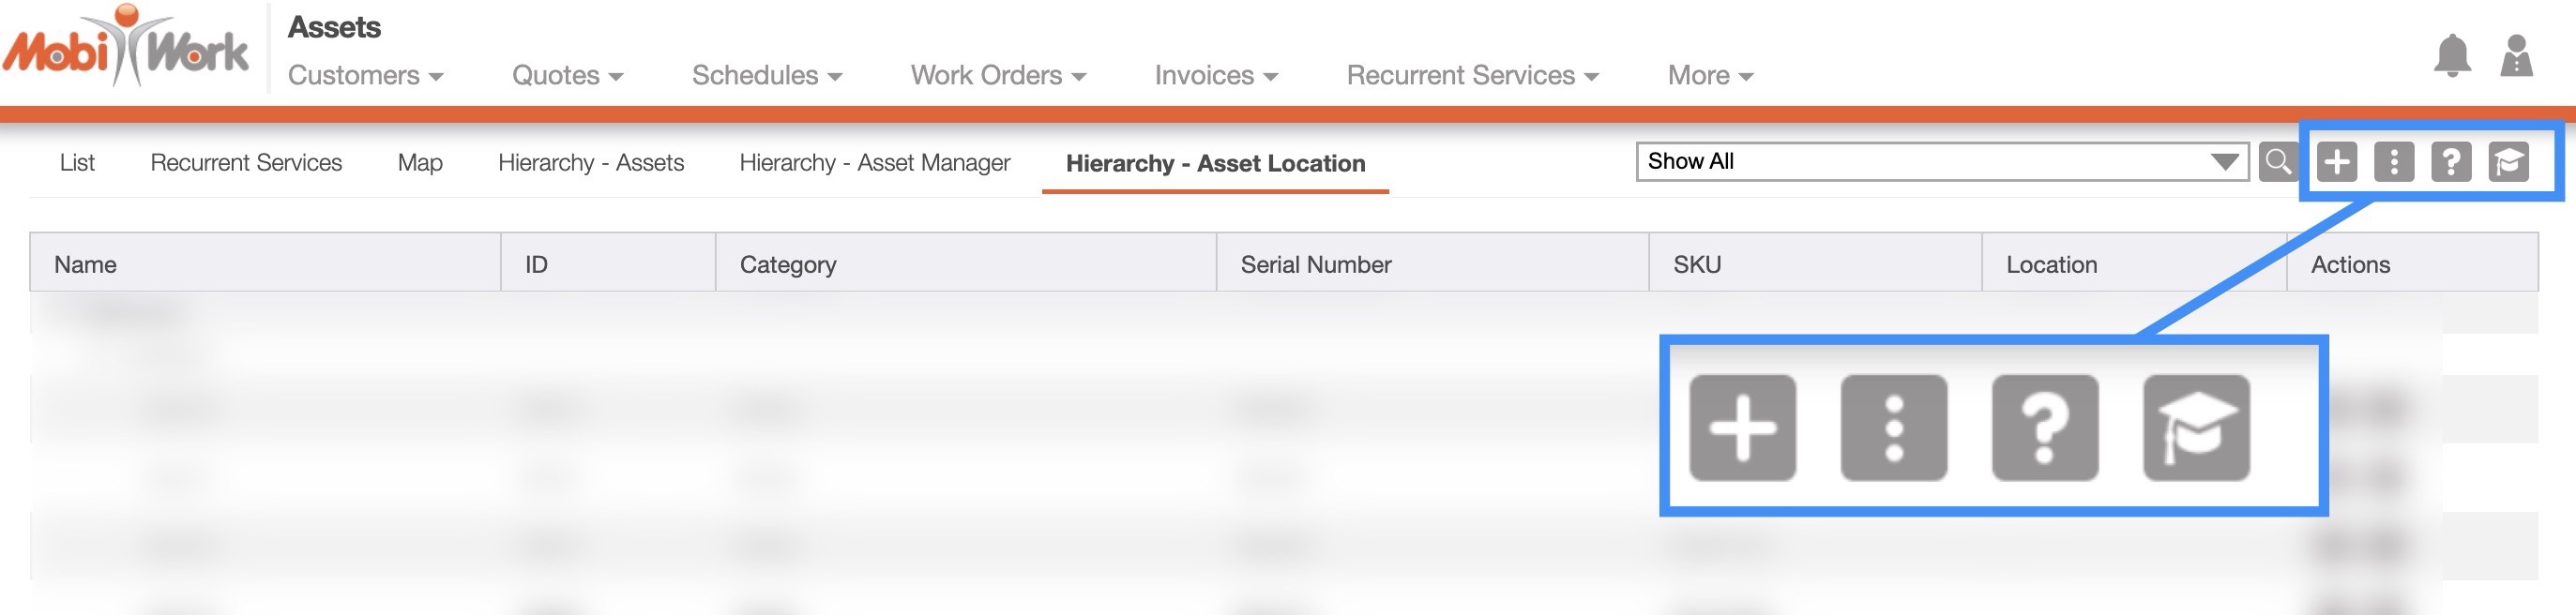
The "Global Actions" section includes:
The Plus Sign button which will allow you to quickly add a new asset
The More Actions button (represented by the three vertical dots) which will allow you to edit selected assets, delete selected assets, import/export from excel, and more
The Question Mark button which will direct you to the respective MobiWork Features page
The Graduation Cap which will activate the Onboarding Assistant
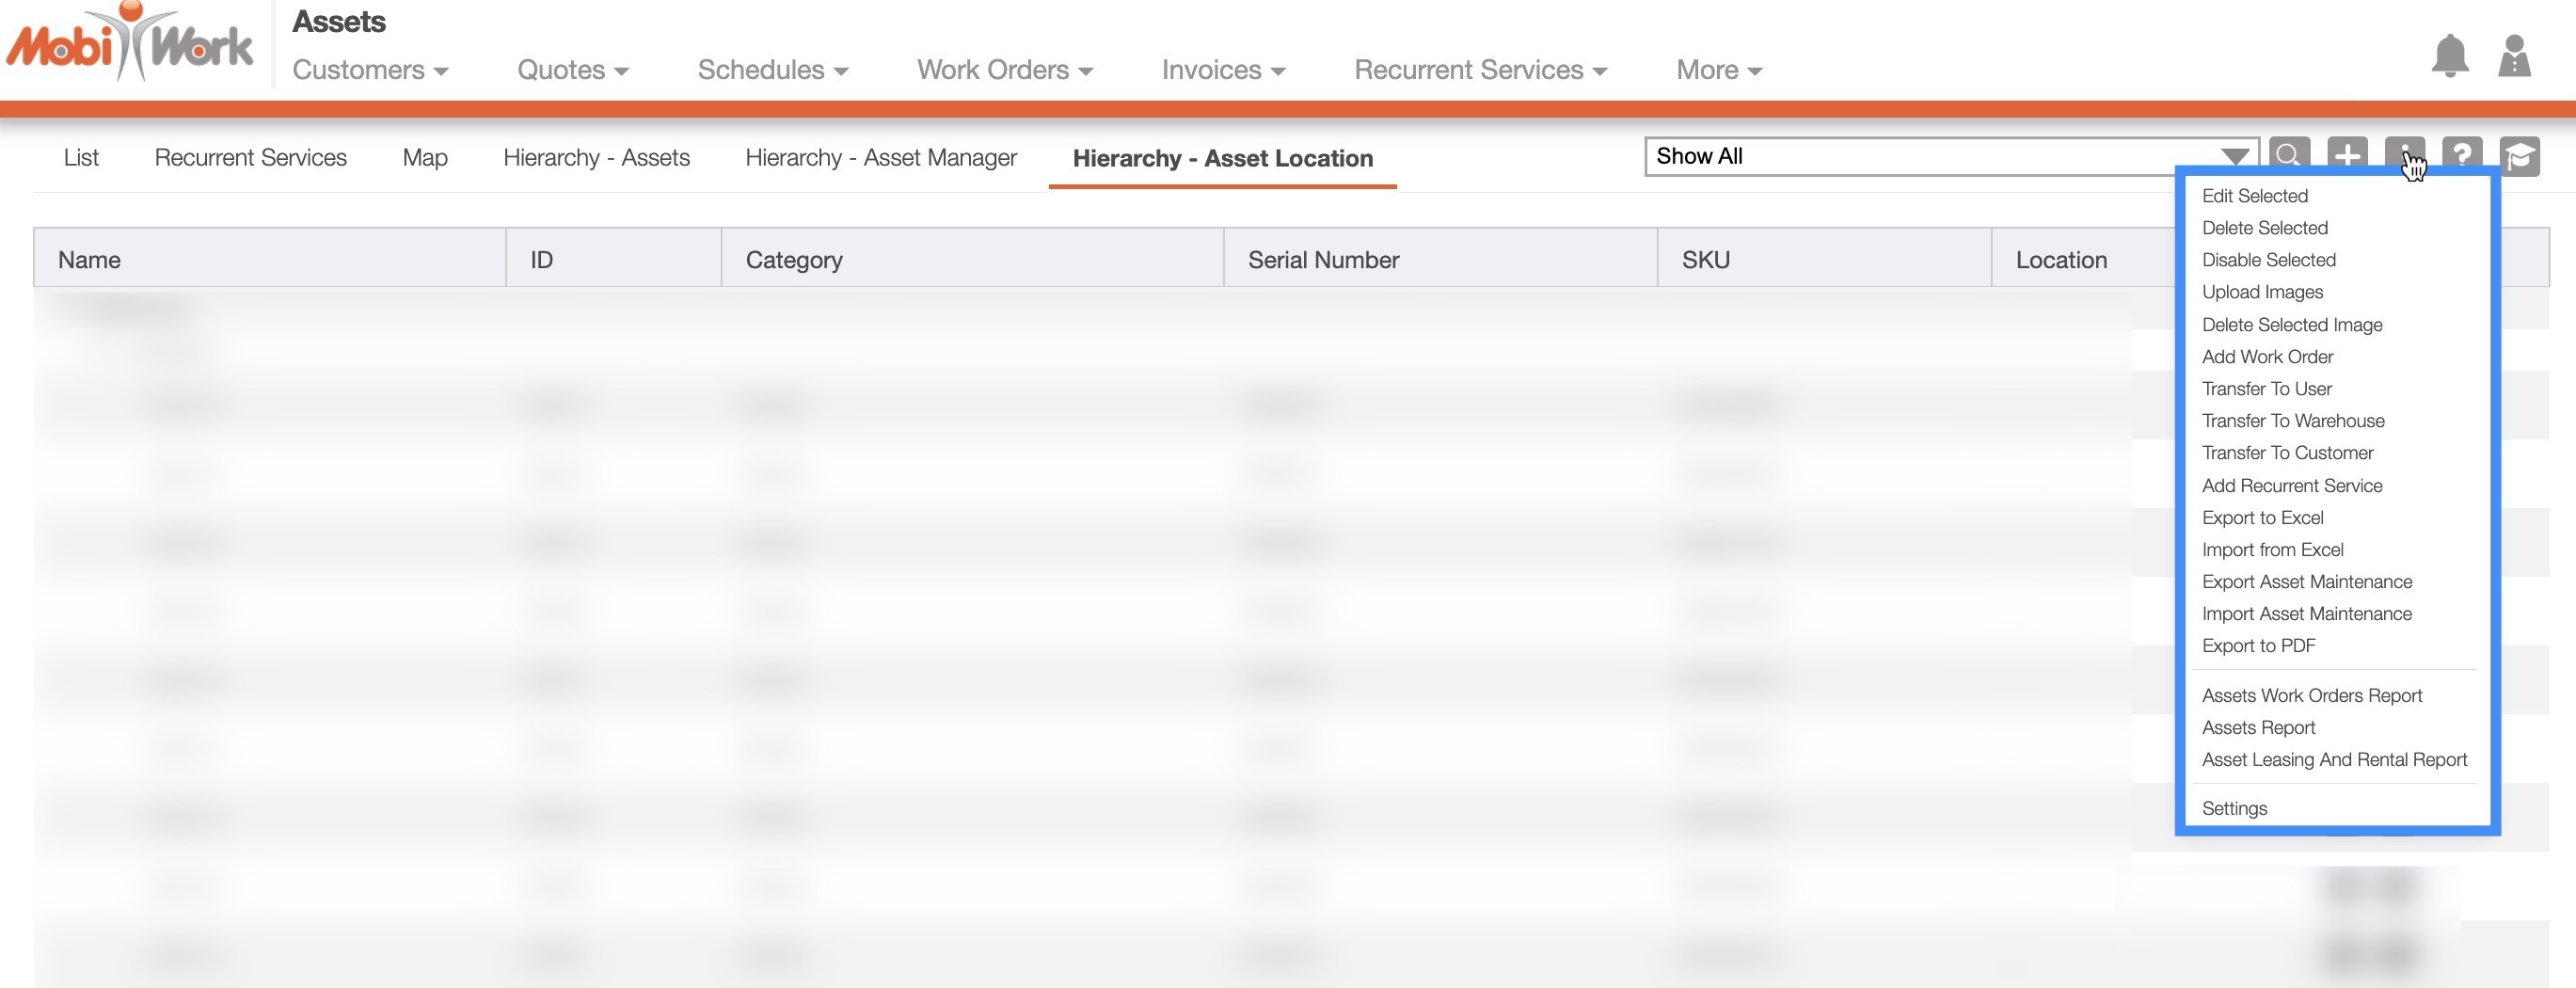
After clicking on the vertical three dots in the top-right corner, the More Actions drop-down menu will appear.
From the More Actions drop-down menu, you can select various actions that will help to manage your assets, such as editing multiple assets, deleting multiple assets, exporting/importing assets, and more.
These actions can be performed on a single asset or on multiple assets.
The complete list of actions found in the More Actions drop-down menu are defined below:
| Name: | Description: |
|---|---|
| "Edit Selected" | Edits the selected assets |
| "Delete Selected" | Deletes the selected assets. This is a non-reversible action in which the asset and all entities associated with it including work orders, invoices, and forms will be deleted. Disable is recommended over deleting unless there is certainty that the items associated with the asset can be deleted. |
| "Disable Selected" | Disables the selected assets |
| "Upload Images" | Uploads the image icon that will visually represent the asset |
| "Delete Selected Image" | Deletes the image icon for the selected assets |
| "Add Work Order" | Adds a work order that is associated with the selected assets |
| "Transfer to User" | Transfers the management responsibility and location to another user |
| "Transfer to Warehouse" | Transfers the management responsibility and location to another warehouse |
| "Transfer to Customer" | Transfers the management responsibility and location to the customer |
| "Add Recurrent Service" | Adds a recurrent service that is associated with the selected assets |
| "Export to Excel" | Exports the selected assets into an Excel document |
| "Import From Excel" | Imports assets from an Excel document |
| "Export Asset Maintenance" | Exports the historical asset maintenance data |
| "Import Asset Maintenance" | Imports the historical asset maintenance data |
| "Export to PDF" | Exports the selected assets into a PDF document |
| "Settings" | Directs you to the Settings page where you can further customize the information and settings (e.g., categories, statuses, actions) found on your assets |