There are a variety of different ways that you can add a new work order into MobiWork. You can add new work orders from the Work Orders feature from your MobiWork menu, the Work Order "List" tab, the Quotes "List" tab, and more.
From the Work Orders Drop-Down
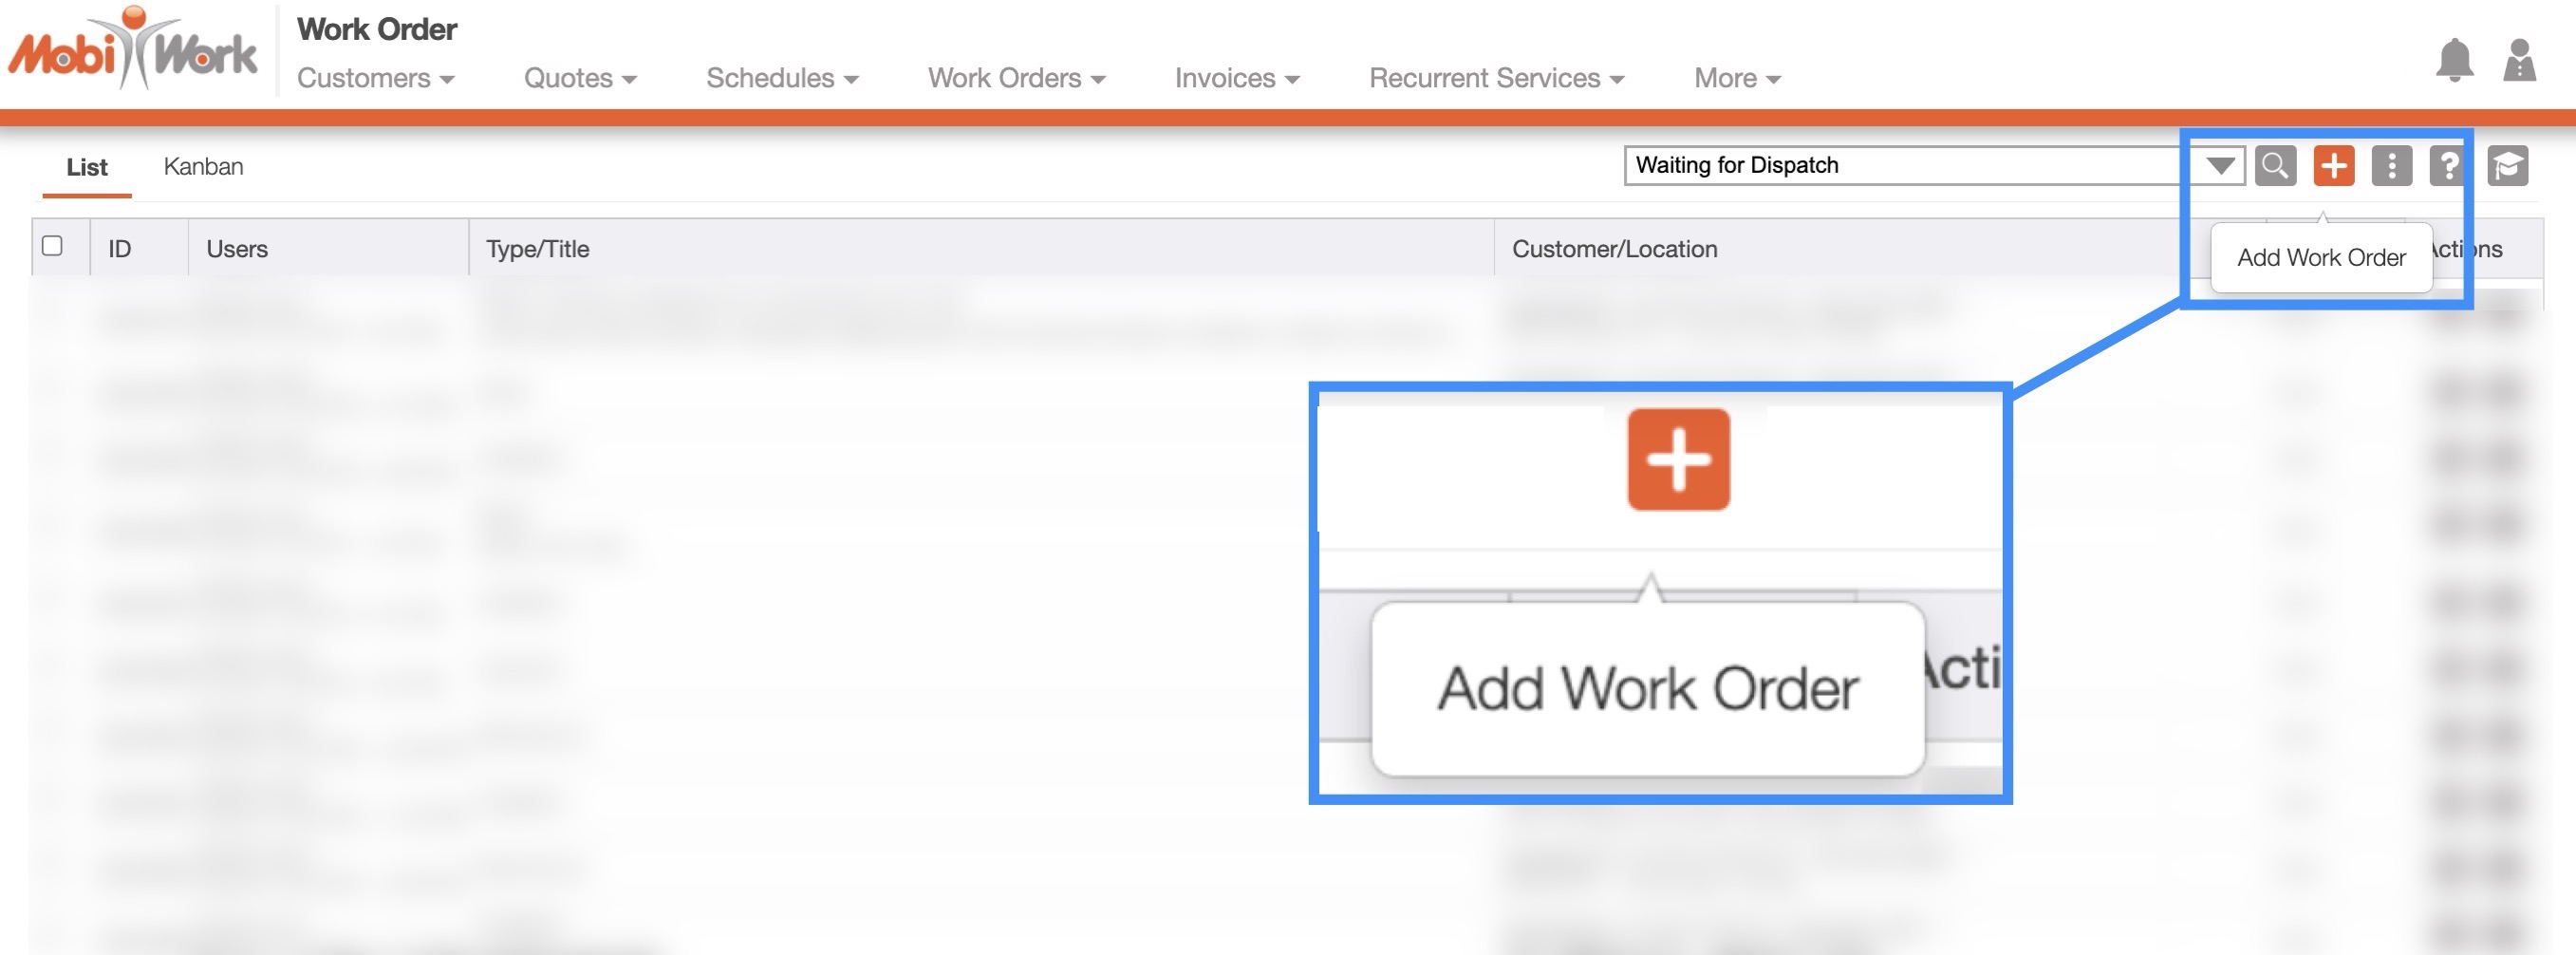
The fastest and easiest way to add a new work order is by accessing the drop-down menu from the Work Orders feature located in your MobiWork menu:
Select the "Add Work Order" option from the drop-down.
The Add Work Order pop-up window will then appear.

From the Work Orders' More Actions
On the Work Orders feature tabs, you will also be able to import your work orders from Excel:

Plus Sign- Adds a new work order.
More Actions- Allows you to access the import drop-down actions.
For more information on how to import your work order, please see the Import From Excel section.
To add a new work order from the Work Orders feature tabs, please see the steps below:
- Once you are on any of the Work Orders feature tabs, click on the Plus Sign to add a new work order:
- The Add Work Order pop-up window will then appear.
Customers
From the Customers "List" tab, there are a couple of different ways you can add a work order. For more information on how to access this page, please see the Customers List page.
In the "All" tab, you can add a work order in the View Customer pop-up window or simply by right-clicking on the desired customer and selecting the "Add Work Order" option from the drop-down:
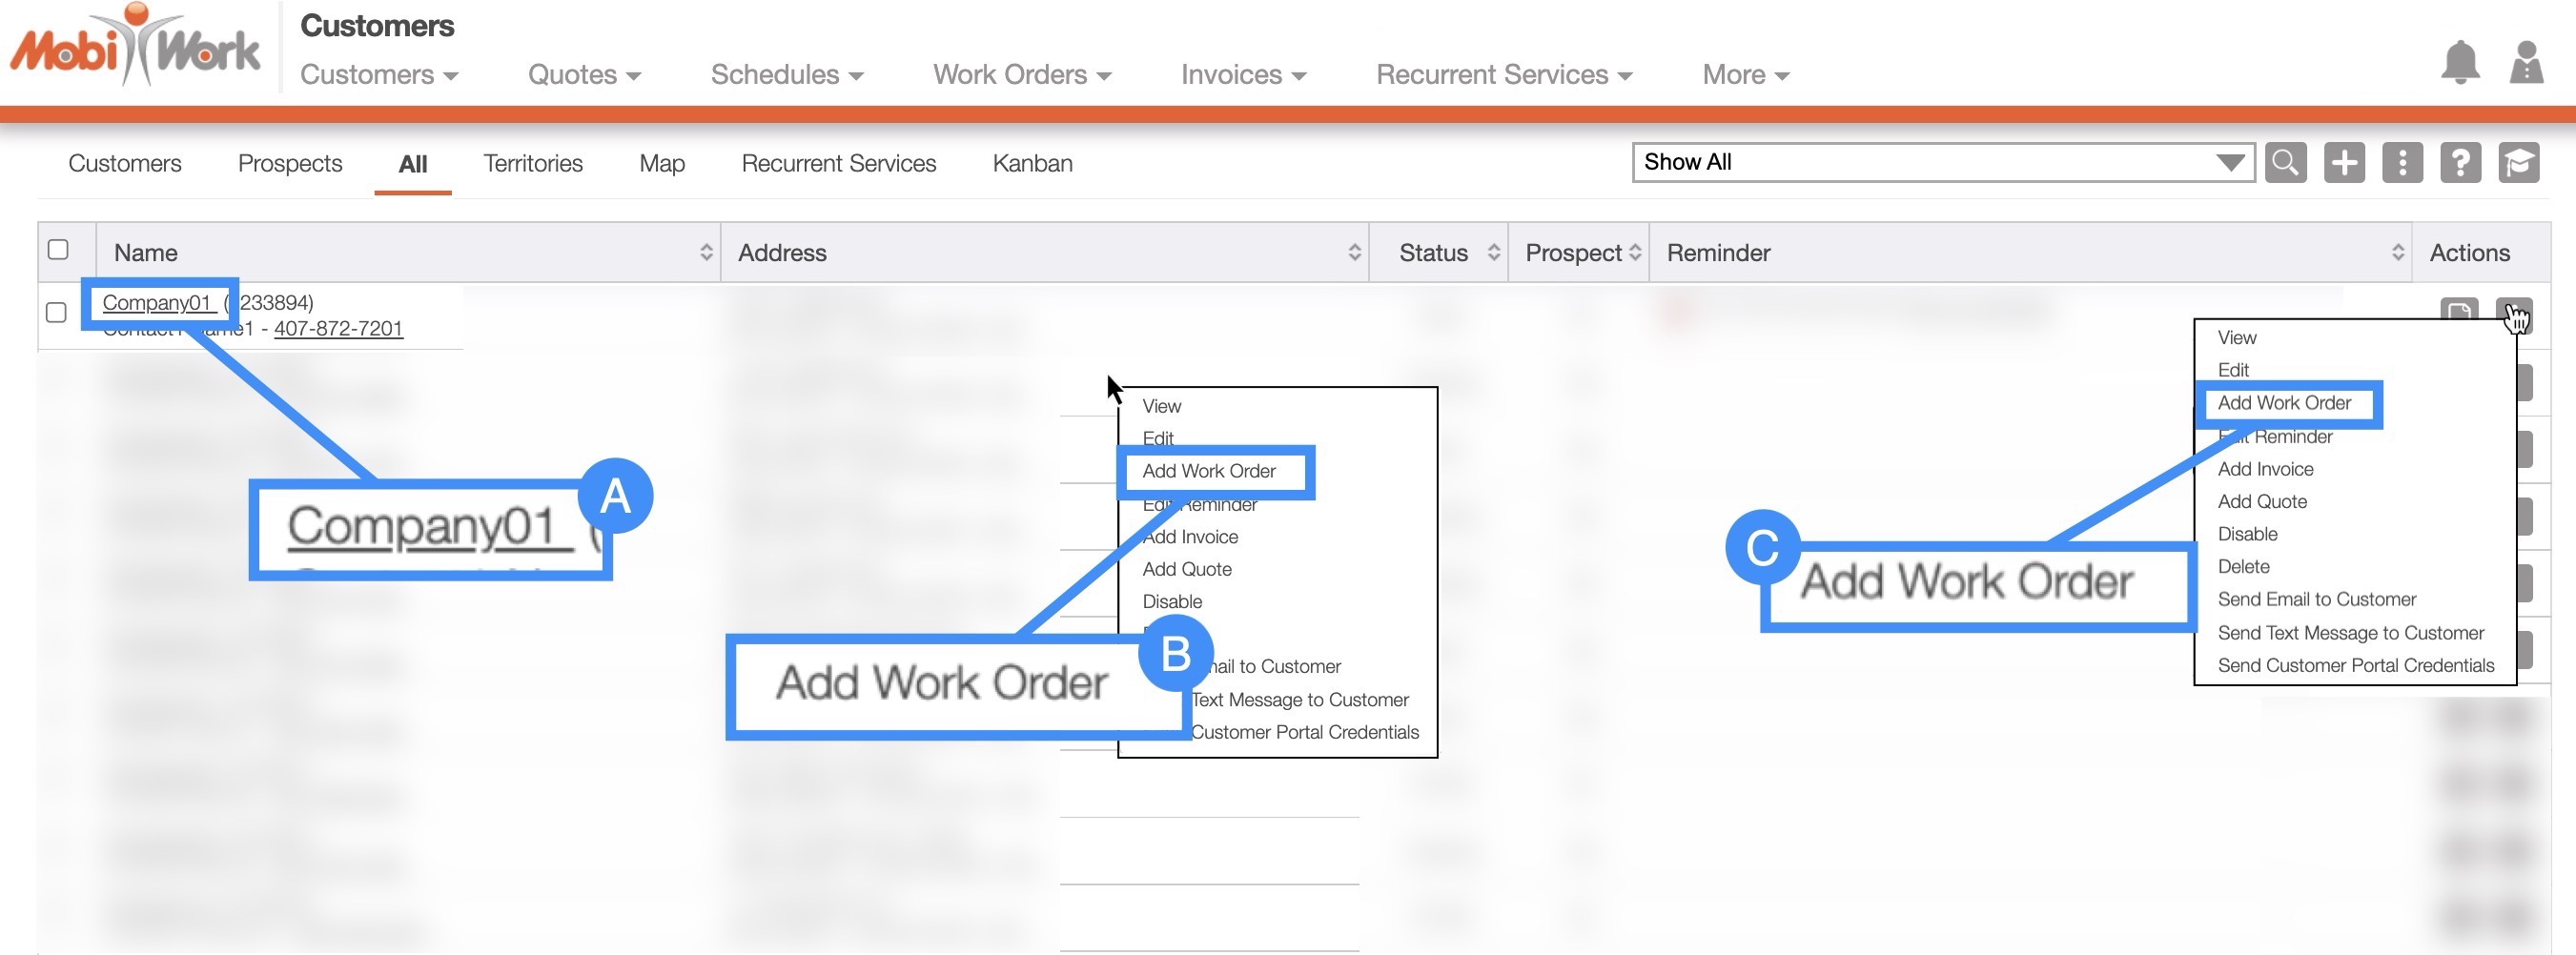
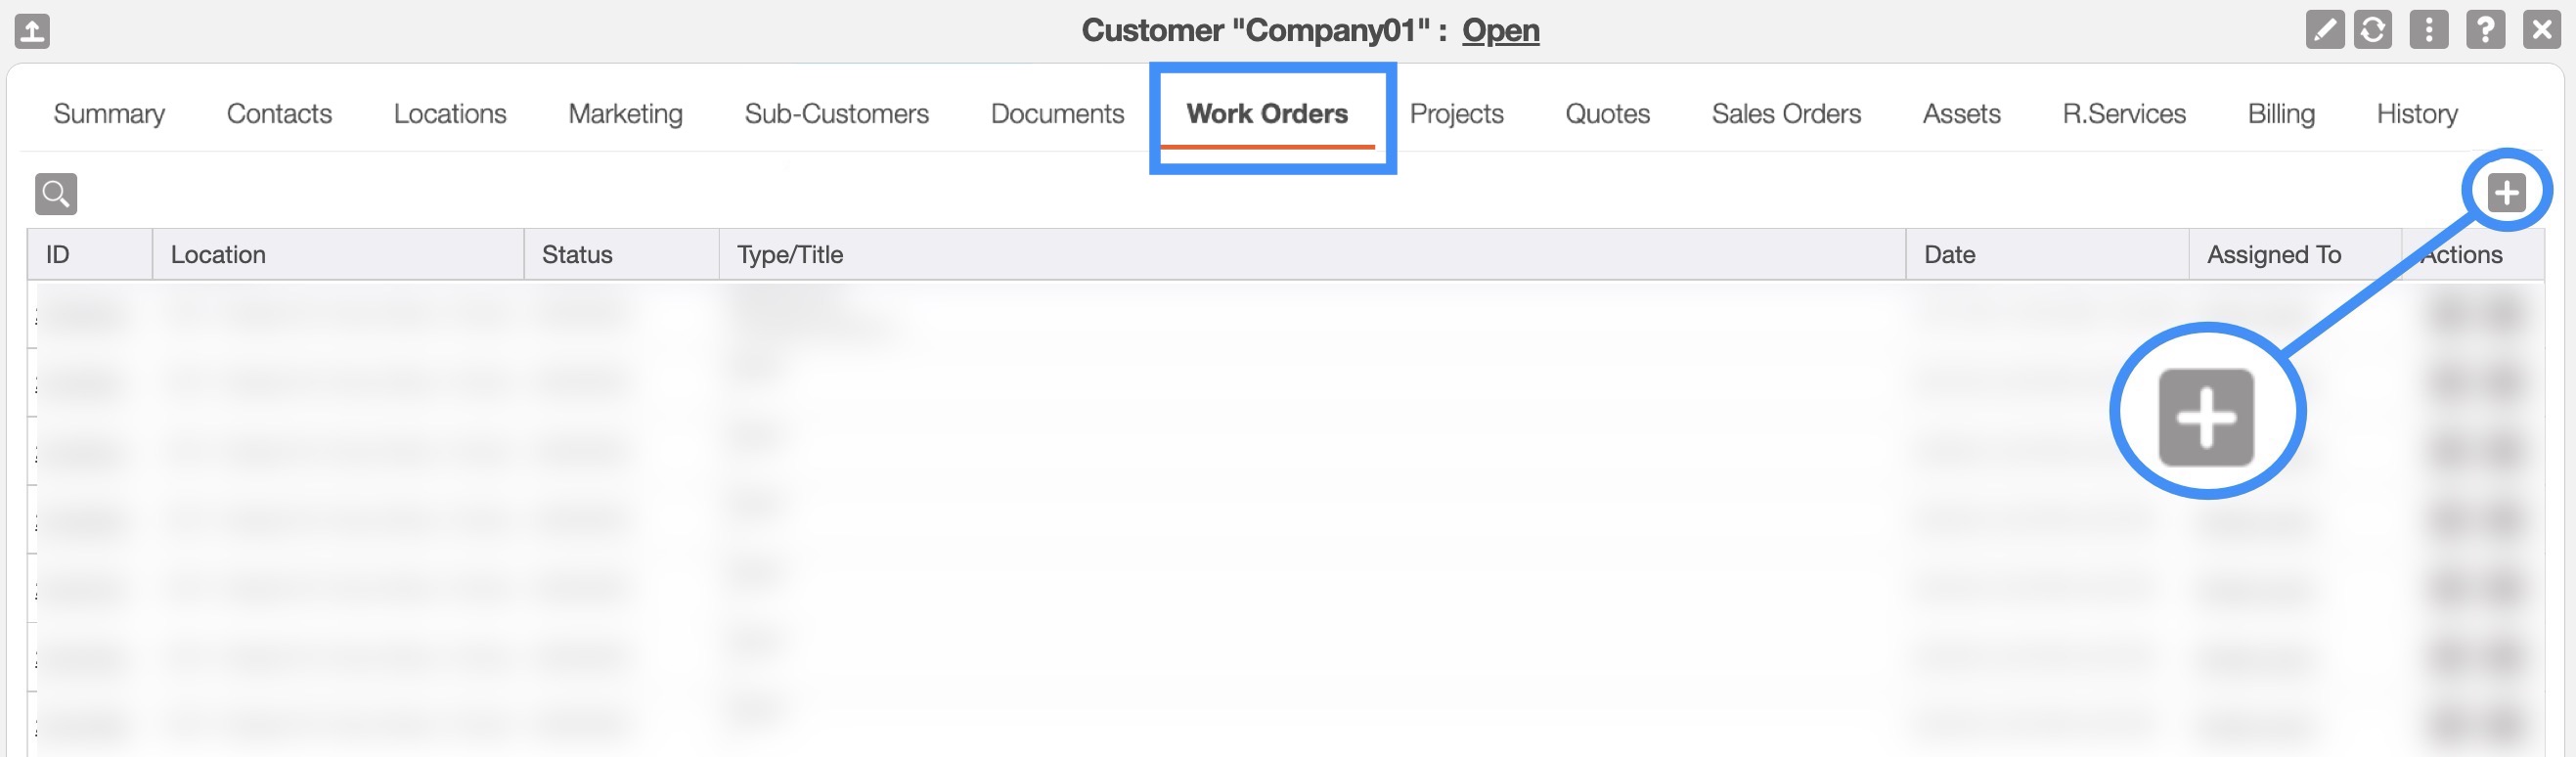
- In the View Customer pop-up window, you can navigate to the "Work Orders" tab and from this tab you can add a new work order:
You can also right-click the selected customer and select the "Add Work Order" option from the drop-down to generate a new work order.
With the Individual Actions you can also select the "Add Work Option" from the drop-down menu.
Quotes
You can also create a new work order from the Quotes "List" tab. For more information on how to navigate to the "List" tab, please see the Quotes List page:
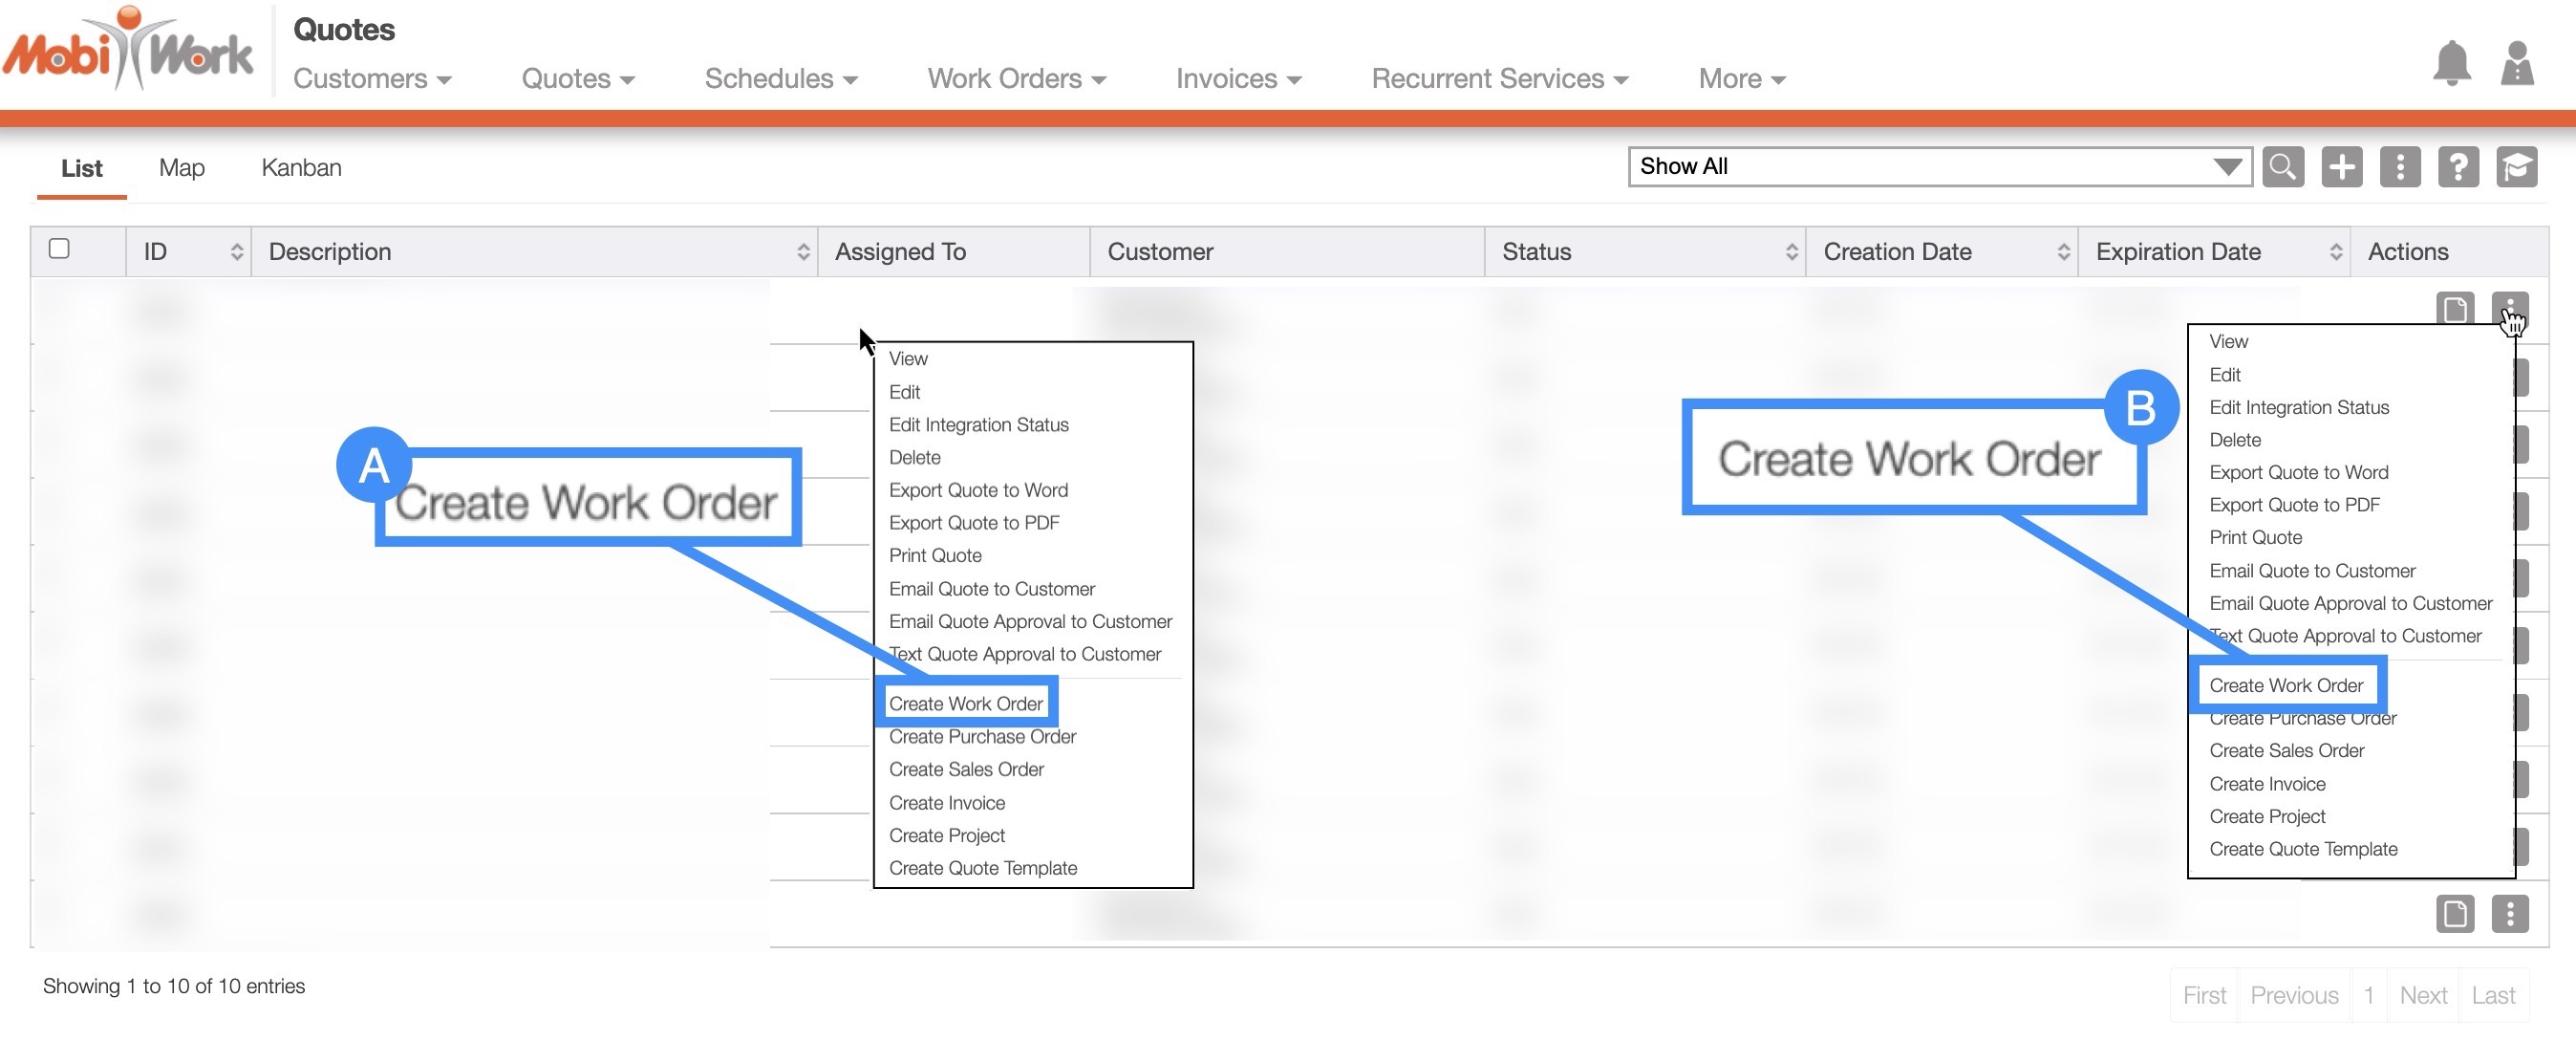
You can right-click on a selected quote and from the drop-down menu select the "Create Work Order" option
Or you can click on the Individual Actions and from the drop-down select the "Create Work Order" Option
Schedule
To create a work order from the Schedule feature tabs, you will first need to be on the Schedule feature page. For more information on how to access this page, please see Schedule List tab.
There are a number of different ways that you can add a work order from the Schedule feature:
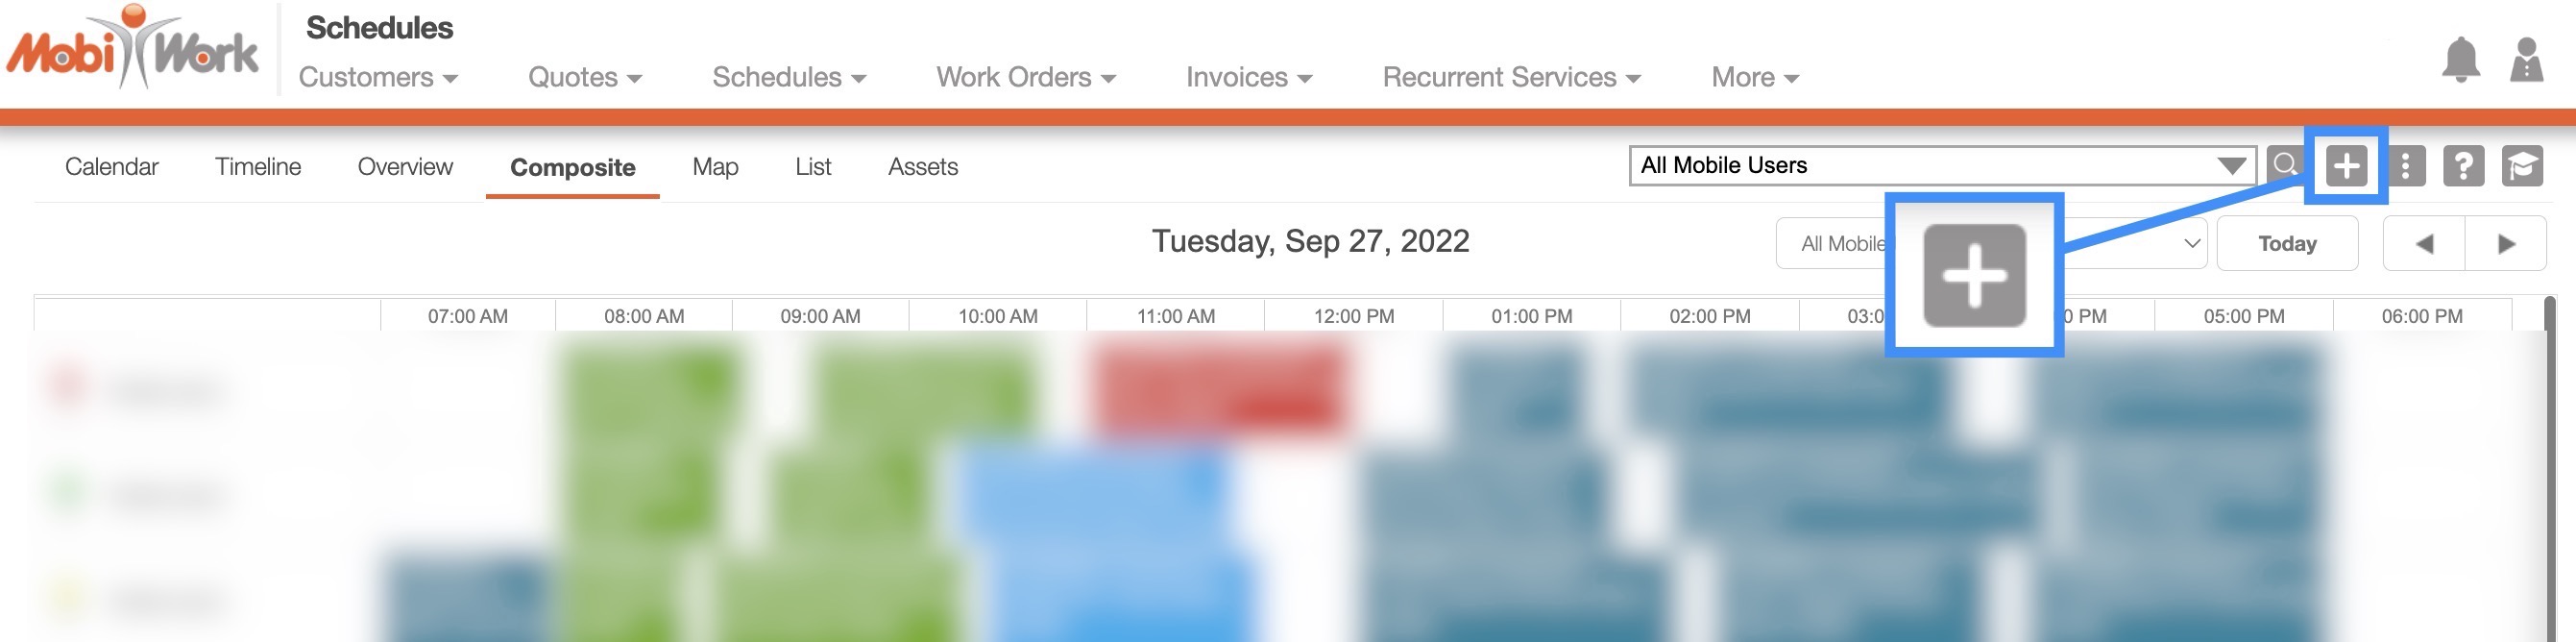
To add a work order from anywhere in the Schedule feature tabs, click on the Plus Sign button from the "Global Actions" section:
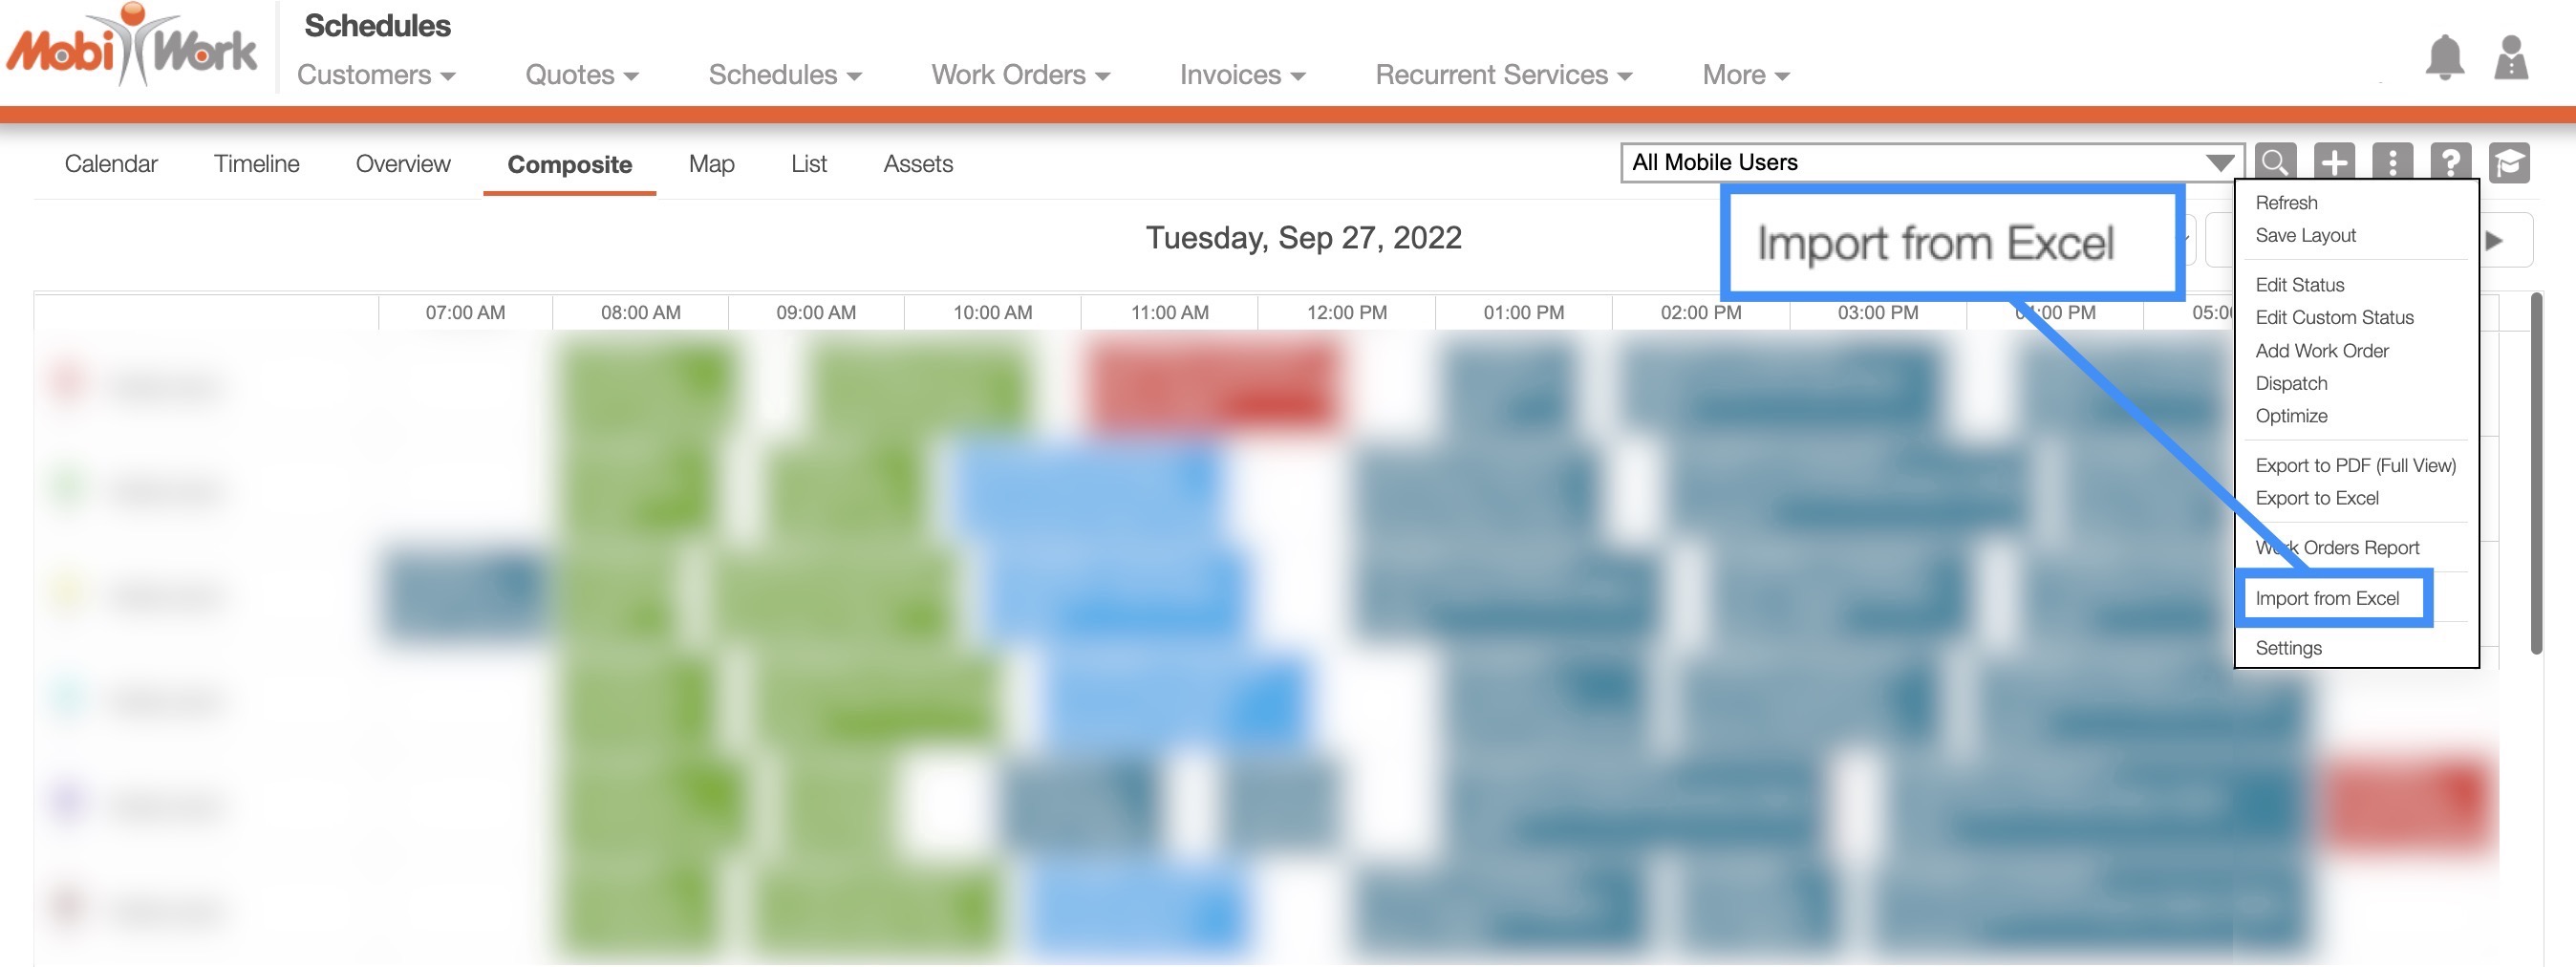
To add a work order from anywhere in the Schedule feature tabs, you can also click on the More Actions button from the "Global Actions" section and from the drop-down select the "Add Work Order" option:
To import work orders from anywhere in the Schedule feature tabs, click on the More Actions button and from the drop-down select the "Import From Excel" option:
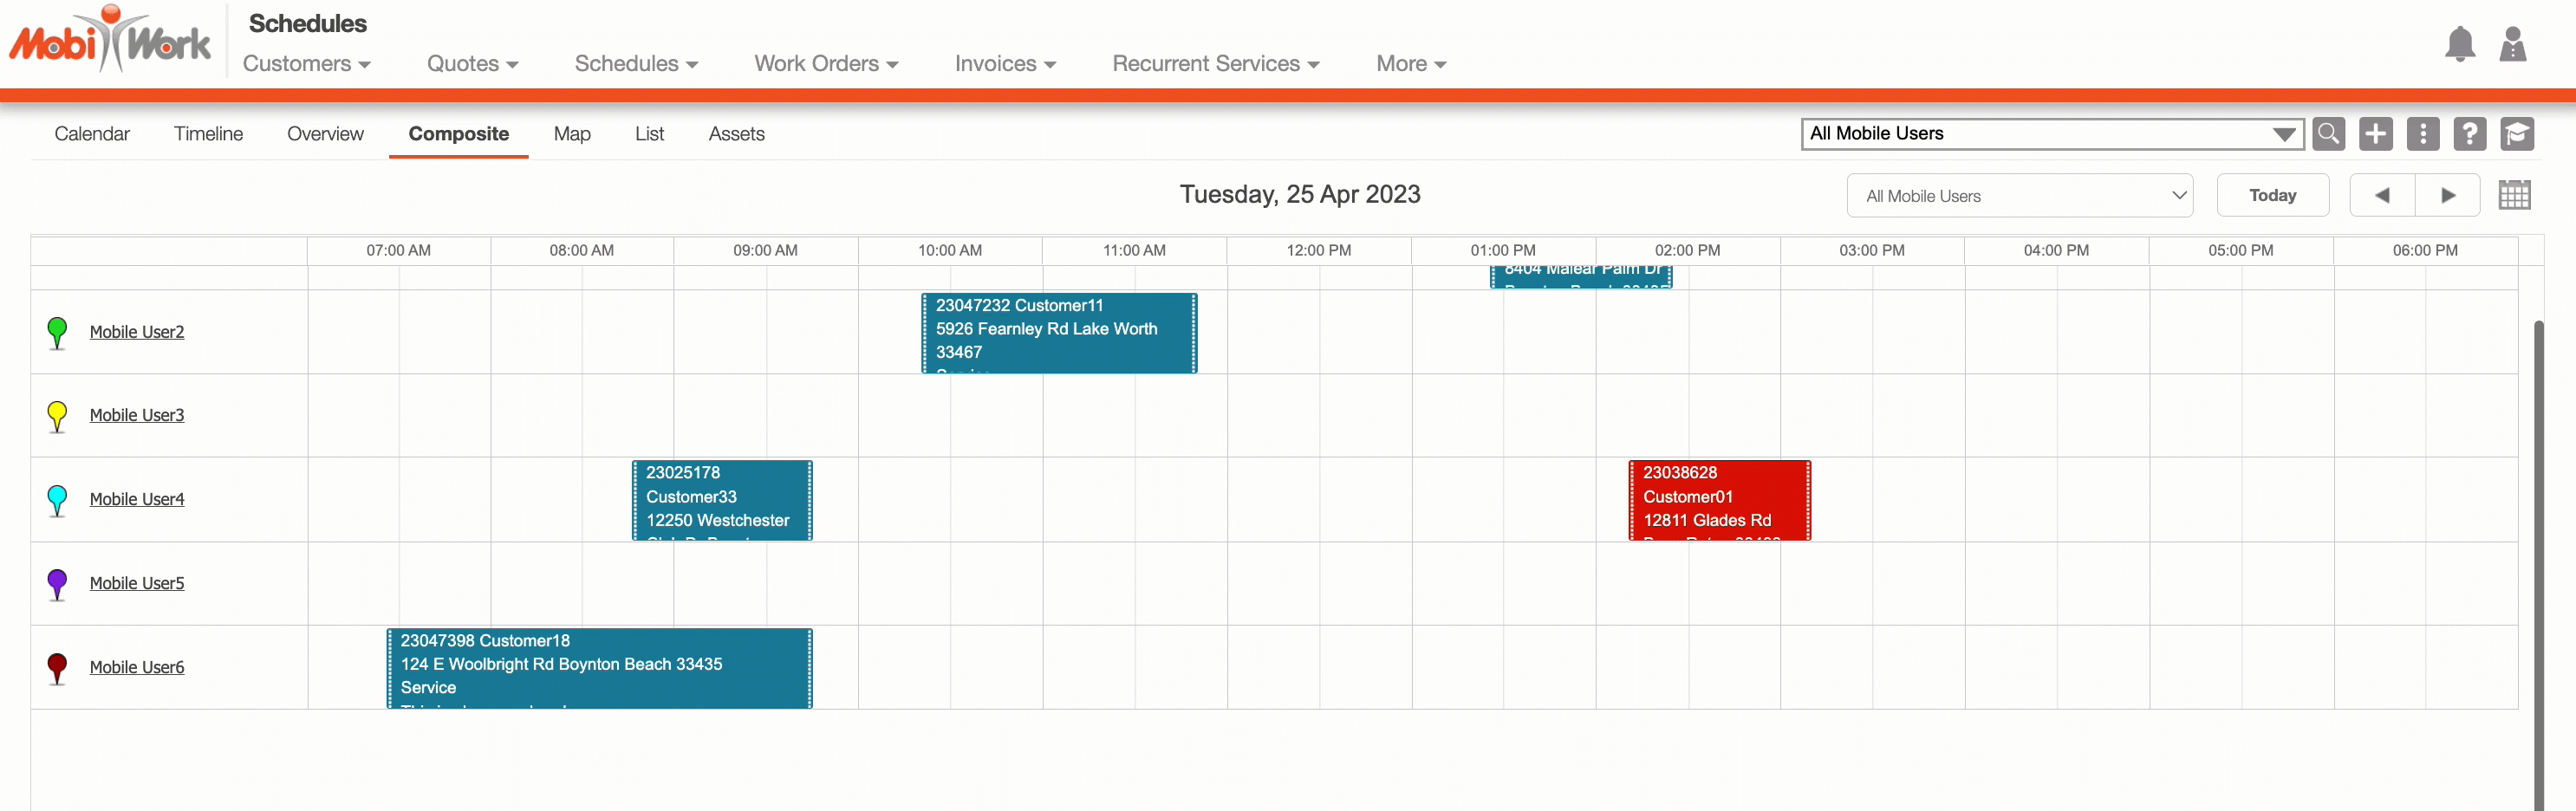
In the "Composite" tab, you can left-click on a desired user, date, and time with your mouse to input a new work order. This work order will then be automatically dispatched to the assigned user:
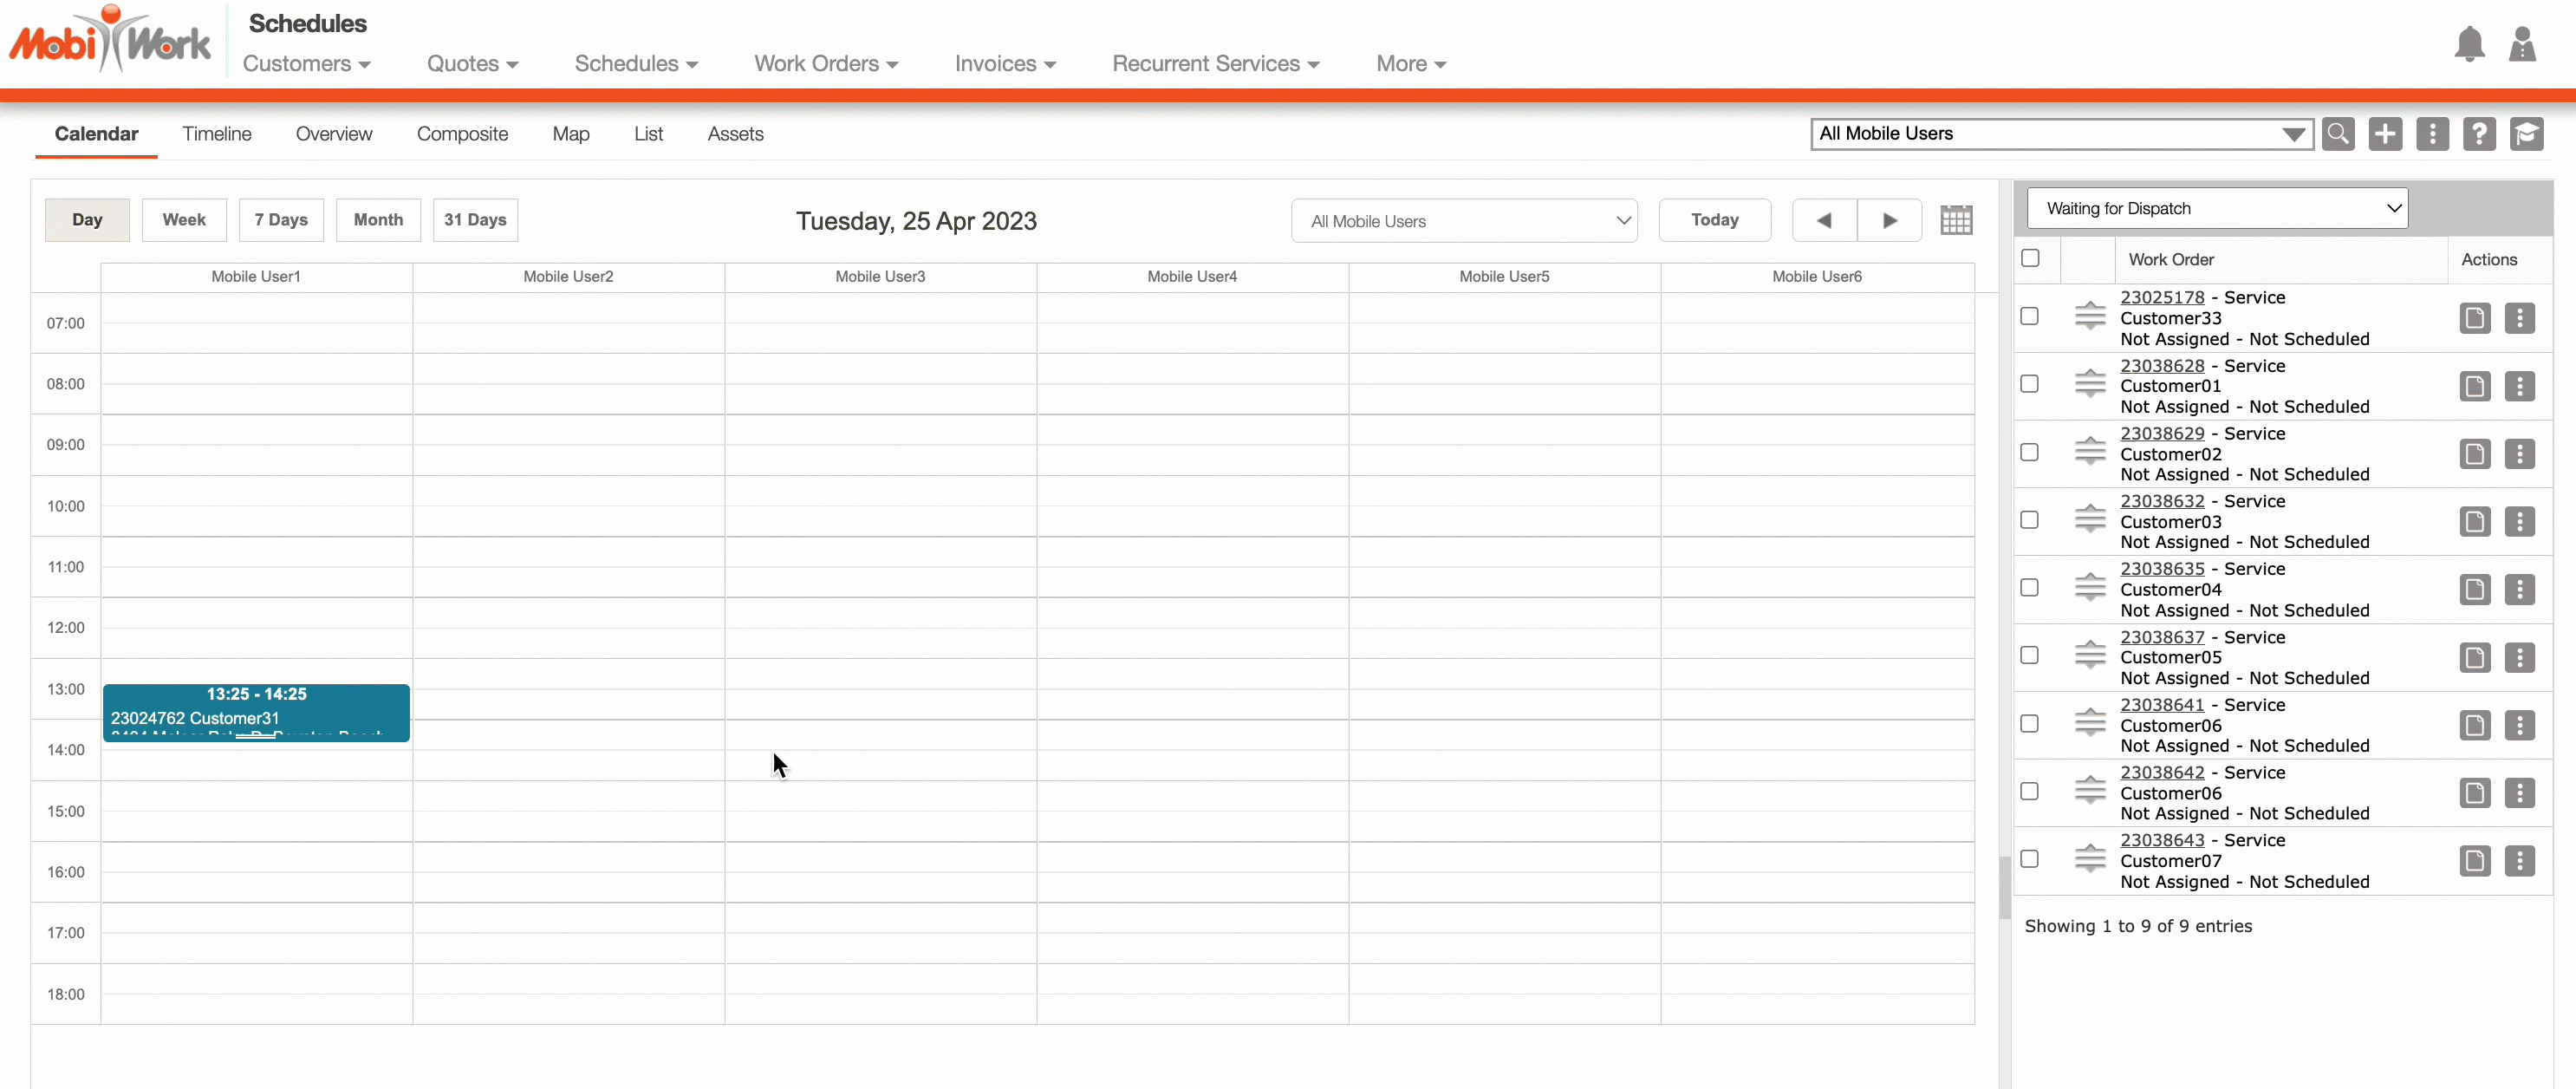
In the "Calendar" tab, you can also left-click on a desired user, date, and time with your mouse to input a new work order. This work order will then be automatically dispatched to the assigned user:

Regardless of the method that you choose to add a work order, the Add Work Order pop-up window will appear:
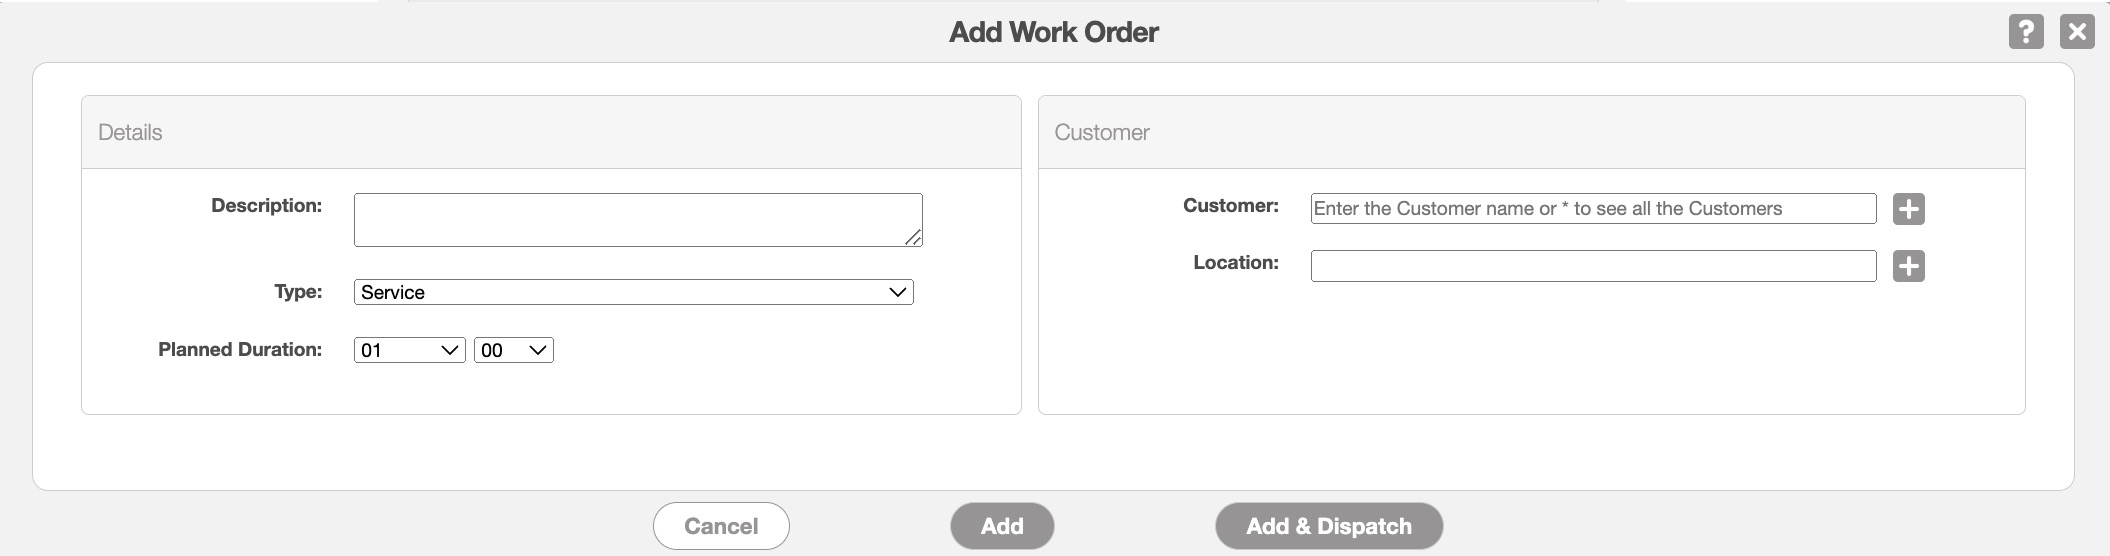
In the Add Work Order pop-up window input:
A description of the work order
The work order type
The planned duration of the work order
The customer that the work order is for
The location of the work order (this will be autocompleted if you add a customer with an address already in the system)
When you are done filling in the required fields you can choose to click either the Add button or the Add & Dispatch button.
The Add button will allow you to save the work order information in your records without dispatching it.
The Add & Dispatch button will allow you to save the work order information and dispatch it simultaneously.