There are several different ways that you can add a new customer to your MobiWork account, including adding a customer when you generate a quote, a work order, and more.
From the Customer Drop-Down
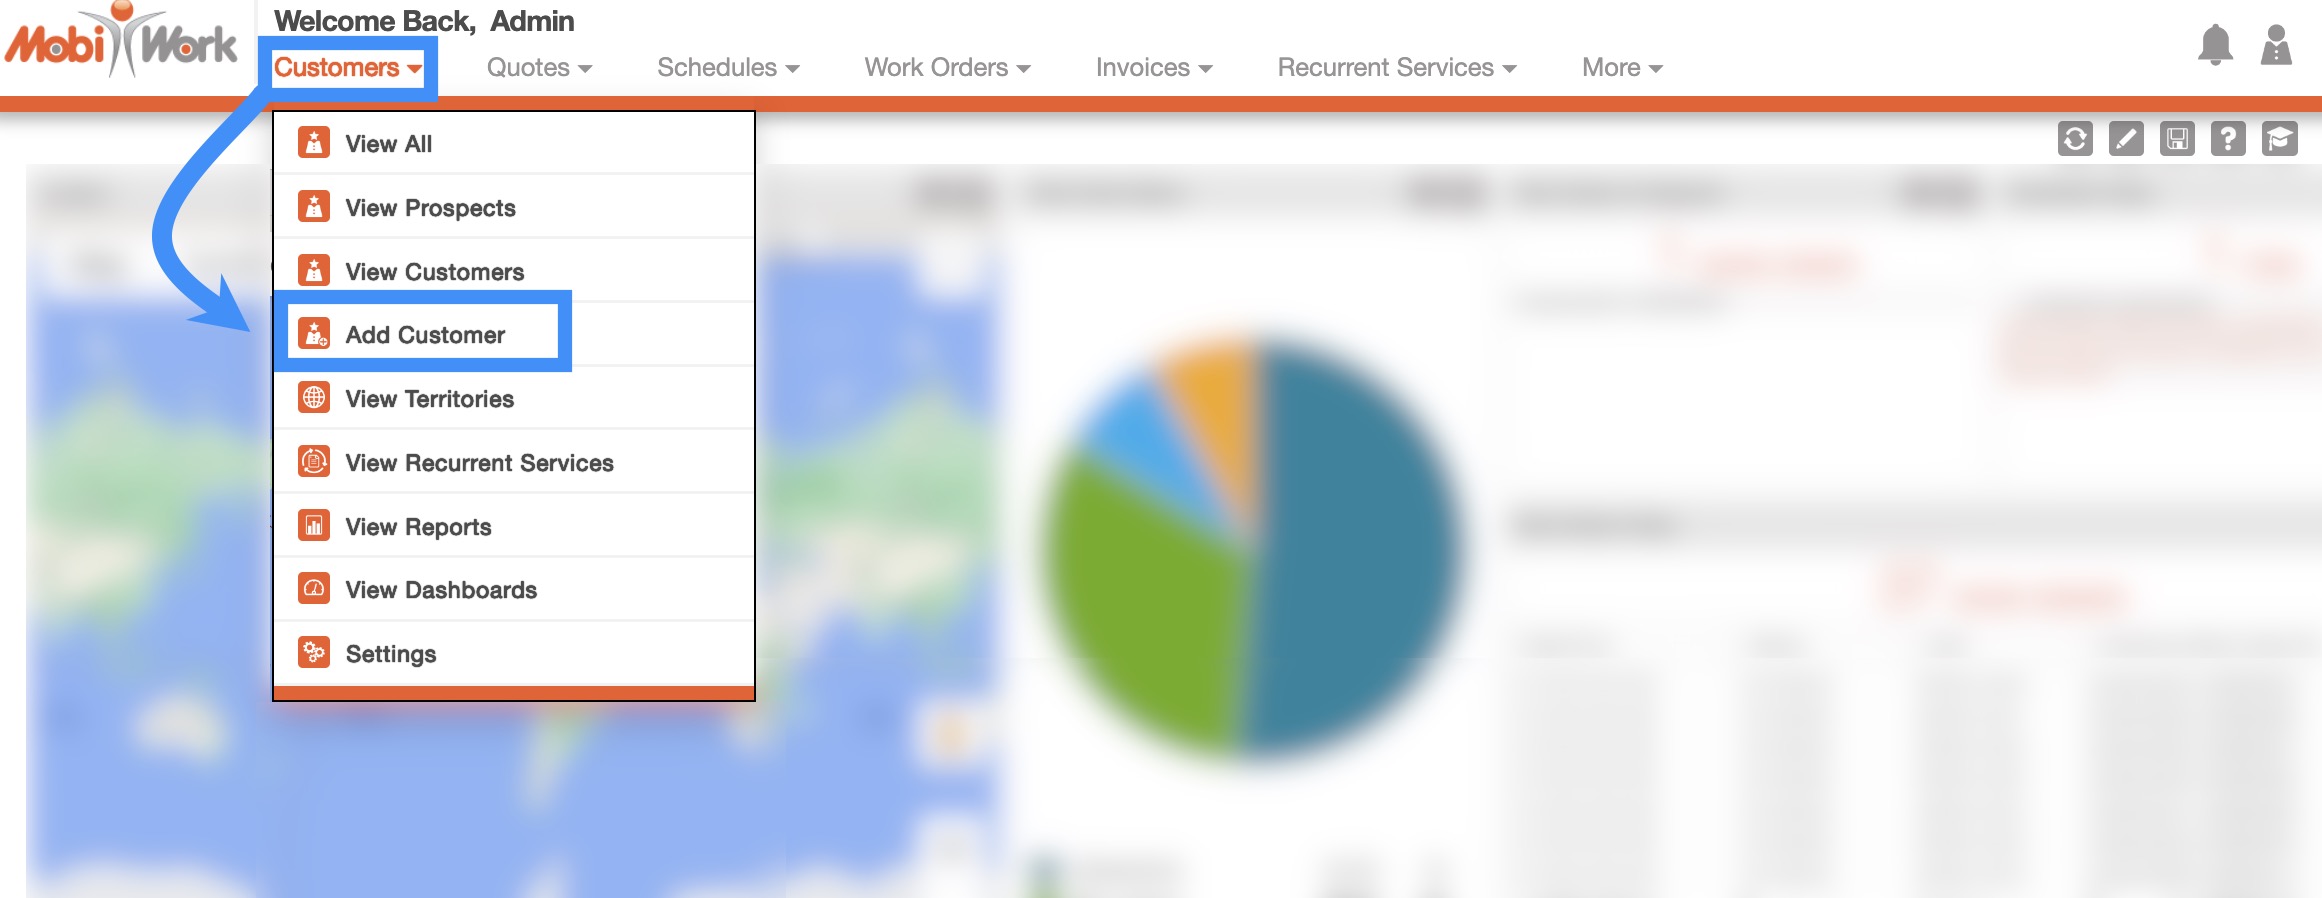
The fastest and easiest way to add a customer is by accessing the drop-down menu from the Customers feature in your MobiWork menu:
- Hover over the Customers feature from your MobiWork menu:
Select the "Add Customer" option from the drop-down.
The Add Customer pop-up window will then appear.
From the Customers' More Actions
Another convenient way to add a new customer is through the More Actions from any of the Customers tabs. For more information on how to access this page, please see the Customers List section.
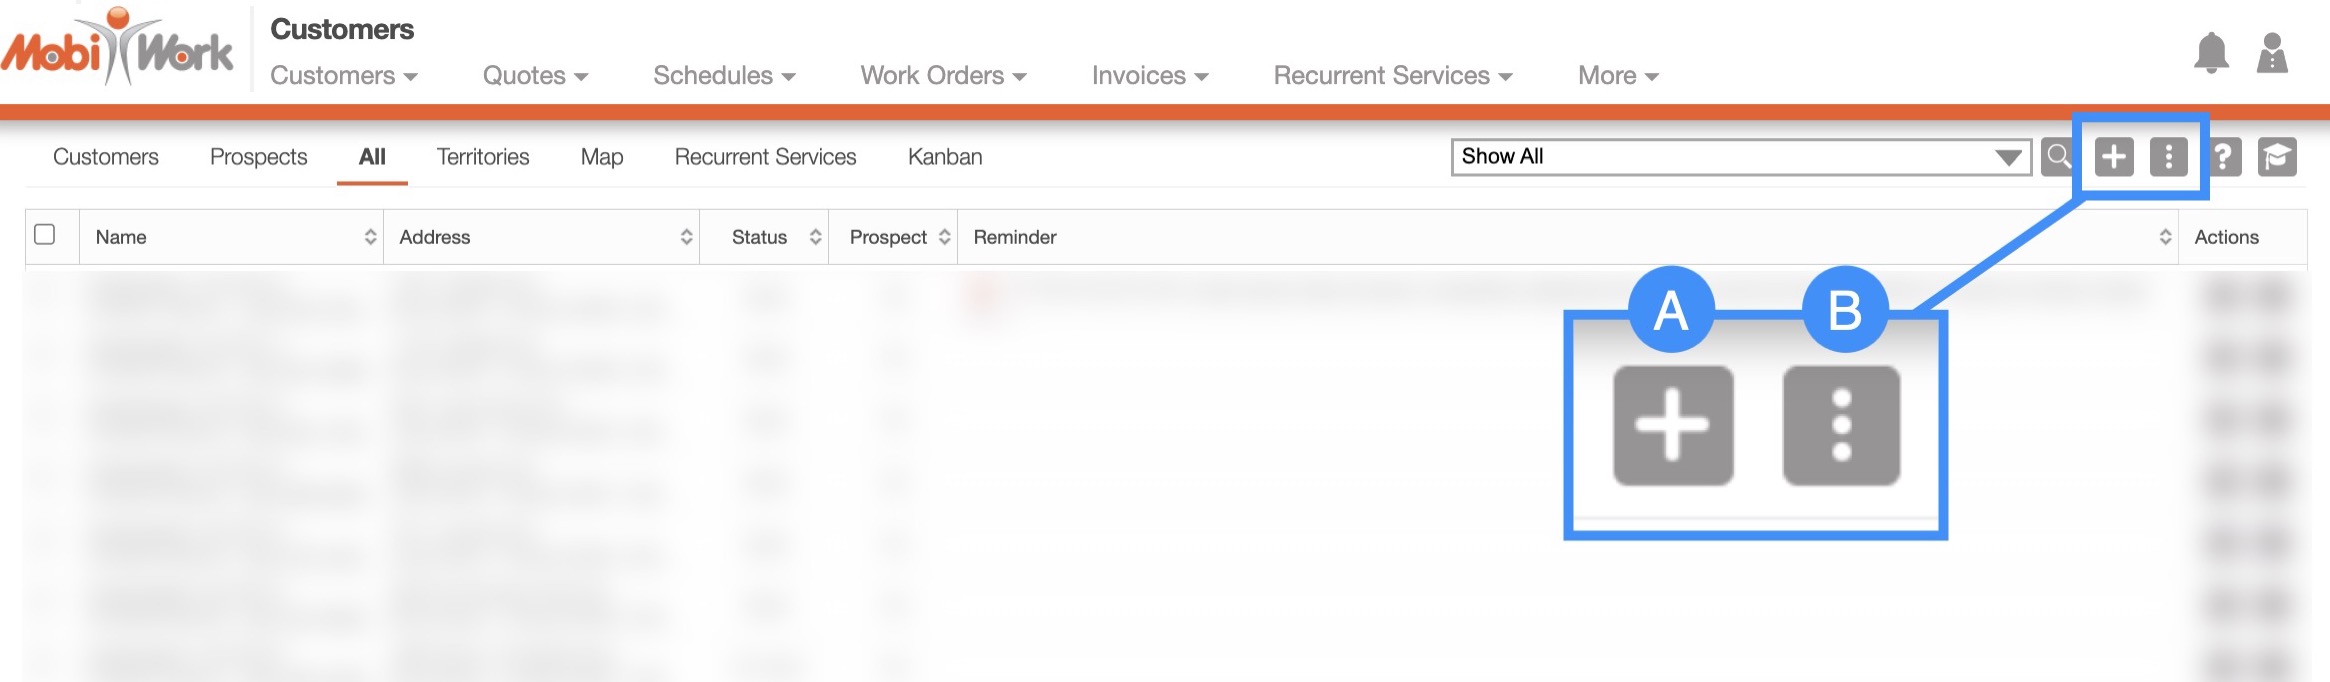
Plus Sign- Adds a new customer.
More Actions- Allows you to access the import drop-down actions.
For more information on how to import your customers, please see the Import Customers sections.
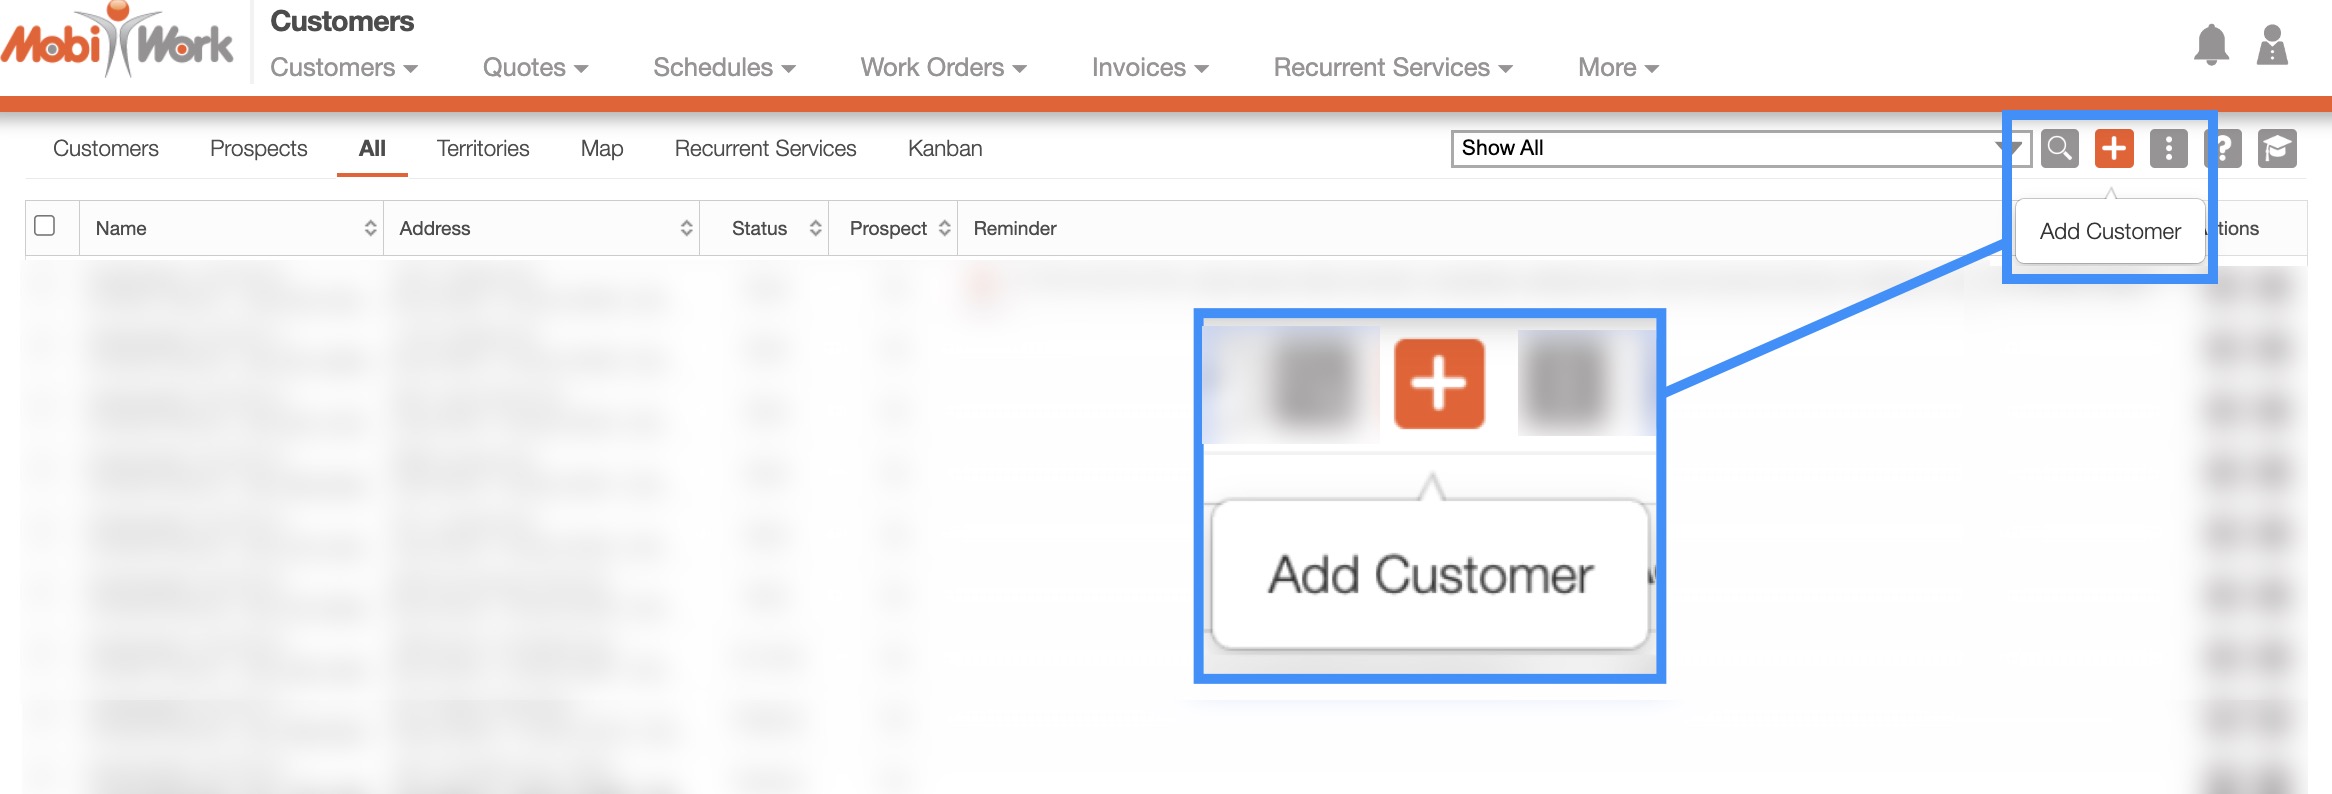
To add a new customer from the Customers tabs, please see the steps below:
Once you are on any of the Customers tabs, click on the Plus Sign to add a new customer:
The Add Customer pop-up window will then appear.
By Adding a Quote
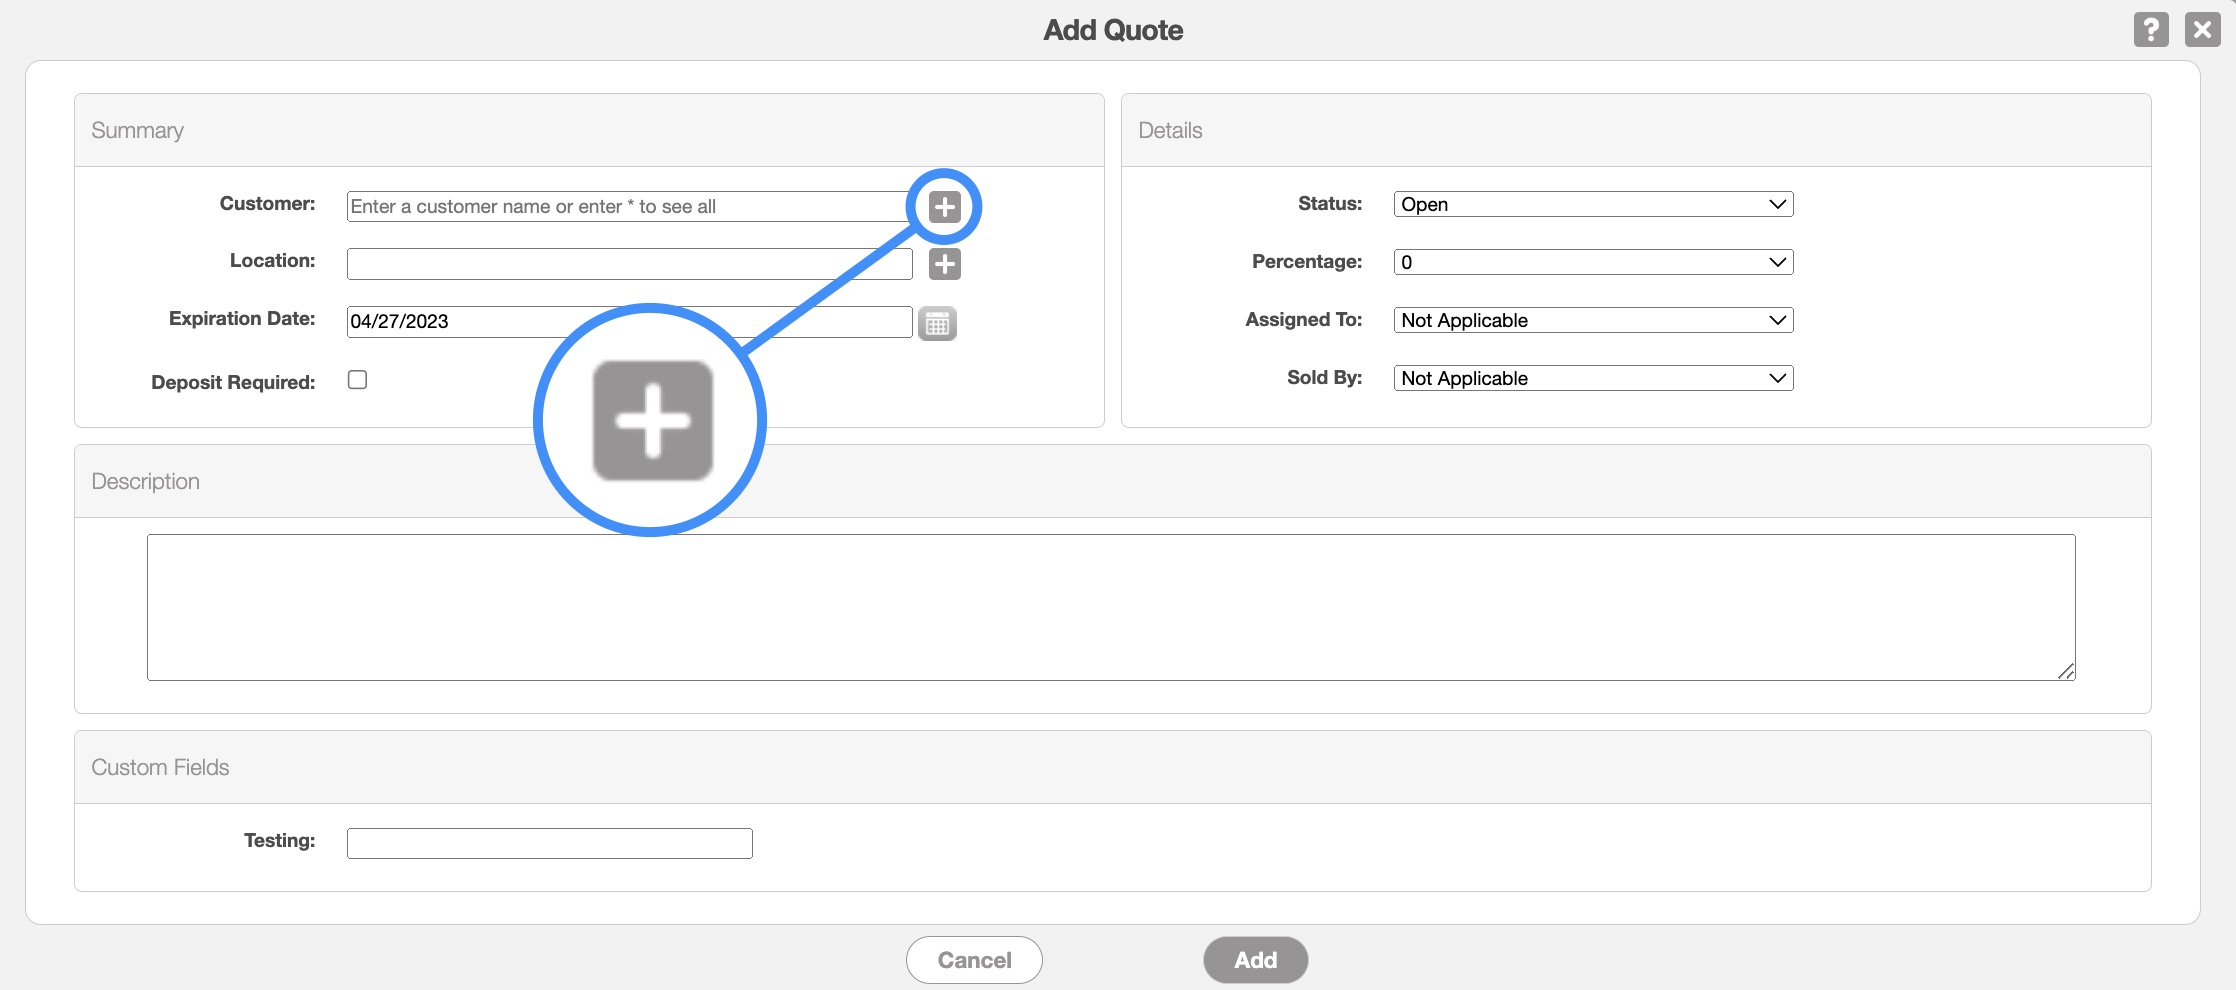
You can add a new customer while adding a new quote in MobiWork; for more information on how to add a quote please see the Add Quote page:
Once you are on the Add Quote pop-up window, click on the Plus Sign button:
The Add Customer pop-up window will then appear.
By Adding a Work Order
Another way you can add a new customer, is by adding a new work order. For more information on how to add a new work order please see the Add Work Order section:
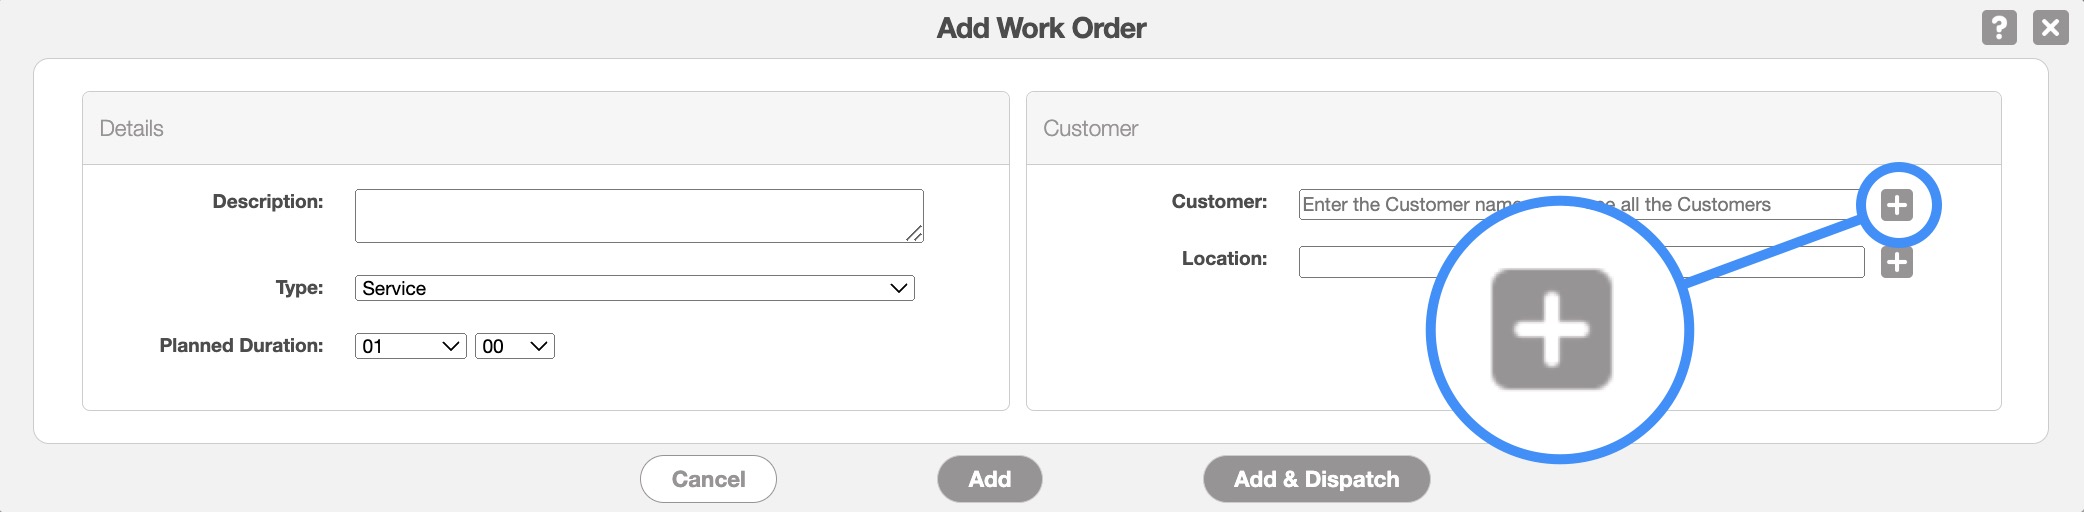
Once you are on the Add Work Order pop-up window, click on the Plus Sign button:
The Add Customer pop-up window will then appear.
Regardless of the method that you choose to add a customer, the Add Customer pop-up window will appear. From this window you will be able to input the name, address, any special notes and more regarding the new customer:
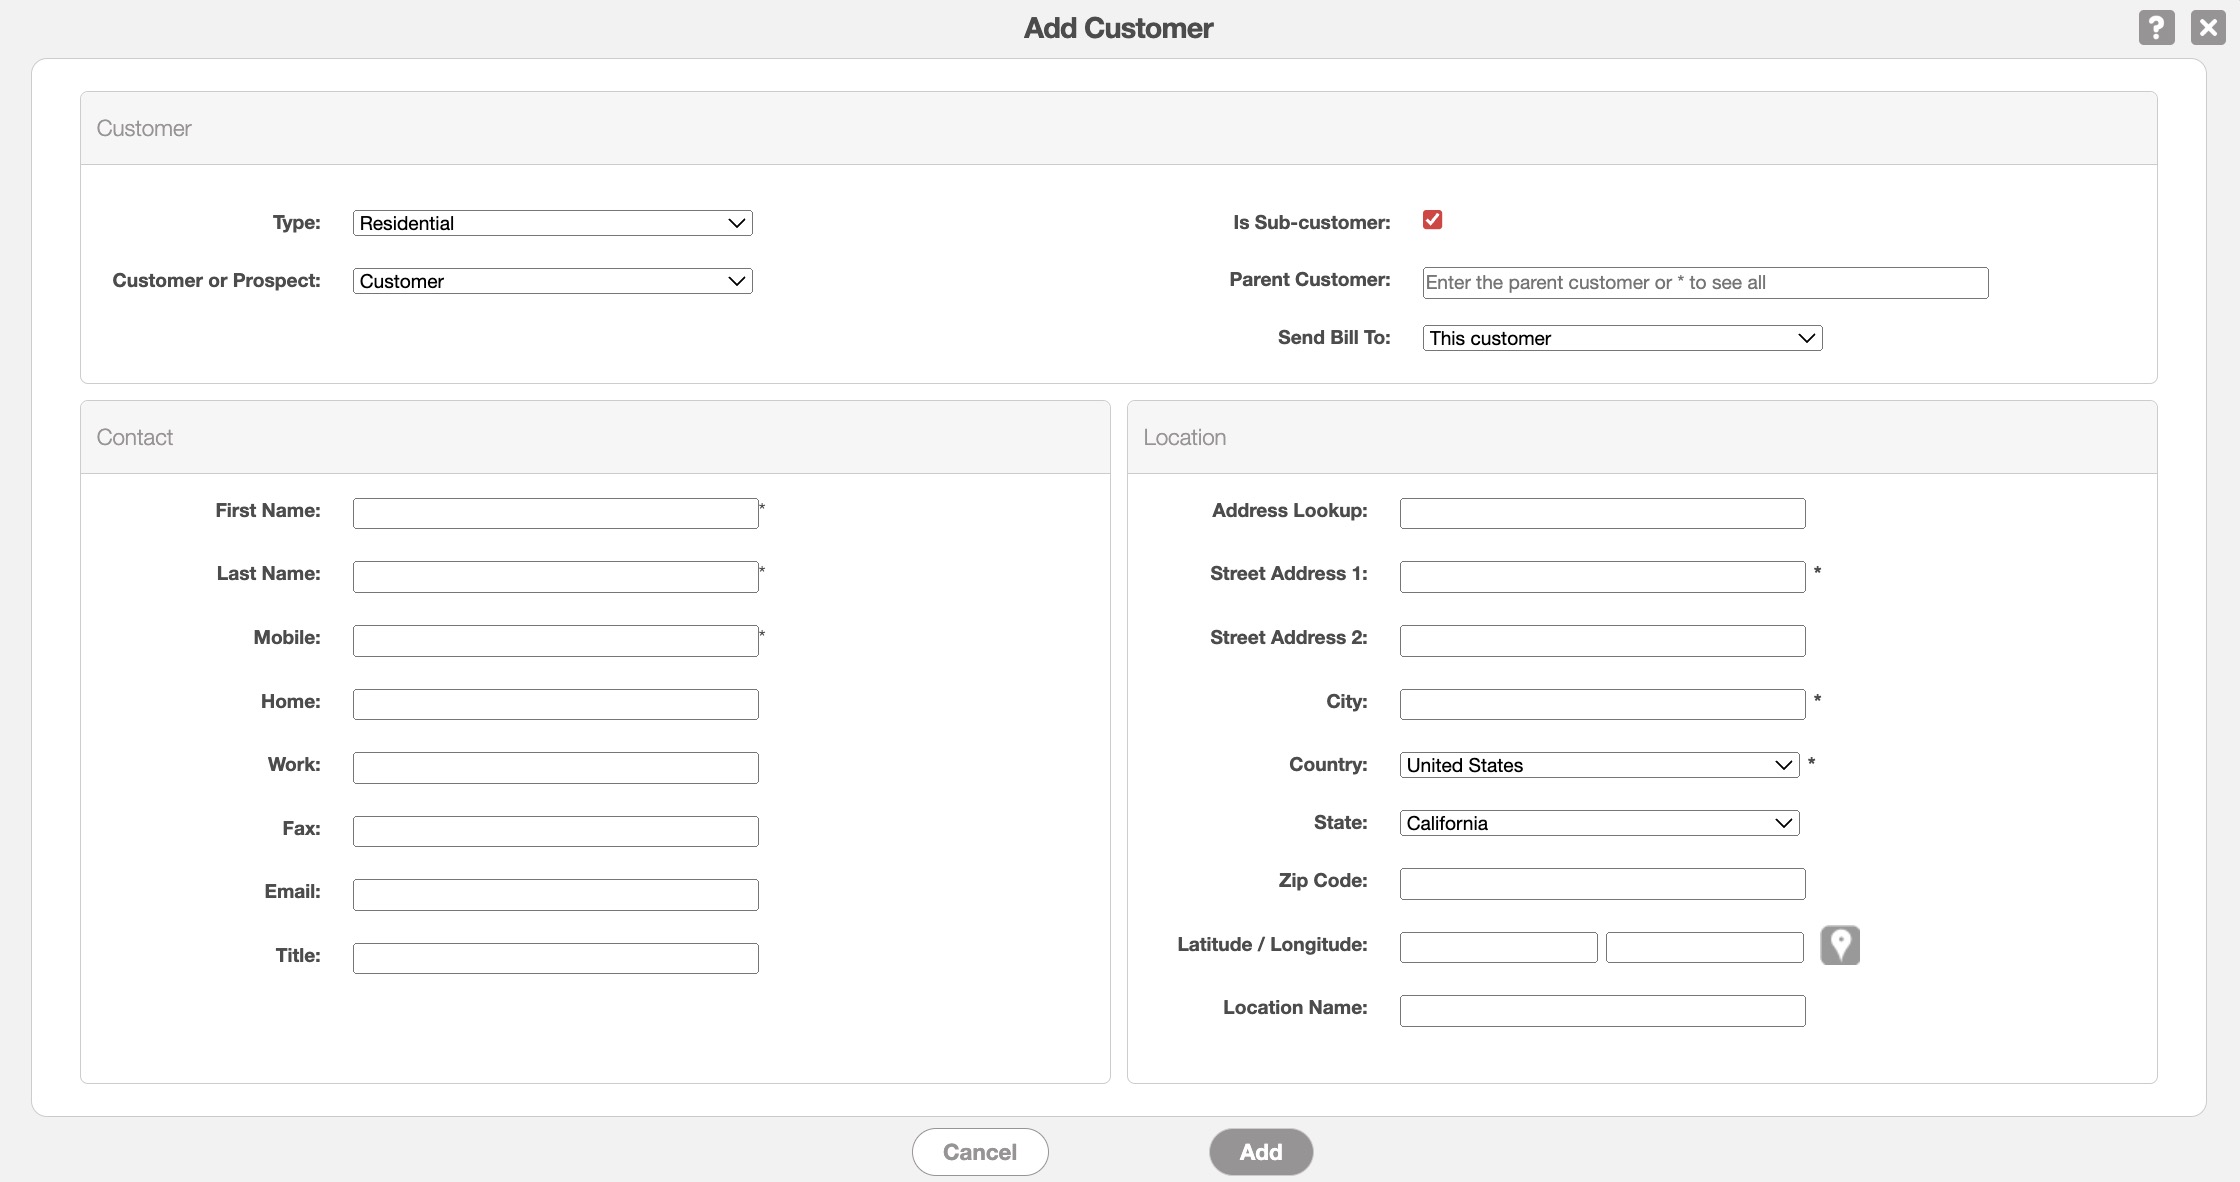
Enter the appropriate information in the specified fields; please note that the fields with an asterisk (*) are required.
Input the following information when adding a new customer:
From the "Type" drop-down, you can select if the customer is a residential or business customer. If you select the "Business" option, you will be able to input the company's name.
From the "Customer or Prospect" drop-down, you can select if the client is a customer or a prospective customer.
You will also have the option to indicate if the customer is a sub-customer of parent customer and where the bill should be sent (i.e., the sub-customer, the parent customer, or another customer). Please note that you will only be able to get these billing options if the "Sub Customer" checkbox is marked when you are creating or editing a customer.
Once all the information for the new customer is completed to your satisfaction click the Add button from the Add Customer pop-up window.
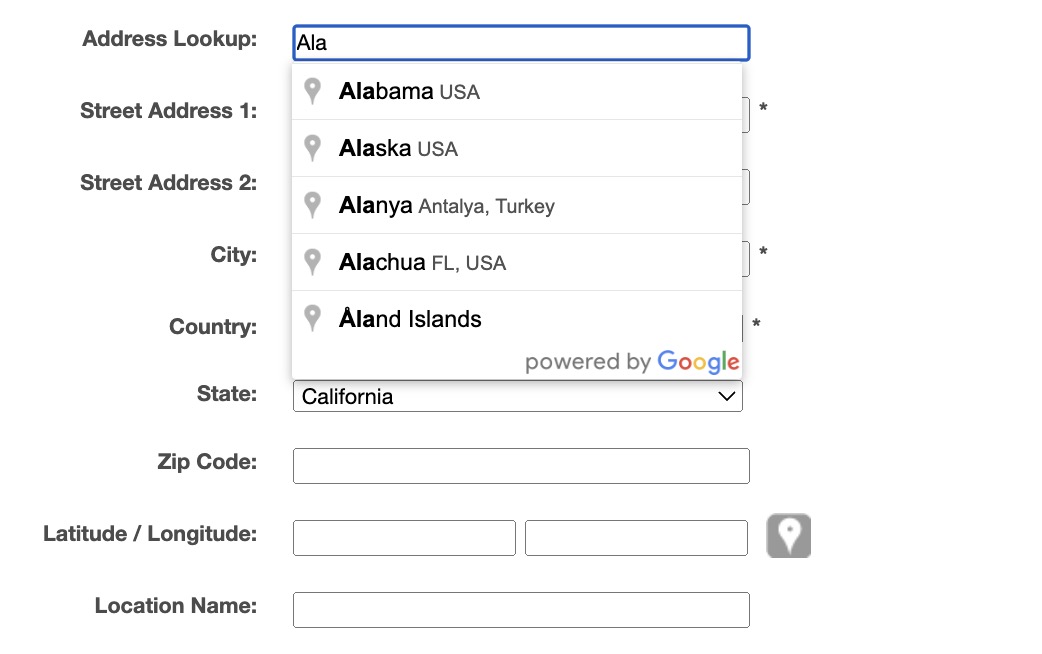
Once you start to input the address, MobiWork will begin to offer address autocomplete suggestions:
You can also use the pin next to the Latitude/Longitude line, to pick the address location on a map:
Once you are satisfied with the location click on the Ok button.

Once all the information for the new customer is completed to your satisfaction click the Add button from the Add Customer pop-up window.
The terms listed in the Add Customer pop-up window are defined below:
| Name: | Description: |
|---|---|
| "Type" | The type of customer (i.e., residential or business). |
| "Company Name" | The name of the company. This field will only appear if Business is selected from the Business Type drop-down. |
| "Customer or Prospect" | From the drop-down, select if the contact is a customer or prospective customer. | "Is Sub-Customer" | Click the checkmark if the contact is a sub-customer of a parent customer. | "Parent Customer" | Input the parent customer details that is associated with the sub-customer. | "Send Bill To" | Indicate which customer is getting the bill (i.e., the sub-customer, the parent customer, or another customer). |
| "First Name" | The first name of the customer contact. This field is required. |
| "Second Name" | The last name of the customer contact. This field is required. |
| "Mobile" | The cell phone of the customer contact. |
| "Home" | The home phone number of the customer contact. |
| "Work" | The work phone number of the customer contact. |
| "Fax" | The fax number of the customer contact. |
| "Email" | The primary email address of the customer contact. |
| "Title" | The honorific of the customer contact (e.g., Mr., Ms., Dr. etc.). |
| "Address Lookup" | Allows you to input the entered address as well as offer suggestions. |
| "Street Address 1" | The primary street address for the customer contact. This field is required. |
| "Street Address 2" | The secondary street address for the customer contact. |
| "City" | The city the customer contact is located in. This field is required. |
| "Country" | The country the customer contact is in. |
| "State" | The state the customer contact is in. |
| "Zip Code" | The zip code of the customer contact. |
| "Latitude / Longitude" | Allows you to input the latitude and longitude coordinates of the address. |
| "Location Name" | How you refer to the customer location for your records (e.g., Home, Site 1, etc.). |
If you would like to easily close any of these pop-up windows, you can click on the esc button from your keyboard.
MobiWork will alert you if the customer that you added is a duplicate customer. The image below displays the message you will receive:
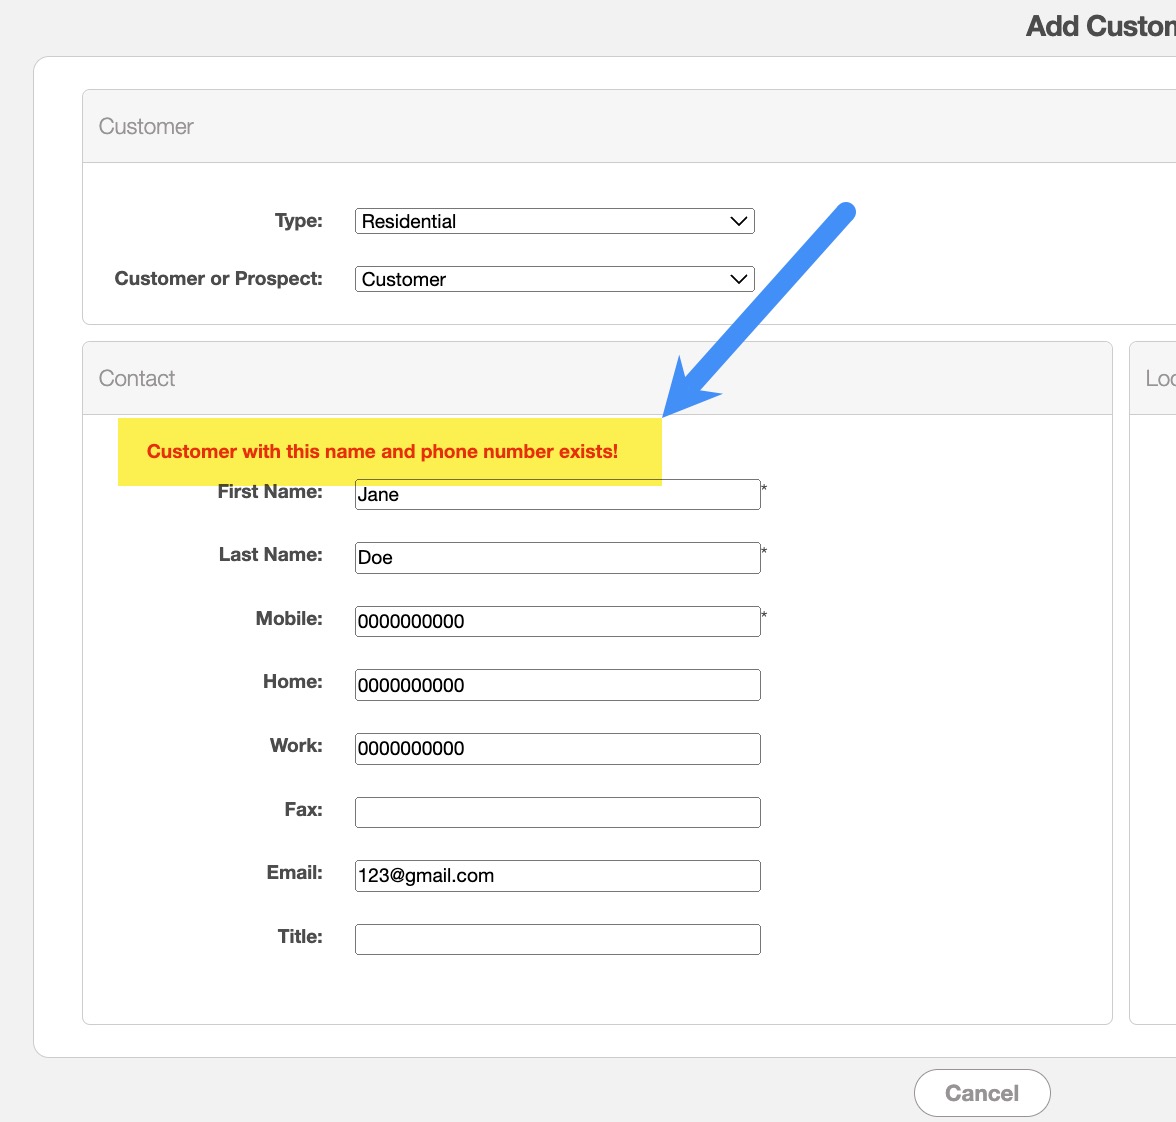
However, to avoid running into this issue, you should perform a search before adding a new customer to confirm that no other variations exist.
You will also have the option to indicate if the customer is a sub-customer of parent customer and where the bill should be sent (i.e., the sub-customer, the parent customer, or another customer). Please note that you will only be able to get these billing options if the "Sub Customer" checkbox is marked when you are creating or editing a customer.
To indicate if a client is a sub-customer, click on the "Is Sub-Customer" checkbox and then enter which customer is the parent customer associated with the sub-customer:
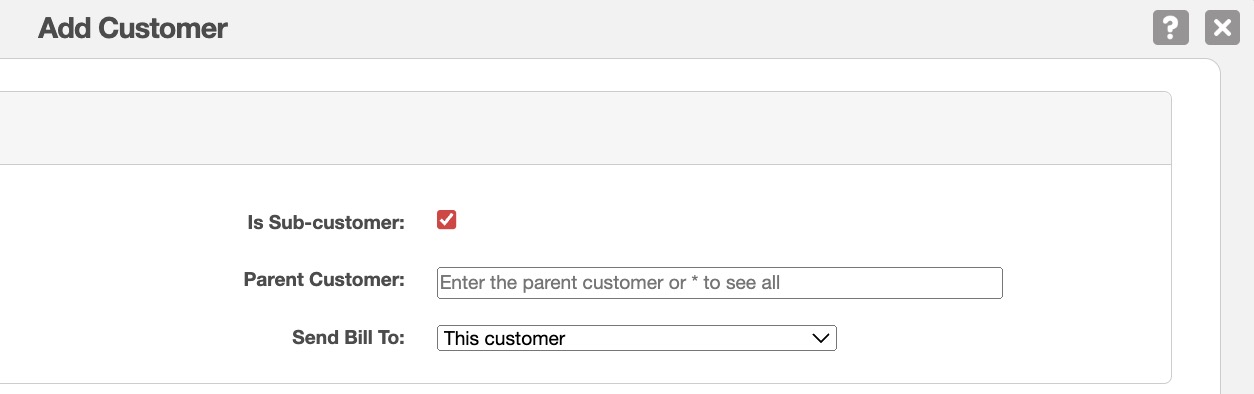
Next, specify which customer is getting the bill (i.e., the sub-customer, the parent customer, or another customer).
Once you have successfully added the sub-customer, you will then have a "Sub-Customer" tab in the View Customer pop-up window.