In order to utilize the Acumatica connector within MobiWork, you will first need to install the connector onto the MobiWork platform, obtain the integration package, and install the MobiWork connector package in your Acumatica account. The following steps will illustrate how to accomplish setting up the Acumatica connector on MobiWork and how to install the integration package on Acumatica.
Client ID
REST Username
REST Version
Step 1: Install the Connector on MobiWork
To install the Acumatica Connector onto MobiWork, you will first need to access the "Connectors" tab from the MobiWork Account Settings. For more information on how to access this page, please see the Account Settings Tab page.
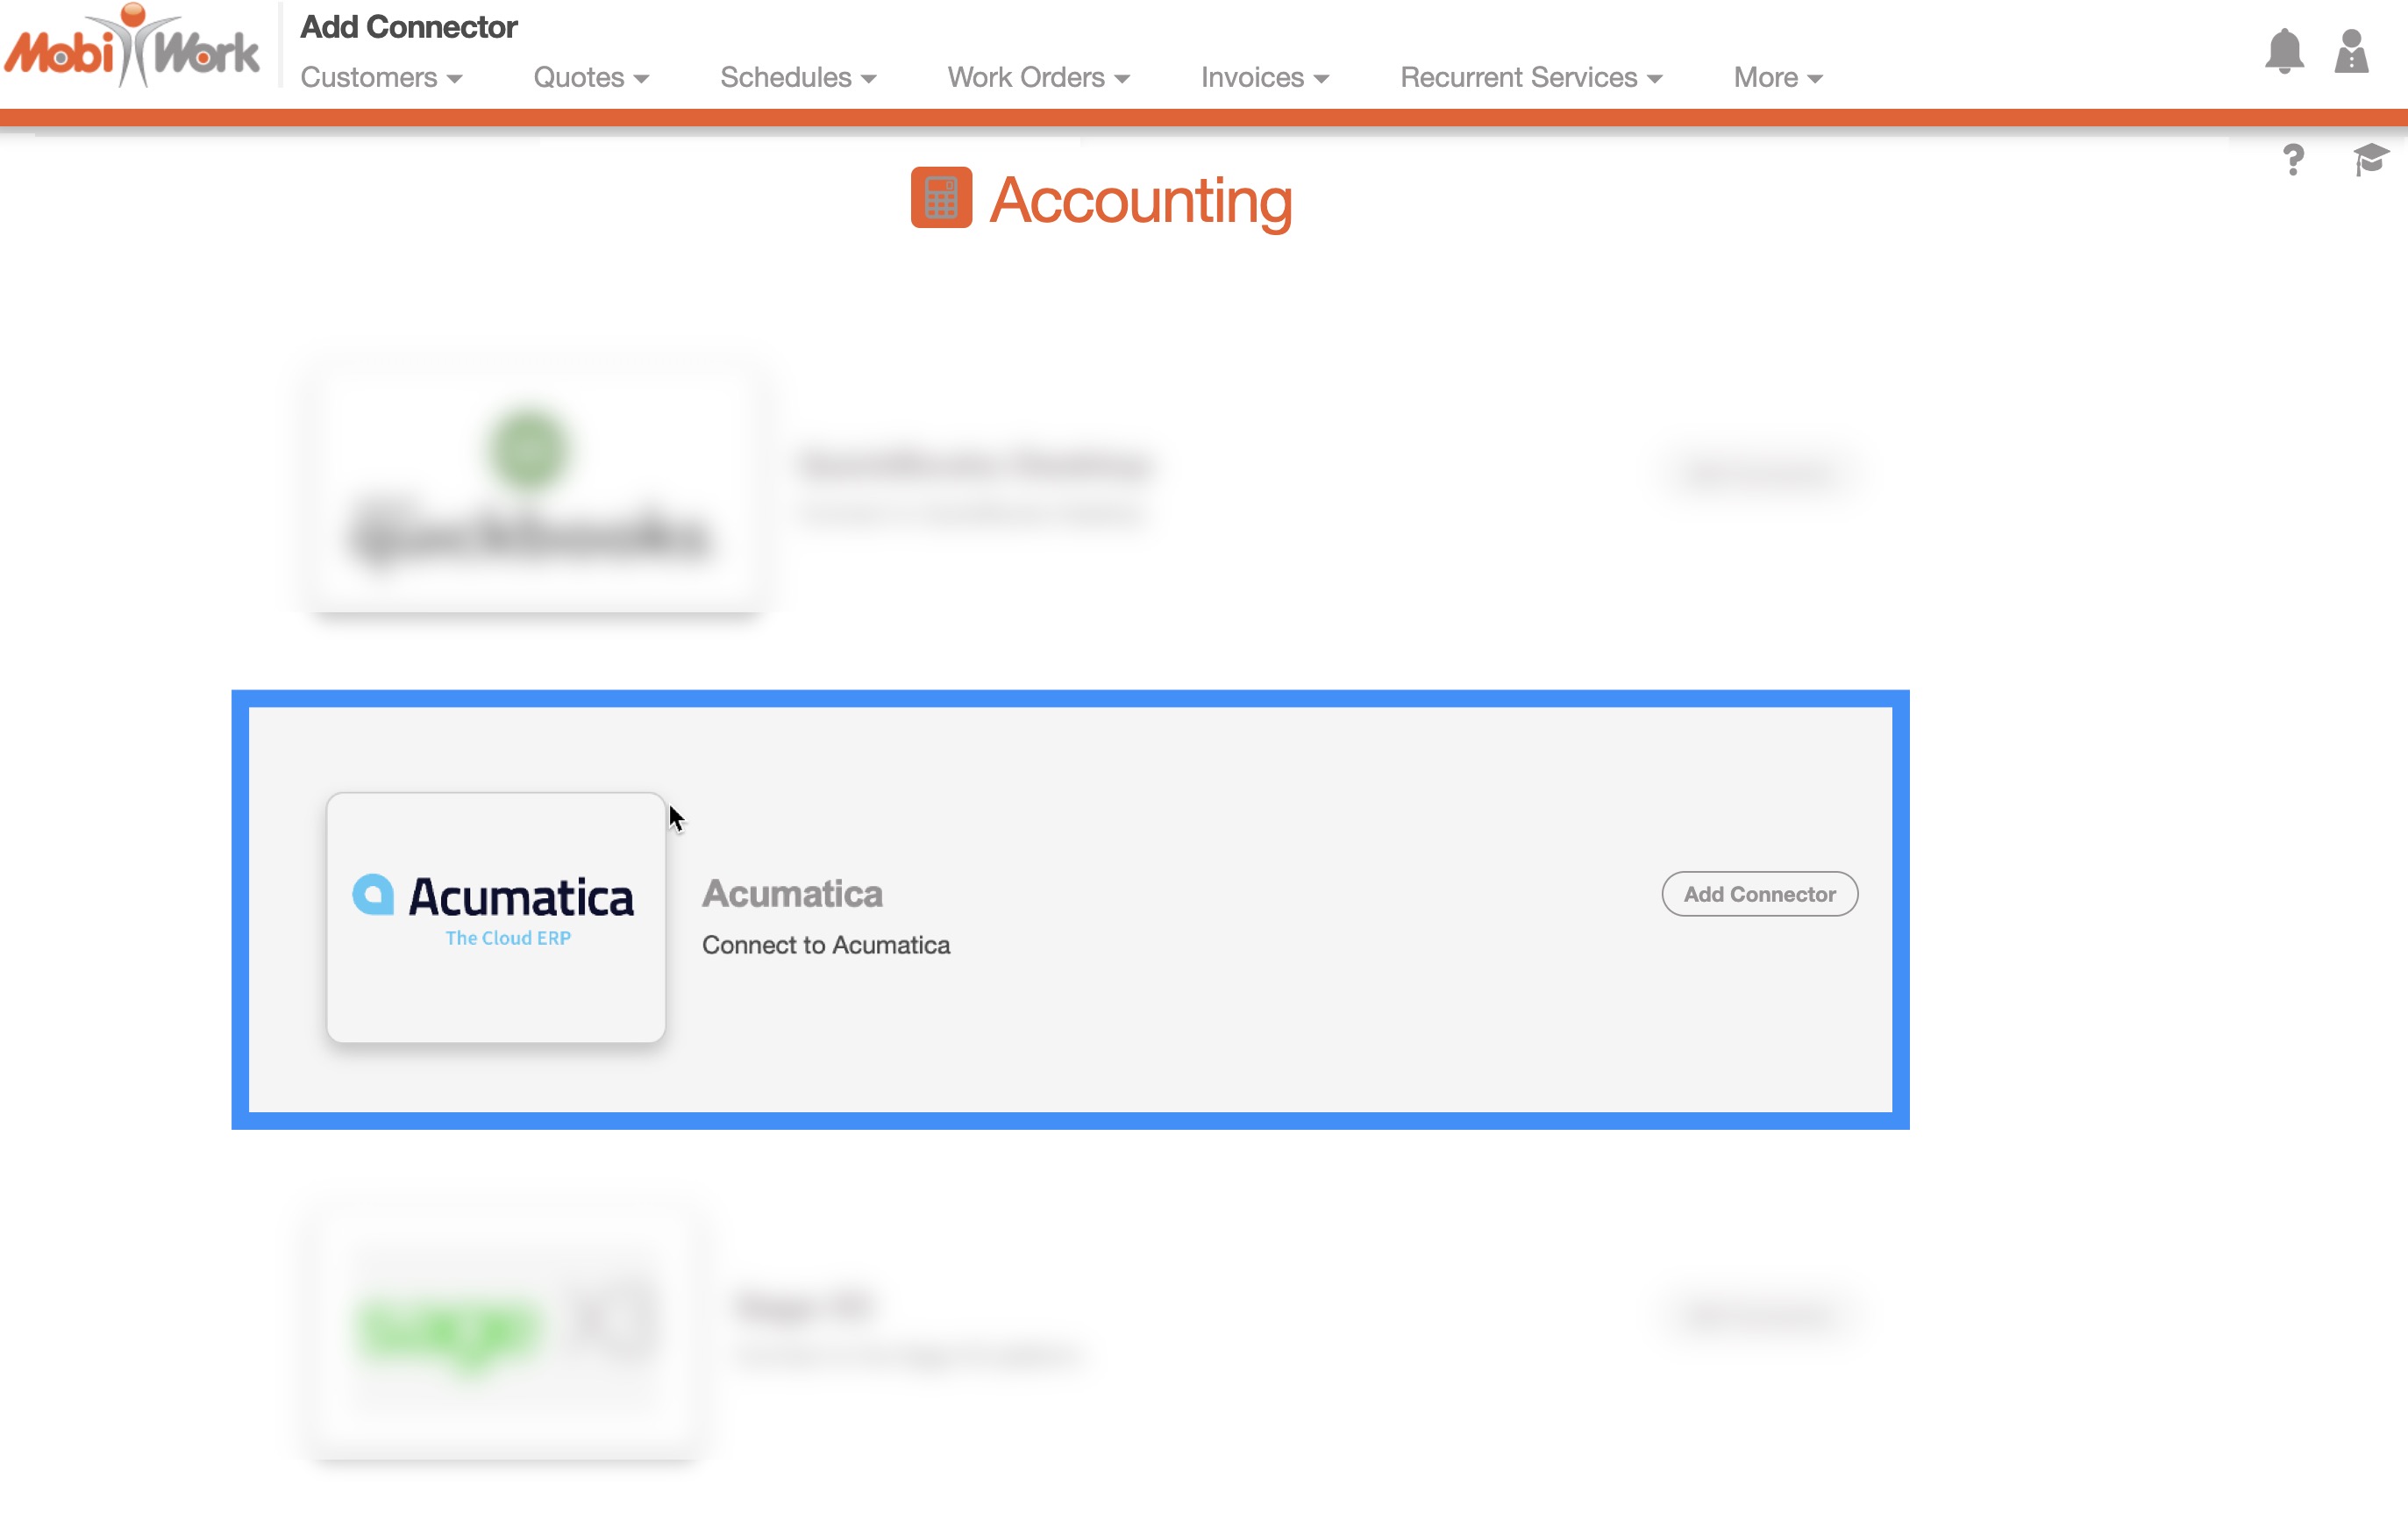
Once you are on the "Connector" tab, select to add a new Connector. You will then be redirected to the Add Connector page. From this page, locate the Acumatica connector and click on the Add button:
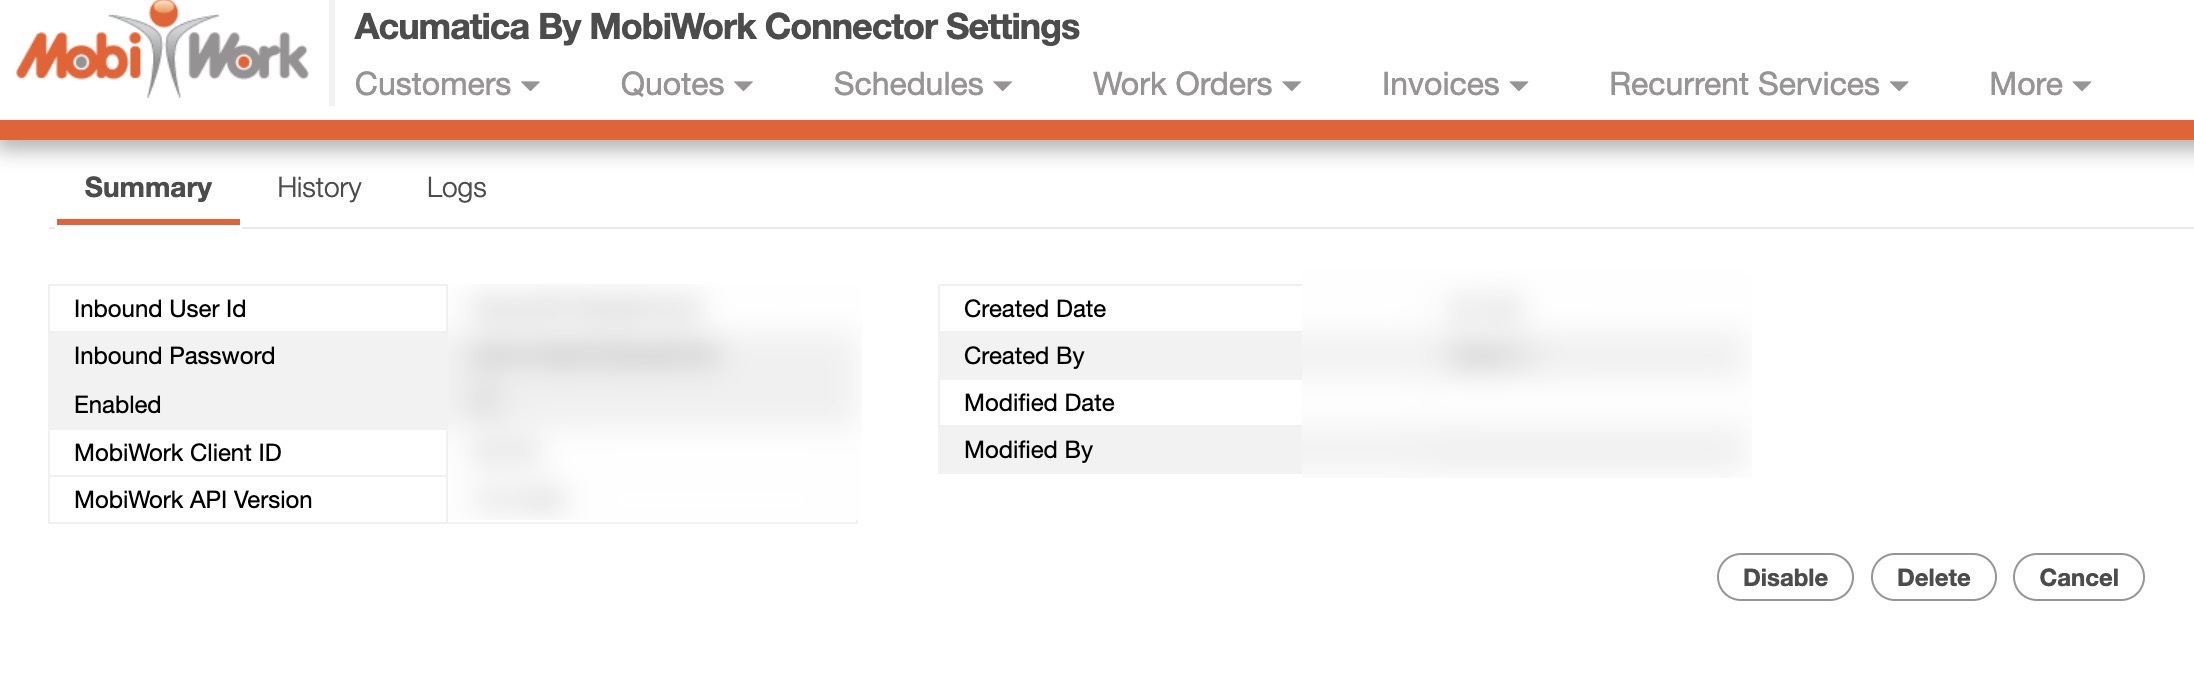
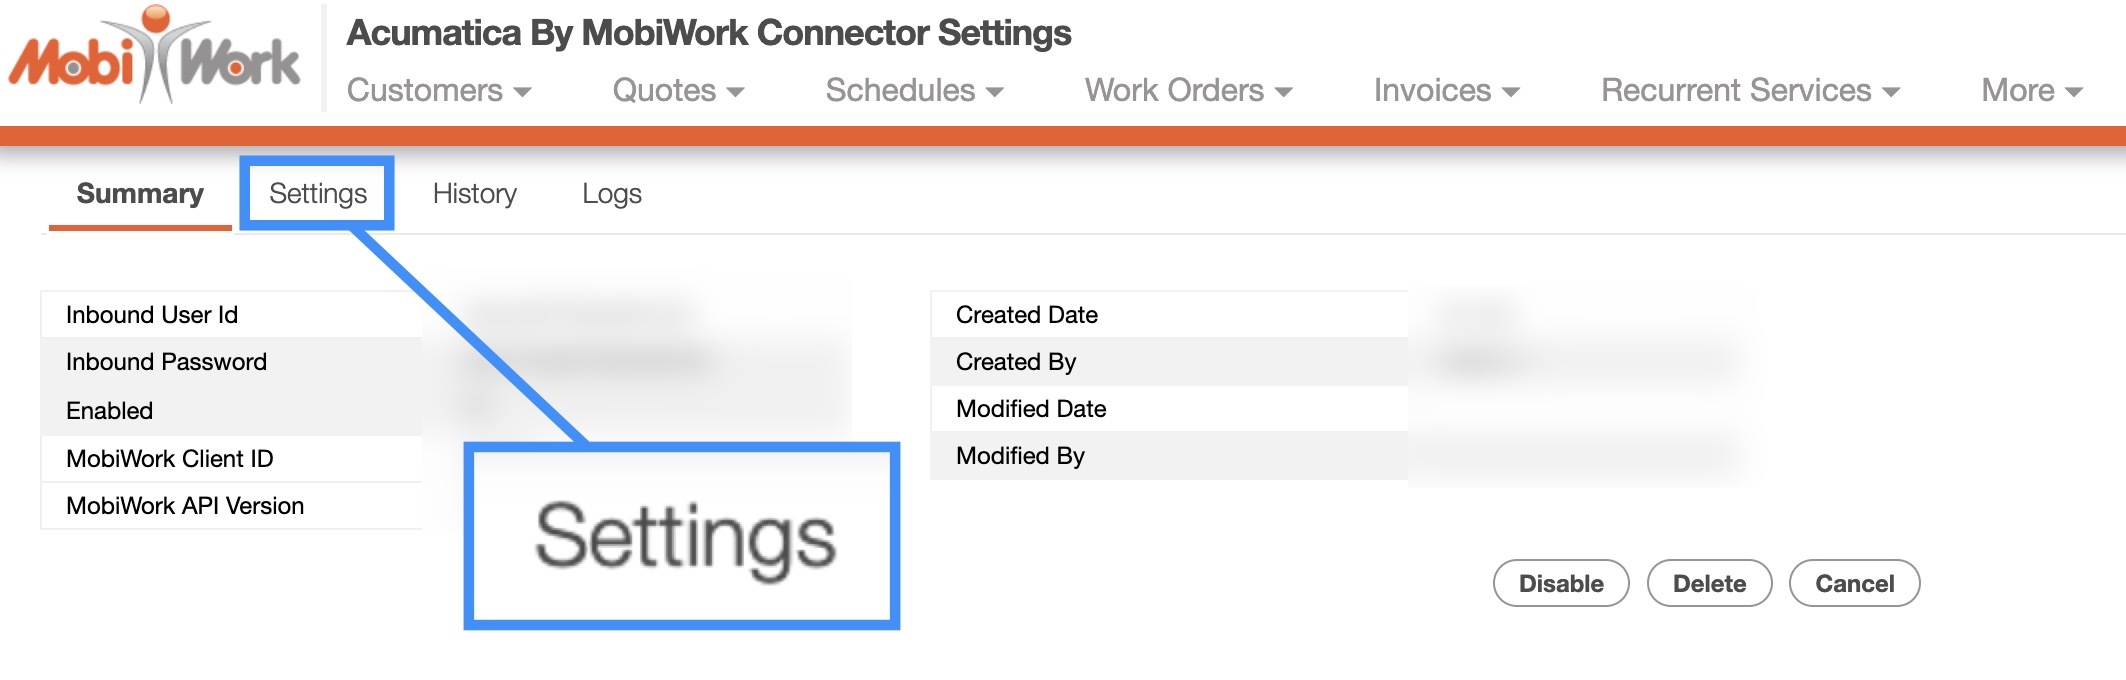
After you confirm that you would like to add the connector, you will be redirected to the Acumatica By MobiWork Connector Settings page.
The Acumatica By MobiWork Connector Settings page will depict the API information regarding the Acumatica connector:
Step 2: Receive the Emailed Acumatica Integration Package
The next step to installing the Acumatica Connector is to download the emailed Acumatica integration package that you will receive from us. You can receive the Acumatica integration package by emailing us at Success@mobiwork.com. This integration package is essential in configuring your Acumatica account so that it can integrate with MobiWork and allow you to sync data between the two platforms:

Note: Please note that the zipped Acumatica integration package is formatted in such a way to be compatible with Acumatica and MobiWork. Do Not edit or open the zipped file. Editing or opening the zipped file will cause integration errors between MobiWork and Acumatica, and you will be unable to set up the connector correctly.
Step 3: Upload the Acumatica Integration Package to Acumatica
Once you have downloaded the zipped Acumatica integration package, you will then upload that file onto Acumatica:
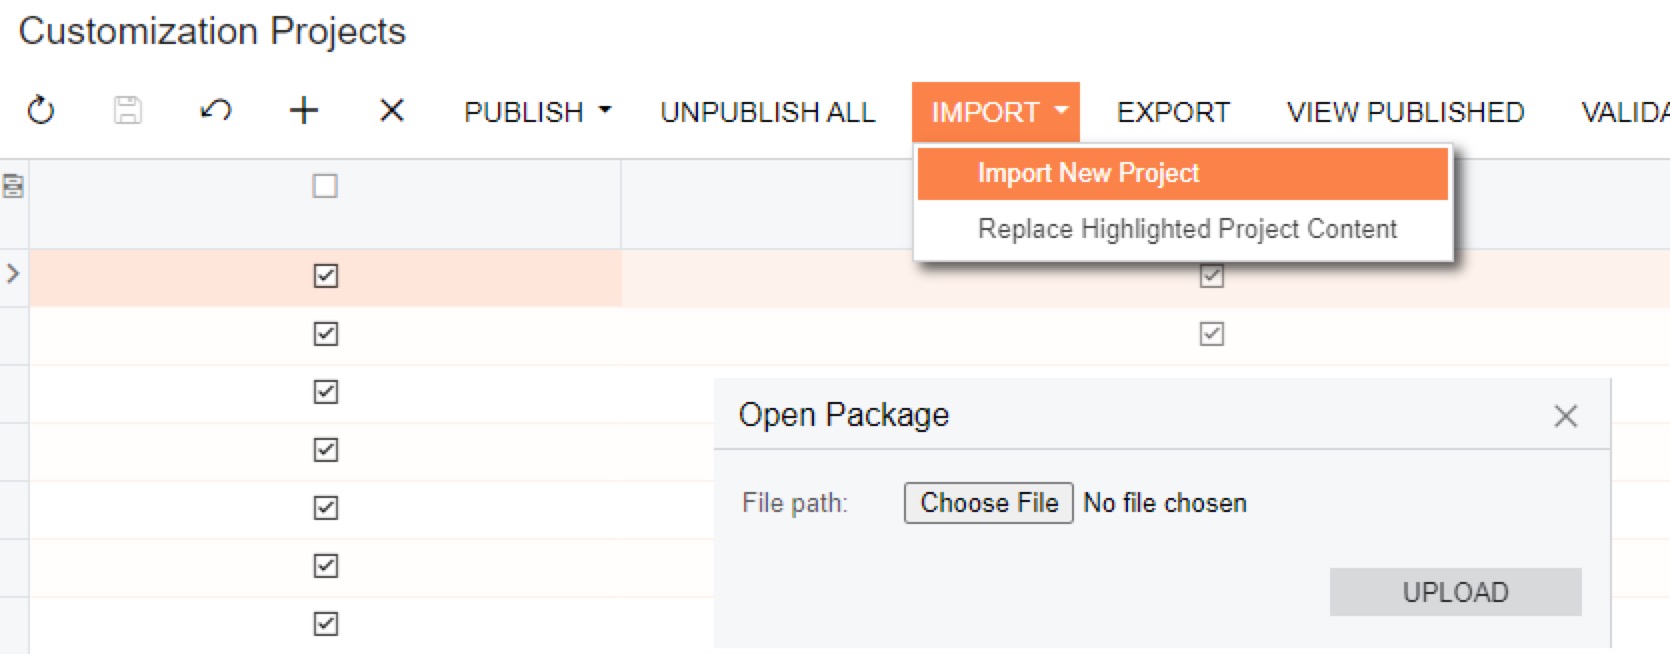
Upload the zipped Acumatica integration package onto the Customization Projects Screen page on Acumatica and then select the Publish action:

If you do not publish the integration package, Acumatica will not be configured correctly and thus will unable to sync the data and information from MobiWork.
Step 4: Setting Up Configuration Options in Acumatica
Once the Acumatica integration package has been uploaded and published correctly, you will be able to access the integration settings within Acumatica.
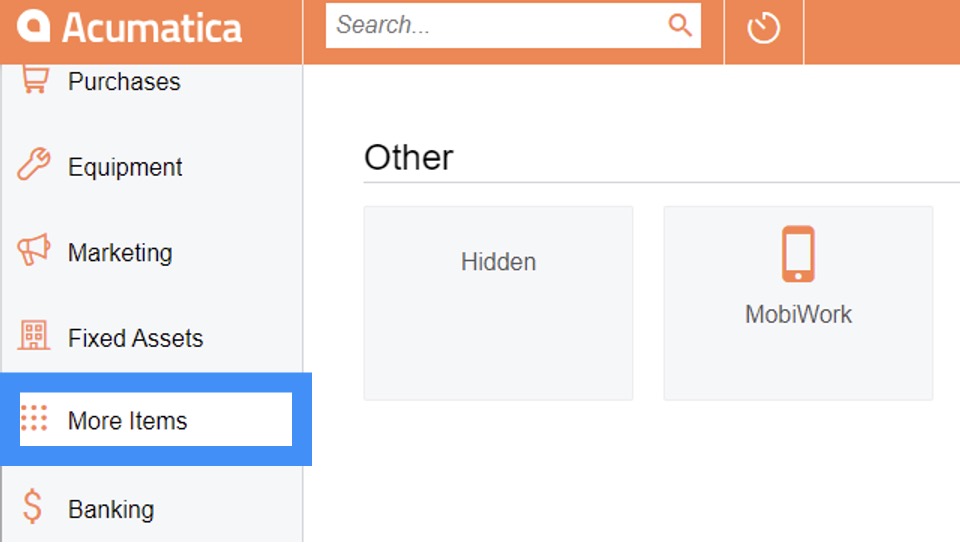
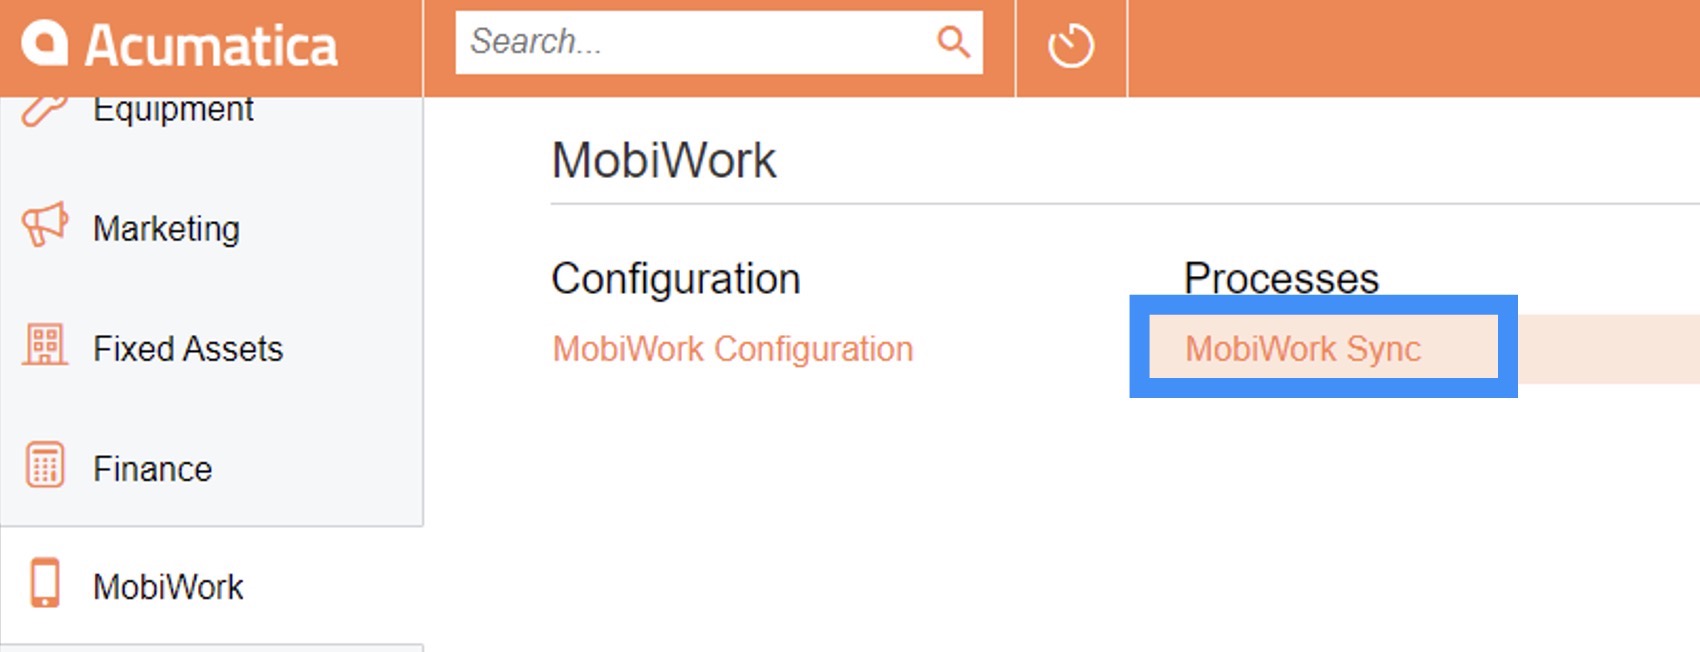
From Acumatica, select the More Items icon from your left-side menu. You will be directed to the Other page; from this page click on the MobiWork icon:
You will then be able to access the Configuration page. On this page, click on the MobiWork Configuration link:

You will then be prompted to input your Acumatica and MobiWork credentials:
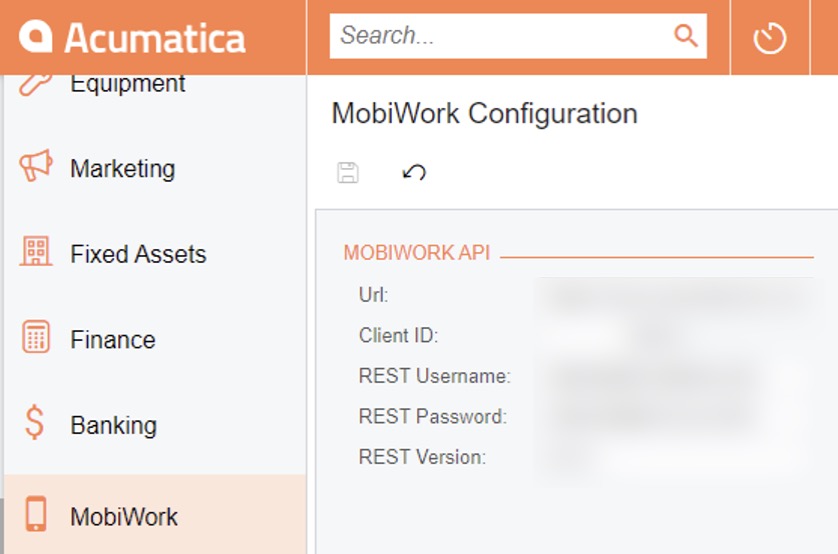
These credentials are as follows:
You can obtain this information from the Acumatica By MobiWork Connector Settings page from Step 1:
Step 5: Validate the MobiWork and Acumatica Integration
Once you have entered the MobiWork credentials into Acumatica, you should double check that the integration between MobiWork and Acumatica is working properly.
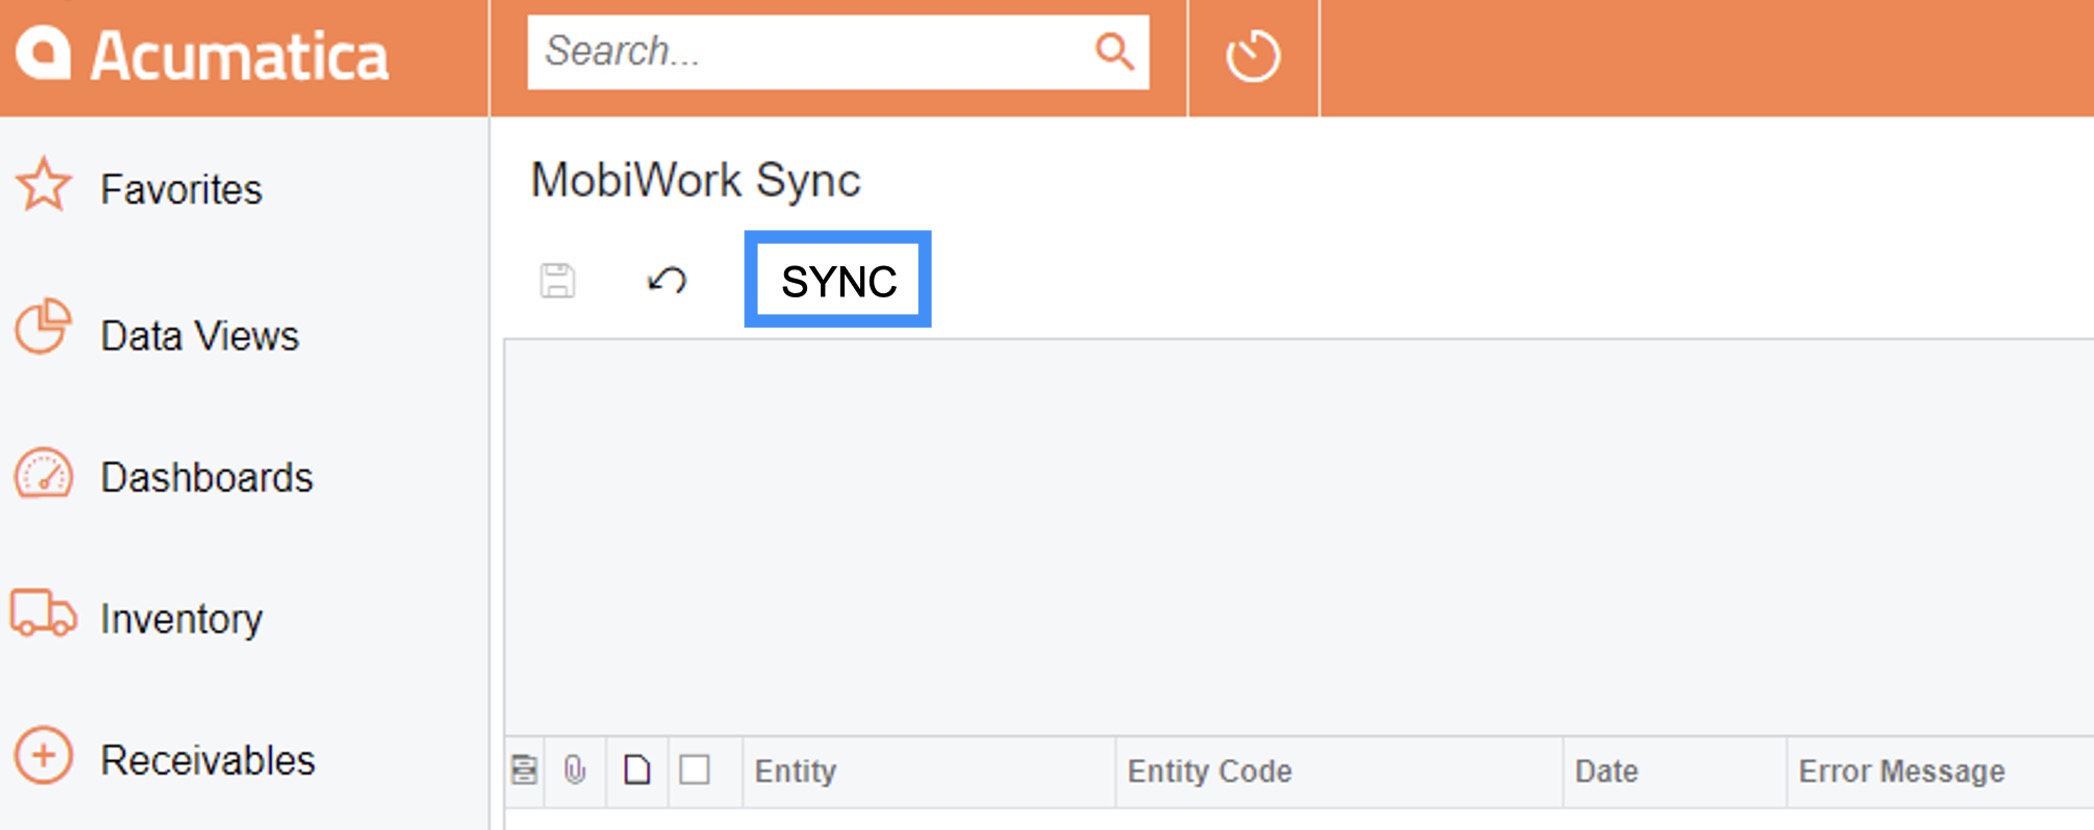
Select all of the features you would like to sync, and then click on the Sync button to begin syncing the test data:

After you have set up your Acumatica connector to MobiWork and have validated the integration process, you can begin syncing data to and from MobiWork.
The following subsections will highlight how to sync between MobiWork and Acumatica.
From Acumatica to MobiWork
You can sync data from Acumatica to MobiWork by running the sync from the Acumatica MobiWork Sync page. On the MobiWork Sync page, click on the Sync button to execute the sync from Acumatica to MobiWork:
The following features will be synced from Acumatica to MobiWork:
Customers (inlcuding customer names, contact, and location information). This information can be synced to and from Acumatica to MobiWork.
Products (inlcuding the product description, SKU, manufacturer name and part number, tag/barcode, and price). This information can be synced to and from Acumatica to MobiWork.
Services (inlcuding the service description, SKU, and price). This information can be synced to and from Acumatica to MobiWork.
Price Lists and Prices. This information can only be synced from Acumatica to MobiWork.
Projects (including project names, description, customer, and location information). This information can only be synced from Acumatica to MobiWork.
Work Orders. This information can be synced to and from Acumatica to MobiWork.
Vendors (including vendor names, contact information, and location information). This information can be synced to and from Acumatica to MobiWork.
All the new entities in Acumatica will be pushed to MobiWork. If a record exists in both MobiWork and Acumatica, the last modified date will be used to update the information, ensuring no unnecessary updates/overwrites occurs.
From MobiWork to Acumatica
You can sync data from MobiWork to Acumatica, by marking the data you want to integrate in MobiWork; you can mark the selected data by right-clicking or clicking on the Individual Actions button and selecting the "Export... to Acumatica" option from the drop-down:
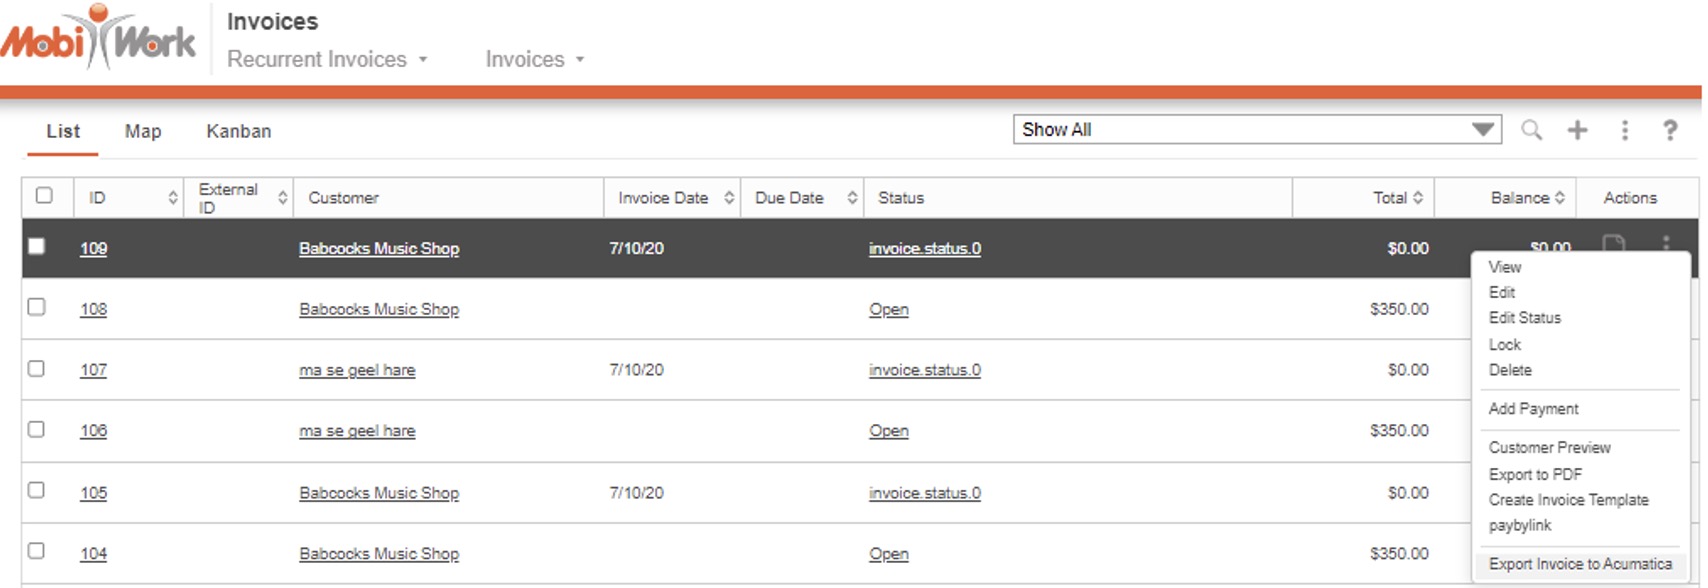
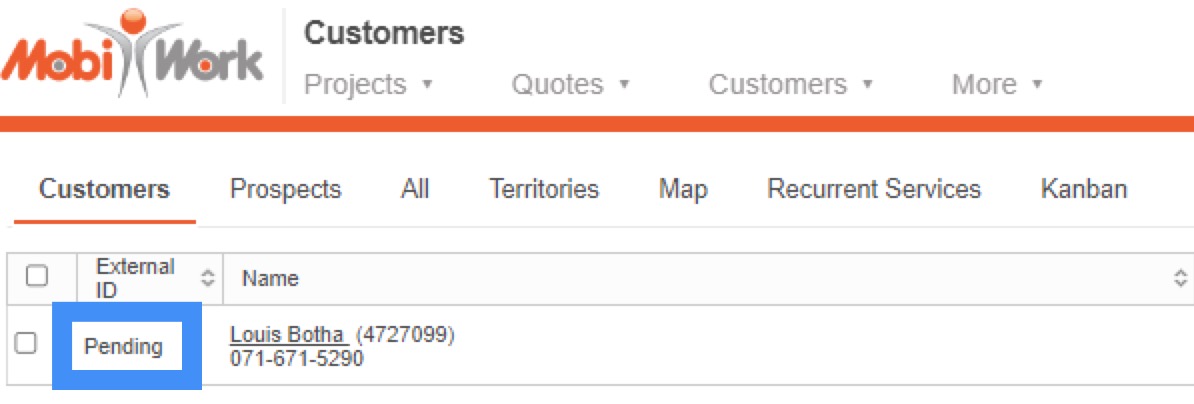
Once selected, the entity will be marked as "Ready" and the "External ID" column will have the "Pending" status. The actual sync will occur when you initiate the sync from Acumatica. Once the synchronization is performed, the "External ID" column will have the unique id of that entity in Acumatica. For more information on how to run the sync from Acumatica, please see the From Acumatica to MobiWork subsection:
The following features can be synced from MobiWork to Acumatica:
Customers (inlcuding customer names, contact, and location information). This information can be synced to and from Acumatica to MobiWork.
Products (inlcuding the product description, SKU, manufacturer name and part number, tag/barcode, and price). This information can be synced to and from Acumatica to MobiWork.
Services (inlcuding the service description, SKU, and price). This information can be synced to and from Acumatica to MobiWork.
Invoices (including marked invoices, invoice line items, customer information, location information, creation date, due date, discount(s), markup(s), sales tax, etc.). This information can only be synced from MobiWork to Acumatica.
Estimates (including marked quotes, quote line items, customer information, location information, creation date, due date, discount(s), markup(s), sales tax, etc.). This information can only be synced from MobiWork to Acumatica.
Sales Orders (including marked sales orders and sales order line items). This information can only be synced from MobiWork to Acumatica.
Purchase Orders (including marked purchase orders and purchase order line items). This information can only be synced from MobiWork to Acumatica.
Work Orders. This information can be synced to and from Acumatica to MobiWork.
Vendors (including vendor names, contact information, and location information). This information can be synced to and from Acumatica to MobiWork.
All new entities that have been marked for integration in MobiWork will be pushed to Acumatica. If a record exists in both MobiWork and Acumatica, the last modified date will be used to update the information, ensuring no unnecessary updates/overwrites occurs.
If a record is not marked in MobiWork when you run the sync, then the data will be pulled from Acumatica if it falls within the designated period. Please see the Settings subsection for more information about how to set up the designated sync periods for your Acumatica connector.
After the Acumatica synchronization is finished, an automatic reminder will be generated. This reminder provides a concise overview of the integration process, detailing the time allocated to the synchronization, and a summary of successful and failed records.
Each connector has detailed logs in MobiWork where you can view the summary of successful and failed records. The logs can be located by selecting the "View" option from your MobiWork Connector Settings page:
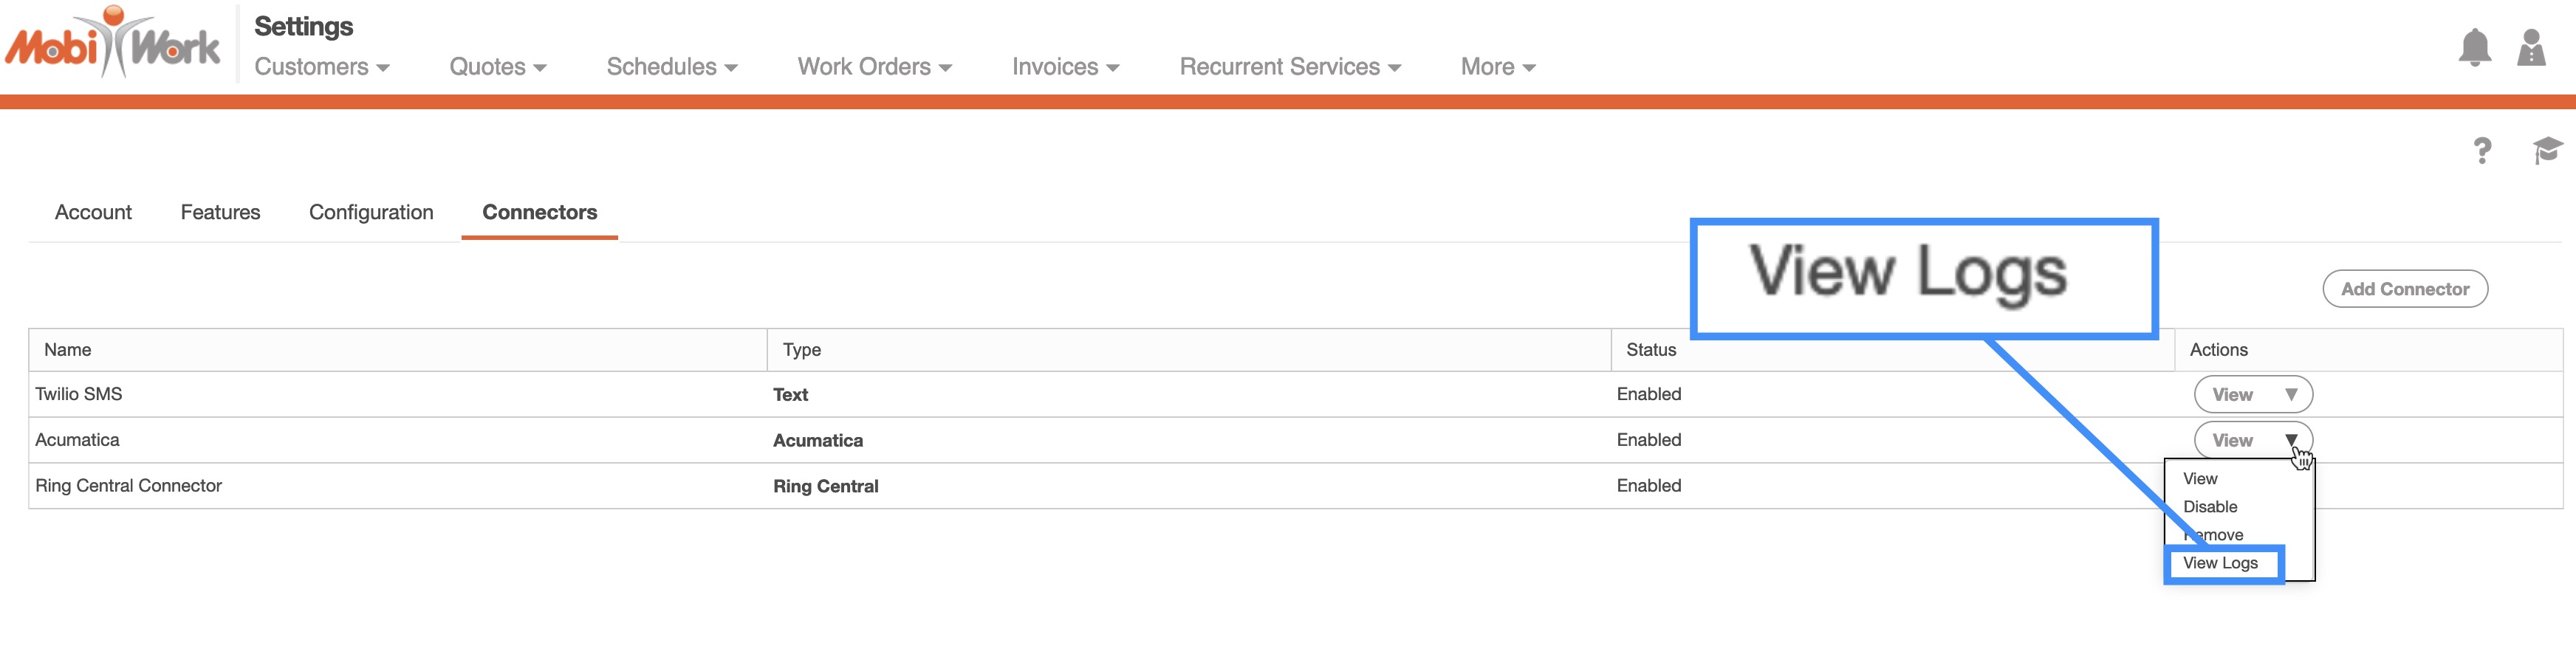
These logs will indicate if there were any issues with the integration on an internal level and will provide valuable info for our team to determine the cause of the issue.
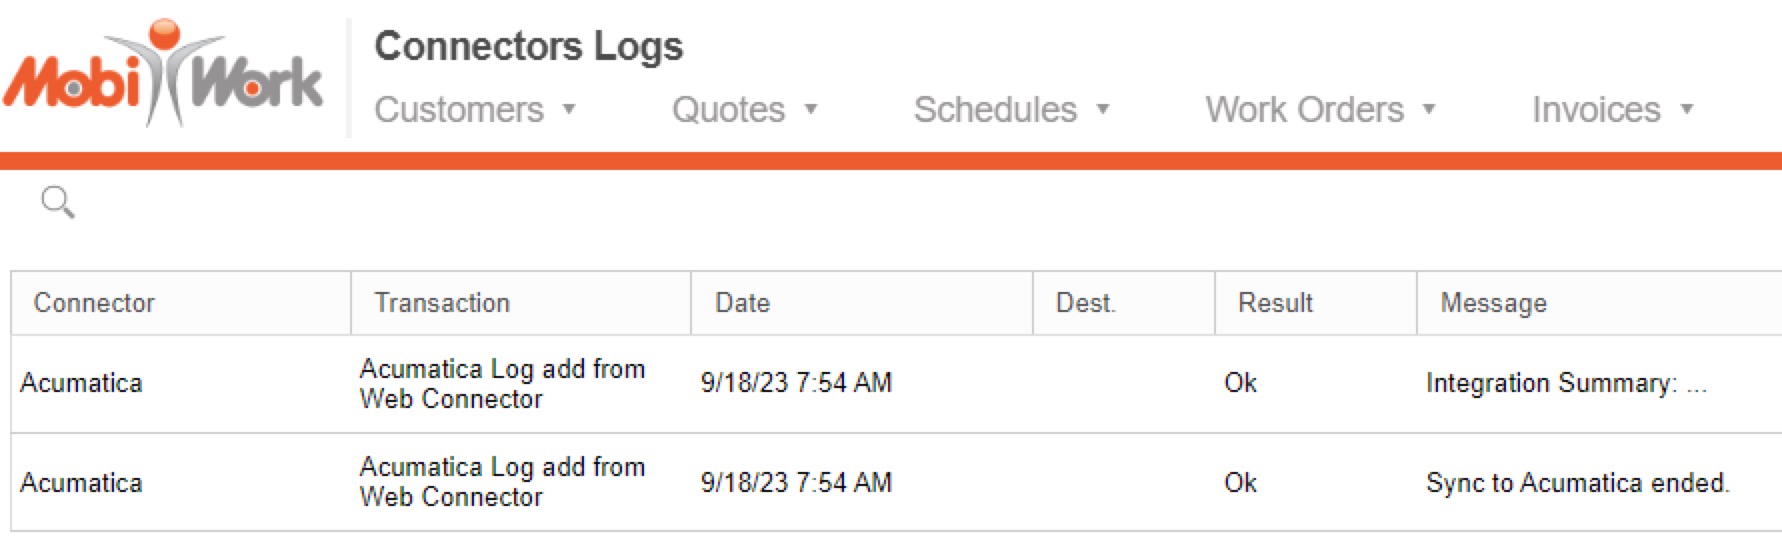
The system notification and connector logs are available whenever the sync is completed. In addition, all the corresponding entities and transaction "External ID" fields will be updated:
Once there is a failure, a note will be on the entity in MobiWork containing the error message. Failed records will also have the status, "Sync Failed" instead of "Pending." These records will continue to have the "Sync Failed" status until you mark them for export again:

By examining the error logs, you will be able to troubleshoot the problem (e.g., missing data, etc.) and run the sync again. If you do not understand the error you are receiving (e.g., API errors, communication errors, etc.) and cannot solve it, please submit a support ticket.
Acumatica Connector Settings Access
The settings for how Acumatica and MobiWork transfer and sync information are controlled within MobiWork.
You can access the Acumatica Settings page by accessing the "Connectors" tab from your Account Settings. For more information on how to access this page, please see the Account Settings page.
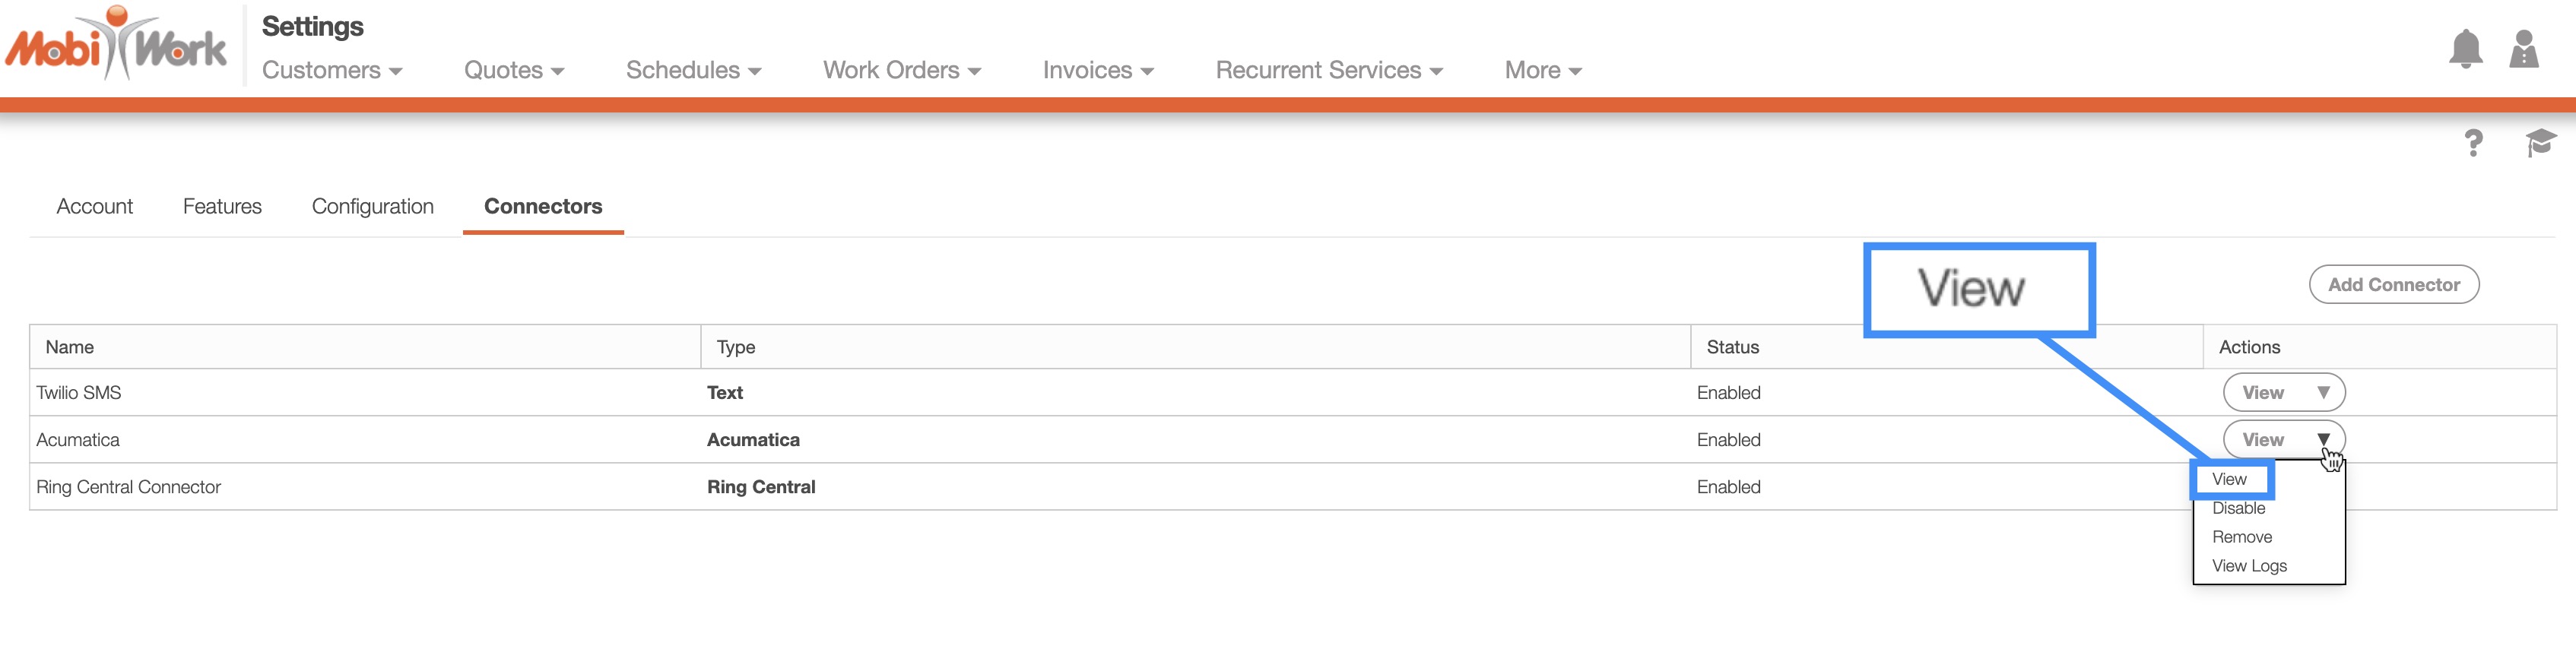
Once you are on this page, click on the "Connectors" tab, and select to view the Acumatica connector:
From the Acumatica Connector page, select the "Settings" tab:
Once you are on the "Settings" tab, click on the Edit button:
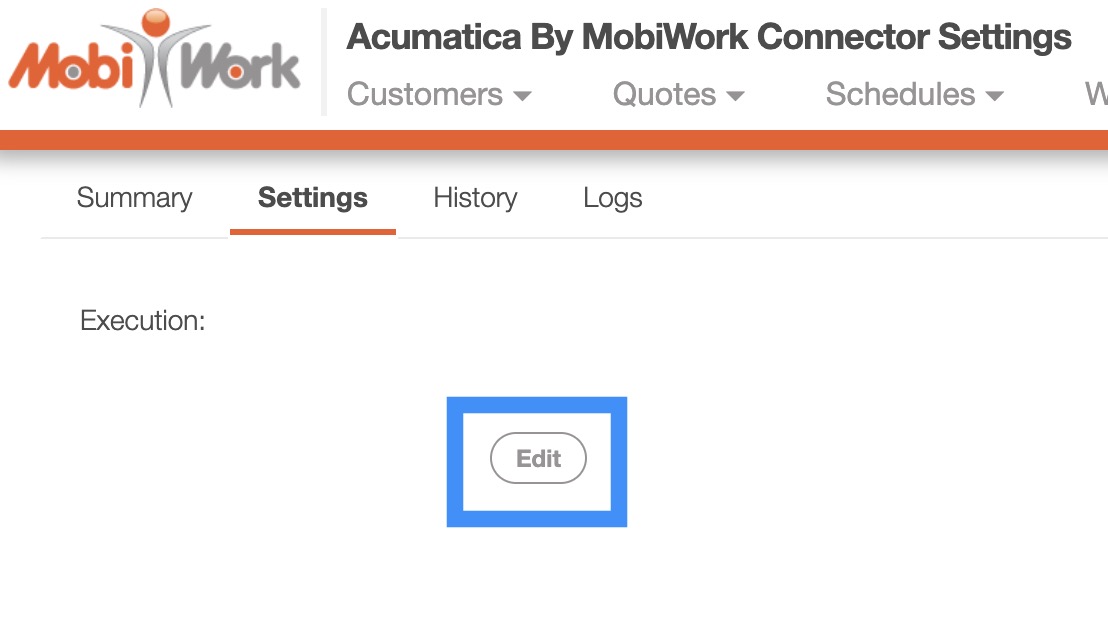
You will then be redirected to the Edit Acumatica Connector Settings page:
Acumatica Connector Settings Access
The following subsections will go into more detail regarding the different settings related to your Acumatica connector.
The following subsections will go into more detail regarding the different settings related to your Acumatica connector.
Acumatica Connector Settings Layout
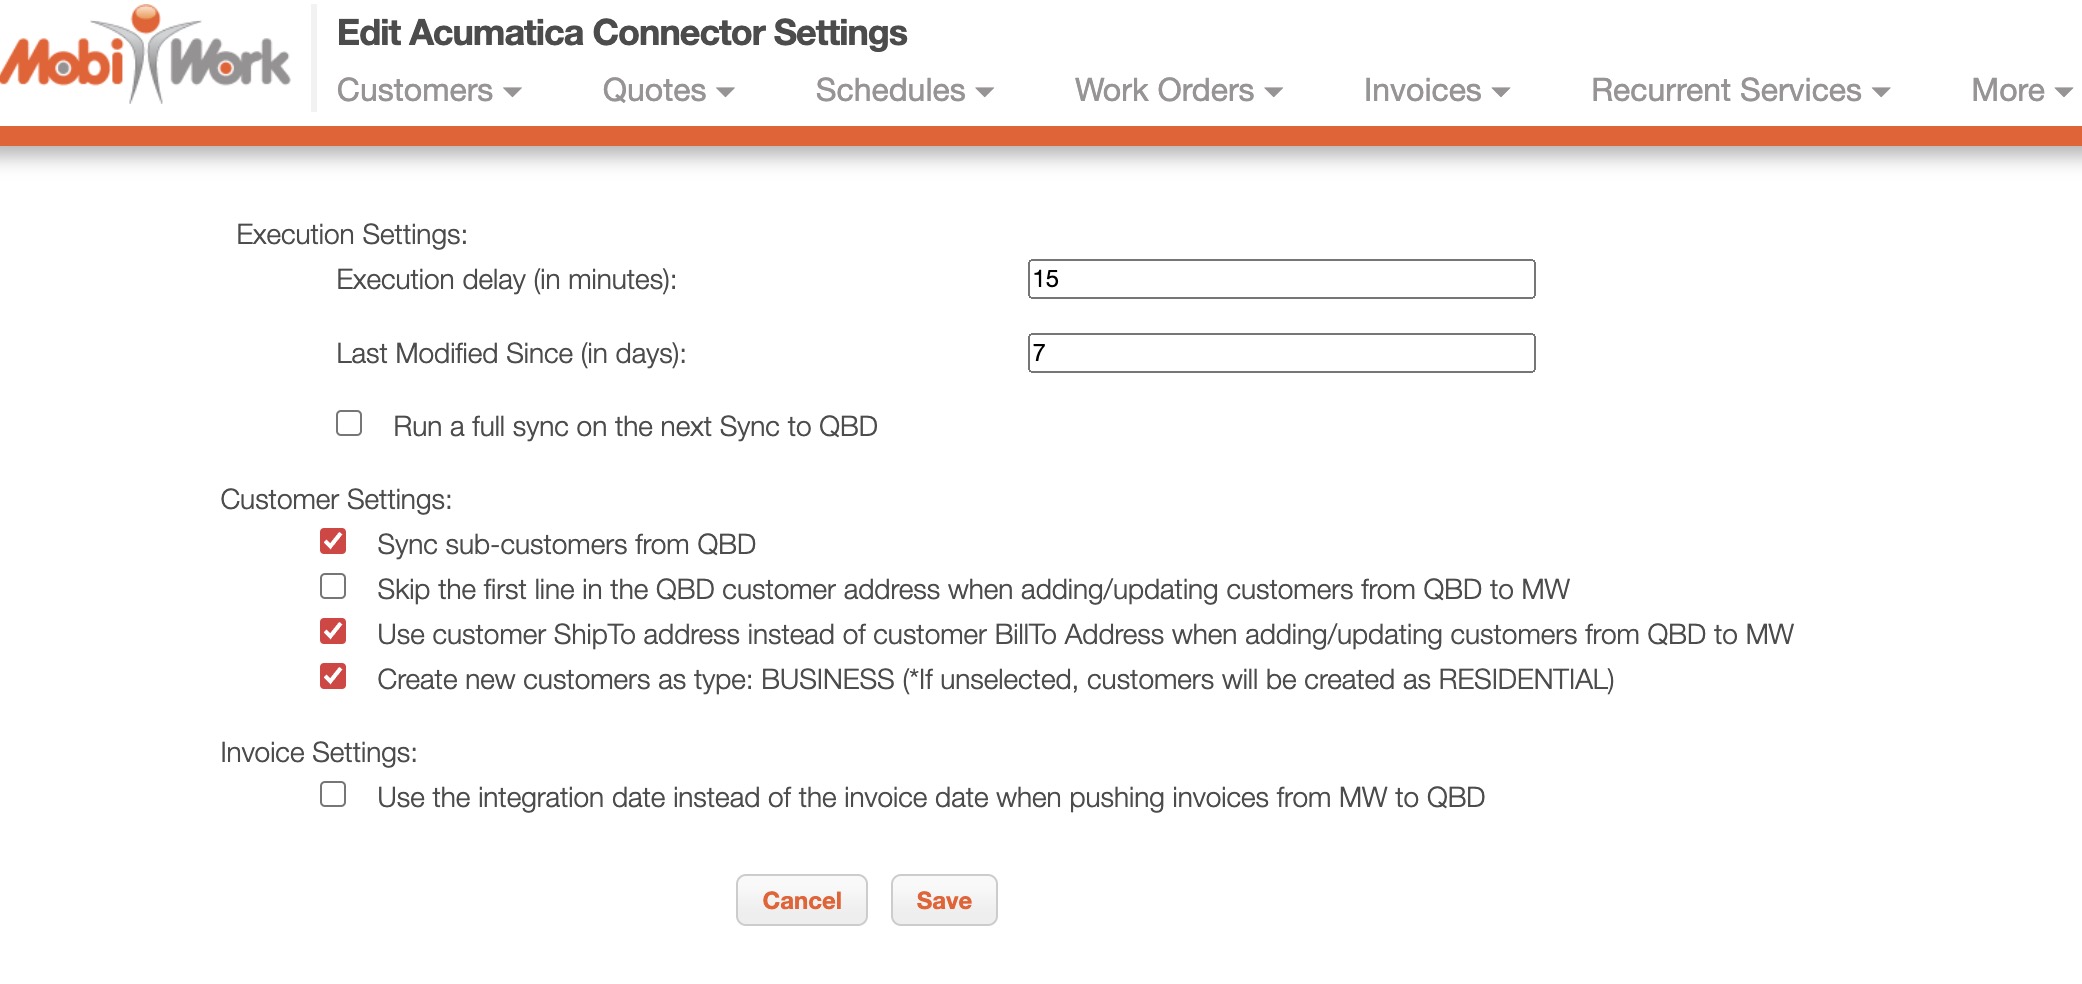
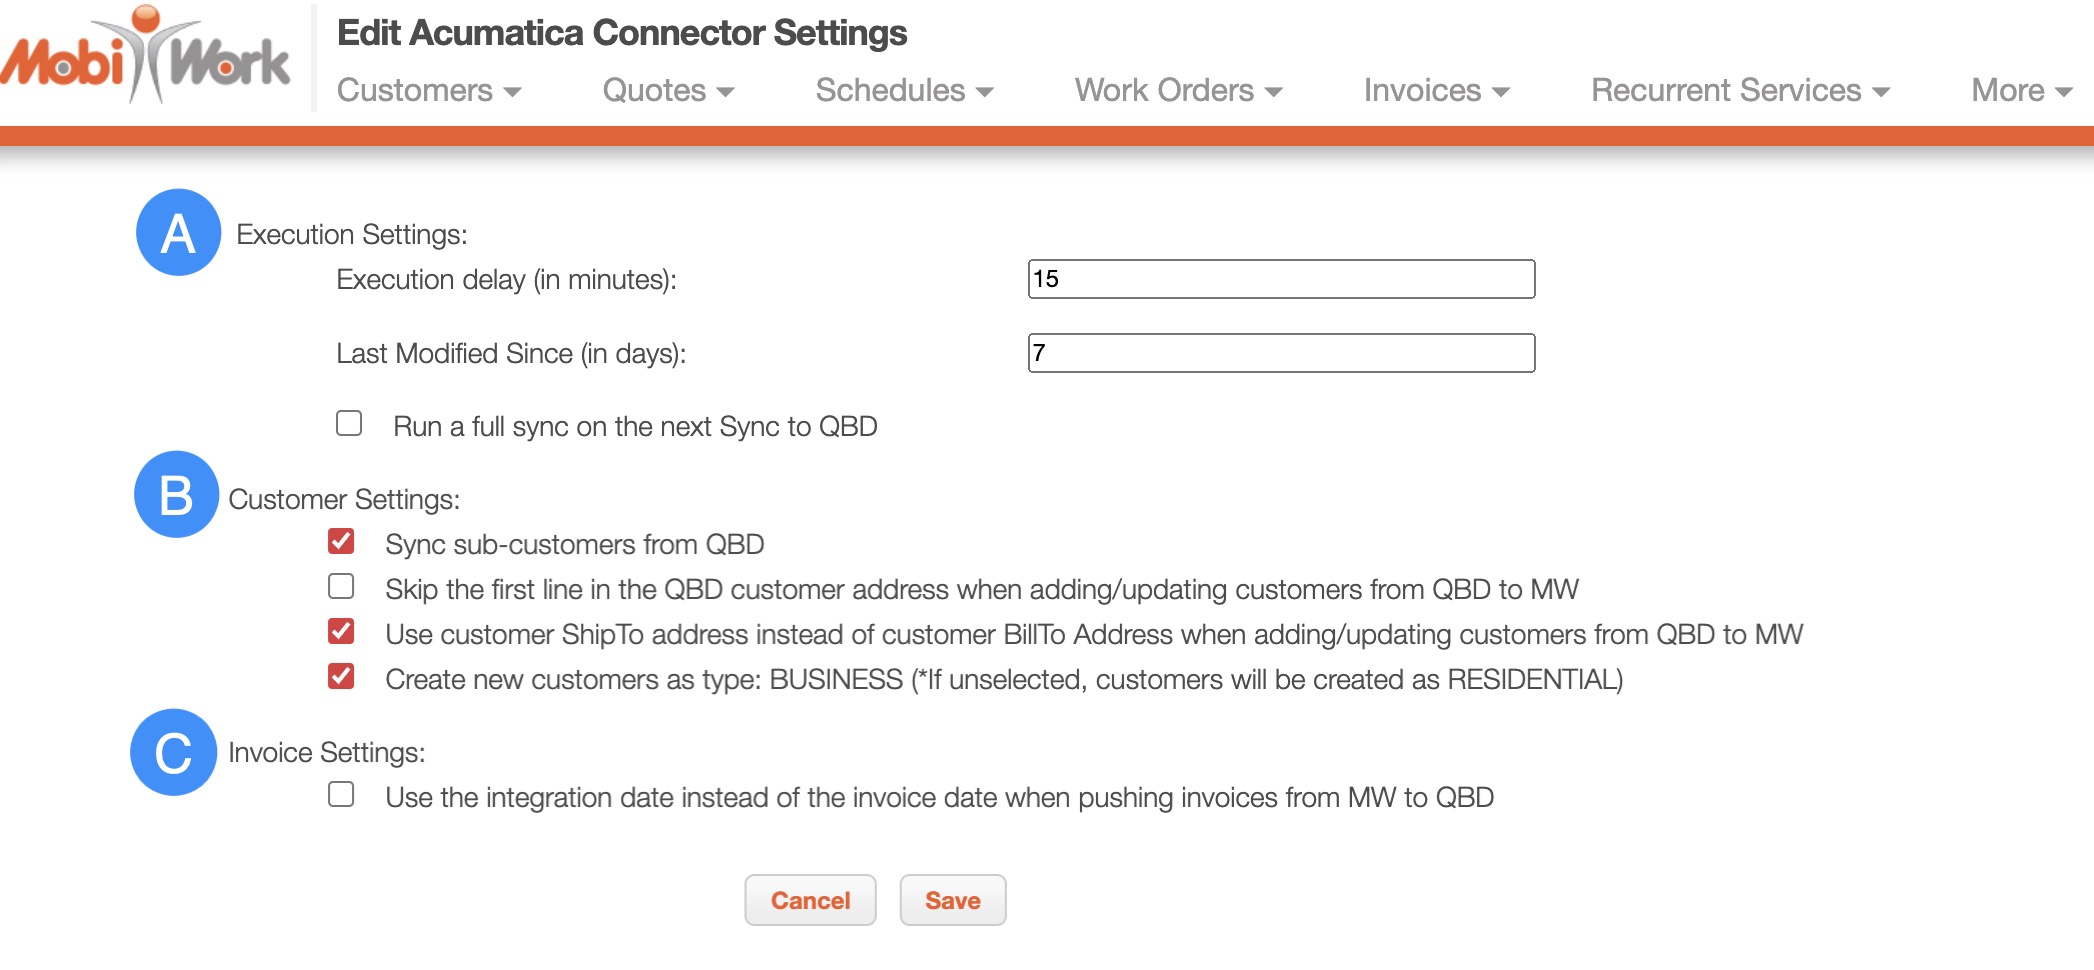
The "Execution Settings" section will allow you to modify how often your MobiWork and Acumatica data syncs and will also allow you to run a full system sync from MobiWork to Acumatica:

The terms found in this section are defined below:
Execution Delay (In Minutes)- Indicates how long the duration should be between running initial and subsequent synchronizations.
Last Modified Since (In Days)- Indicates how long ago in which updated records can be synced. Please note that anything greater than the indicated date range will not be included in the sync.
Run a full sync on the next Sync to Acumatica- Allows you to run a complete sync through all your MobiWork records to Acumatica. Once the sync is finished, this option will be unchecked; to run another full systems sync, you will need to check it again.
Note: Please note that the delay can be no shorter than 15 minutes. If the number is less than 15, then errors will occur with the synchronization.
Customer Settings
The "Customer Settings" section will allow you to indicate how your customers should be synced to Acumatica as well as what data should be synced:

The terms found in this section are defined below:
Sync sub-customers from Acumatica- If checked, allows you to sync sub-customers to MobiWork from Acumatica.
Skip the first line in the Acumatica customer address when adding/updating customers from Acumatica to MW- If checked, allows you to skip the first address line when updating or adding customers from Acumatica to MobiWork when syncing.
Use customer ShipTo address instead of customer BillTo Address when adding/updating customers from Acumatica to MW- If checked, allows you to use the ship-to address instead of the bill to address when updating or adding customers from Acumatica to MobiWork.
Create new customers as type: BUSINESS (*If unselected, customers will be created as RESIDENTIAL)- If checked, new customers will be created with the "BUSINESS" type.
Invoice Settings
The "Invoice Settings" section will allow you to indicate how your invoices should be synced to Acumatica:

The terms found in this section are defined below:
Use the integration date instead of the invoice date when pushing invoices from MW to Acumatica- If checked, invoices that are pushed to Acumatica from MobiWork will use the integration date instead of the invoice date.