To edit a customer, you will first need to be on the Customers feature page on MobiWork; for more information on how to access this page, please see the Customers List page.
Once you are on this page, there are four different ways you can edit a customer:
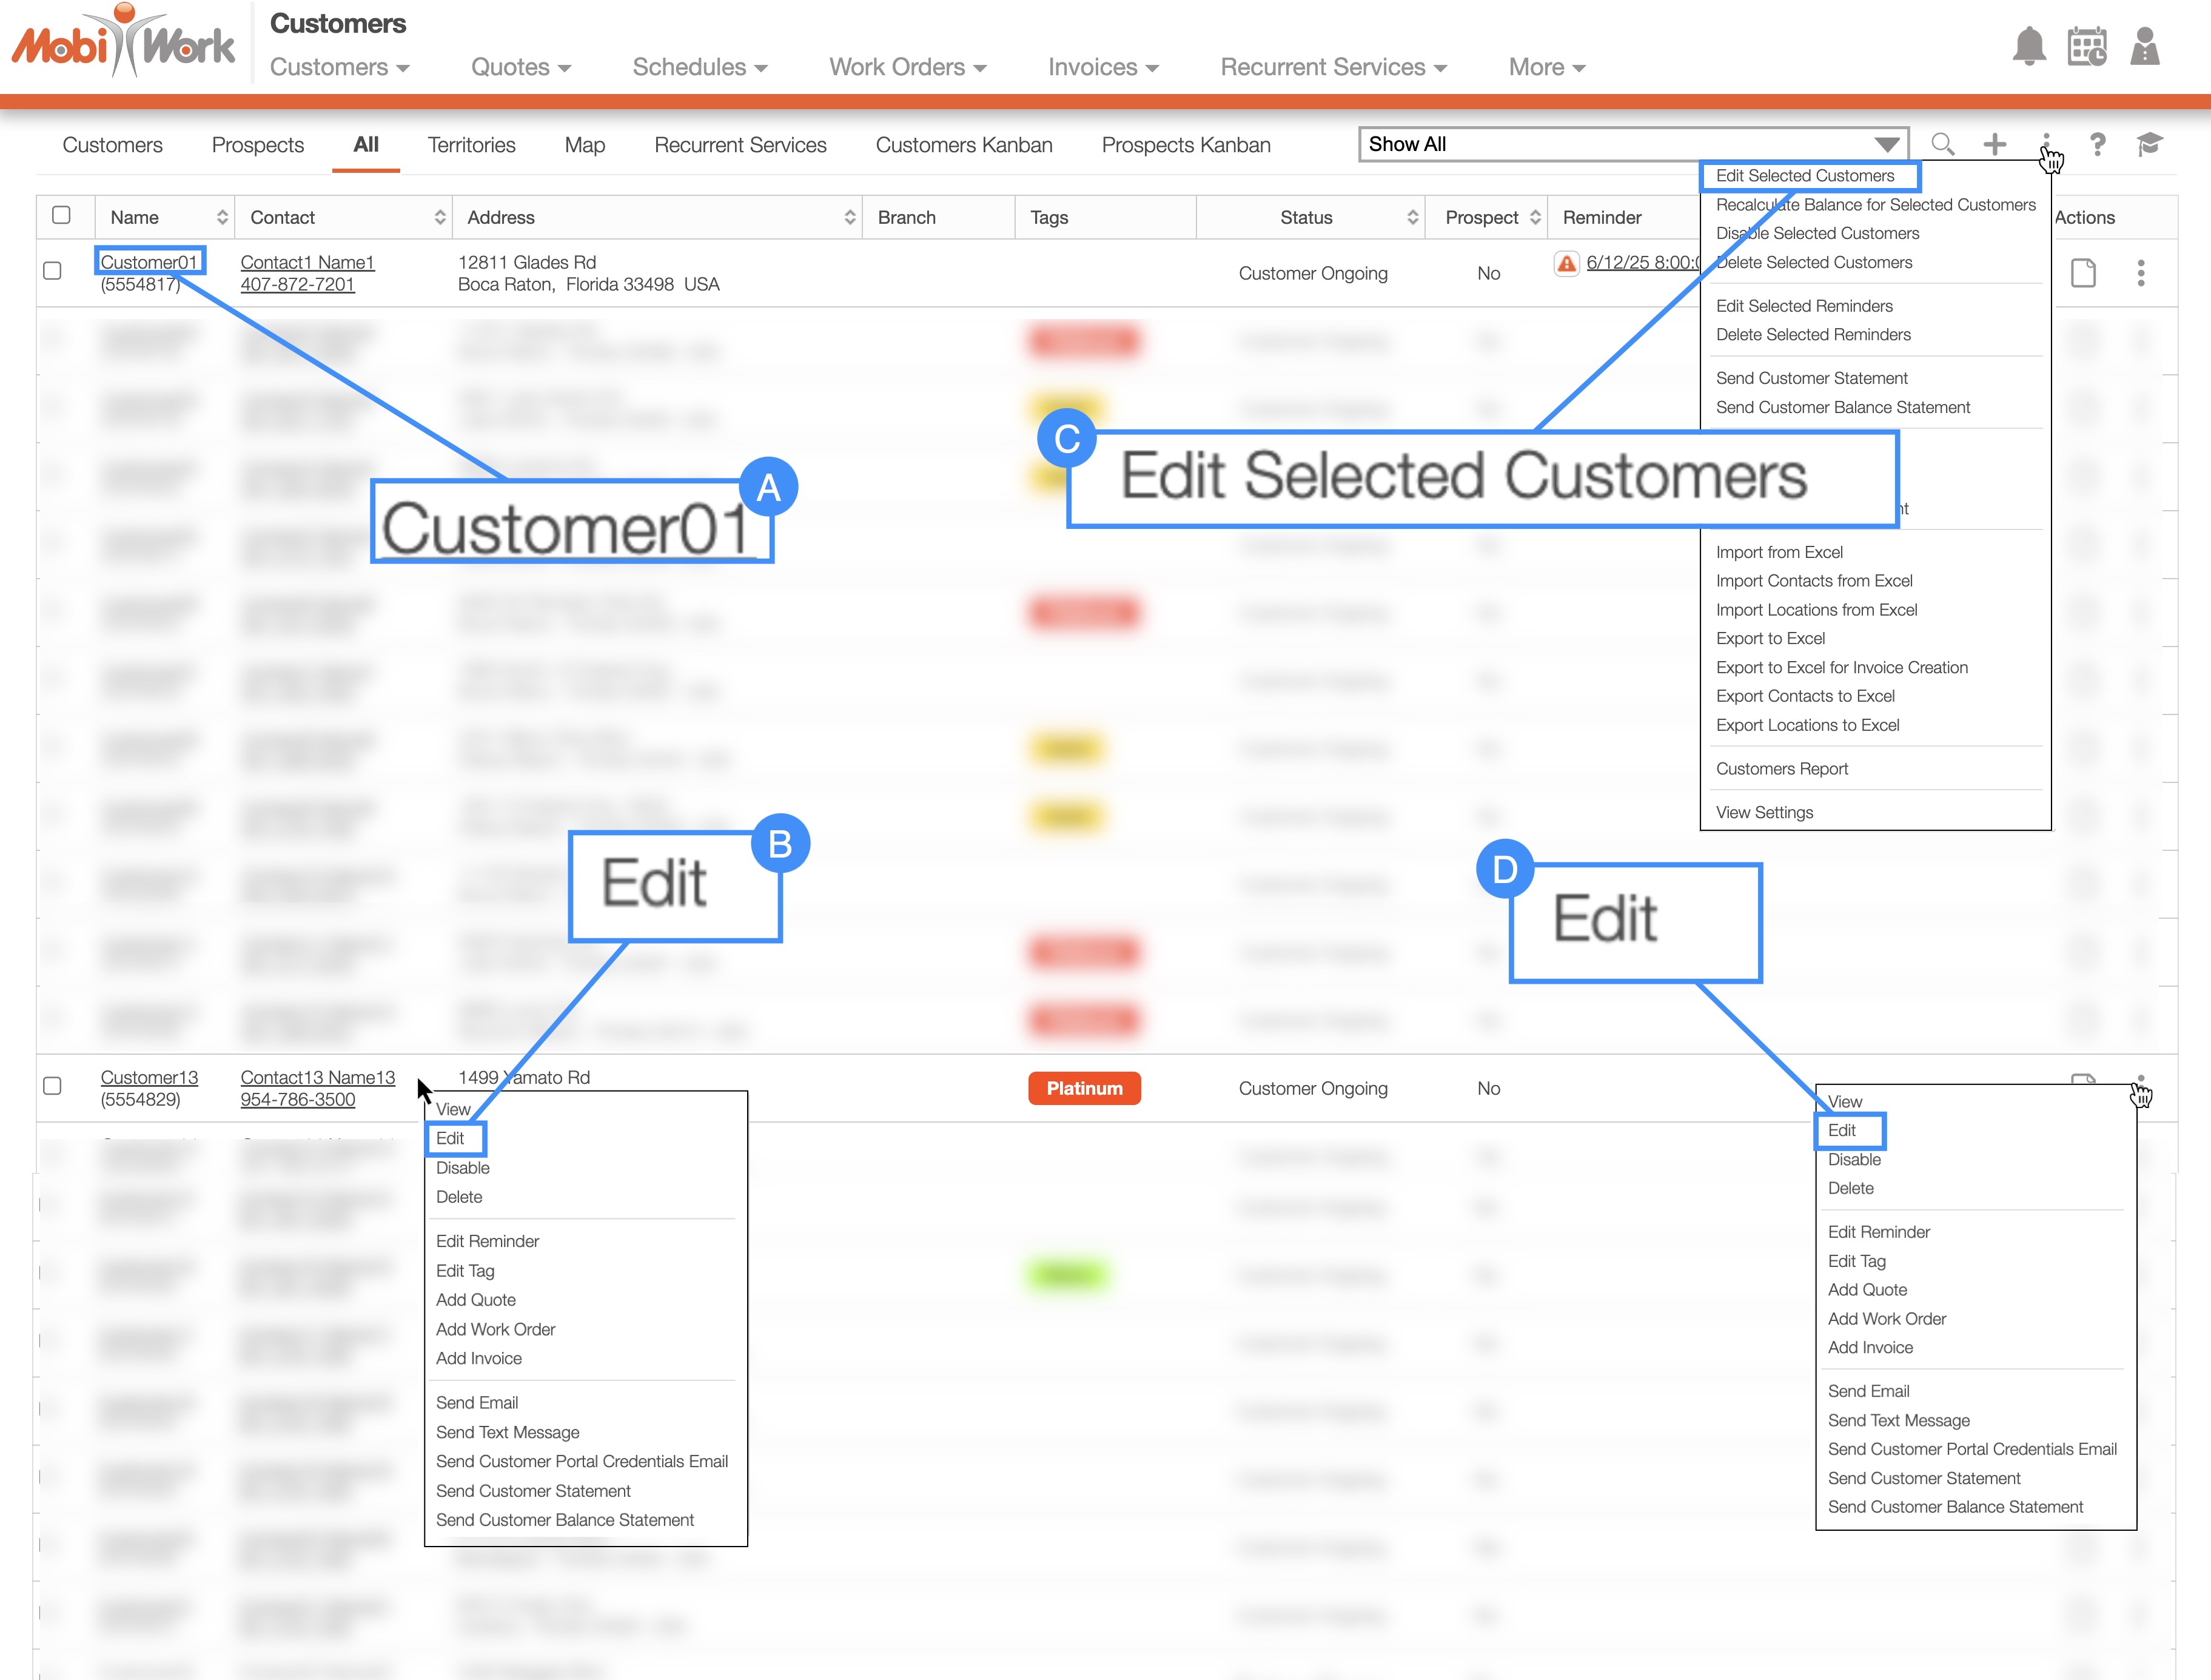
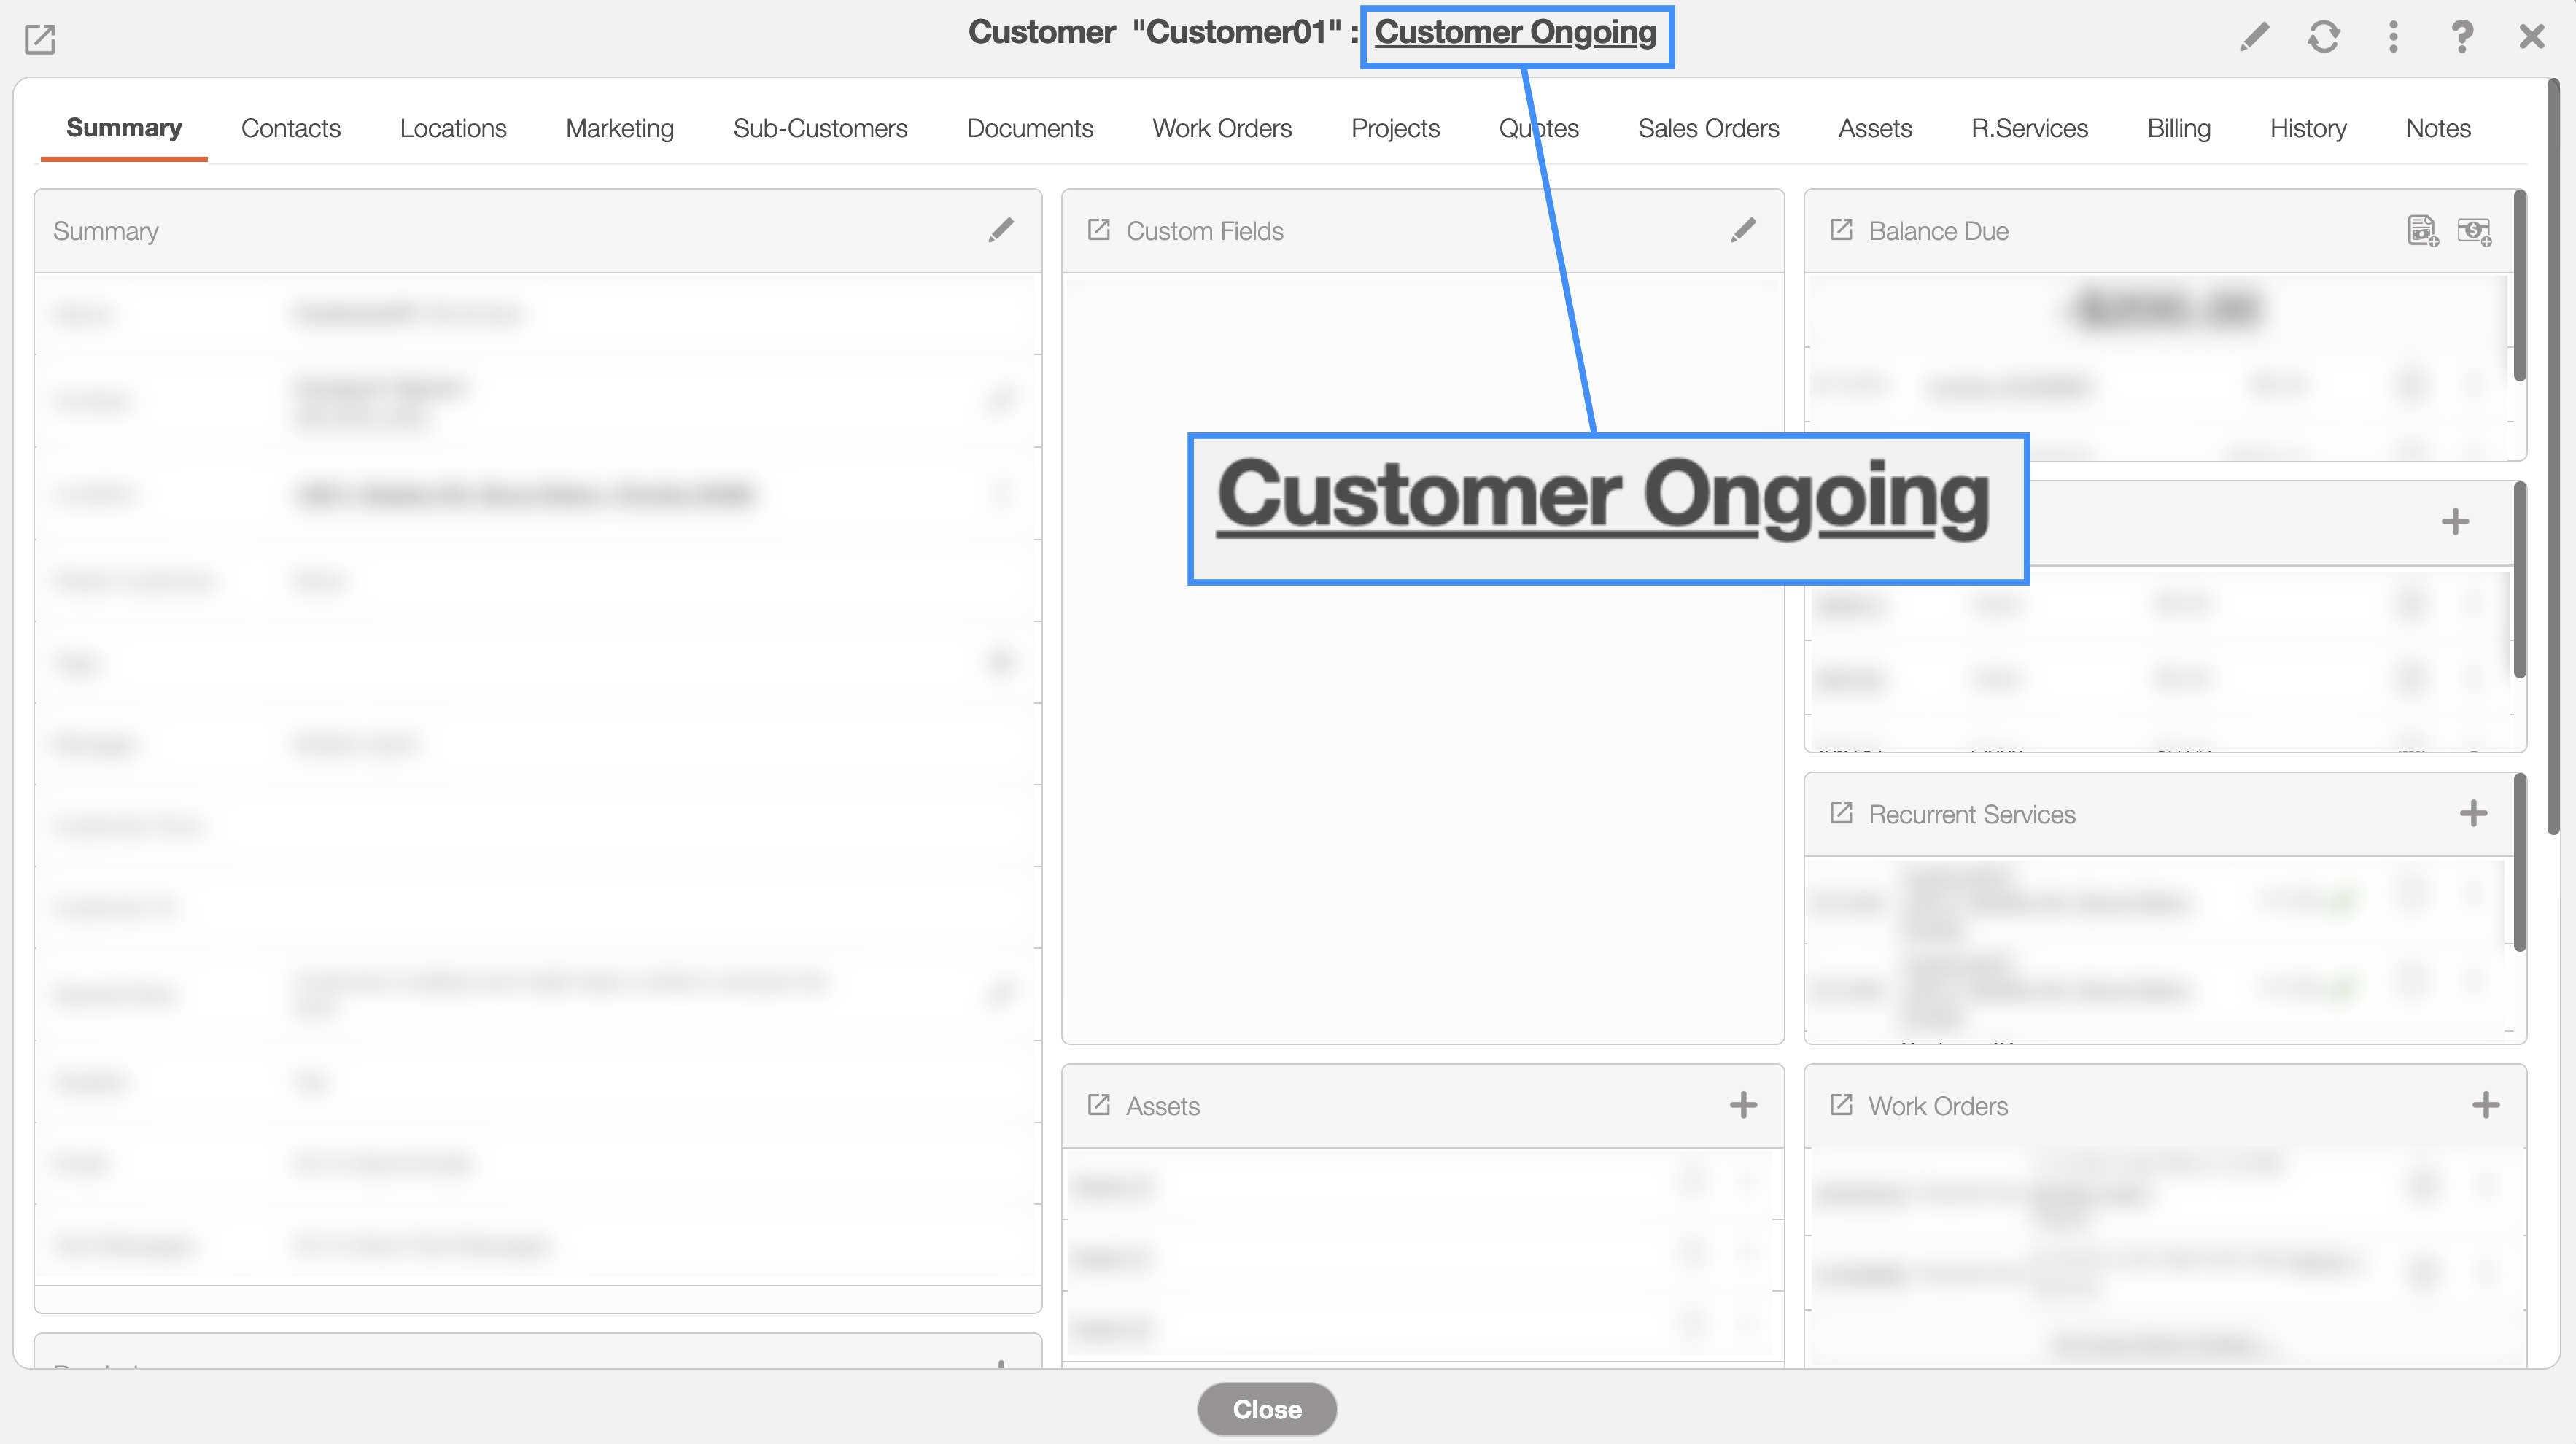
Clicking on the customer's name to open the View Customer pop-up window:
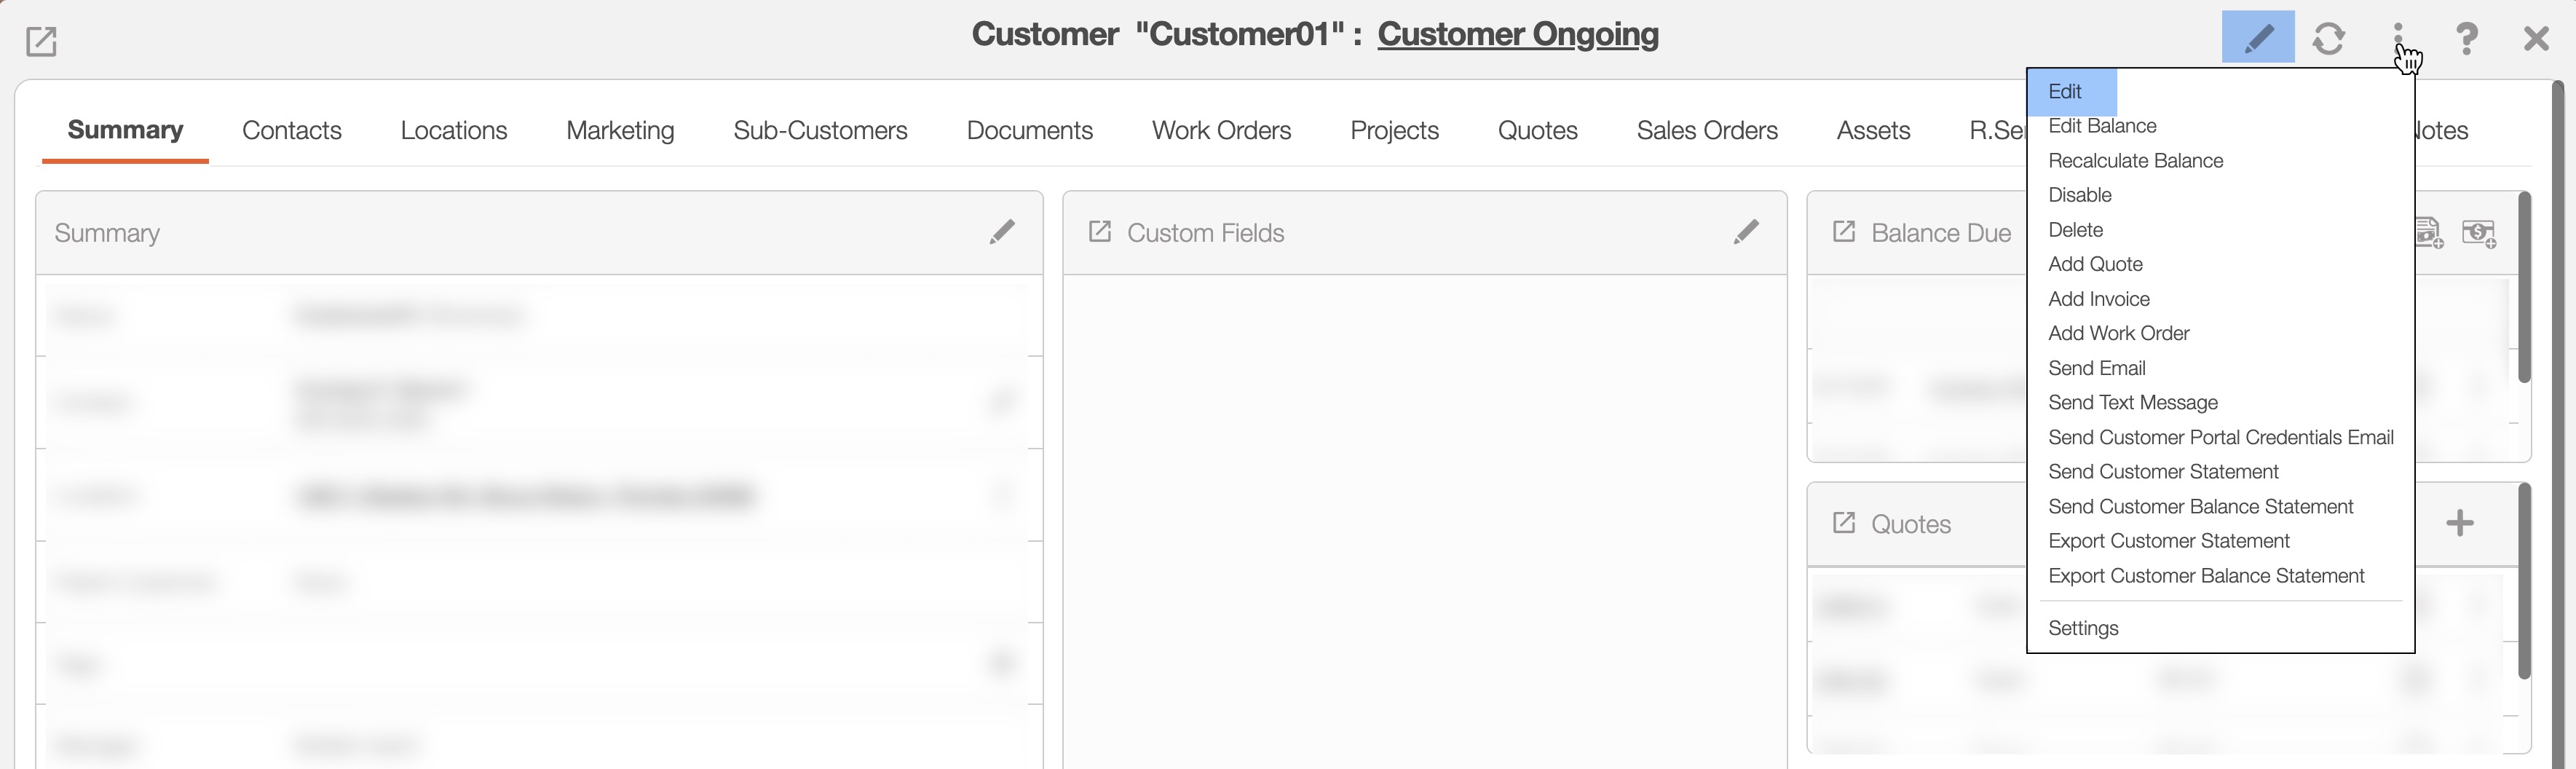
In the upper right-corner of the View Customer pop-up window, you will see a Pencil icon and the Individual Actions button. Either option will allow you to edit the customer:
Please note that there are many ways that you can access the View Customer pop-up window. Please see the View Customer page for the different ways that you can open the View Customer pop-up window.
Right-clicking on a customer or prospect to open the right-click options. The options that are displayed when you right-click on a contact are also available when you select the Individual Actions button.
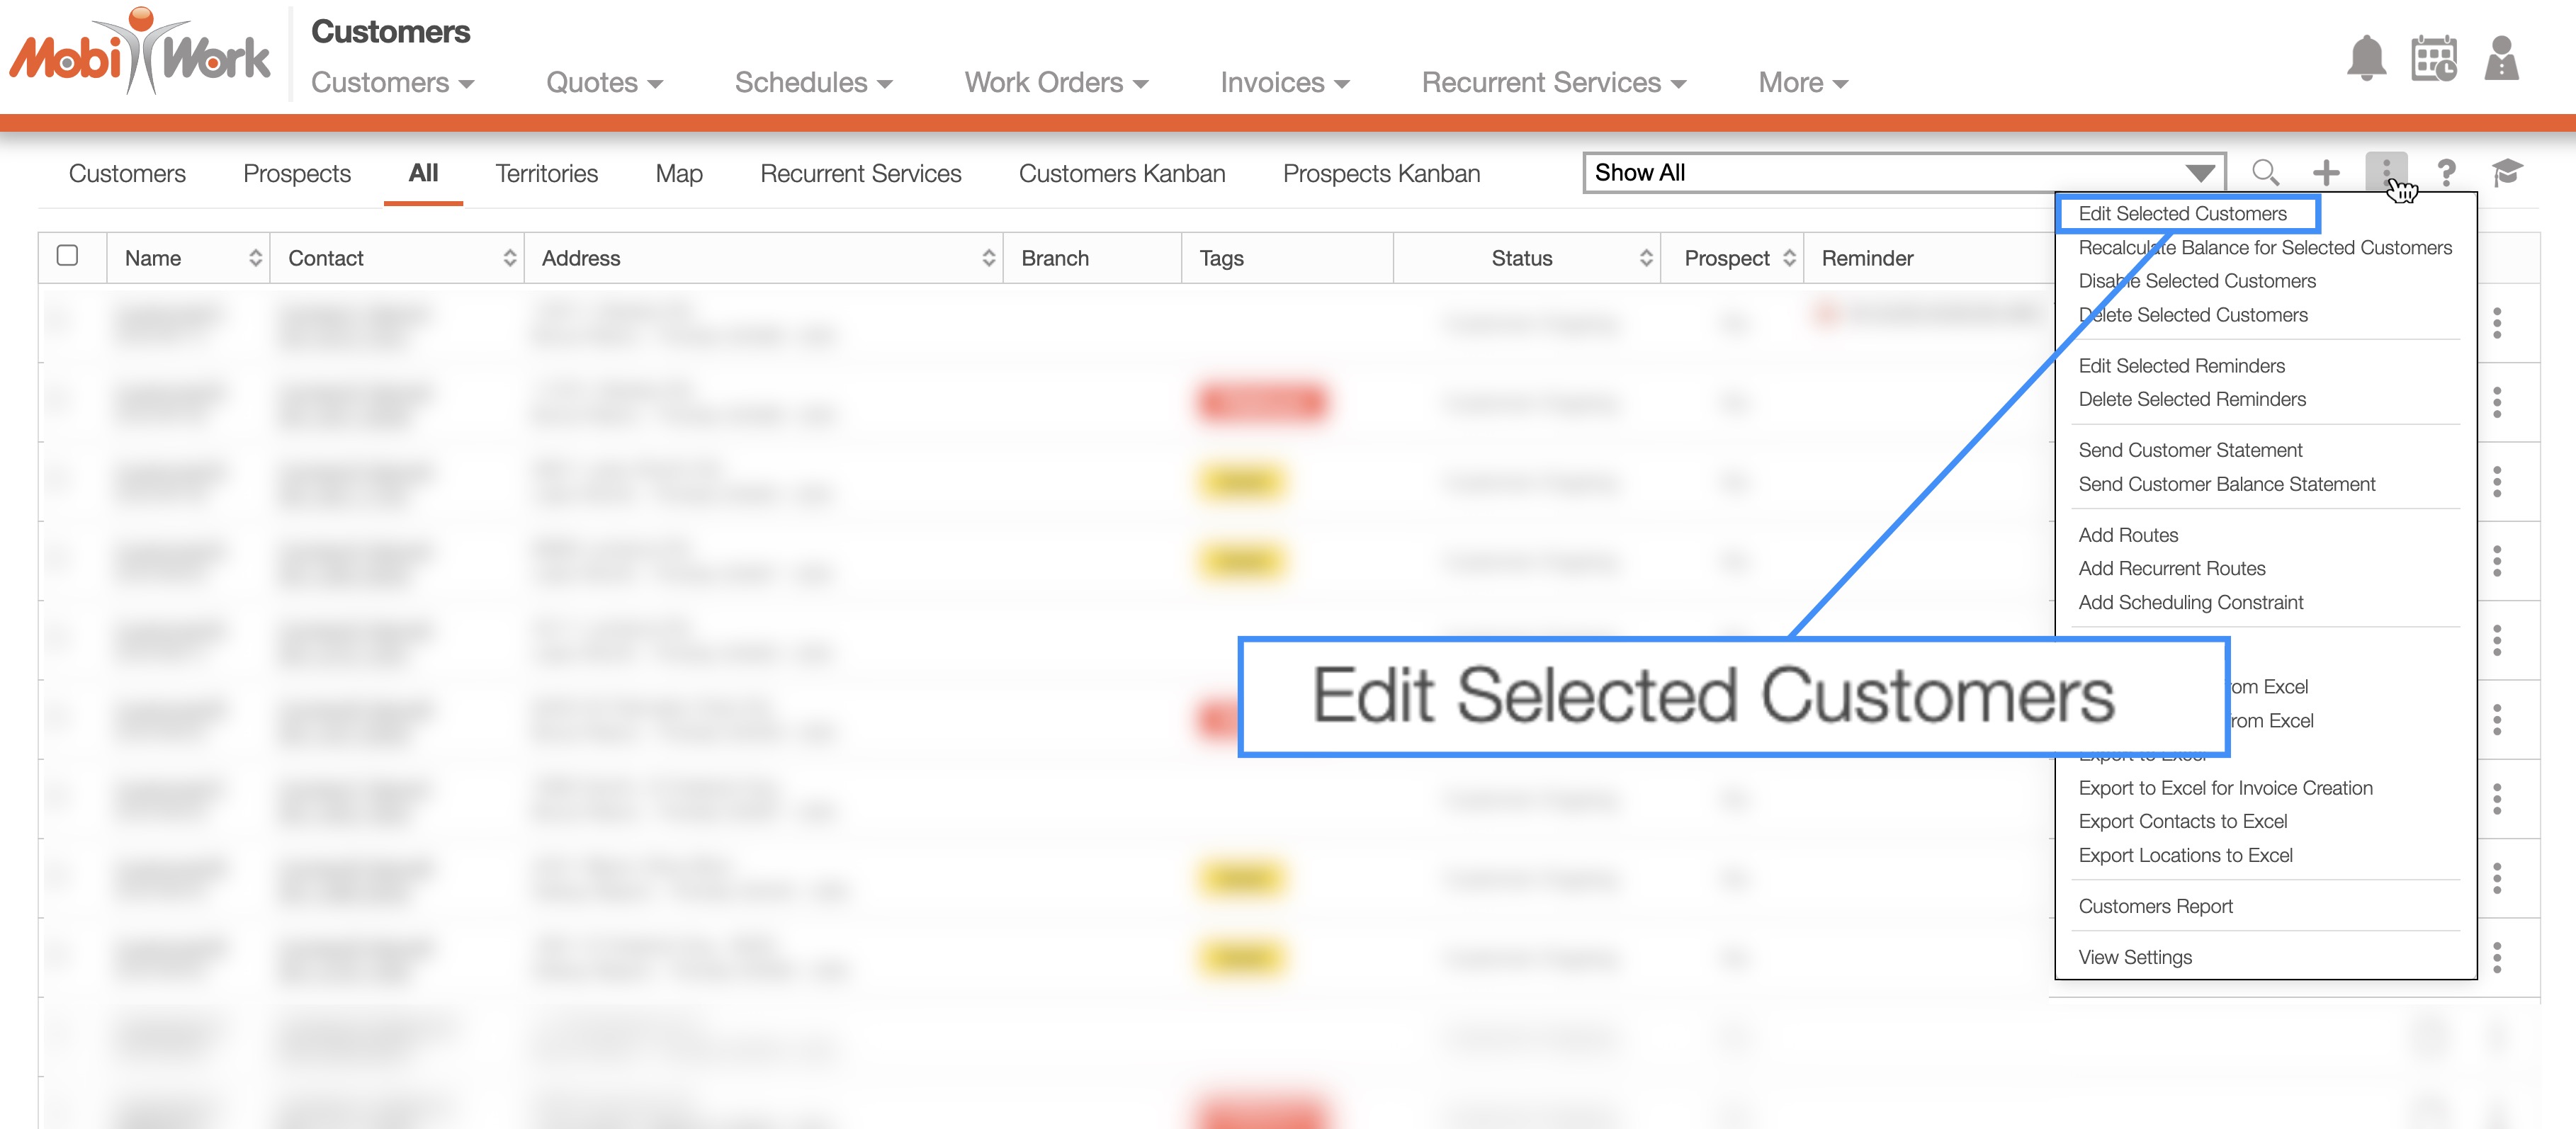
Selecting the More Actions button from the "Global Actions" section. Please note that this option will give you the ability to edit multiple customers at once.
Clicking on the Individual Actions button (the three vertical dots) from the "Actions" column. The options that are displayed from the Individual Actions button are the same as when you right-click on a contact.
The How to Access the Page section will highlight how to navigate to the Edit Customer pop-up window. Regardless of the method you choose, the Edit Customer pop-up window will appear.
Once the Edit Customer pop-up window appears update the fields that you would like to change for the selected customer. When you are finished updating the selected fields, click on the Save button:
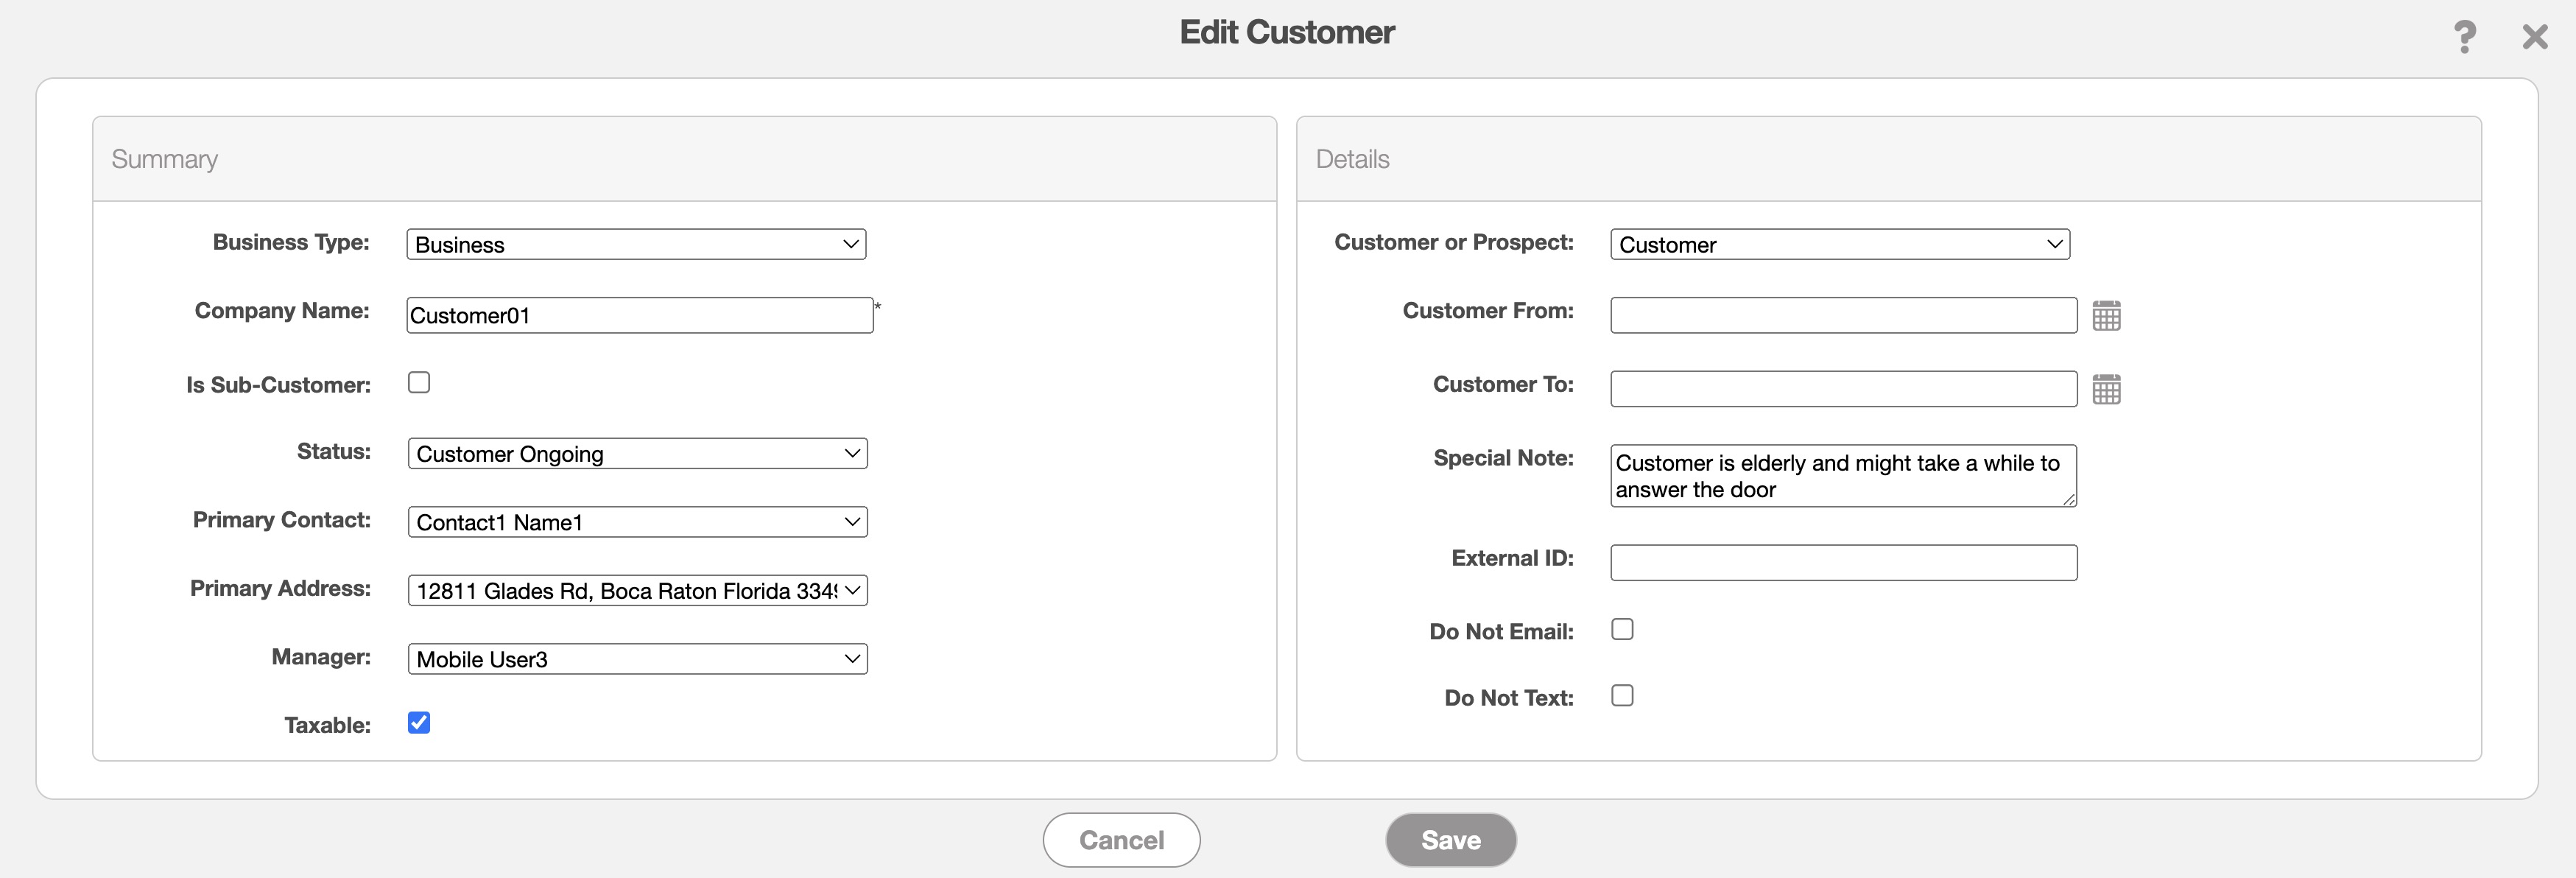
You can update the “Taxable," "Do Not Email," and "Do Not Send Texts" fields in the Edit Customer pop-up window.
The columns for the Edit Customer pop-up window are defined below:
| Name: | Description: |
|---|---|
| "Business Type" | Selects the type of customer (i.e., residential or business). |
| "Company Name" | The name of the company. This field will only appear if Business is selected from the Business Type drop-down. |
| "Is Sub-Customer" | Will indicate that the designated customer profile is a sub-customer of a specified parent customer. |
| "Parent Customer" | You can associate the selected customer to a parent customer. |
| "Send Bill To" | Indicates who the bill should be sent to. |
| "Status" | Edits the status of the customer. The status can be "Open," "Ongoing," "At Risk," "On Hold," or "Lost." |
| "Primary Contact" | The primary contact for the customer profile. |
| "Primary Address" | The primary address for the primary customer. |
| "Manager" | The name of the user in charge of the customer. |
| "Taxable" | is if tax needs to be calculated for the invoice for this customer. |
| "Customer or Prospect" | Select from the drop-down if the contact is a prospective customer or a customer. |
| "Percentage" | A sales funnel to measure how close a prospect is to becoming a customer; the percentage will only appear if prospect is checked off when you create a customer profile. |
| "Expected Closing" | The date when the prospect will sign up as a customer. |
| "Customer From" | The start date the individual or company started being a customer. |
| "Customer To" | The end date the individual or company stopped being a customer. |
| "Special Note" | Any special notes or comments regarding the customer. |
| "External ID" | is the ID you use to identify a customer in your database. |
| "Do Not Email" | Indicates that the customer does not want to receive automated emails from the system. |
| "Do Not Send Texts" | Indicates that the customer does not want to receive automated text messages from the system. |
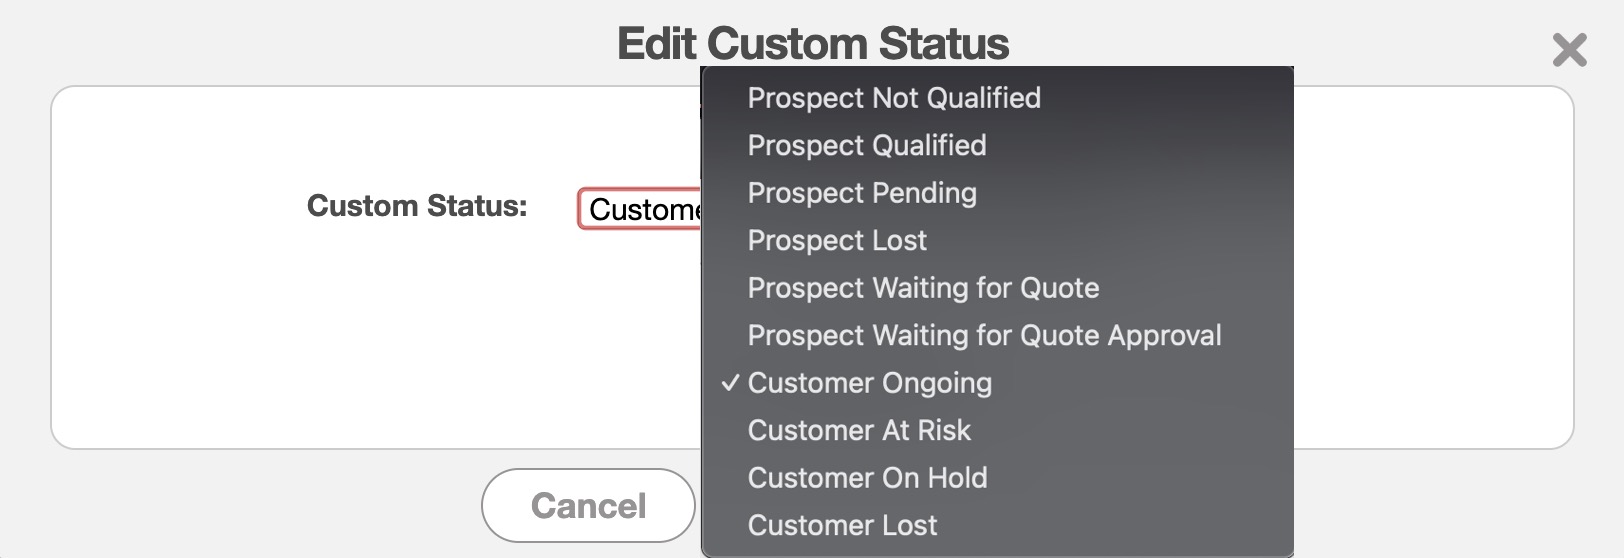
Instead of editing the entire customer, MobiWork gives you the option to update the status. There are several different ways to edit the status for an individual customer; you can either edit the status from the View Customer pop-up window or the "List" tab.
Regardless, of how you decide to update the status, the Edit Custom Status pop-up window will appear. In this window, select the new status and then click the Save button:
View Customer Window
When you acccess the View Customer pop-up window, you will be able to update the customer's status by clicking on the status from the pop-up window's header:
This option will allow you to update the status of a singular customer.
Customer Global Actions
Using the More Actions menu on the Customers feature page, you can update not only the customer's status, but also their type, enabled status, integration status, and the dates during which the customer is active with your company.
Check off the desired customers you would like to edit; if you would like to edit all your customers you can click on the topmost checkbox (Multiple Selection Area) located in the Customers feature page.
Click on the More Actions button and from the drop-down select the "Edit Selected Customers" option:
Once you click on the "Edit Selected Customers" option the Edit Selected Customers pop-up window will appear:
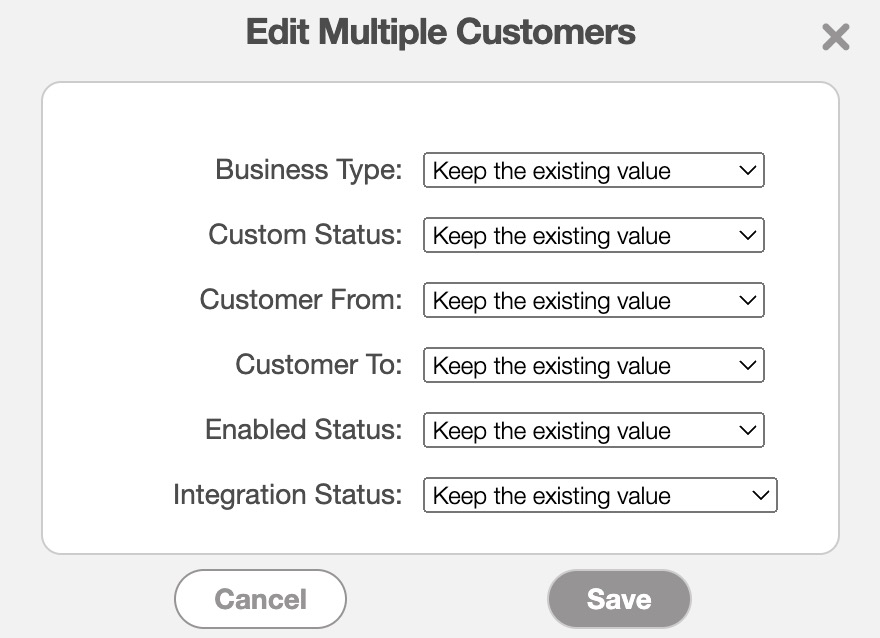
From the pop-up window, select the new values for the "Business Type," "Custom Status," "Customer From," "Customer To," "Enabled Status," and "Integration Status" fields:
The "Business Type" drop-down will update the customer's type (i.e., residential or business).
The "Custom Status" drop-down will update the status of the customers (The status can be "Open," "Ongoing," "At Risk," "On Hold," or "Lost").
The "Customer From" drop-down will update the date when the individual or company started being a customer.
The "Customer To" drop-down will update the date when the individual or company stopped being a customer.
The "Enabled Status" drop-down will either show customer (Enabled) or hide customers (Disabled).
The "Integration Status" is the integration status of the customer.
Once you have selected the new values from the drop-downs, click on the Save button.
If you need to fix a typo in a residential customer's name, you will need to edit the contact associated with the customer profile.
You can edit a contact under the customer profile. All listed contacts associated with the customer can be found in the "Contacts" tab within the View Customer pop-up window.
For more information on accessing this tab, please refer to the View Customer page:
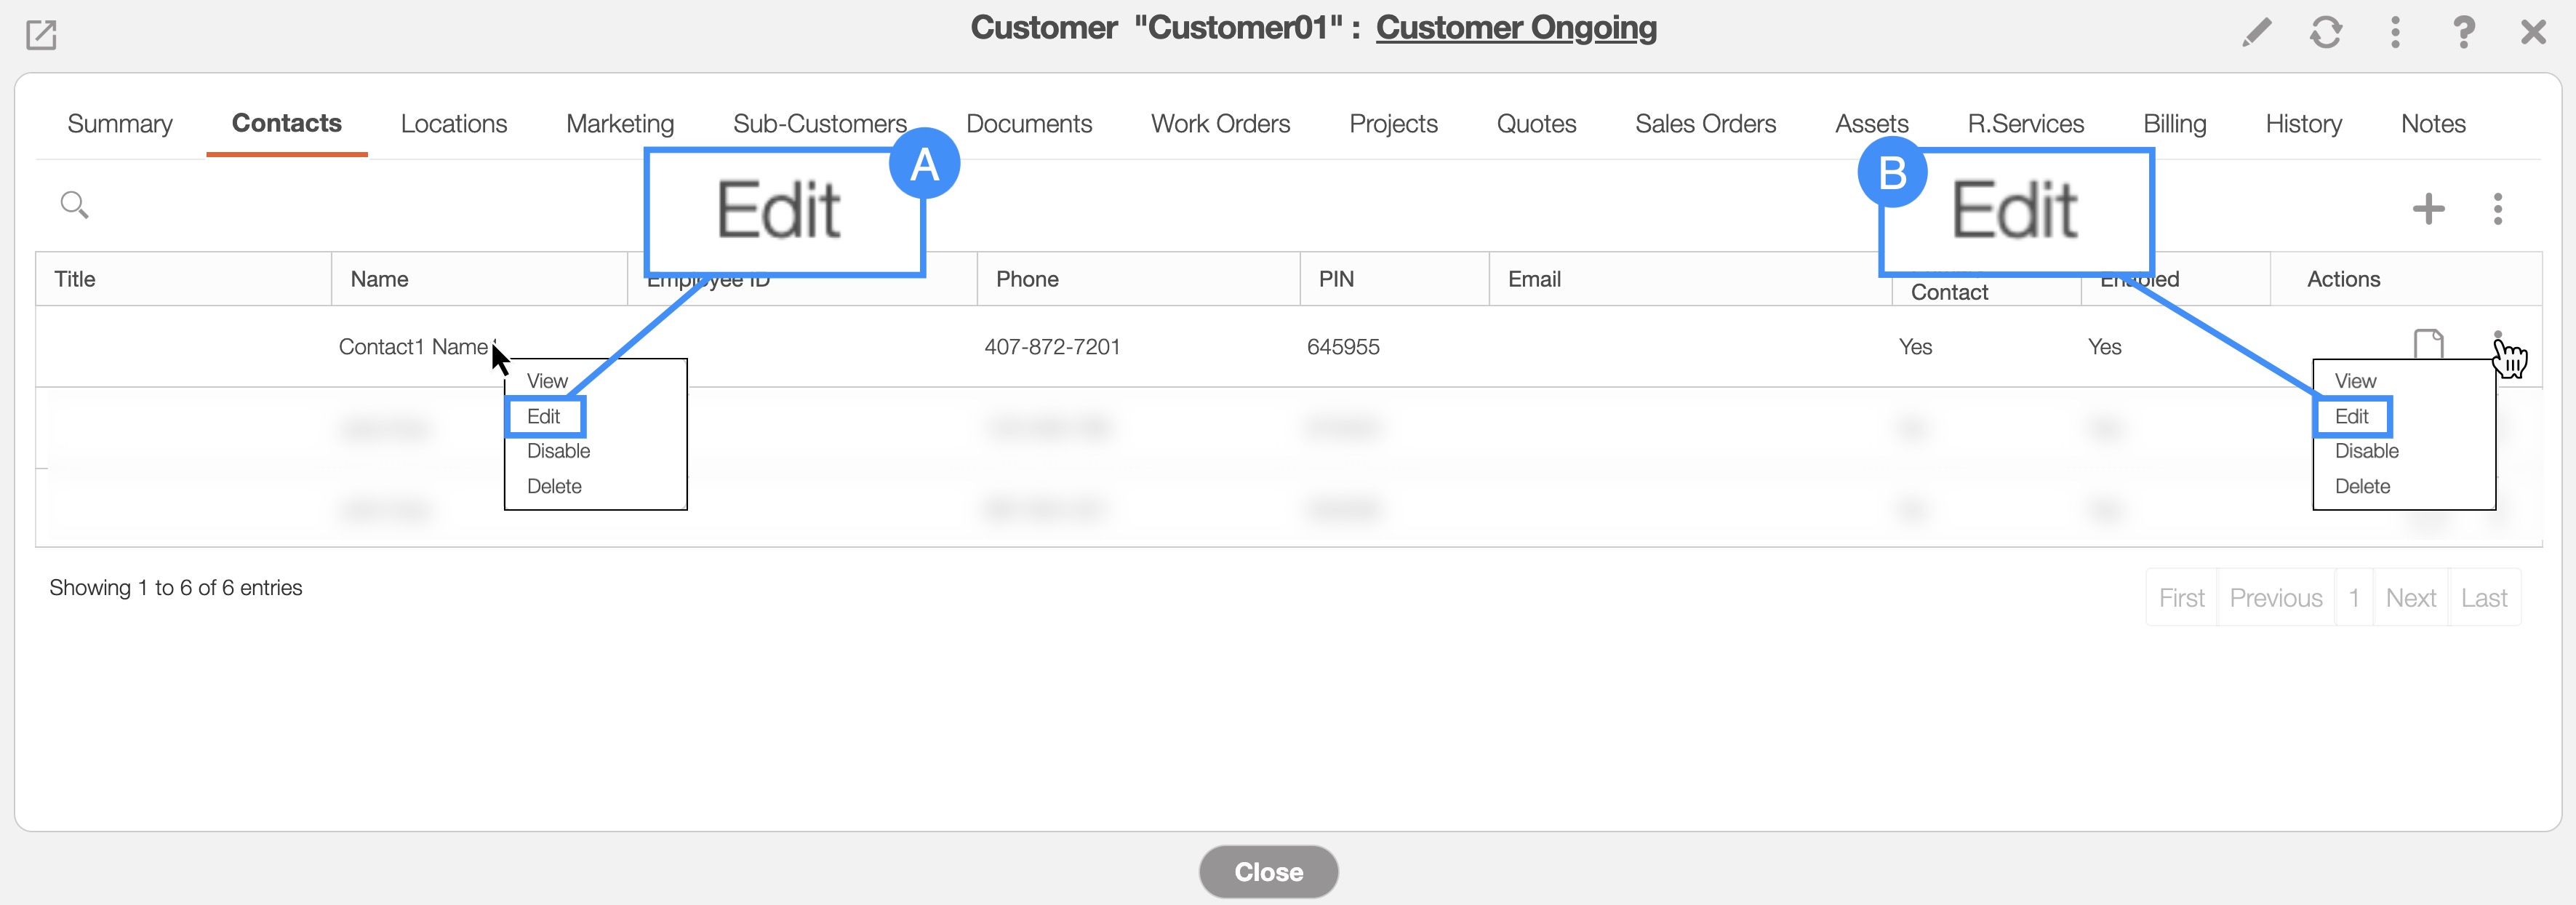
On the "Contacts" tab, there are two different ways you can edit a contact:
- By right-clicking on the contact and selecting the "Edit" option from the drop-down menu.
- By clicking on the individual Actions button and selecting the "Edit" option from the drop-down menu.
The Edit Contact pop-up window will then appear:
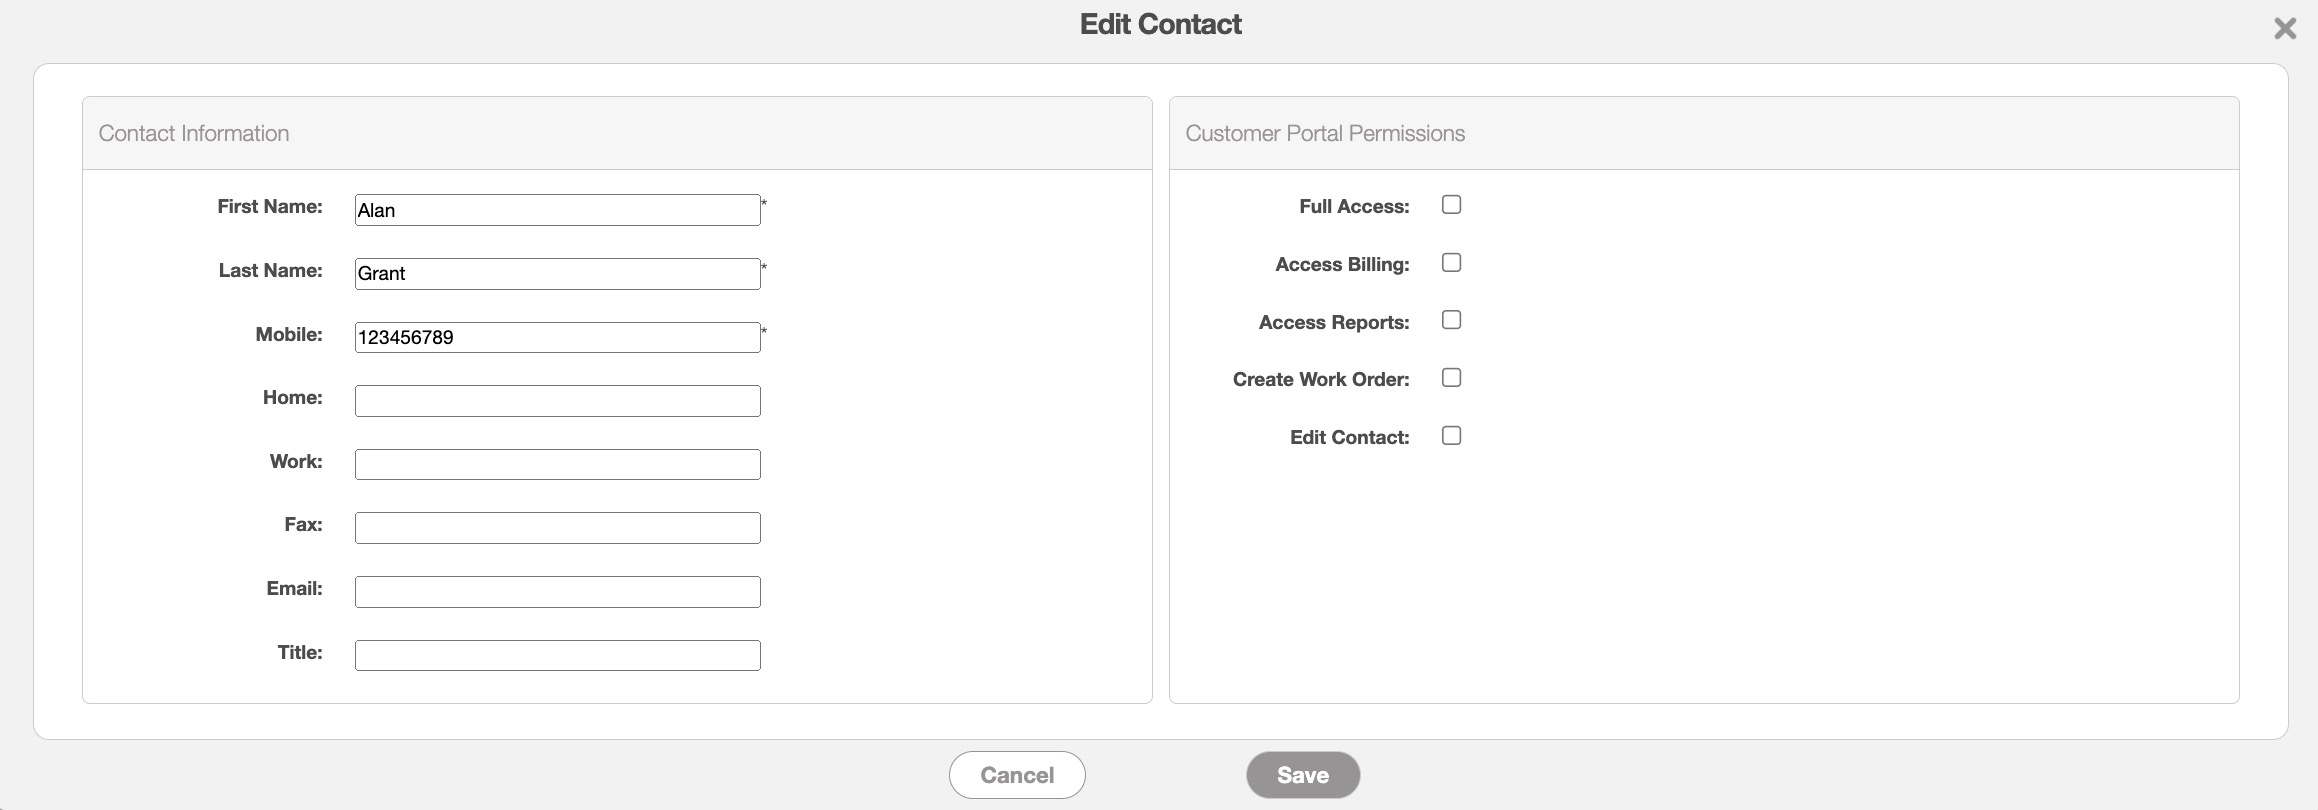
In this window, enter the following details:
Contact's first and last name.
Associated phone numbers.
Email address.
Desired honorific (Mr., Mrs., Dr., etc.).
You can also select which features the contact has access to from the customer portal. By checking the relevant boxes, the contact will have access to the selected features.
Once you are satisfied with the information entered, click on the Save button.
You can adjust the customer's balance to be applied to future invoices and billing. This feature can be used to store customer credit or to edit the customer's outstanding invoices. To edit the balance, click on Individual Actions in the View Customer pop-up window. From the drop-down menu, select the "Edit Balance" option:

The Edit Balance pop-up window will appear. Enter the desired amount and click the Save button:
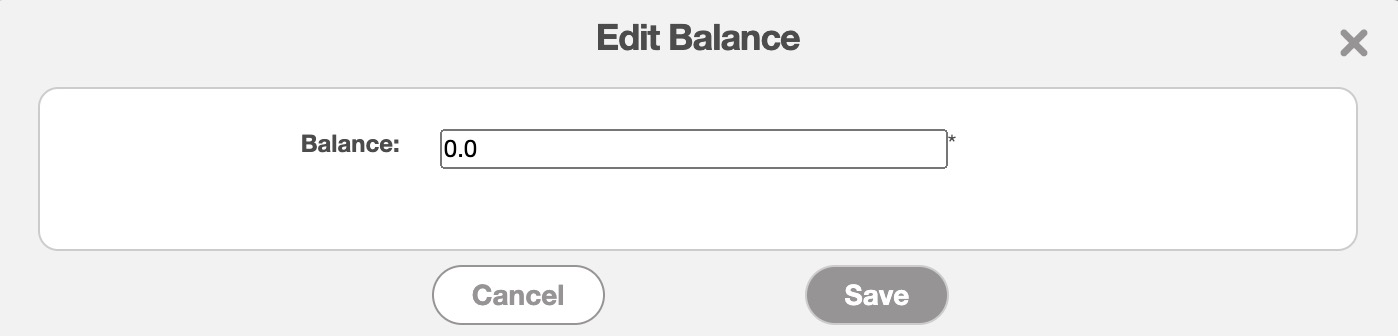
Please note that for the invoice balance to be displayed in this panel, the invoice status must be set to "Service Completed," "Customer Invoiced," or "Paid." The prepayment amount or invoice will be applied to the outstanding balance.
The "Recalculate Balance" option will update the customer balance based on recent changes to the invoice and billing, thus issuing a reset to ensure all information is accurately processed.