
The easiest way to access the View Delivery Items pop-up window is through the "List" tab. For more information on how to access the "List" tab, please see the Delivery Items List page.
Once you are on the "List" tab, there are four different ways to access the View Delivery Items pop-up window:

Select the desired Delivery Item ID
Right-click on the selected delivery item and click on the "View" option from the drop-down.
Click on the "View" option from the Individual Actions drop-down.
Select the View icon under the "Actions" column
Once you open the View Delivery Items pop-up window, you will be automatically directed to the "Summary" tab:

These features are available in all four tabs and in both, the pop-up window and the full-size view:
Please note that if you would like to easily close this pop-up window, you can click on the esc button from your keyboard.
Delivery Items Full-Size View
By clicking on the upwards arrow in the left-hand corner, you can expand the View Delivery Items pop-up window so that it is full-size:

Delivery Items Tabs
There are four tabs in all for the View Delivery Items pop-up window; each tab displays different information regarding the delivery item:
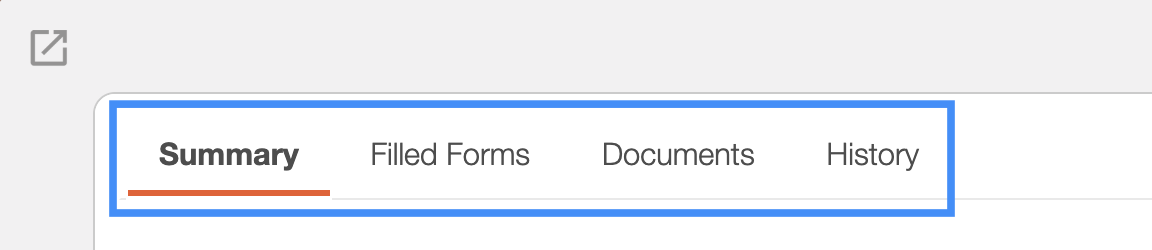
You can navigate to other tabs by clicking on the desired tab.
Delivery Items ID
The delivery item's name will be displayed here:

Upper Right Corner Actions
The Delivery Item's Upper Right Corner Actions can be found in the top-right corner of the View Delivery Items pop-up window. These actions are located in this section, regardless of the tab you are on:
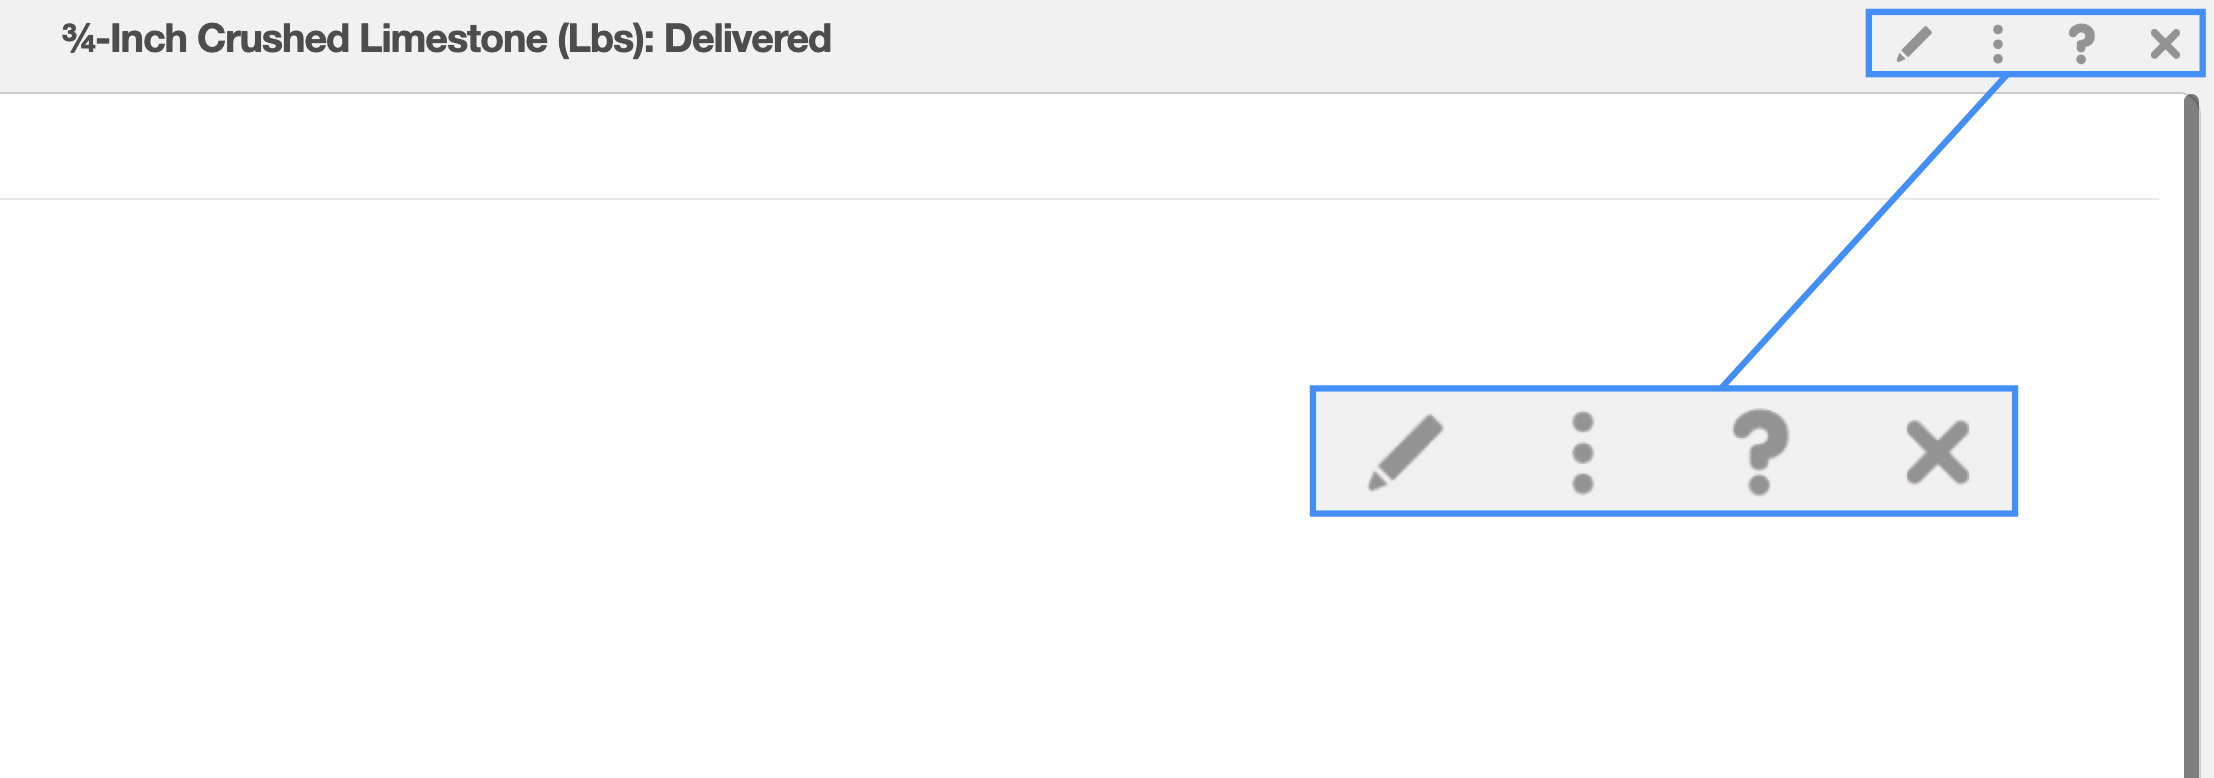
The Upper Right Corner Actions section includes:
The Pencil button will allow you to edit the delivery item.
The Individual Actions will allow you to perform various actions.
The Question Mark button which will direct you to the respective MobiWork Features page.
The X will close out of the View Delivery Items pop-up window.
After clicking on the vertical three dots in the top-right corner, the Individual Actions drop-down menu will appear:
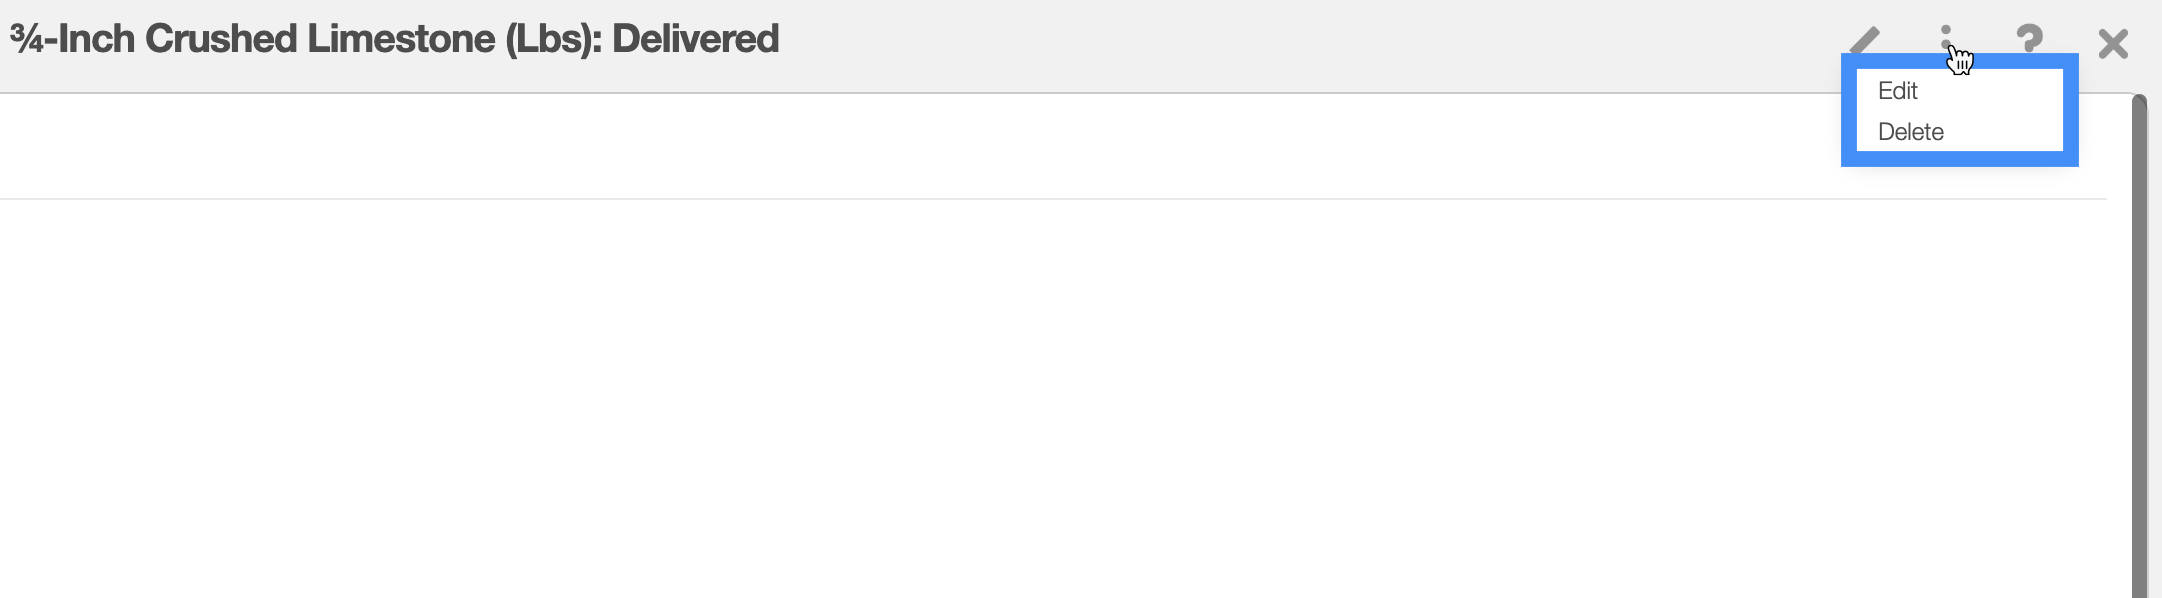
From the Individual Actions drop-down menu, you can select various actions that will help manage the specified delivery item.
The complete list of actions found in the Individual Actions drop-down menu are defined below:
| Name: | Description: |
|---|---|
| "Edit" | Edits the selected delivery item. |
| "Delete" | Deletes the selected delivery item. |
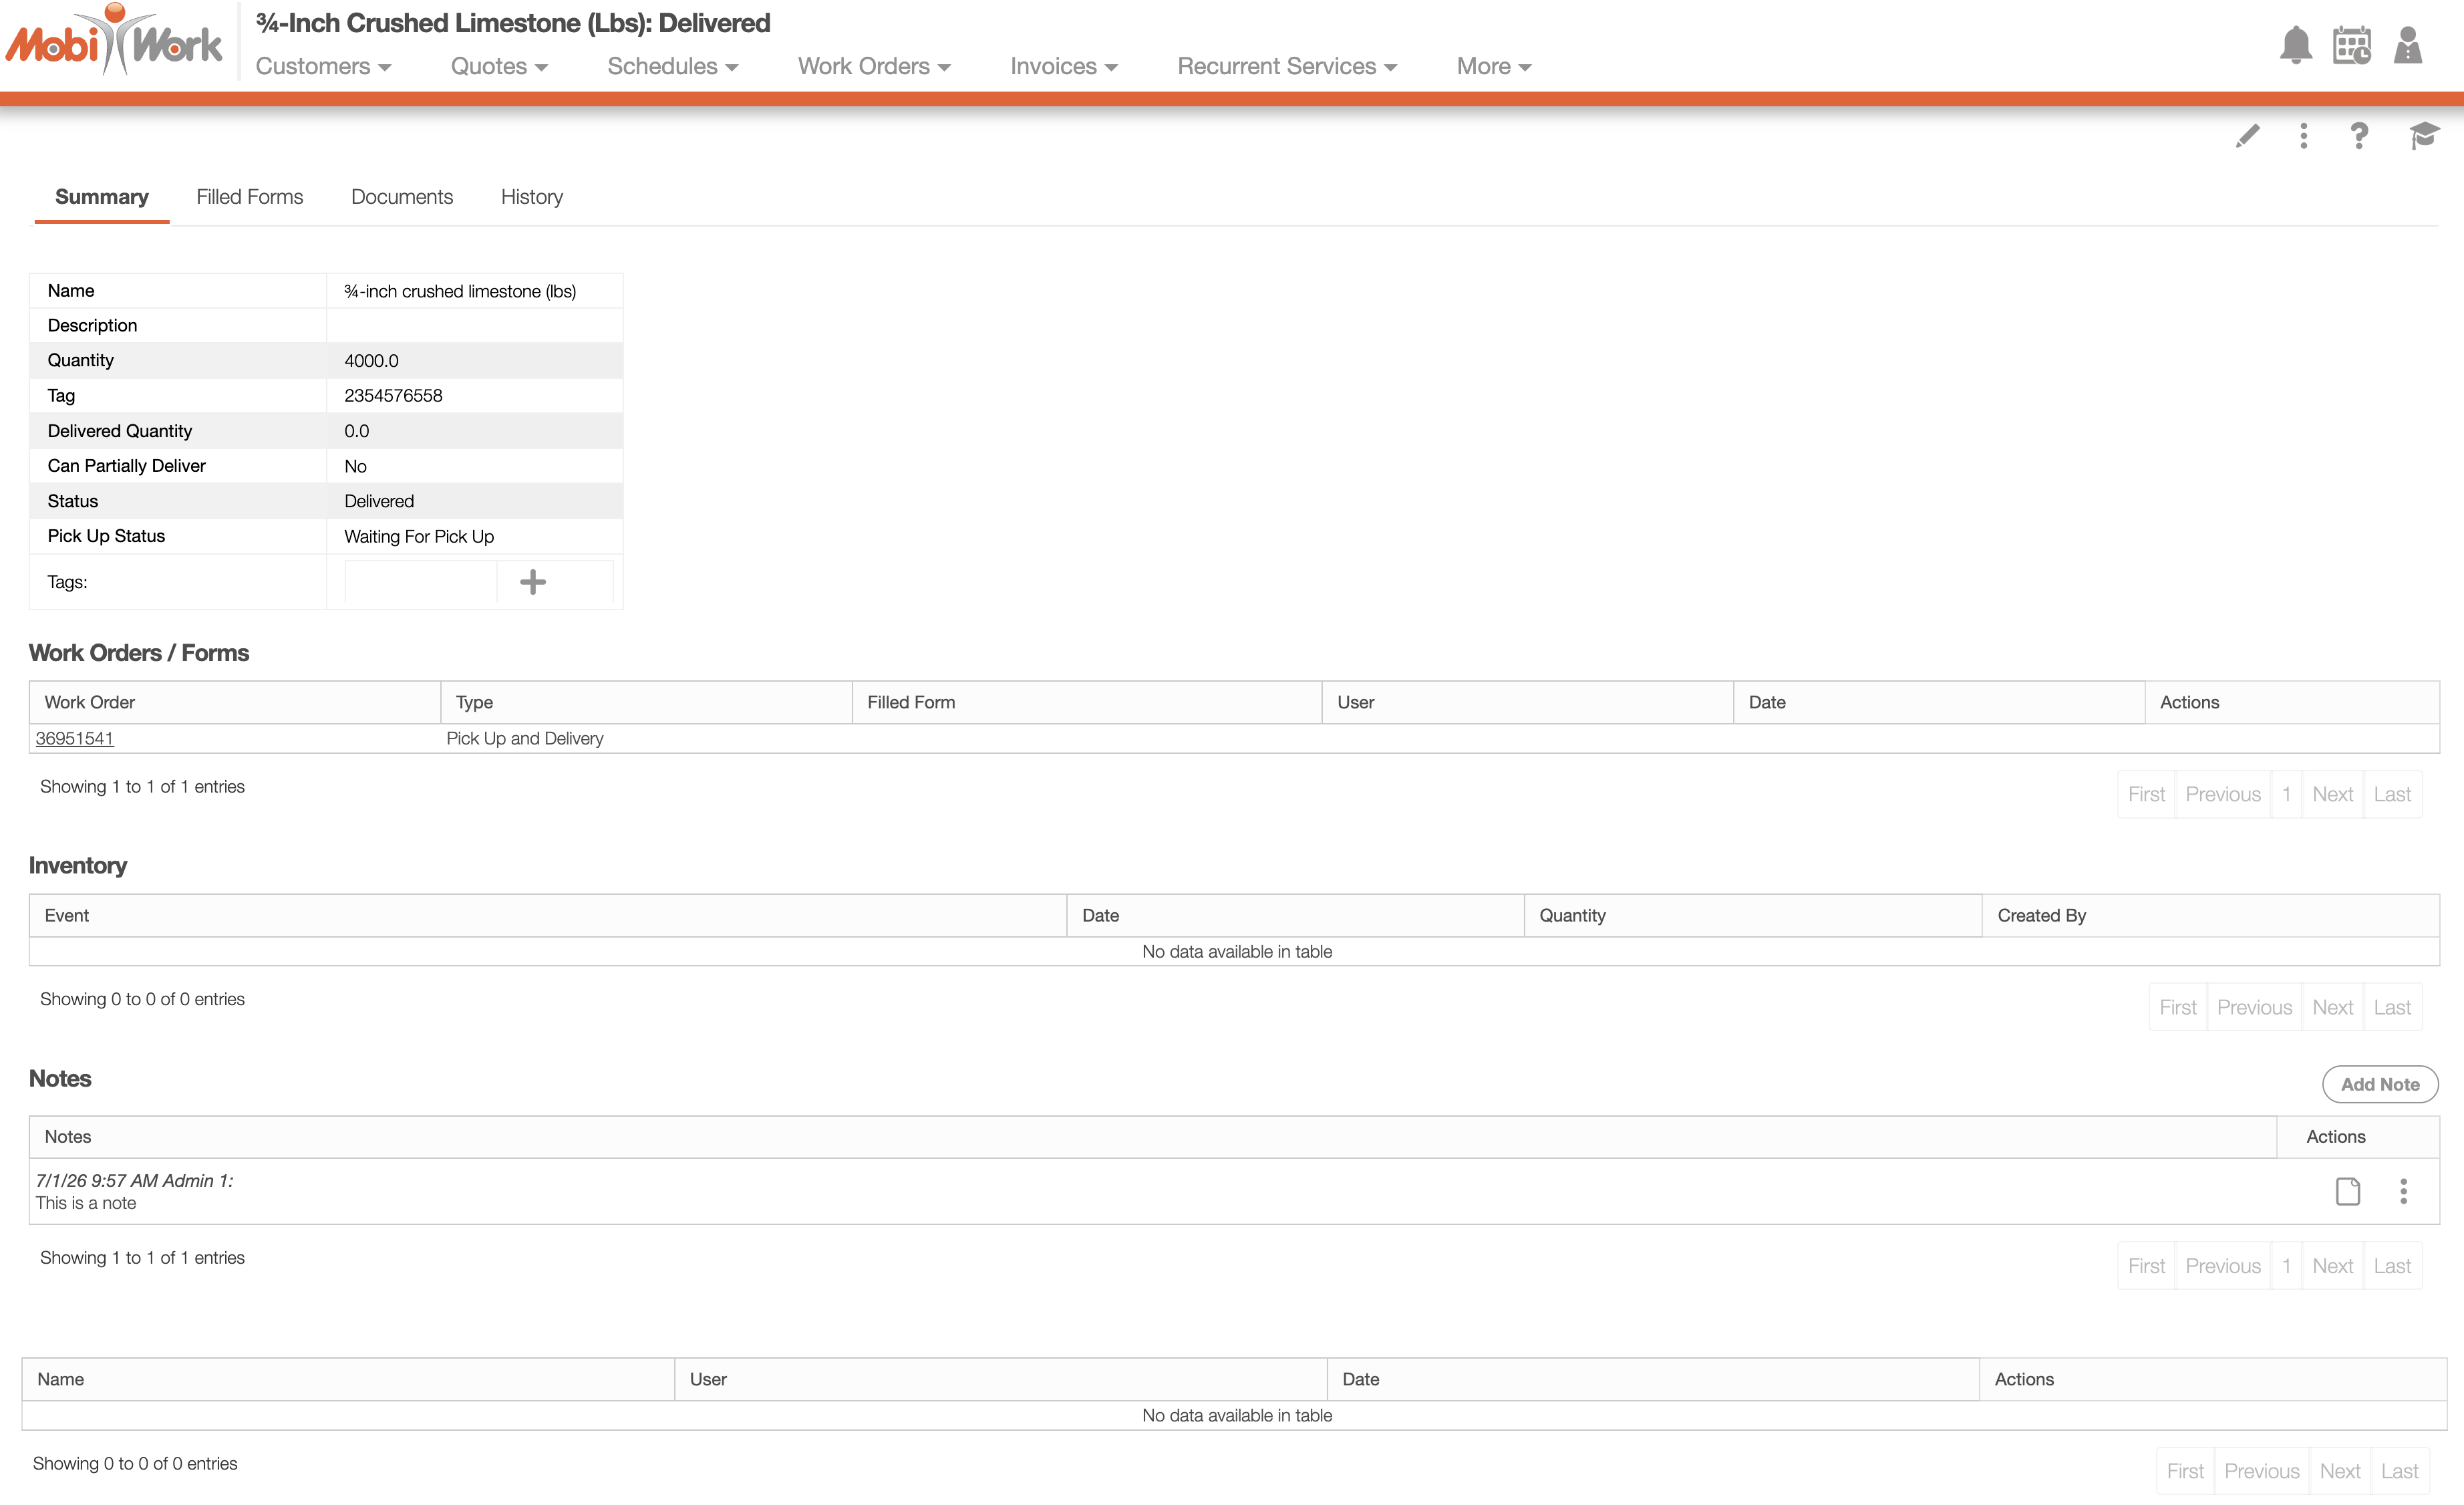
The "Summary" tab is the default tab you will be directed to; it will display all the requisite information regarding a delivery item.
The panels found on the "Summary" tab will summarize the data from the other View Delivery Items tabs including the quantity, status, and inventory:
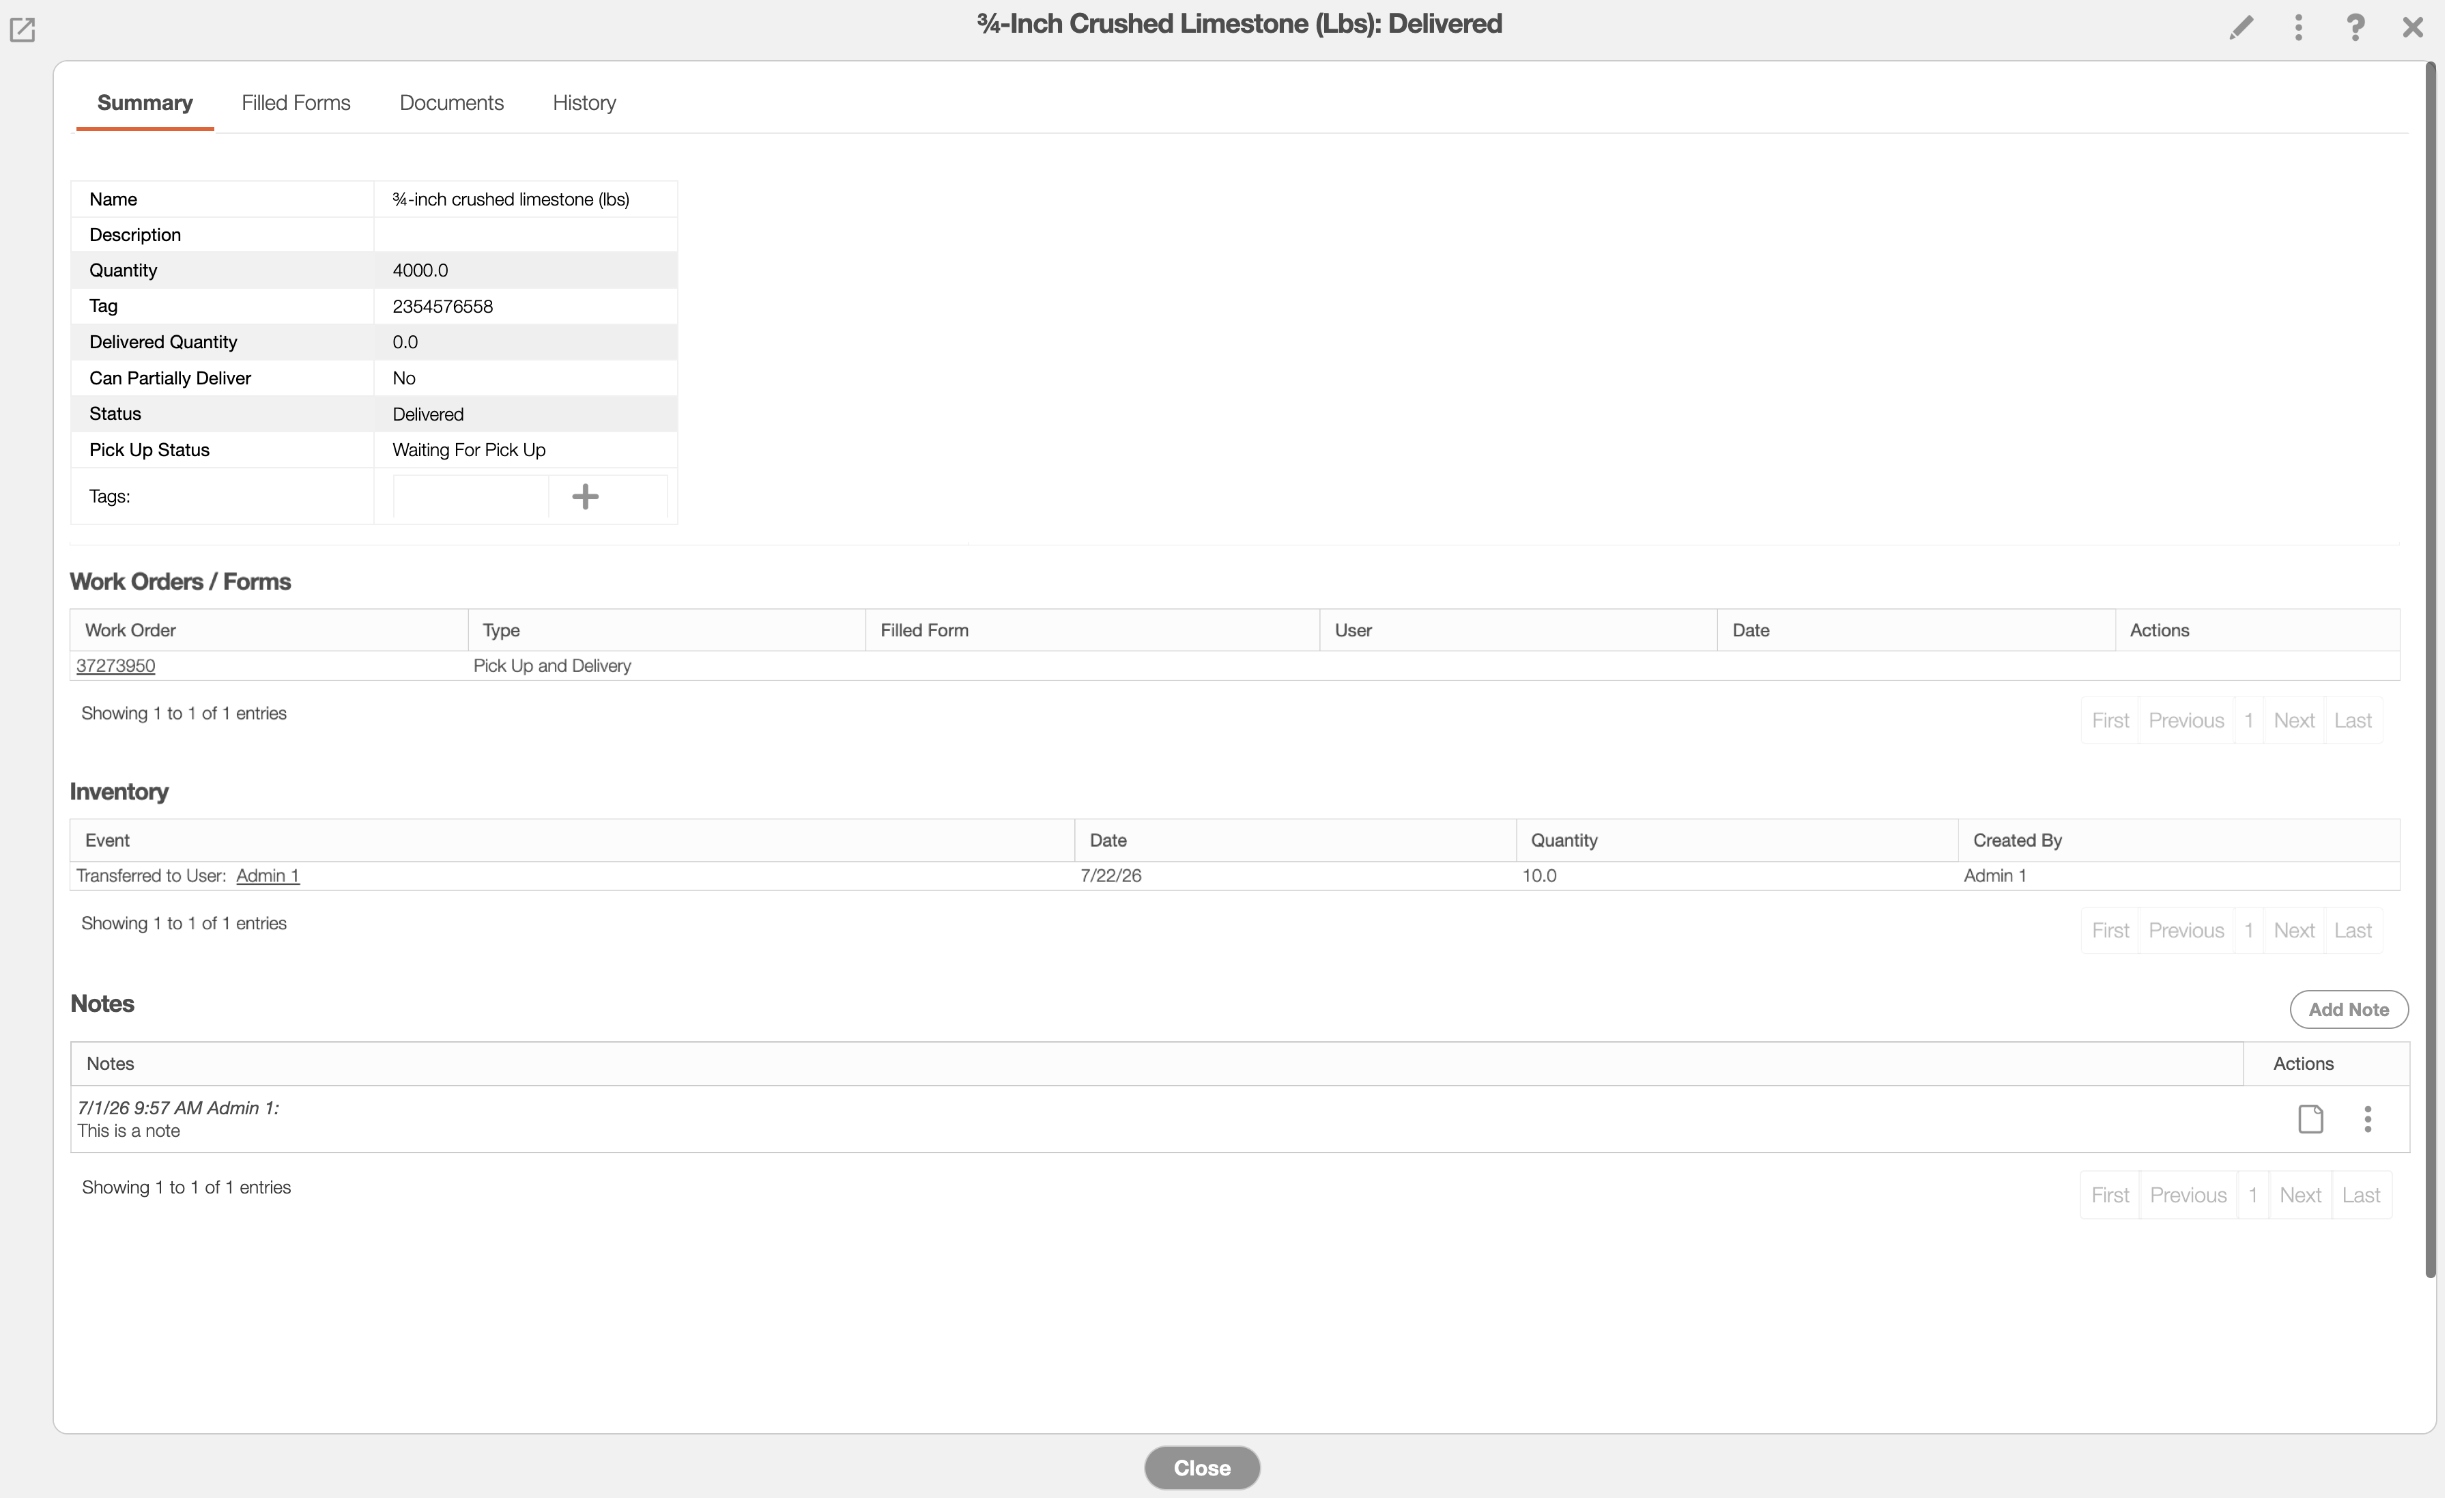
Where applicable, you can edit or add additional information directly in the "Summary" tab:
The Arrow icon (found in the top left of designated boxes) will open the corresponding tab in the View Part pop-up window.
The Individual Actions button (the three dots) will display different options (e.g., view, edit, delete, etc.) depending on the corresponding panel.
The View icon will allow you to view the selected data in a separate window.
The Pencil icon will allow you to edit the selected data or field.
The Plus Sign icon will allow you to add additional inventory, reminders, notes, etc.
The Trash Can icon will allow you to delete the selected data.
Summary Panel
The "Summary" panel will contain general delivery item information, including the name and quantity of the delivery item. The other information found in the "Summary" panel are described below:
| Name: | Description: |
|---|---|
| "Name" | The designated name or title of the delivery item for easy identification. |
| "Description" | Includes a detailed summary of the delivery item. |
| "Quantity" | The total quantity of delivery items that is available. |
| "Tag" | |
| "Delivered Quantity" | The total amount of delivery items set to be delivered to a location. |
| "Partial Delivery" | Indicates if the delivery items can be delivered Incrementally. |
| "Status" | The delivery status of the delivery item. The status can be "Waiting for Delivery," "Delivered," "Partially Delivered," "Rejected," "Received and Ready for Delivery," and "Received Damaged." The pick-up status will not influence the status in this column. |
| "Pick Up Status" | The pick up status of the delivery item. The status can be, "Waiting for Pick Up," "Partial Pick Up," or "Pick Up Completed." |
| "Tags" | Tags act as a visual indicator of a custom status or category, thus improving organizational clarity with the ability to identify specified tagged quotes at a glance. |
Work Orders/Forms Panel
The "Work Orders/Forms" tab displays all work order forms associated with the selected delivery item, providing a complete history of where and when the item has been used.
By selecting a form, you will be redirected to the corresponding work order, allowing you to review the job details and the delivery item's role in the service performed. This tab also displays additional information, including the user who completed the form and the date the form was submitted, giving you greater visibility into the delivery item's usage history and supporting accountability across your organization.
Inventory Panel
The "Inventory" panel will list the total inventory of the parts, as well as the reserved total, and purchase orders.
The Individual Actions button will allow you to add the inventory to a warehouse.
The column information found in the "Inventory" panel are described below:
| Name: | Description: |
|---|---|
| "Event" | Details where the part or product was transferred. |
| "Date" | The date that the request for the part or product was made. |
| "Quantity" | Indicates how many parts are available to use or to sell. |
| "Created By" | The user requesting the part or product. |
To populate the "Inventory" panel, you will first need to add the delivery items to the corresponding work order. For more information on how to add delivery items to the work order, please see the Add Delivery Items page or the Delivery Item Movements page. By adding the delivery items to the work order, you will be able to access the delivery items movement as well as the inventory status. The delivery item will also be added to the Delivery Item List page if the delivery item was not previously in your MobiWork system.
Notes Panel
The "Notes" panel will contain any additional notes related to the delivery item. To add a note, click the Plus Sign in the upper right corner. To edit a note, click on the Pencil icon or if you would like to delete a note, click on the Trash Can icon.
The "Documents" tab will allow you to store delivery item-specific documentation (e.g., contracts, photos, etc.) for future use. This tab will also list the type of document file, the date it was uploaded, the user who uploaded it, and more.
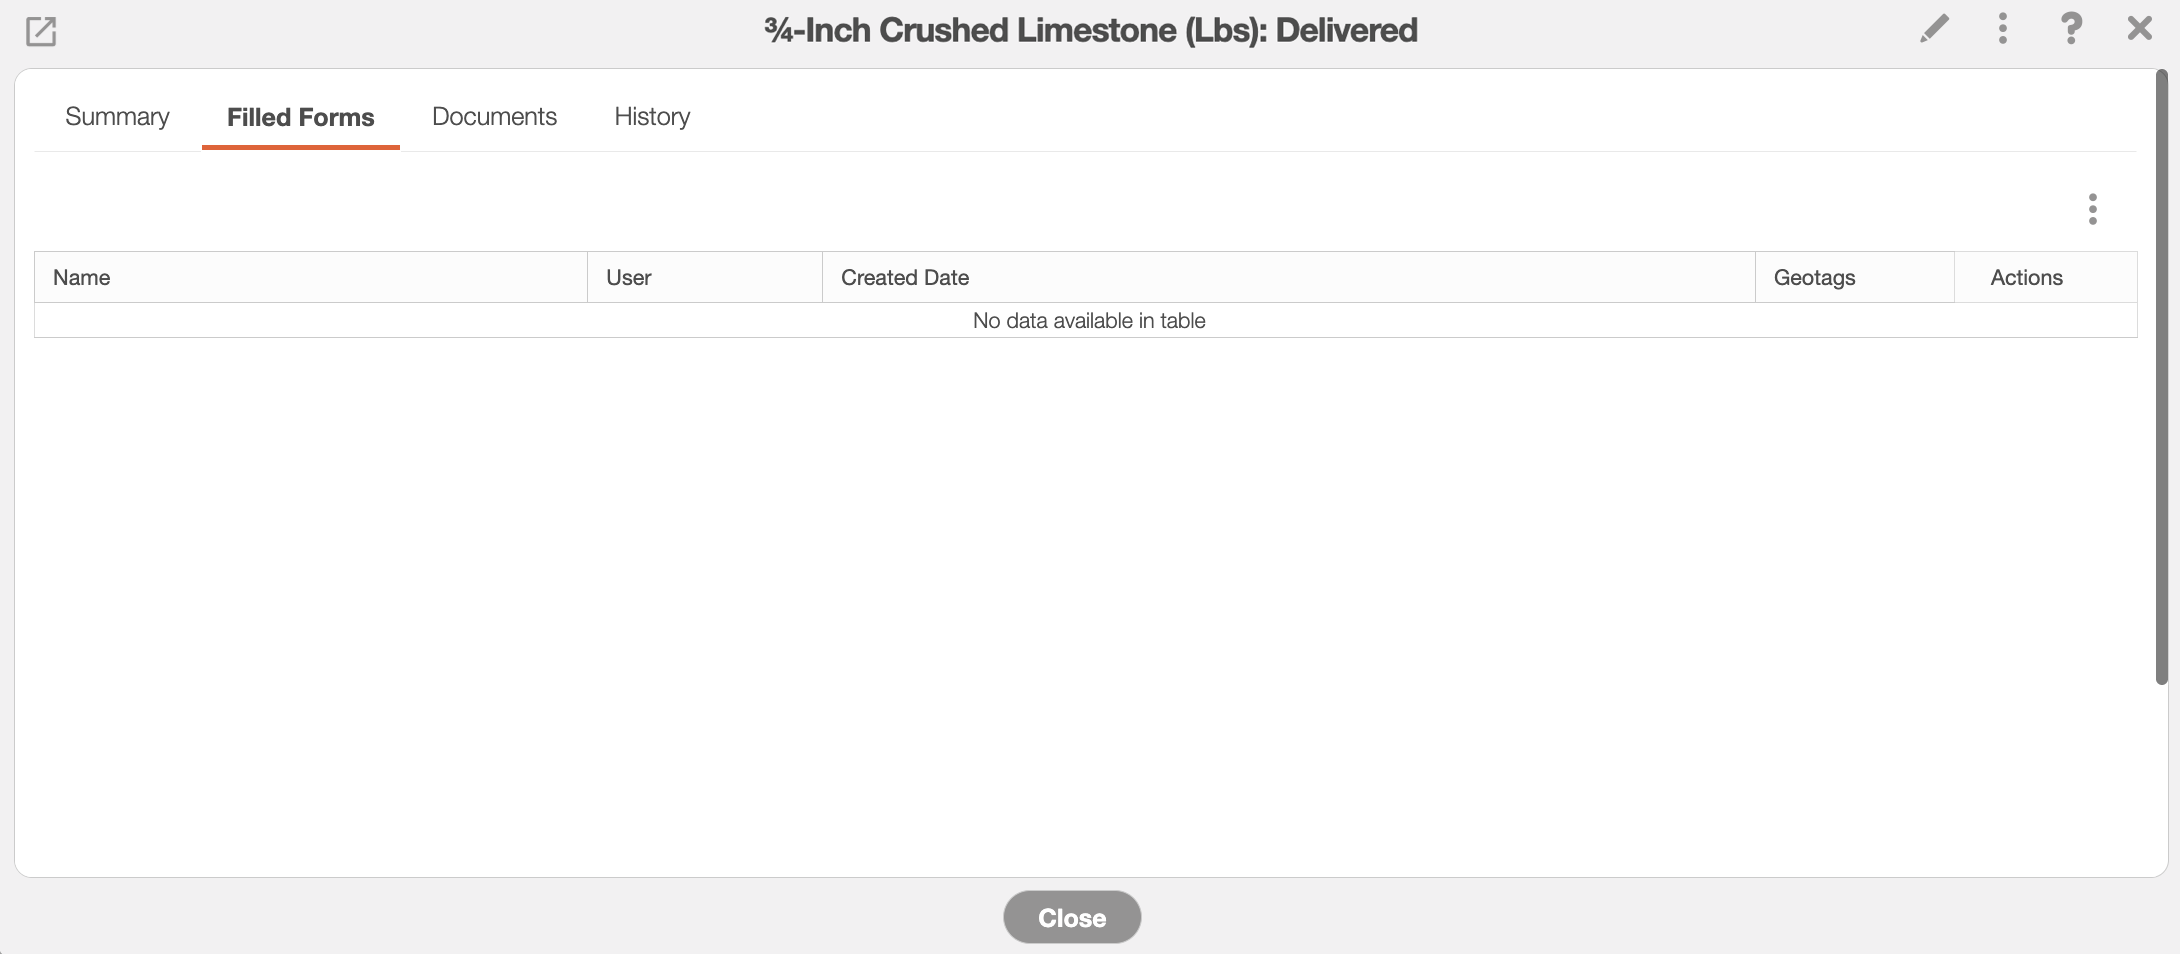
Only after you upload a file or document to this tab will you be able to access the Action options:
| Name: | Description: |
|---|---|
| "Name" | The name / type of form associated with the work order. |
| "User" | The user who uploaded the form to the work order. |
| "Created Date" | The date and time that the form was uploaded to the work order. |
| "Geotags" | The geographical location of where the form was created. |
| "Actions" | Will allow you to view, edit, or export the MobiForm to PDF. |
The "Documents" tab will allow you to store delivery item-specific documentation (e.g., contracts, photos, etc.) for future use. This tab will also list the type of document file, the date it was uploaded, the user who uploaded it, and more.
Only after you upload a file or document to this tab will you be able to access the Action options:
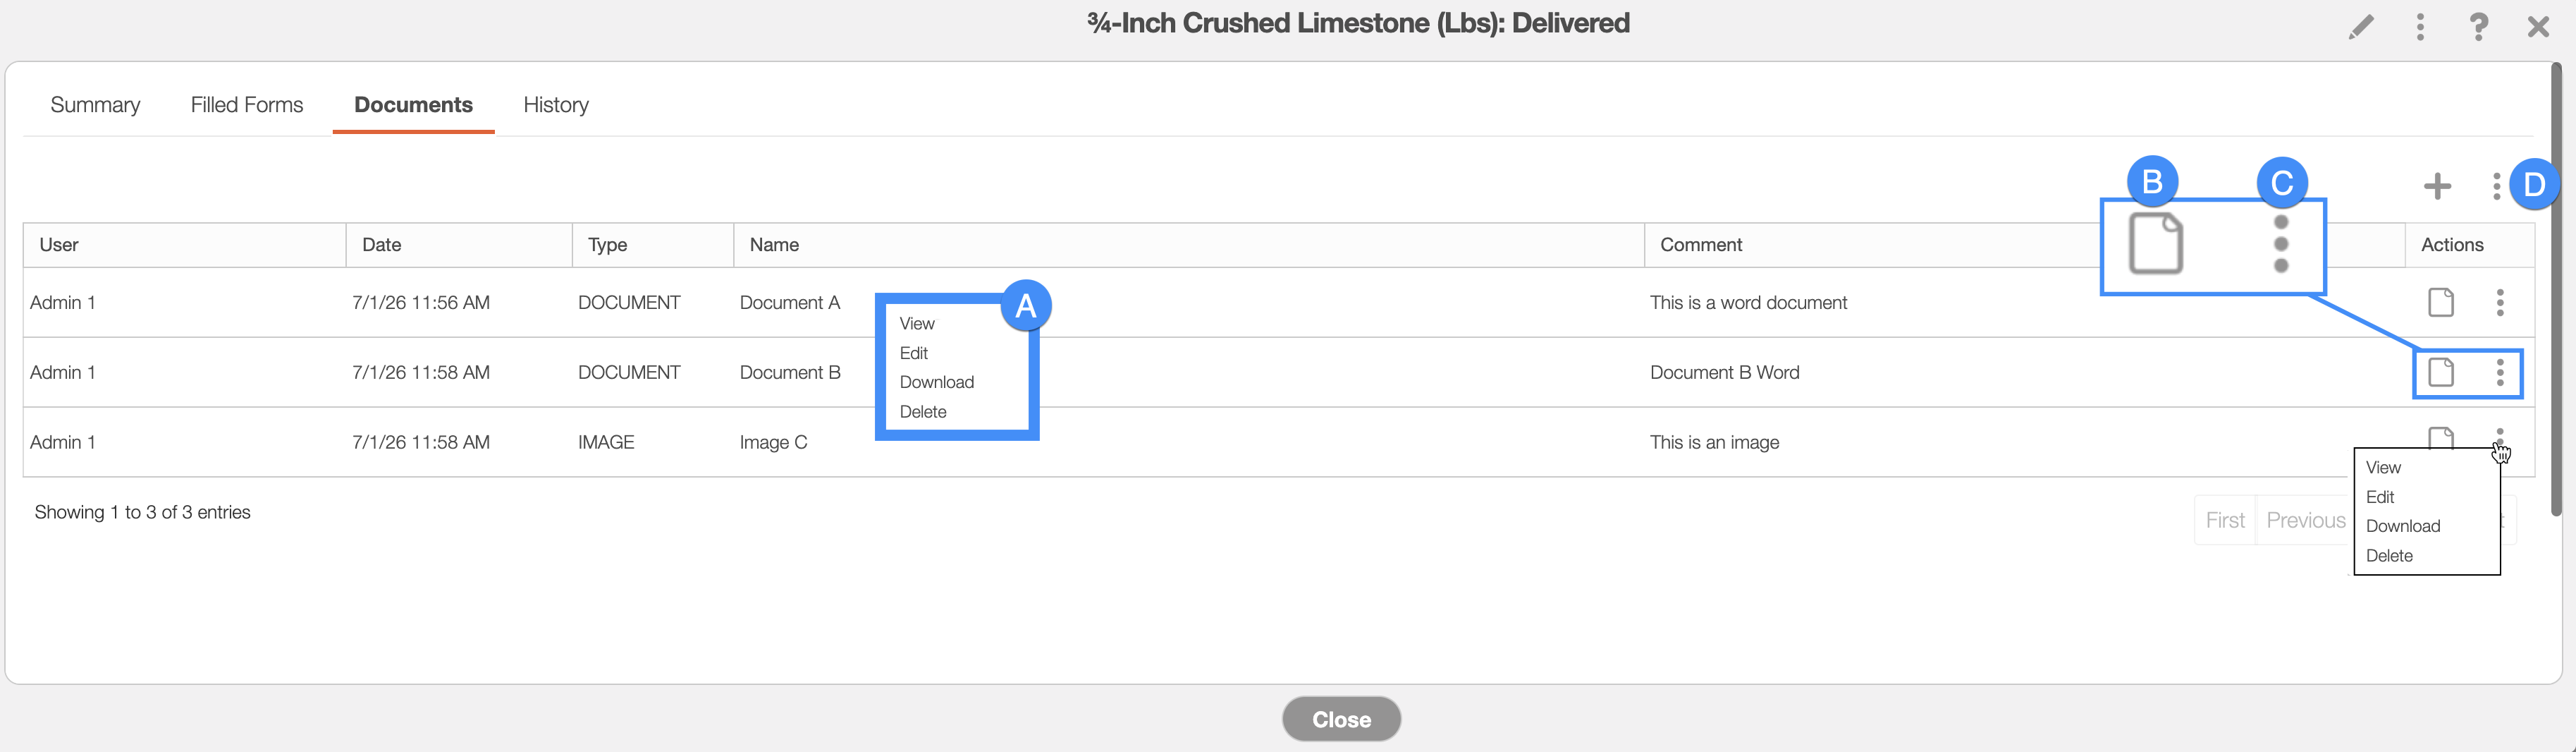
By right-clicking you will bring up the right-click actions. These actions are identical to the Individual Actions and will allow you to view, edit, download, or delete the document.
The View icon will allow you to view the image file in a new tab, window, or allow you to download the document.
The Individual Actions (the three dots next to the View icon) are identical to the right-click actions and will allow you to view, edit, download, or delete the document.
The Plus Sign will add a new document or file.
| Name: | Description: |
|---|---|
| "User" | The user who uploaded the document or file. |
| "Date" | The date that the document or image file was uploaded. |
| "Type" | The type of document (e.g., PDF, Word, image, Excel, etc.). |
| "Name" | The name of the document. |
| "Comment" | Any comments or notes associated with the document. |
| "Actions" | Allows you to view, edit, download, or delete the document. |
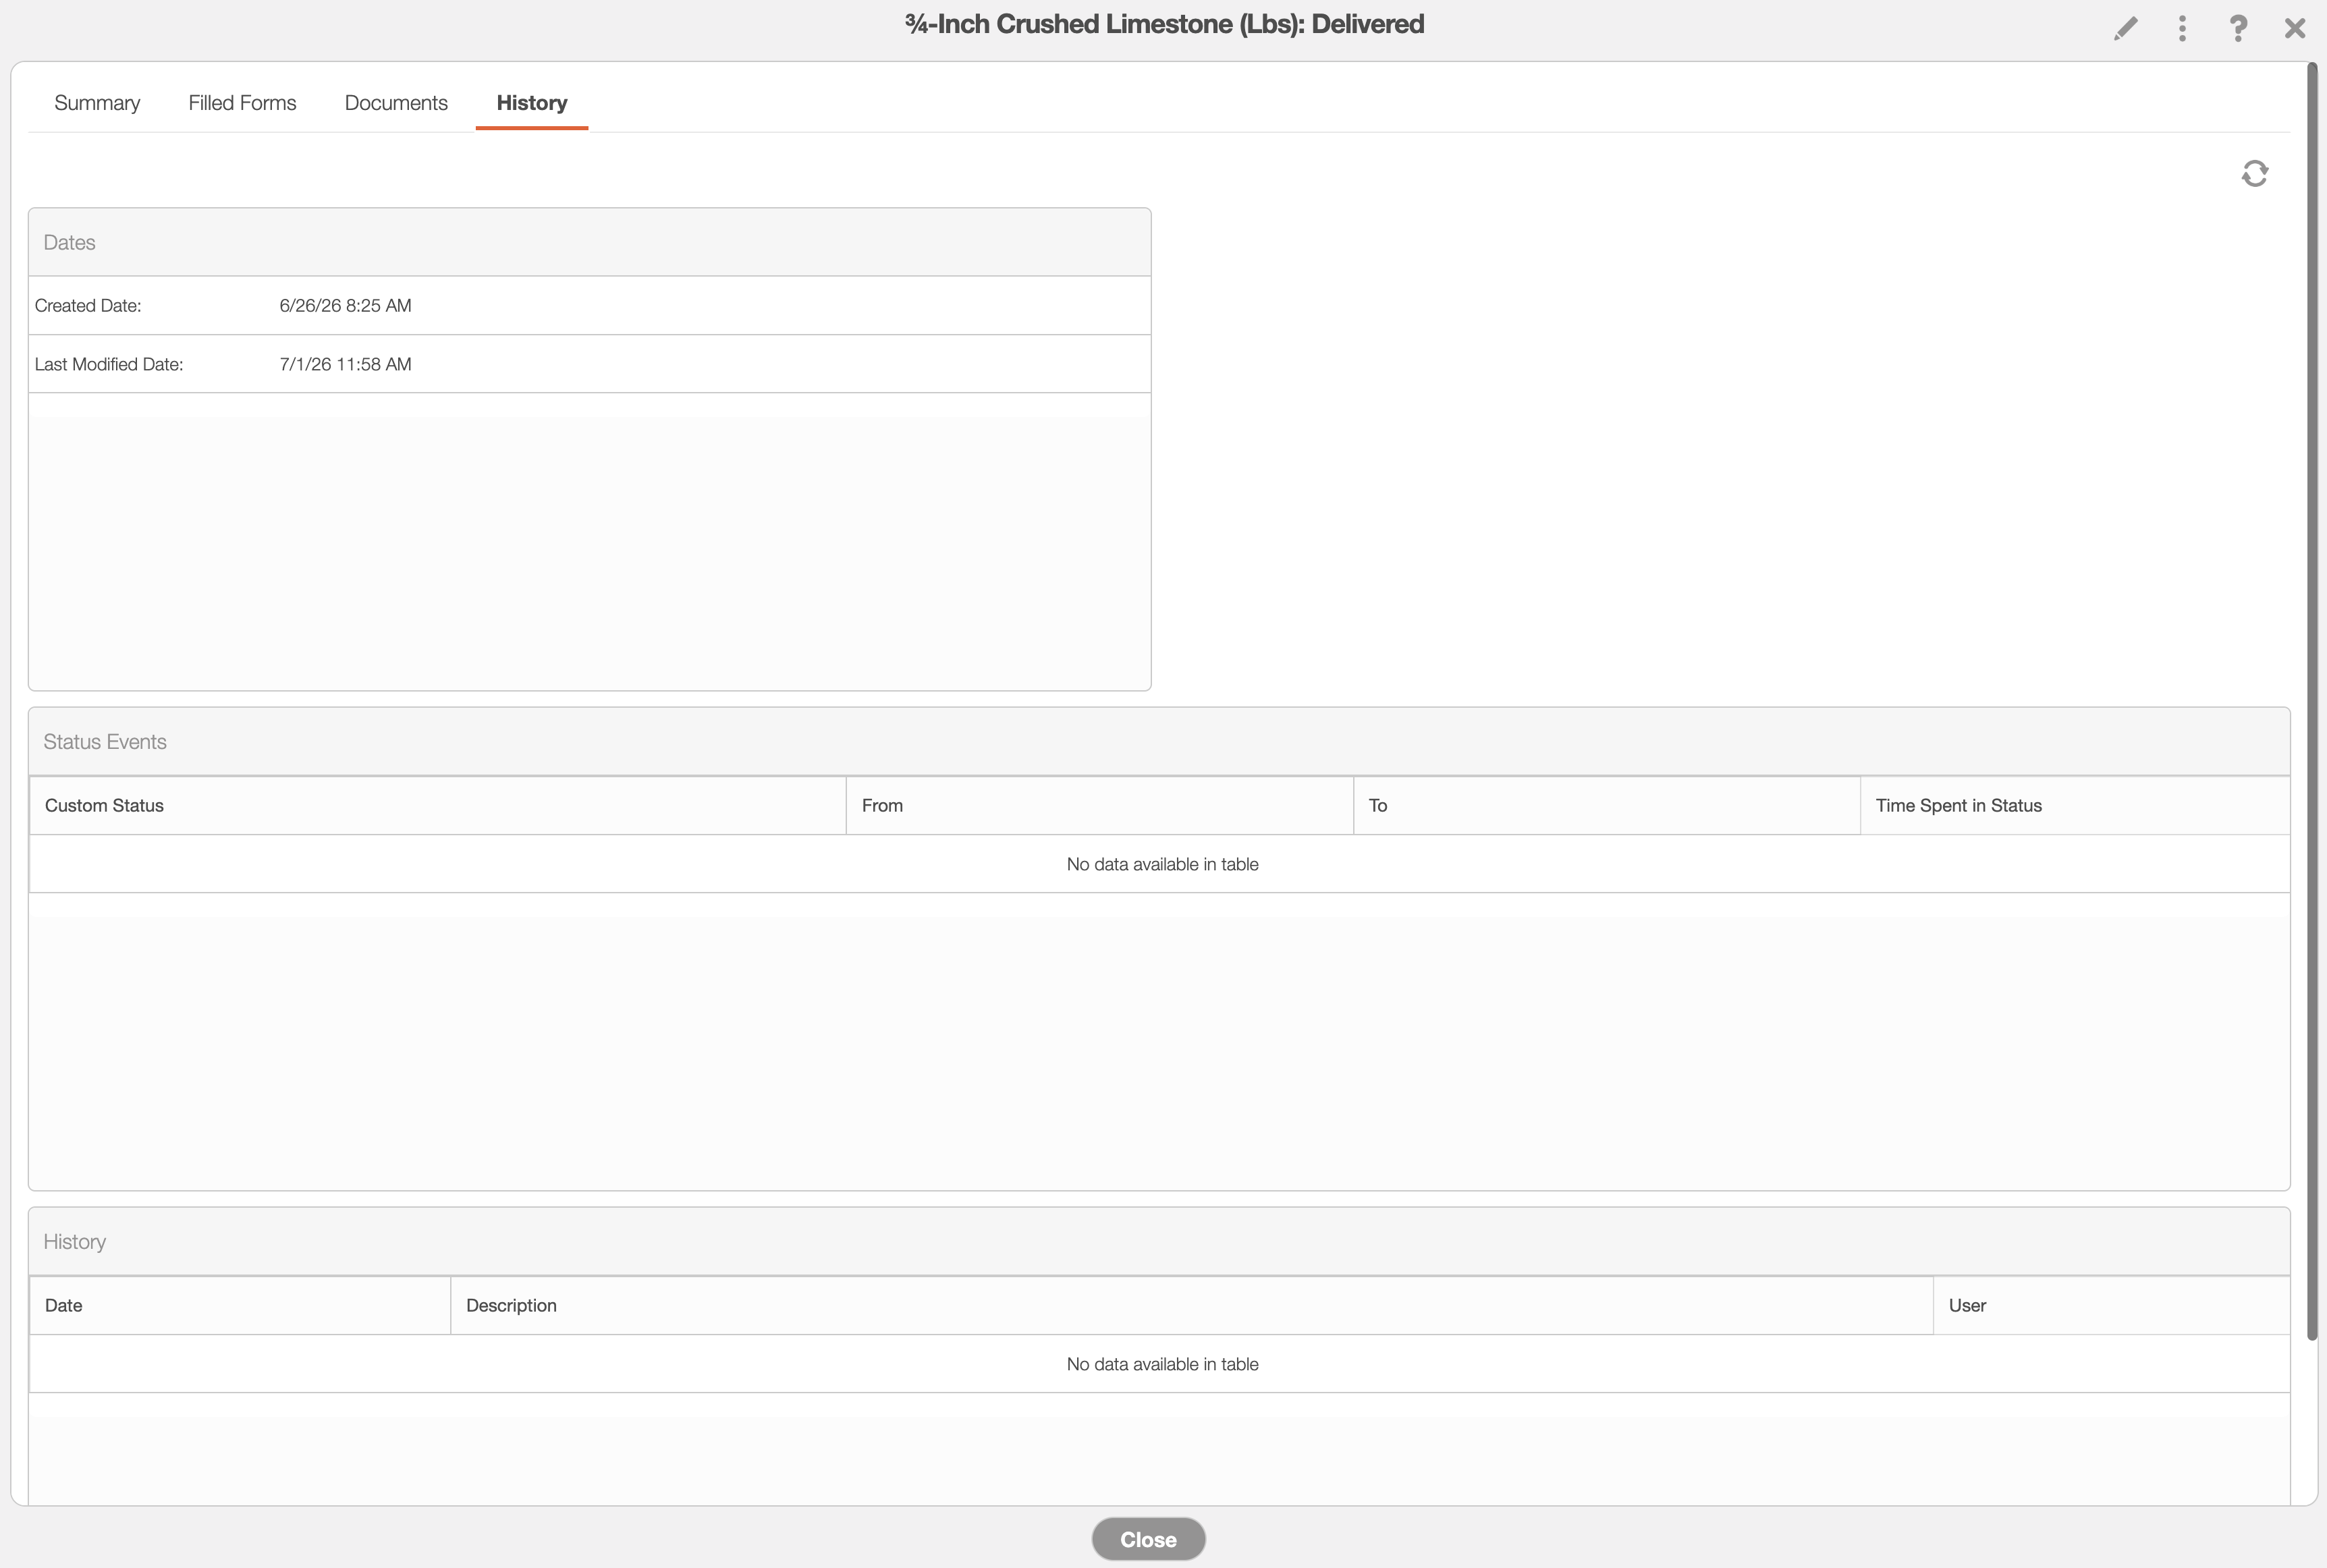
The "History" tab lists the historically recorded details of the delivery item.
Dates Panel
The "Dates" panel will list the date that the delivery item was created and when it was last edited.
Status Events Panel
The "Status Events" panel will show the duration that the delivery item spent in the corresponding custom status.
History Panel
The "History" panel will display all events and actions that occur on the delivery item.