
Once you select this Action Item, you will be redirected to the Add Invoice page. On this page, you will be able to populate the invoice with parts, services, discounts, and markups.
Work Order
While out in the field, you can quickly add an invoice directly from the corresponding work order. As you complete the requiste Action Items, you will notice that there is an Action Item for Invoice & Payment tile:
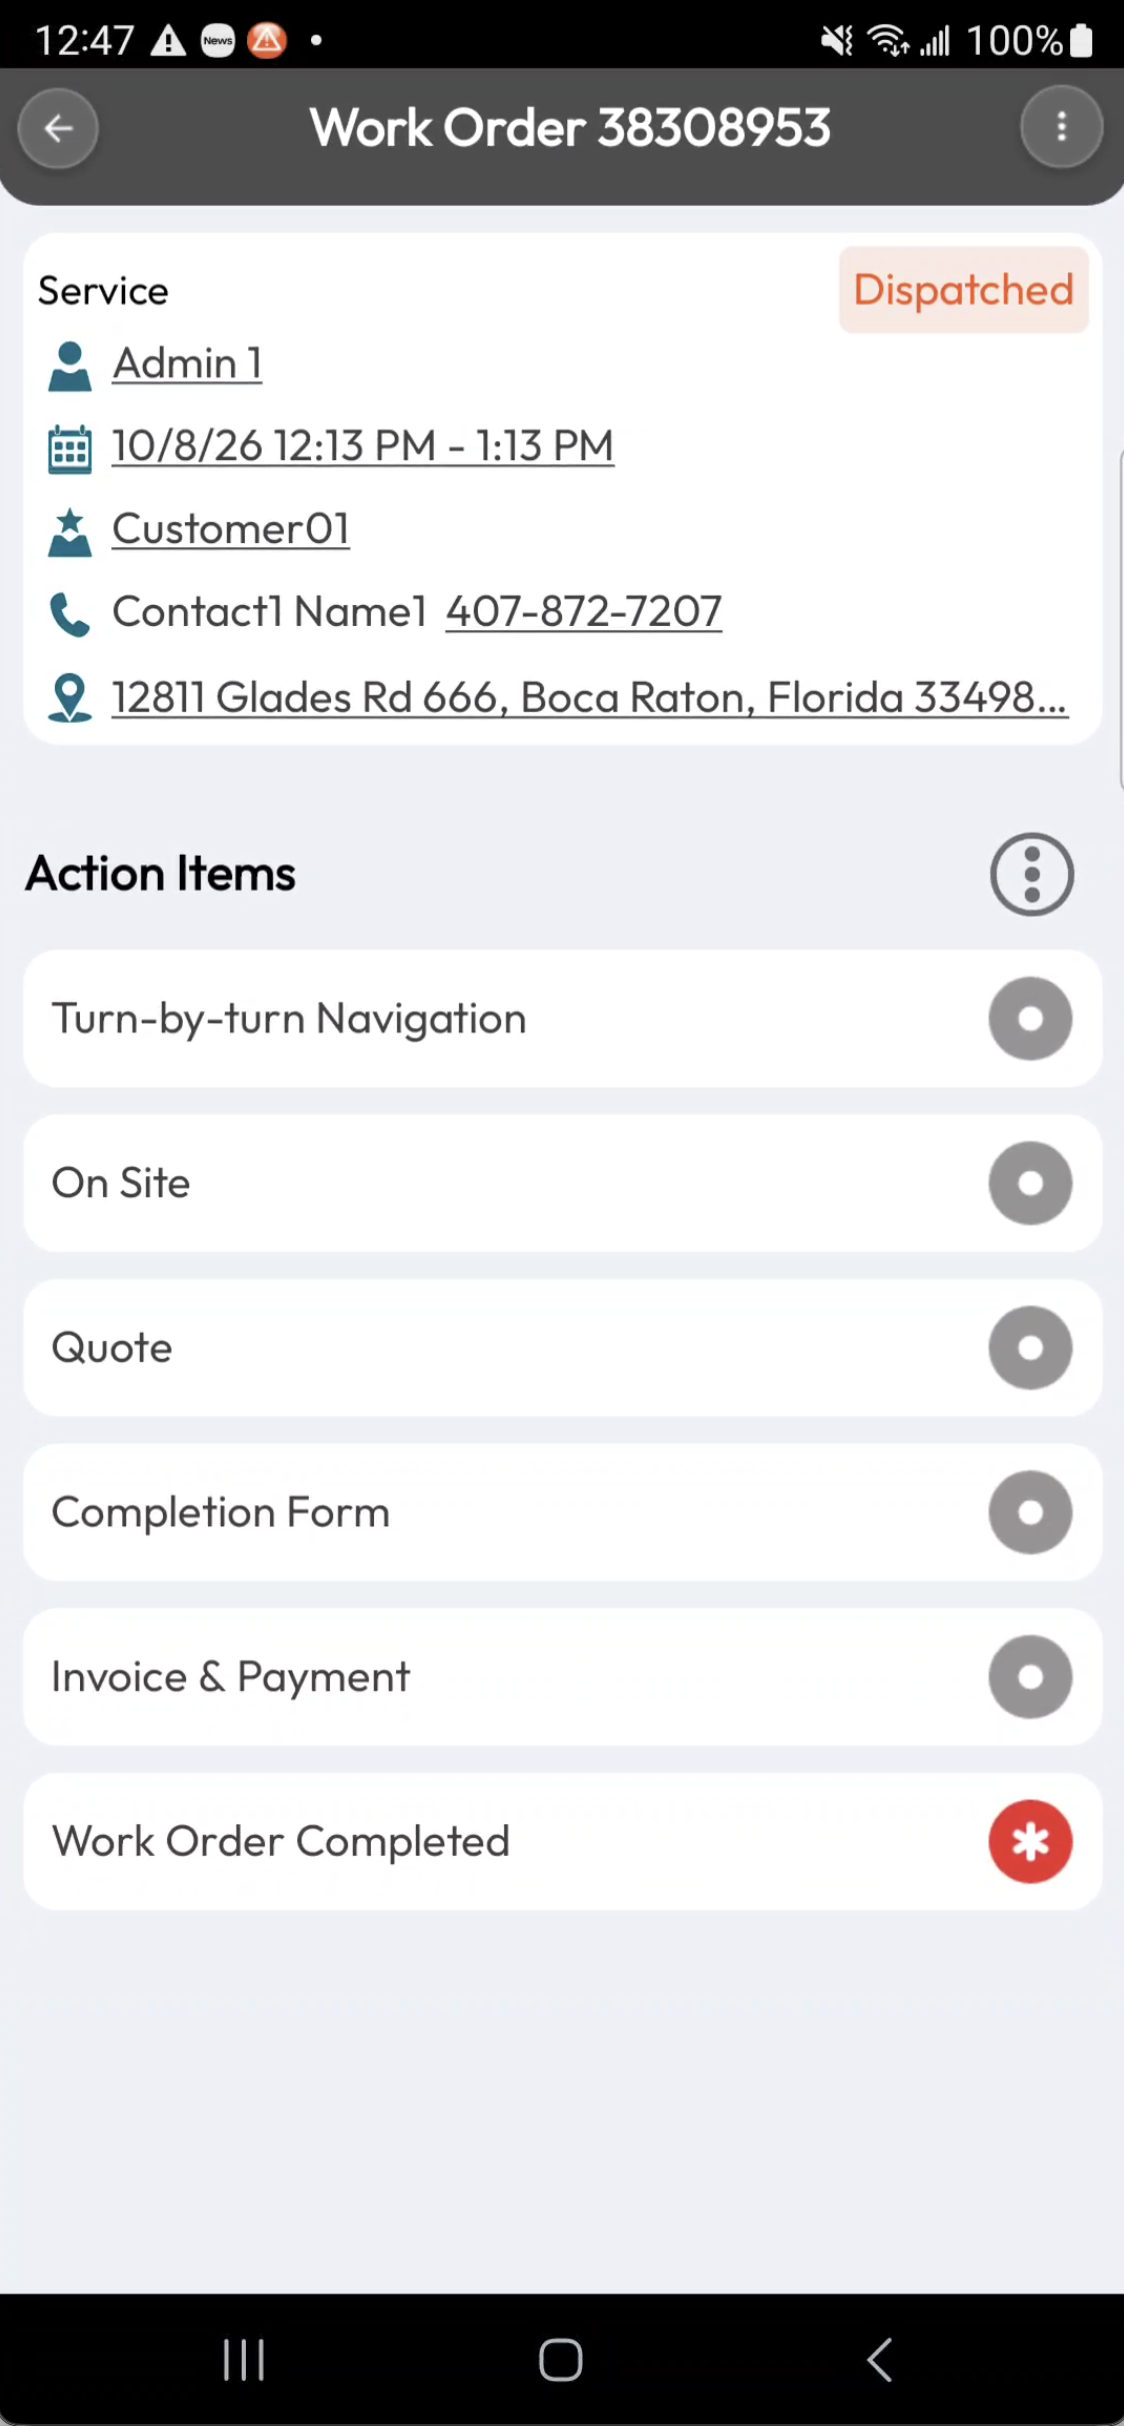
Once you select this Action Item, you will be redirected to the Add Invoice page. On this page, you will be able to populate the invoice with parts, services, discounts, and markups.
When you are done populating the invoice's line items, you can update the invoice's status accordingly as well as accept payment from the customer. By creating an invoice through the work order Action Item, the invoice and work order will be linked; this association allows for streamlined navigation and organization.
For more information on how to add an invoice while completing a work order, please see the Complete a Work Order section.
Quotes
Invoices can also be created from a quote on the MobiWork app. To generate an invoice from the quote, first navigate to the View Quote page.
For more information on how to access this page, please see the View Quote on the Device page.
Once you are on this page, press on the quote's Action Panel tile, and select the "Create Invoice" option:

You will then be redirected to the Add Invoice page. By creating an invoice through the quote Action Item, the invoice and quote will be linked; this association allows for streamlined navigation and organization.
Customer
You can also add an invoice from the Customer feature page. Once you access the customer profile, there are two different ways to add a new invoice.
For more information on how to access this page, please see the Mobile Customer Layout page.
Once you are on the Customer feature page, press on the Invoice tile to be redirected to the customer's Invoice List page:

On the Invoice List page, you will be able to add an invoice that is associated with the customer profile by:
Using the Actions Panel to add an invoice
Or pressing the Plus Sign tile

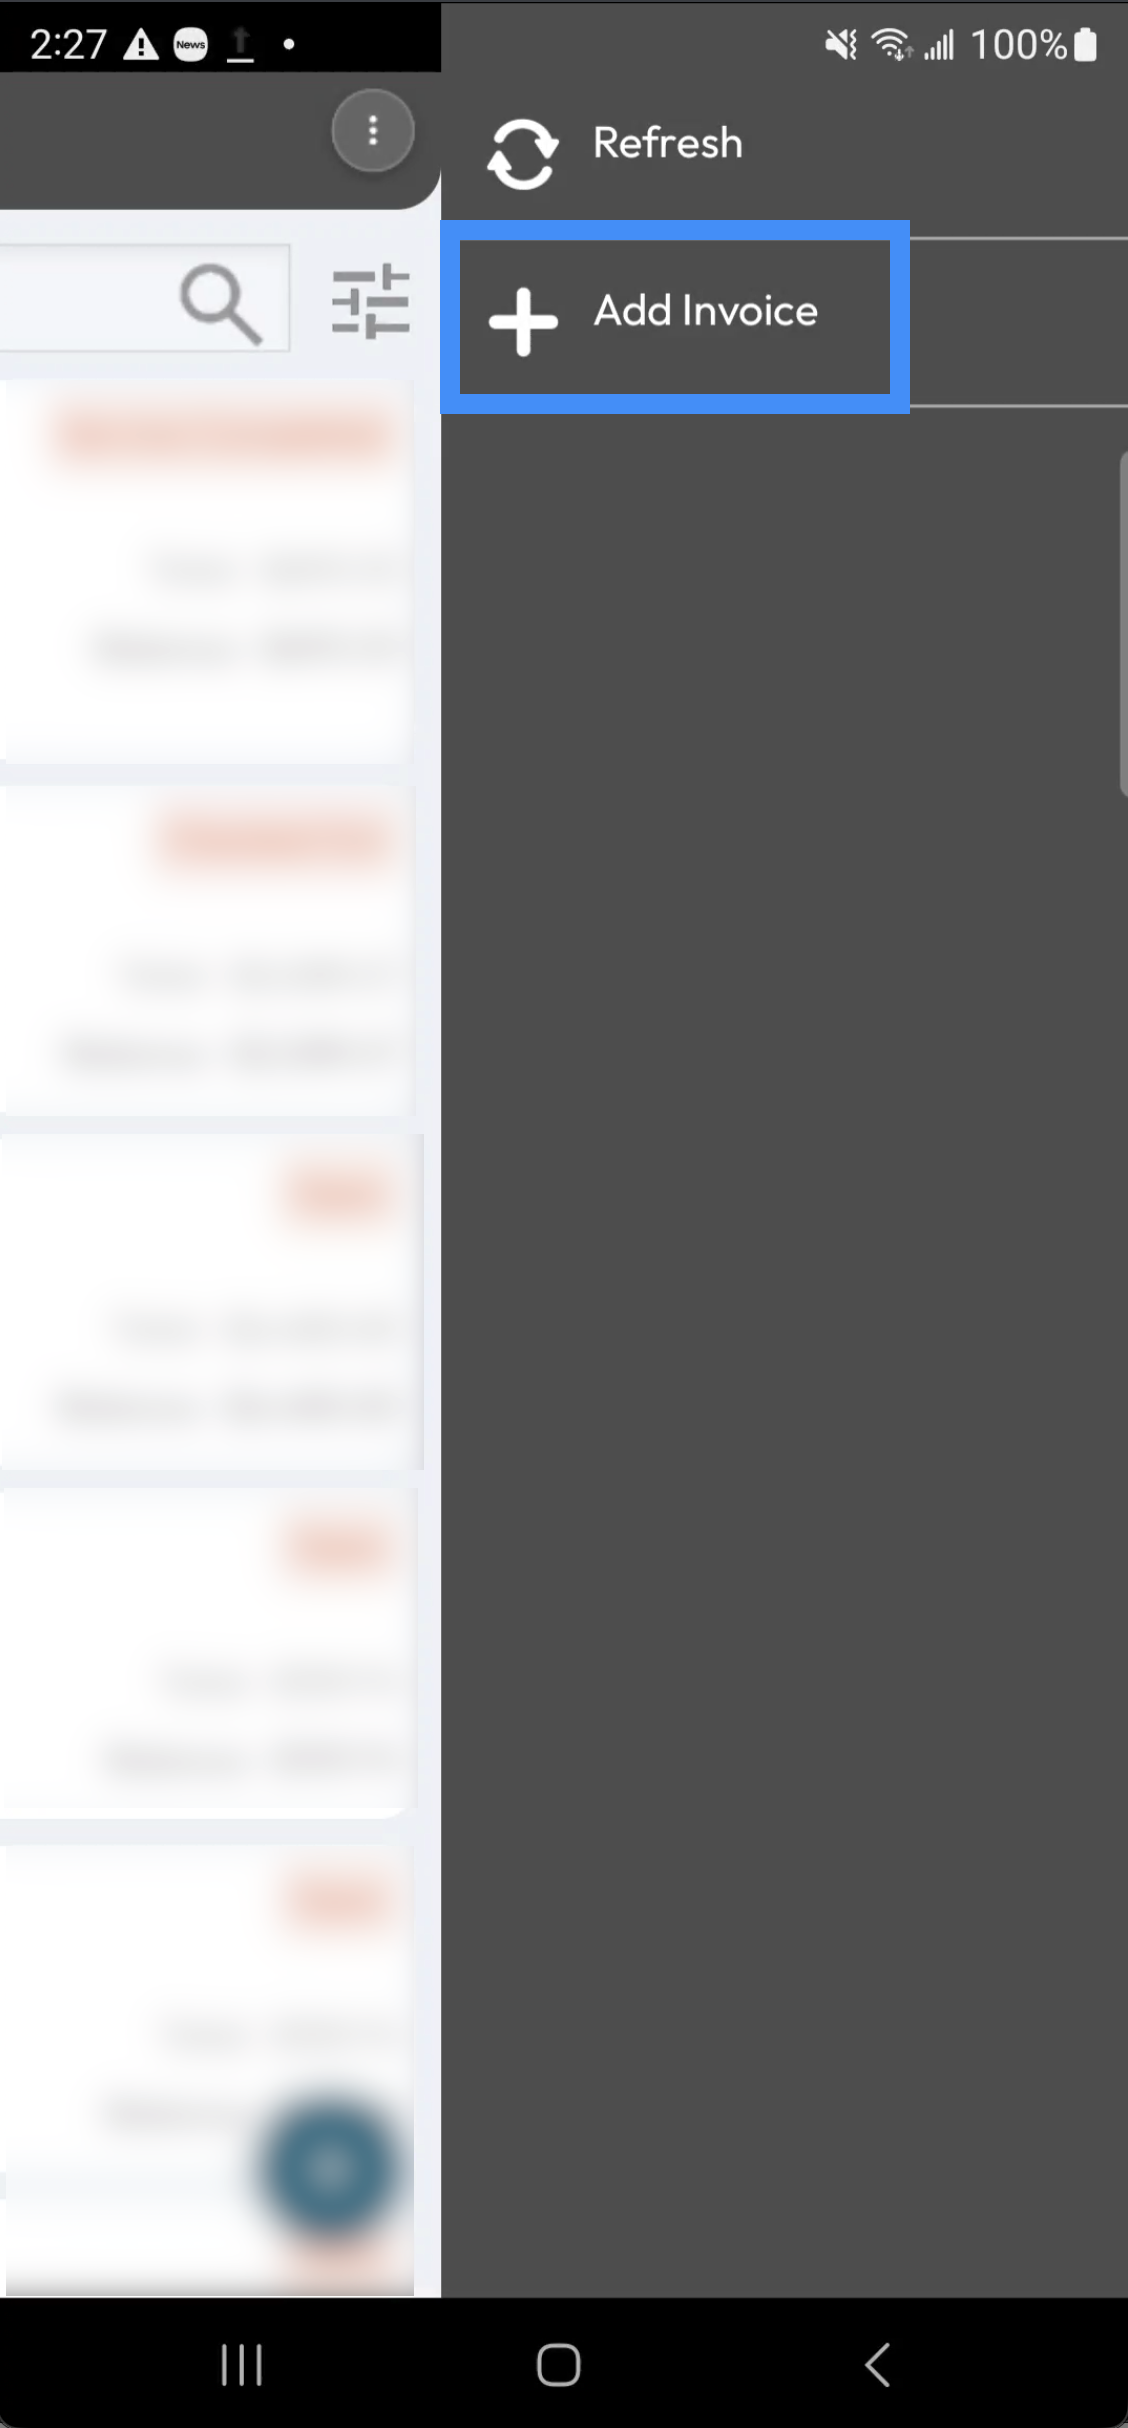
Likewise, you can press on the Actions Panel tile from the customer profile and select the "Add Invoice" option:
After accessing the Add Invoice page, you can begin to populate the invoice's line items. You will be able to add the corresponding parts, services, discounts, and markups for the invoice.
The subsections below will highlight how to populate your invoice from the MobiWork mobile app.
Add Part
To add parts to your invoice, press the Add Part tile:

You will then be redirected to the Add Parts page. From this page, you can select the desired products by pressing the respective Part tiles:

By pressing the desired Part tile, you will be redirected to the item page of the selected product:

From this page, you can input the:
Description of the product.
If applicable, the price and cost of the product.
How many items are being requested by the customer.
If applicable, any applied discounts (the discount can be inputted as a numerical value or a percentage).
And indicate if you would like to convert a product to an asset. This option will only be applicable, if indicated on the View Part page from the web application. If it is not indicated on the View Part page, then this field will not appear on the device's item page. For more information about converting parts into assets, please see the Add a Part page.
Press the Save tile to add the part to the invoice.
Repeat this process as many times as necessary until you have added all the needed parts. Once you are satisfied with the items entered, press the Save tile from the Add Parts page:

Add Service
To add services to your invoice, press the Add Service tile:

You will then be redirected to the Add Service page. From this page, you can select the desired services by pressing the respective Service tiles:

By pressing the desired Service tile, you will be redirected to the service page of the selected service:

From this page, you can input the:
Description of the service.
If applicable the price and cost of the service.
How many hours worked (by inputting the quantity).
If applicable, any applied discounts (the discount can be inputted as a numerical value or a percentage).
Press the Save tile to add service part to the invoice.
Repeat this process as many times as necessary until you have added all the needed services. Once you are satisfied with the services entered, press the Save tile from the Add Services page:

Add Discount
To add a discount, you will first need to access the More... tile. For more information how to access this tile, please see the Mobile Invoices Layout page.
The Add Discount tile allows you to apply an ad hoc discount to the overall invoice. Once you press on the Add Discount tile, the Ad Hoc Discount window will appear:
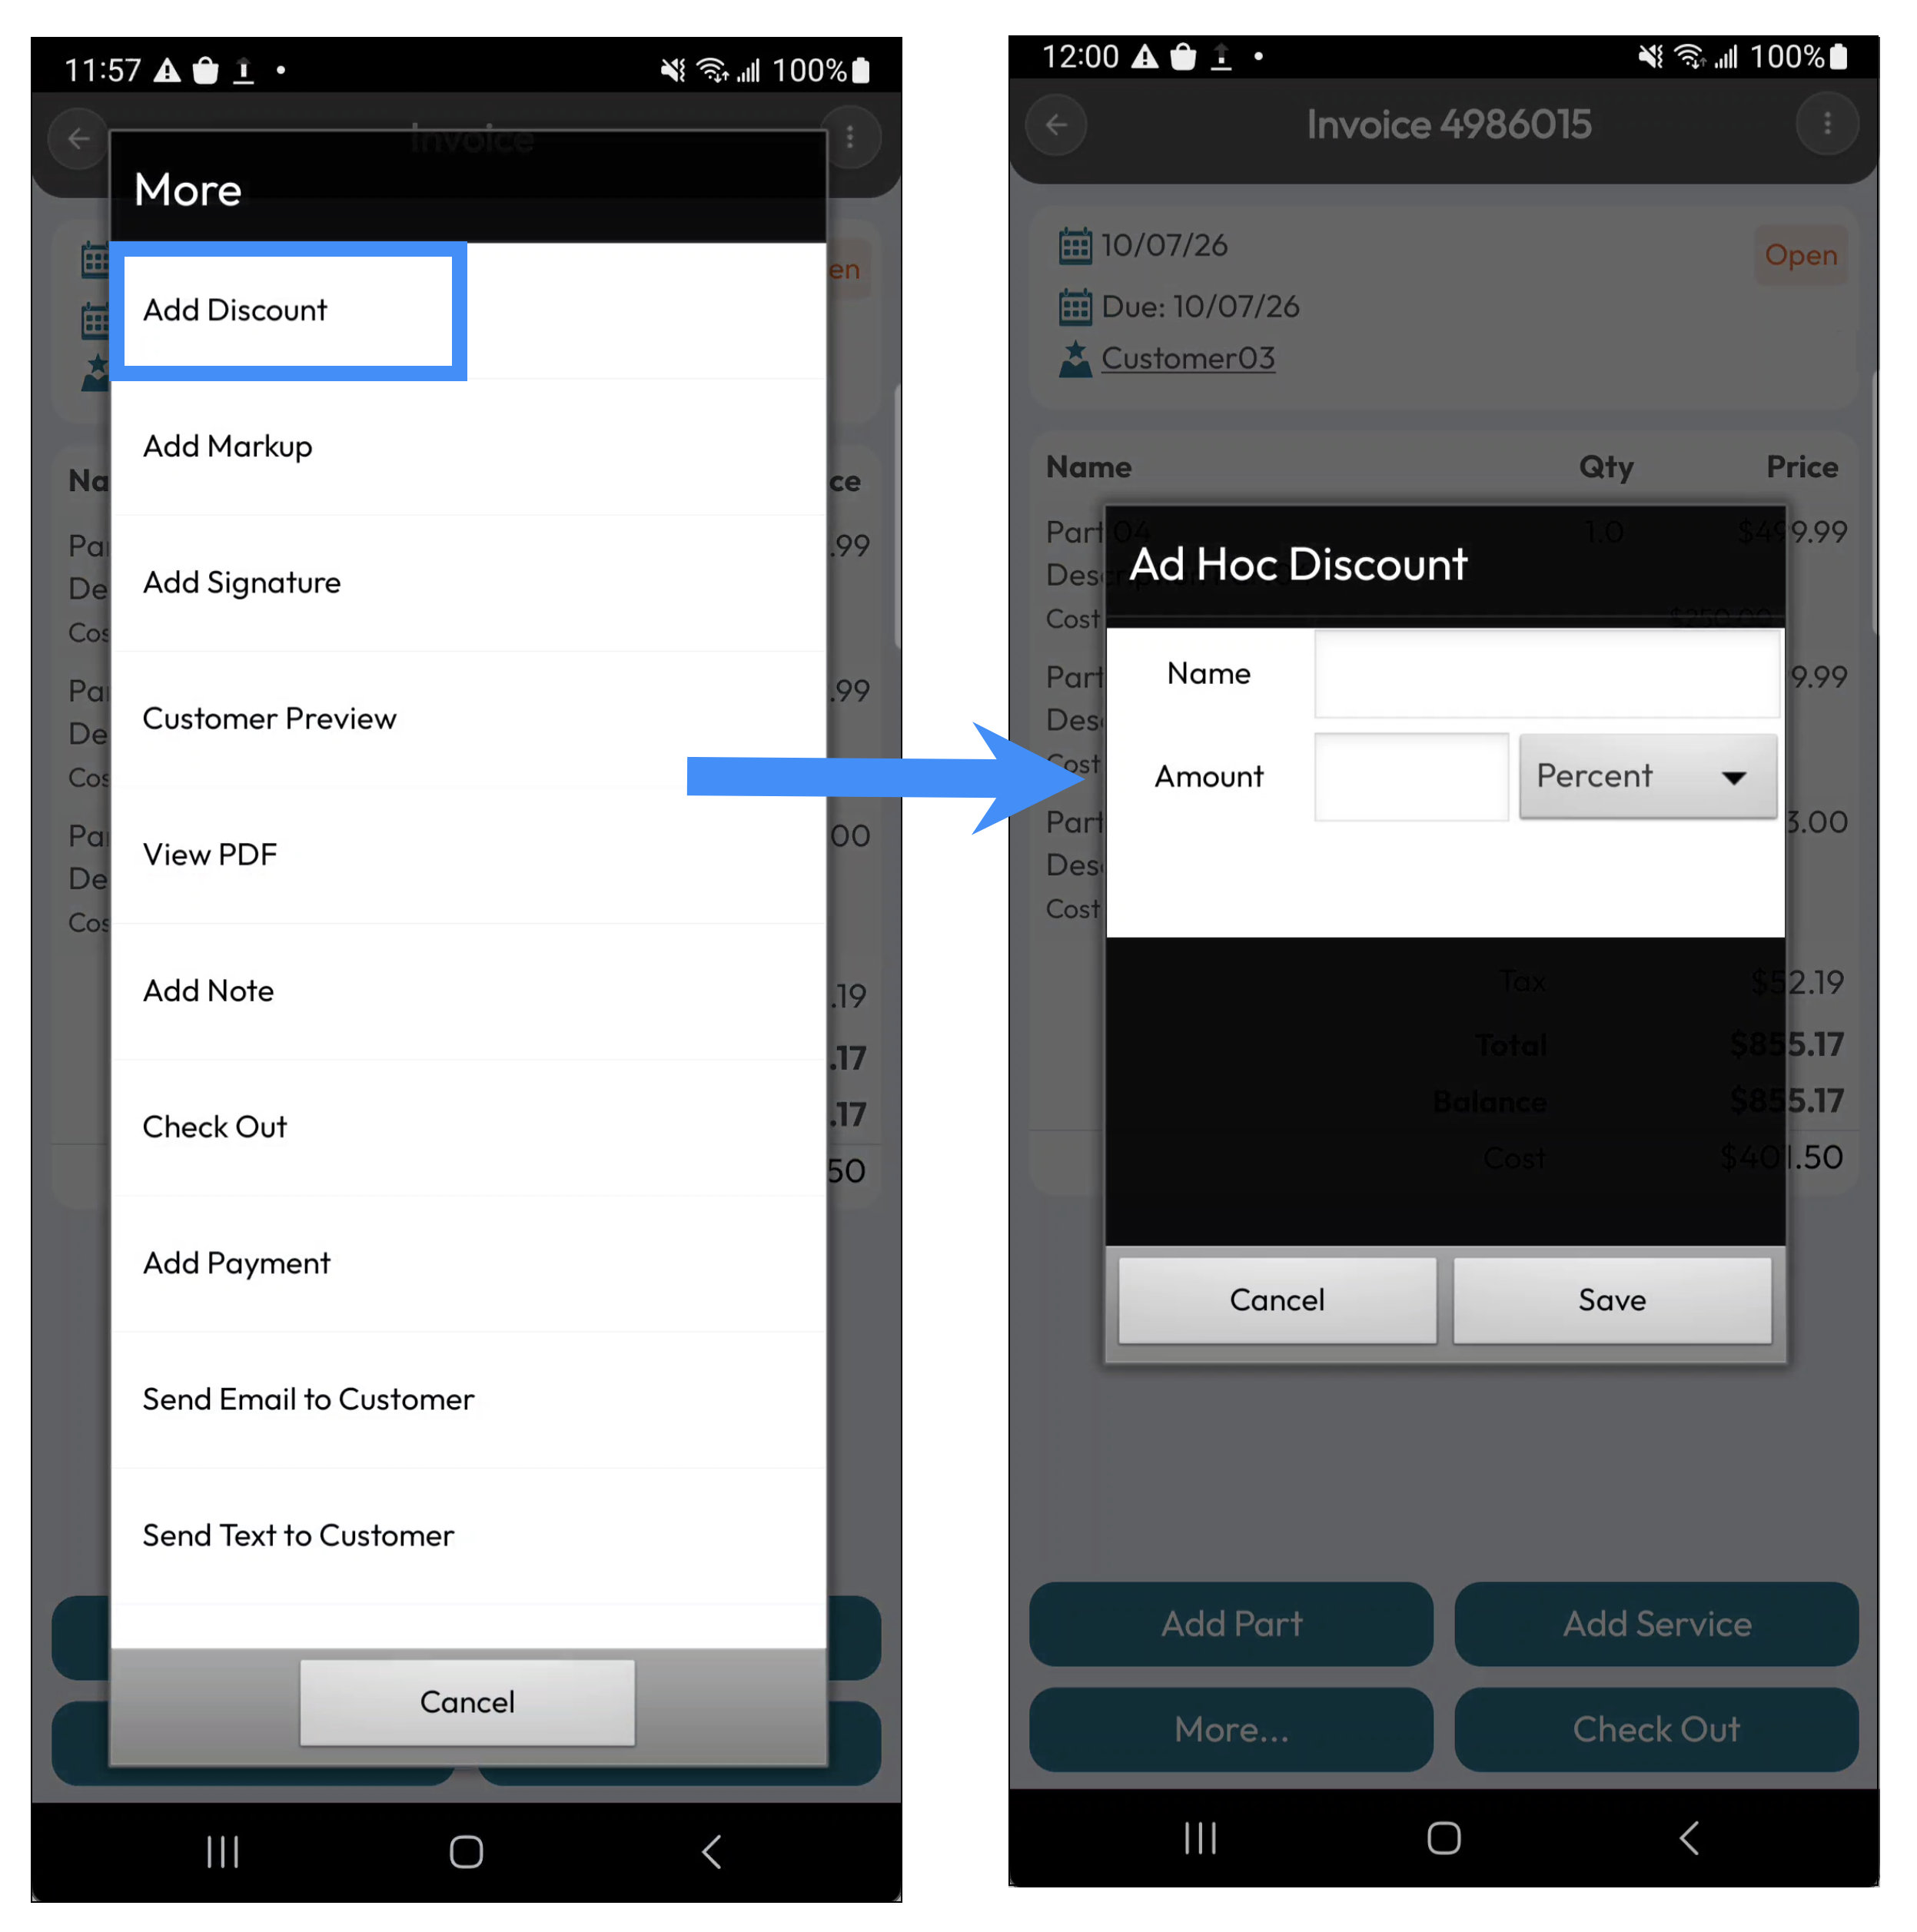
In this window, enter the desired name of the discount and the discount amount.
You can enter the discount amount as either a percentage or a specific dollar amount.
Add Markup
To add a markup, you will first need to access the More... tile. For more information how to access this tile, please see the Mobile Invoices Layout page.
The Add Markup tile allows you to apply an ad hoc markup to the overall invoice. Once you press on the Add Markup tile, the Ad Hoc Markup window will appear:
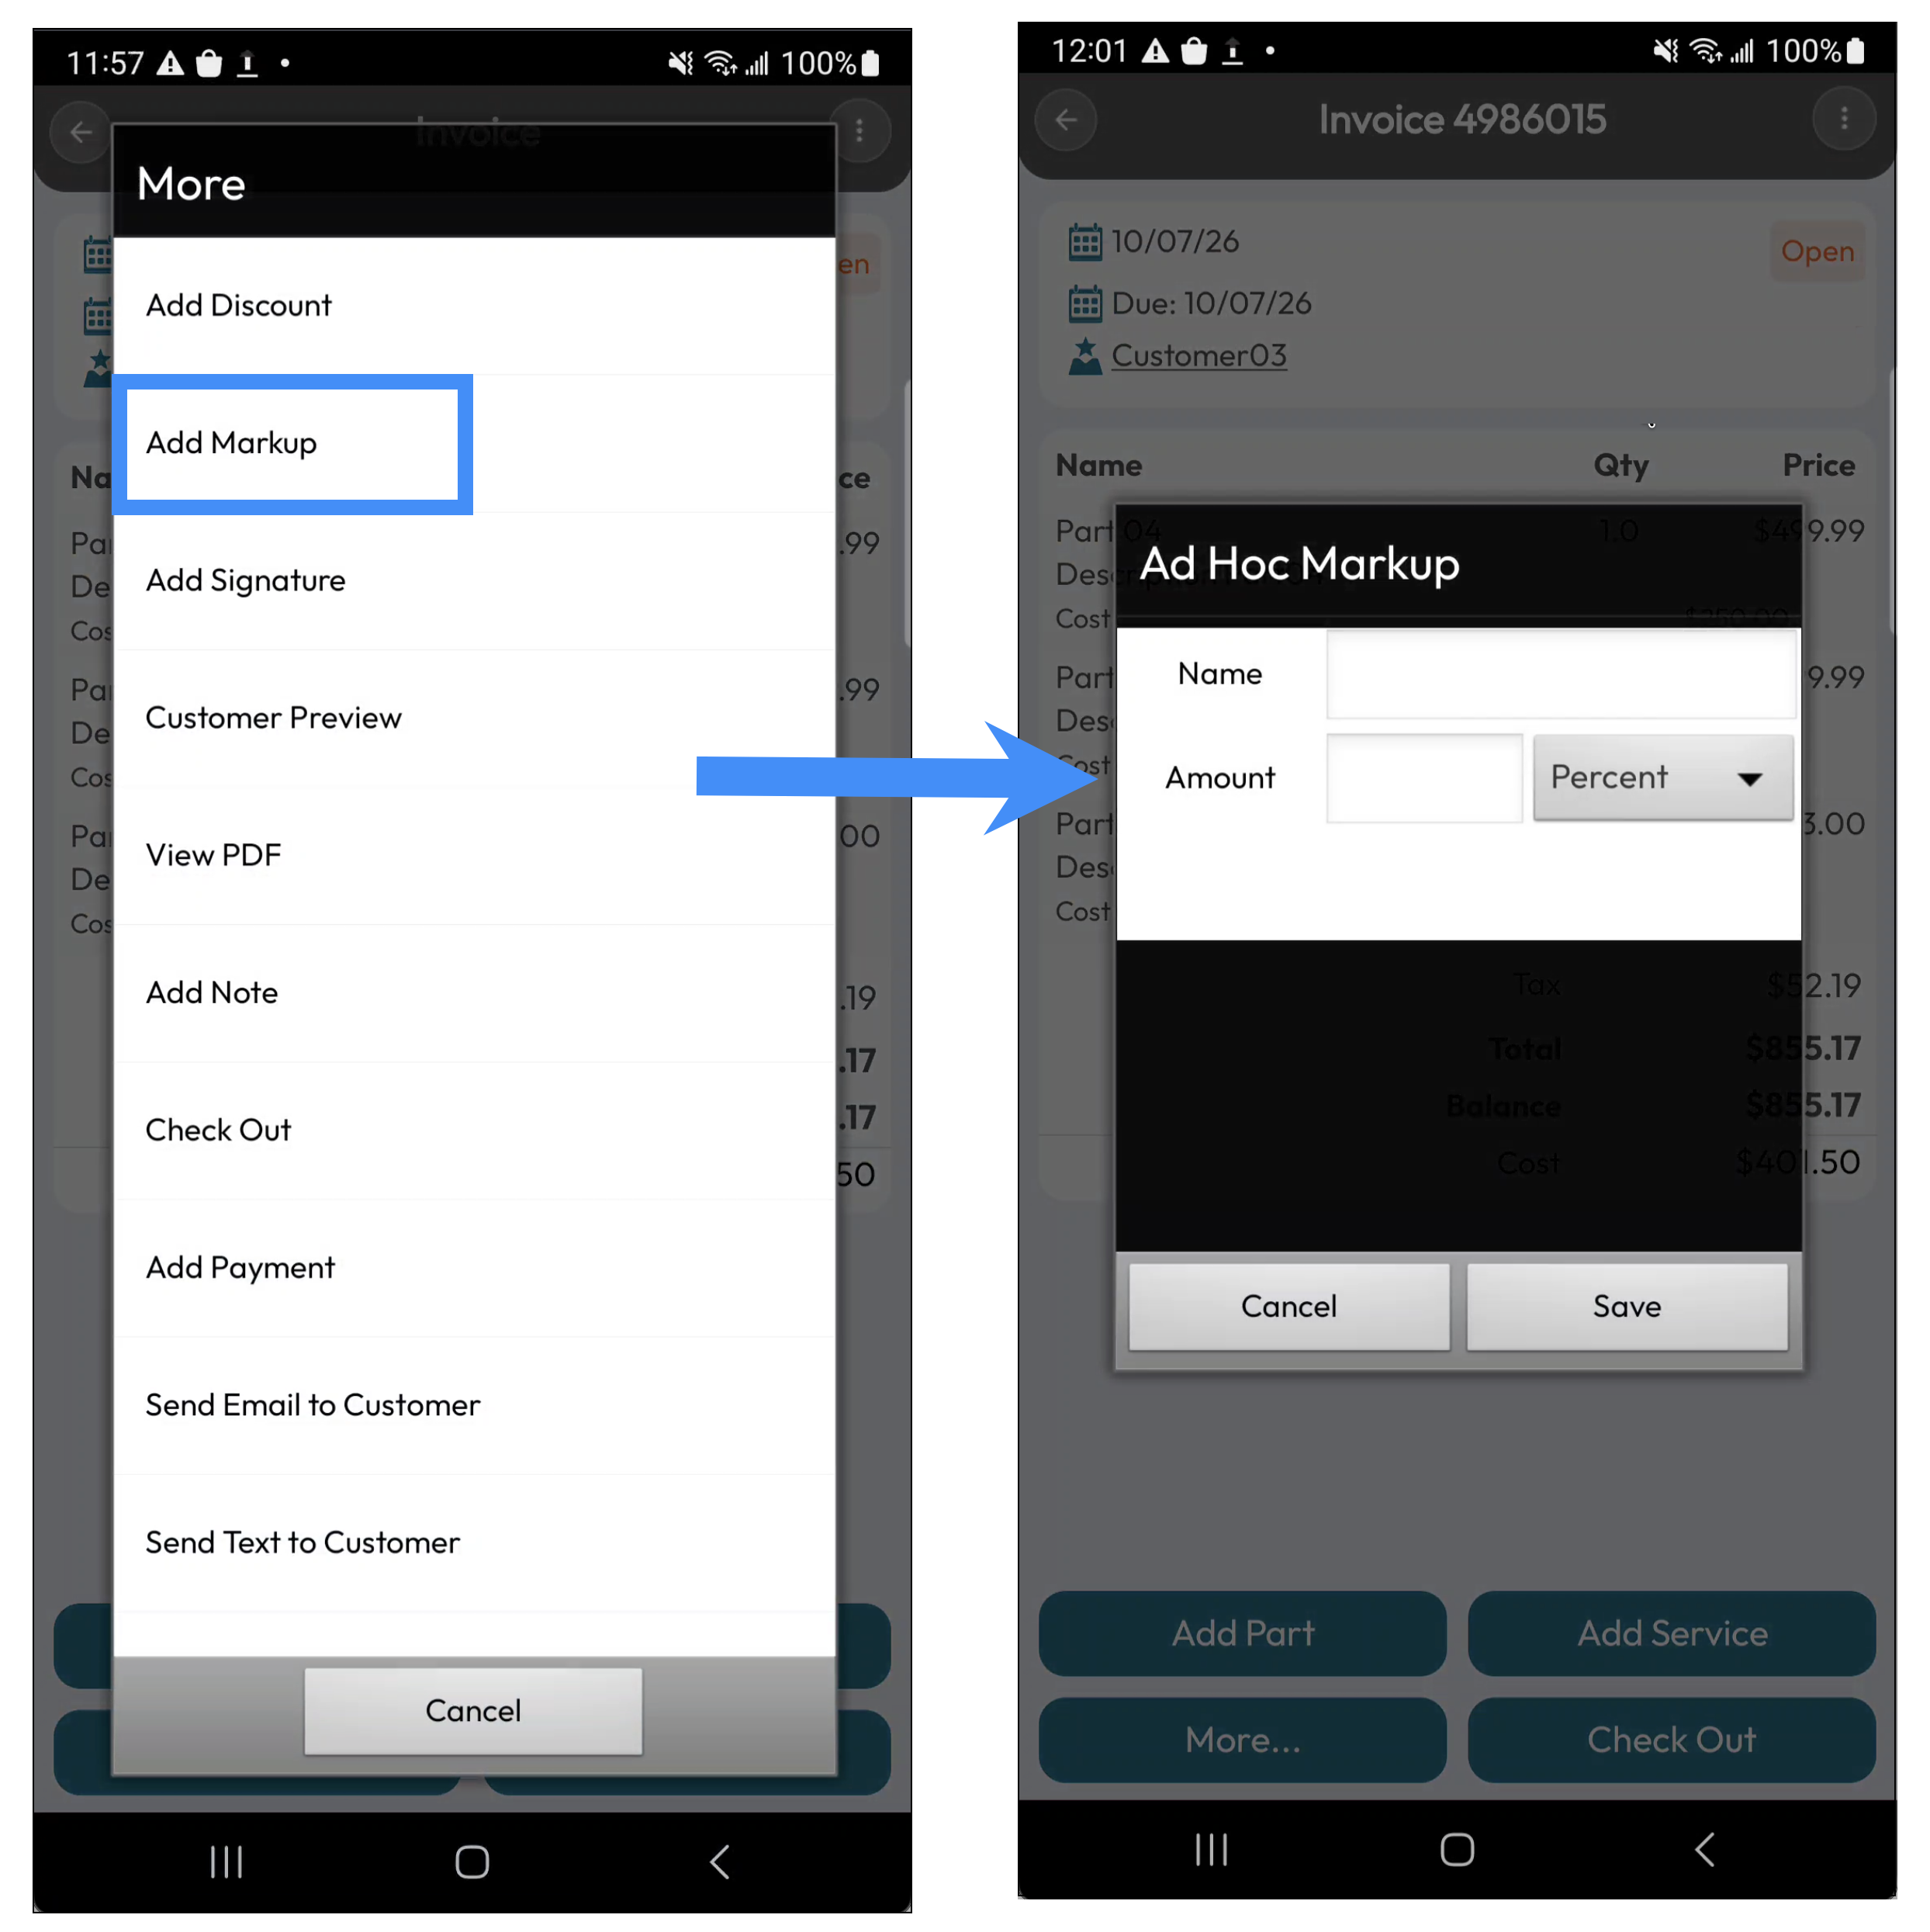
In this window, enter the desired name of the markup and the markup amount.
You can enter the markup amount as either a percentage or a specific dollar amount.
Add Note
To add a note, you will first need to access the More... tile. For more information how to access this tile, please see the Mobile Invoices Layout page.
The View Note tile allows you to add a note regarding the invoice. You can use this feature to record additional information, instructions, or comments associated with the invoice:
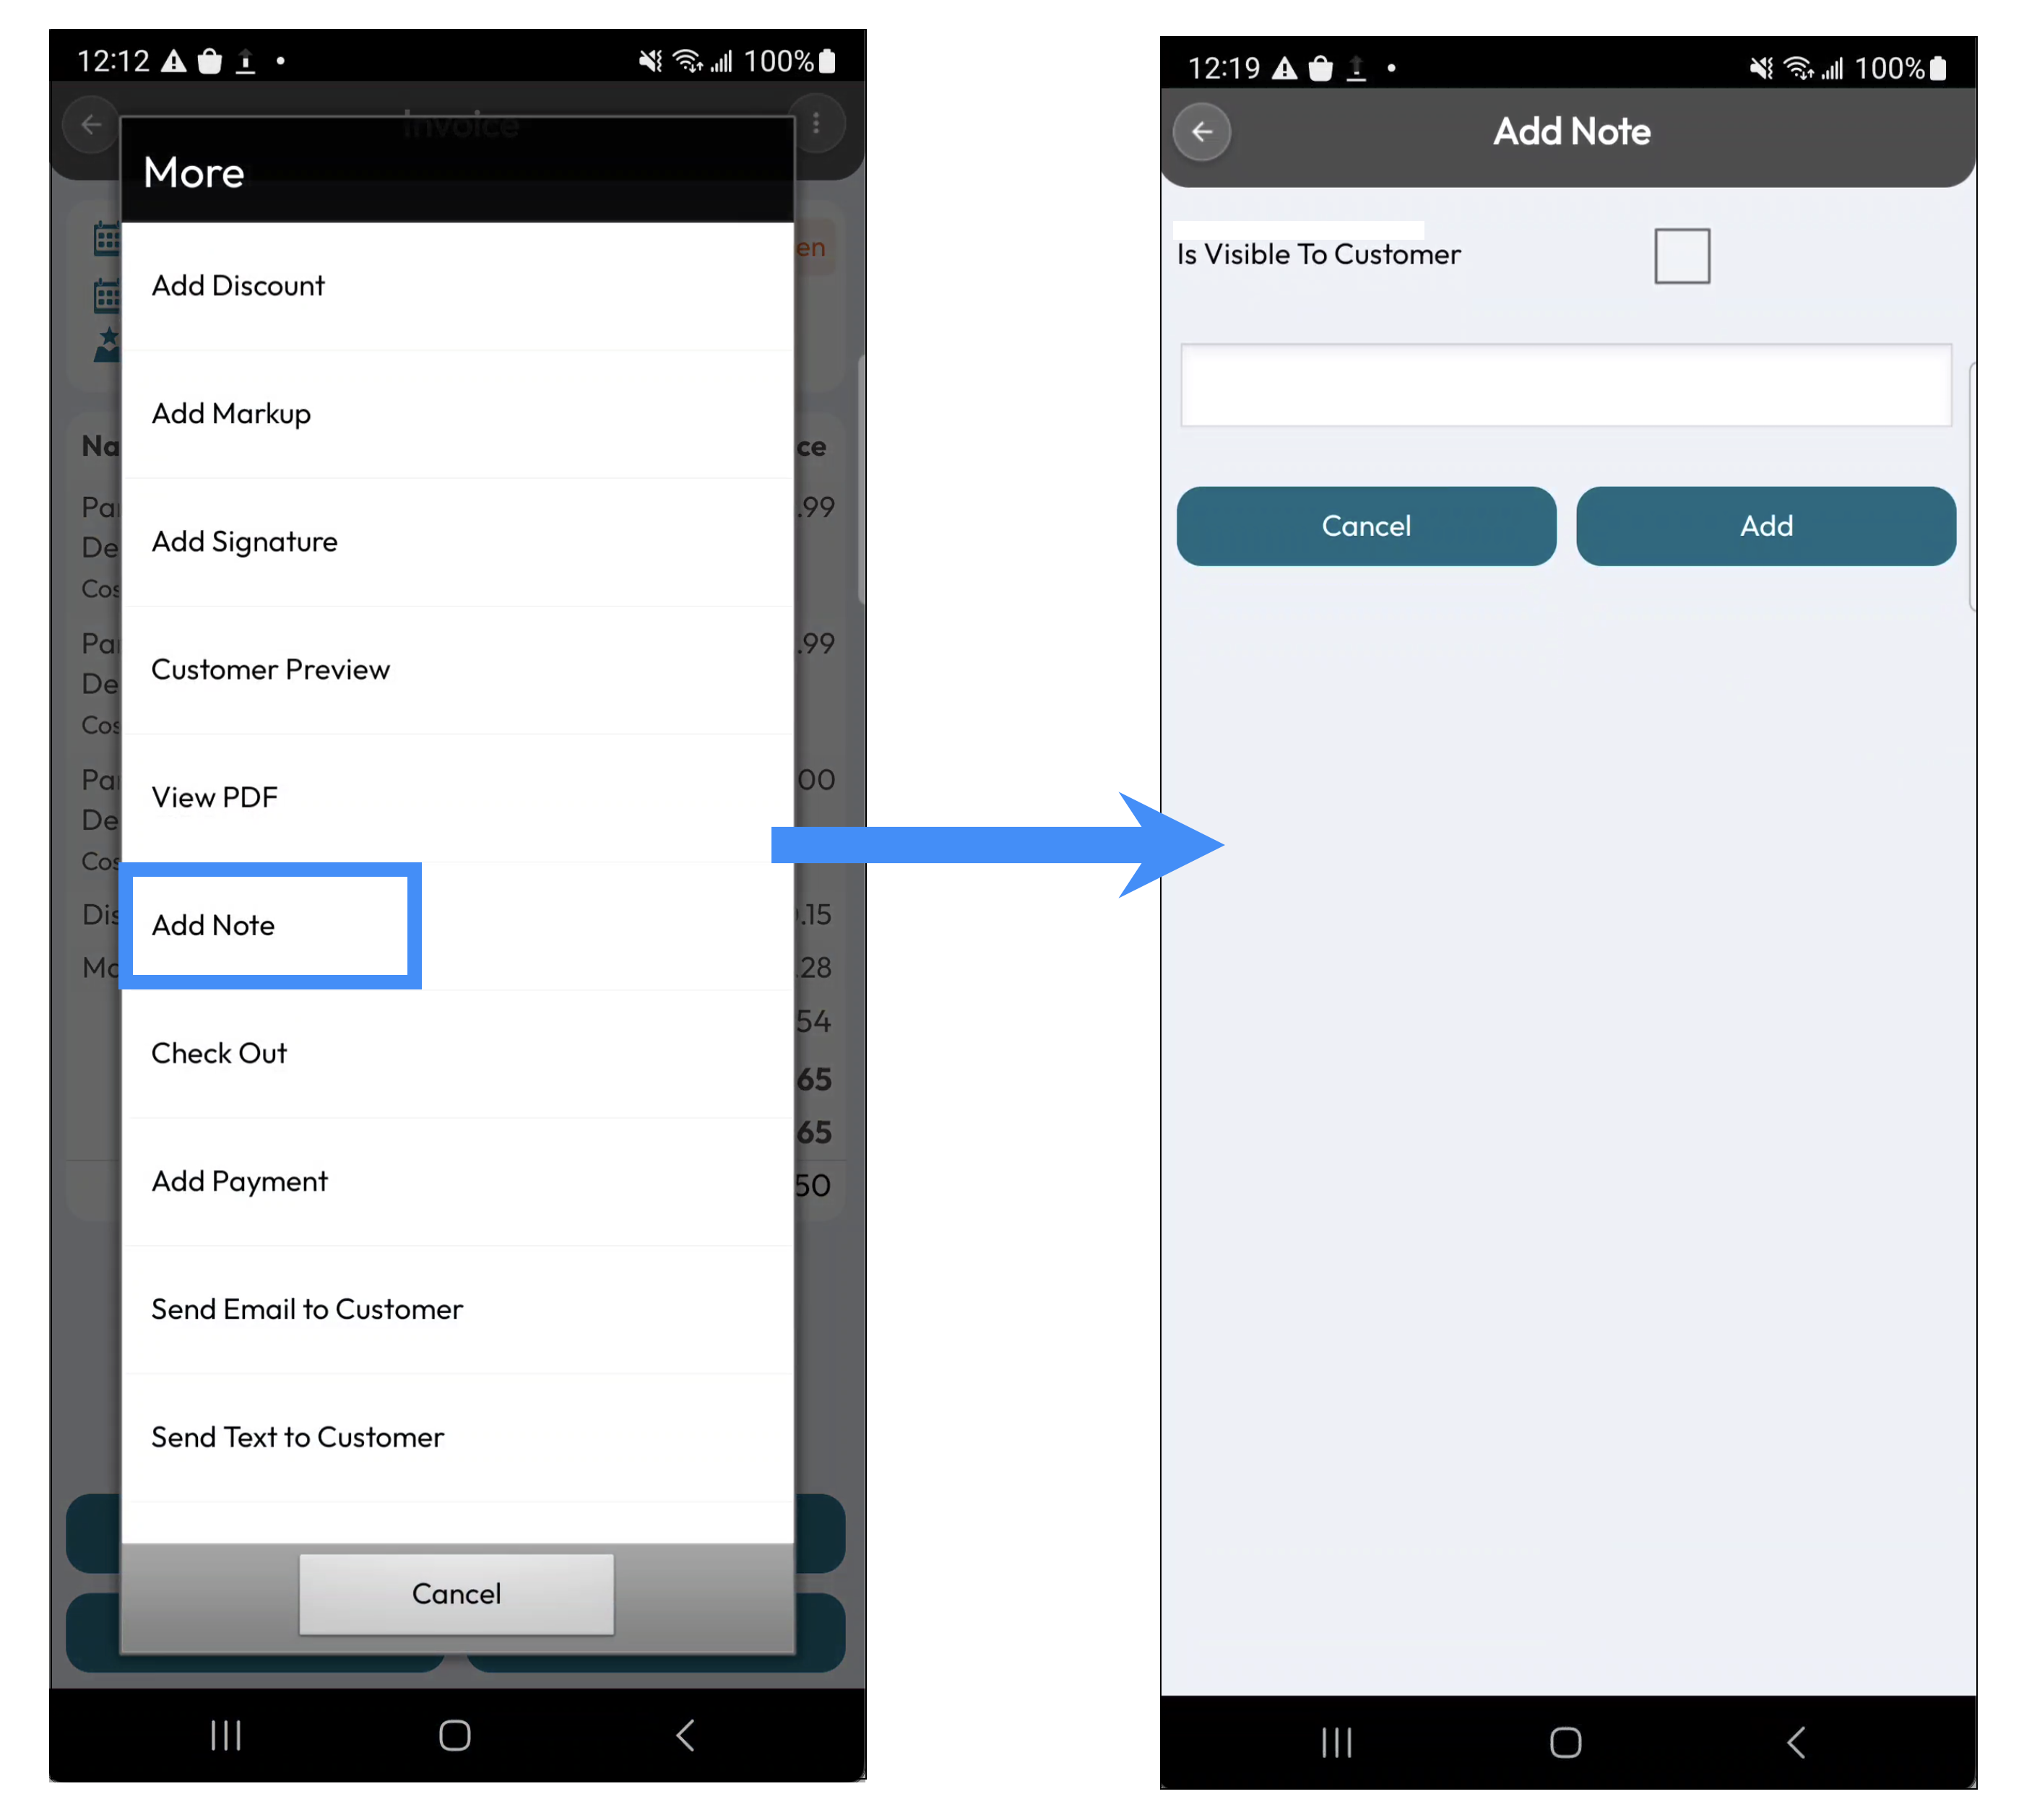
If you want the note to be visible to the customer, select the "Is Visible To Customer" checkbox. Notes that are not marked as visible to the customer remain internal.
The View Note tile is available regardless of the current status of the invoice.
Once you are done adding the invoice's line items, you can go ahead and check out the invoice.
You can check out the invoice in two different ways. Either by accessing the More tile and selecting the "Checkout" option:
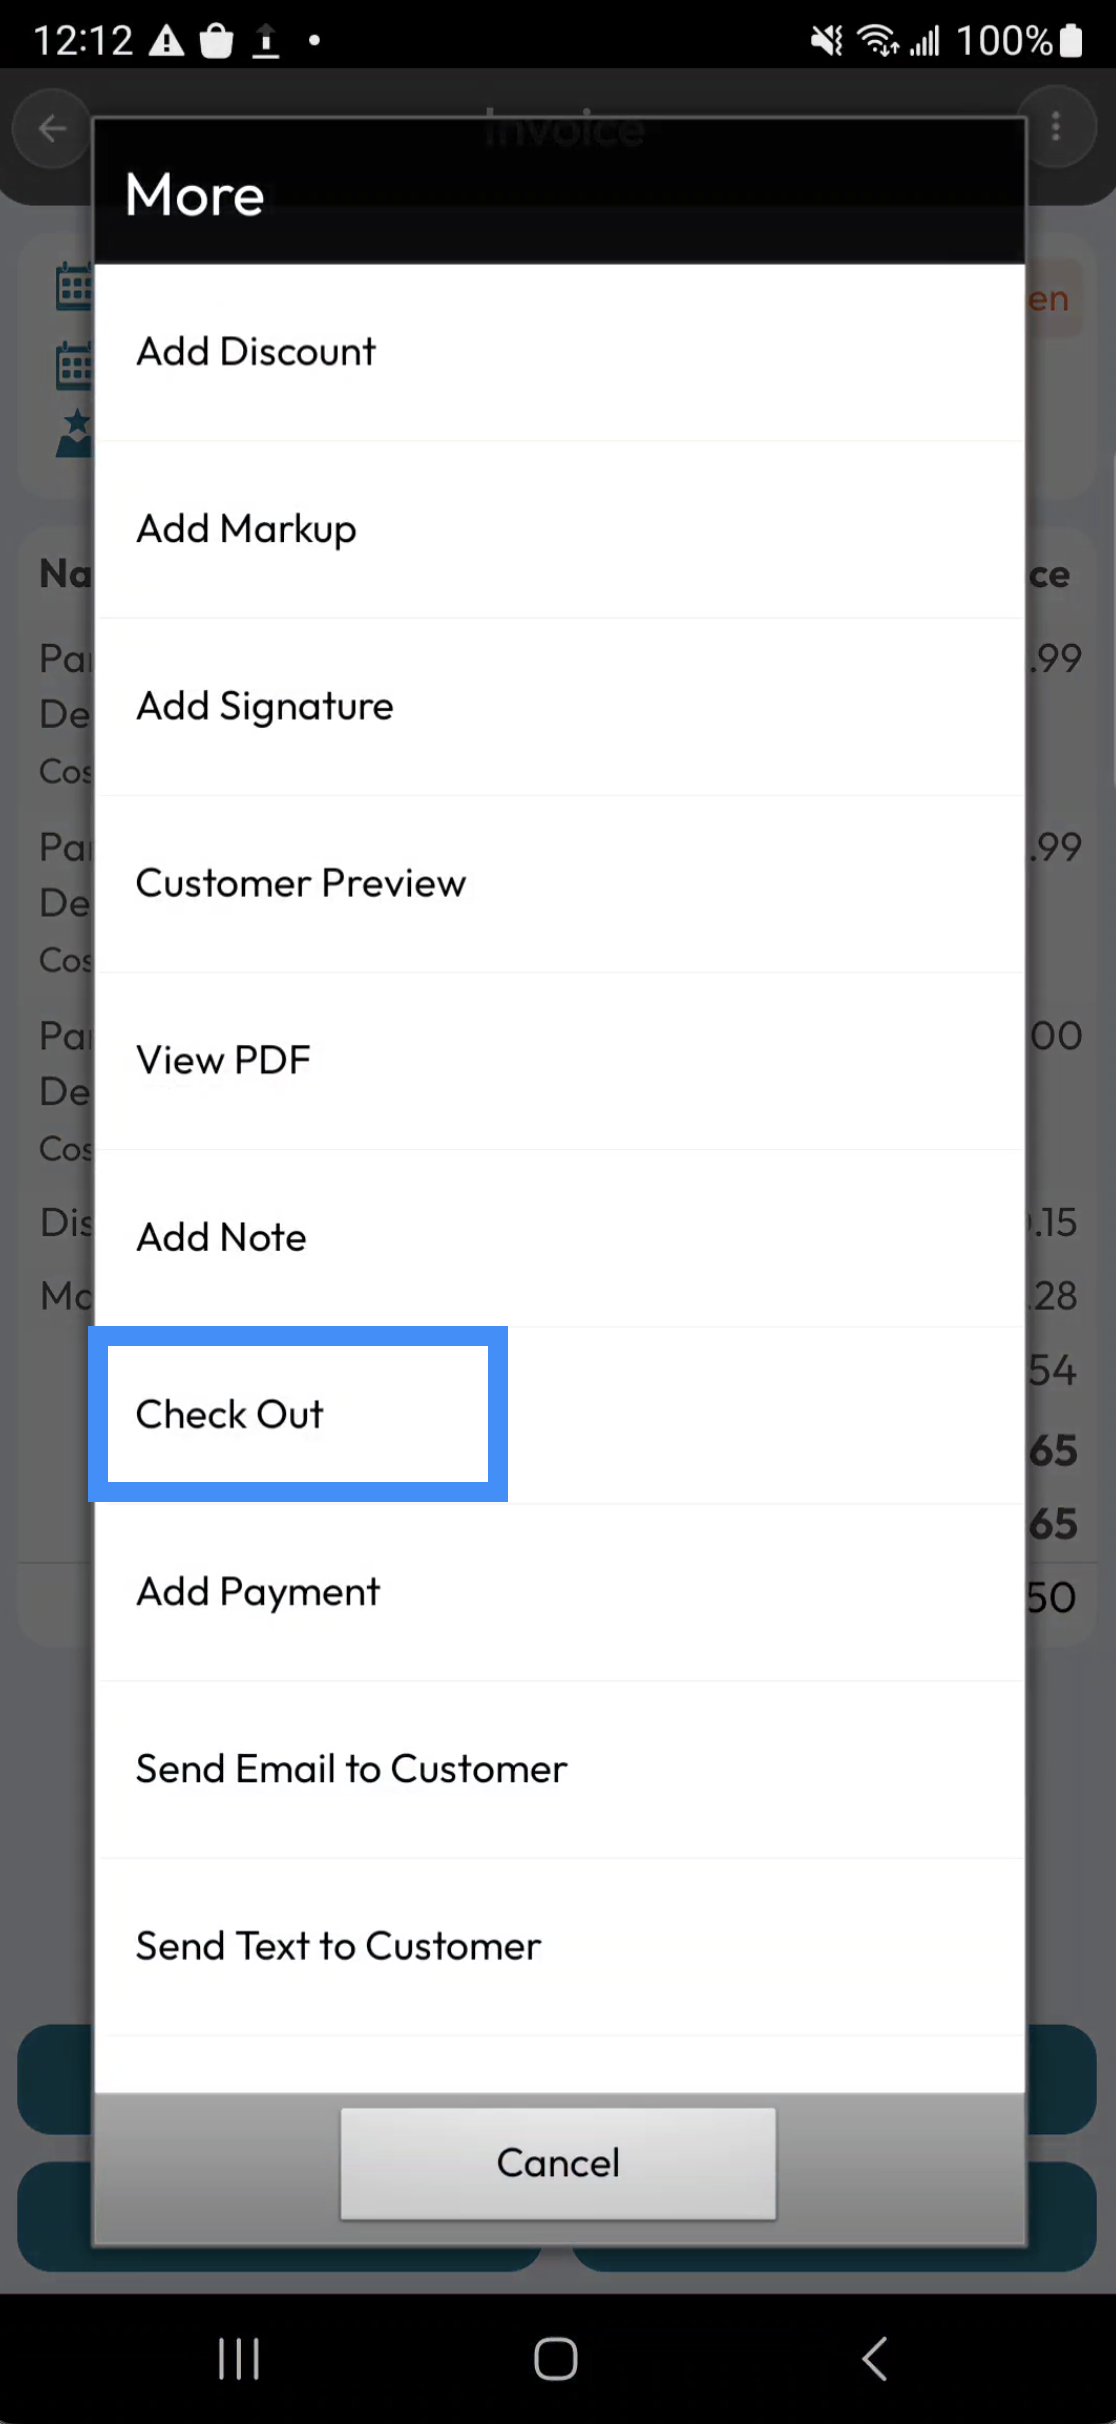
For more information how to access the More... tile, please see the Mobile Invoices Layout page.
Or by pressing directly on the Checkout tile from the Add Invoice page:
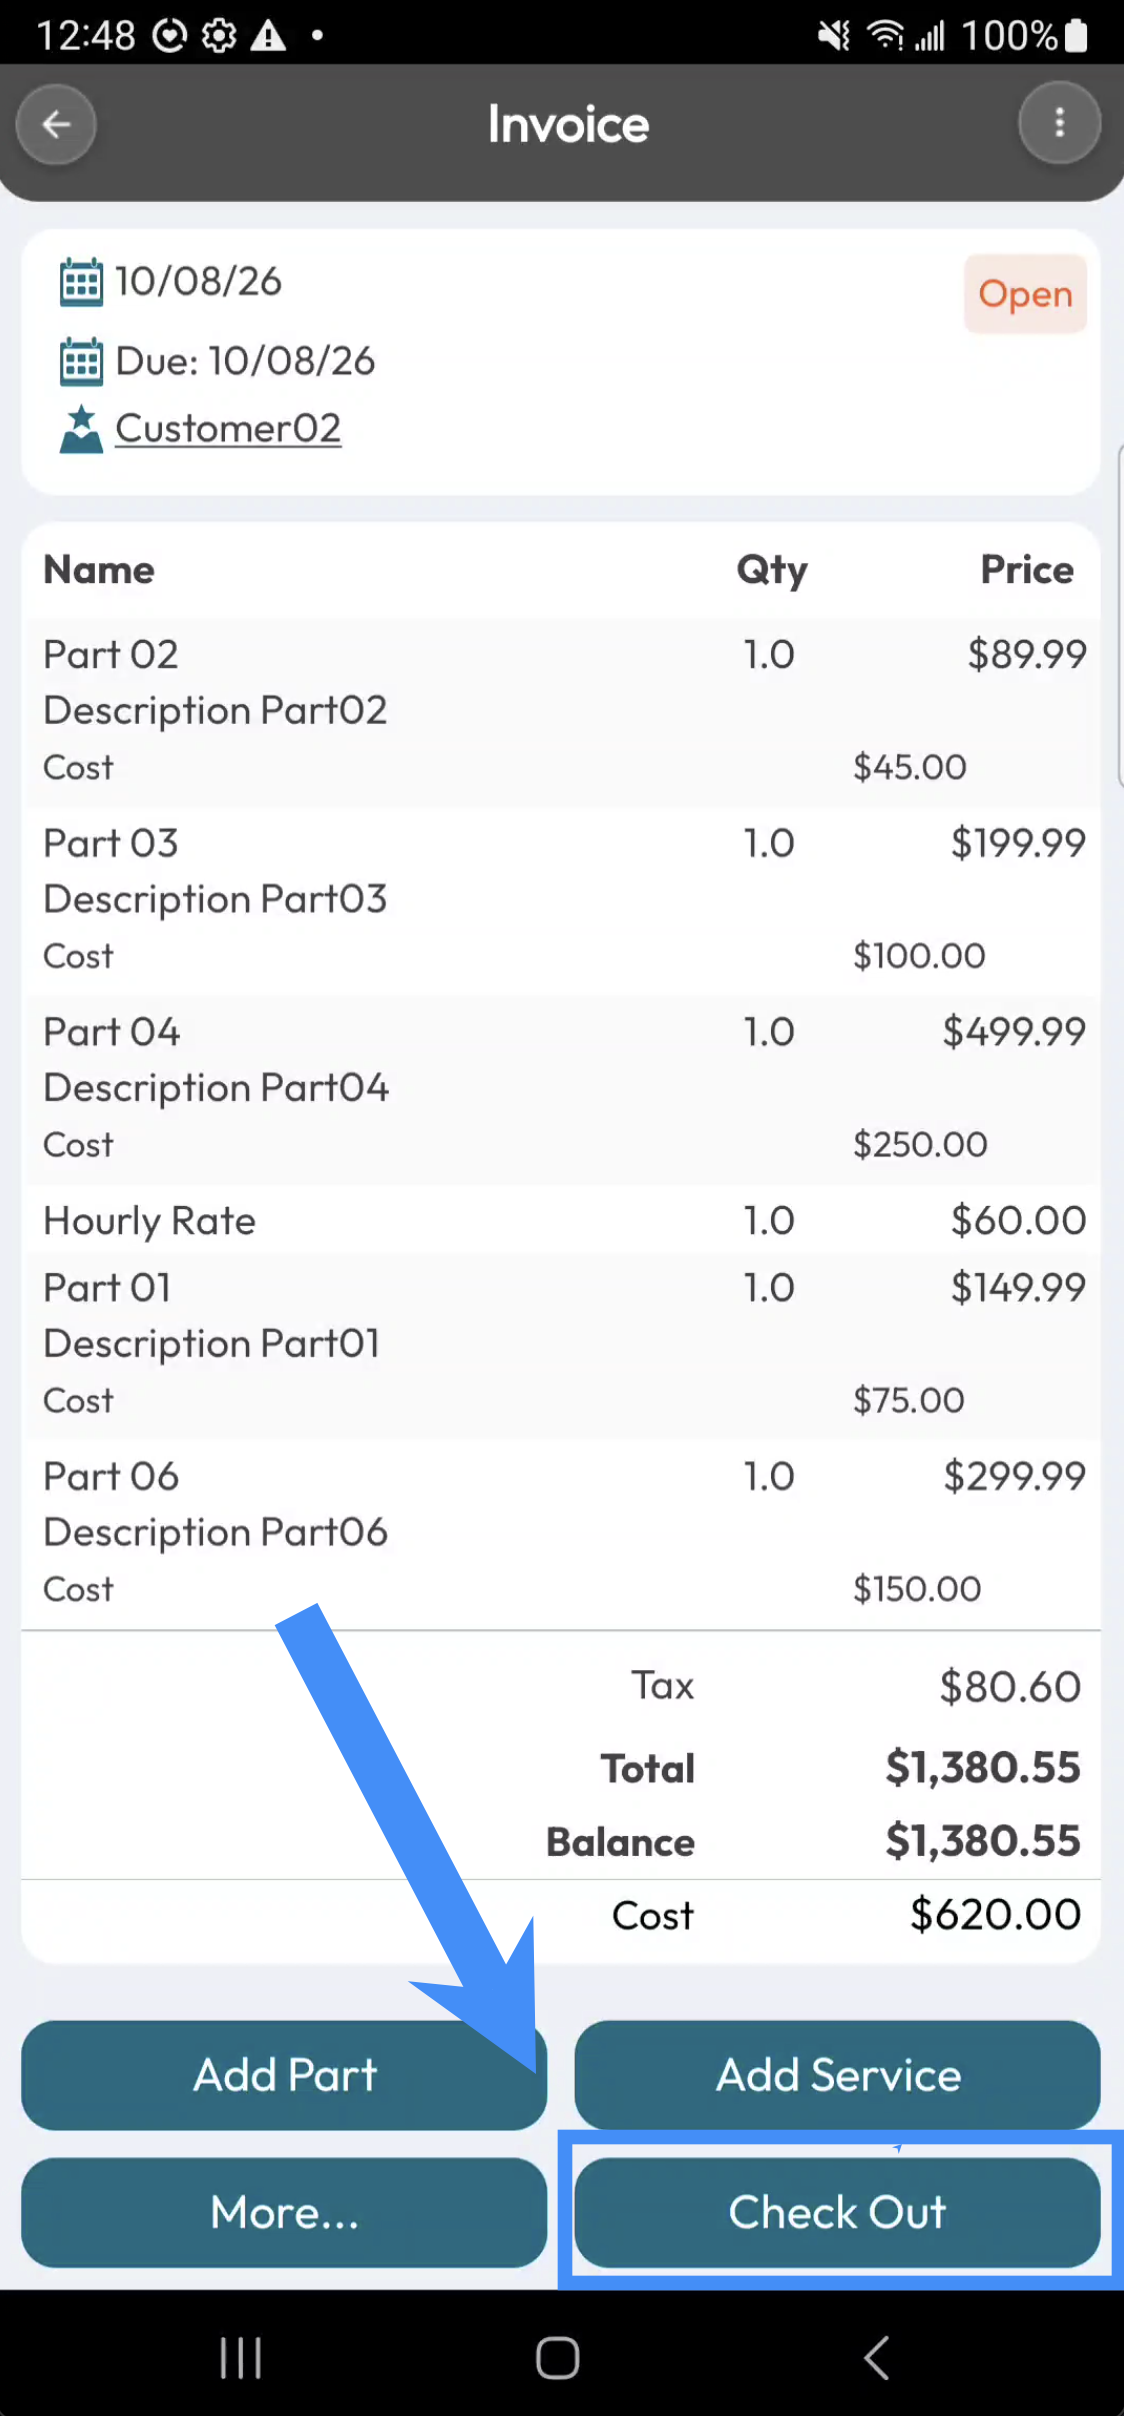
After the invoice has been checked out, you can apply the customer's payment. For more information on how to apply a payment to the invoice, please see the Invoice Checkout and Payment page.