- Overview
- Account Settings
- Assets
- Connectors Framework
- Overview
- QuickBooks Online
- QuickBooks Desktop Web Connector
- Azure AD
- Salesforce Integration
- FleetNet Connector
- Avalara Connector
- Inbound REST API
- Outbound REST API
- Mailchimp Connector
- Text Messaging Connector
- Clearent Connector
- Stripe Connector
- HubSpot Connector
- UKG Connector
- Paylocity Connector
- UKG Connector
- Gusto Connector
- iSolved Payroll Connector
- Customer Portal
- Customers
- Dashboards
- Devices
- Dispatching
- Forms
- Inventory
- Invoices & Billing
- Locations
- Payments
- Parts
- Projects
- Quotes
- Recurrent Routes
- Recurrent Services
- Reports
- Sales Orders
- Schedule
- Services
- Tasks
- Text Messaging
- Time Tracking
- Users
- Work Orders
To edit the URL or the settings that your Customer Portal website offers, you will first need to need to access your Account Settings. This page will highlight how to navigate to your Account Settings and also how to edit specific aspects (e.g., the url, features, etc.) of your customer portal.
To access your Account Settings, hover over the User icon in the upper right corner and from the drop-down menu, select the "Account Settings" option:

Once you have accessed your Account Settings, you will be redirected to the Settings page; once you are on this page, select the "Features" tab.
On the "Features" tab, click on the Customer Portal hyperlink:

Once you click on this hyperlink, you will be redirected to the Customer Portal Settings page. To edit the Customer Portal URL click the Edit Customer Portal Settings button:

Once you click on the Edit Customer Portal Settings button, you will be redirected to the Edit Customer Portal portal page. On this page, you can:

Enter the text for the Customer Portal URL (please make sure that the text URL is unique)
Link the customer portal to your company's main webpage,
Input text greeting for the customer portal's login screen:
Once you are satisfied with your updates, click the Save button.
Once you have accessed your Account Settings, you will be redirected to the Settings page; once you are on this page, select the "Configuration" tab.
On the "Configuration" tab, click on the Customer Portal Features hyperlink:

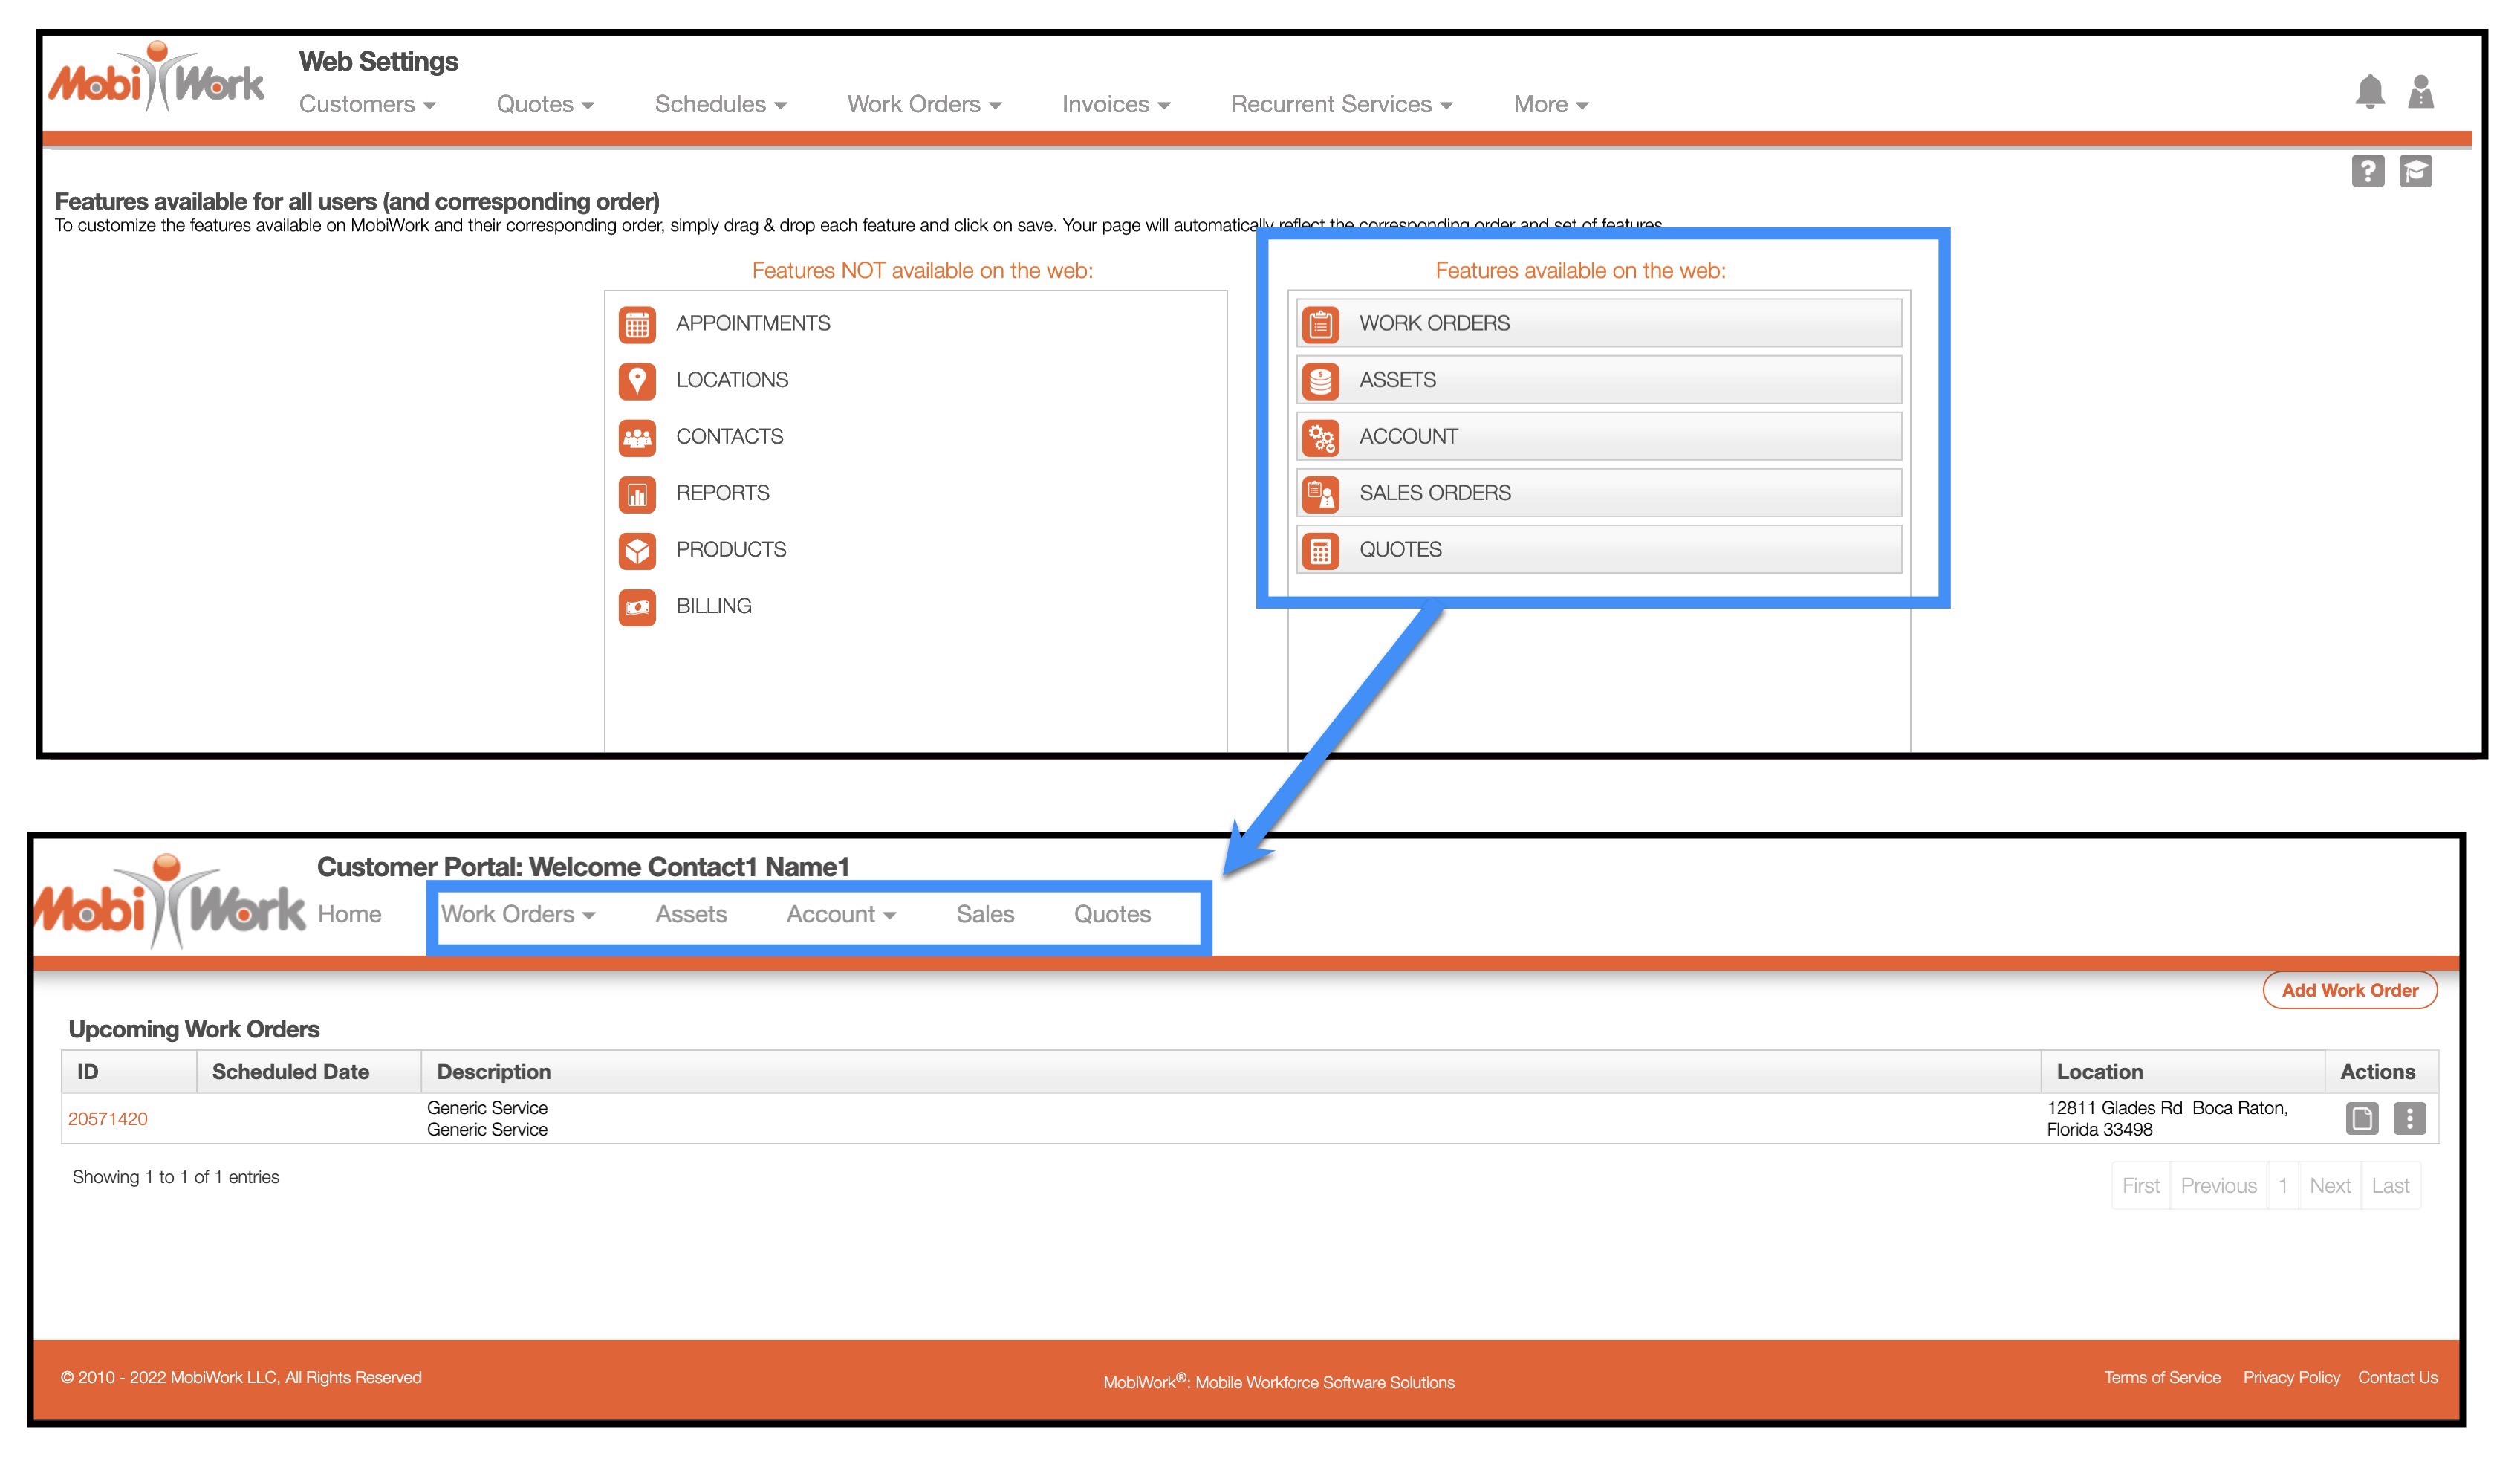
Once you click on this hyperlink, you will be redirected to the Web Settings page. To edit the features found on the Customer Portal, drag & drop the desired feature from the specified columns:

Please note that the features in the left column will NOT appear on the customer portal website, while the features in the right column WILL appear on the customer portal.
Once you are satisfied with your updates, click the Save button.
The specified features will then appear in the Customer Portal website that the customer accesses:

If you have any questions or need further assistance, please let us know. We'd be happy to help!
