Add a User
You will be able to add a user through the "List" tab. For more information how to access this page, please see the User List page.
Once you are on the "List" tab, click on the Plus Sign in the top right corner to add a new user:
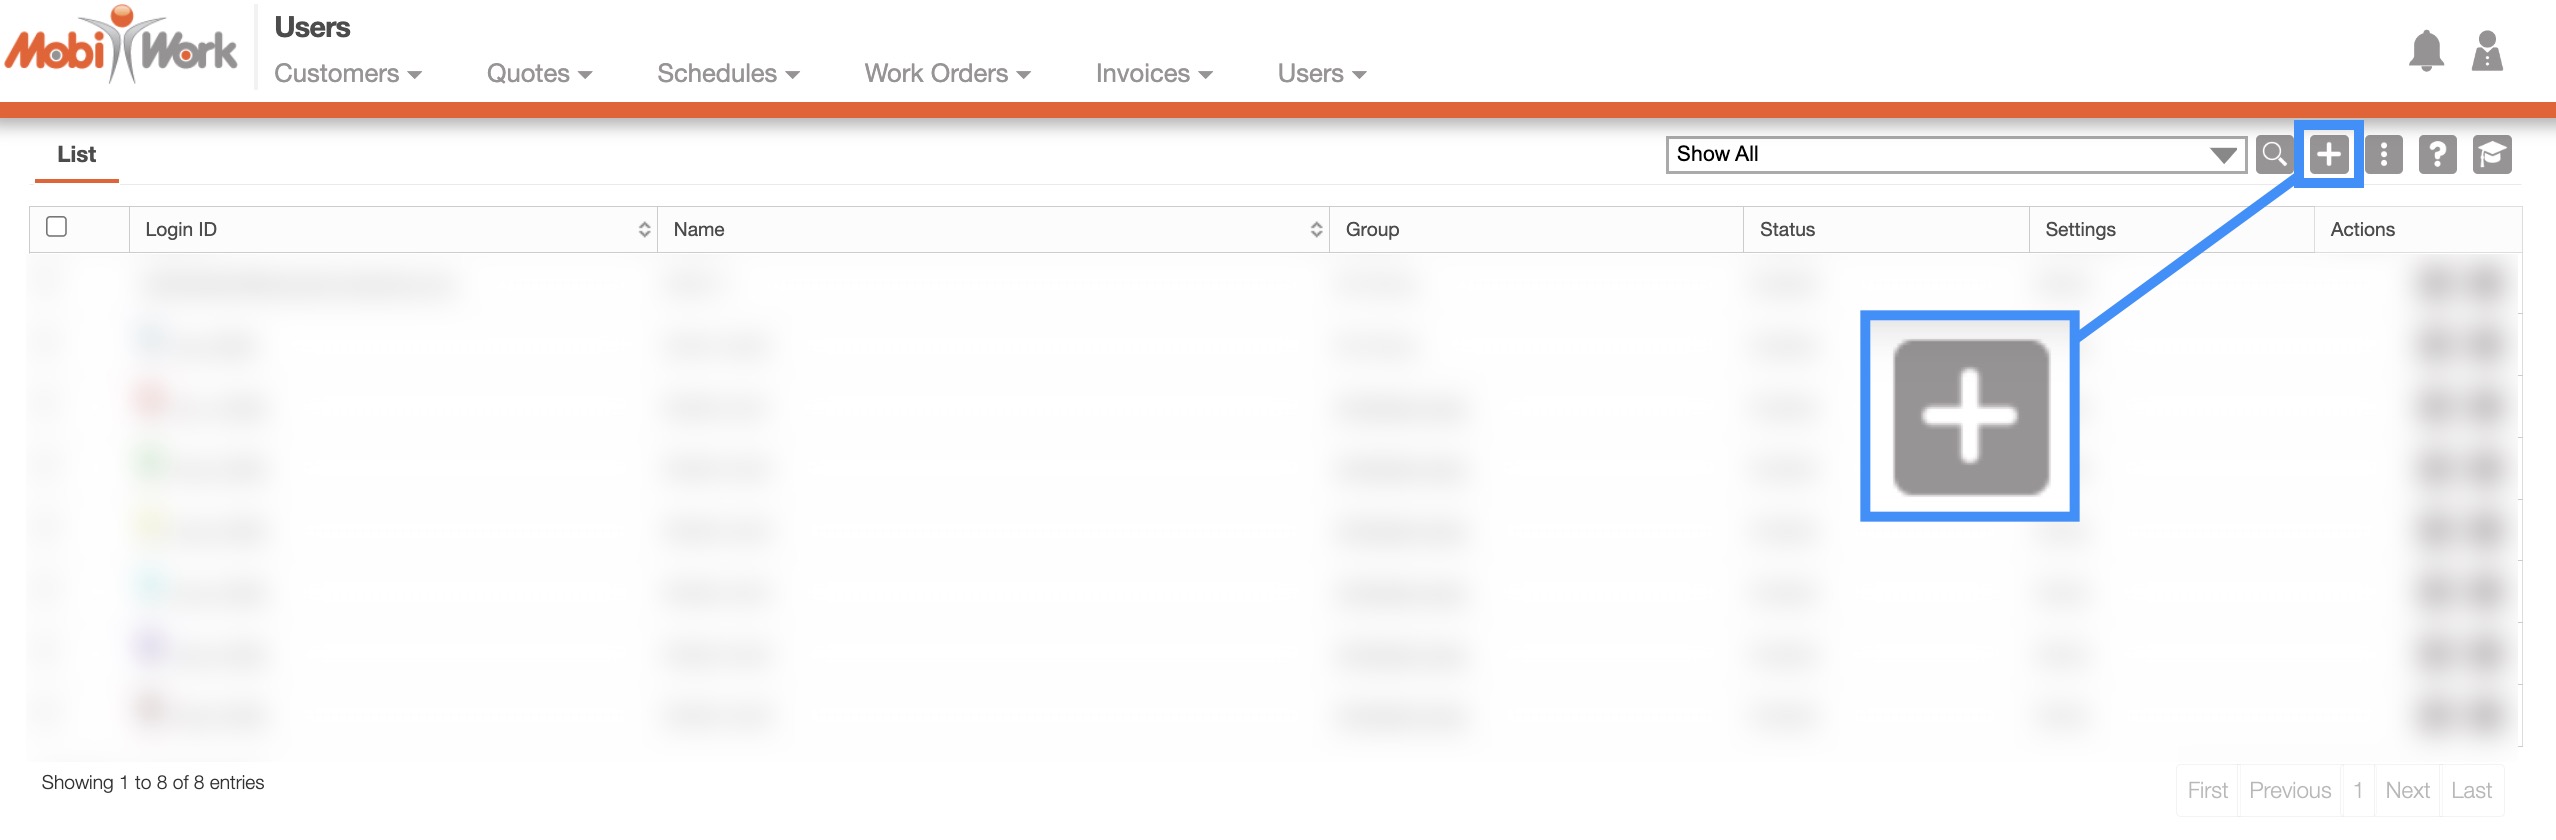
When you click on the Plus Sign button, the Add User pop-up window will automatically appear.
Note: Please note that adding a new user will generate a brand-new user for MobiWork. We strongly recommend that if there is a new employee at your company that you create a new user. If a new employee uses an enabled user's account, the historical data will be overwritten with the new user's data.
Enable a User
You will be able to enable a user through the "List" tab. For more information how to access this page, please see the User List page.
When you are on the "List" tab, please make sure that the "Disabled" predefined search is selected. Once this is done, there are three different ways you can enable a user:
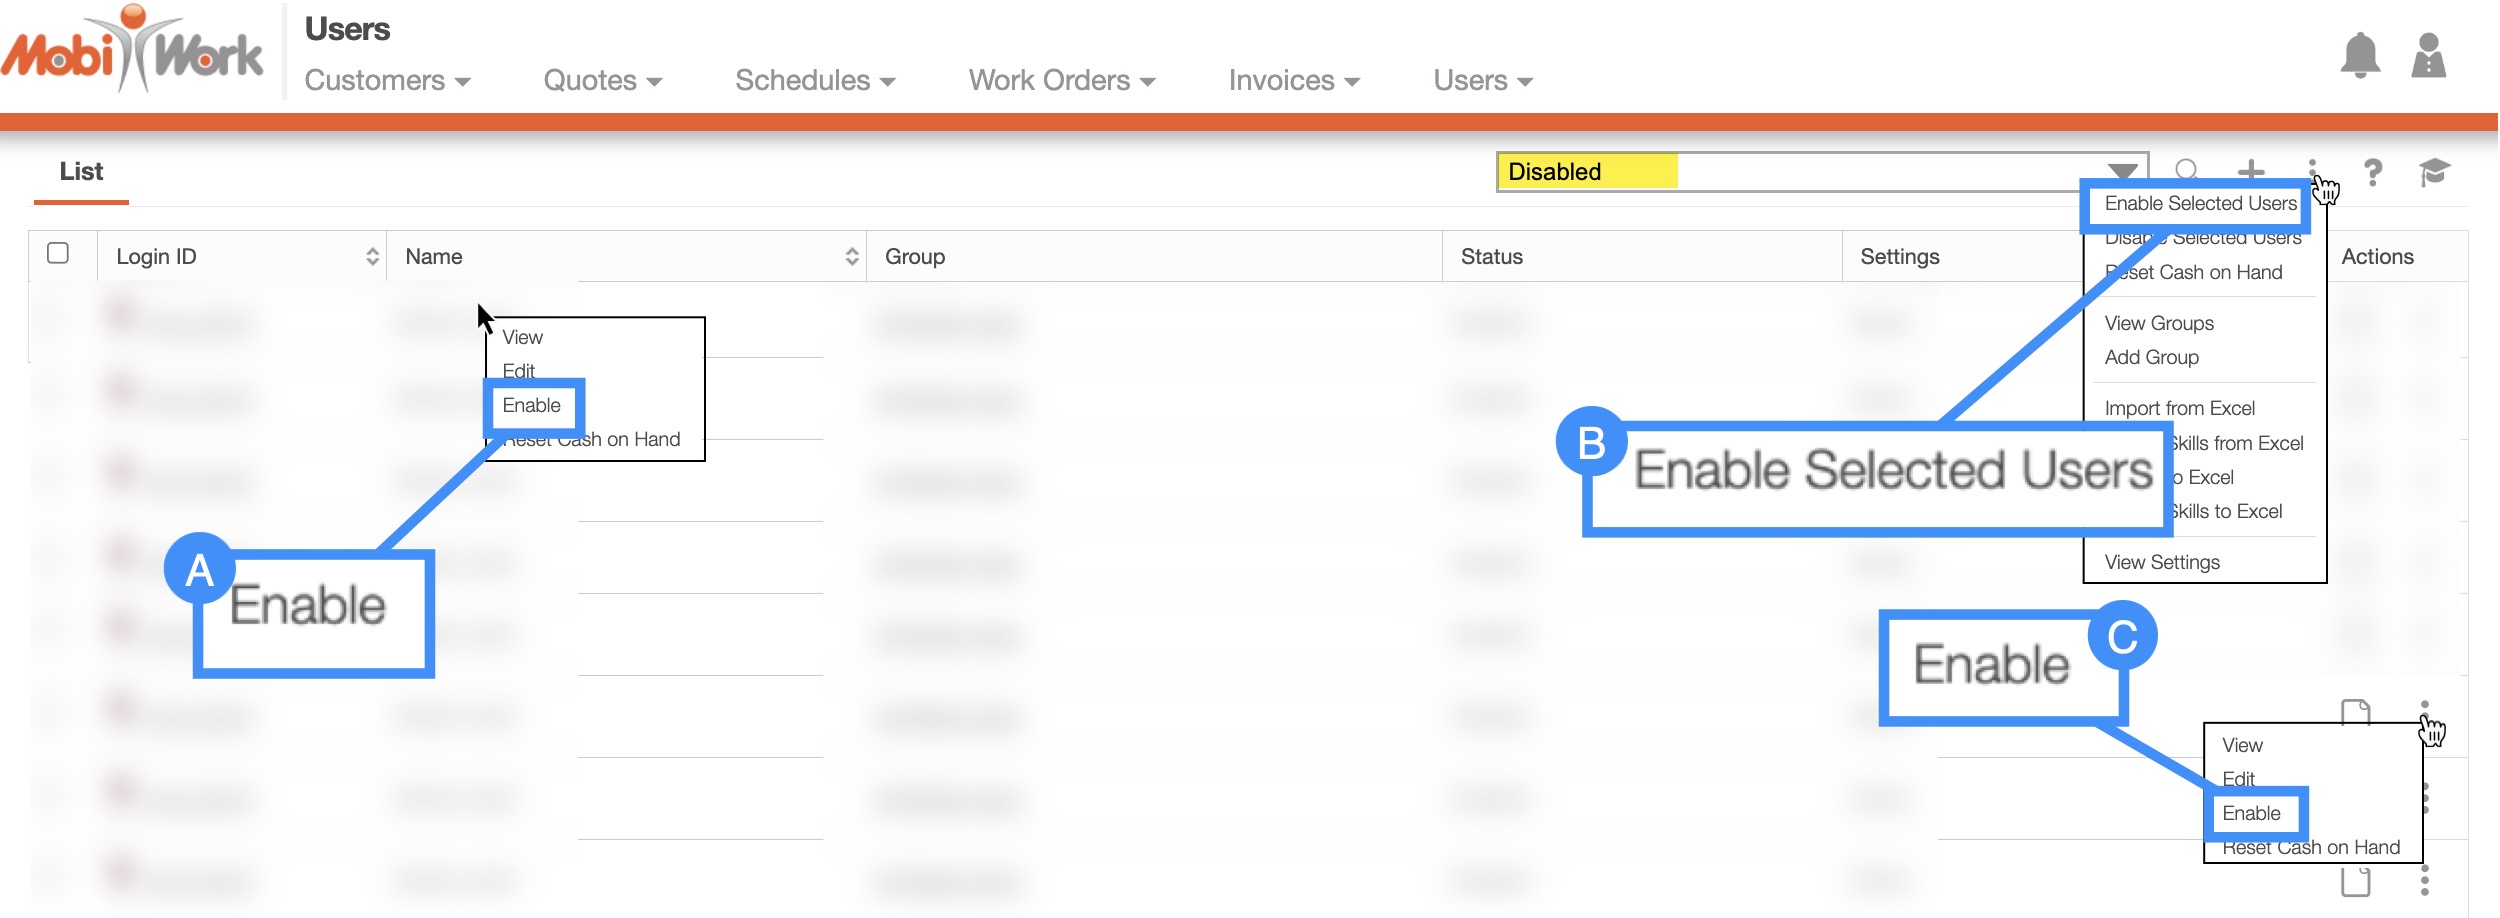
Right-click on a user to open the right-click options and from the drop-down, select the "Enable" option. (The options that are displayed when you right-click on a user are also available when you select the Individual Actions button).
Select the More Actions button and from the drop-down, select the "Enable Selected Users" option. Please note that this option will give you the ability to enable multiple users at once.
Click on the Individual Actions (the three vertical dots) and from the drop-down select the "Enable" option. (The options that are displayed from the Individual Actions button are the same as when you right-click on a user).
Note: Please note that if you have a user returning to your company (e.g., an intern returning for the summer) you can enable that user; this will then reactivate the user account that is already within the system.
Once the Add User pop-up window appears, you will be able to input the necessary data for your new user:
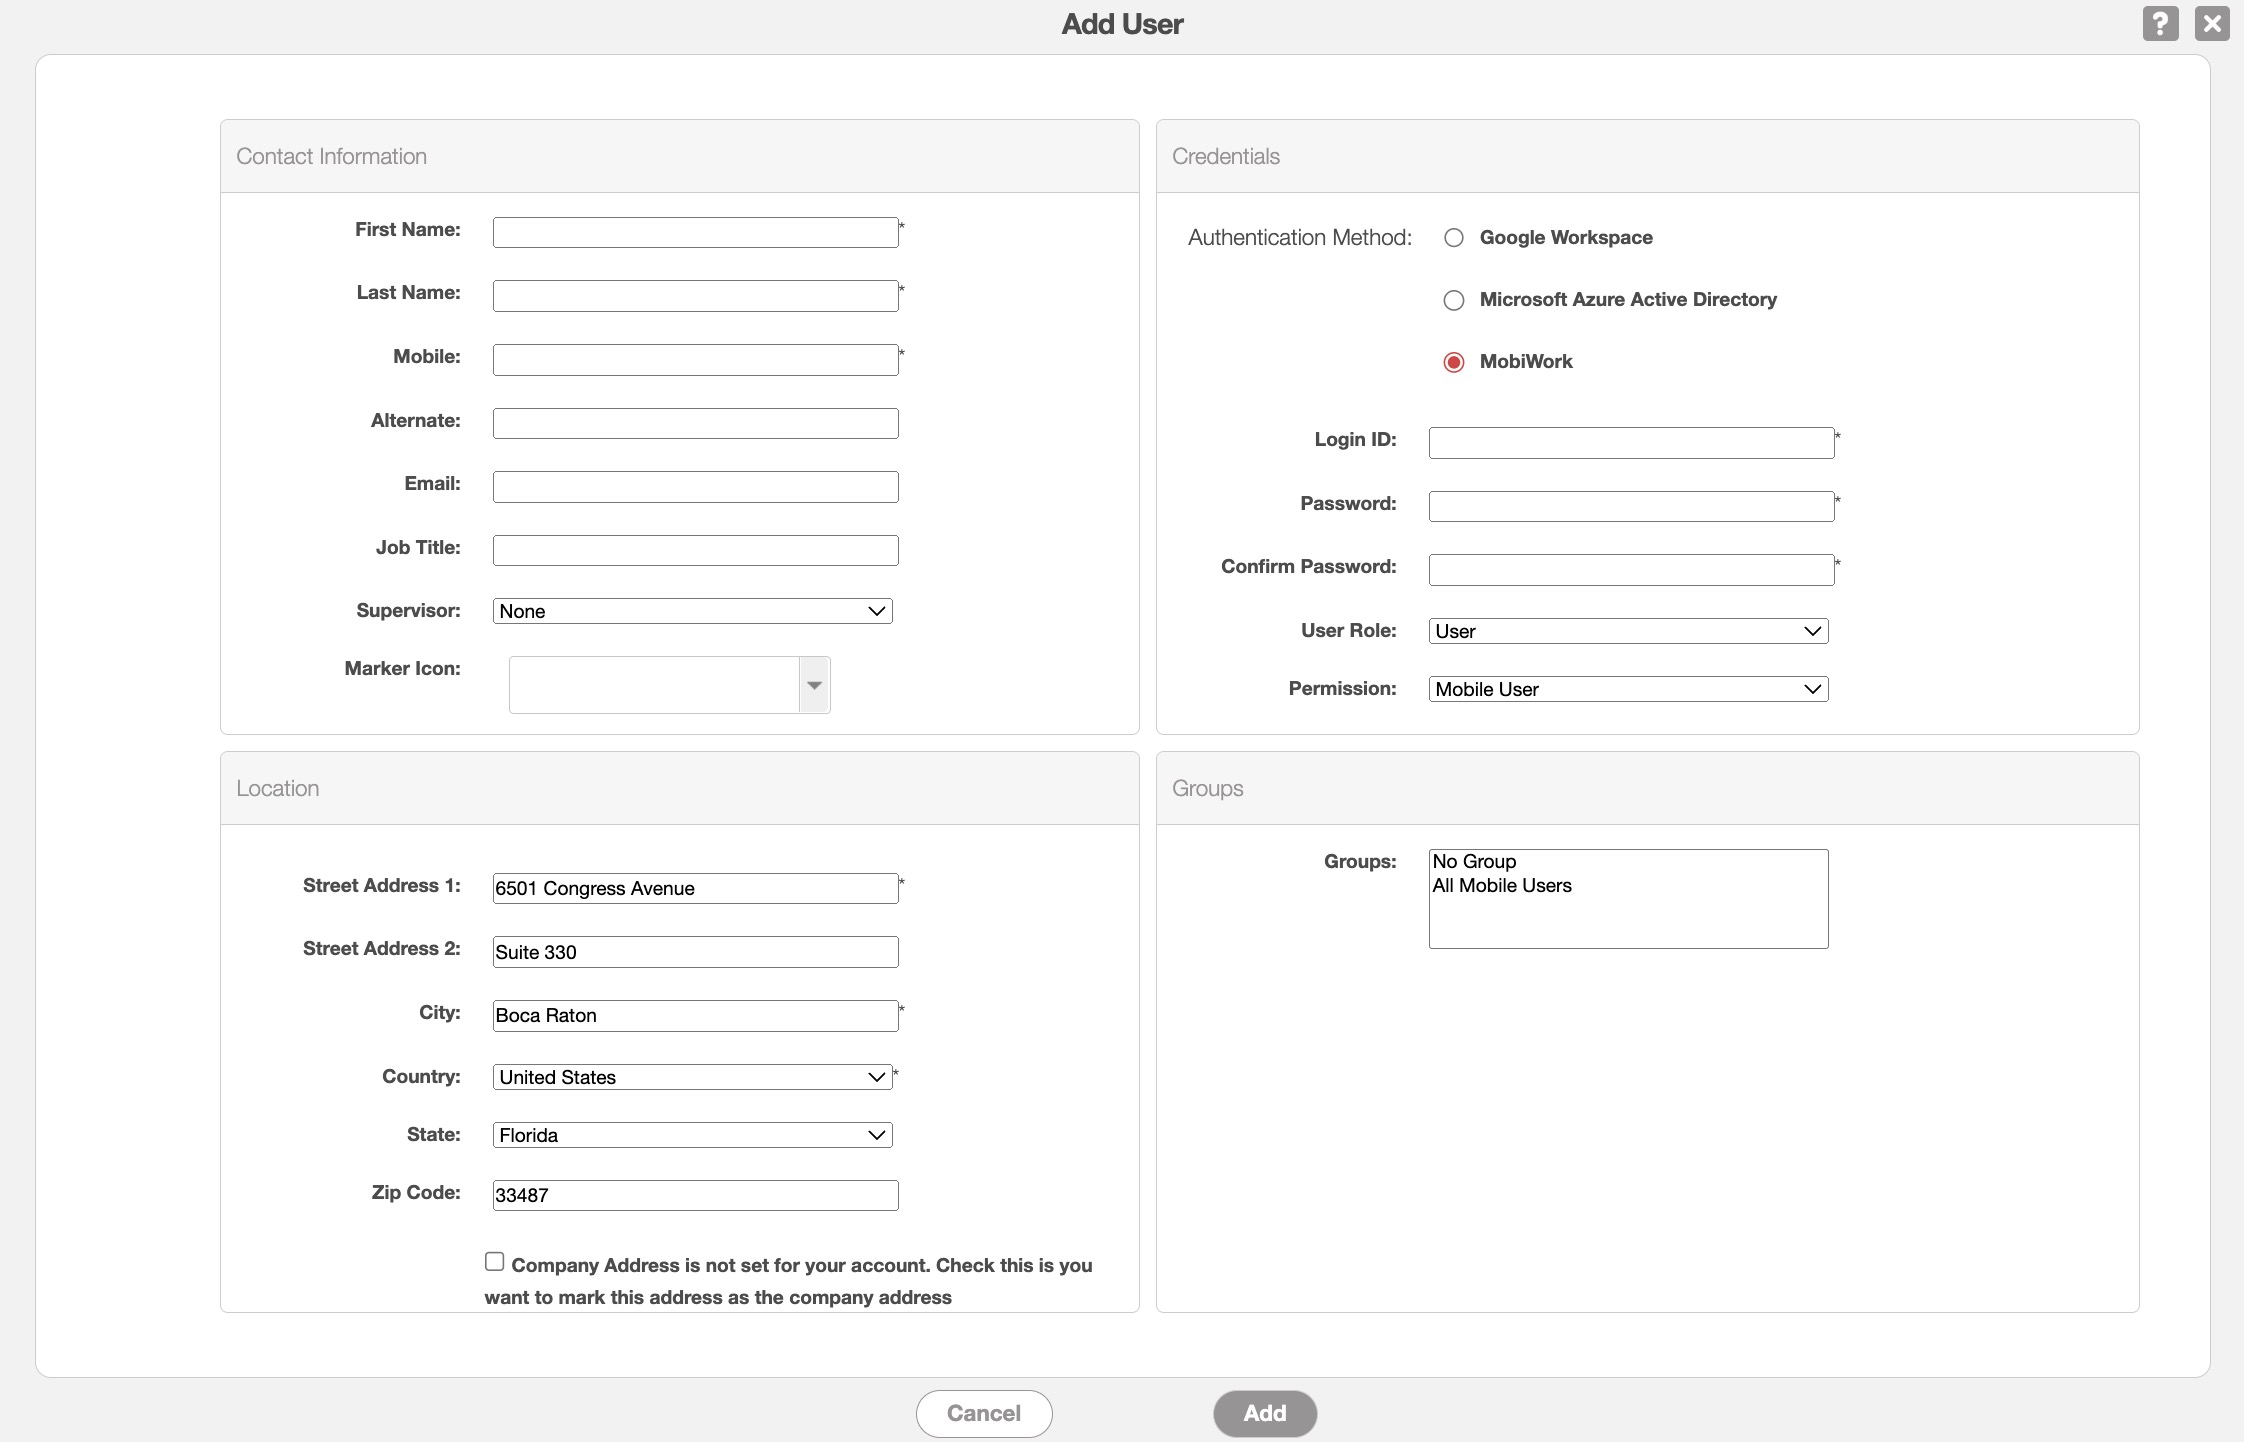
In the Add User pop-up window input the:
The first and last name of the user.
The email address of the user and the user's phone number.
The login ID and password for the user.
The user's role within the company (e.g., a standard user or a global user).
online-help.platform.features.users.starter,add.add_new_user.paragraph8
The user's job title and the supervisor in charge of the user.
The marker icon that will visually represent the user for work orders, scheduling, and dispatching.
The groups that the user should be a part of.
The contact address of the user (this address will be used when issuing work orders, etc).
Note: Please do not put special characters in the phone number field; doing so will inhibit the ability to send text messages to the recipient.
The terms for the Add User pop-up window are defined below:
| Name: | Description: |
|---|---|
| "First Name" | The user's first name. |
| "Last Name" | The user's last name. |
| "Mobile" | The user's phone number |
| "Alternate" | The user's alternate phone number |
| "Email" | The user's email address. |
| "Job Title" | The user's job title within your company. |
| "Supervisor" | The supervisor of the user; the supervisor can access and take action on the user. |
| "Marker Icon" | The visual icon of the user. This is used for specific tabs in the Schedule feature to have a consistent representation of the user; there are 125 color markers to choose from. |
| "Street Address 1" | In this field input the address of the user. |
| "Street Address 2" | In this field input the any additional address information of the user. |
| "City" | In this field input the city of the user. |
| "Country" | In this field input the country of the user. |
| "State" | In this field input the state of the user. |
| "Zip Code" | In this field input the zip code of the user. |
| "Company Address Checkmark" | If checked, will set the entered address as the company's official address |
| "Authentication Method" | The method in which the user can log into MobiWork. (i.e., the user can use their MobiWork credentials, their Google credentials, or their Microsoft credentials) |
| "Login ID" | The MobiWork Login ID of the user. |
| "Password" | The MobiWork password of the user. |
| "Confirm Password" | Retype the password in this field to confirm it. |
| "User Role" | The user's role. Can either be a user (permissions can be edited) or a Global admin (have access to all actions within MobiWork). |
| "Permission" | Indicates which permission template the user will be assigned to; this field will only appear if "User Role" is selected as user. |
| "Group" | List the groups associated with the user |
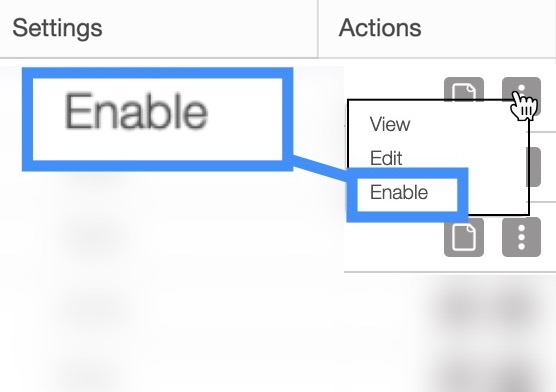
To enable a single user, you can either:
Right-click on the selected user and from the drop-down select the "Enable" option.
Or use the "Enable" option from Individual Actions button.

Regardless of the method you choose, the Confirm Enable pop-up window will appear:
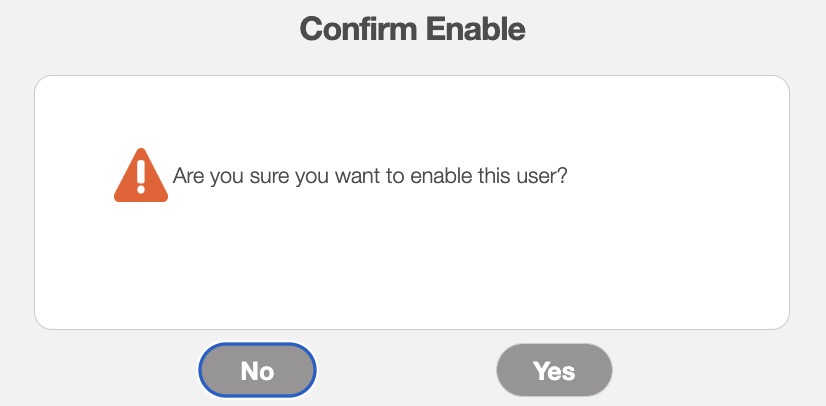
Click the Yes button to confirm that the user should be enabled, and the user will automatically be set as active.
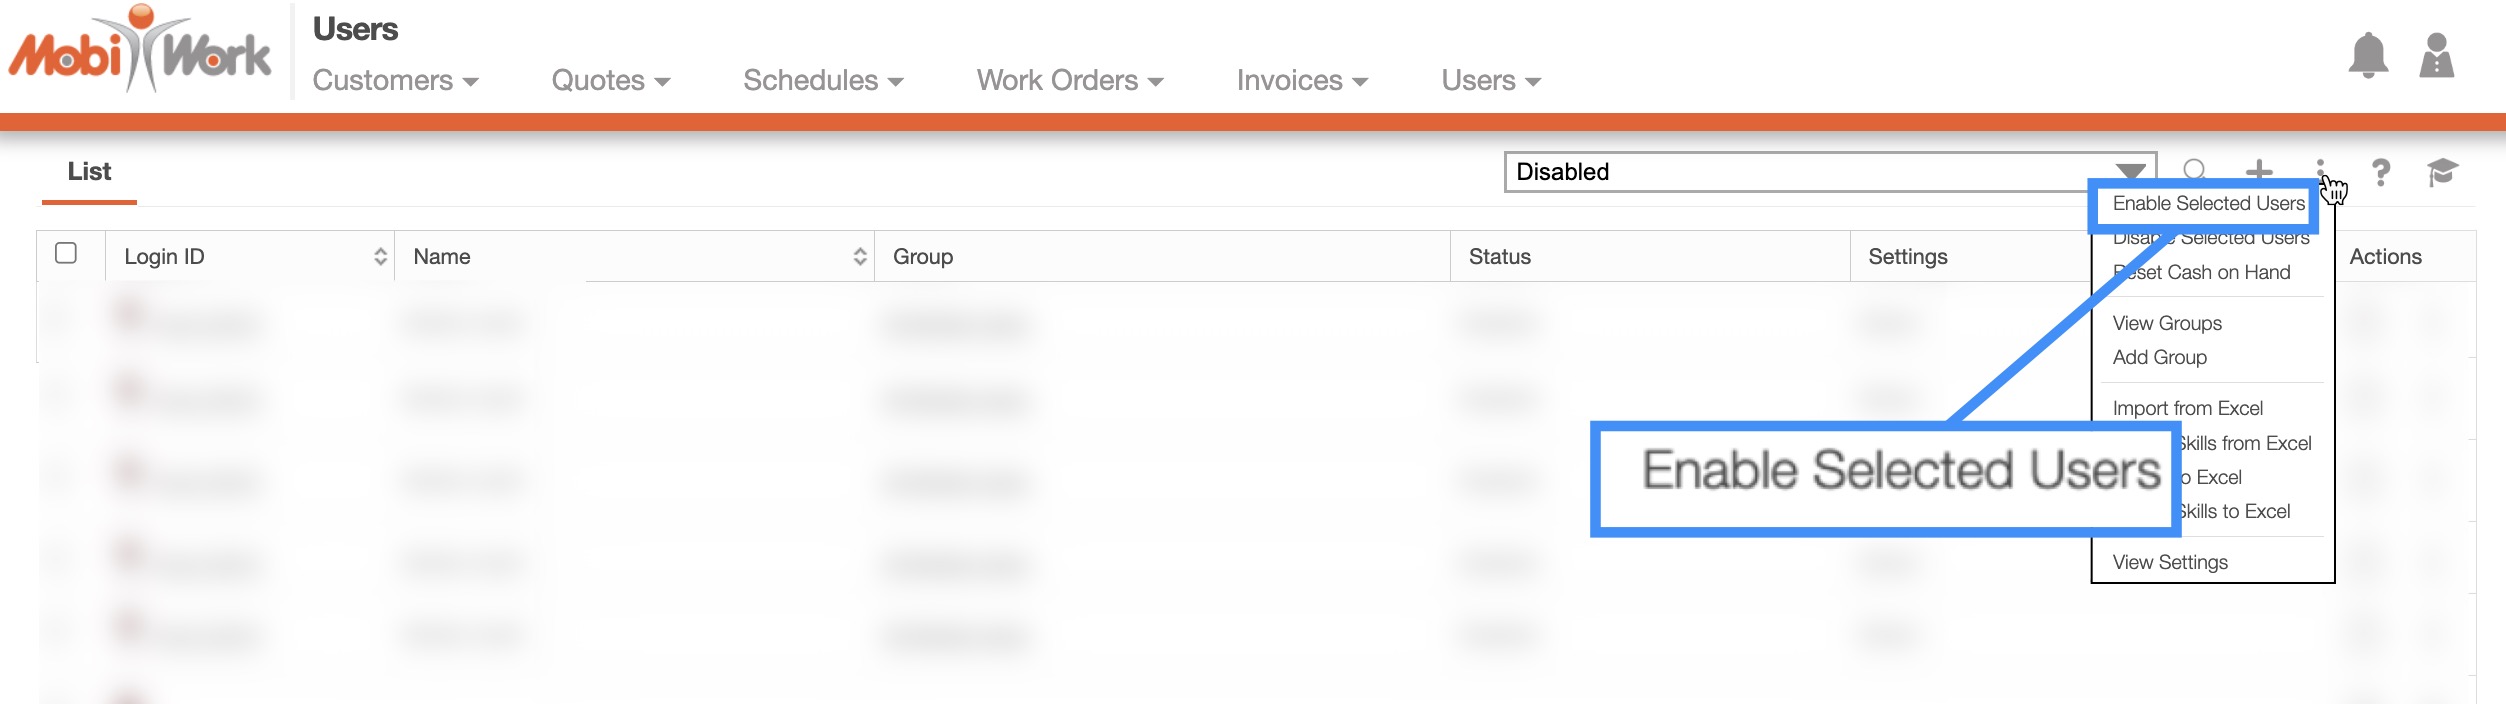
Within MobiWork, you will be able to enable multiple users at once. You will need access the More Actions button from the "List" tab. For more information on how to access this page, please see the User List page for more information:
- Once, you are on the "List" tab, check off the users you would like to enable:
If you would like to enable all your users, you can click on the topmost checkbox (Multiple Selection Area).
Click on the More Actions button and from the drop-down select the "Enable Selected Users" option:
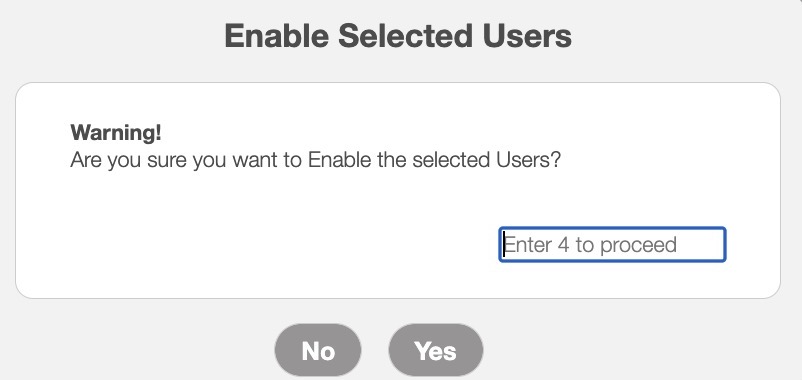
The Enable Selected Users pop-up window will then appear. Enter the specified number and click the Yes button to confirm that you would like to enable the selected users:
The selected users will then be automatically activated within the system.