- Welcome
- Discover MobiWork
- Welcome
- The Onboarding Assistant
- How To Contact Us
- Your Solution at a Glance
- MobiWork in Action!
- Mobile App User Interface
- Web Portal User Interface
- Schedule Views
- Customers & Prospects
- Quotes (Estimates)
- Built-in Work Order Types
- Adding Work Orders
- Scheduling & Dispatching
- Parts & Services Catalog
- Invoices & Payments
- Dashboards & Reports
- And So Much More...
- Ready To MobiWork?
- Welcome
- How To Contact Us
- Set Up Your Business Information
- Set Up Your Localization Settings
- Set Up Your Business Hours
- Clear Sample Data
- Set Up Your Users
- Send Login Information
- Connect With An Existing Software Solution
- Set Up Your Customers
- Set Up Your Parts And Services
- Set Up Credit Card Payments Capture
- Enter Your Credit Card
Customers are the heartbeat of your company, and they'll be needed before creating work orders, estimates, sales orders, and almost anything else.
Now that your account has been cleared of all sample data, it's time to add your list of customers.
Note: If you plan to connect MobiWork with your accounting software, like QuickBooks or Sage, we recommend initially importing your customers from your accounting software into MobiWork. This will be the easiest way to populate your list of customers and will automatically link them in both accounts. If you haven't connected the software yet, navigate to Connect With An Existing Software Solution for instructions.
Overview Video
Step by Step
- At the top of your screen, navigate to the Customers menu option:
- At the top right, click the More Actions button, then choose "Import Customers from QuickBooks" (or the name of your connected Accounting Software):
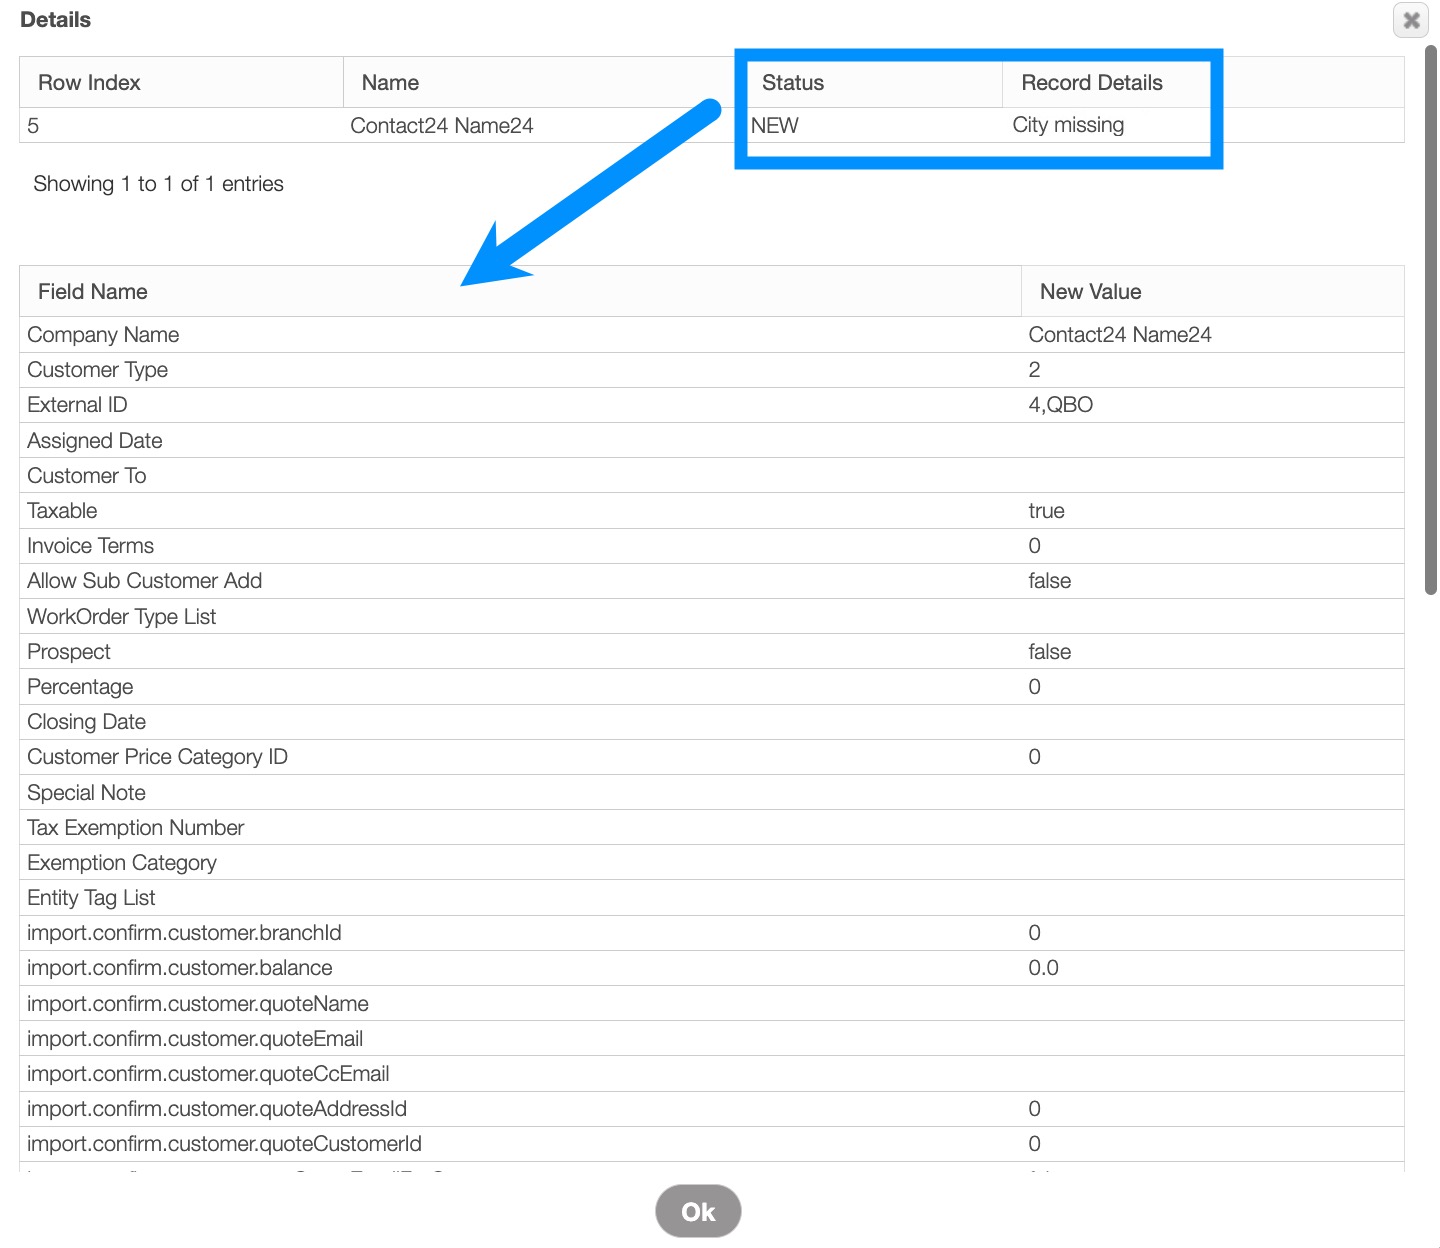
- You'll be shown a list of customers found in your accounting software. For a list of all fields that will be imported, choose "Click for Details" on the right side of each record:
- Using the checkboxes, select the customers you wish to import or use the Select All option. Once all necessary records have been selected, click Submit.
- IMPORTANT: Only click the Submit button one time. Clicking more than once may result in duplicate entries:
- You should now see a "Confirm Results" page showing you the results of your import.
- You'll see an overall recap of the import at the top (showing how many customers were created, skipped, etc.), along with a breakdown of each entry's results on the bottom.
- If only some of your imported records are shown, use the page navigation buttons on the lower right of the records to move to other pages or records:




Overview Video
Step by Step
- At the top of your screen, navigate to the Customers menu option.
- Select the customers you would like to sync to your QuickBooks Desktop Web Connector using the checkboxes.
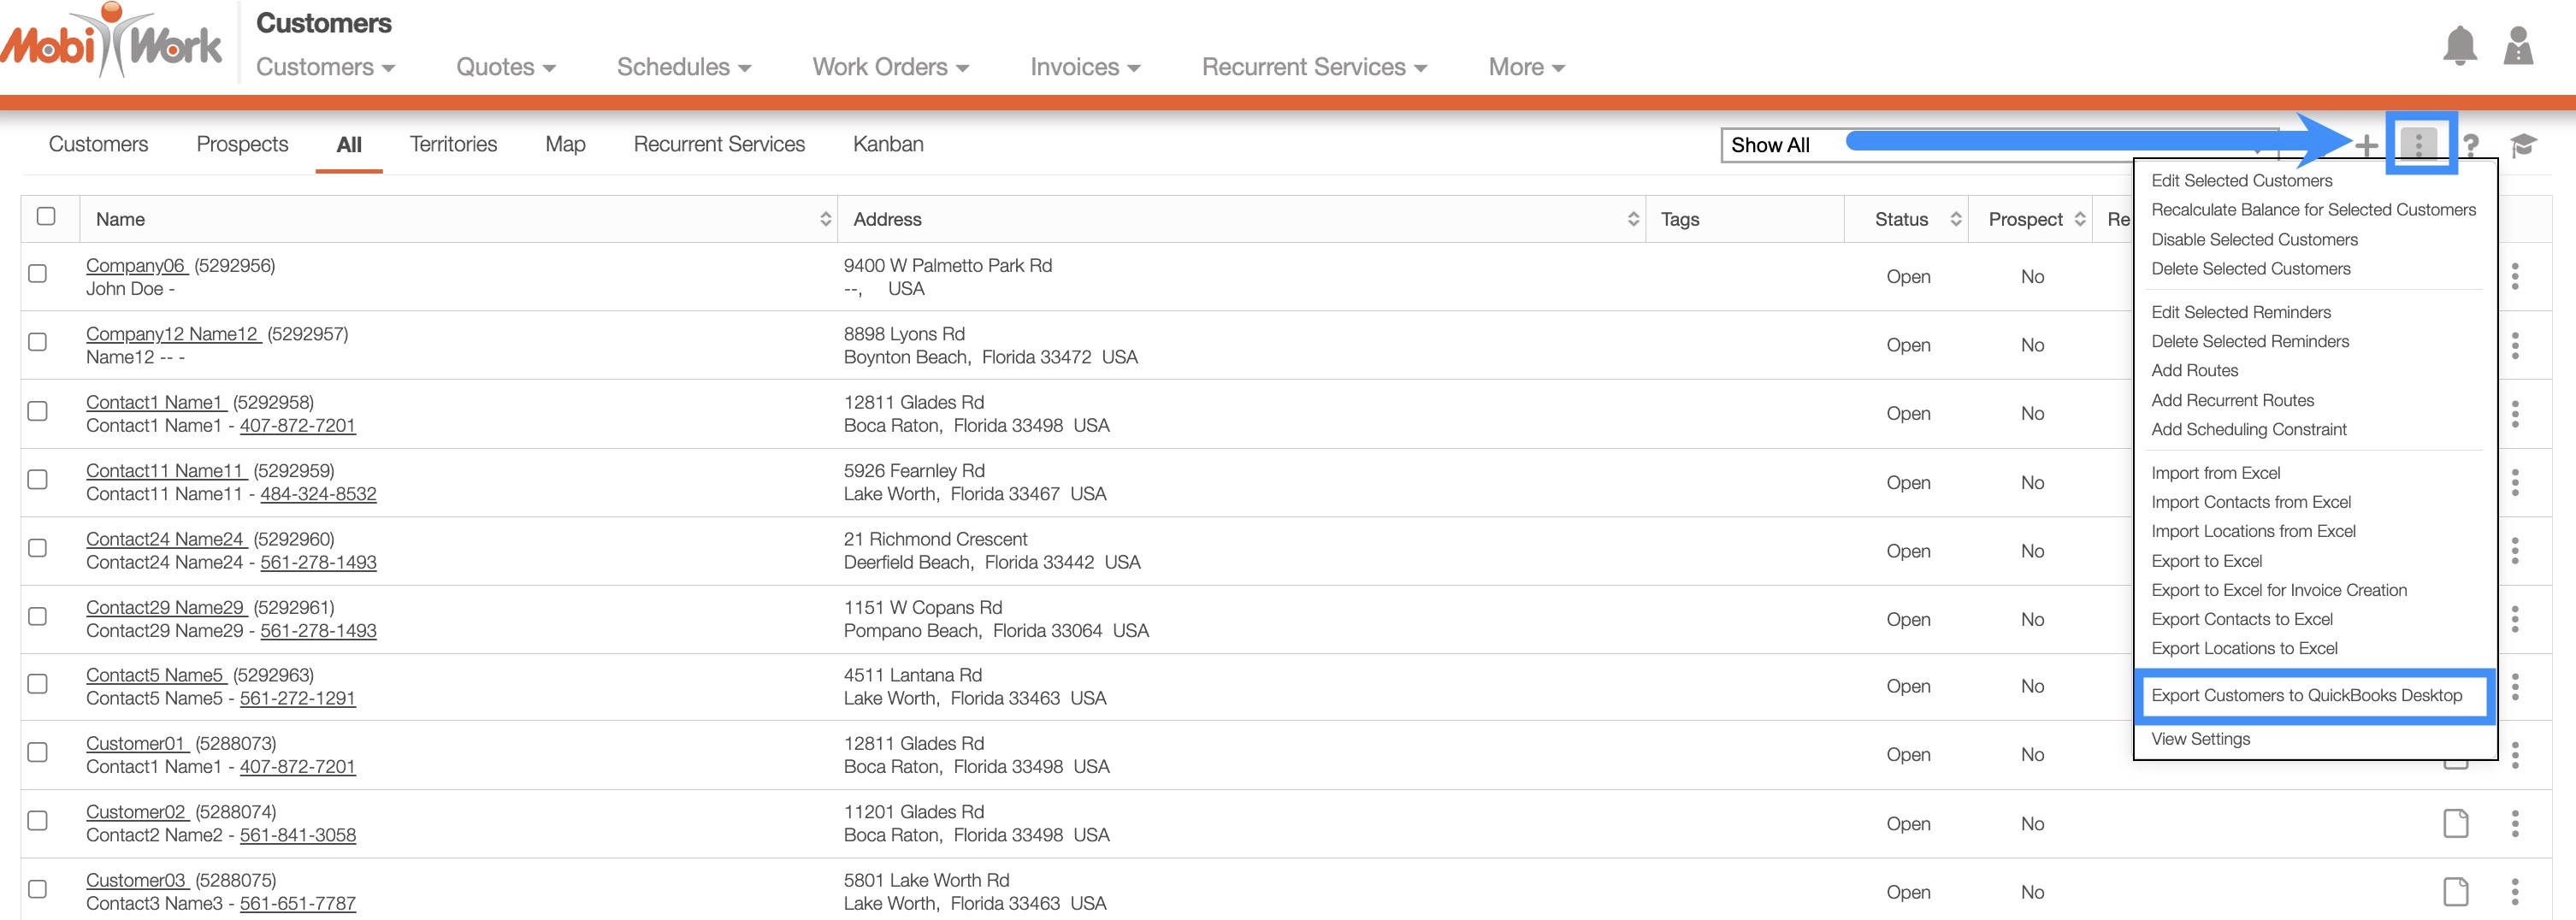
- At the top right, click the More Actions button, then choose "Export Customers to QuickBooks Desktop" option:
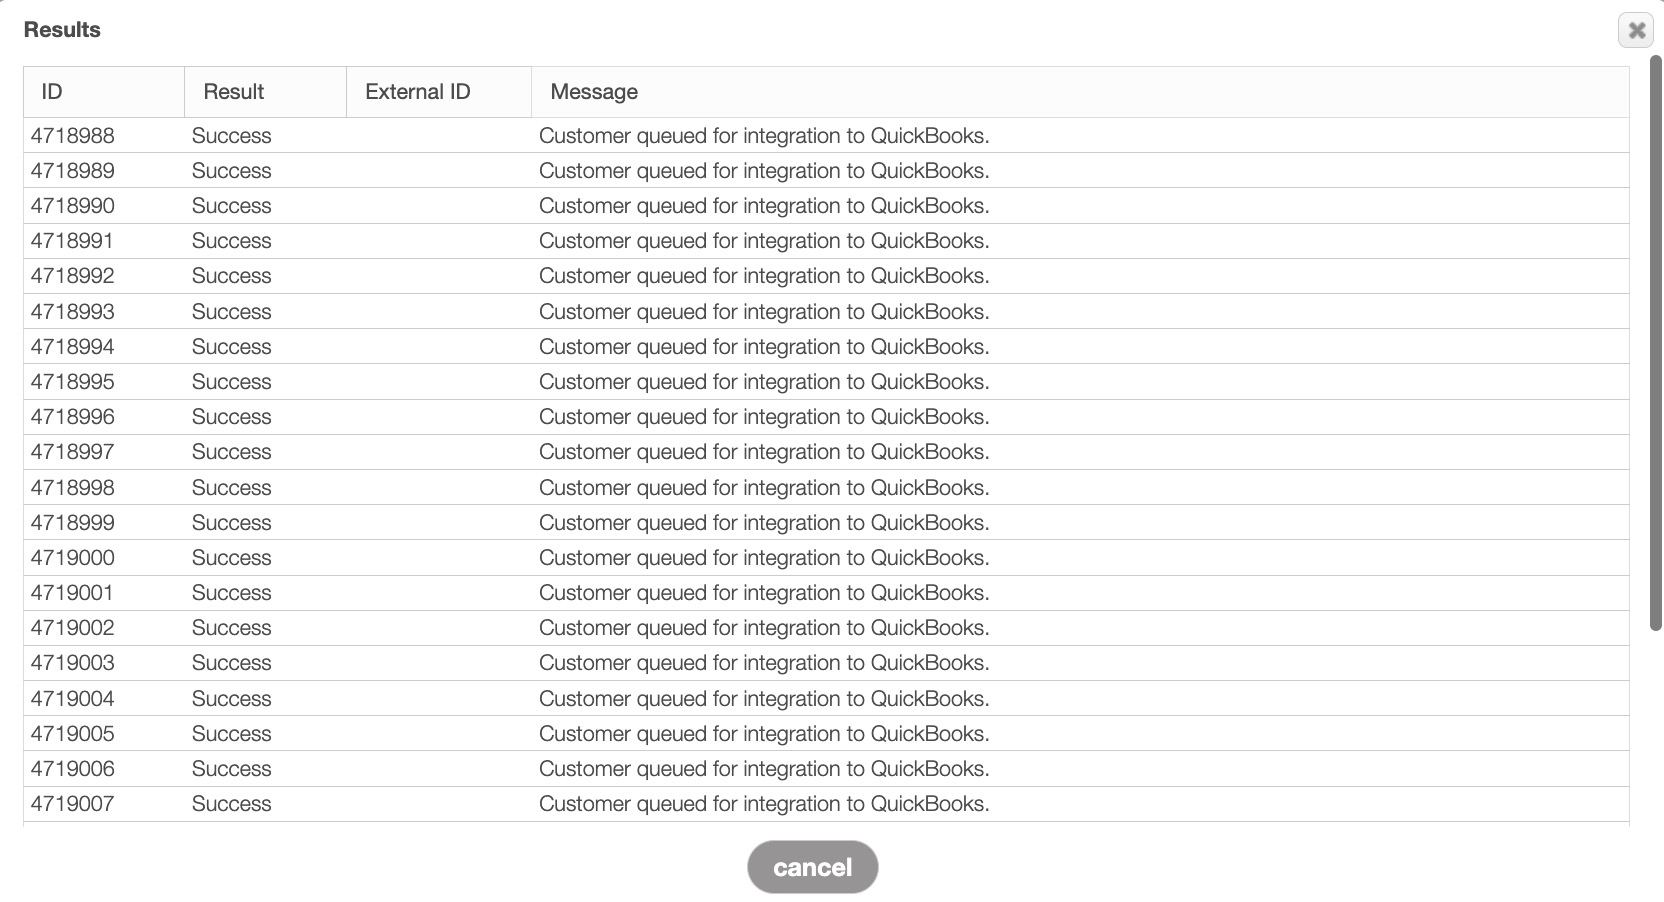
- The selected customers will then be registered to be exported to QuickBooks Desktop upon the next sync. You will receive a pop-up window confirming the listed customers are registered for syncing:
Overview Video
Step by Step
- At the top of your screen, navigate to the Customers menu option:
- At the top right, click the More Actions button, then choose Export to Excel:
- Depending on your browser settings, a download window may appear (if the file downloads without a prompt, skip to Step D). Save the spreadsheet in a folder you'll remember, like Downloads or Documents:
- Once the spreadsheet has been downloaded, open it.
- First, clear out the sample data listed in the import template:
- Then, following the guidelines outlined in red in row 6, add your customers. We recommend expanding or resizing all of the columns in Excel; this action will allow you to see the full column header and verify if an asterisk is present.
- If a field marked with an asterisk is left blank, the import will fail. To ensure a successful import, ensure that the designated field is not empty (e.g., if you do not know a last name, enter TBD [to be determined] or a dash[-]).
- As stated on the import template, headers marked with an asterisk (*) are required:
- The double asterisks (**) on the import template indicate that the specified fields are conditional and should be populated in specific circumstances. For example, the "Business Name" field is only required if the customer is set as a business type.
- Save the spreadsheet, then return to the MobiWork Customers page.
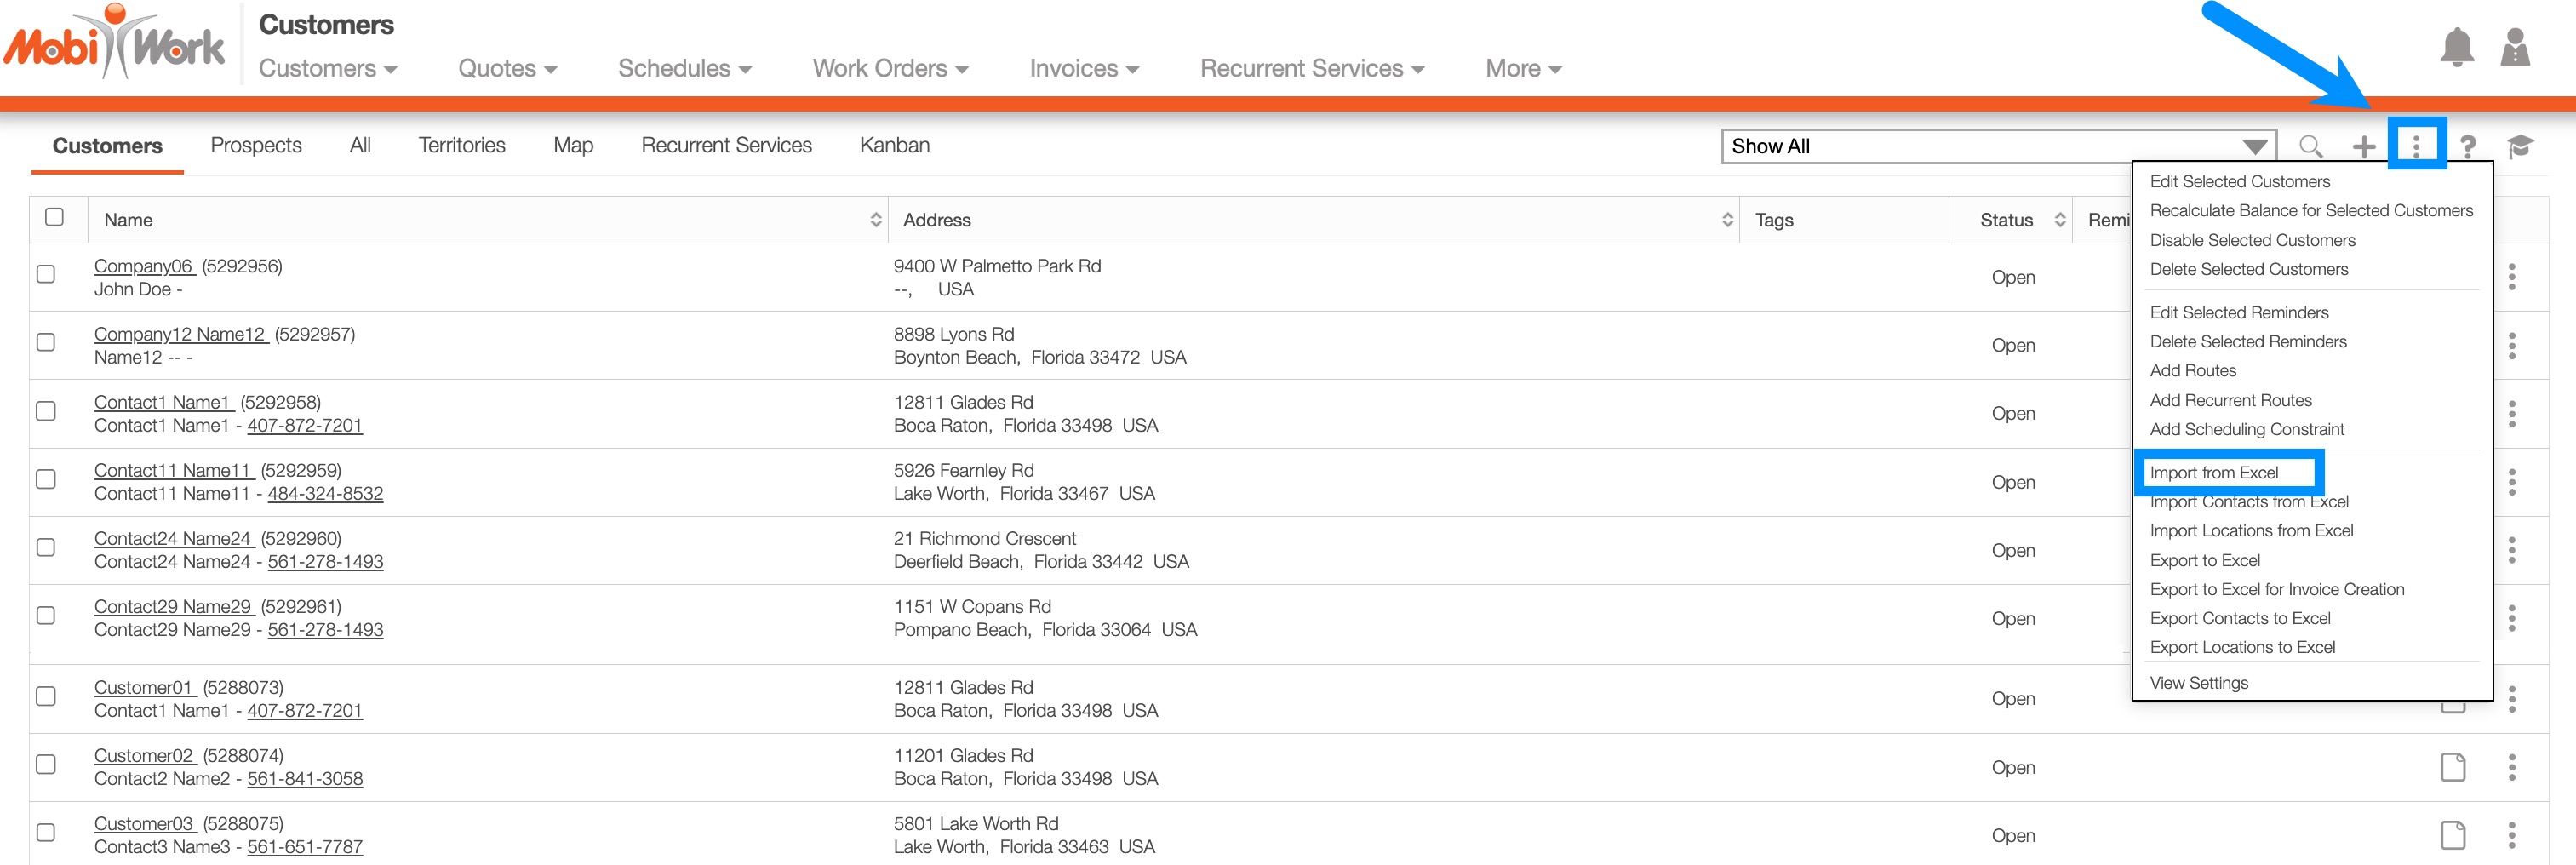
- Click the More Actions button and choose the Import from Excel option:
- Using the Choose File button, find your spreadsheet, attach it, and click Import:
- Review the list of customers recognized by MobiWork. If everything looks good, click Submit to bring in your list of customers:
- IMPORTANT: Only click the Submit button one time. Clicking more than once may result in duplicate entries.
- The import preview tool will flag any required data that is missing on the import template and prevent the row of data from importing:
- You should now see a "Confirm Results" page showing you the results of your import.
- You'll see an overall recap of the import at the top (showing how many customers were created, skipped, etc.), along with a breakdown of each entry's results on the bottom.
- If only some of your imported records are shown, use the page navigation buttons on the lower right of the records to move to other pages or records:




Overview Video
Step by Step
- At the top of your screen, navigate to the Customers menu option:
- At the top right, click the Plus Sign button:
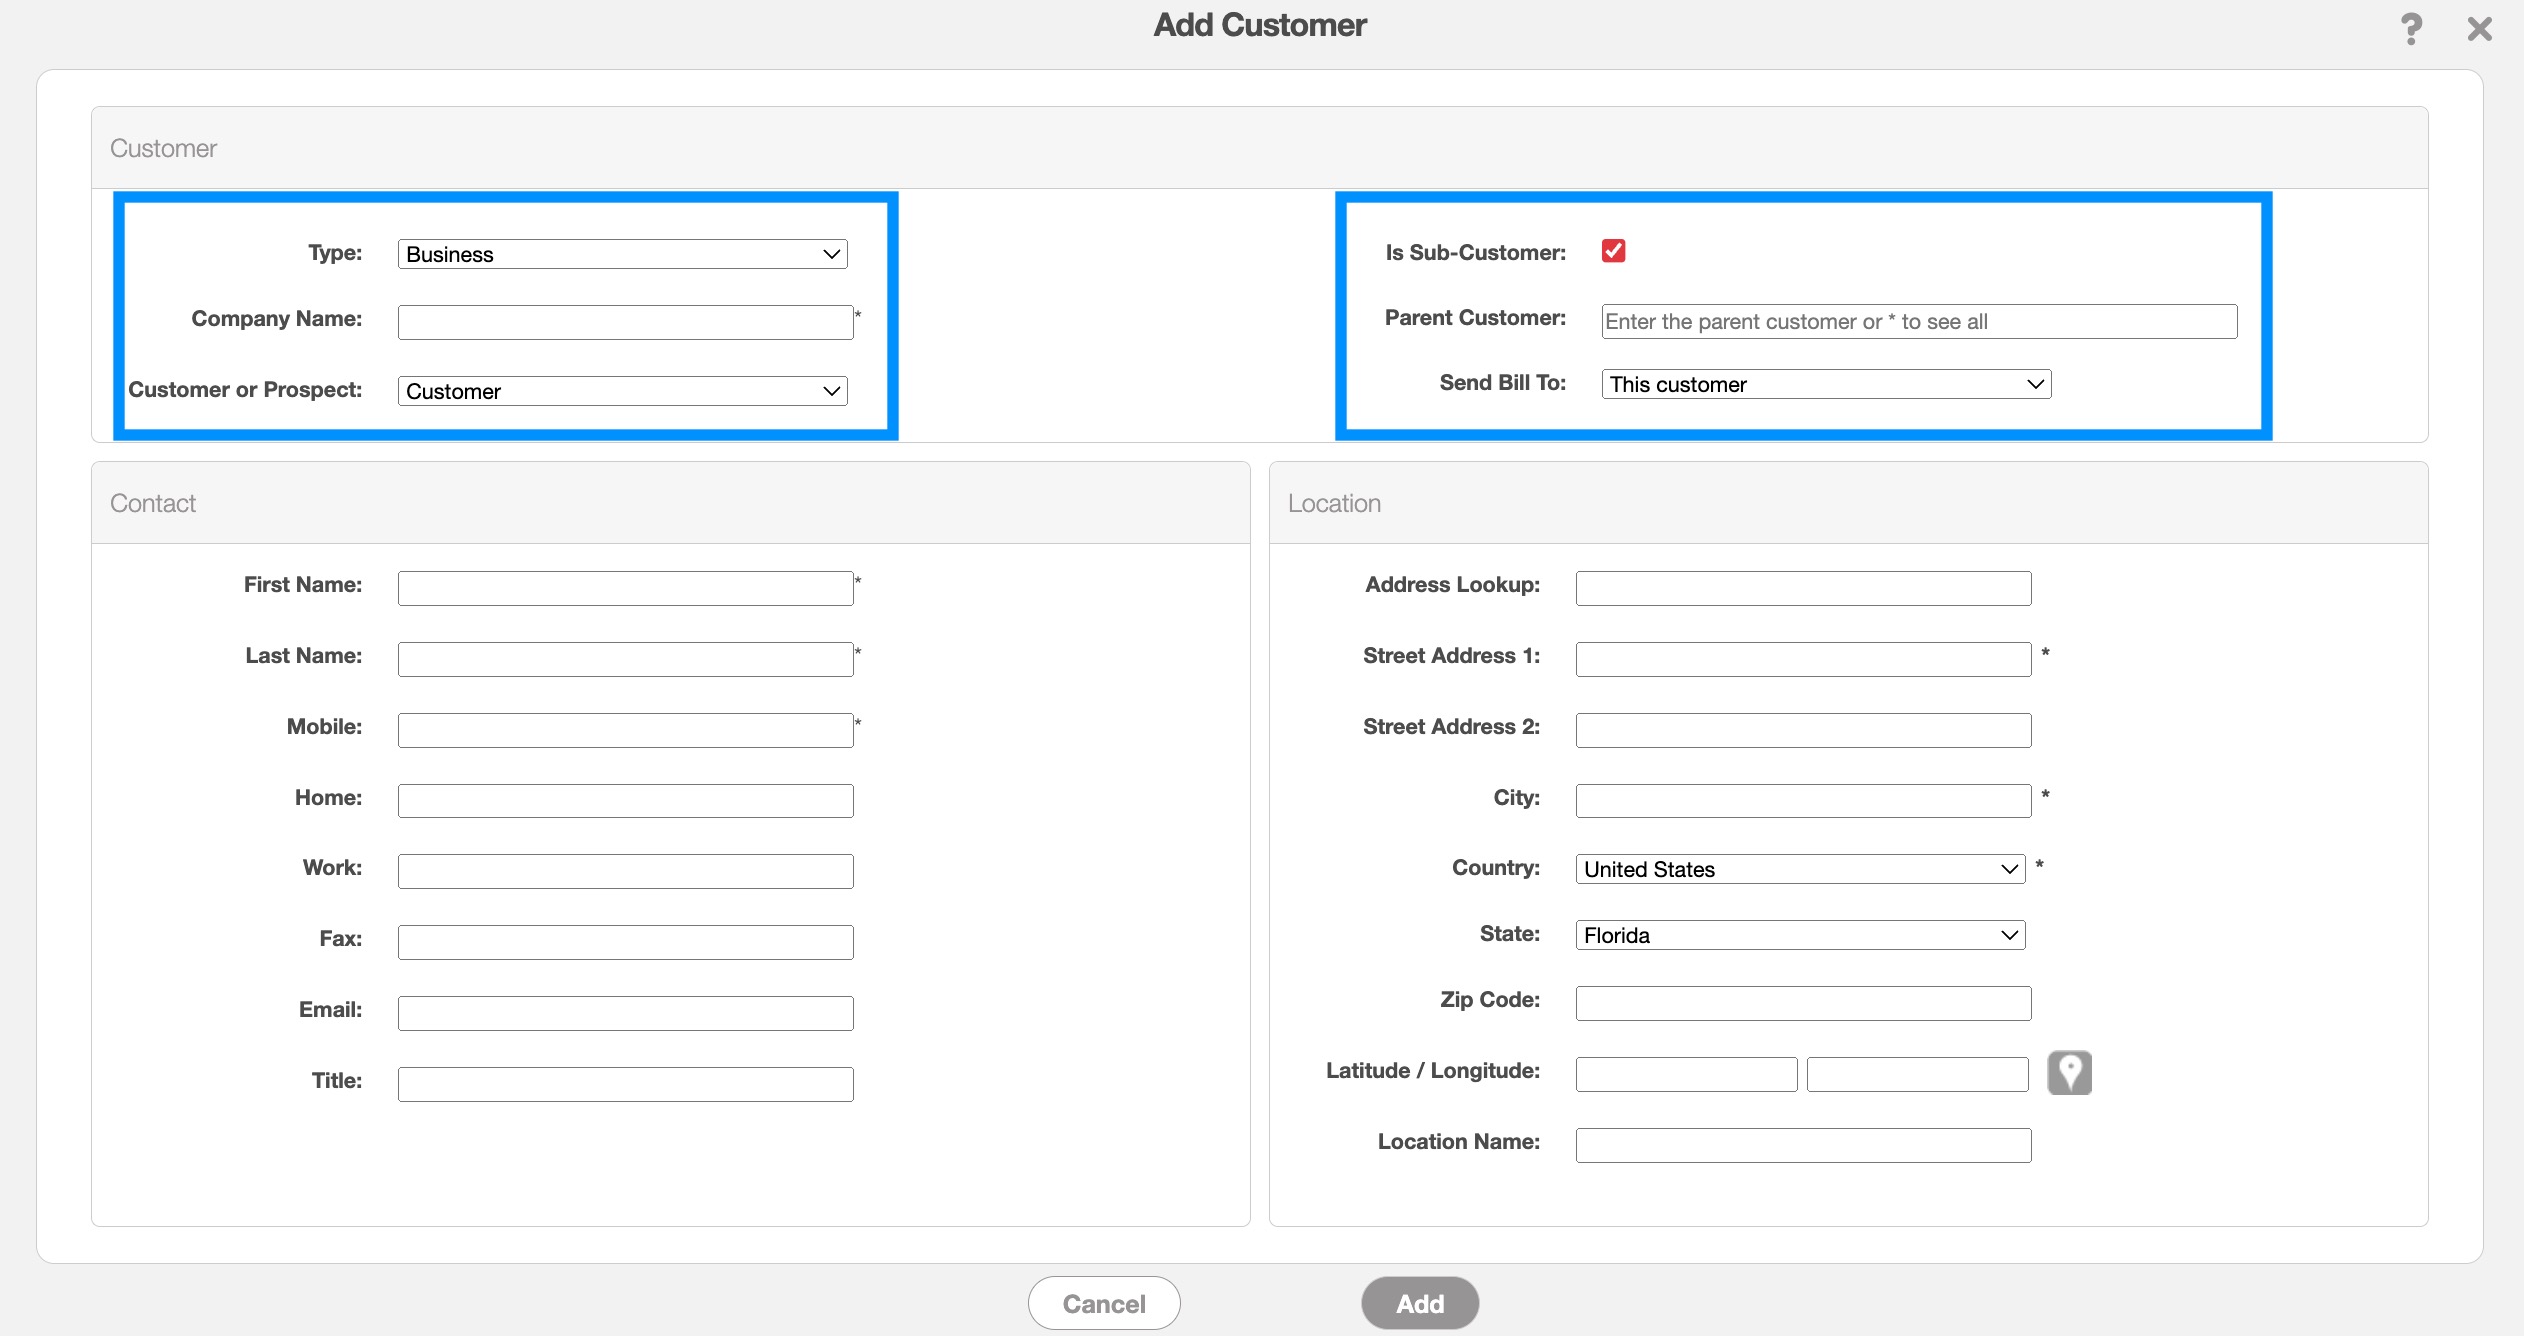
- First, select whether you are creating a Business or Residential customer from the Business Type drop-down.
- If choosing Business, a new field labeled Company Name will be provided.
- If creating a Prospect, make sure to select the Prospect option from the Customer/Prospect drop-down.
- You can also indicate if the customer profile is a child or sub-customer of a parent customer and where the bill should be sent to:
- Fill out any other necessary customer information.
- Keep in mind, any required fields will be marked with an asterisk.
- When finished, click Add.
- Repeat Steps B through D for all customers needed.


By default, your customers will be sorted by the Business Name (residential customers will be sorted by First Name).
It's a good idea to go through a few pages of customers to make sure there are no duplicate entries.
- If you find duplicates, click on the customer and check the information on the Summary, Contacts, and Locations tabs.
- If all customer information matches, it should be safe to delete one entry.
- If each entry contains different information (for instance, two listings for one company, with each one having a different contact person or location), add all company contacts/locations to one customer listing, or modify the customer's name to differentiate the two.
- If you have many duplicated customers, there might have been an issue with the import. Please contact us for further help.
When using the MobiWork app, tapping the turn-by-turn navigation sends the destination's longitude and latitude to the user's preferred GPS app for directions.
To ensure your team doesn't encounter any routing issues, it's a good idea to periodically check this saved search.
- If you're not already looking at your customer list, navigate to Customers.
- From the search drop-down, find the saved search titled "Invalid Address"; Clicking this will search through your customers to see which ones don't have a valid longitude and latitude:
- If you do have any customers with invalid addresses:
- Choose to view the customer and then click the Location tab.
- In this tab, select the Individual Actions under the Actions column. From the drop-down select the Edit option.
- Check the address for any errors.
- Click the Verify Address button.
- If MobiWork says the address cannot be verified, either save the contact as is, contact the customer to verify the address, or create a support ticket.

If you have any questions or need further assistance, please let us know. We'd be happy to help!
