Set Up Your Users
Creating Users by Hand
Overview Video
Step by Step
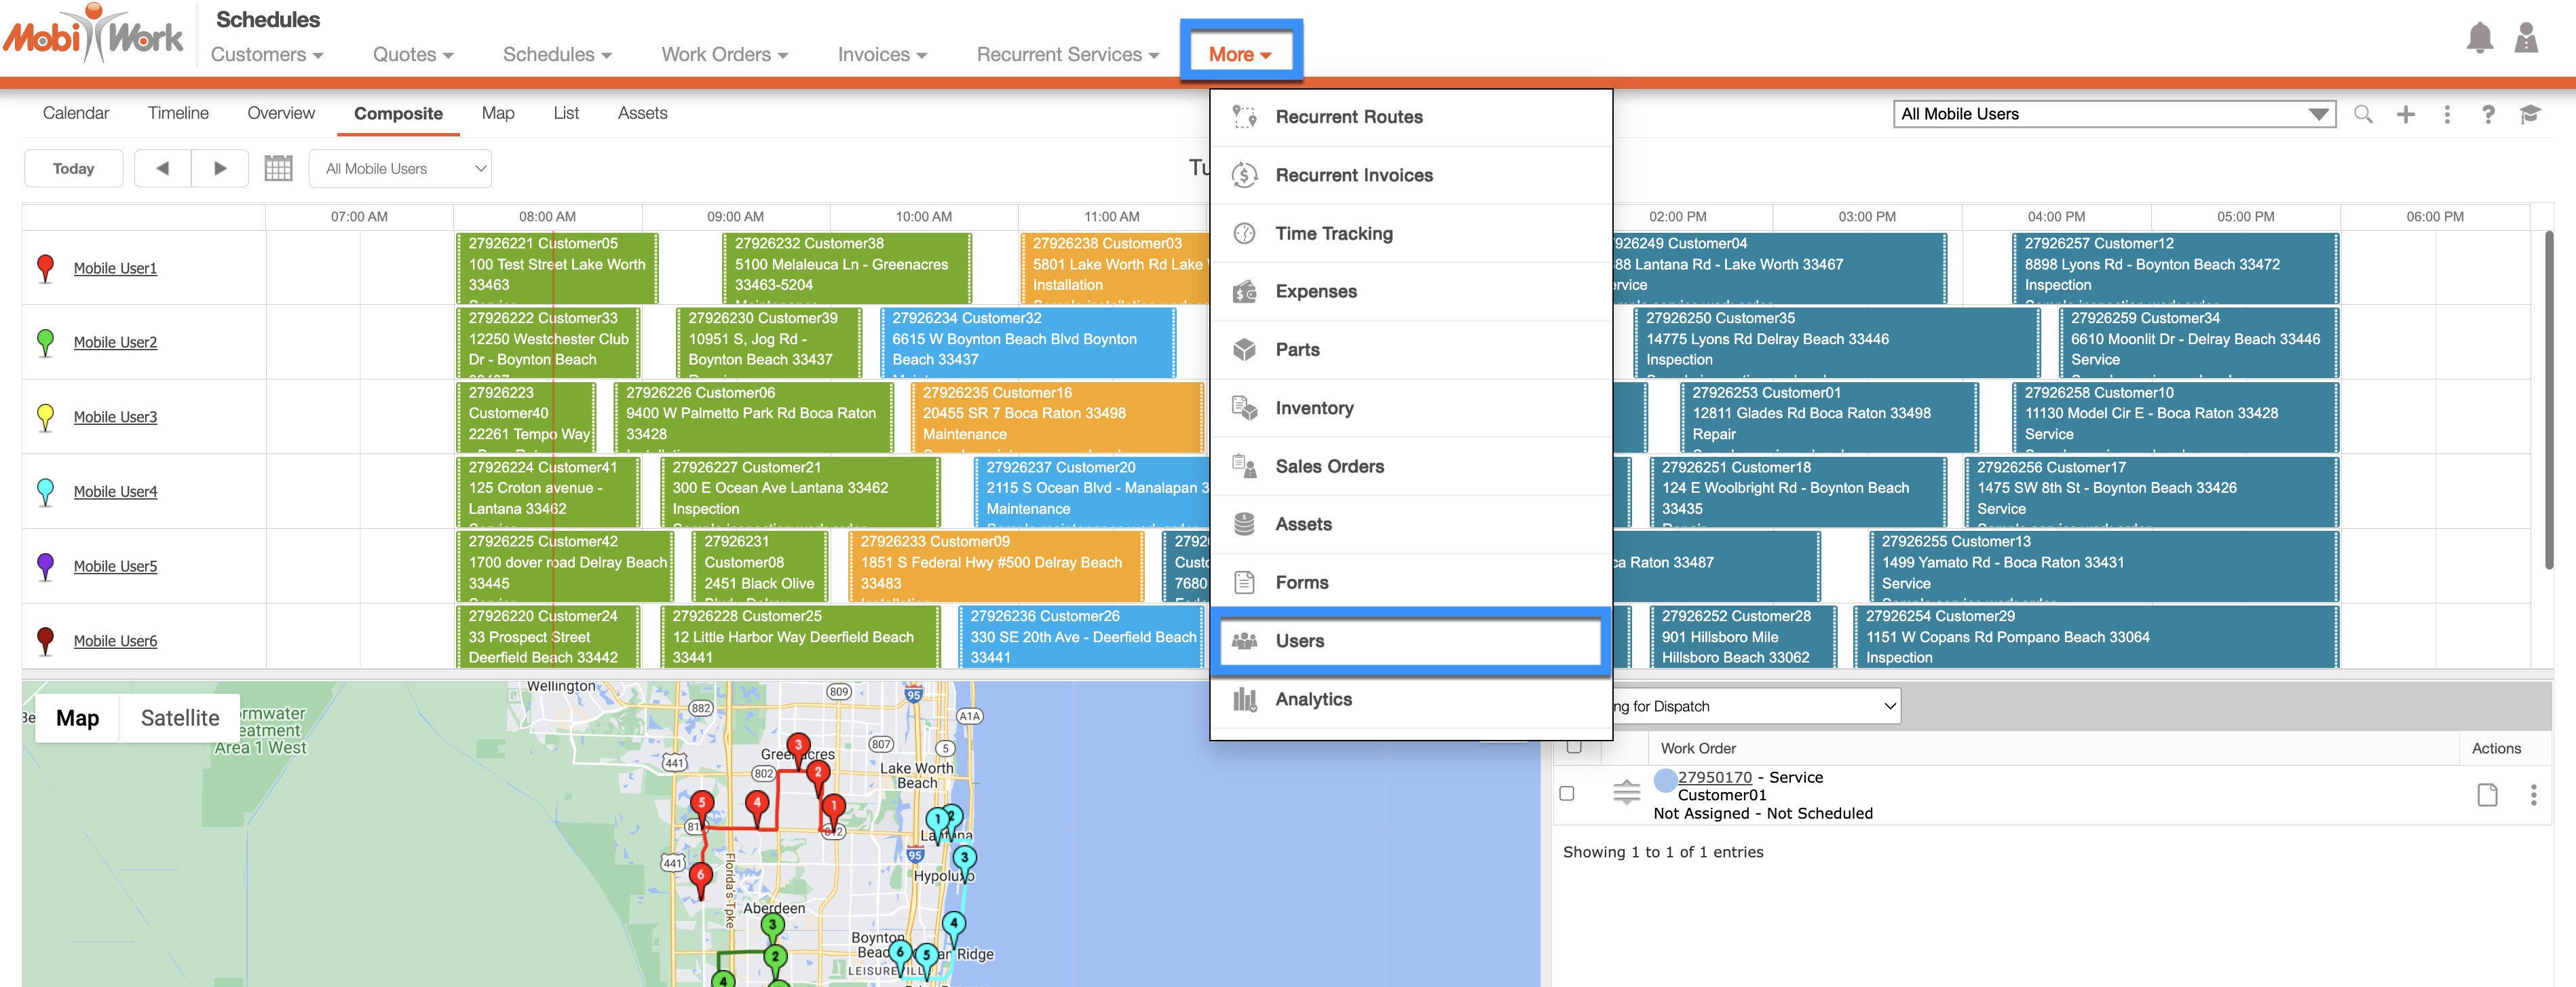
- Navigate to the More drop-down menu to choose Users:
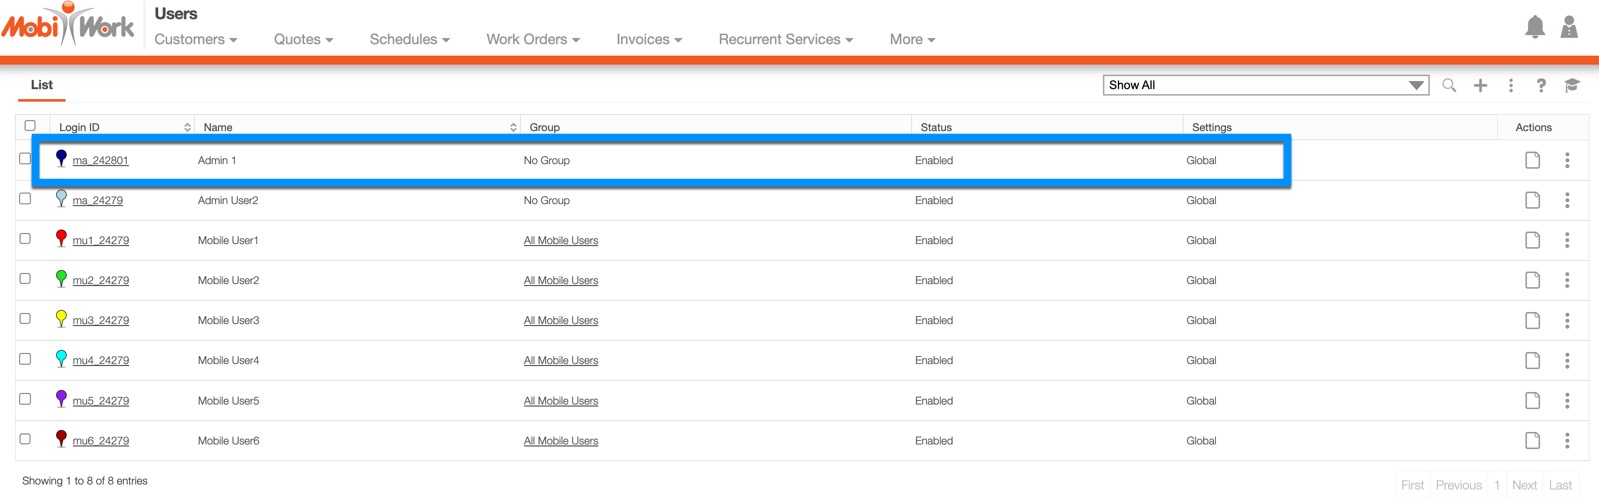
- You'll see a list of all currently enabled users, including one with your email address. This will be your login as an administrator.
- You'll also see users with the following Login IDs: ma_#####, mu1_#####, mu2_#####, etc., with generic names like Mobile User 1 and so on; these will be the users you'll be changing.
- *Rather than disabling the sample users then creating new users, we recommend simply modifying the provided sample users.
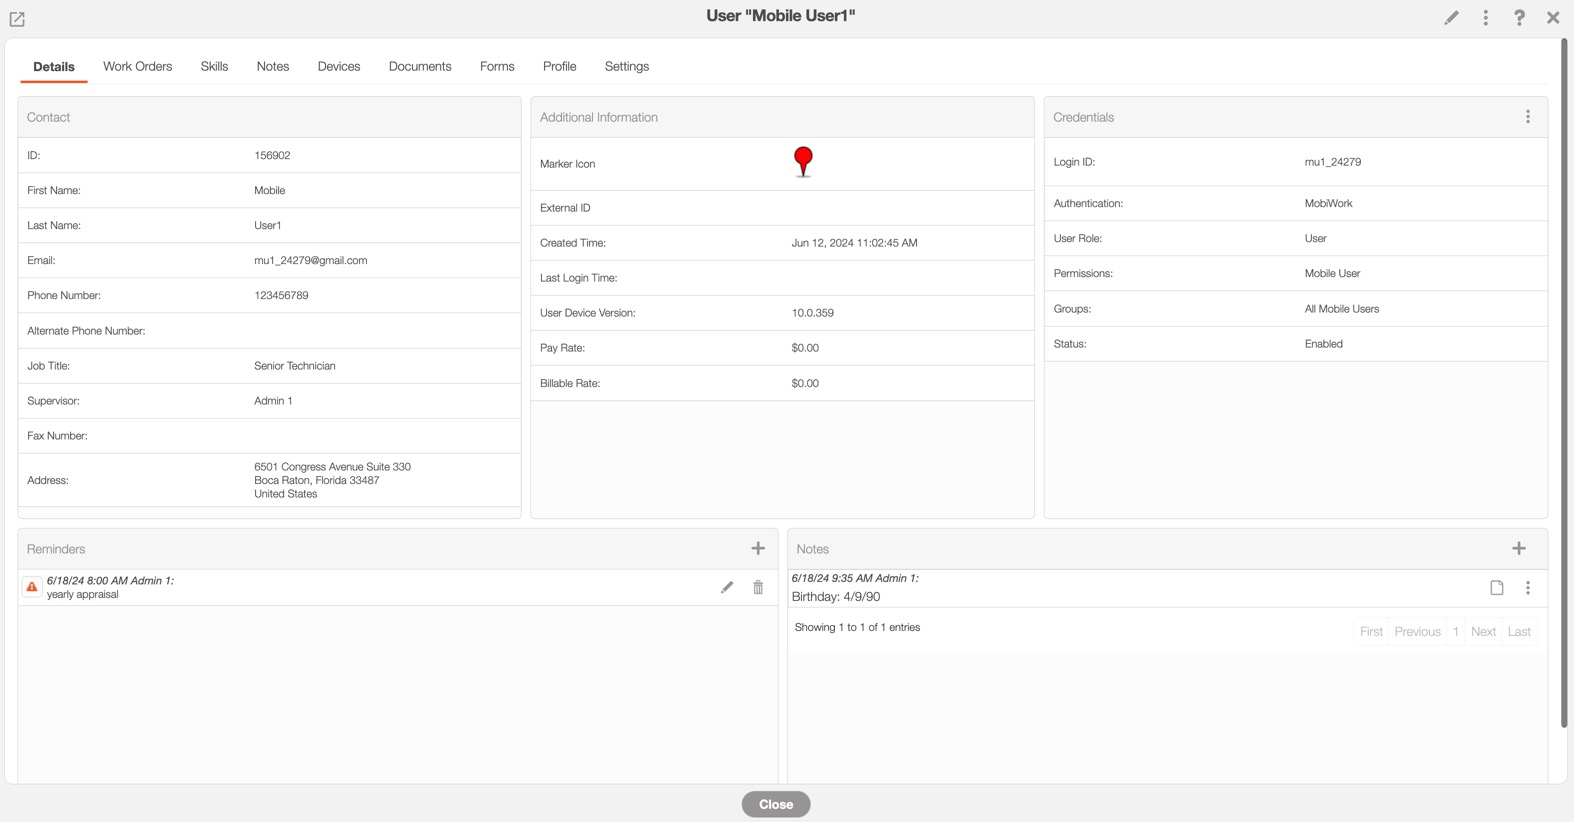
- Click directly on the Login ID of a user you'd like to modify or choose the View button; This will open a new window showing the user's information:
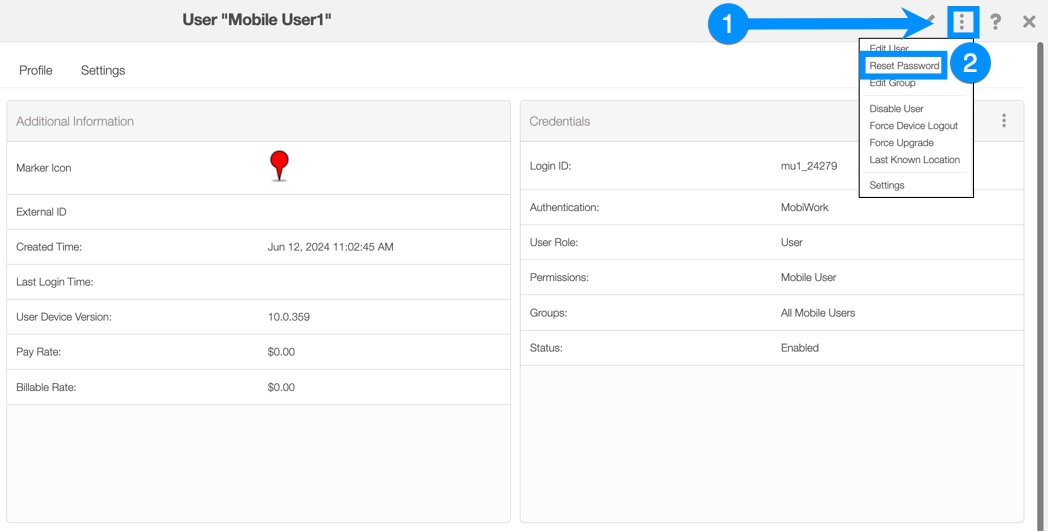
- At the top right of the new window, click the More Actions button, then click Reset Password:
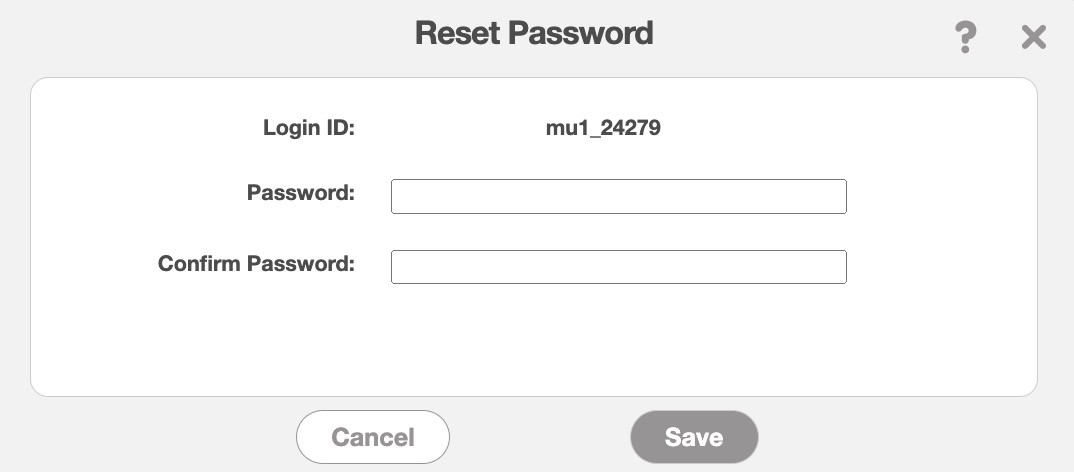
- Enter a new password, confirm the password, and click Save.
- Note: Passwords can only be created or updated through the MobiWork web interface:
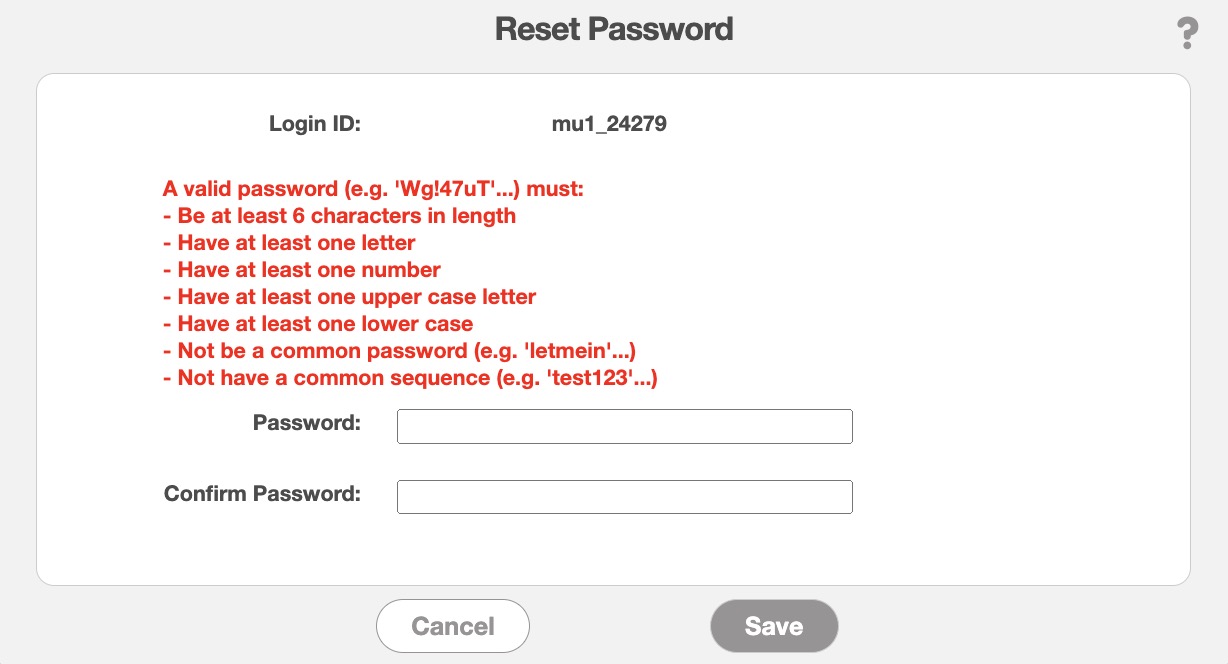
- If the password is invalid, you will be notified. Create a new password, adhering to the requirements, and click Save again when done:
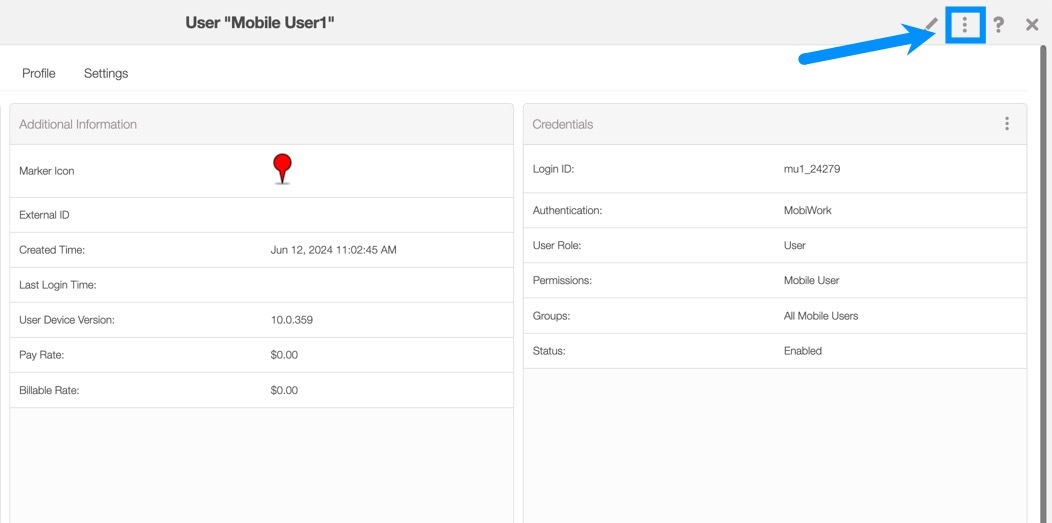
- Back in the User window, click the Pencil icon (or choose More Actions > Edit User):
- Enter the user's information, including first name, last name, email address, and Login ID. The Login ID can be an email address (recommended) or a unique username. Any username should work, provided it's not already in use and does not contain any spaces.
- Note: MobiWork does not allow the duplication of username IDs. Thus, we highly recommend that you use your email address as the Login ID. This will not only help you with memorizing your Login credentials, but provides you with a unique identifier as your Login ID.
- If you try to use a username that already exists in the system, you will receive the notification, Login ID already exists. You will be unable to save the user profile until you have a unique username:
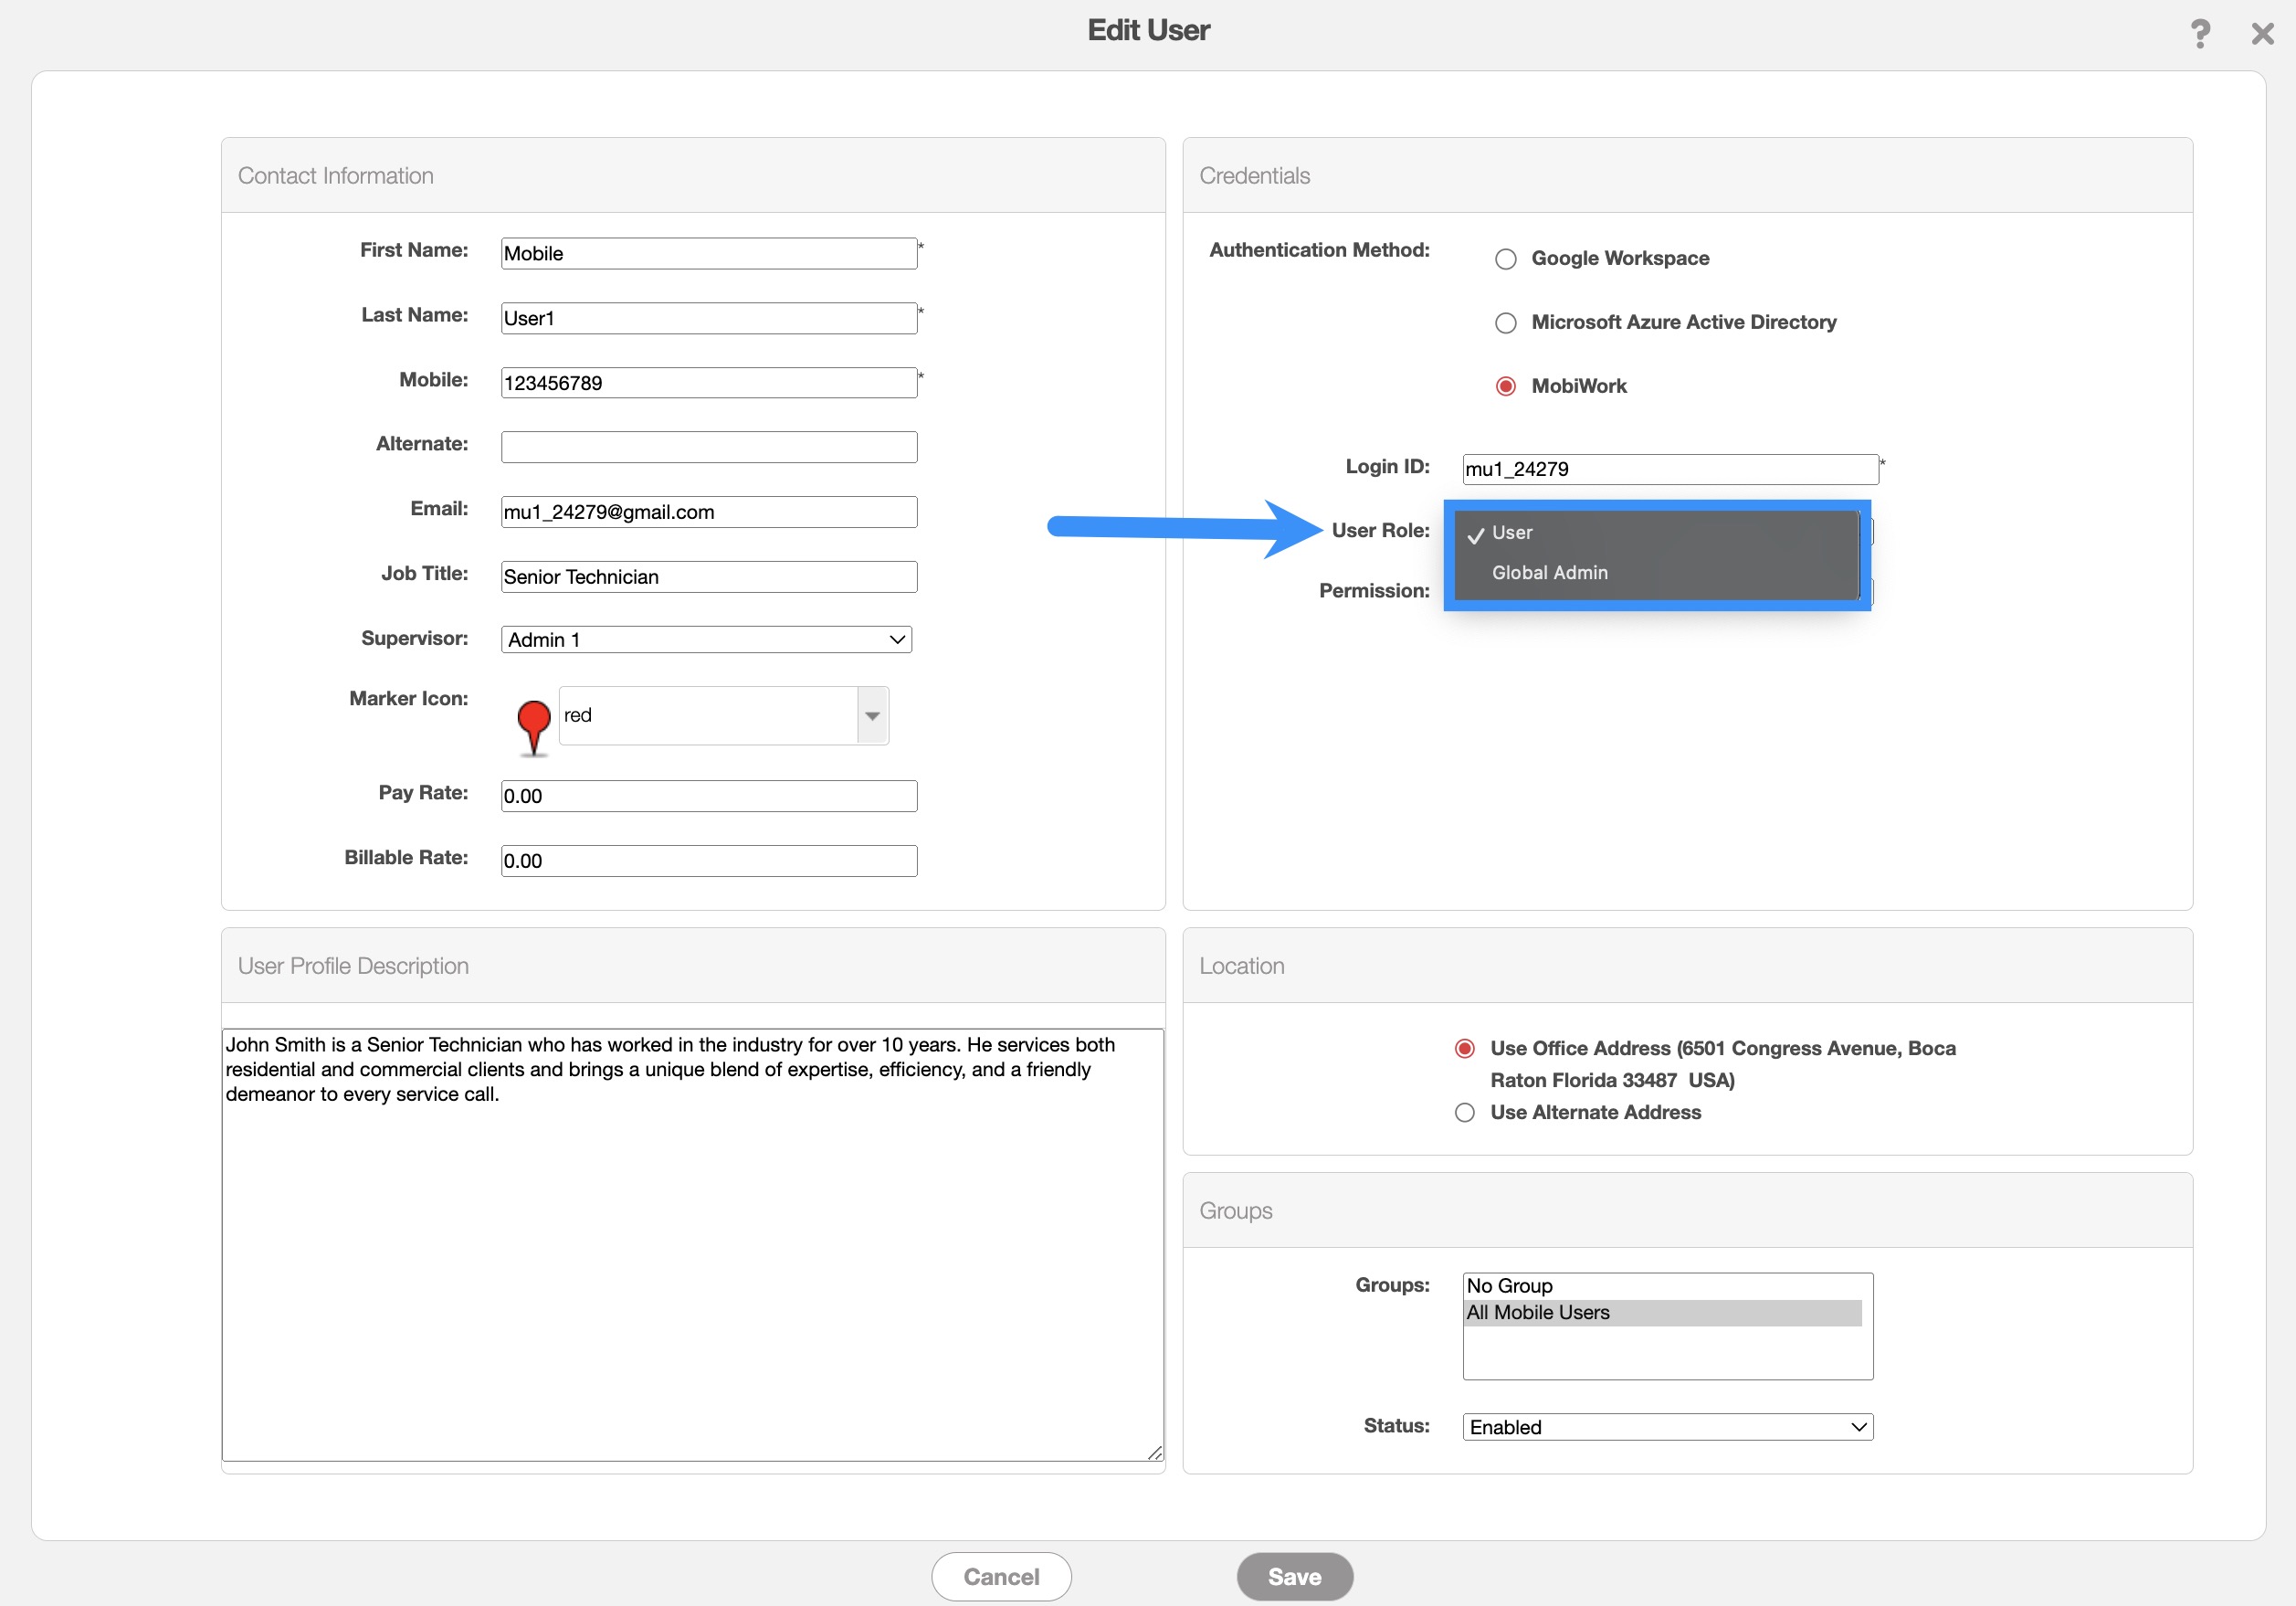
- Make sure to specify whether the User Role will be a:
- Global Admin - Giving them access to view/modify/delete anything in MobiWork, or
- User - Restricted access, which can be modified by using Access Control / Permission Templates.
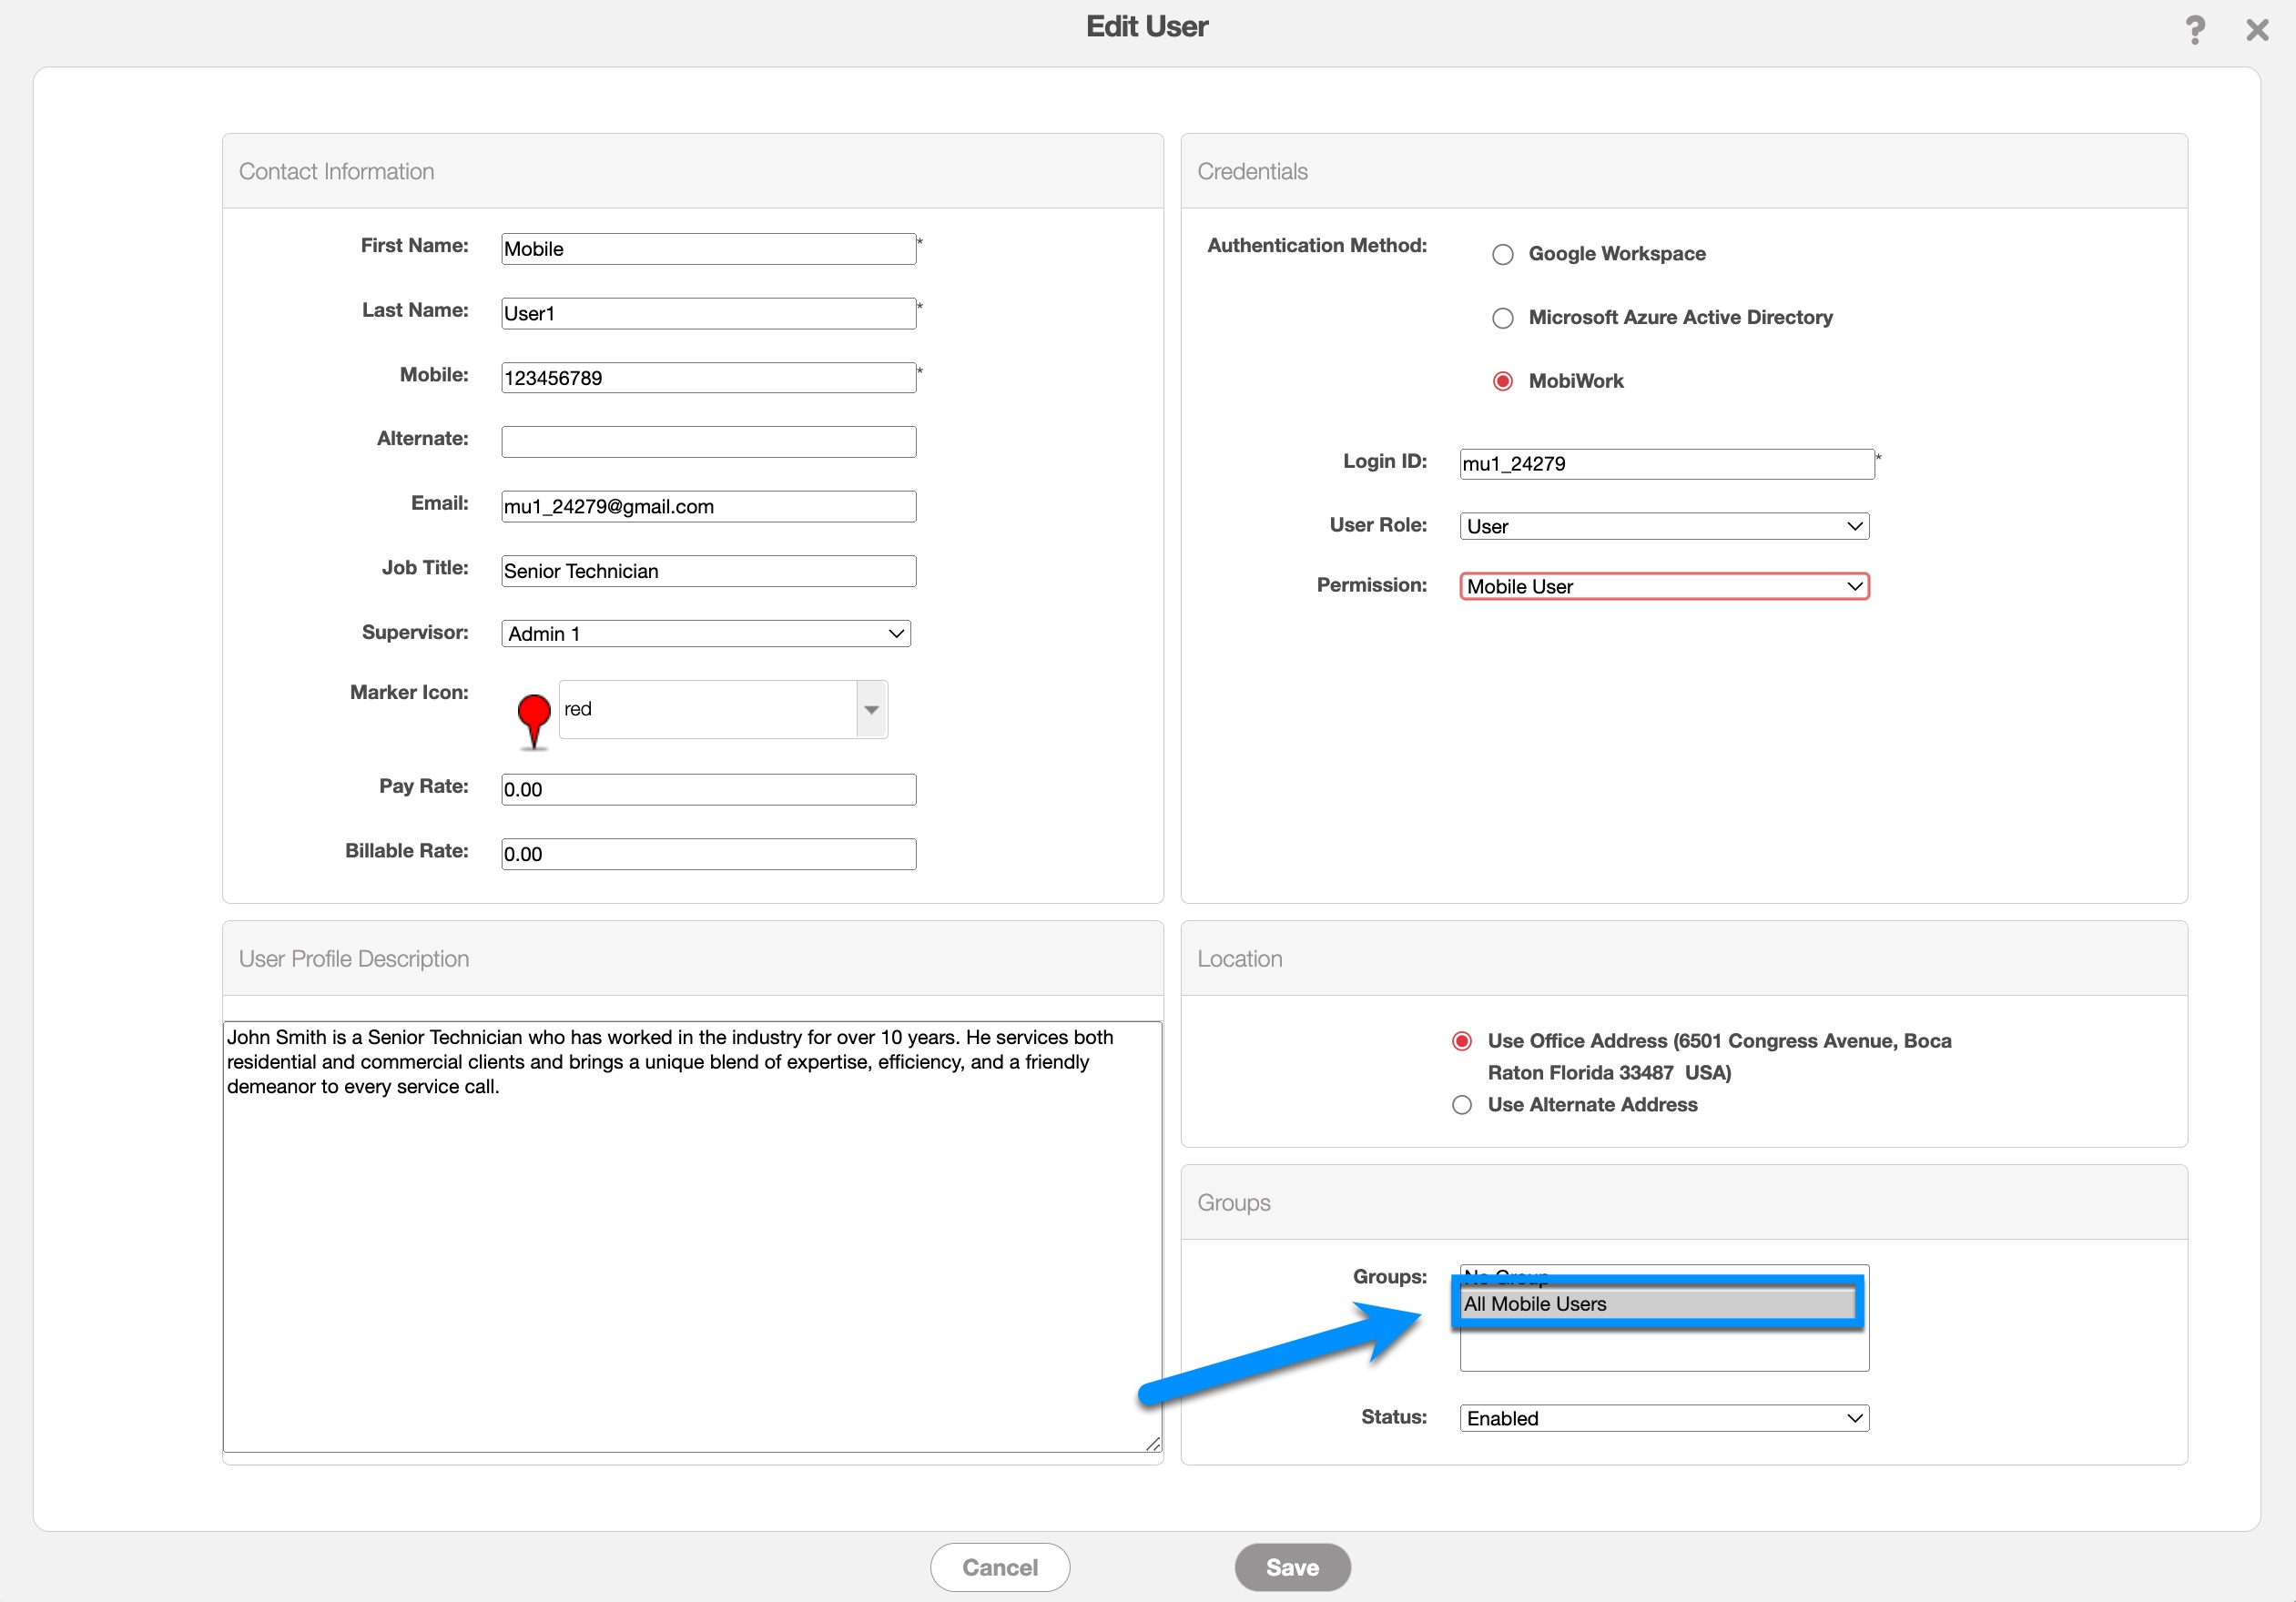
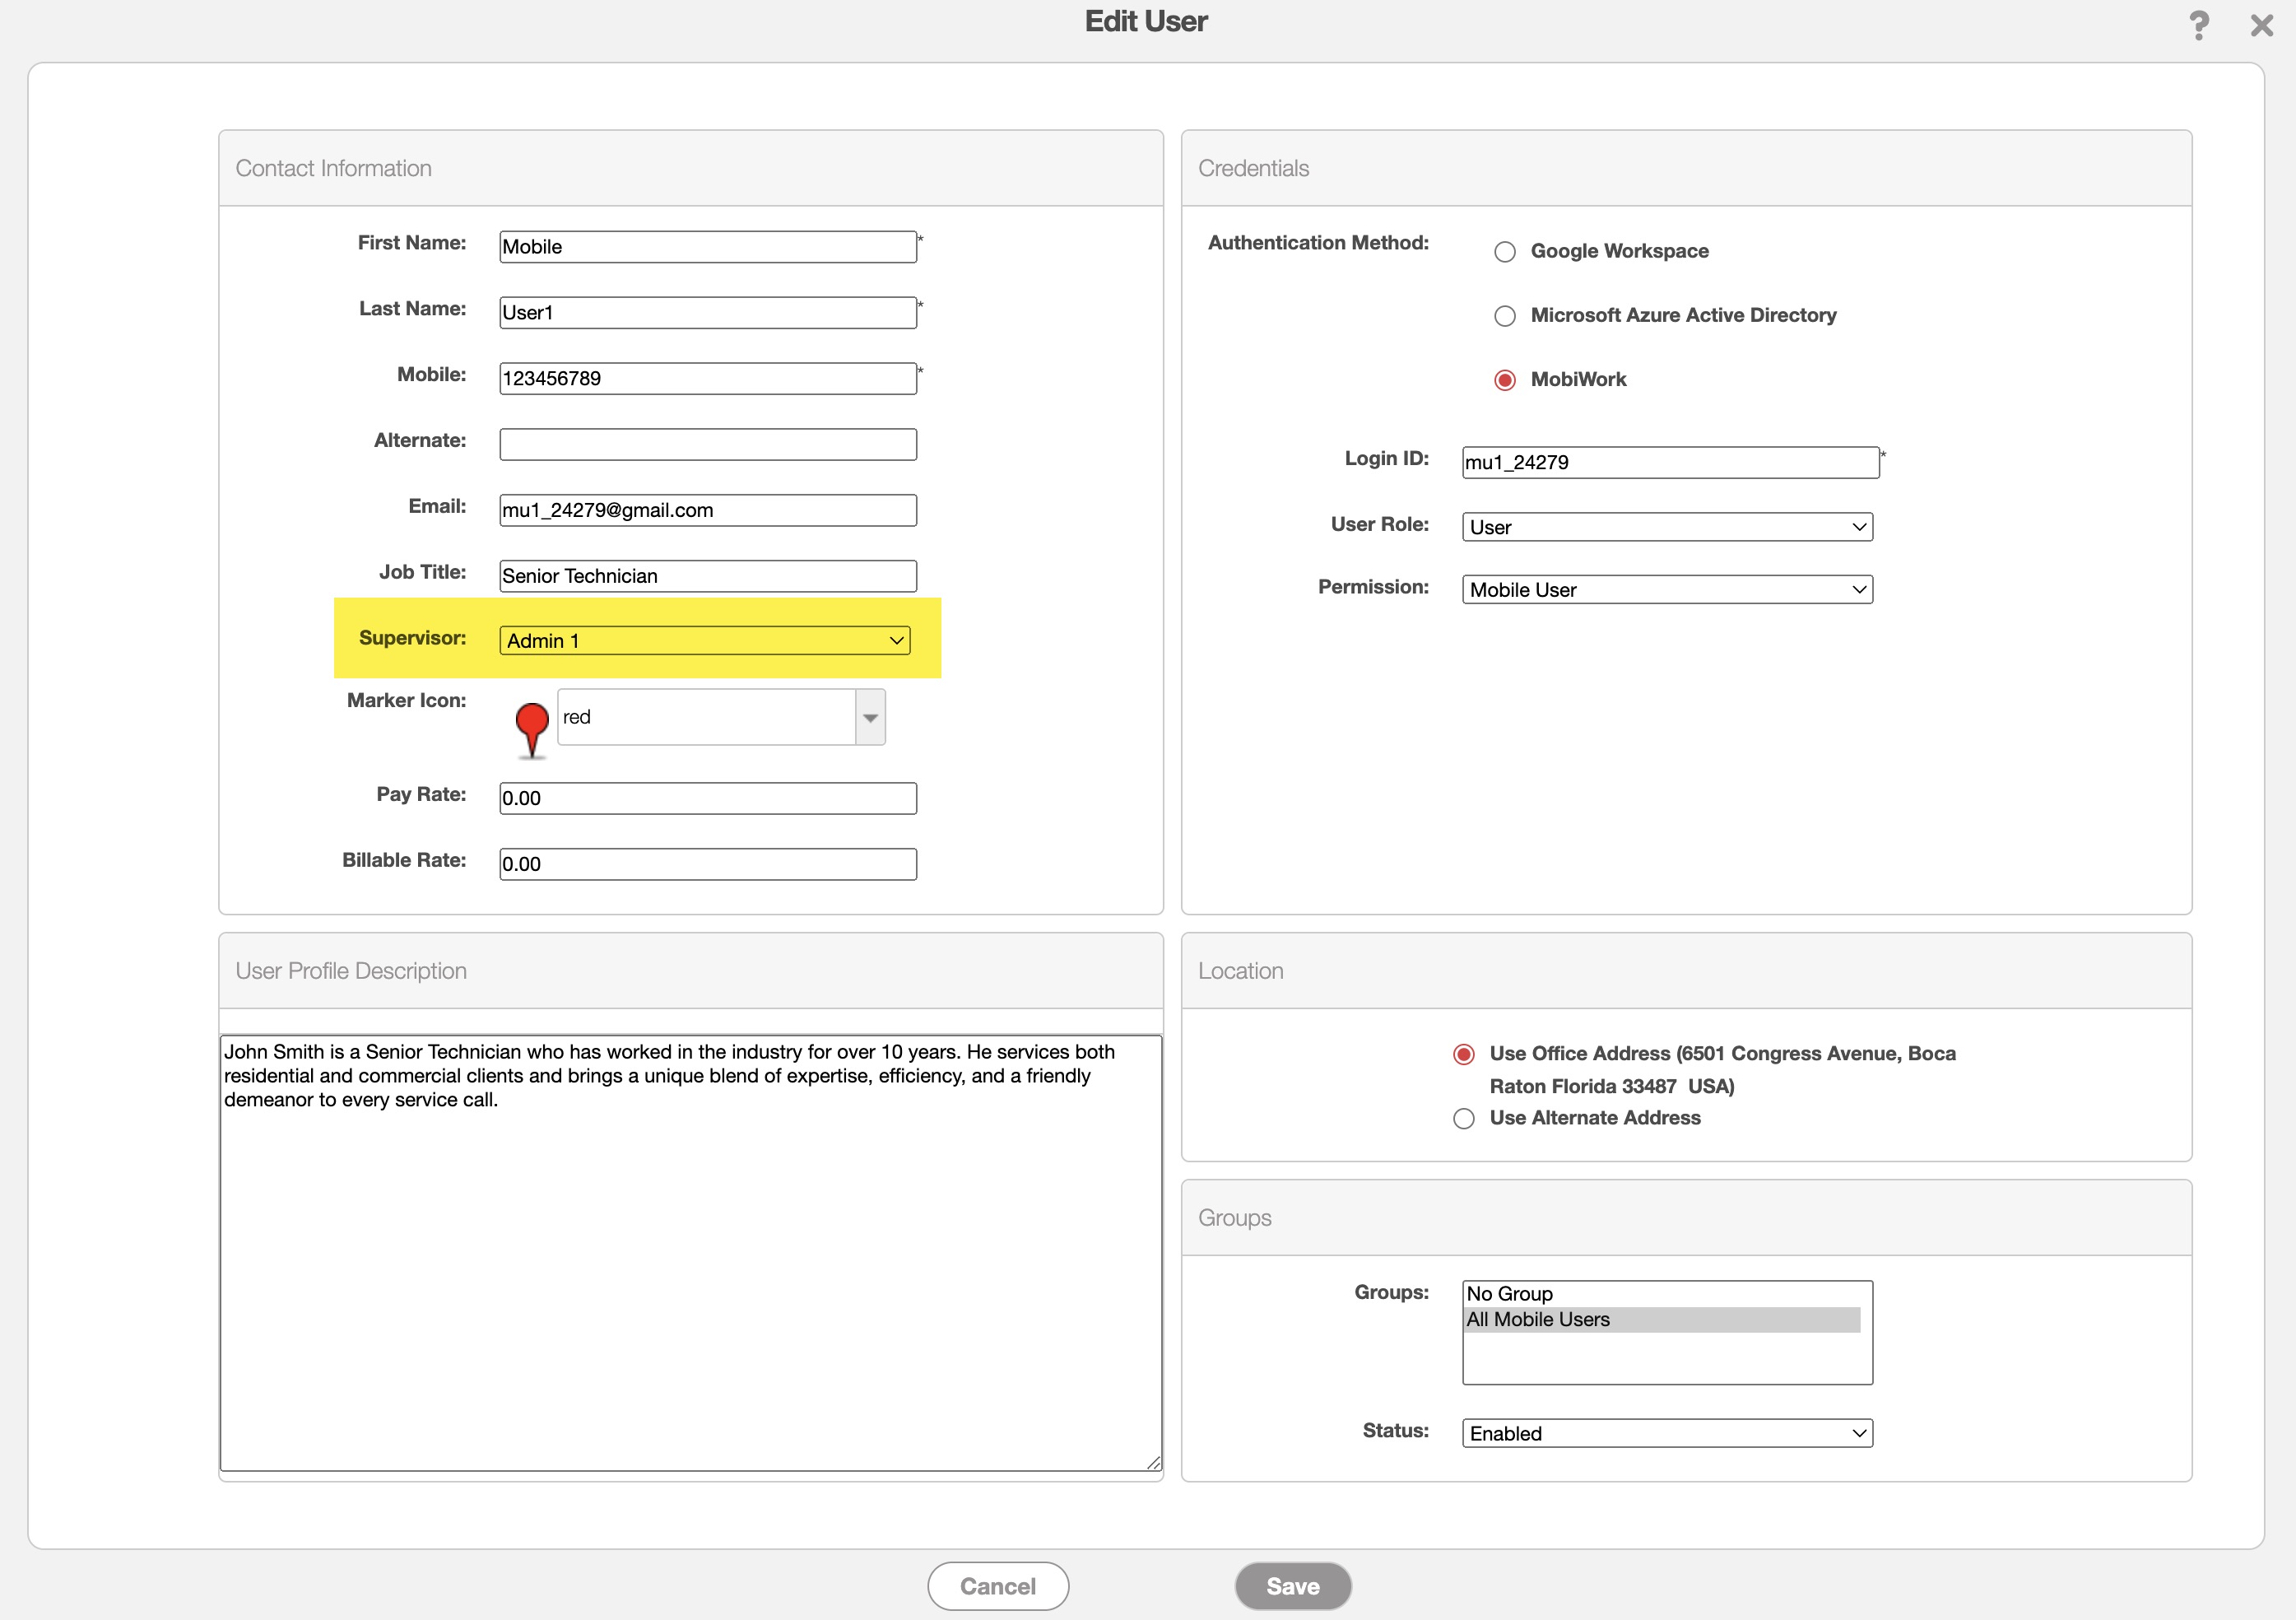
- If User is selected, the Permission drop-down field will appear directly beneath the User Role field:
- If your user is an employee in the field using a mobile device, select Mobile User.
- If your user is an employee in the office in charge of operations, select Office User - Operations.
- If your user is an employee in the office that must access invoices, select Office User - Accounting.
- If you need to set up specific access control for a user, please contact us.
- Add your mobile device users to the "All Mobile Users" Group:
- You can also select the user's supervisor through the Supervisor field in the "Contact Information" panel. If the user does not have a supervisor, select the "None" option from the drop-down. In MobiWork, the supervisor can edit their assigned user's time tracking:
- Make any other desired updates and click Save when done.
- You may need to refresh your page before seeing any changes appear on the User List.
- Repeat Steps B-I for any other users you'd like to set up.
- For any users you won't be using, click the More Actions button, then choose Disable.
- Note: You will not be charged for any disabled users:
- If you wish to disable multiple users at once, simply select the corresponding checkboxes next to the Login ID, click the global More Actions button in the top right corner, then choose Disable Selected Users:


Creating Users in Bulk Using Our Excel Import Template
Overview Video
Step by Step
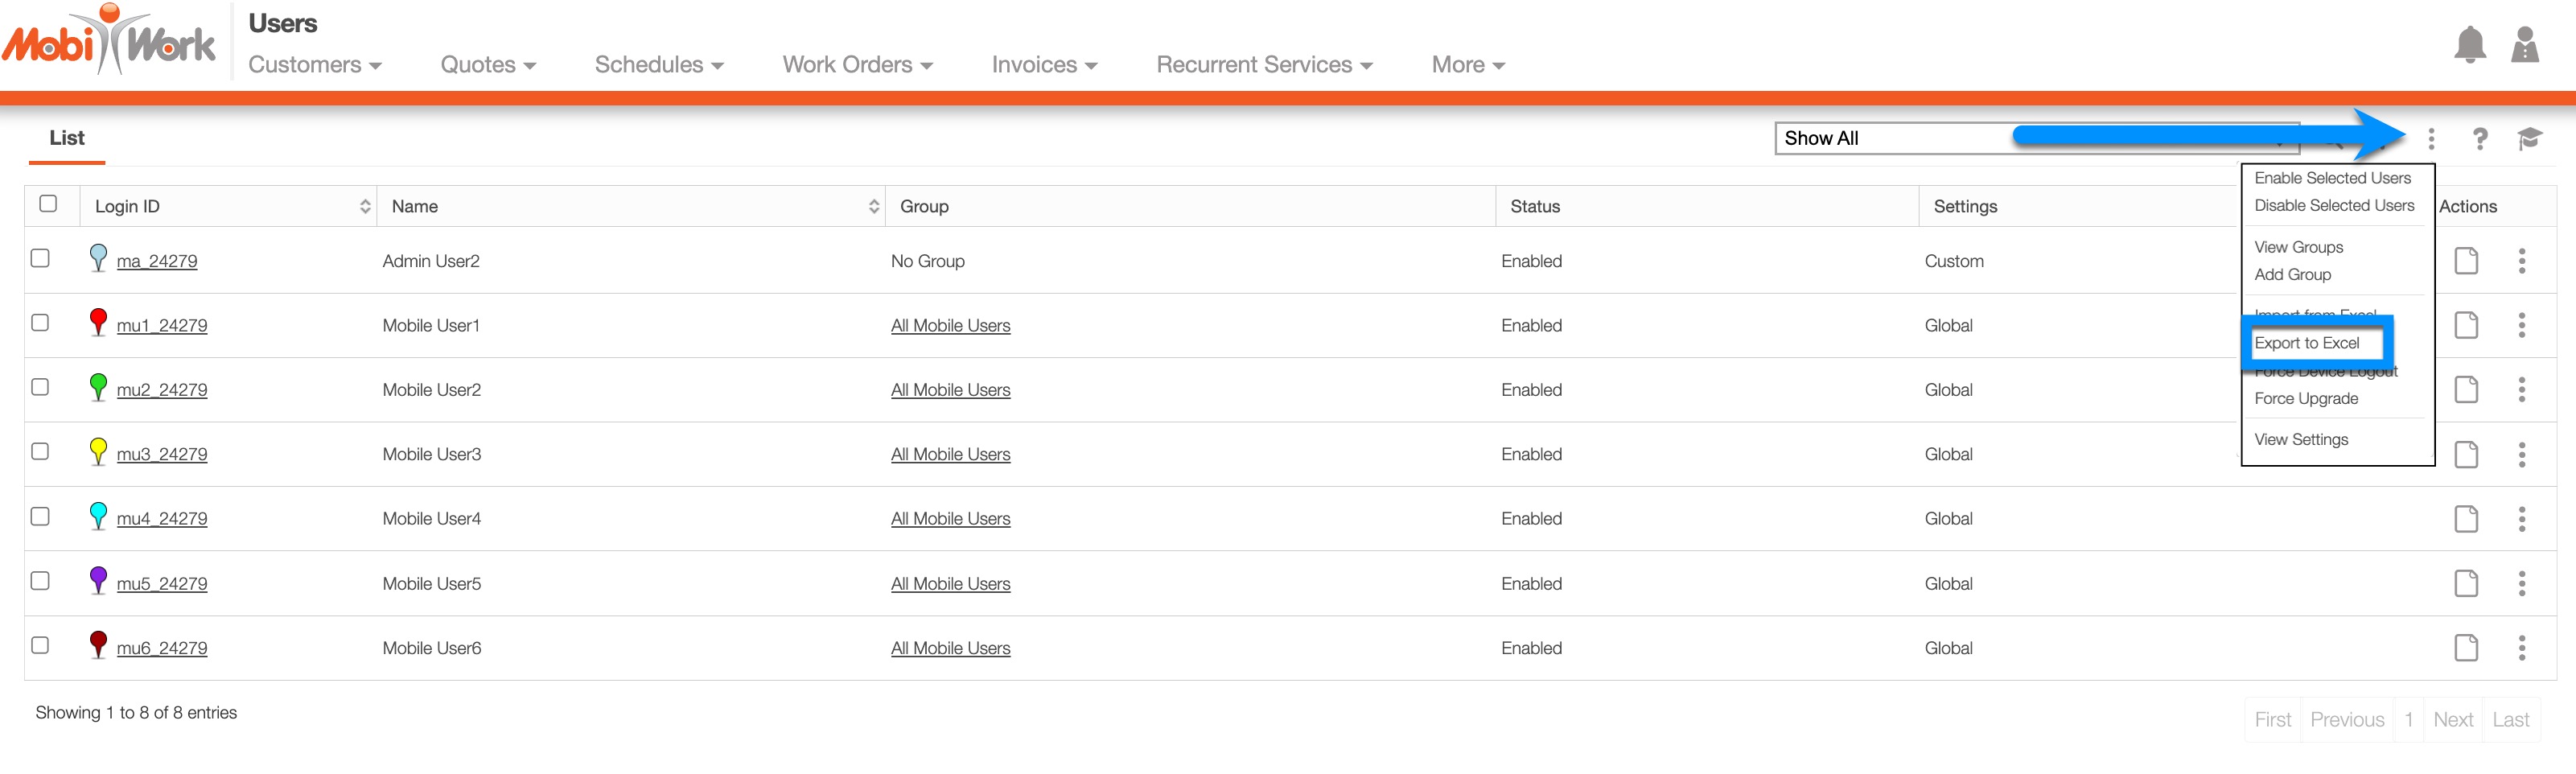
- Navigate to the More drop-down menu to choose Users:
- Select the More Actions button in the top right corner, then click Export to Excel:
- Depending on your browser settings, a download window may appear (if the file downloads without a prompt, skip to Step D). Save the spreadsheet in a folder you'll remember, like Downloads or Documents:
- Once the spreadsheet has been downloaded, open it.
- Take some time to review the contents and structure of the spreadsheet:
- Column headers are found in Row 5 and show the user fields (like User ID, First Name, and Last Name).
- Headers marked with an asterisk (*) are required. Headers marked with two asterisks (**) are conditional and are required if specific criteria are met. For instance, the Login ID field is required if the user is already in MobiWork; otherwise, leave it blank for new users.
- Feel free to widen the columns in Excel (or whichever spreadsheet app you're using) to see if any parts of the headers are being cut off / hidden.
- IMPORTANT: Do not change the contents or delete any headers in Row 5. Modifying them may result in data importing incorrectly.
- Row 6 contains special instructions for each field, noted in red. Follow the instructions as well as you can, as they're the key to a successful and accurate import.
- Rows 7 and on will show your account's individual users. You'll notice the spreadsheet shows your user information along with your account's sample users.
- *Rather than disabling the sample users then creating new users, we recommend simply modifying the provided sample users.
To do so, first delete the rows that will not be altered. For the users you are editing, leave the User ID field (in column A) as is, but change the rest of the user's information. - For example, to set one of your employees up with a login account, find Mobile User1's row, keep the same User ID, but change the first name, last name, email address, user role, etc.:
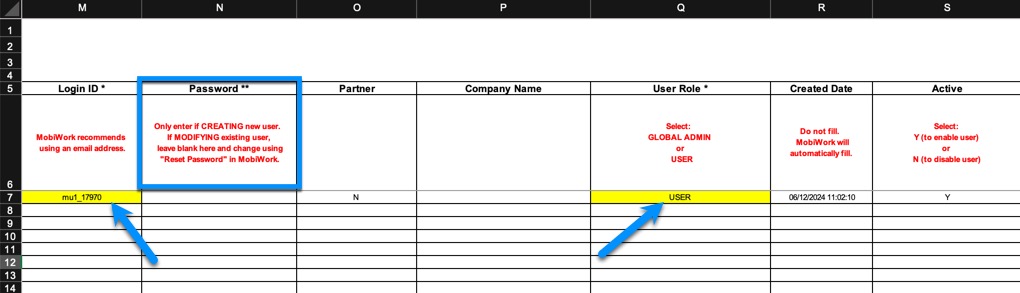
- Remember to be mindful of fields that are required (marked with an asterisk (*) in Row 5) and require special attention (noted in red) in Row 6. For example, as noted in the Password column, passwords can't be changed using the spreadsheet.
- The User Role column will allow you to specify the account administrators. Global Admins will have access to view/modify/delete anything in MobiWork, while Users will have restricted access controlled by Permission Templates. More on this later...:
- If you modify all the available users and still need more, just add new user information in new rows:
- As specified in the notes in Row 6, new users will need the User ID field blank but the Password field completed. A valid password (e.g. 'Wg!47uT'...) must:
- Be at least 6 characters in length
- Have at least one character
- Have at least one number
- Have at least one upper case letter
- Have at least one lower case
- Not be a common password (e.g. 'letmein'...)
- Not have a common sequence (e.g. 'test123'...)
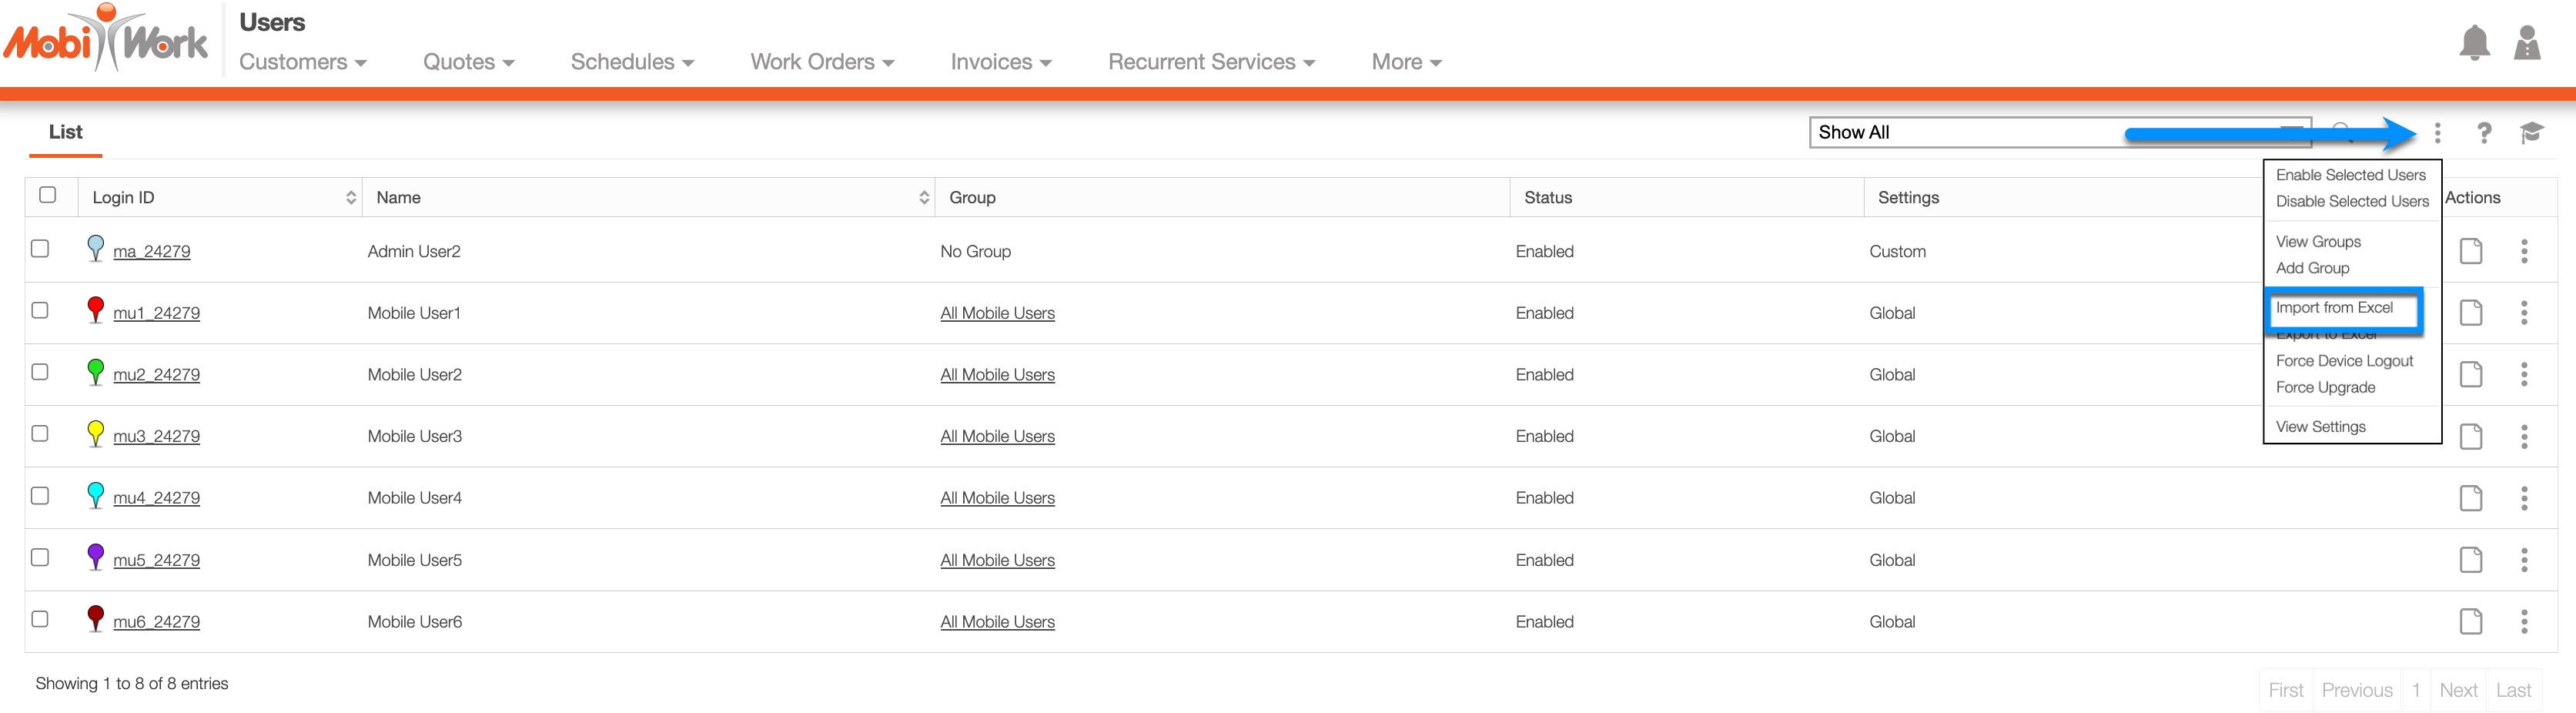
- Save the spreadsheet, then return to the MobiWork Users page.
- Click the More Actions button and choose Import from Excel:
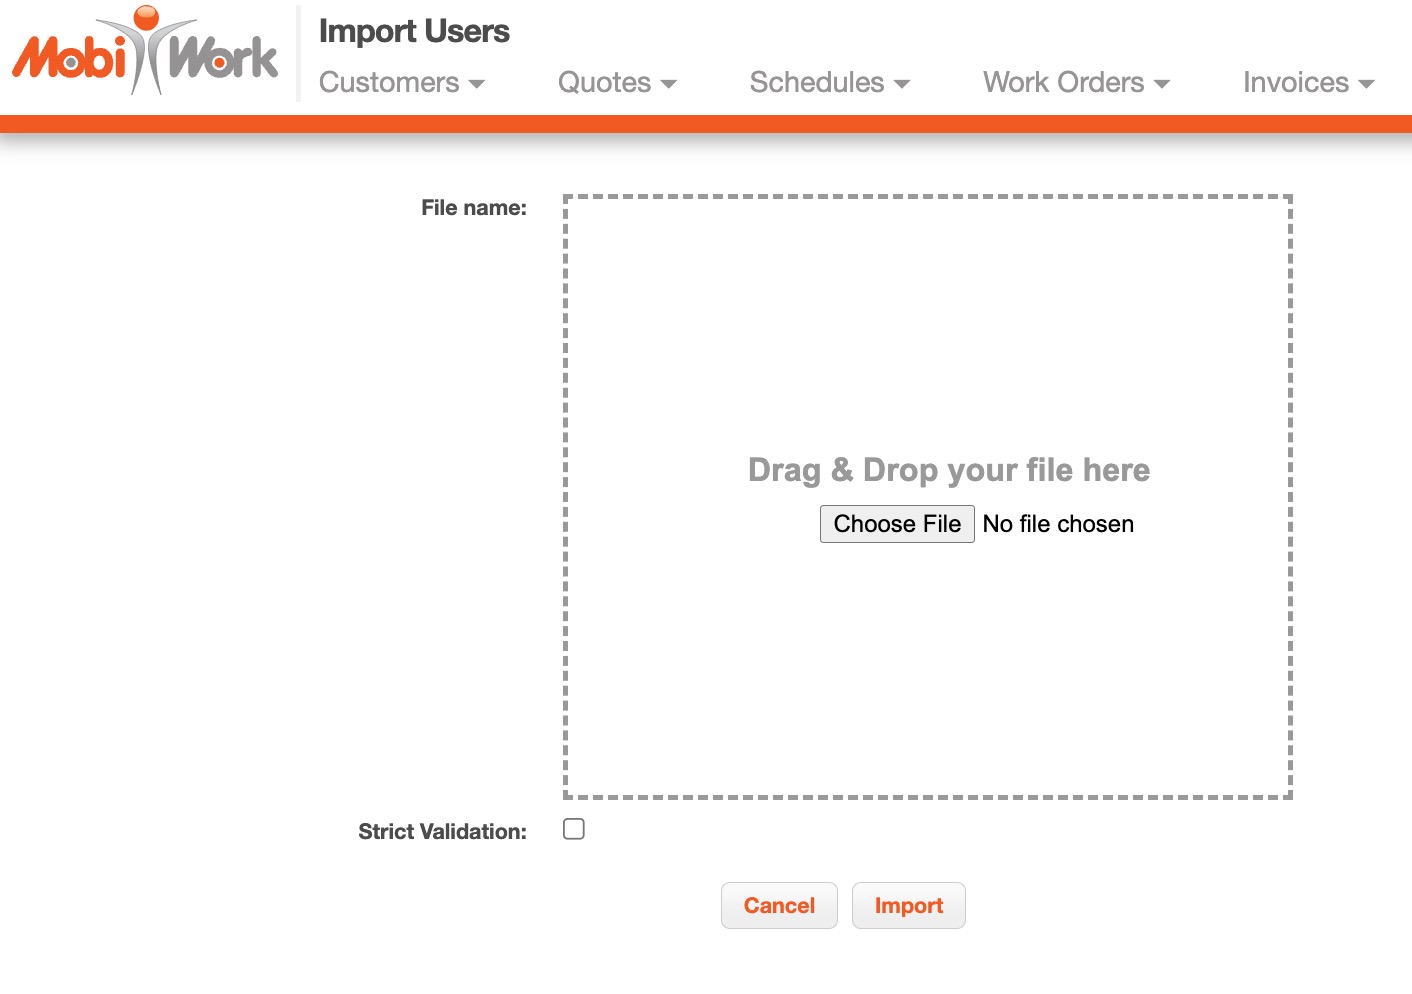
- Find your spreadsheet, attach it, and click Import:
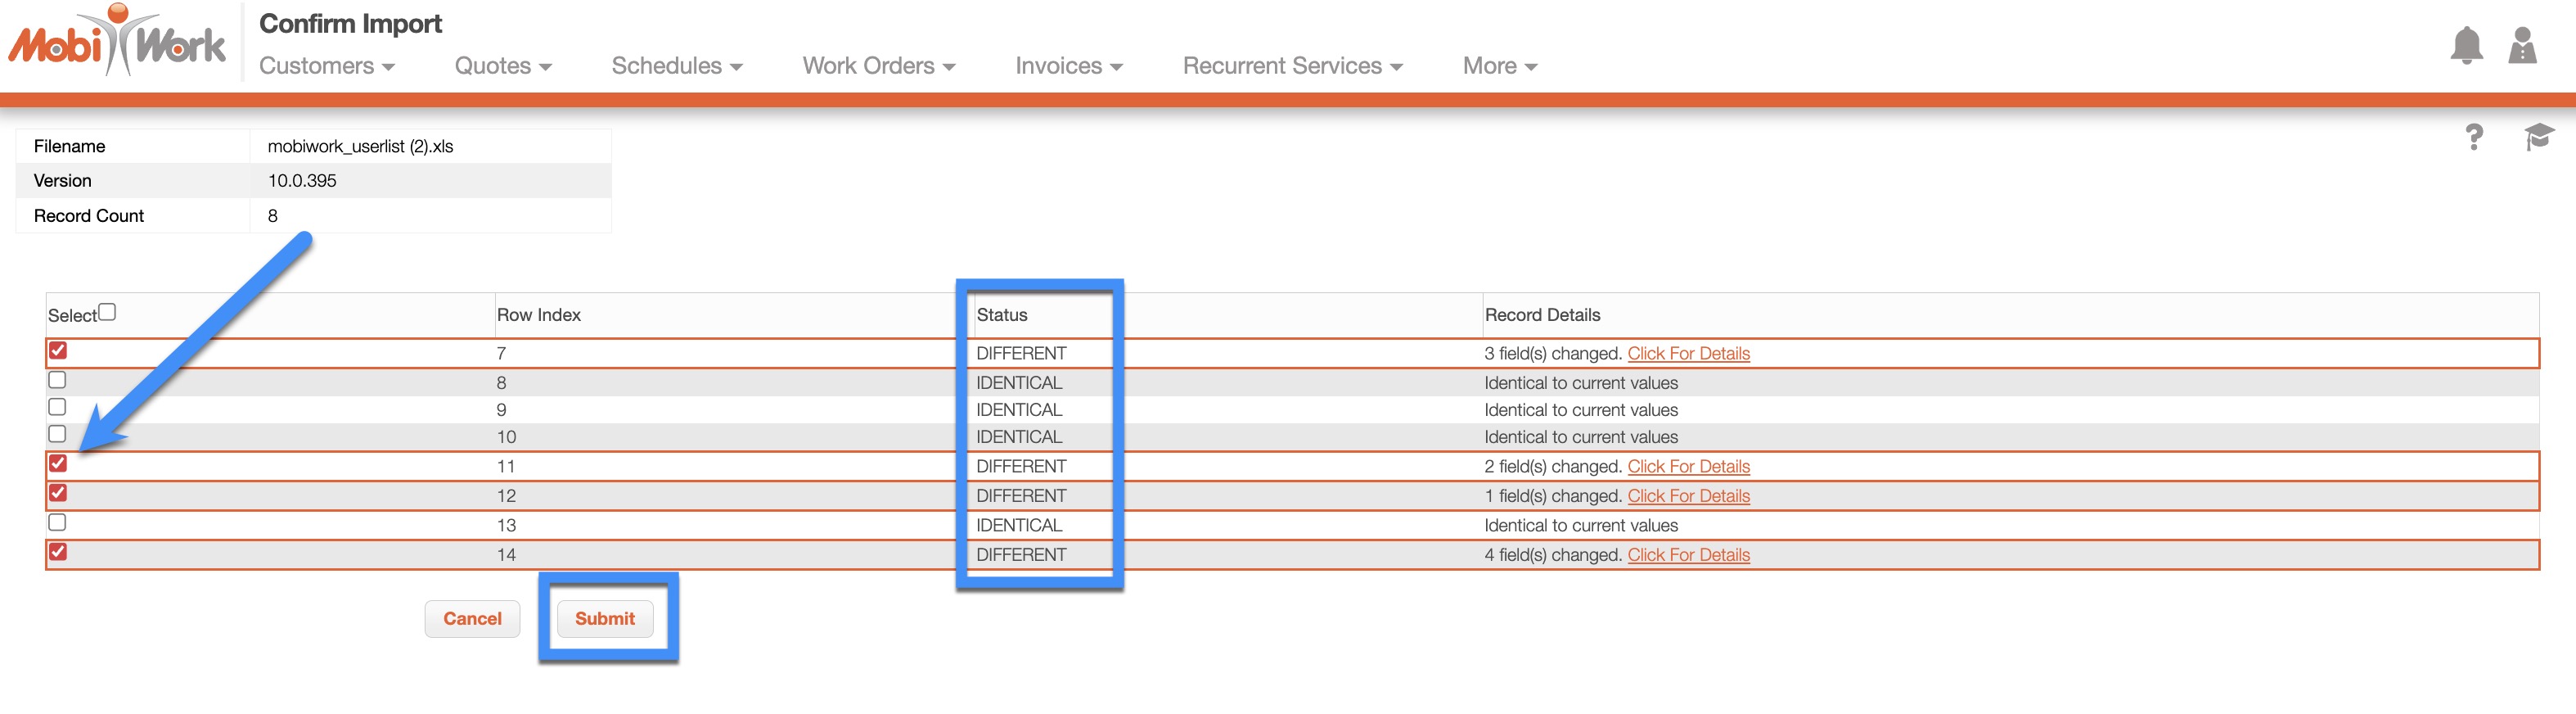
- Review the list of users recognized by MobiWork. If everything looks good, click Submit to bring in your list of users:
- IMPORTANT: Only click the Submit button one time. Clicking more than once may result in duplicate entries.
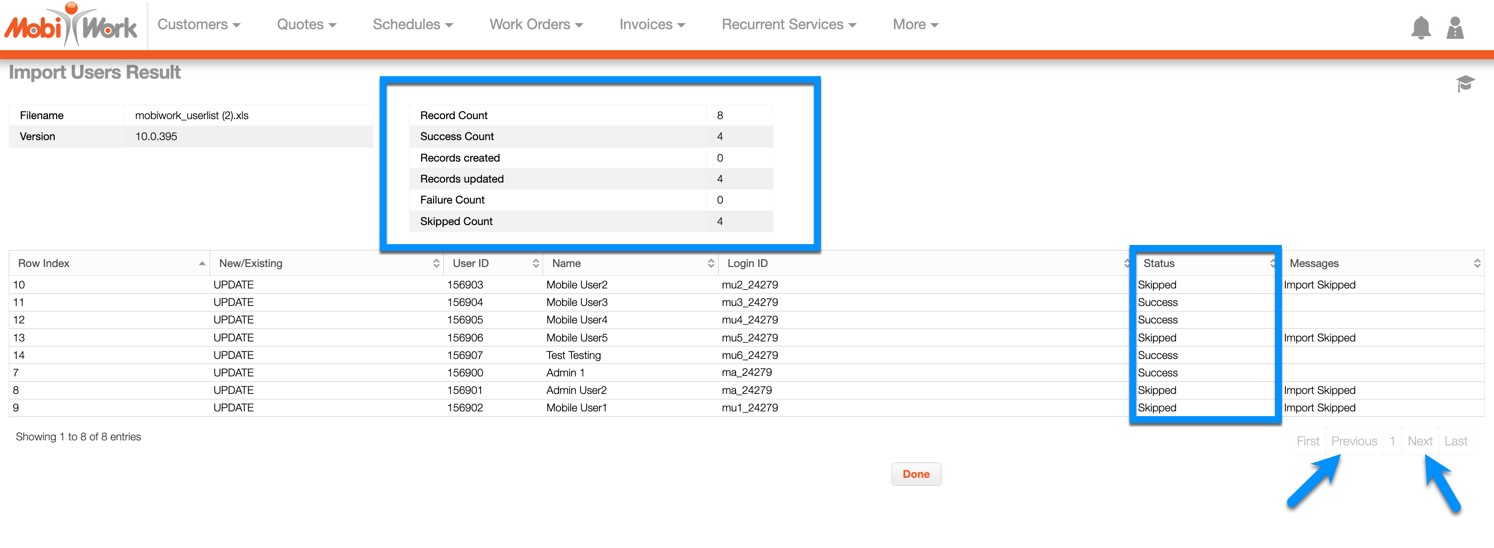
- You should now see a "Confirm Results" page showing you the results of your import:
- You'll see an overall recap of the import at the top (showing how many users were created, skipped, etc.), along with a breakdown of each entry's results on the bottom.
- If only some of your imported records are shown, use the page navigation buttons on the lower right of the records to move to other pages or records.
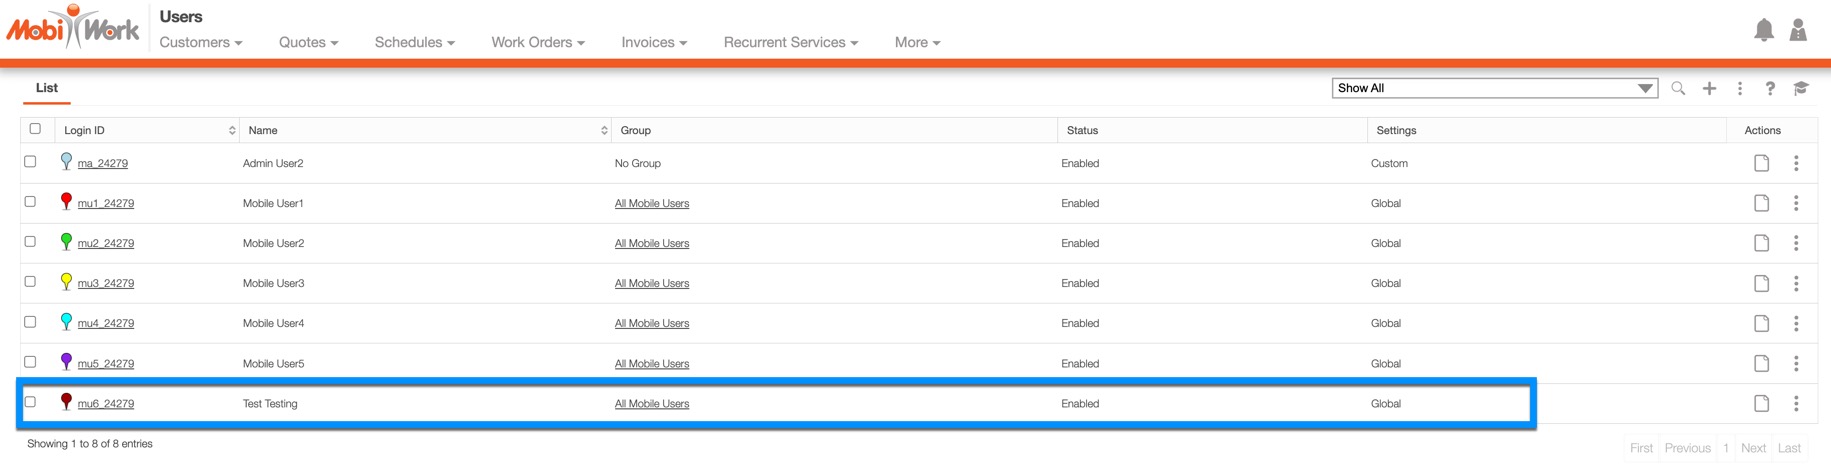
- Click Done to return to the list of users; you'll see the results of the import reflected here:
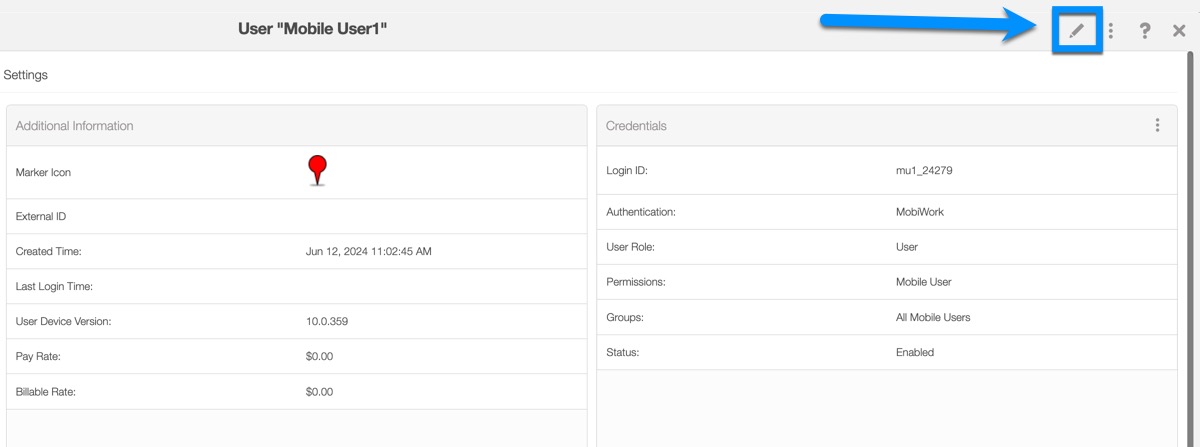
- Since passwords cannot be changed using the import template, let's change them next. Start by clicking the user's Login ID or the View button:
- On the top right of the User window, click the More Actions button, then Reset Password:
- Enter a new password, confirm the password, and click Save:
- If the password was accepted, you'll be redirected back to the User window. If not, create a new password that meets all the noted requirements, and try saving again:
- Next, you will need to specify Permissions given to any non-admin users: Select the Pencil button from the user view:
- Click the drop-down menu for the Permission field and select the appropriate template as outlined below:
- If your user is an employee in the field using a mobile device, select Mobile User.
- If your user is an employee in the office in charge of operations, select Office User - Operations.
- If your user is an employee in the office that must access invoices, select Office User - Accounting.
- If you need to set up specific access control for a user, please contact us.
- If you would like more information about the User Permission Templates, please see the Permission Templates page.
- Finally, add your mobile device users to the "All Mobile Users" Group, and click Save:
- Repeat Steps N through S to change Passwords and/or Permissions for any other users.