To view the route for a specified user, you will first need to be on the Schedule feature page. For more information on how to access this page, please see the Schedule List page.
From the Schedule "Timeline" Tab
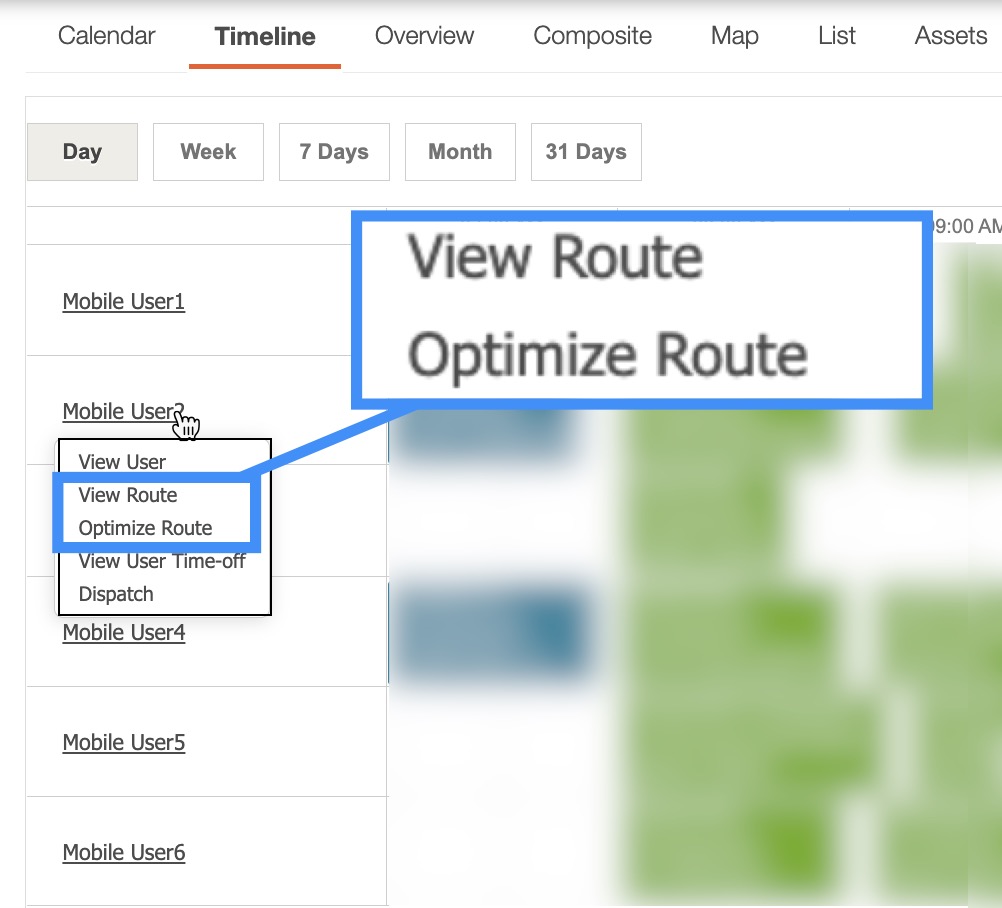
You can view the route or optimize a route for a user from the Schedule "Timeline" tab. Once you are on this tab, click on the desired user and from the drop-down select either the "View Route" or "Optimize Route" option:
From the Schedule "Composite" Tab
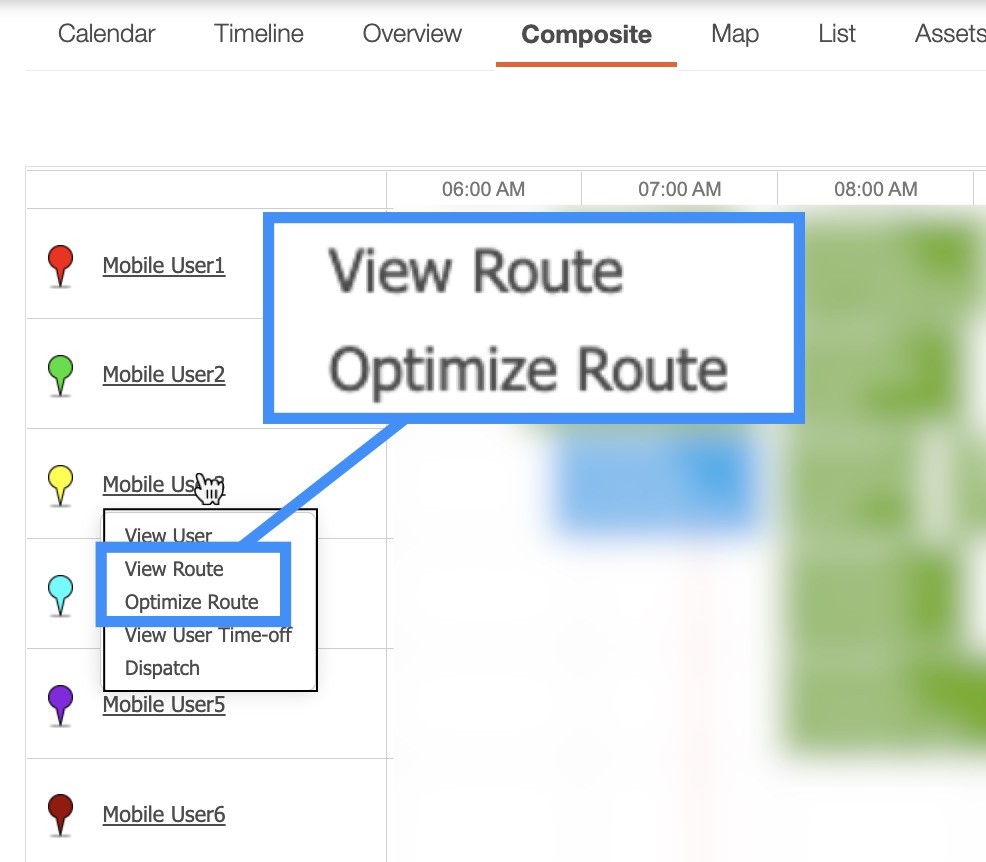
You can also view the route or optimize a route for a user from the Schedule "Composite" tab. Once you are on this tab, click on the desired user and from the drop-down select either the "View Route" or "Optimize Route" option:
Regardless of the manner that you choose to view your user's route, you will be directed to the map-view for your user.
From the User Map-View
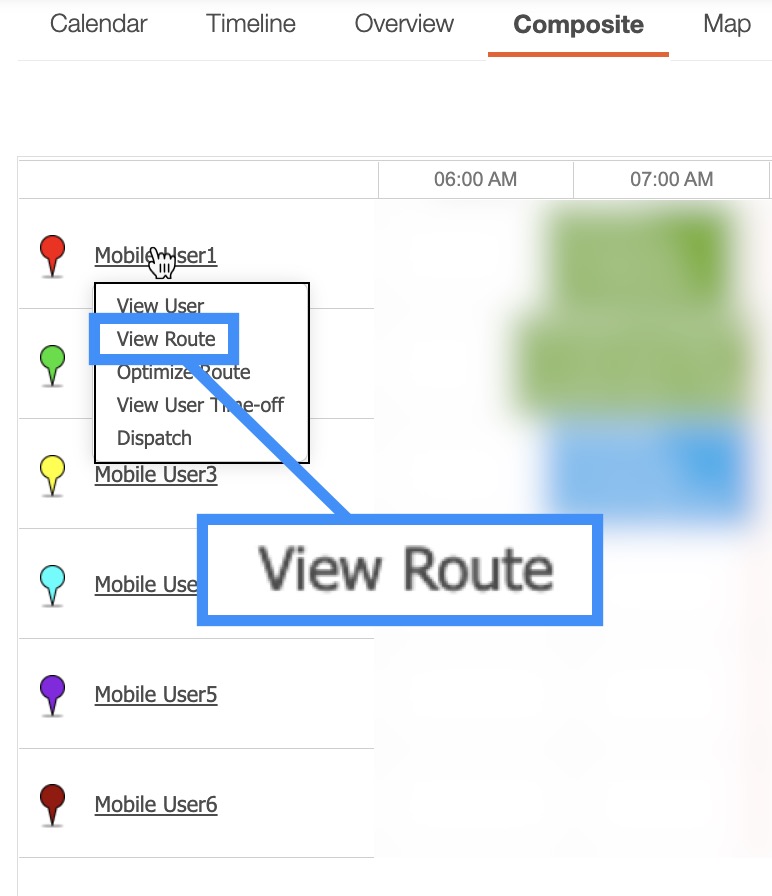
You can also optimize your user's routes from the user map-view. To access this page, please click on the "View Route" option from a selected user. This can be done from either the Schedule "Timeline" or "Composite" tab:
Once you select the "View Route" option from the selected user, you will be brought to the User Schedule page. On this page, navigate to the "Global Actions" area; from this area, click on the Optimize Route button to optimize your routes:
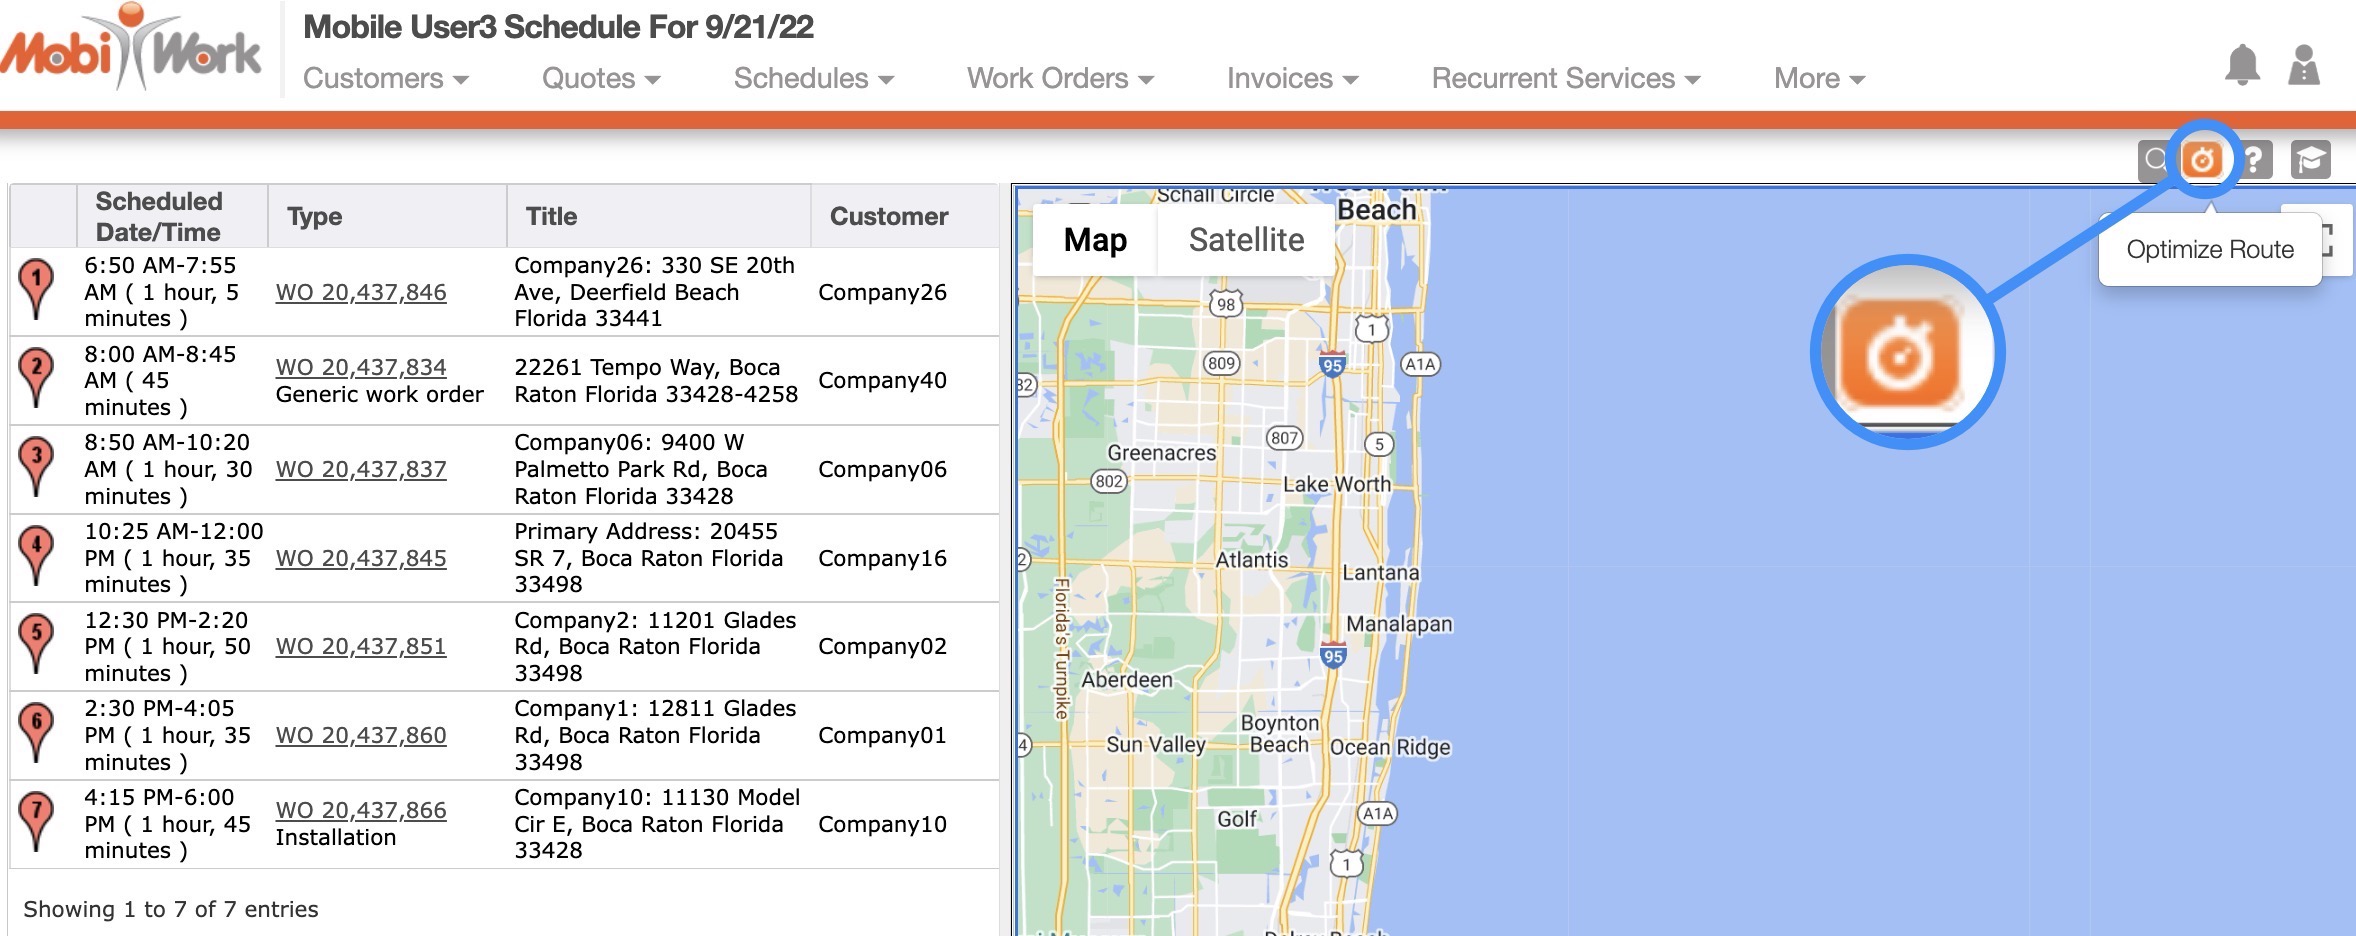
The map-view will visually display all your customers that are assigned to a specified user on a map; these customers are represented by a pin. MobiWork utilizes the same map system that is utilized in Google Maps; the buttons and functions will work the same way.
Map-View Layout
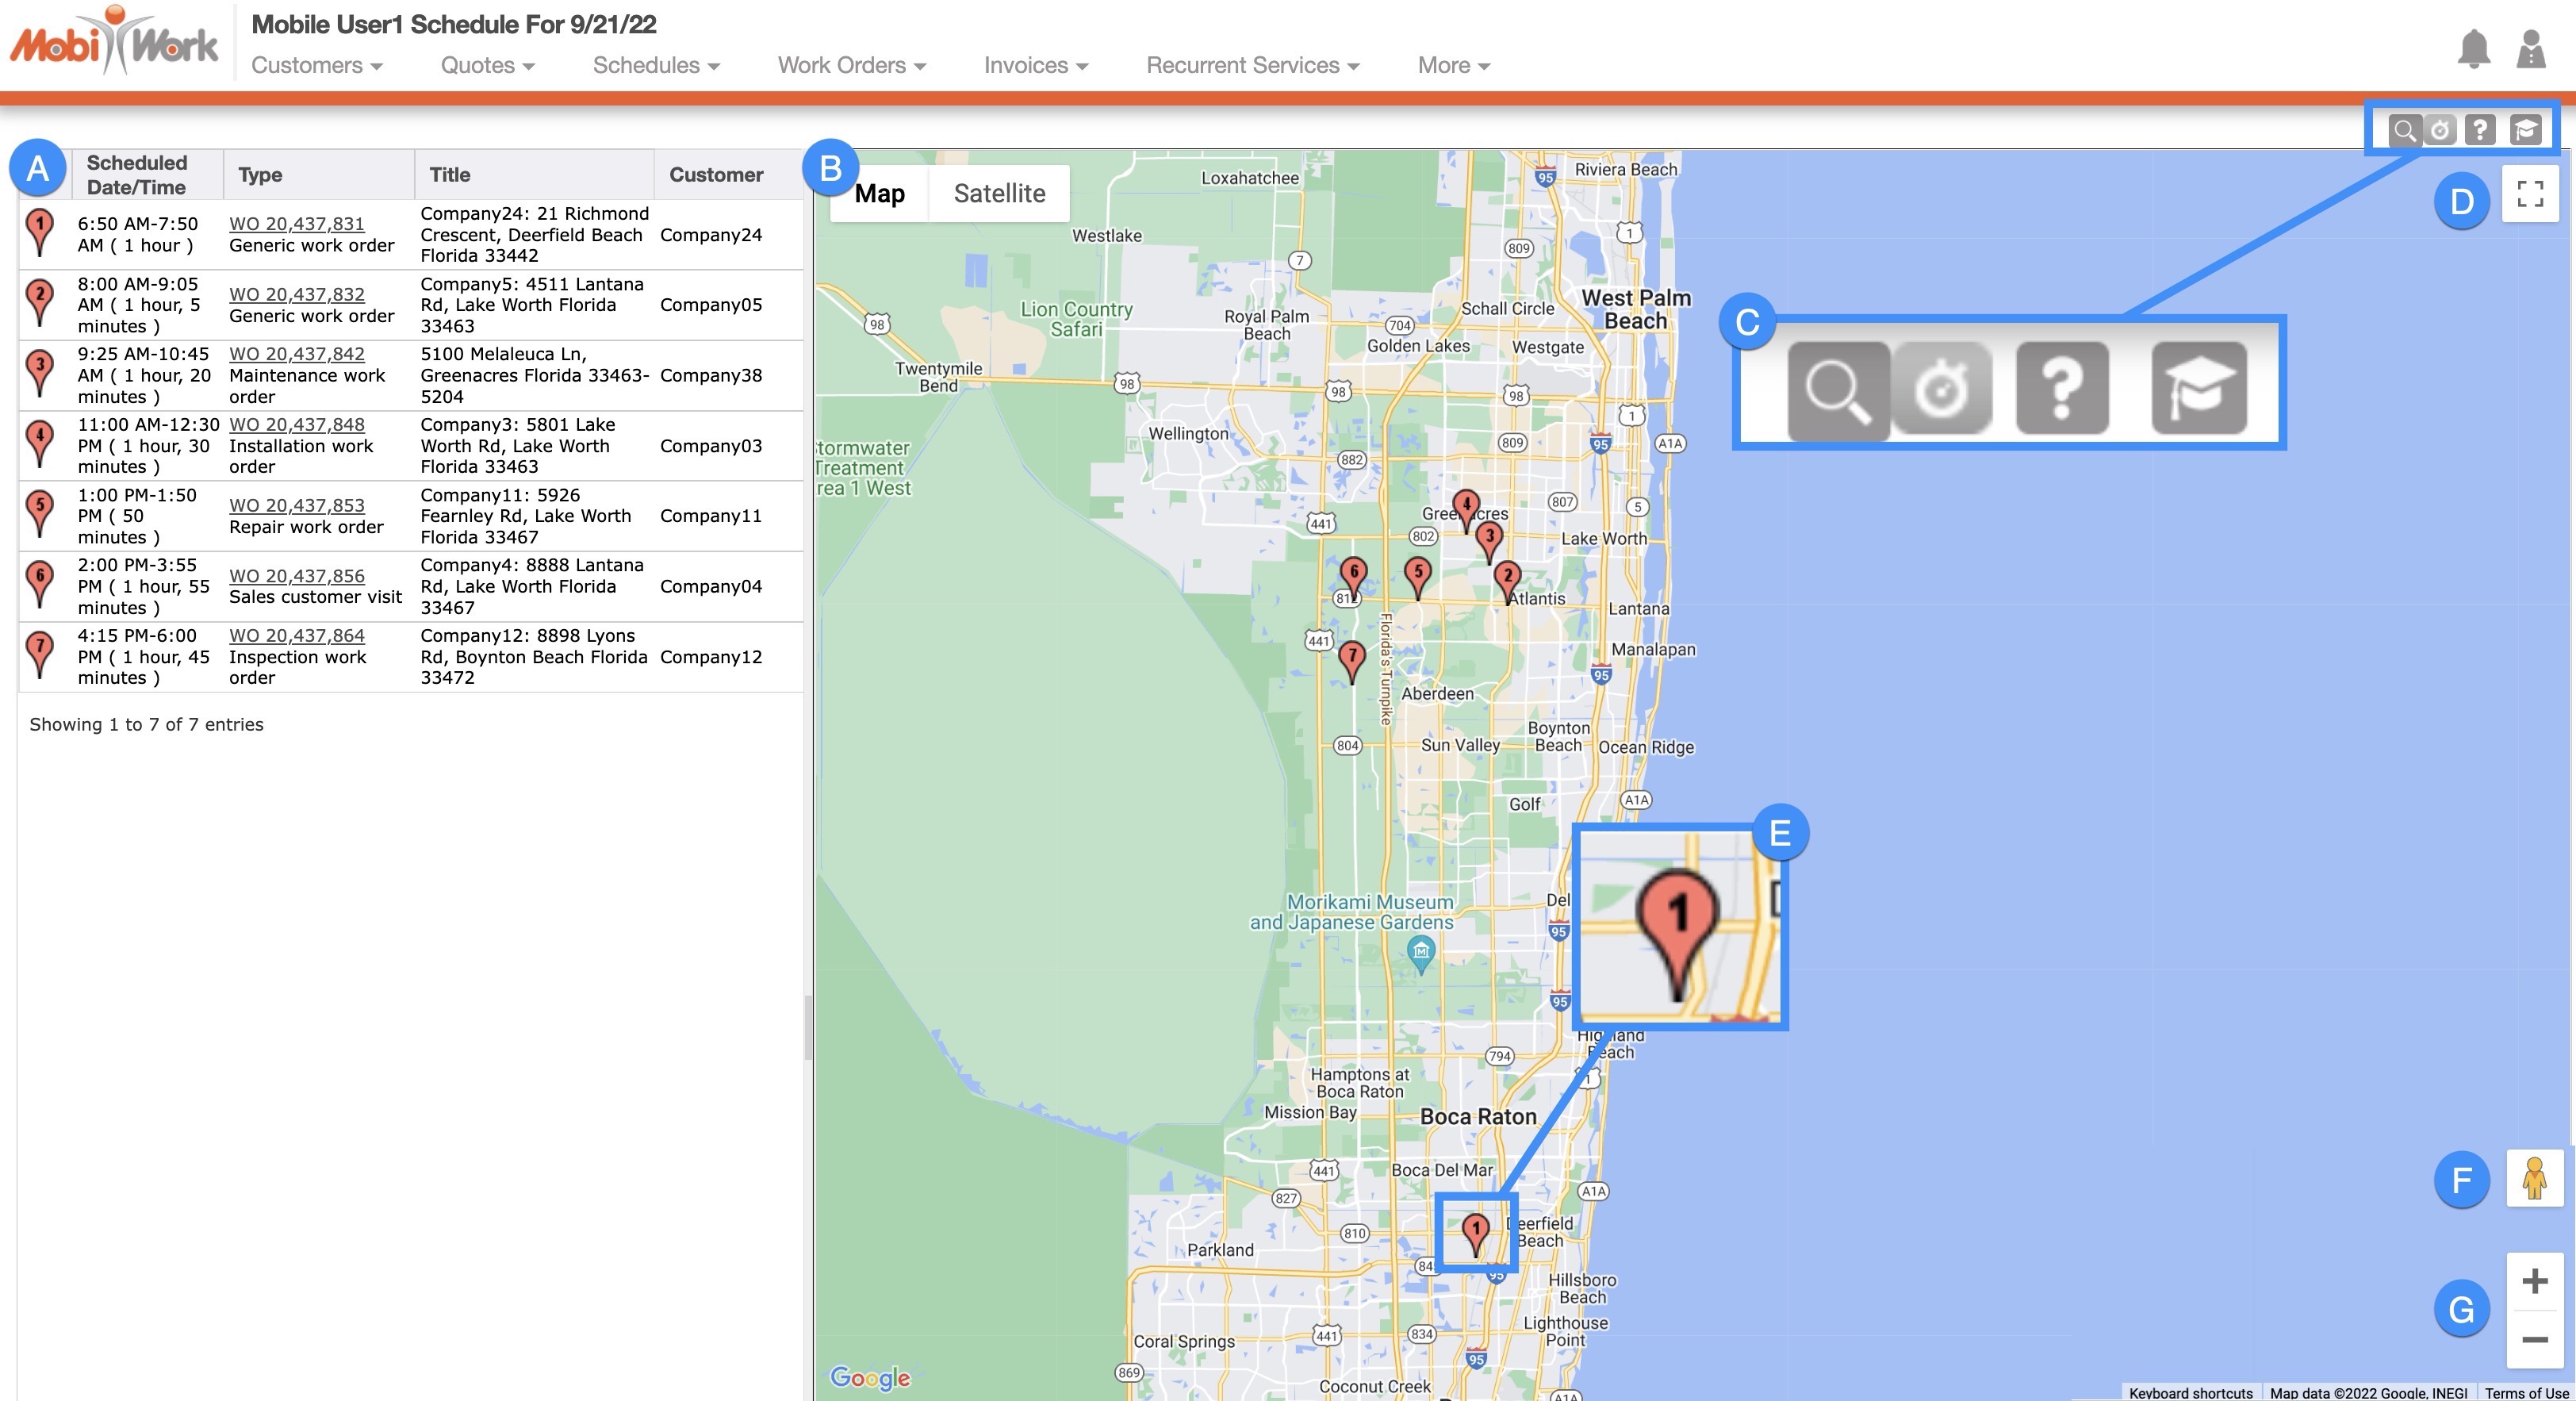
This map-view will allow you to:
View the details concerning the work order, including the number of the map-pin, the time and date scheduled, the work order number, the address, and the customer's name.
Switch the view from the standard map-view to a satellite view.
Access the map-view "Global Actions" section, which will allow you to perform a search, optimize the user's route, access the Schedule feature page, or activate the Onboarding Assistant.
Have the map fill the entire screen for a better view of the region.
View the map-pin's number. This number will be correlated with the work order on the left side of the screen and will represent the order in which the user will complete the work orders.
Use the yellow person icon to view an area in street view.
Increase the zoom on the map or decrease it by toggling the Plus and Minus buttons.
Map-View Global Actions
The "Global Actions" section is located at the top-right of your map-view:
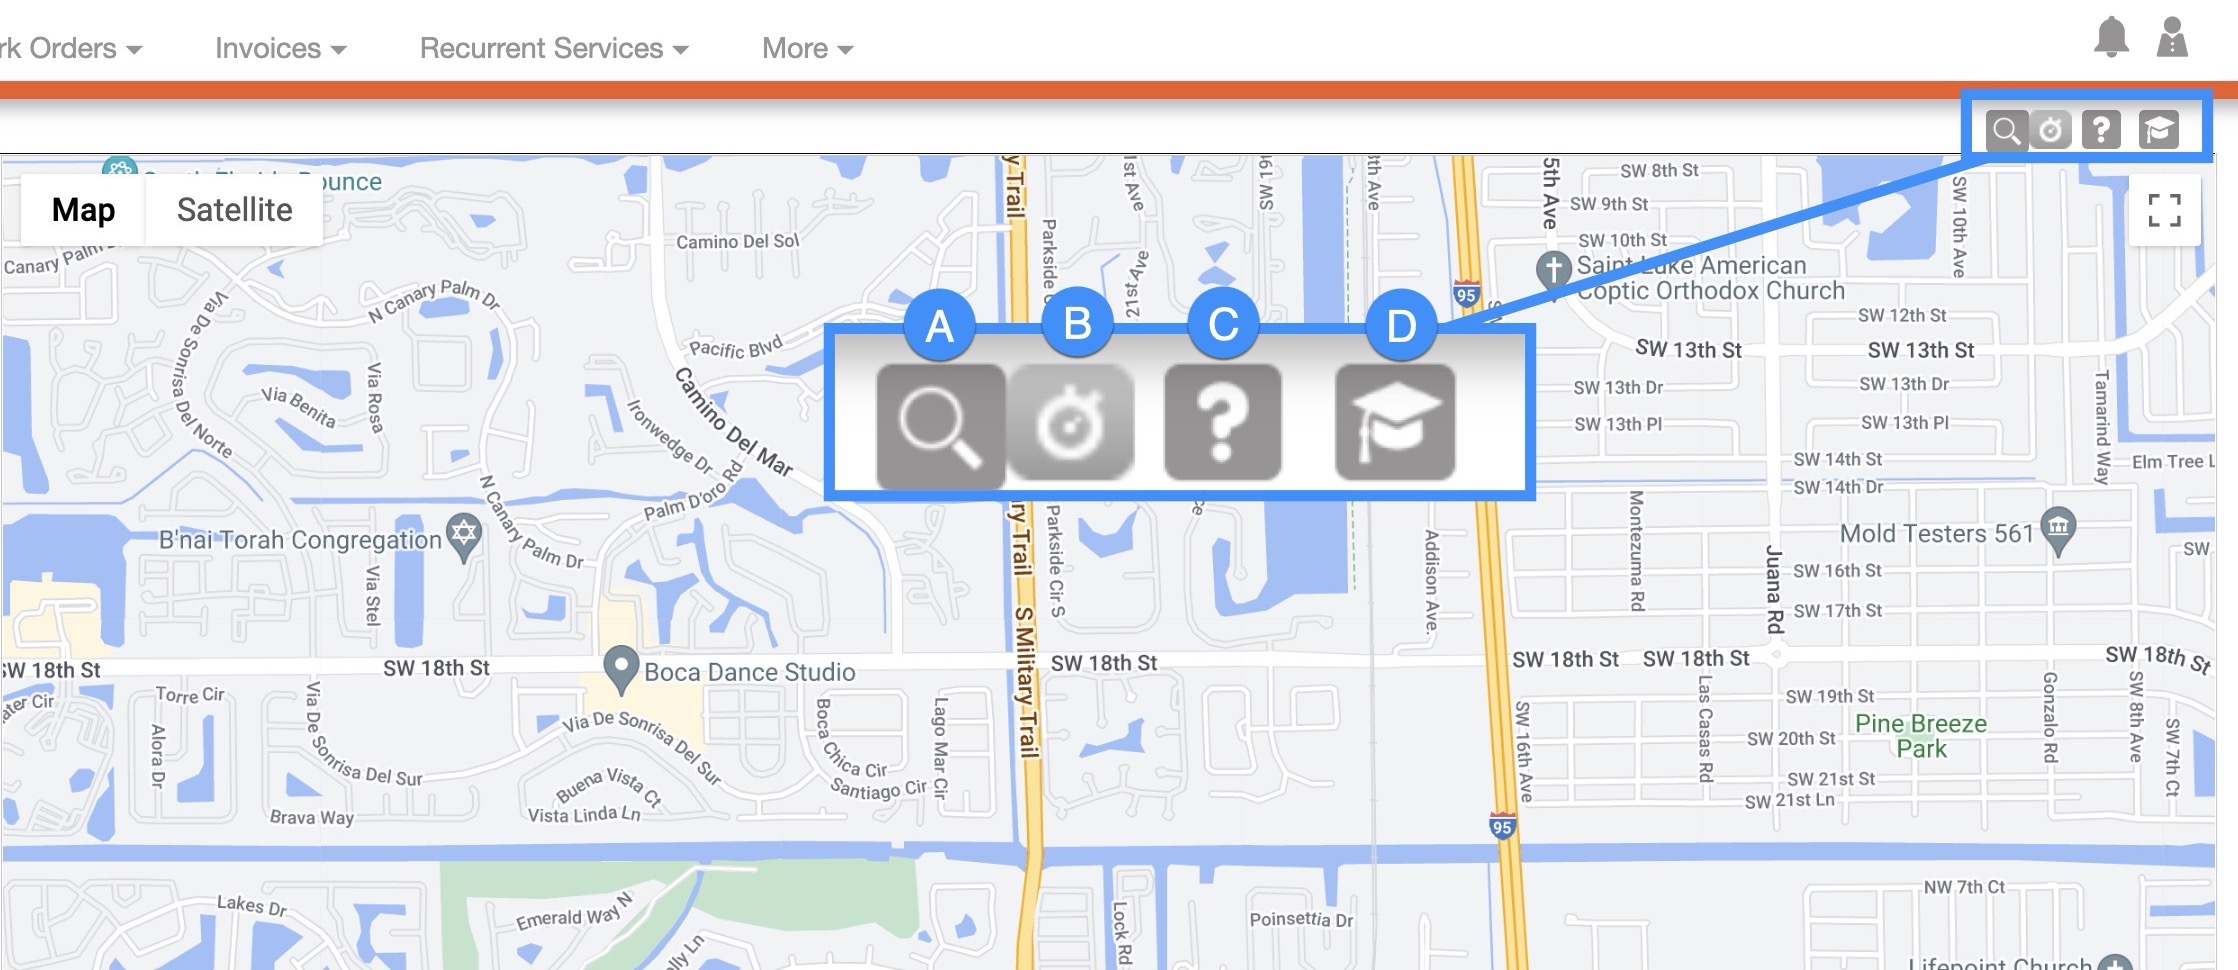
The "Global Actions" section includes:
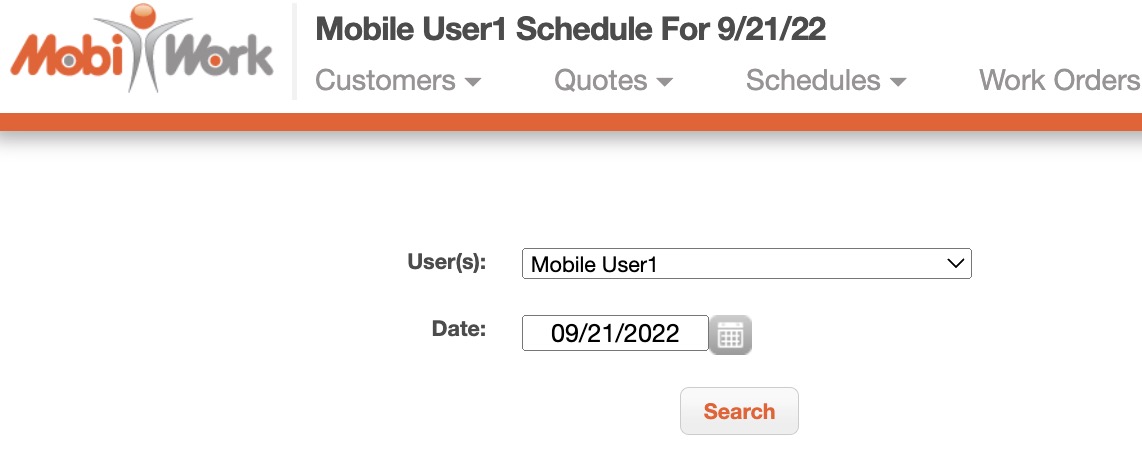
The Quick Search will allow you to switch the map-view between different users and dates. Use the drop-down to select the desired user and the Calendar button to select a new date:
The Optimize Route will optimize the routes for a selected user based on distance.
The Question Mark button which will direct you to the respective MobiWork Features page.
The Graduation Cap which will activate the Onboarding Assistant.
You can add an unassigned work order to a user's route through the Schedule "Composite" or "Map" tabs.
By clicking on the pin of an unassigned work order the map tool tip will appear:
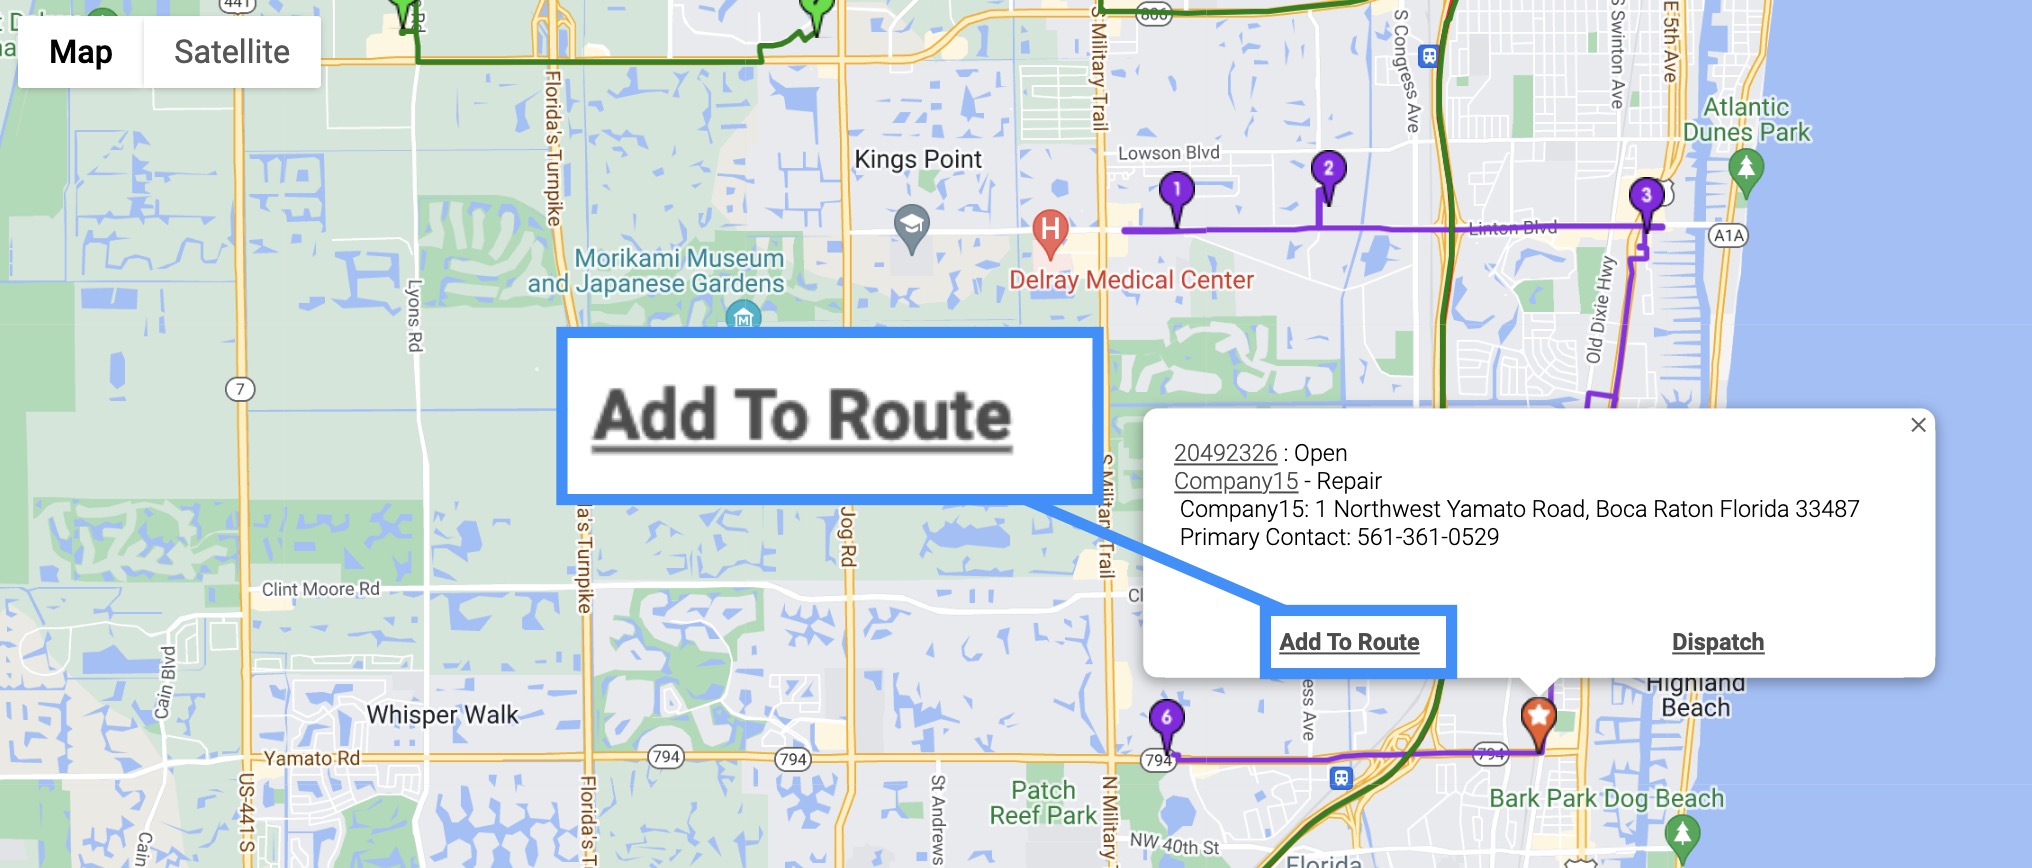
Once you click on the Add To Route button the Add Work Order To Route will then appear:
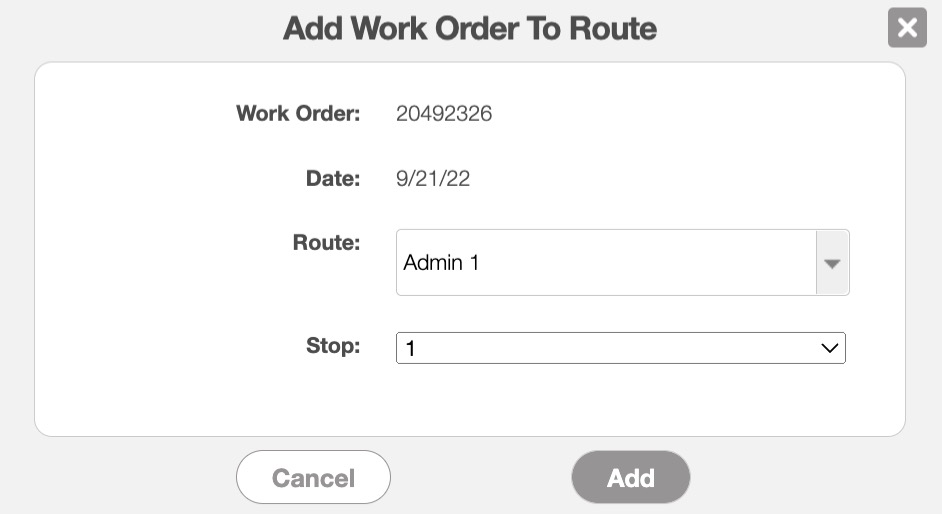
Use the "Route" drop-down to select the user that should be assigned the work order; in the "Stop" drop-down, indicate the number of stops on the route. Once you are satisfied with your route updates click the Add button.
Note: Unassigned work orders are displayed on the map as star pins.
When you optimize a route from the Schedule feature page, the Optimize User Schedule will appear. From this window the drop-down will show the address of origin and the final destination.
Regardless of the manner you choose when you optimize a route from the Schedule feature page, the Optimize User Schedule pop-up window will appear:
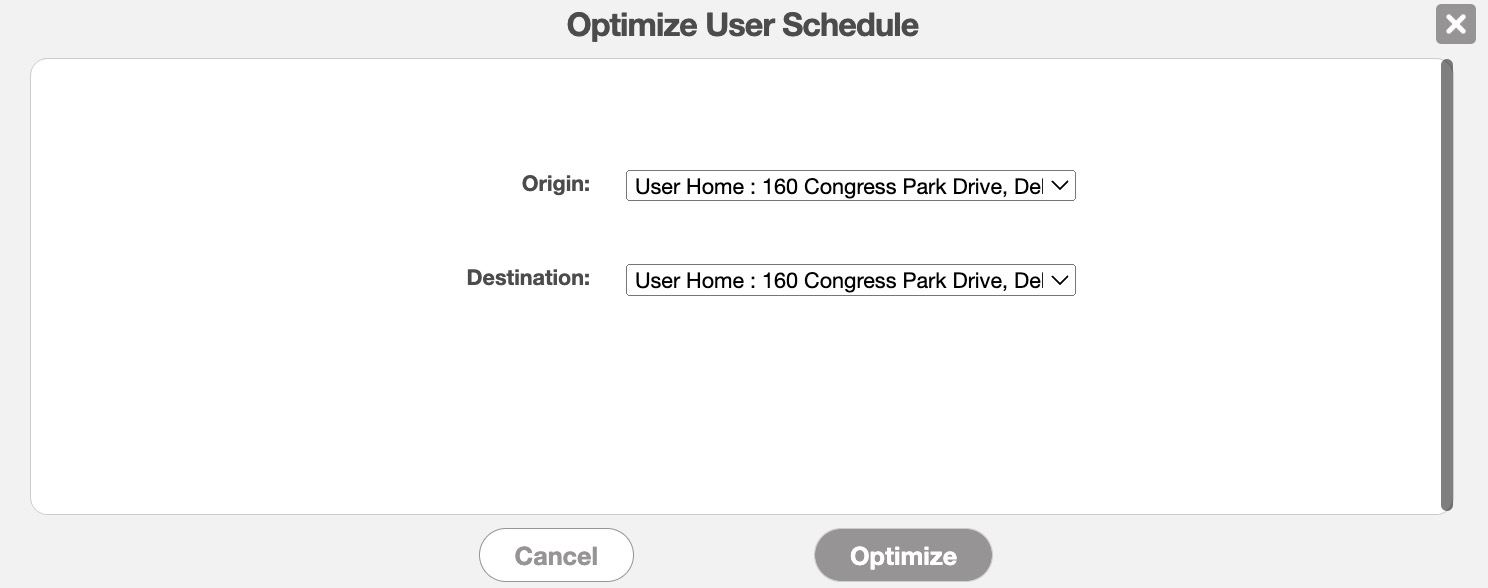
Once the Optimize User Schedule pop-up window appears click the Optimize button.
Once you click Optimize, the Optimize Route pop-up window will appear. This window will show the "Before Optimization" and "After Optimization" of the user's routes:
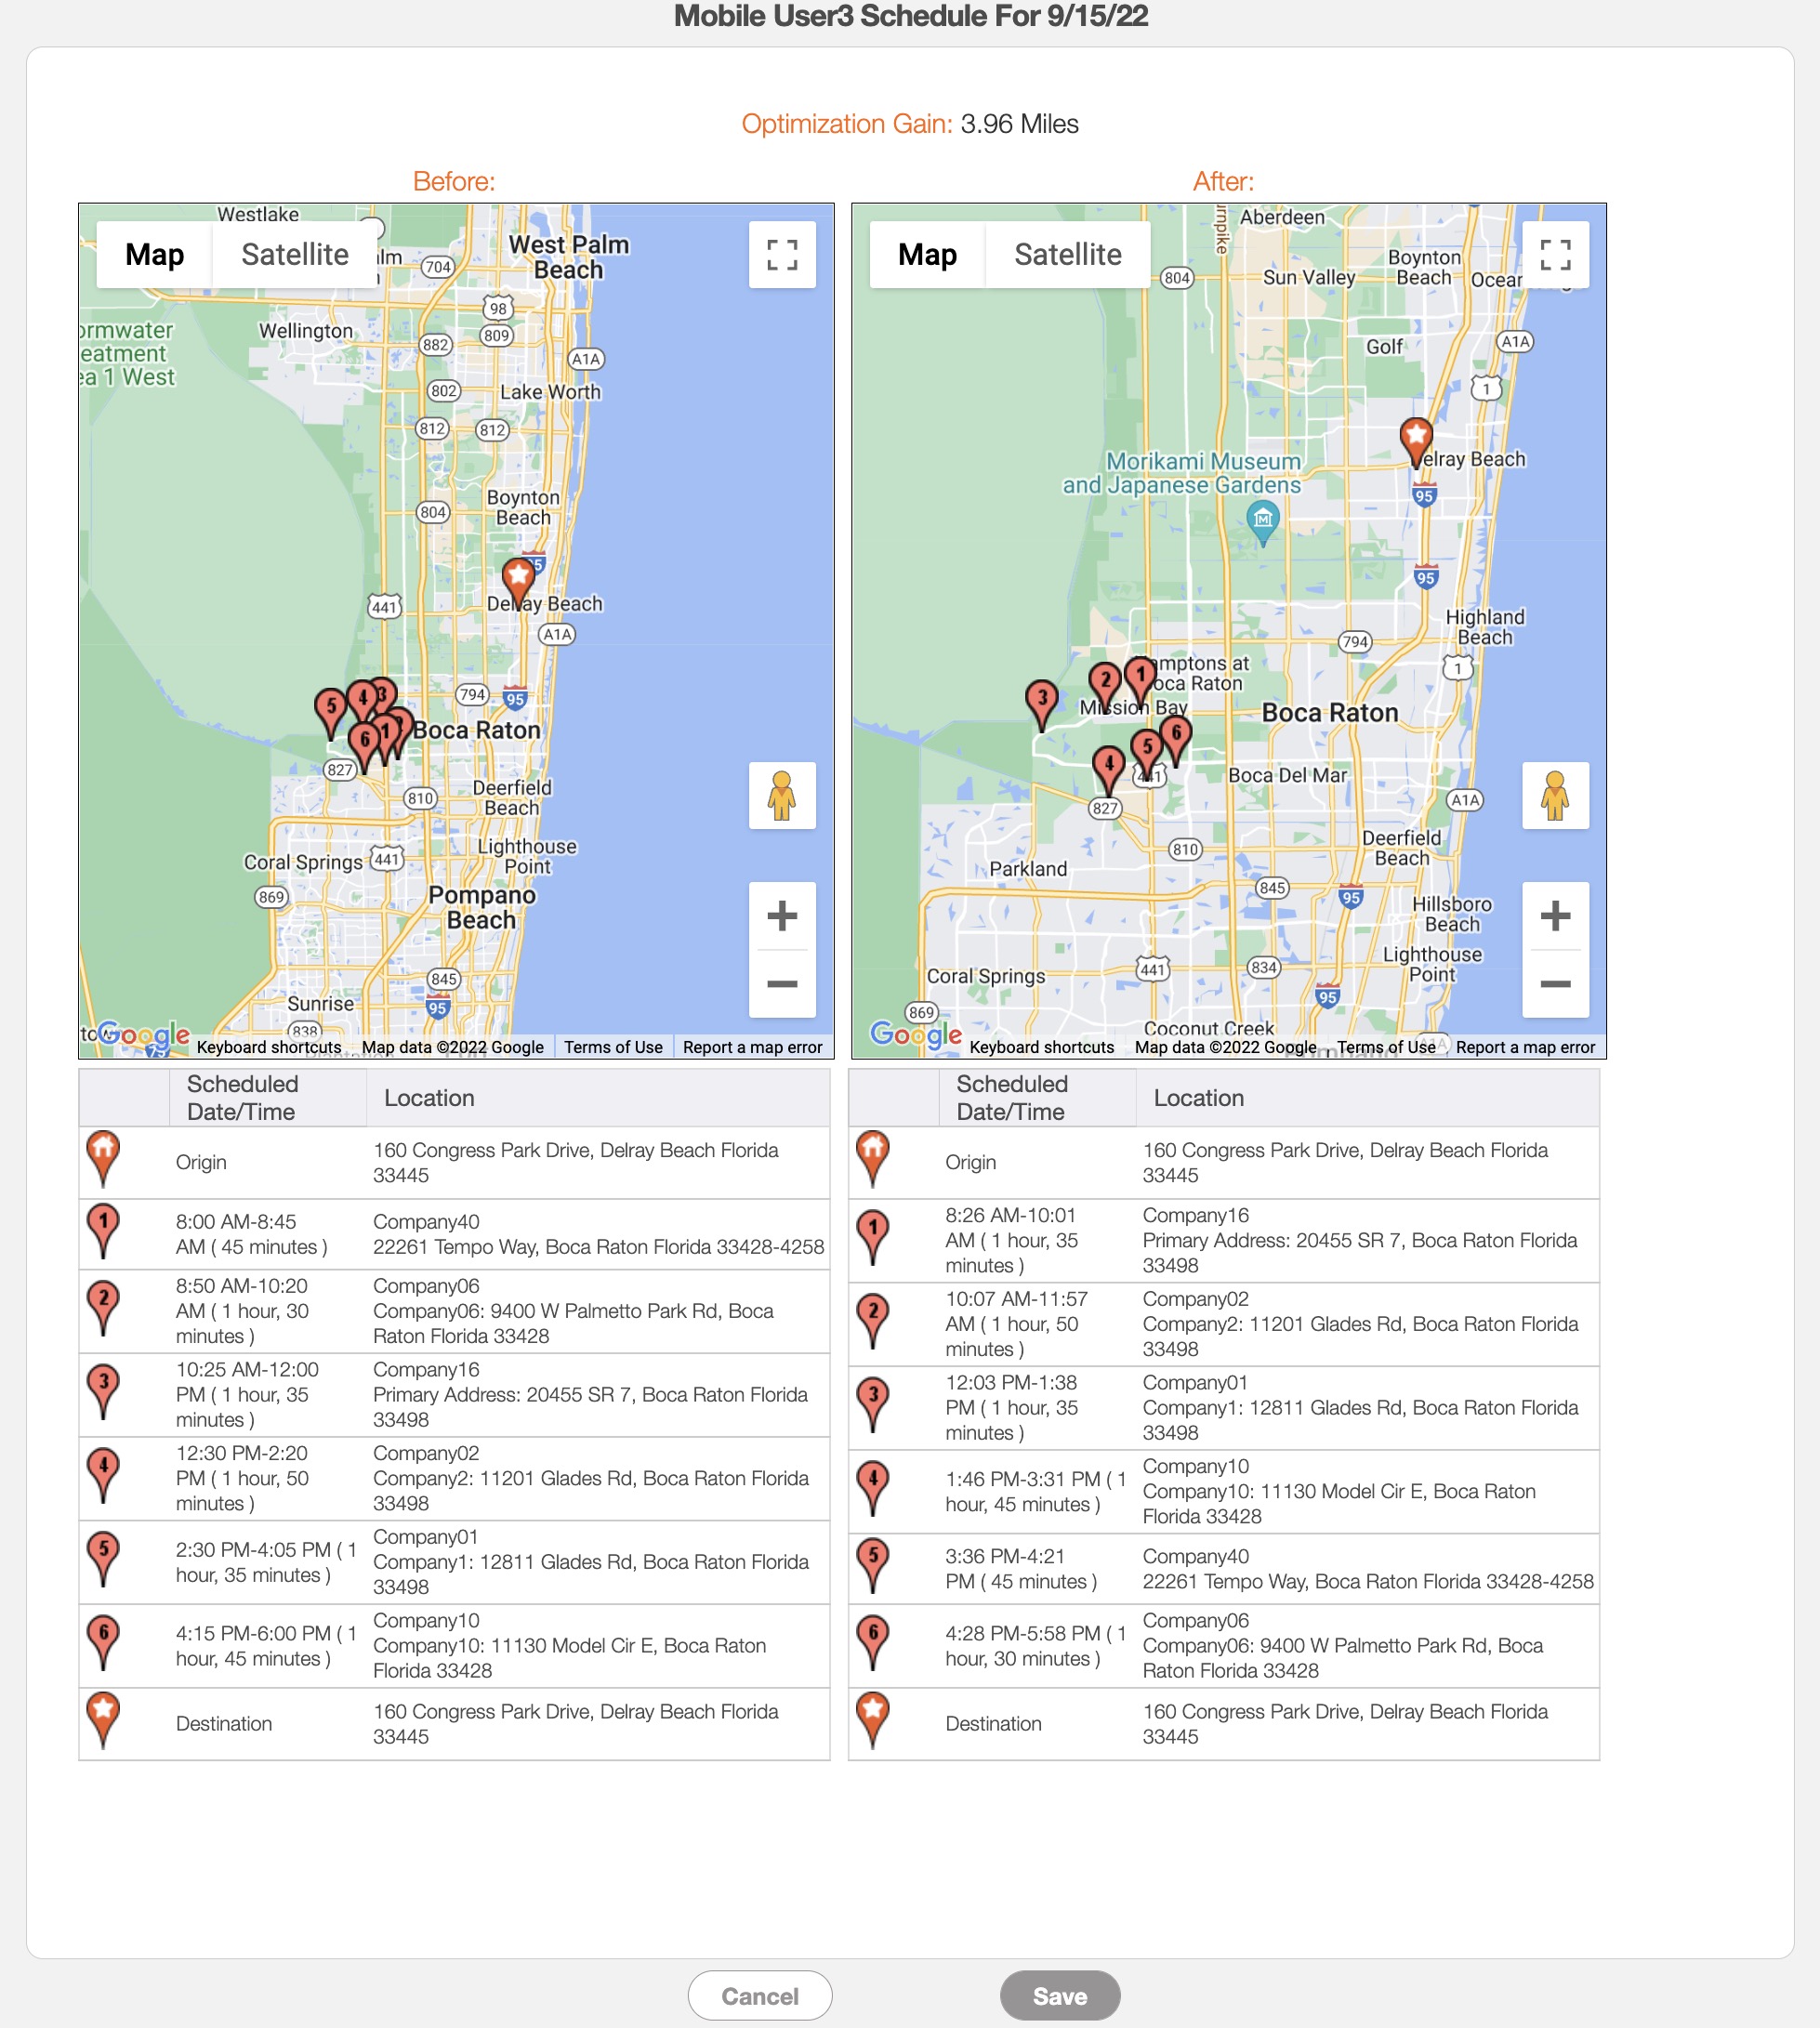
The work orders assigned to the user will also be listed under the respective "Before" and "After" maps.
Once you are ready to finalize the optimization, click the Save button.
Note: The optimization of work order routes will only optimize the routes based on distance. This may rearrange the original time and dates scheduled for the work orders. Please make sure your customers are aware of any changes in their scheduled appointments.
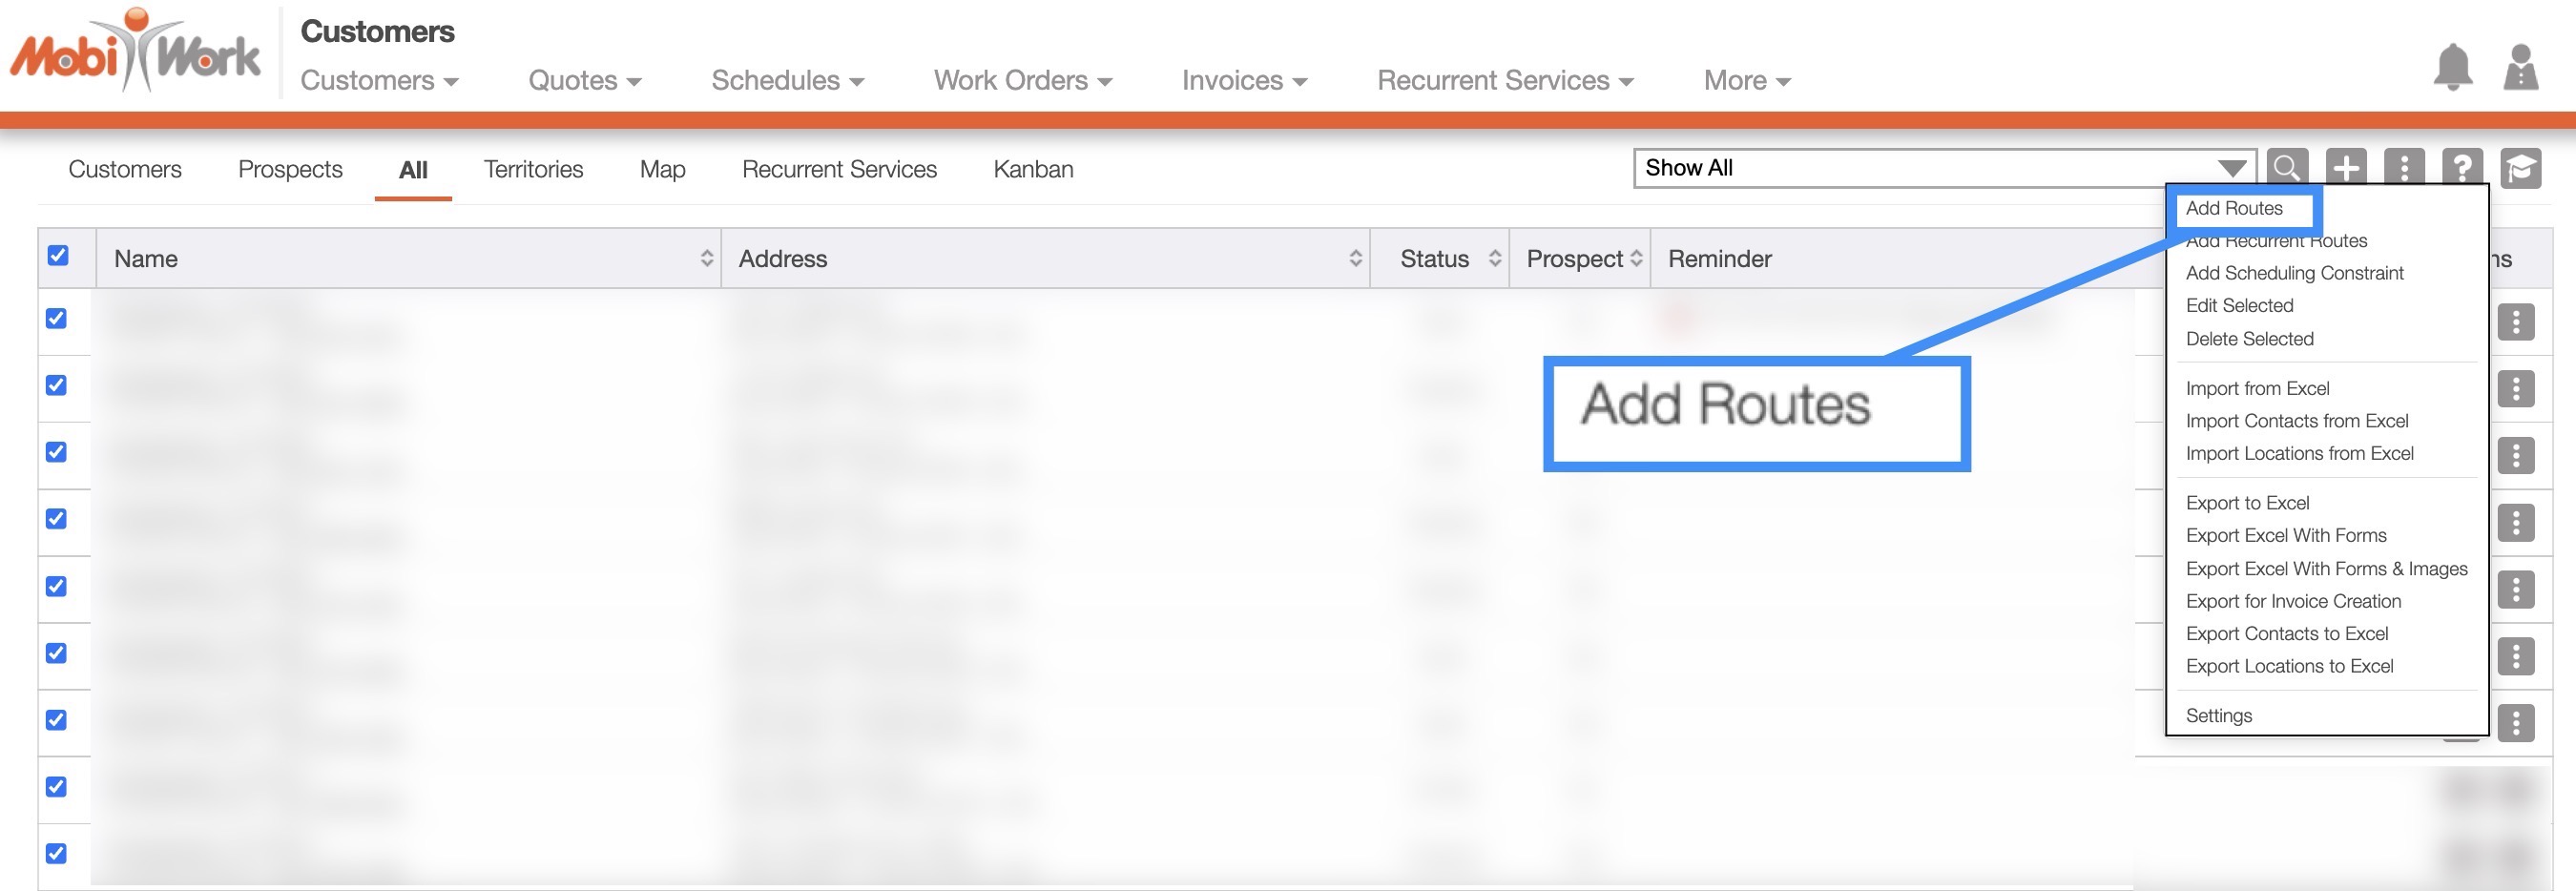
You can also add and optimize routes from the Customers feature page. For more information on how to access these tabs, please see the Customer List page.
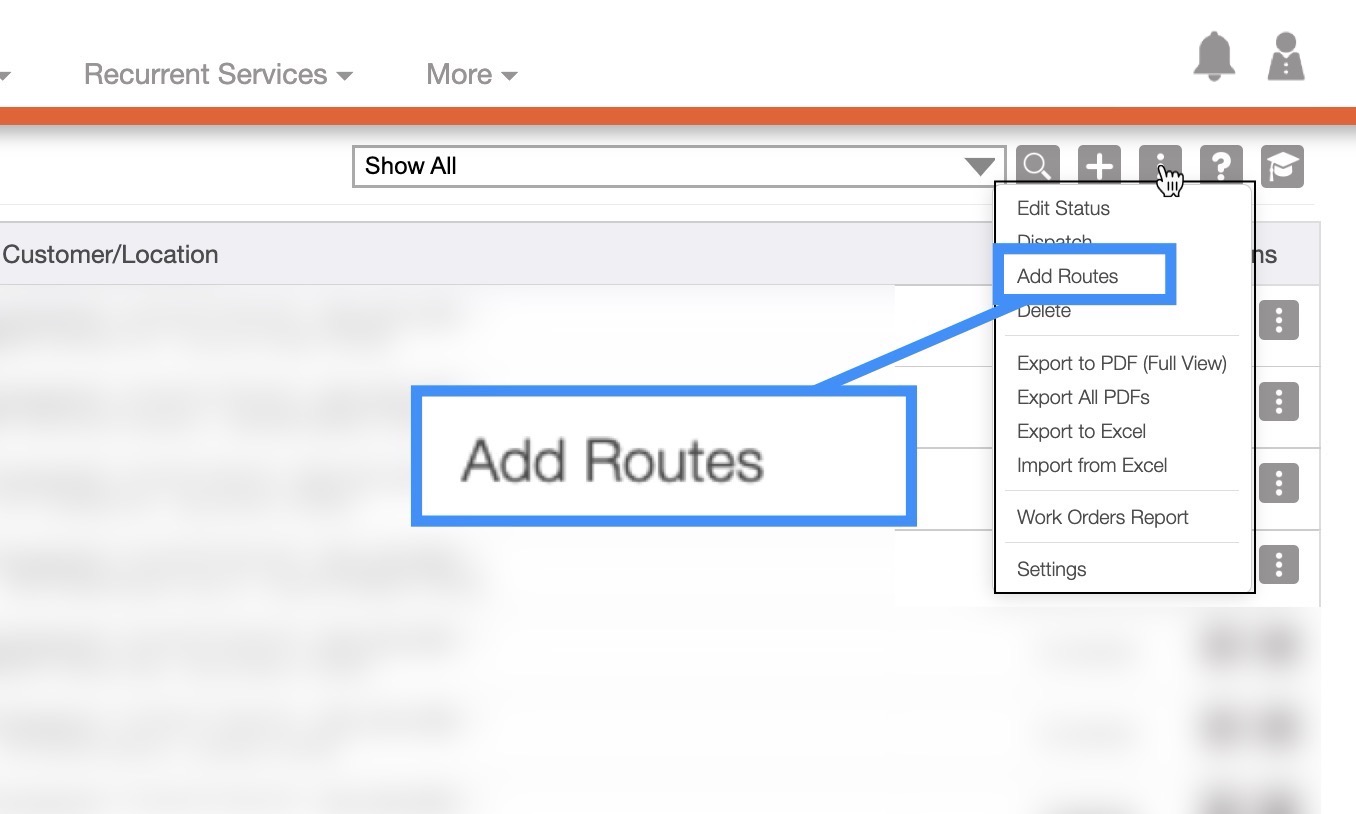
Once you have selected the customers whose routes you would like to optimize, click on the More Actions button and from the drop-down select the "Add Routes" option:
You will then be brought to the Create Optimized Routes for Selected Customers page. On this page indicate the start date, the work order types, the max number of days that are needed to schedule the work order, and the users that will oversee the work orders:
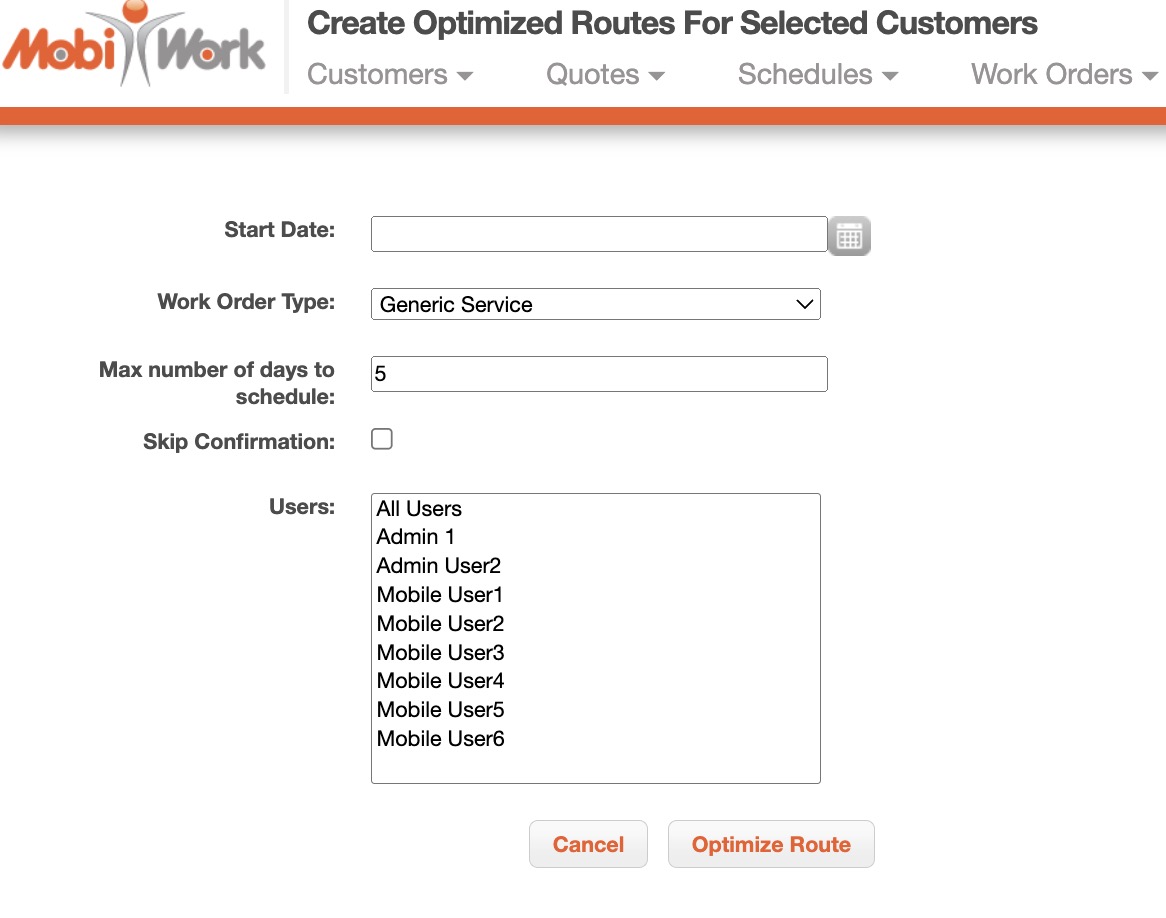
To highlight multiple users at once, click and hold the Control key (Windows) or the Command key (Mac) on your keyboard.
To skip the confirmation of the optimize routes, please click the "Skip Confirmation" checkbox.
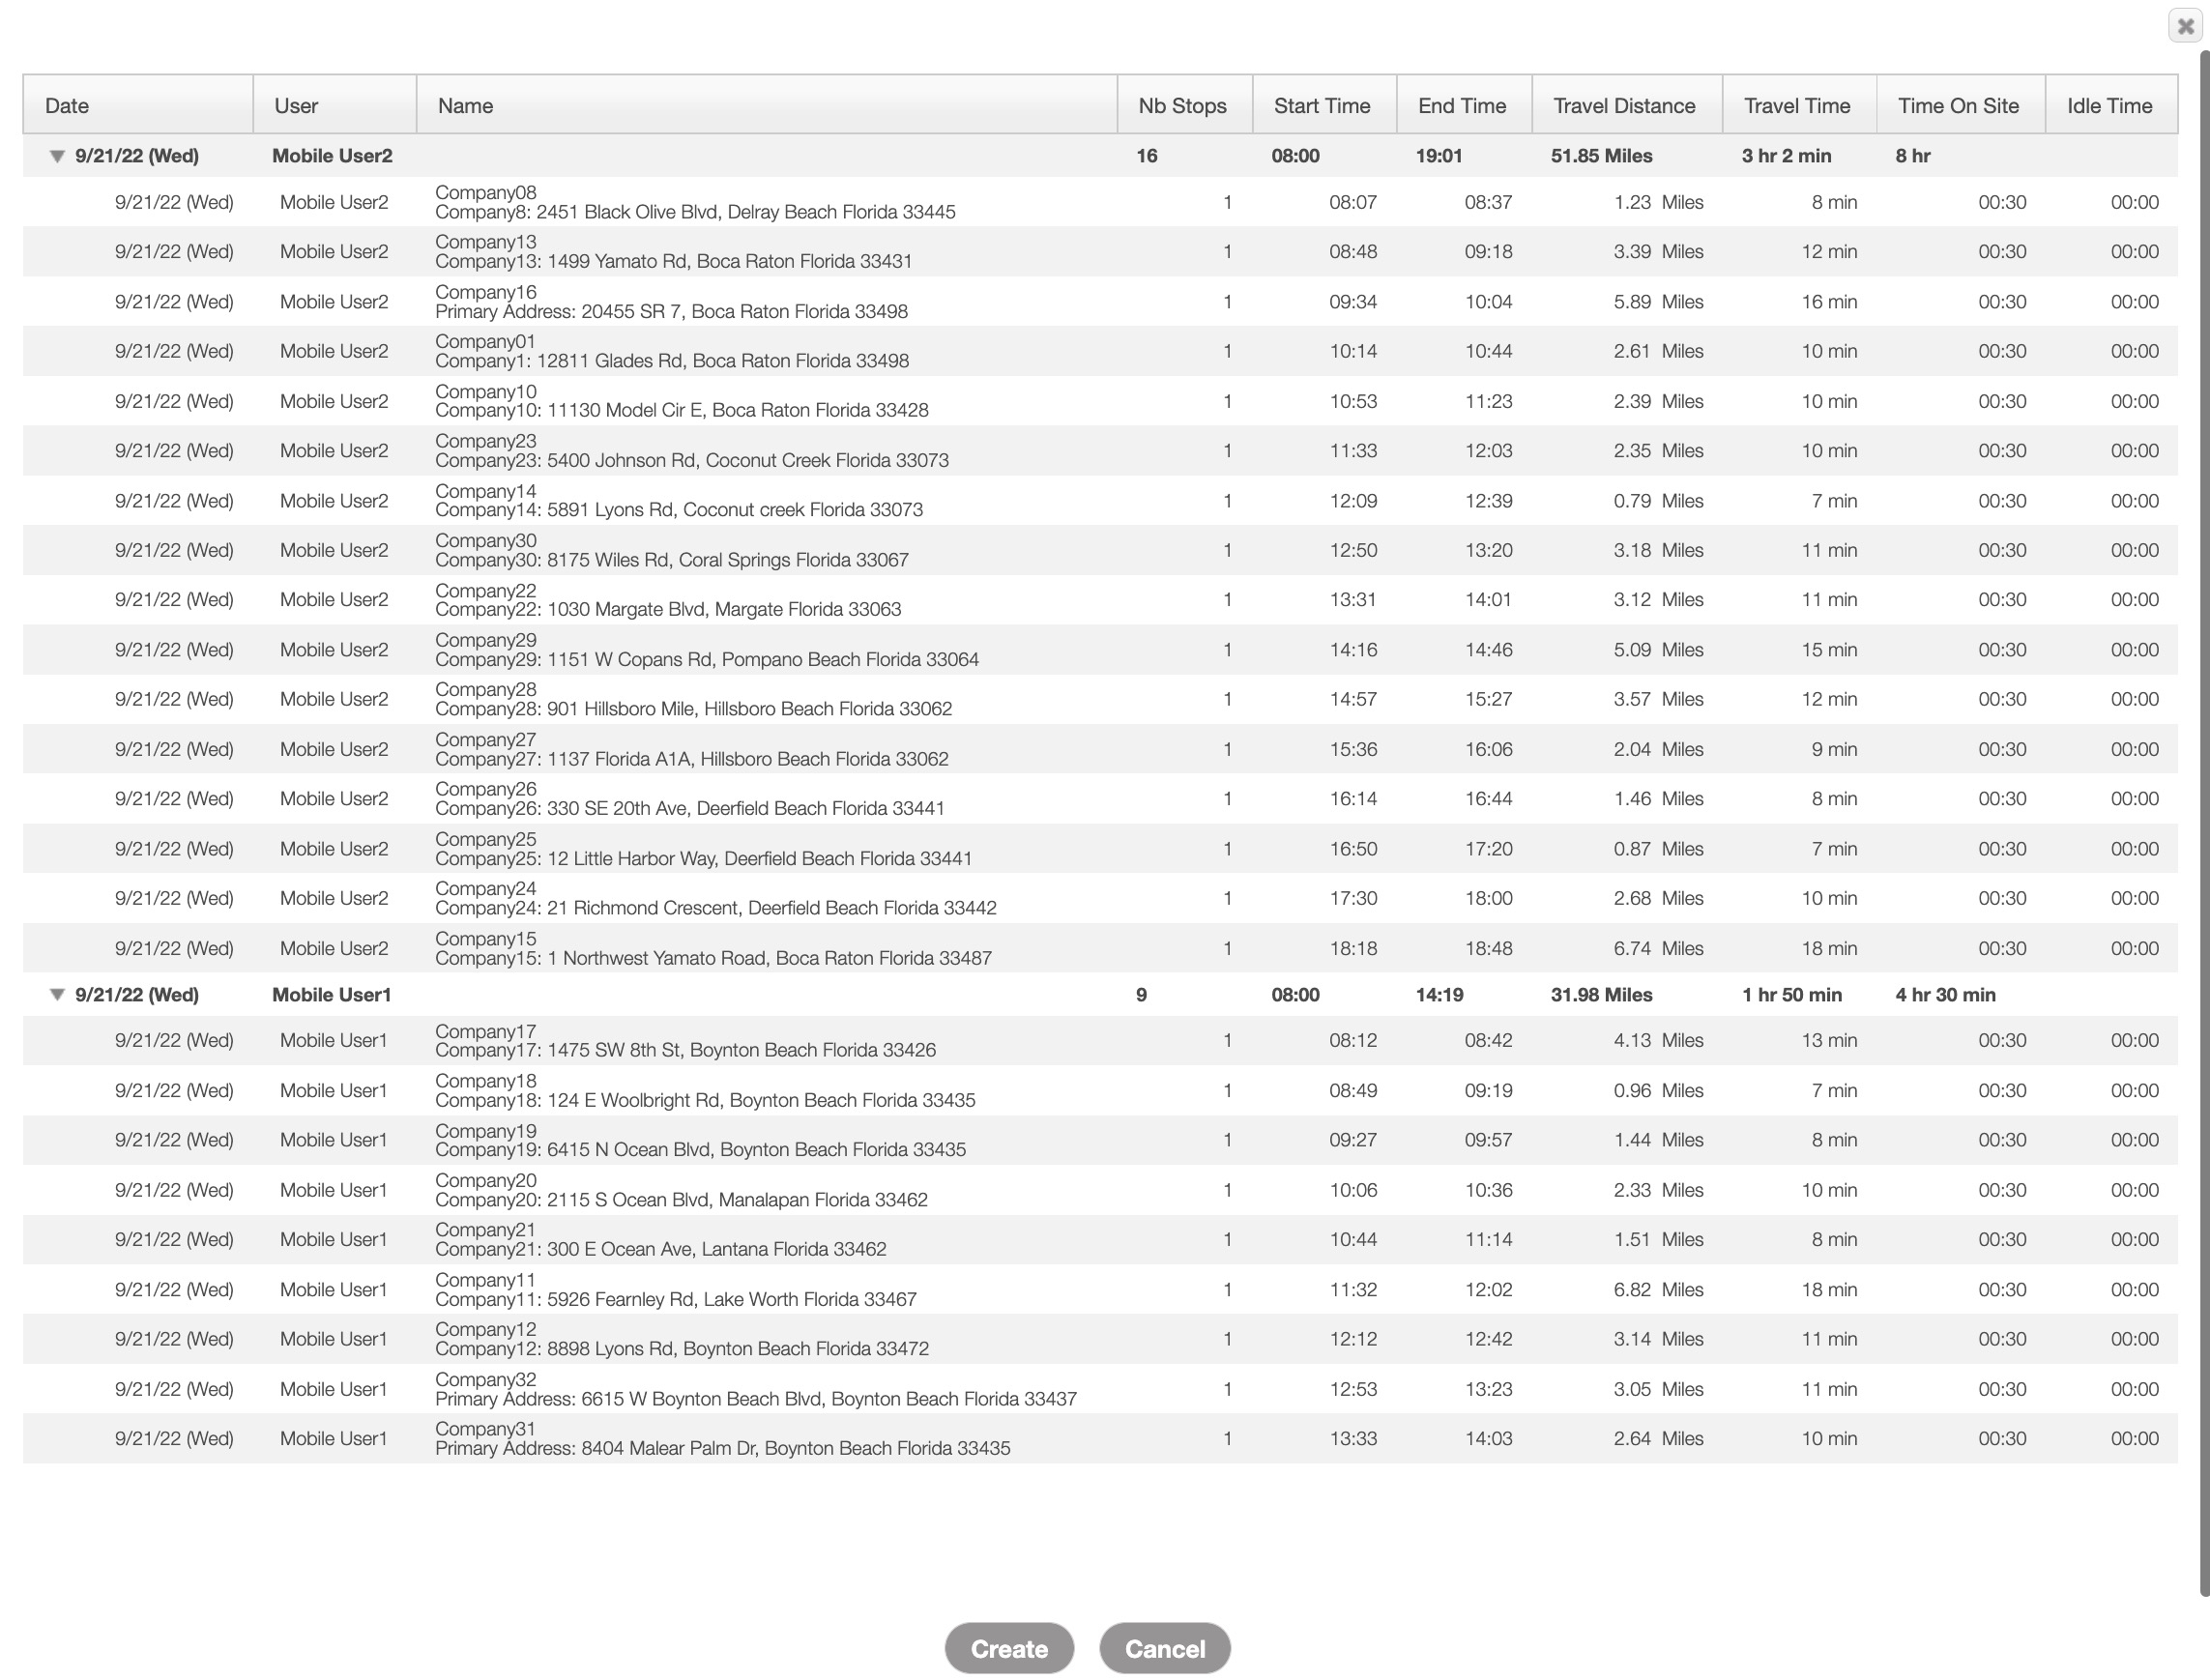
Click the Optimize Route button to confirm the selected users for the customers. The confirmation pop-up window will then appear; to finalize the route creation and optimization click the Create button:
Note: If there is a special constraint set up on the customer, which prioritizes time over distance optimization, then the route will be created with the time constraint as the priority.
You can also dispatch and optimize routes at the same time from the Work Orders feature page. For more information on how to access these tabs, please see the Work Orders List page.
Once you have selected the work orders whose routes you would like to optimize, click on the More Actions button and from the drop-down select the "Dispatch Selected Work Orders Using Route Optimization" option. This function is more automated, so once the work orders are dispatched, MobiWork will choose the best route optimization method:
Select the users you would like to dispatch for the selected work orders. To highlight multiple users at once, click and hold the Control key (Windows) or the Command key (Mac) on your keyboard:
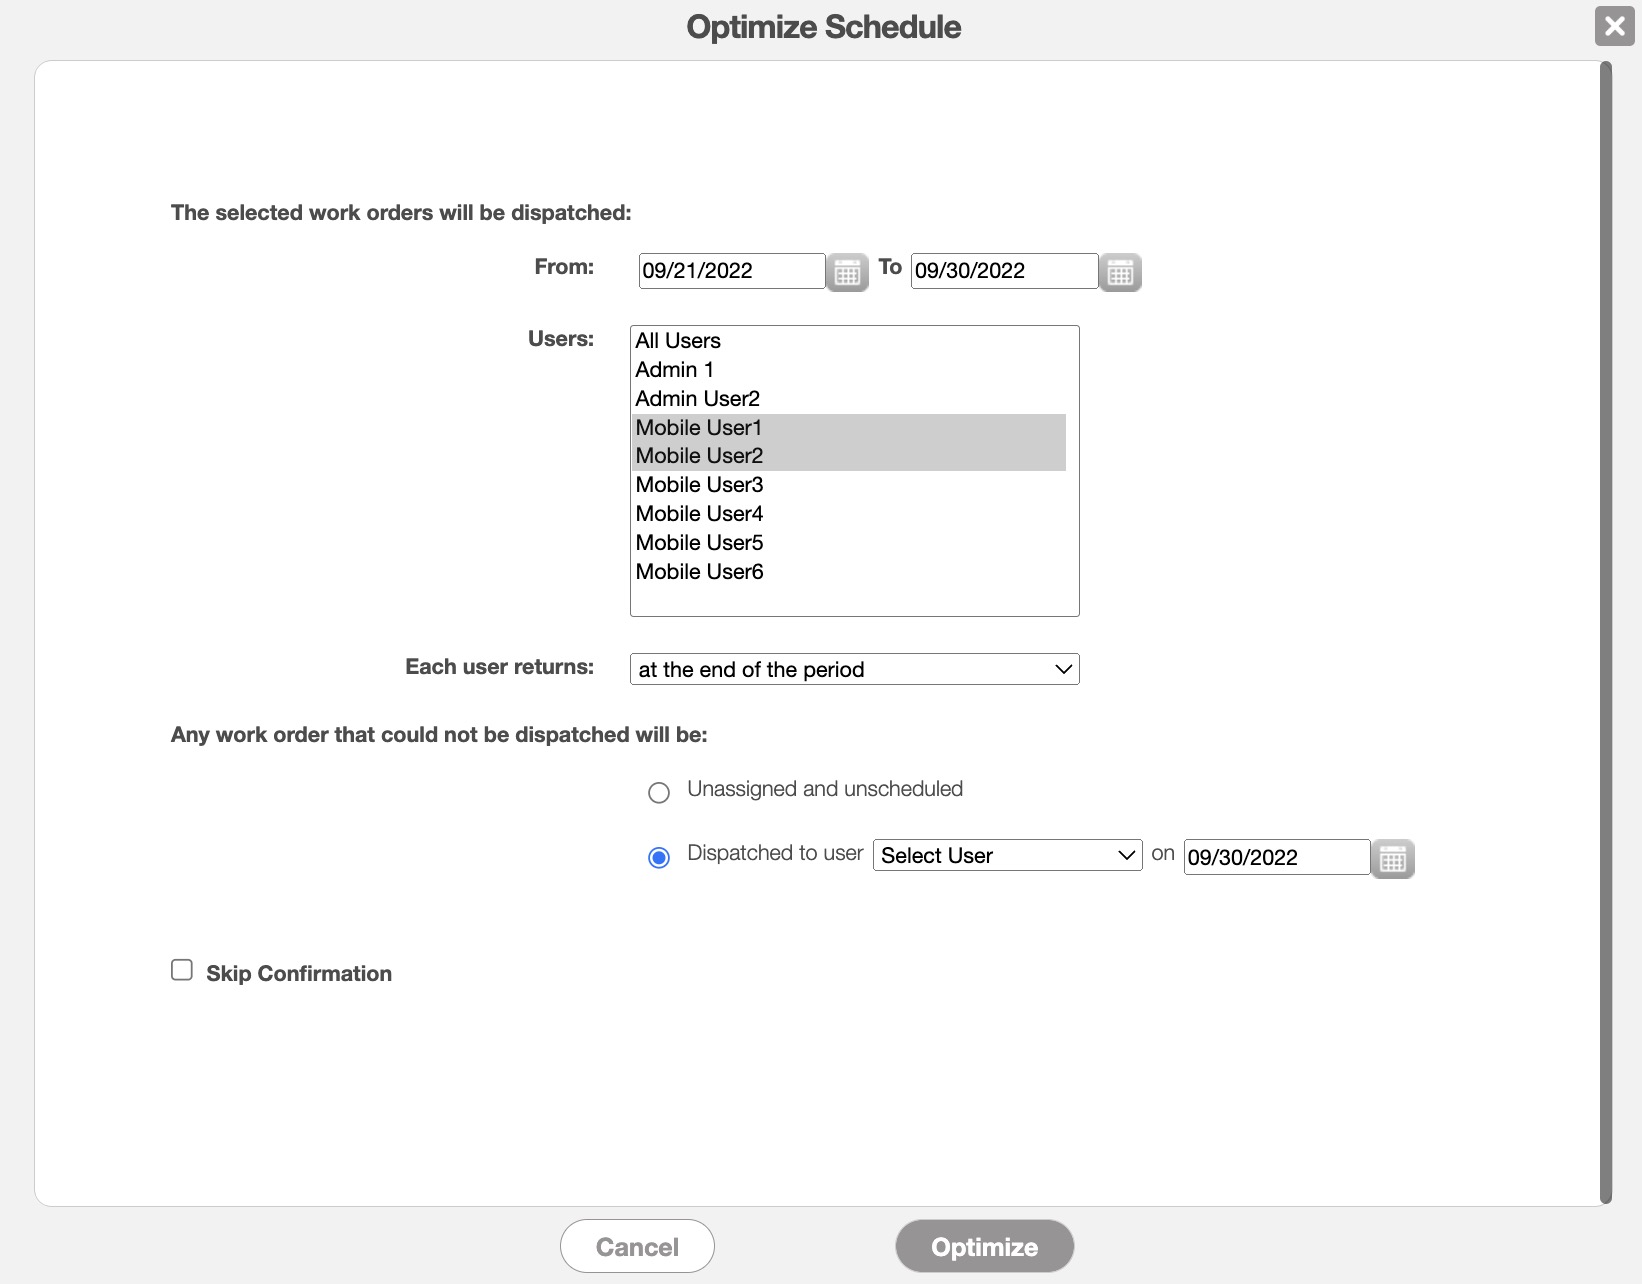
Input if the user should return to the office once the work order is completed and what should be done with work orders that could not be dispatched. Once you are satisfied with your selections, click on the Preview Routes button.
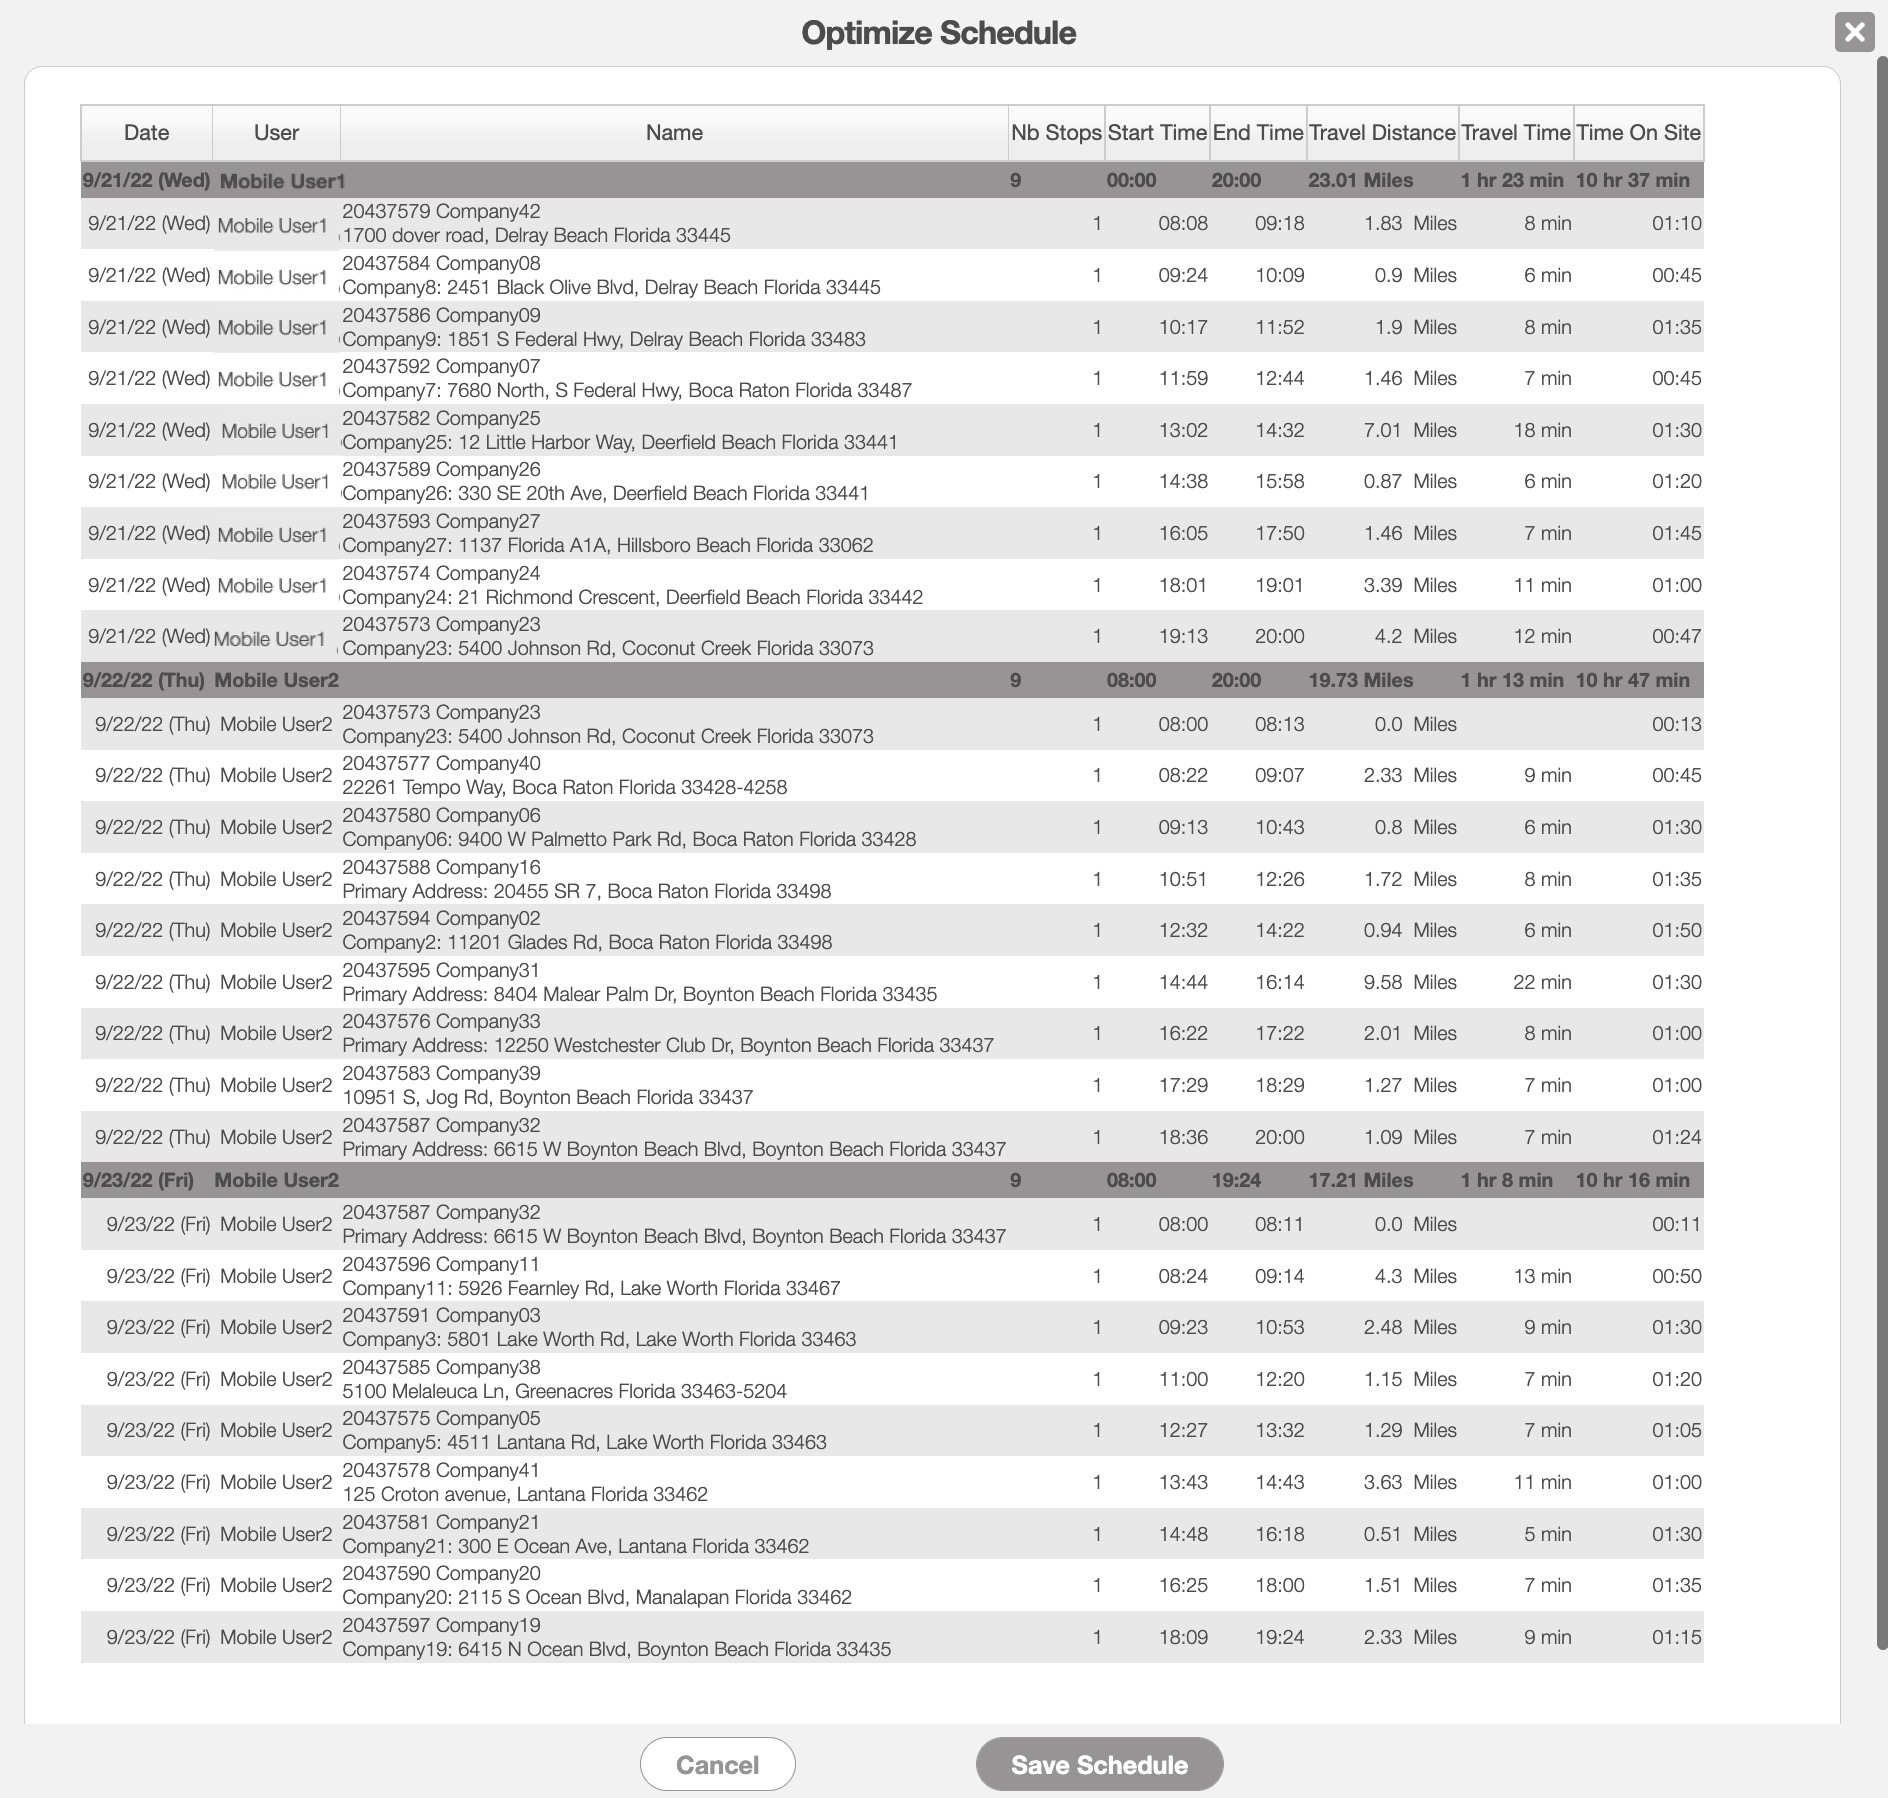
Look over the new scheduled and if satisfied, click the Save Schedule button to finalize.