- Overview
- Account Settings
- Assets
- Connectors Framework
- Overview
- QuickBooks Online
- QuickBooks Desktop Web Connector
- Azure AD
- Salesforce Integration
- FleetNet Connector
- Avalara Connector
- Inbound REST API
- Outbound REST API
- Mailchimp Connector
- Text Messaging Connector
- Clearent Connector
- Stripe Connector
- HubSpot Connector
- UKG Connector
- Paylocity Connector
- UKG Connector
- Gusto Connector
- iSolved Payroll Connector
- Customer Portal
- Customers
- Dashboards
- Devices
- Dispatching
- Forms
- Inventory
- Invoices & Billing
- Locations
- Payments
- Parts
- Projects
- Quotes
- Recurrent Routes
- Recurrent Services
- Reports
- Sales Orders
- Schedule
- Services
- Tasks
- Text Messaging
- Time Tracking
- Users
- Work Orders
With MobiWork, transferring assets between locations or individuals is a breeze. Seamlessly relocate assets with just a few clicks, ensuring smooth operations and optimal resource allocation.
Track all transfer events conveniently in the "Tracking" tab of the View Asset pop-up window, providing full visibility into asset movements and enhancing accountability.
To transfer an asset, you will first need to access the Assets feature page. For more information on how to access this page, please see the Asset List page.
Once you are on the Assets feature page, click on the More Actions button and select the desired transfer option:

Transfer the asset's current location to a specified user
Transfer the asset's current location to a specified warehouse
Transfer the asset's current location to a specified customer
You can transfer an asset's current location to a specific user, by selecting the "Transfer to User" option from the More Actions drop-down:
Once the Transfer to User pop-up window appears, use the drop-down to select the desired user:
When you are satisfied with the new location for the asset, click the Transfer to User button.
A new pop-up window will then appear. In this window, input any comments and your manager's name (or your name if you are the manager):
Once you are done inputting the comments and manager information, click the Add Form button to complete the transfer. This button will add a form that will serve as a receipt to any transfers performed and can be viewed in the "Tracking" tab for the View Asset pop-up window.


You can transfer an asset's current location to your warehouse, by selecting the "Transfer to Warehouse" option from the More Actions drop-down:
Once the Transfer to Warehouse pop-up window appears, use the drop-down to select the desired warehouse:
When you are satisfied with the new location for the asset, click the Transfer to Warehouse button.
A new pop-up window will then appear. In this window, input any comments and your manager's name (or your name if you are the manager):
Once you are done inputting the comments and manager information, click the Add Form button to complete the transfer. This button will add a form that will serve as a receipt to any transfers performed and can be viewed in the "Tracking" tab for the View Asset pop-up window.


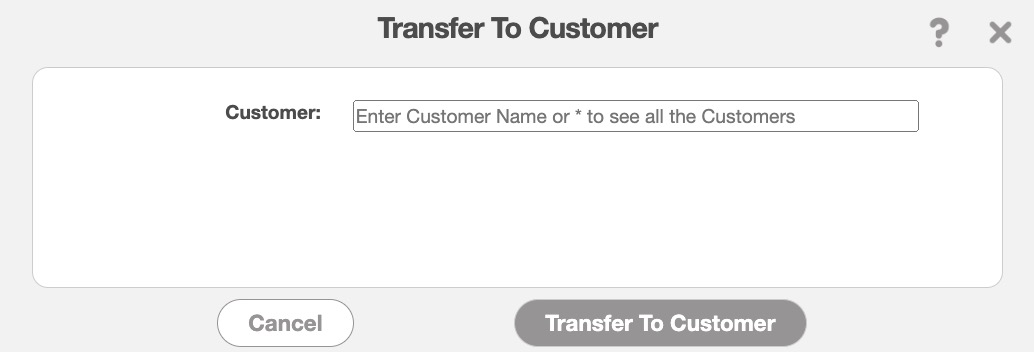
You can transfer an asset's current location to a specific customer, by selecting the "Transfer to Customer" option from the More Actions drop-down:
Once the Transfer to Customer pop-up window appears, you can type the desired customer's name or use the asterisk (*) to search through your customer list:
When you are satisfied with the new location for the asset, click the Transfer to Customer button.
A new pop-up window will then appear. In this window, input any comments and your manager's name (or your name if you are the manager):
Once you are done inputting the comments and manager information, click the Add Form button to complete the transfer. This button will add a form that will serve as a receipt to any transfers performed and can be viewed in the "Tracking" tab for the View Asset pop-up window.


In the "Tracking" tab of the View Asset pop-up window, you will be able to view all the transfers that were performed on the asset. Whenever an asset is transferred to a customer or a user, a number will appear for the "Load Event ID" column.
For more information on how to access this tab, please see the View Asset page:
![]()
- Note: When you transfer an asset to a customer through the More Actions "Transfer to Customer" option, the customer will be listed as a user under the "Event" column.
Transfer Summary Pop-up Window
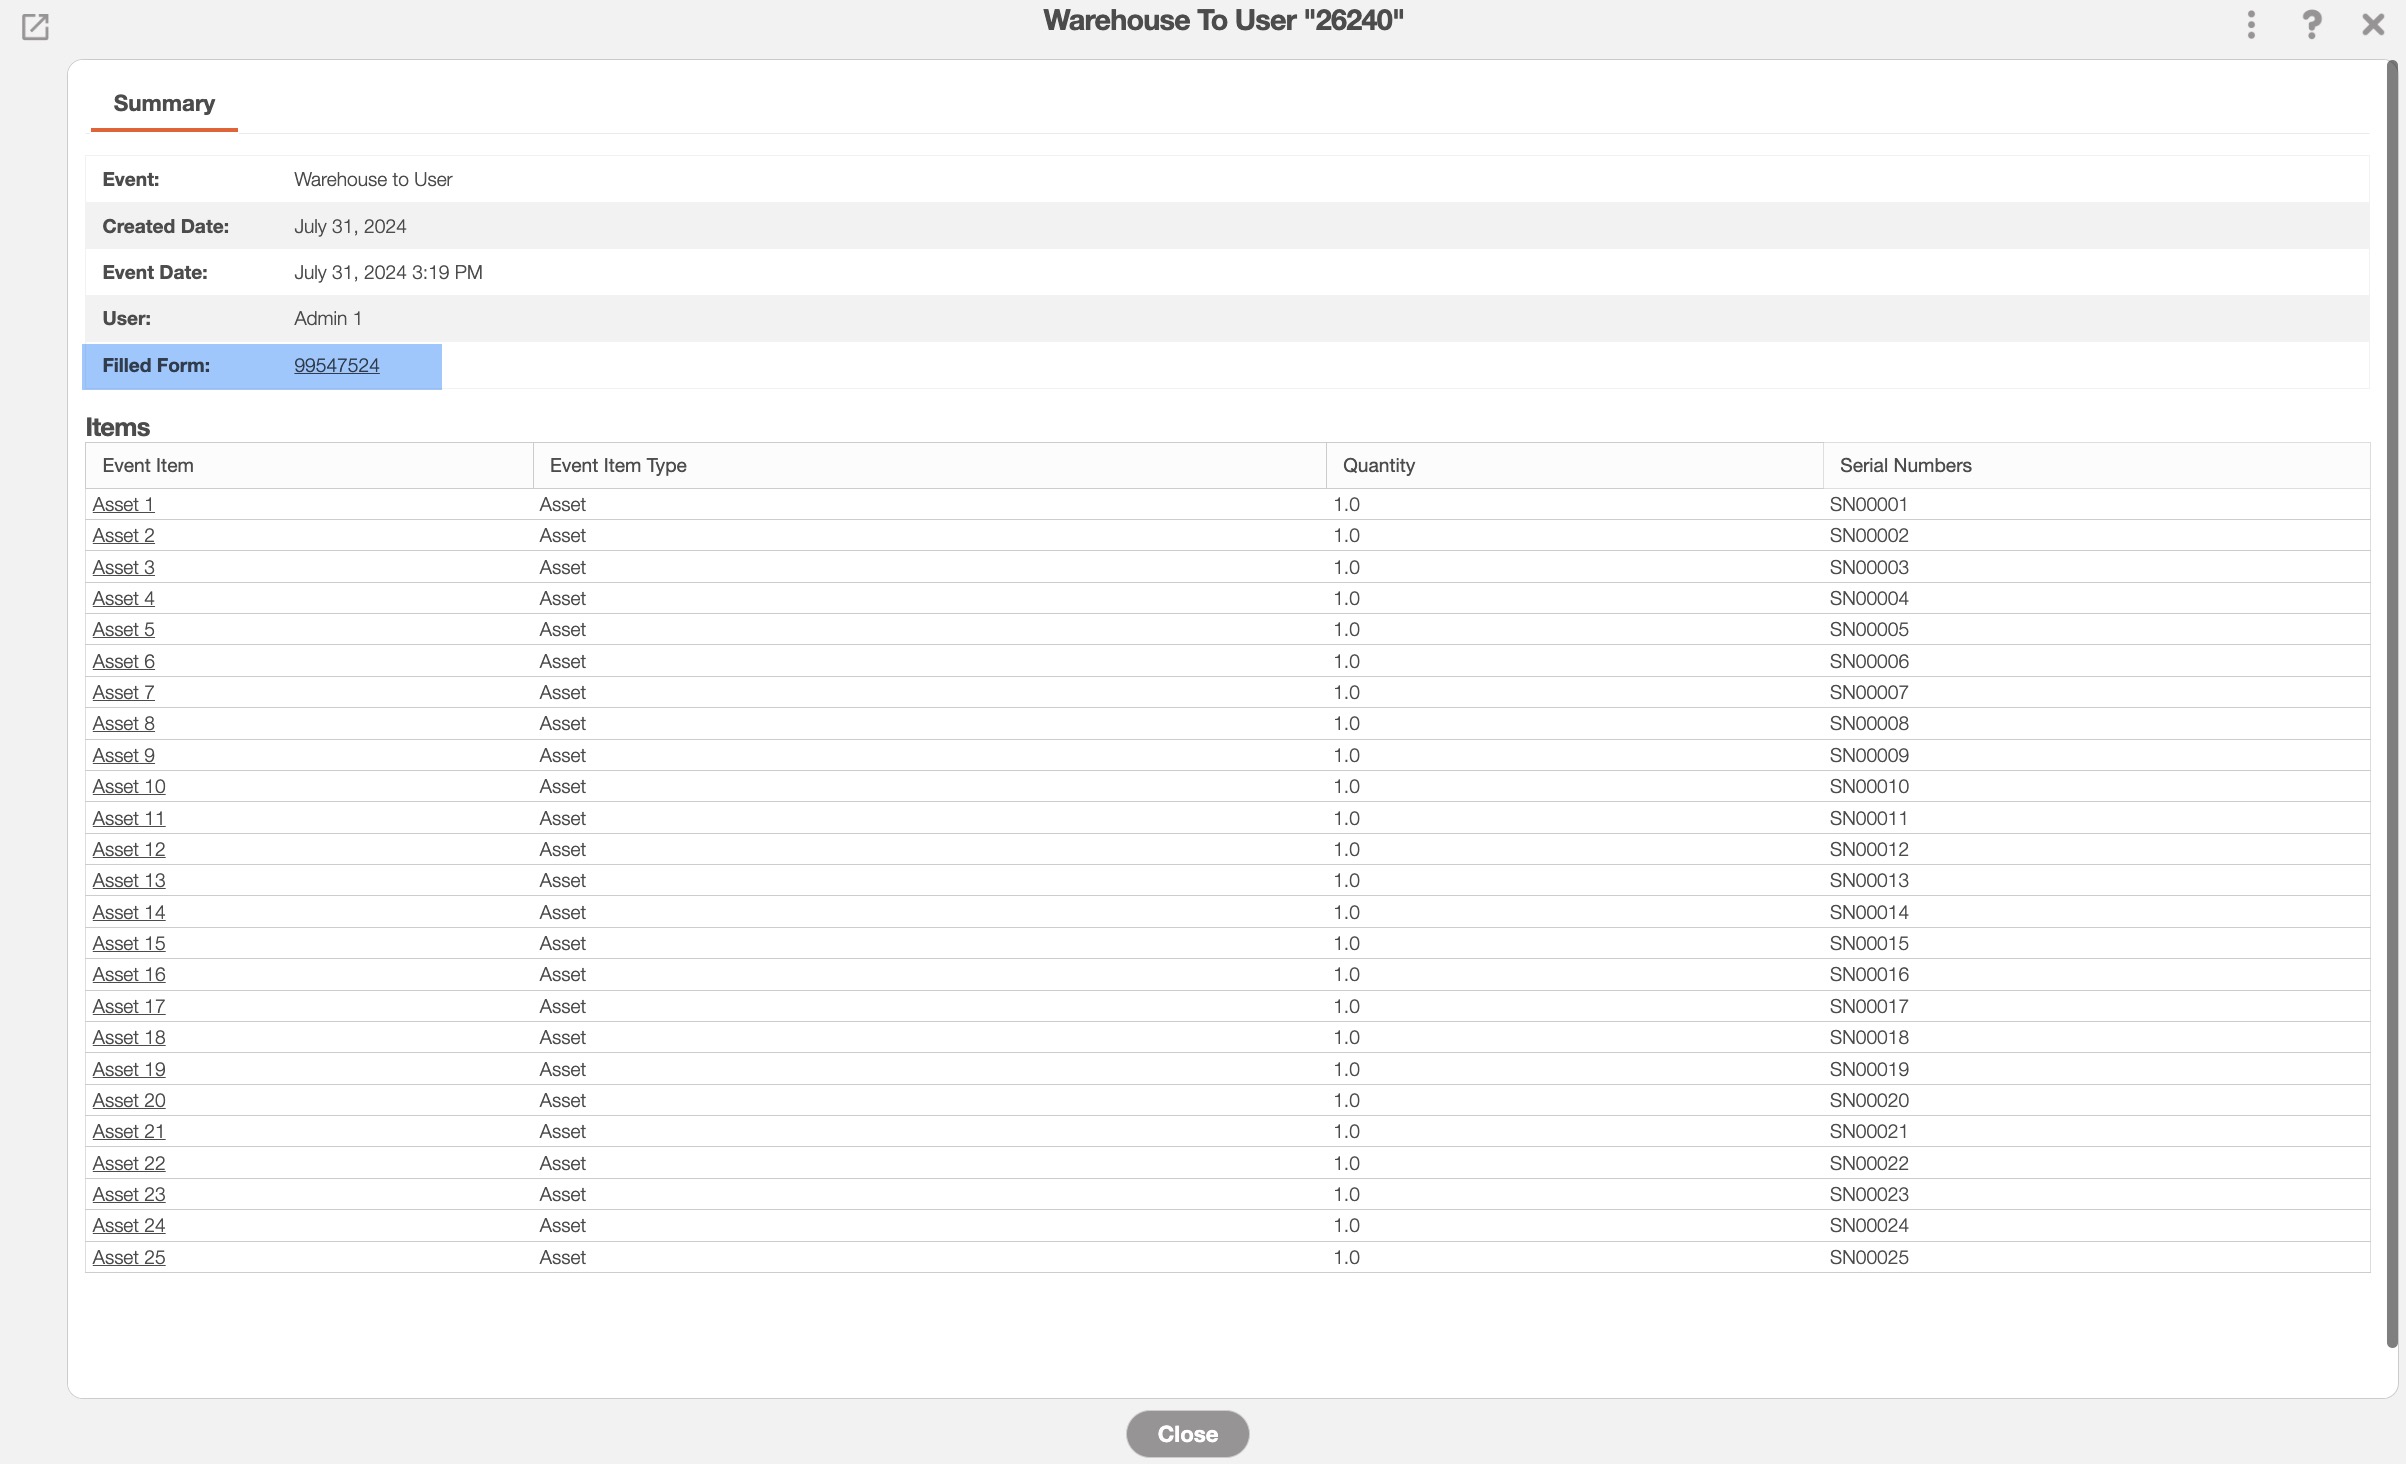
By clicking on the number under the "Load Event ID" column (highlighted in the image above), you will be able to access the Transfer Summary pop-up window:
![]()
In this pop-up window, you will be able to view:
The type of transfer that occurred.
The date the transfer was created and occurred.
The user who performed the transfer.
The filled form that has additional details concerning the transfer.
The quantity, serial number, event type, and event item of the asset being transferred.
Transfer Form
Clicking on the form ID number in the "Filled Form" section grants access to the asset transfer record, displaying comments and your manager's name:

You can add an image regarding the asset transfer by clicking the Individual Actions button in the Image column:

Once an image has been added a second Individual Actions button will appear. This button will allow you to view the image in a pop-up window, view the image in a new tab, or delete the image:
![]()
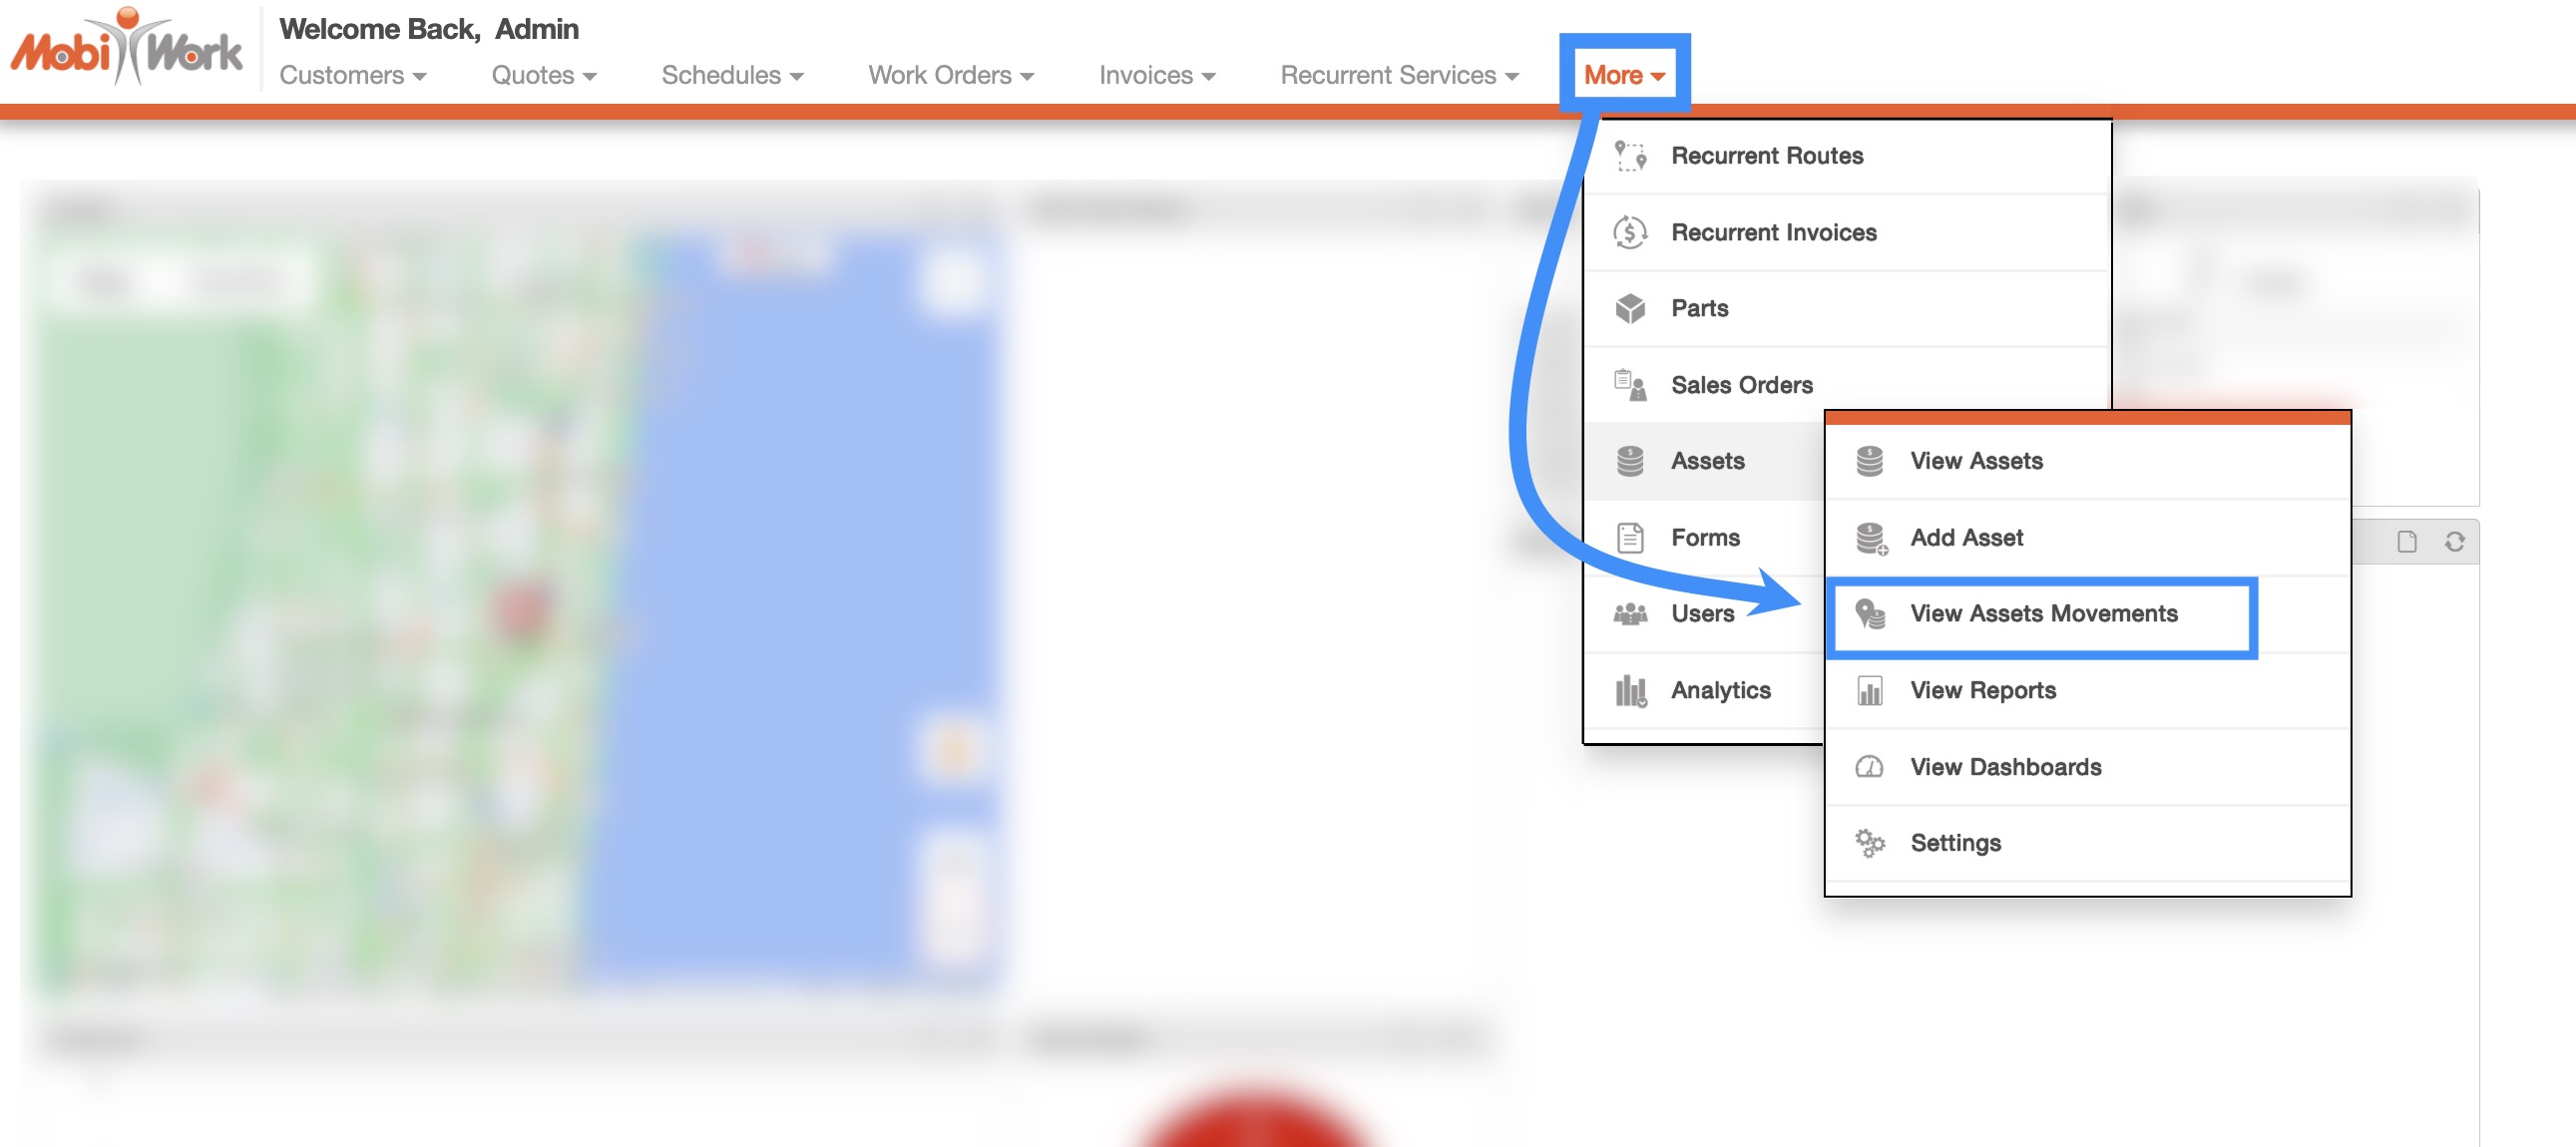
You can also view all the transfer and movements of your asset inventory in the Asset Movement page. To access this page, you can click on the "Assets Movements" option from the Assets drop-down:

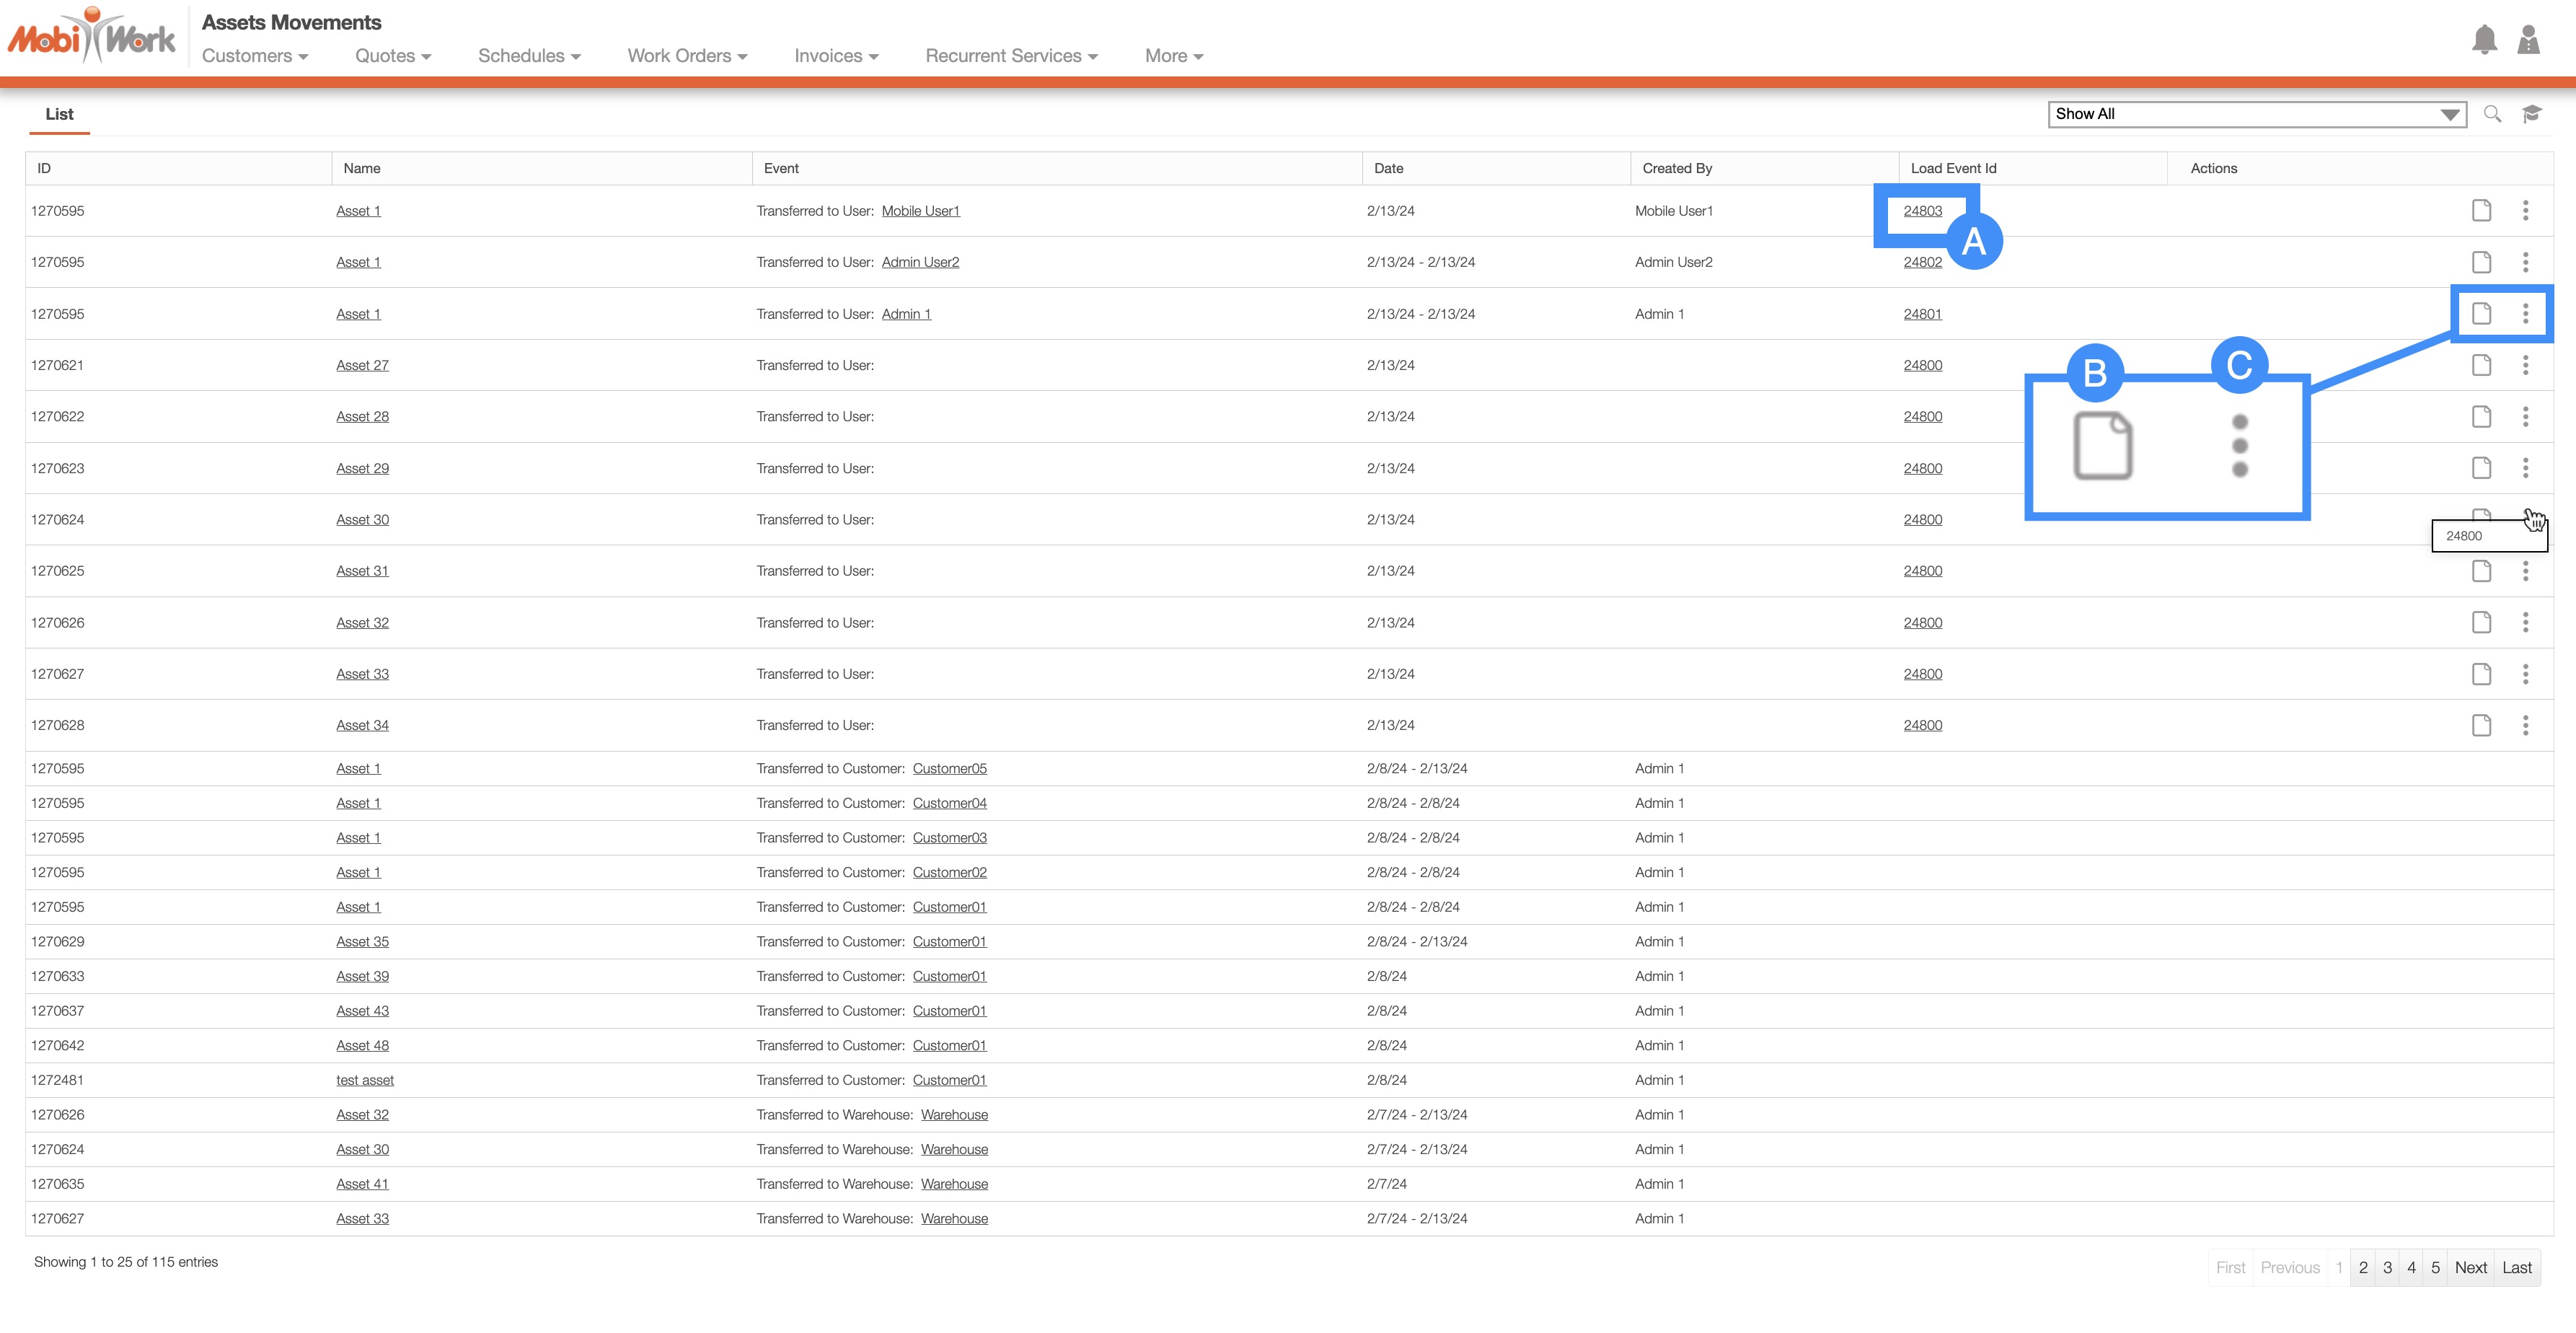
Once you are on this page, you can see the data for all the transfers that were done to your assets:

If the asset has a Load Event ID, when you right-click on it you will bring up the right-click actions. These actions are identical to the Individual Actions and will allow you to view the transfer summary.
If the asset has a Load Event ID, when you access the View icon you will be able to access the Transfer Summary Pop-up Window pop-up window.
If the asset has a Load Event ID, when you access the Individual Actions button, you will be able to access the Transfer Summary Pop-up Window pop-up window..
For more information about the Transfer Summary Pop-up Window pop-up window, please see the Transfer Summary Pop-up Window subsection.
The columns for the Asset Movement page are defined below:
| Name: | Description: |
|---|---|
| "ID" | The asset ID. |
| "Name" | The name of the asset. |
| "Event" | The type of transfer event that occurred. |
| "Date" | The date that the asset transfer occurred. |
| "Created By" | The user who created/authorized the asset transfer. |
| "Load Event ID" | The Load Event ID of the transfer, by clicking on it you will be able to view the transfer summary. |
| "Actions" | If the asset has a Load Event ID, you will be able to access the View icon or the Individual Actions button. |
If you have any questions or need further assistance, please let us know. We'd be happy to help!
