- Overview
- Account Settings
- Assets
- Connectors Framework
- Overview
- QuickBooks Online
- QuickBooks Desktop Web Connector
- Azure AD
- Salesforce Integration
- FleetNet Connector
- Avalara Connector
- Inbound REST API
- Outbound REST API
- Mailchimp Connector
- Text Messaging Connector
- Clearent Connector
- Stripe Connector
- HubSpot Connector
- UKG Connector
- Paylocity Connector
- UKG Connector
- Gusto Connector
- iSolved Payroll Connector
- Customer Portal
- Customers
- Dashboards
- Devices
- Dispatching
- Forms
- Inventory
- Invoices & Billing
- Locations
- Payments
- Parts
- Projects
- Quotes
- Recurrent Routes
- Recurrent Services
- Reports
- Sales Orders
- Schedule
- Services
- Tasks
- Text Messaging
- Time Tracking
- Users
- Work Orders
You can organize your users into specified groups in order to help with employee management, organization, messages, etc.
Groups make it easier to message multiple, specific employees at once, or to create MobiRules that affect a specific range of employees when certain criteria In MobiWork are met. (e.g., employees in charge of financing are notified when an invoice is paid).
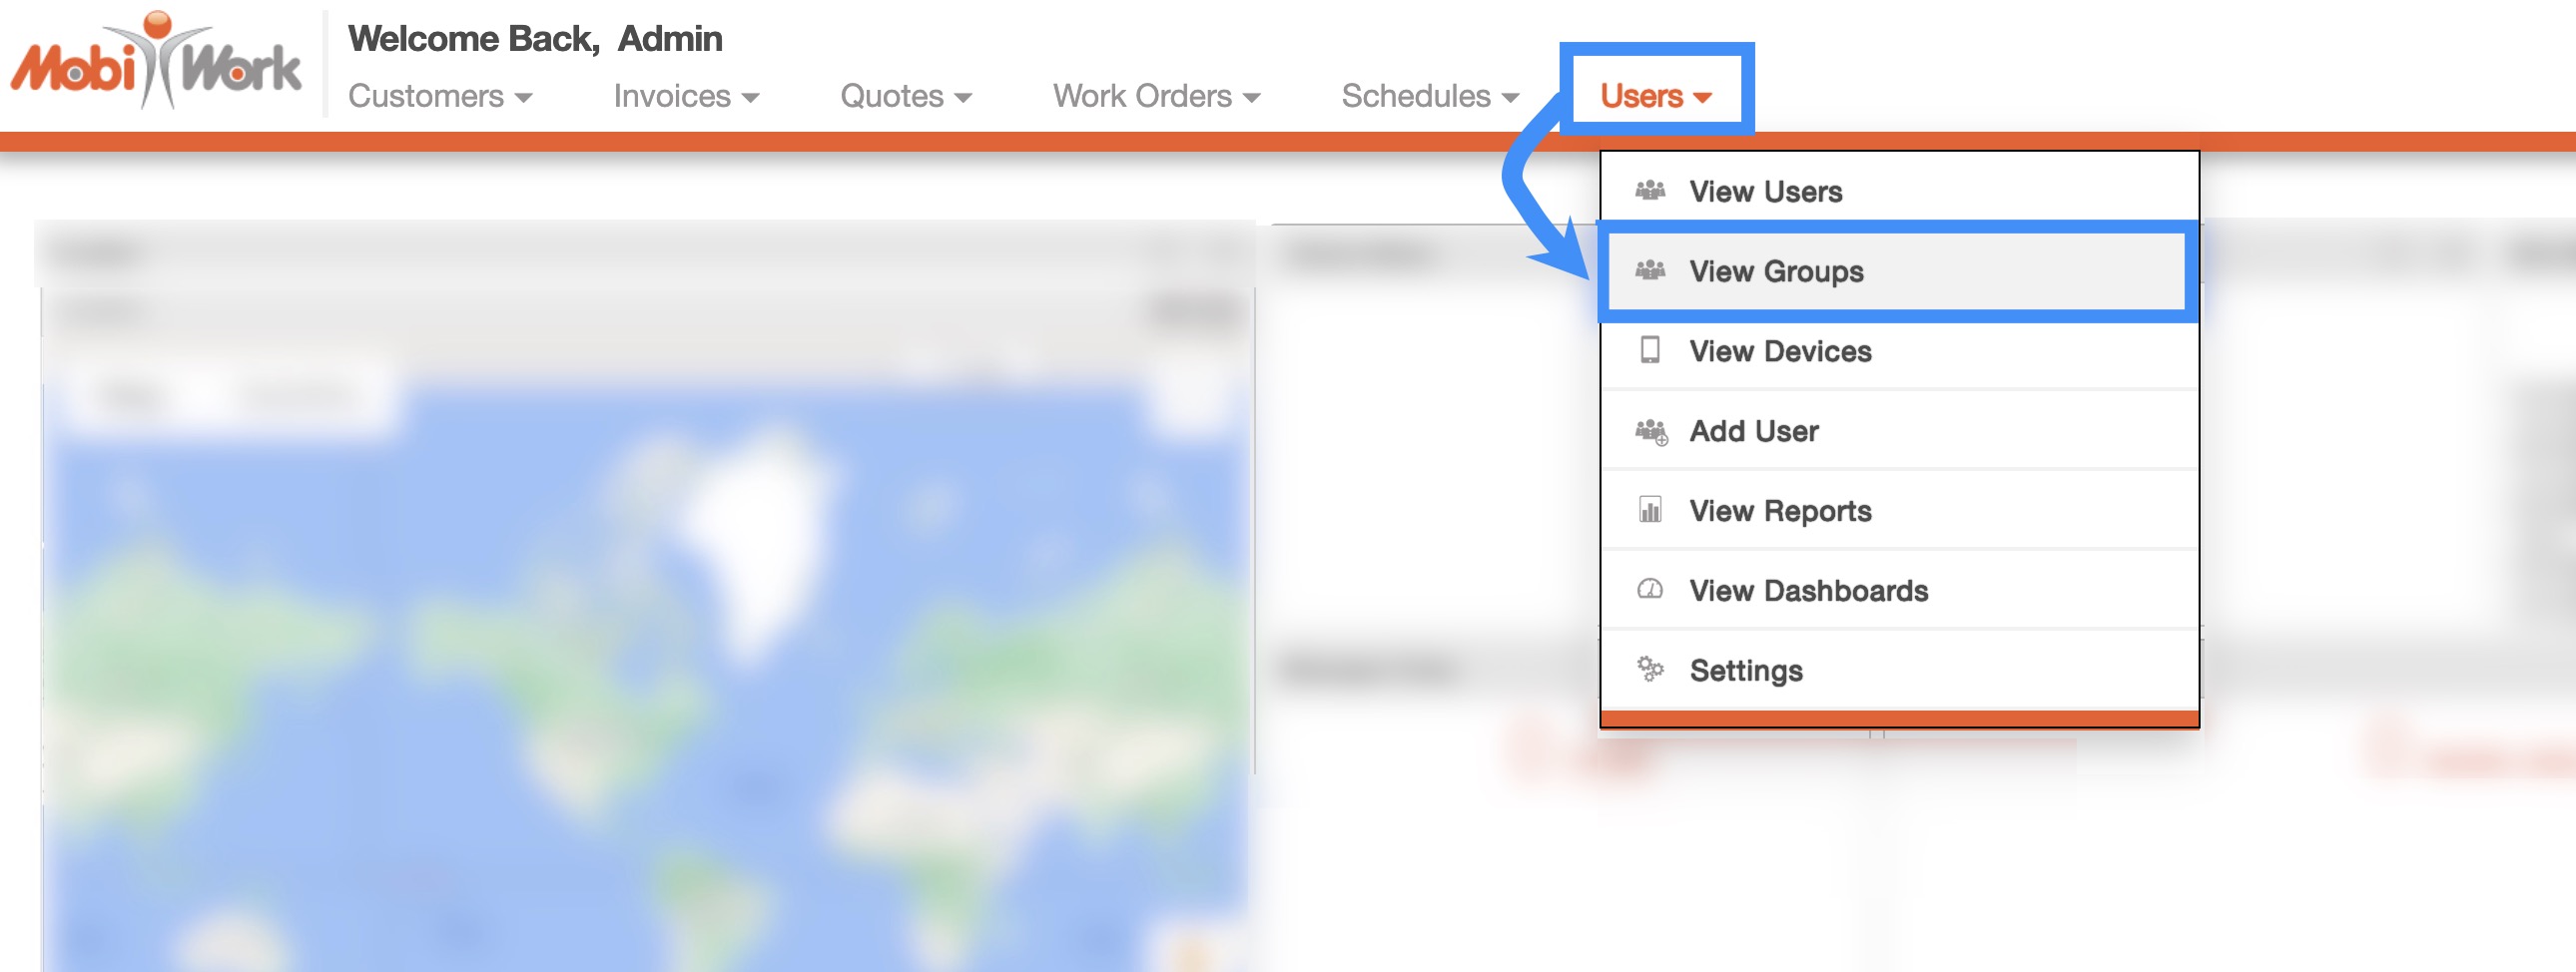
You can access the Groups feature by:
Hovering over the Users feature from your MobiWork menu, and clicking on the "View Groups" option when it appears:
The View Group page is the default tab once you access the "View Groups" option from the Users menu.
The View Groups page will display all the groups that you have in MobiWork; on this page you can edit the group itself, edit the users listed in the group, or delete the group:

The Groups tabs which will toggle the information displayed about your groups.
The search bar allows you to search through your group.
The "Global Actions" section will allow you to add a new group, direct you to the Help page, or open the Onboarding Assistant.
The name of the group; if you click on a selected group, you will be brought to the View Detailed Group page.
By right-clicking you will bring up the right-click actions. These actions are identical to the Individual Actions and will allow you to view, edit the group, edit the users associated with the group, or delete the group.
The Arrow button will allow you to view your groups in alphabetical order or reverse-alphabetical order.
The "Actions" column which will allow you to access the View icon and the Individual Actions. You can view, edit the group, edit the users associated with the group, or delete the group from these actions.
If you click on a selected group, the View icon, or the "View" option from the Individual Actions button, you will be brought to the View Detailed Group page where you can see all the users listed in a group.
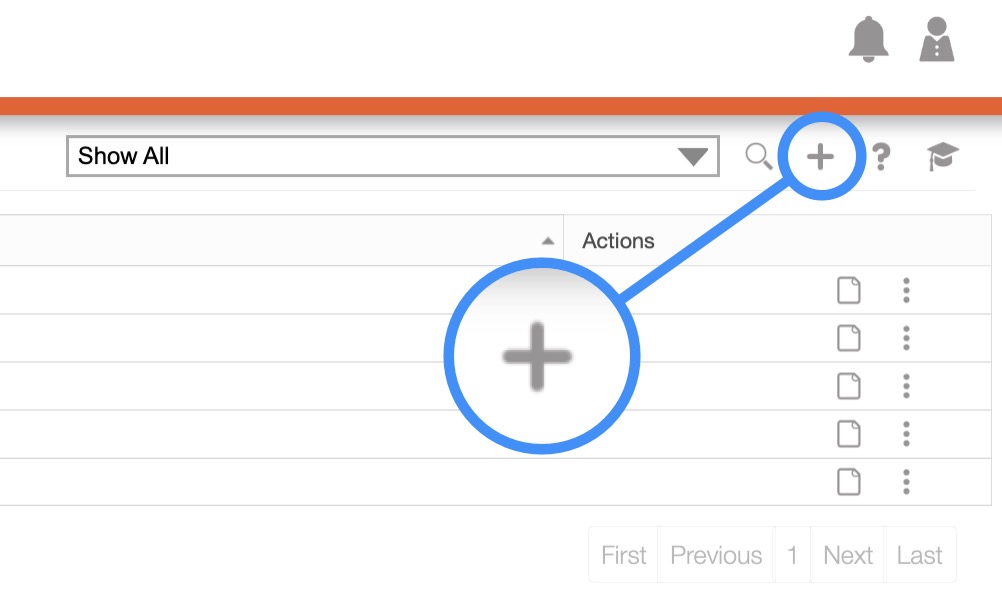
To add a new group for your users, you will first need to access the View Groups page. Once you are on this page, click on the Plus Sign button in the right corner.
You will then be brought to the Add Group page. On this page enter the name of the group as well as the description of the group:
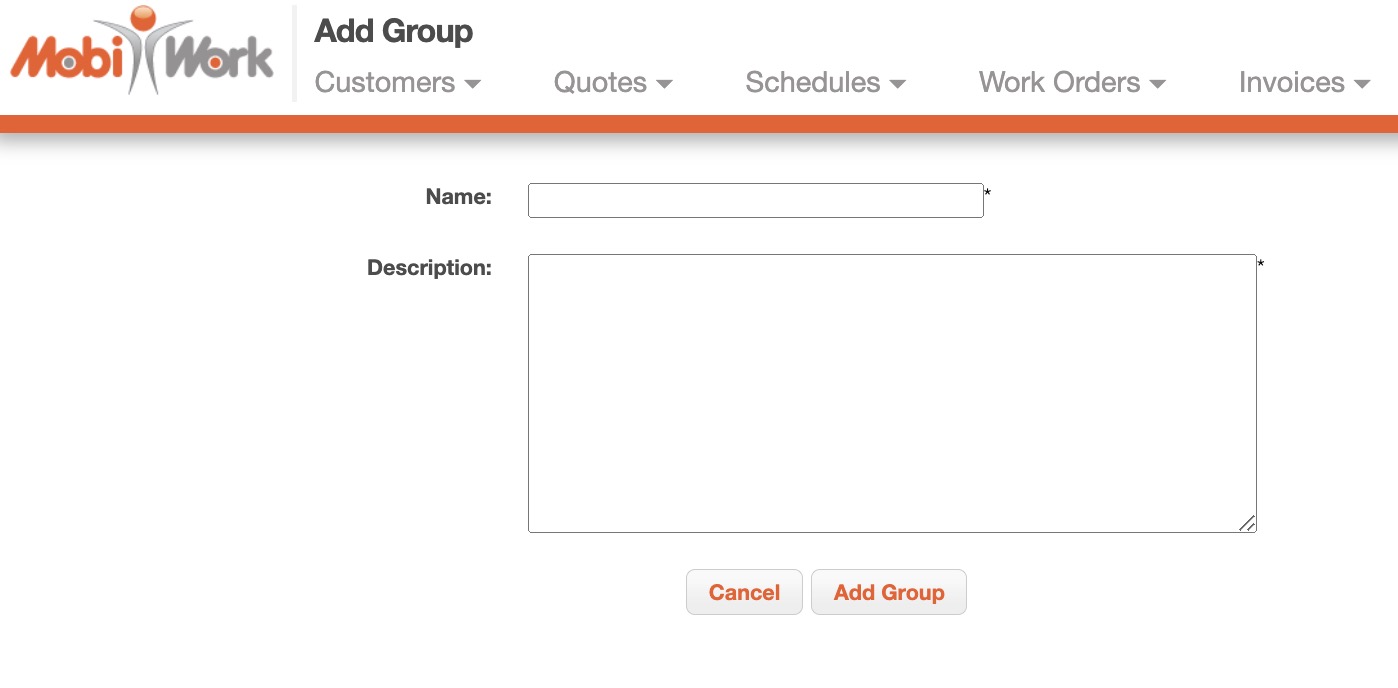
Once you are satisfied with the name and description, click the Add Group button.
There are several ways you can edit your MobiWork Groups and the Group User List:

You can select the desired group and from the View Detailed Group page and click on the Pencil icon or the More Actions button and from the drop-down select the "Edit" option:
You can right-click on the desired group and from the drop-down select the "Edit" option or the "Edit User List" option as desired.
Or you can click on the Individual Actions button and from the drop-down select the "Edit" option or the "Edit User List" option as desired.

Edit Group Name and Description
If you would like to edit the name and description of your group, you will need to:
Select the desired group and from the View Detailed Group page and click on the Pencil icon or the "Edit" option from the Individual Actions button:
Right-click on the desired group and from the drop-down select the "Edit Group" option:
Or you can click on the Individual Actions button and from the drop-down select the "Edit Group" option:
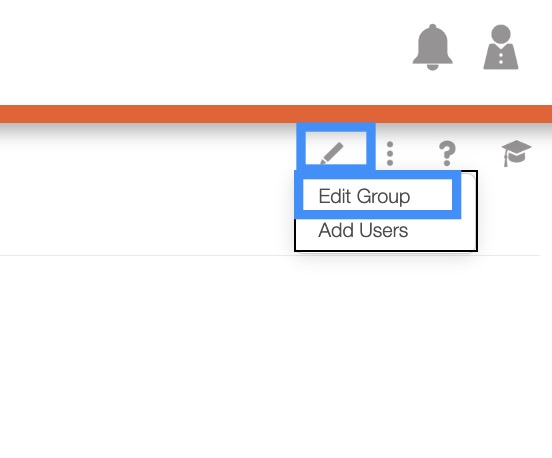
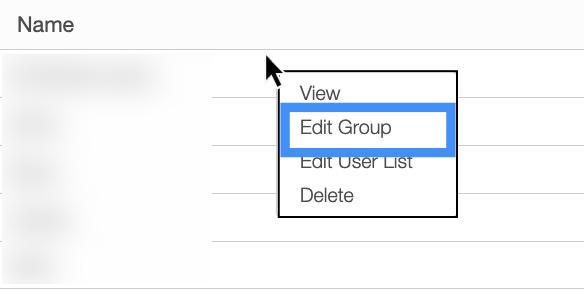
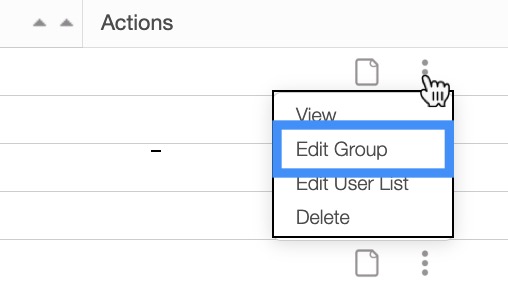
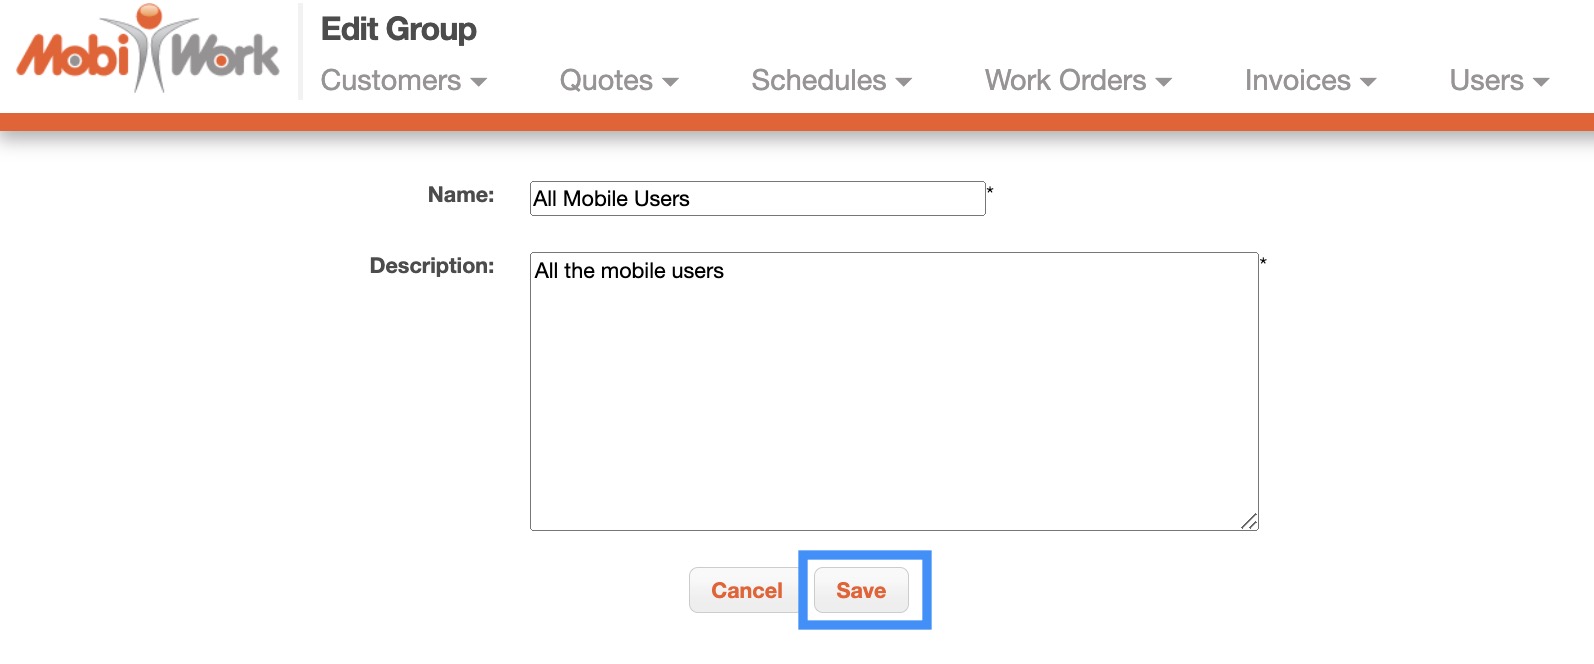
Regardless of the method you choose, you will be brought to the Edit Group page. On this page enter the changes you would like to implement and once you are satisfied, click the Save button:
Edit Group User List
You can edit the users who are associated with a group through the following methods:
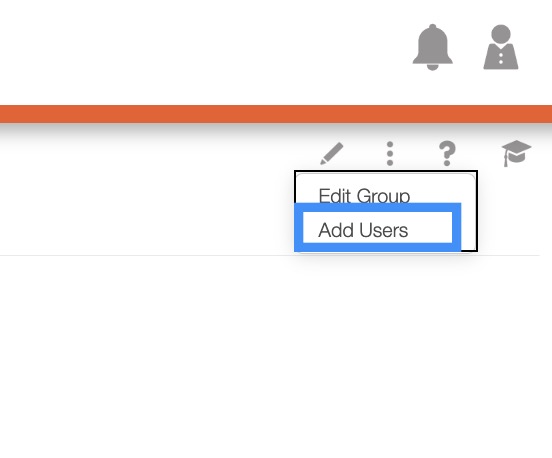
Select the desired group and from the View Detailed Group page and click on the "Add Users" option from the Individual Actions button:
Right-click on the desired group and from the drop-down select the "Edit User List" option:
Or you can click on the Individual Actions button and from the drop-down select the "Edit User List" option:
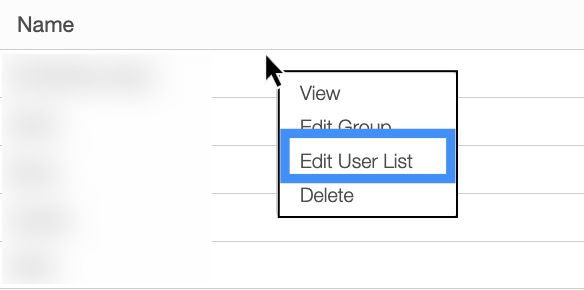
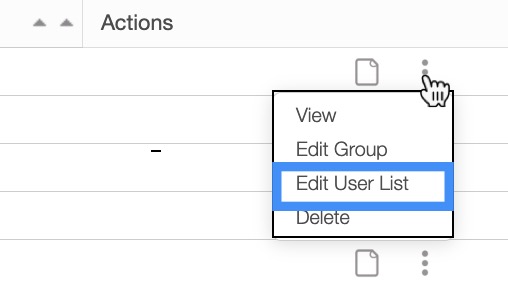
Regardless of the method you choose, you will be redirected to the Edit User List page. On this page, select the desired users from the "Available Users" column and use the arrows to move them to the "Selected Users" column:
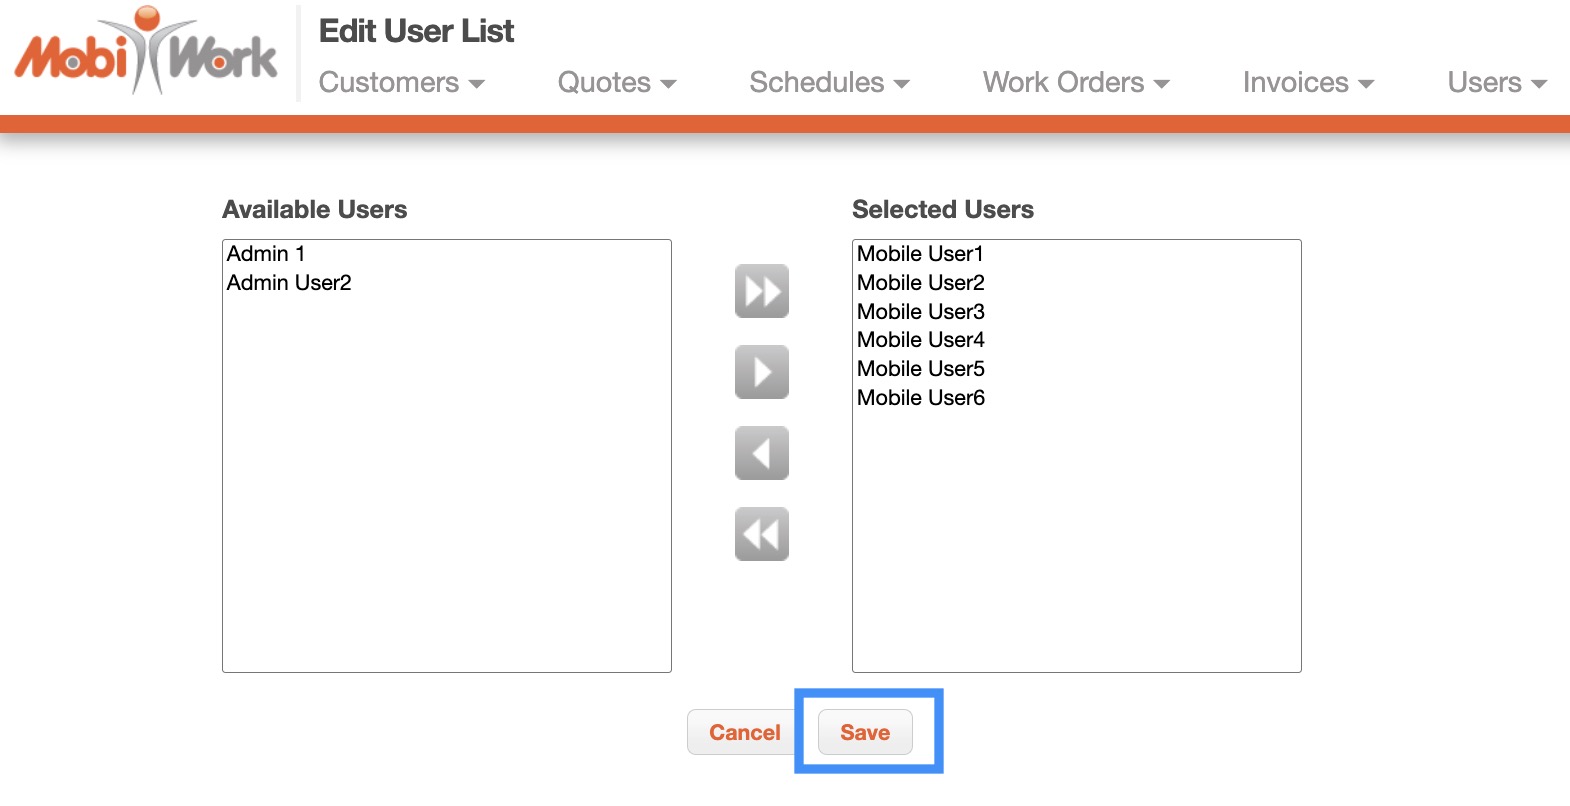
The users listed under the "Selected Users" column will be the users associated with the group list. Once you are satisfied with the new list, click the Save button.
You can delete a selected group from the View Groups page. On this page, there are two different ways you can delete a group:

Right-click on the desired group and from the drop-down select the "Delete" option.
Or you can click on the Individual Actions button and from the drop-down select the "Delete" option.
Regardless of the method you choose, the Delete Group pop-up window will appear asking you to confirm the deletion of the group:
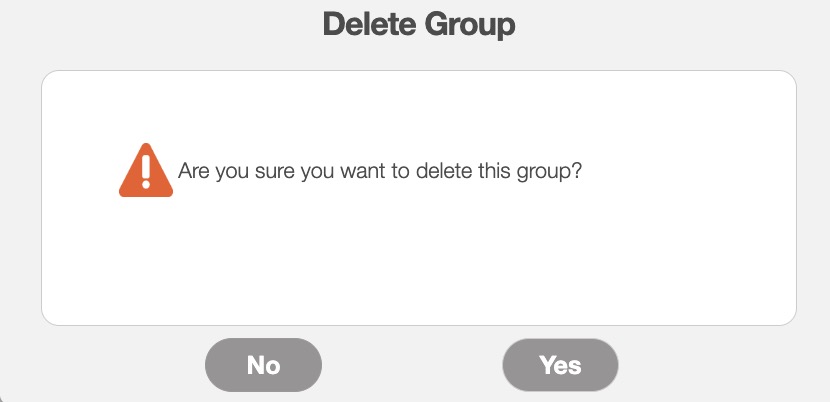
Please note that the deletion of a group is permanent and cannot be undone.
You can access the View Detailed Group page in several different ways:
- In the View Group page there are four ways you can access the View Detailed Group page:
By clicking on the desired Group from the View Group page:
By right-clicking on the desired Group and selecting the "View" option from the drop-down.
Click on the "View" option from the Individual Actions drop-down.
By clicking on the View icon.
- You can also access the View Detailed Group page of a specific user from the User feature page under the "Group" column:


Regardless of how you access it, you will be brought to the View Detailed Group page. On this page there are two tabs, "Summary" and "Users."
Summary Tab
The "Summary" tab will display the name of the group, the description of the group, and the number of users associated with the group:

Users Tab
The "User" tab will display the users associated with the group in addition to their respective emails, as well as, first and last names:

If you have any questions or need further assistance, please let us know. We'd be happy to help!
