To export your customers into Excel or QuickBooks, you must first access the Customers feature page on MobiWork. For more information on how to access this page, please see the Customer List page:
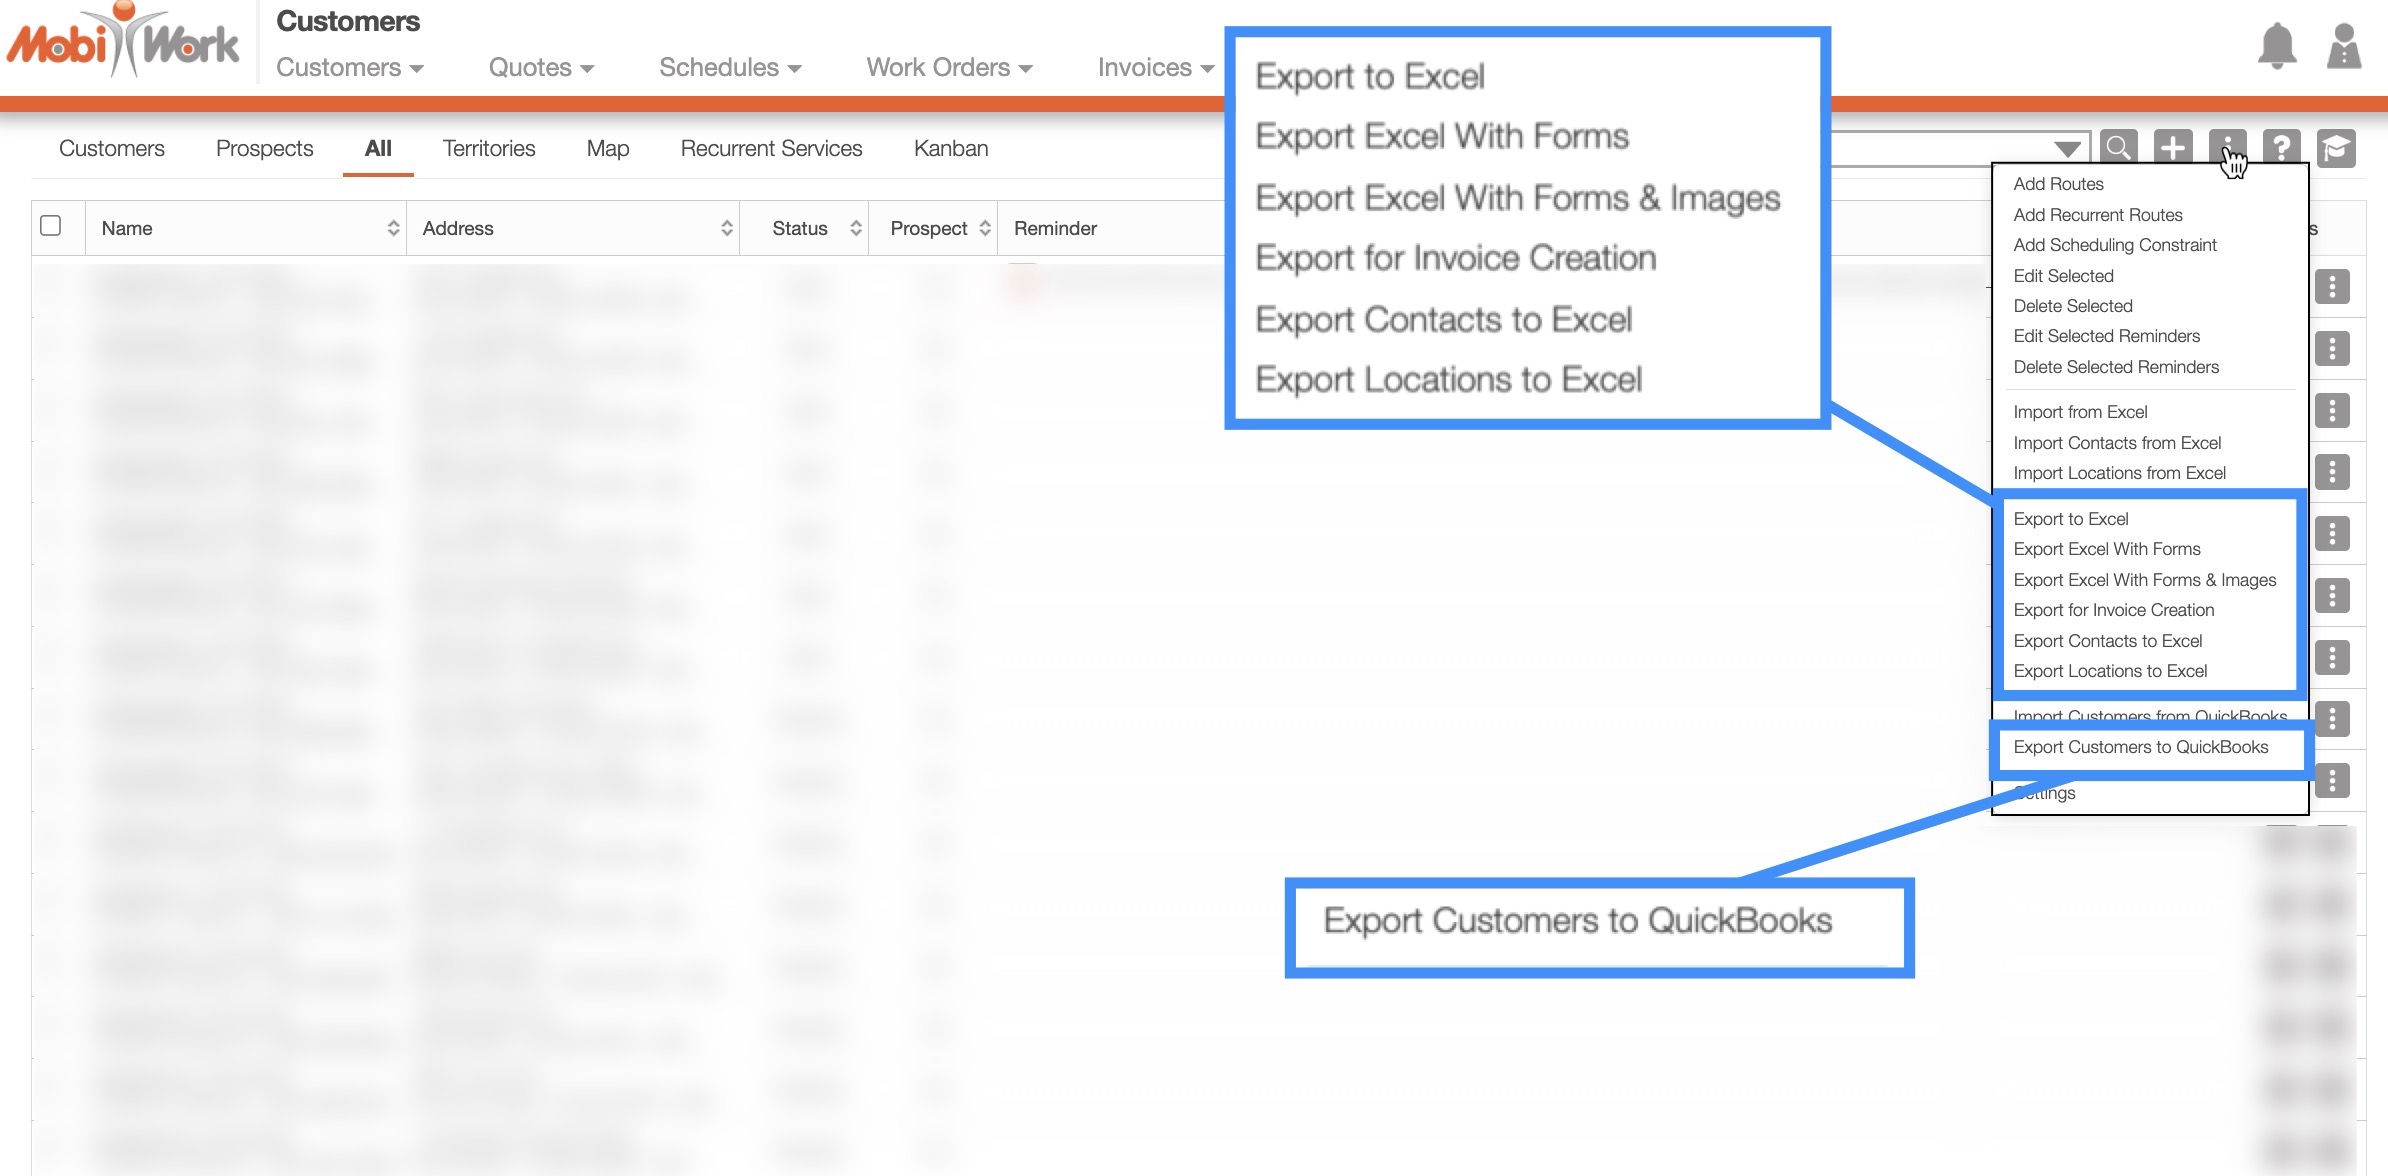
Once you are in the Customers feature page, click on the More Actions button to access the export to Excel actions. There are several different types of Excel export options that you can choose from, and each one will display a different data set.
The subsequent sections will go more into detail about applications of each Excel export file.
To export your customers into an Excel document, you will first need to access the Customers Section. Once you click on the More Actions button there are six different export to Excel options for you to choose from:
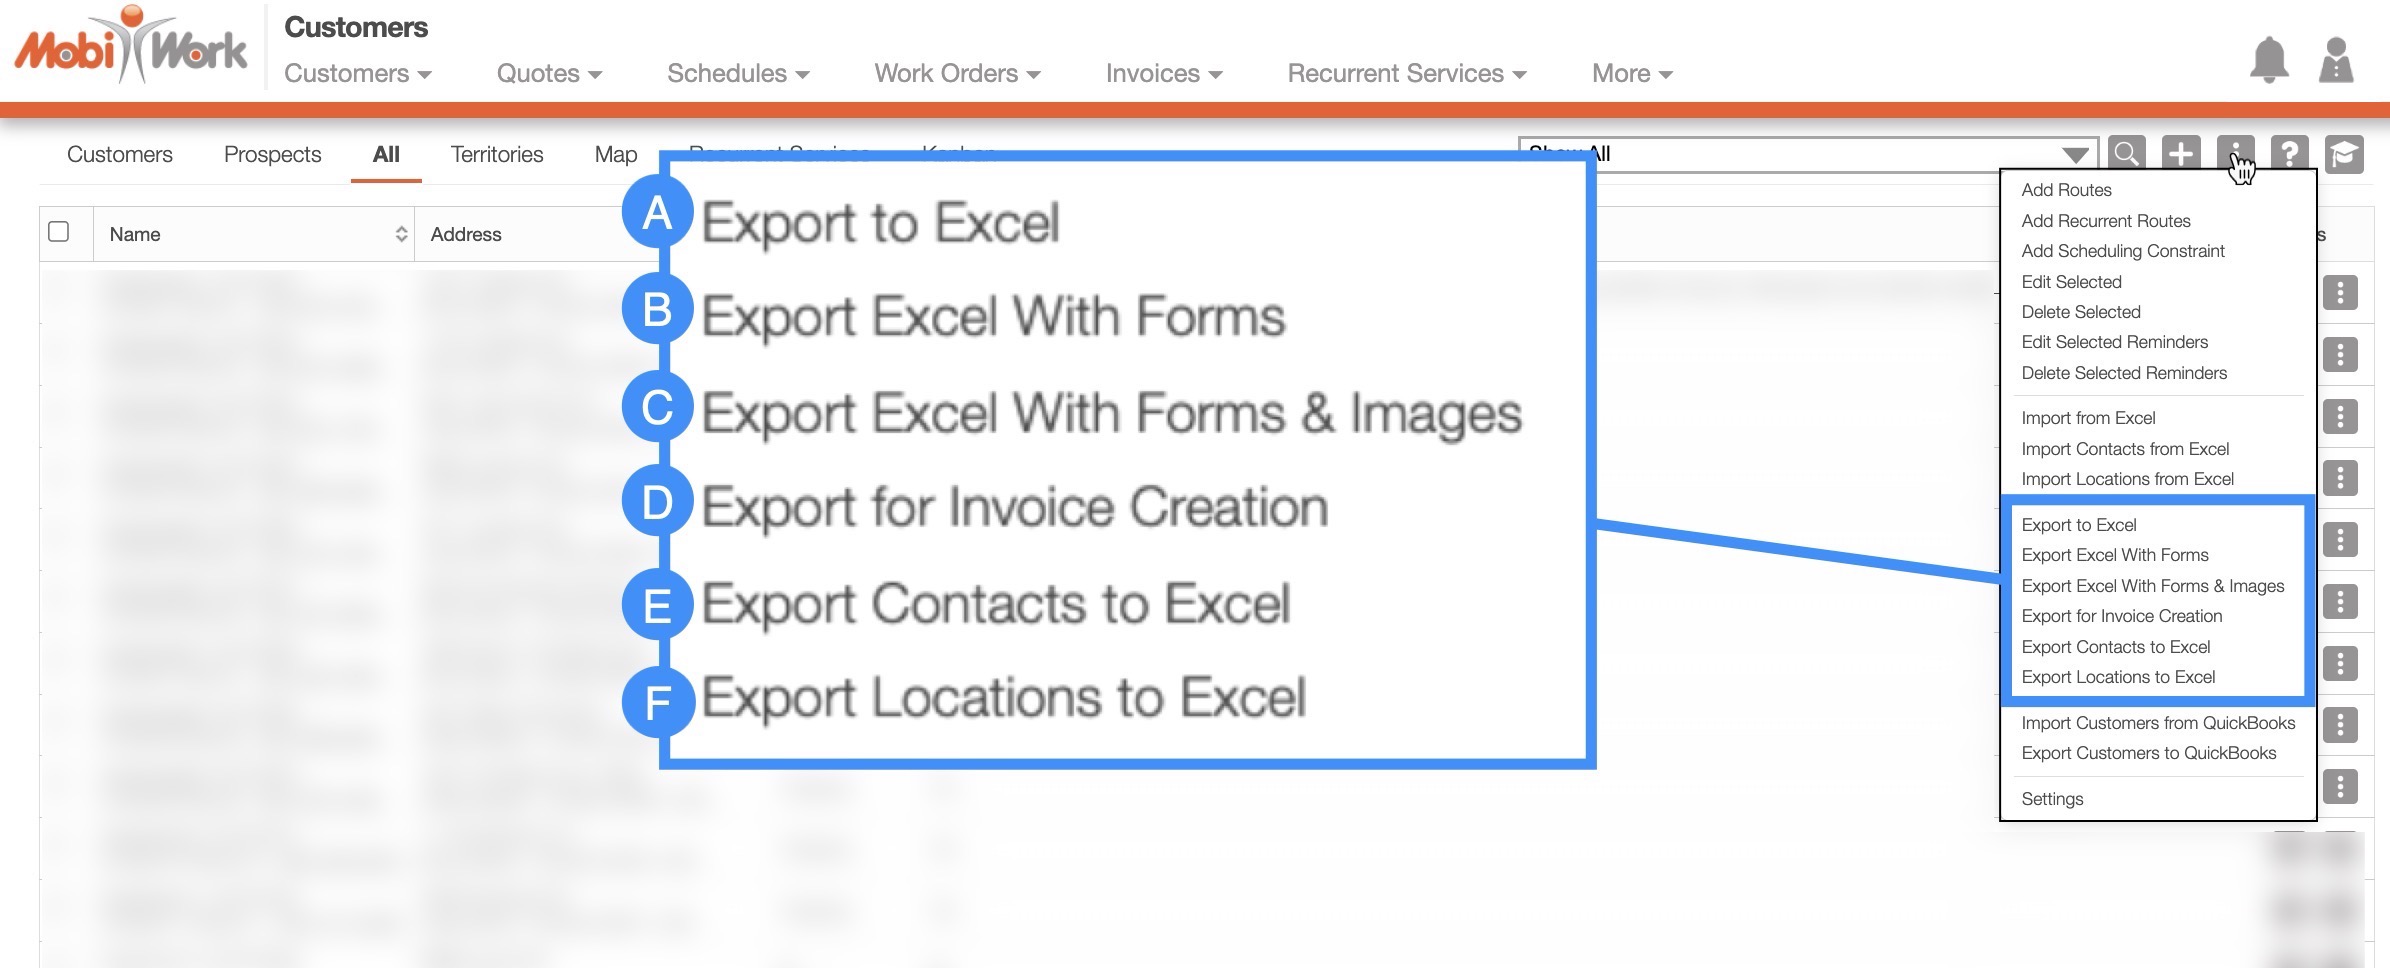
Export to Excel (Drop-down)
To export this file from the Customers feature page:
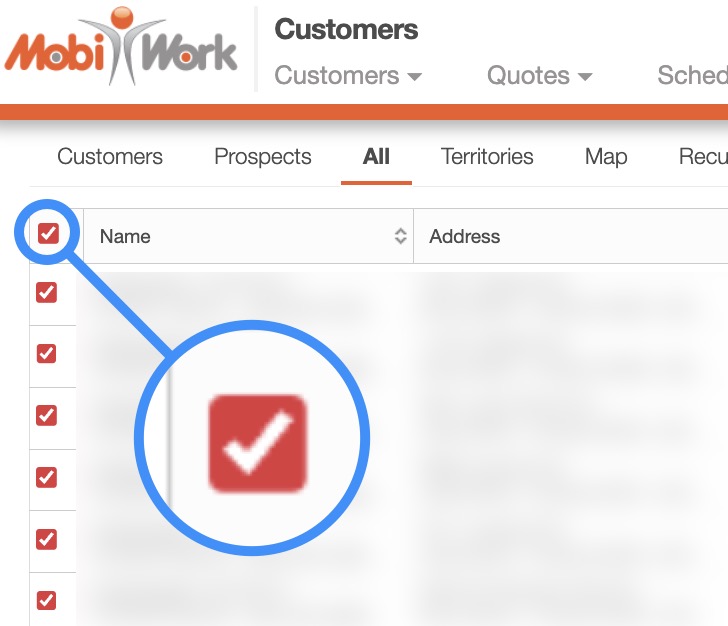
Select the customers that you would like to export to Excel:
- Please note that if you would like to export all your customers into Excel you can click on the topmost checkbox (Multiple Selection Area) located in the Customers feature page. Likewise, if you do not select any customers ALL records will be exported:
Click on the More Actions button and from the drop-down menu select the "Export to Excel" option:
The Excel file will automatically download, and you will be able to locate it in your computer's Download folder.
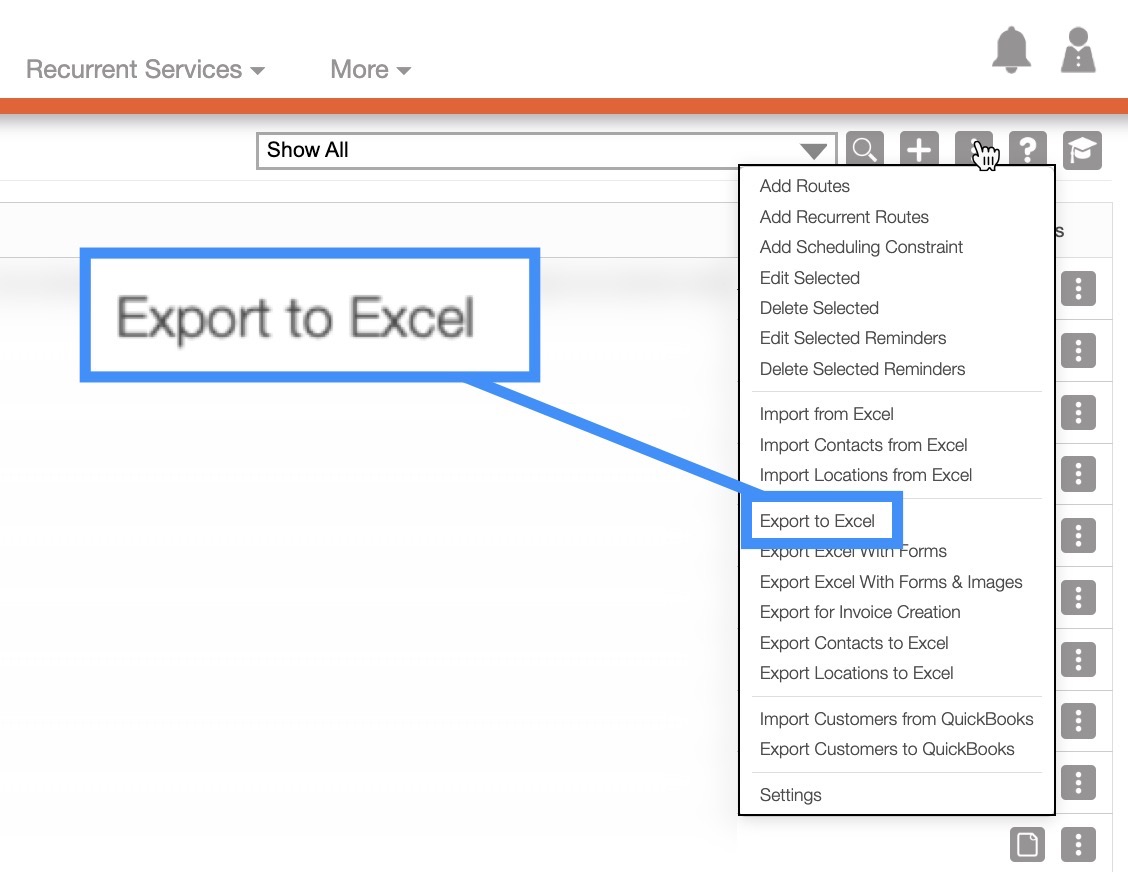
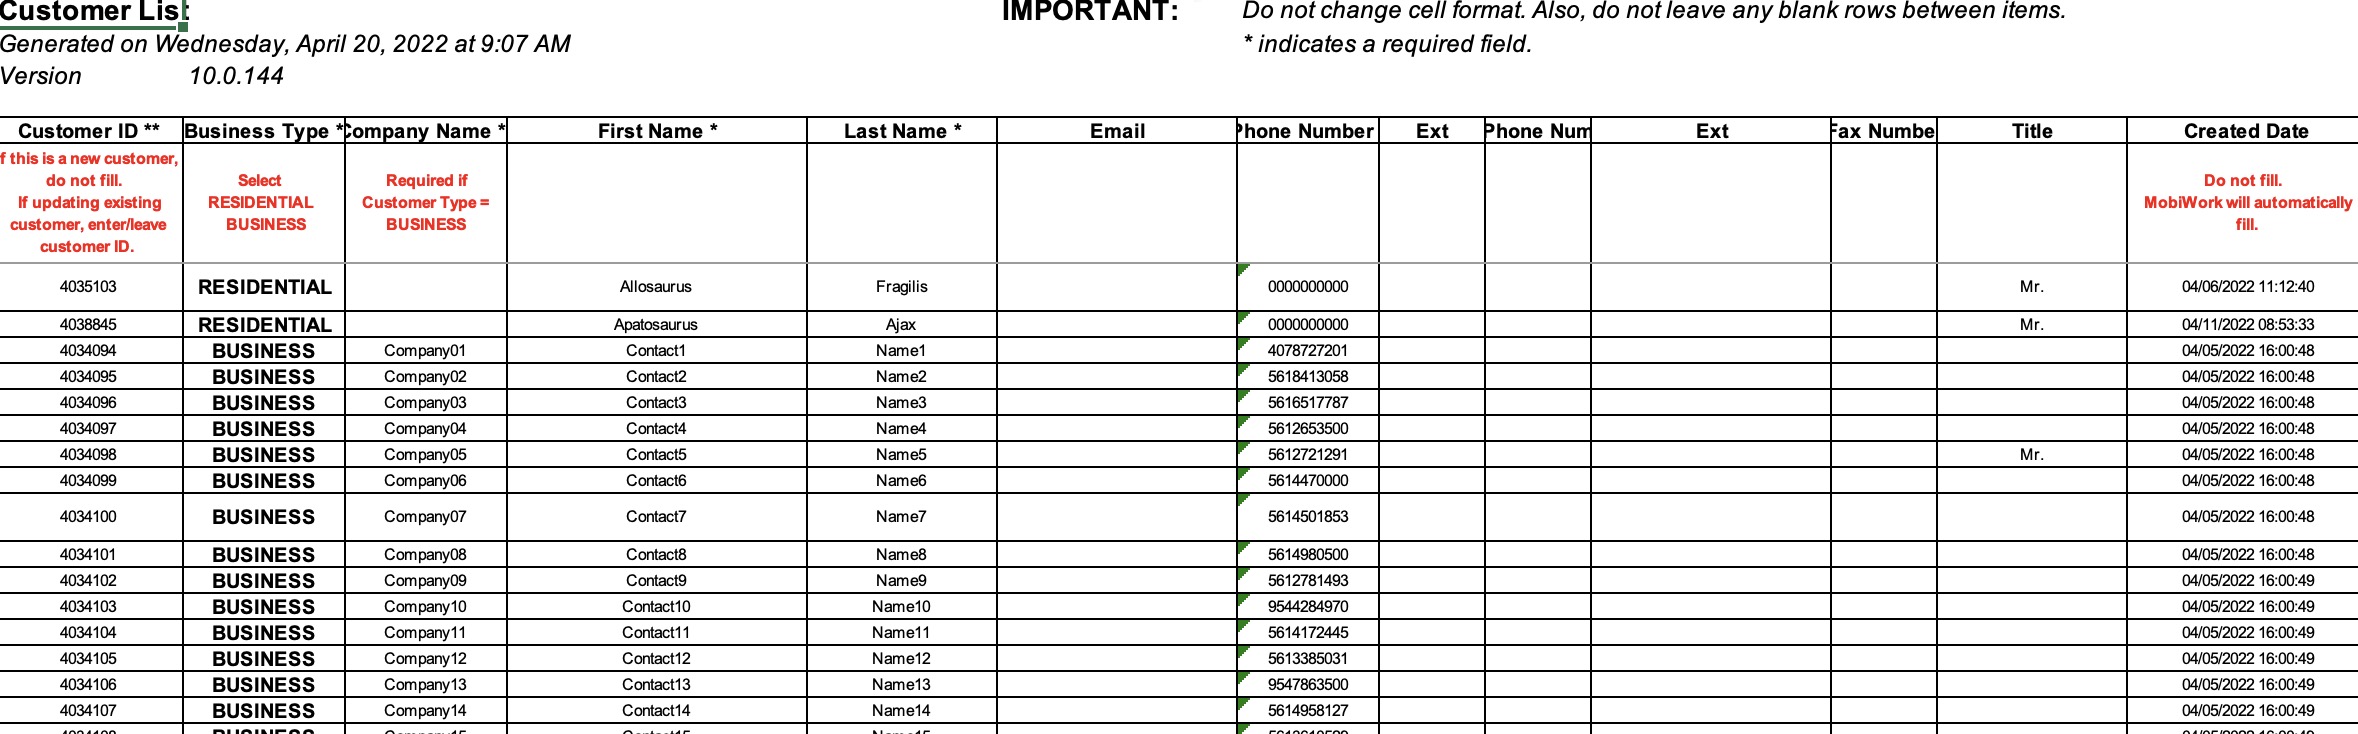
The "Export to Excel" option will export your customers and prospects to an Excel file. This Excel file will have all the basic information regarding your customers and prospects, including their names, statuses, countries, etc.:
Export to Excel with Forms
To export this file from the Customers feature page:
Select the customers that you would like to export to Excel:
- Please note that if you would like to export all your customers into Excel you can click on the topmost checkbox (Multiple Selection Area) located in the Customers feature page. Likewise, if you do not select any customers ALL records will be exported:
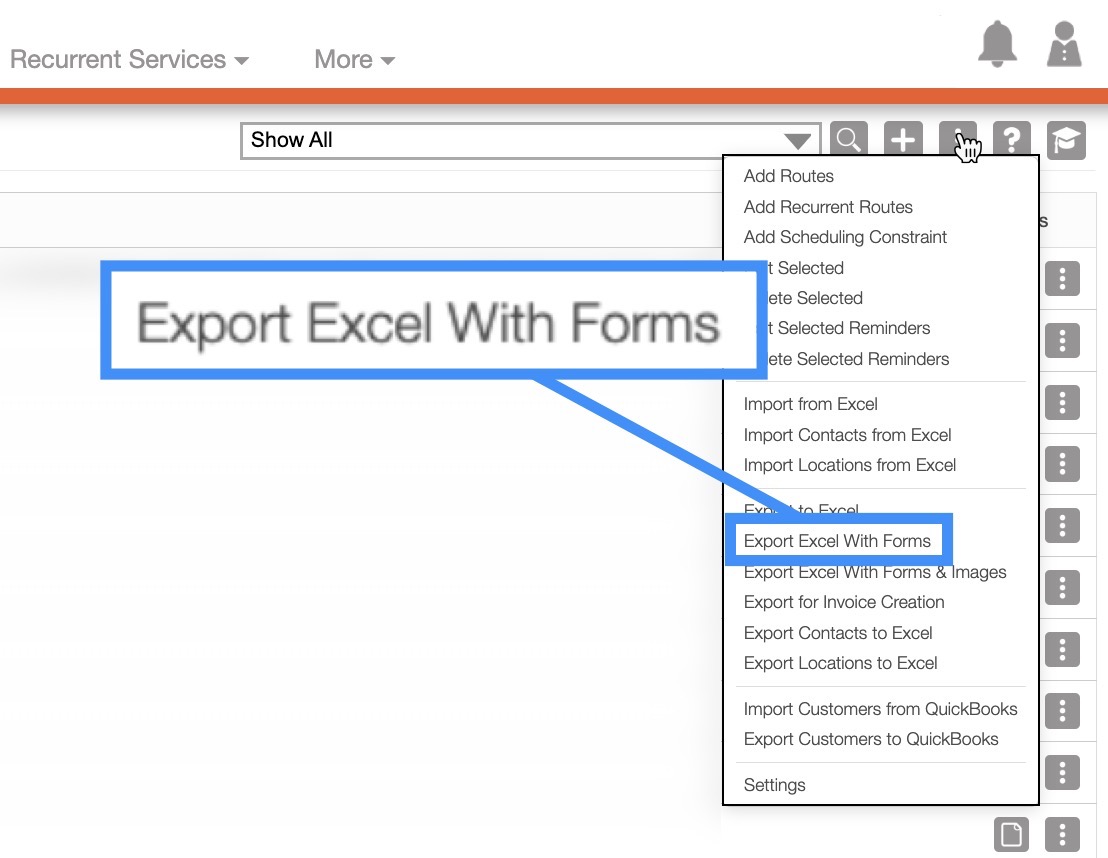
Click on the More Actions button and from the drop-down menu select the "Export to Excel with Forms" option:
The Excel file will automatically download, and you will be able to locate it in your computer's Download folder.
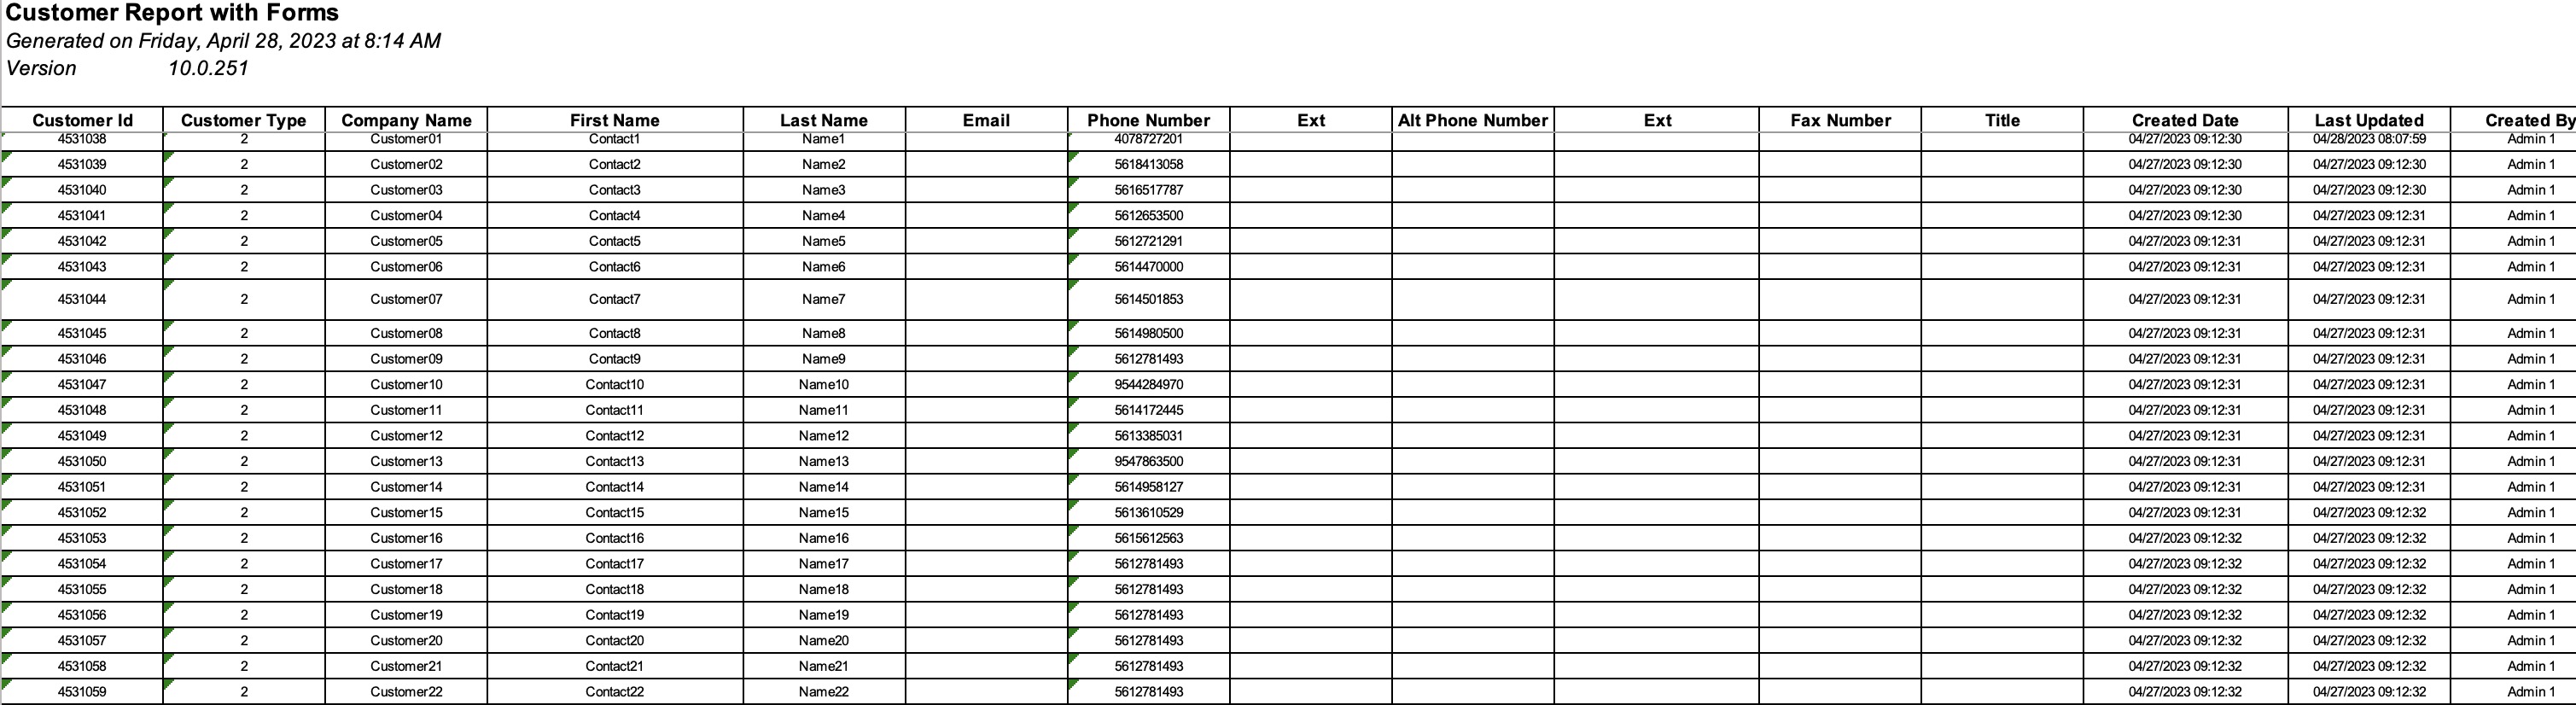
By using the "Export to Excel with Forms" option, your Excel file will display the data from the Forms tab; any pictures associated with a form will be represented with a URL:
If you would like more information about forms, please see the Customer Settings page.
Export to Excel with Forms & Images
To export this file from the Customers feature page:
Select the customers that you would like to export to Excel:
- Please note that if you would like to export all your customers into Excel you can click on the topmost checkbox (Multiple Selection Area) located in the Customers feature page. Likewise, if you do not select any customers ALL records will be exported:
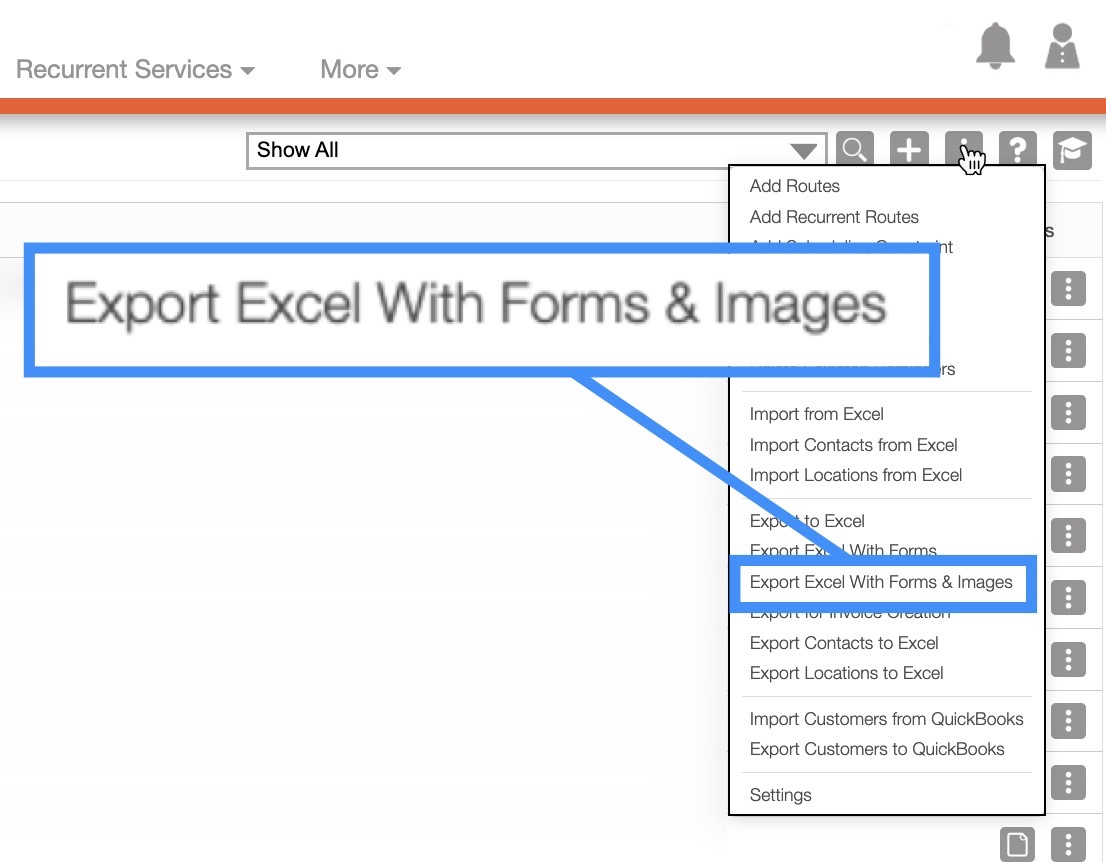
Click on the More Actions button and from the drop-down menu select the "Export to Excel with Forms & Images" option:
The Excel file will automatically download, and you will be able to locate it in your computer's Download folder.
By using the "Export to Excel with Forms & Images" option, your Excel file will display the data from the Forms tab; any pictures associated with a form will also display as an image:
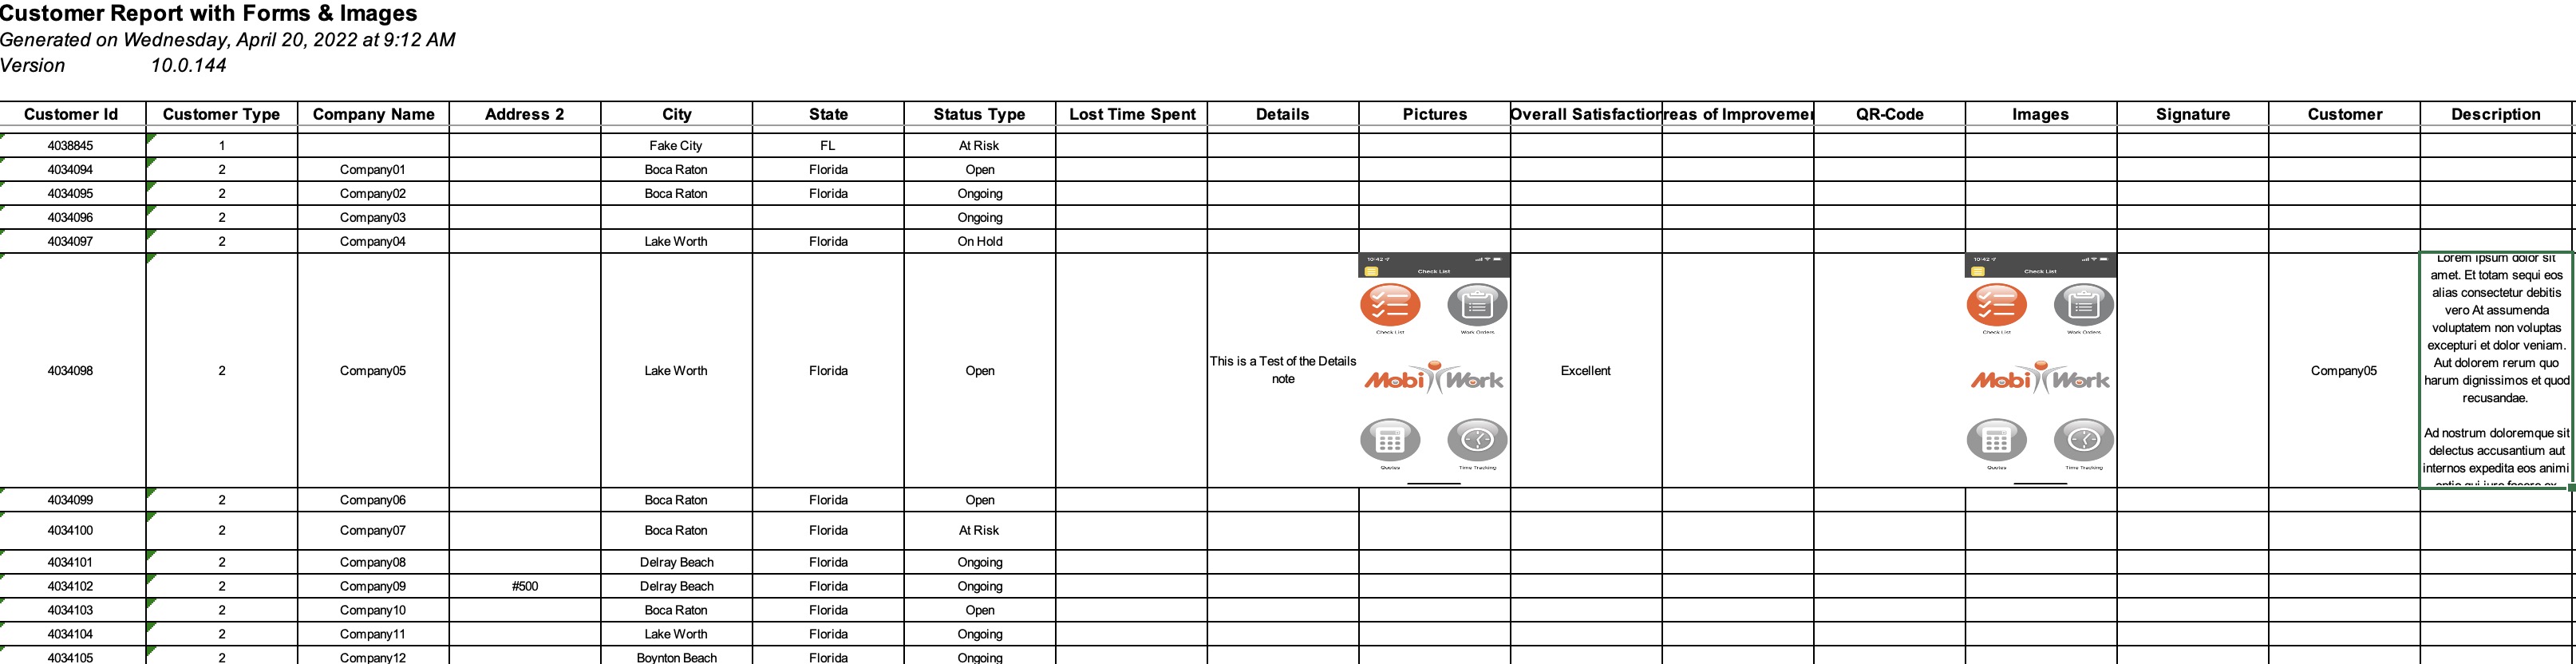
If you would like more information about forms, please see the Customer Settings page.
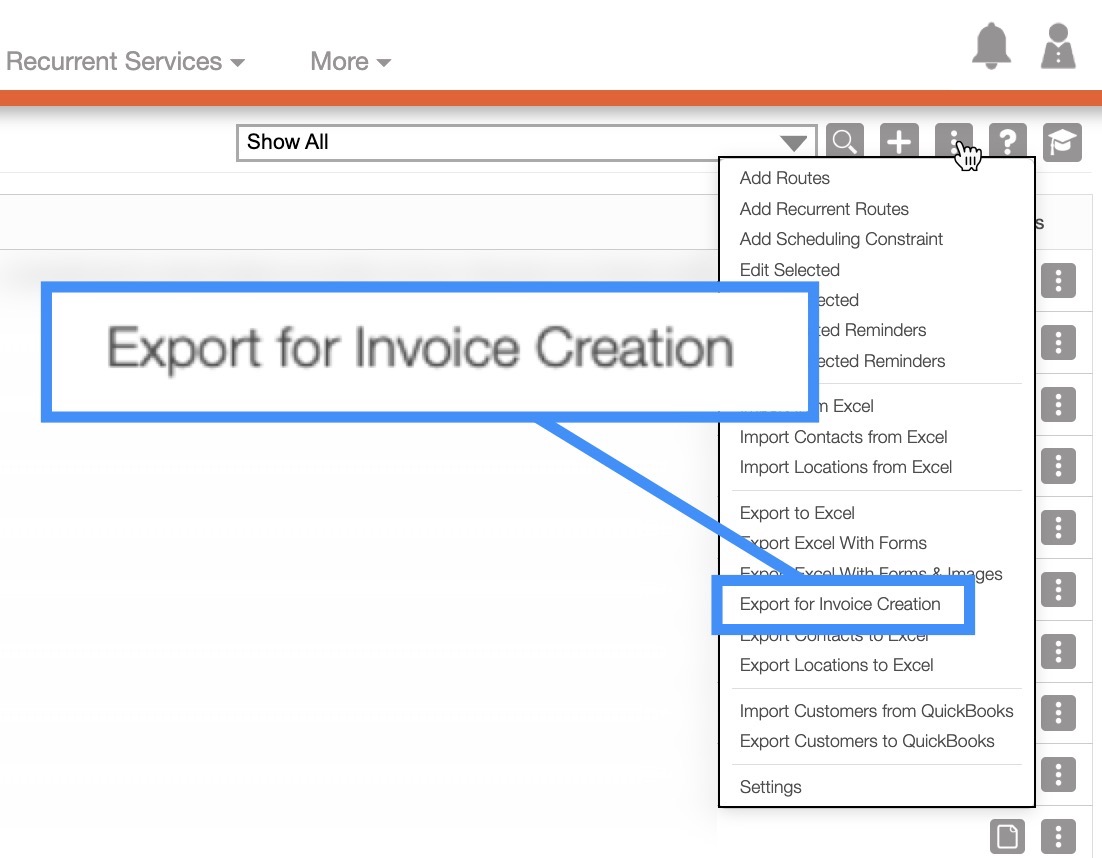
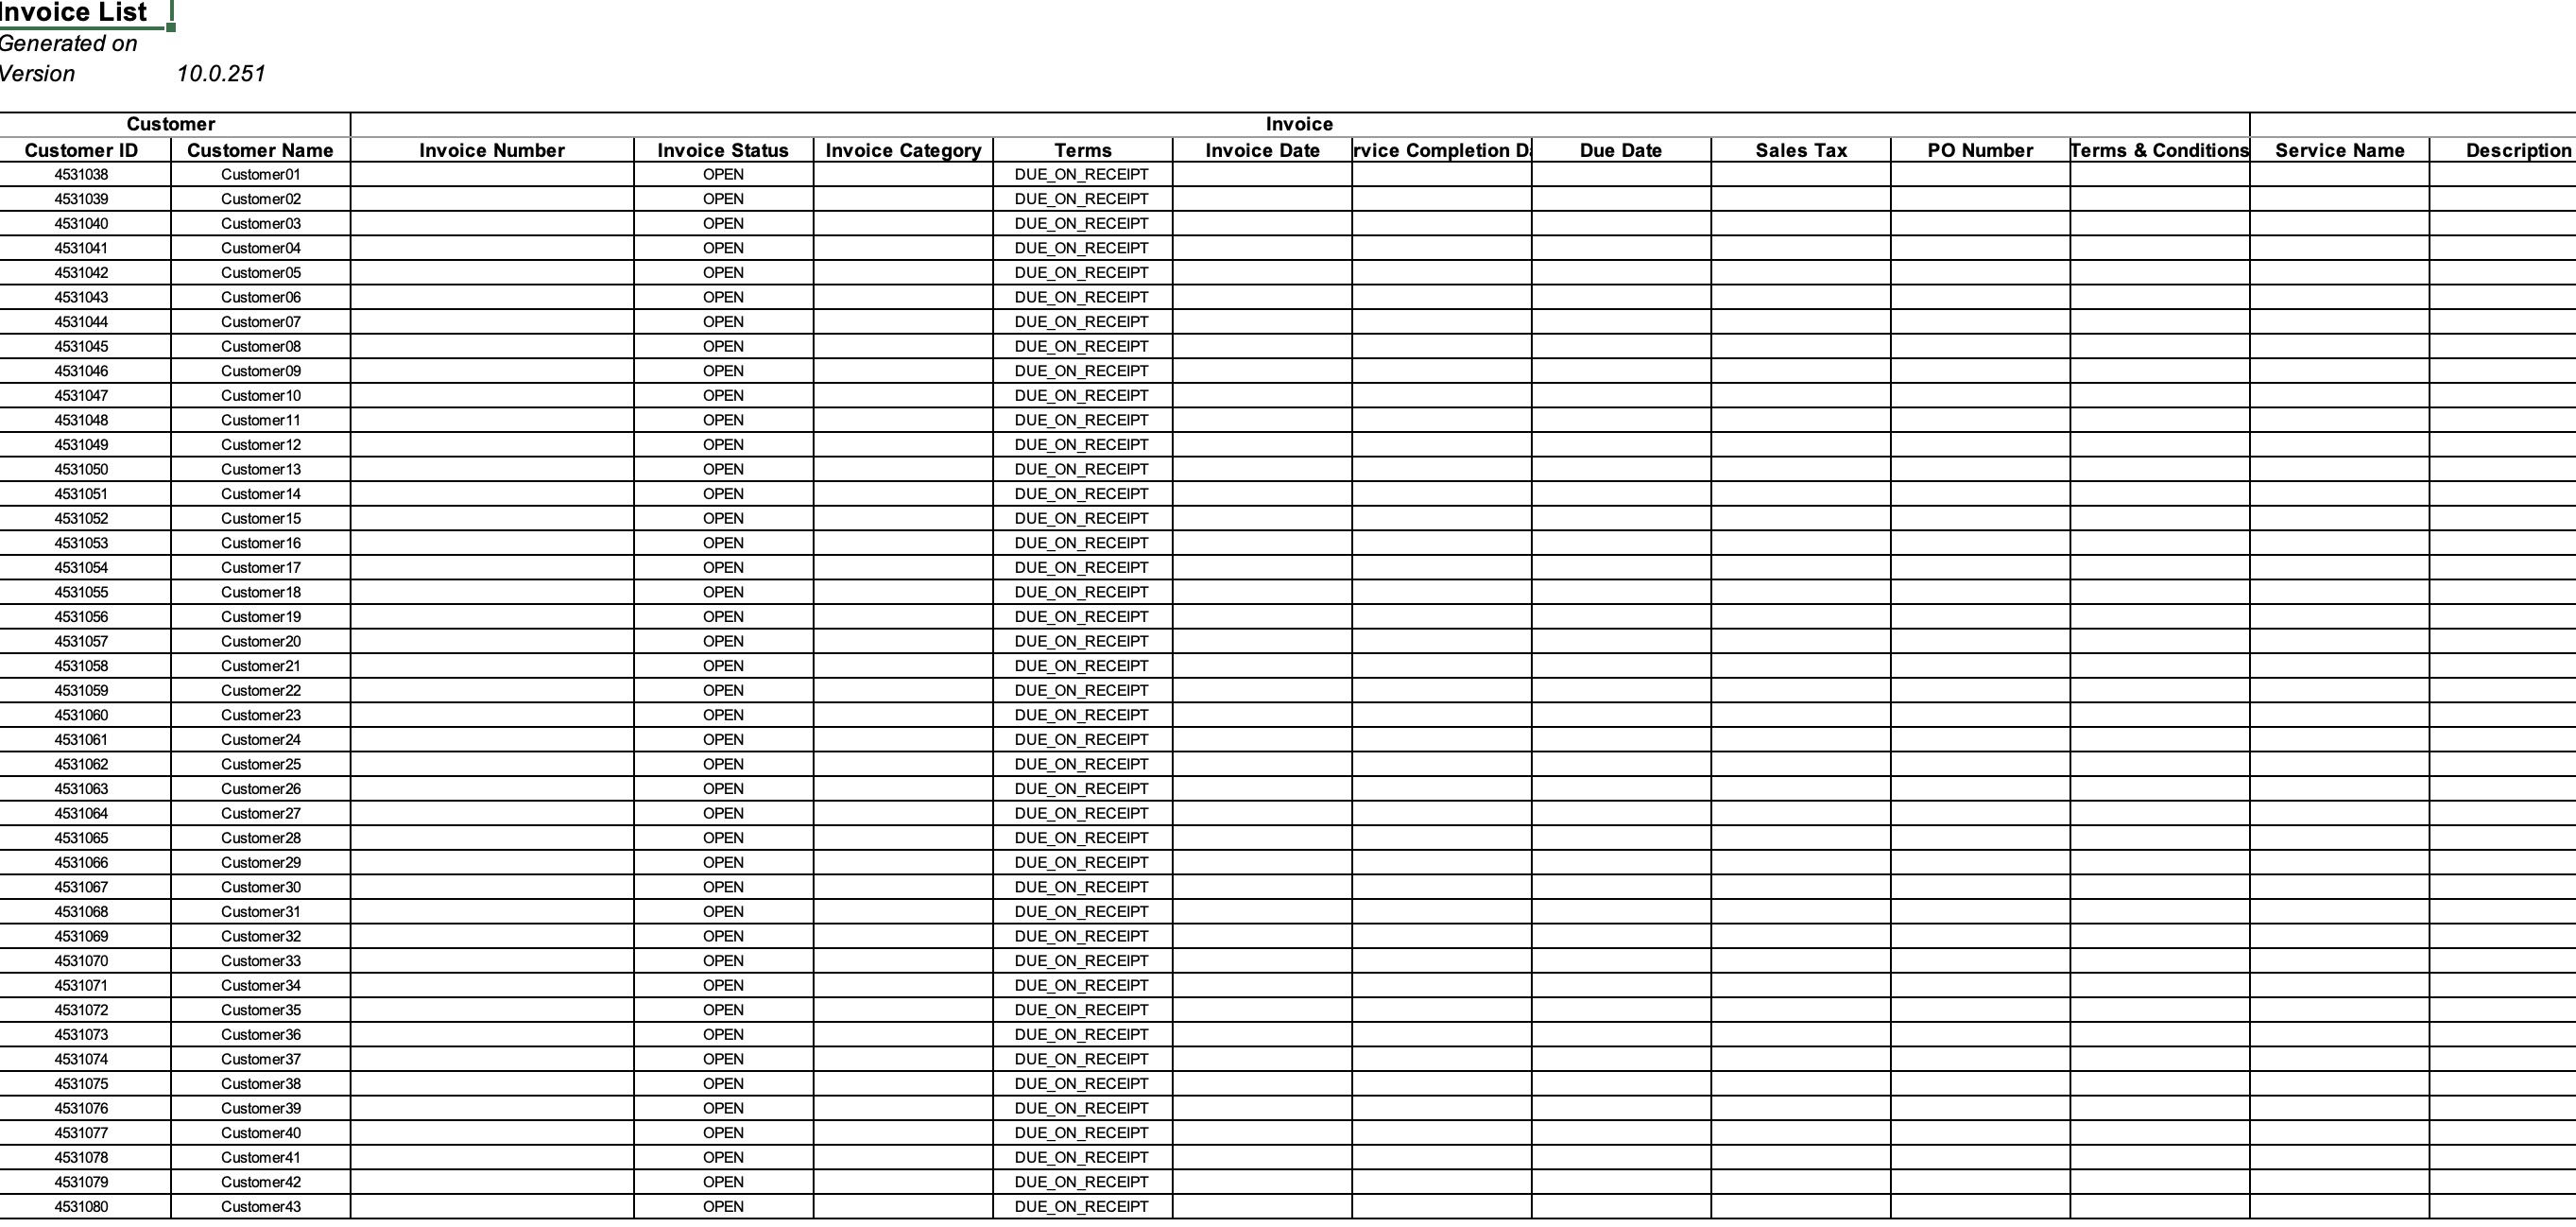
Export to Excel for Invoice Creation
To export this file from the Customers feature page:
Select the customers that you would like to export to Excel:
- Please note that if you would like to export all your customers into Excel you can click on the topmost checkbox (Multiple Selection Area) located in the Customers feature page. Likewise, if you do not select any customers ALL records will be exported:
- Click on the More Actions button and from the drop-down menu select the "Export to Excel for Invoice Creation" option:
- The Excel file will automatically download, and you will be able to locate it in your computer's Download folder.
By selecting the "Export to Excel for Invoice Creation" option, your Excel document will be formatted to allow manual input of invoices, which can then be uploaded into MobiWork:
For more information on how to upload invoices from an Excel file, please see the Import Invoices page.
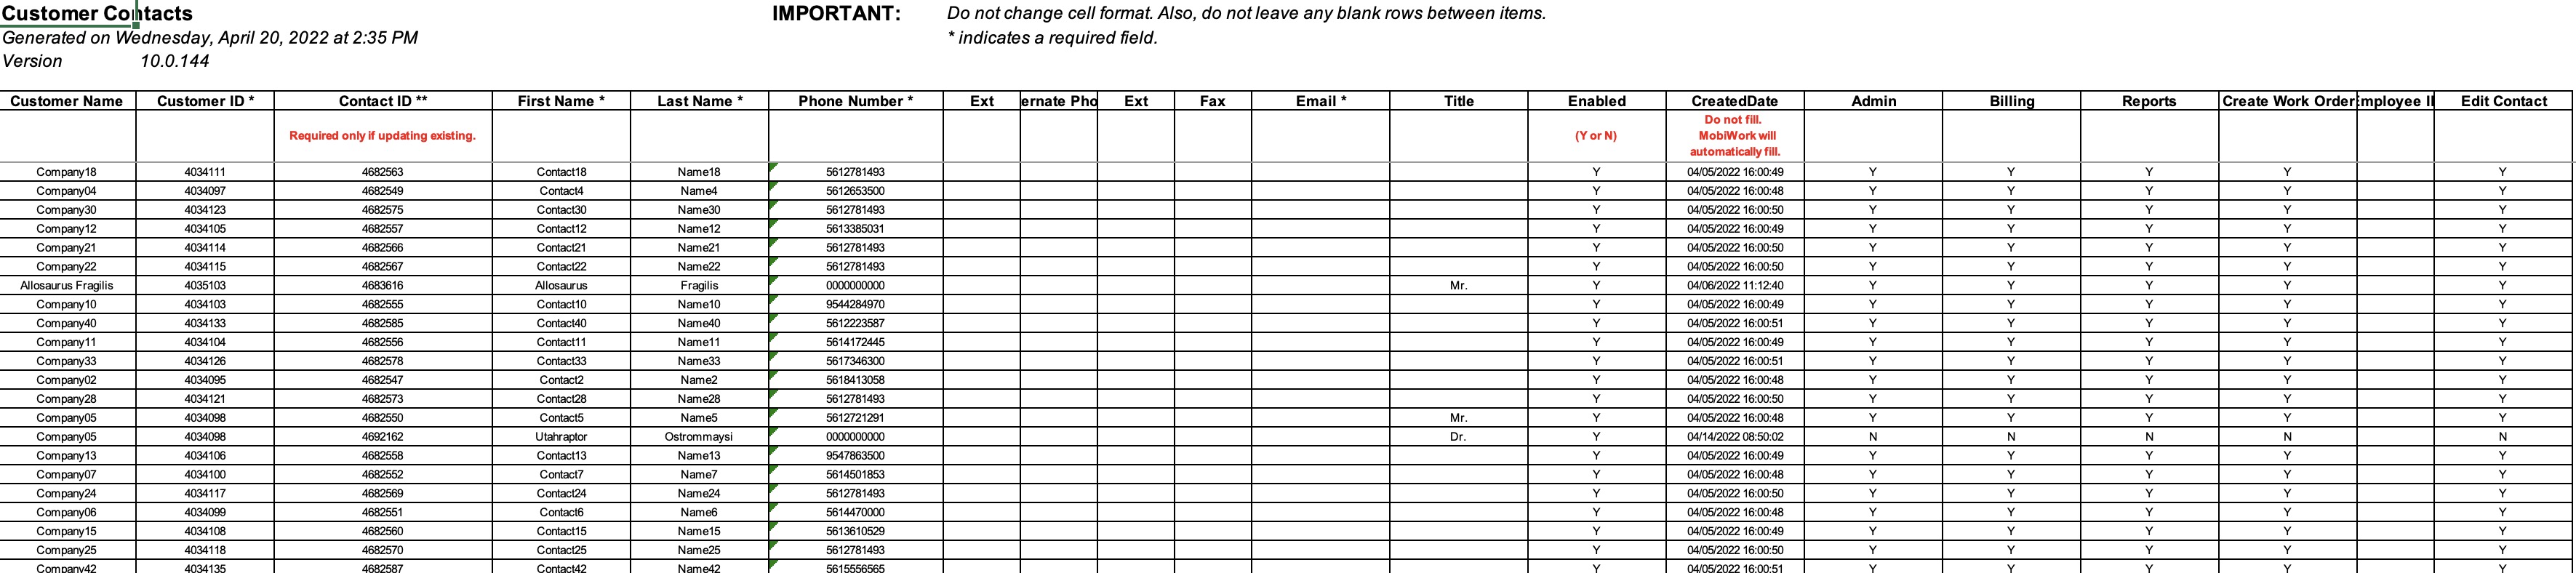
Export Contacts to Excel
To export this file from the Customers feature page:
Select the customers that you would like to export to Excel:
- Please note that if you would like to export all your customers into Excel you can click on the topmost checkbox (Multiple Selection Area) located in the Customers feature page. Likewise, if you do not select any customers ALL records will be exported:
Click on the More Actions button and from the drop-down menu select the "Export Contacts to Excel" option:
The Excel file will automatically download, and you will be able to locate it in your computer's Download folder.
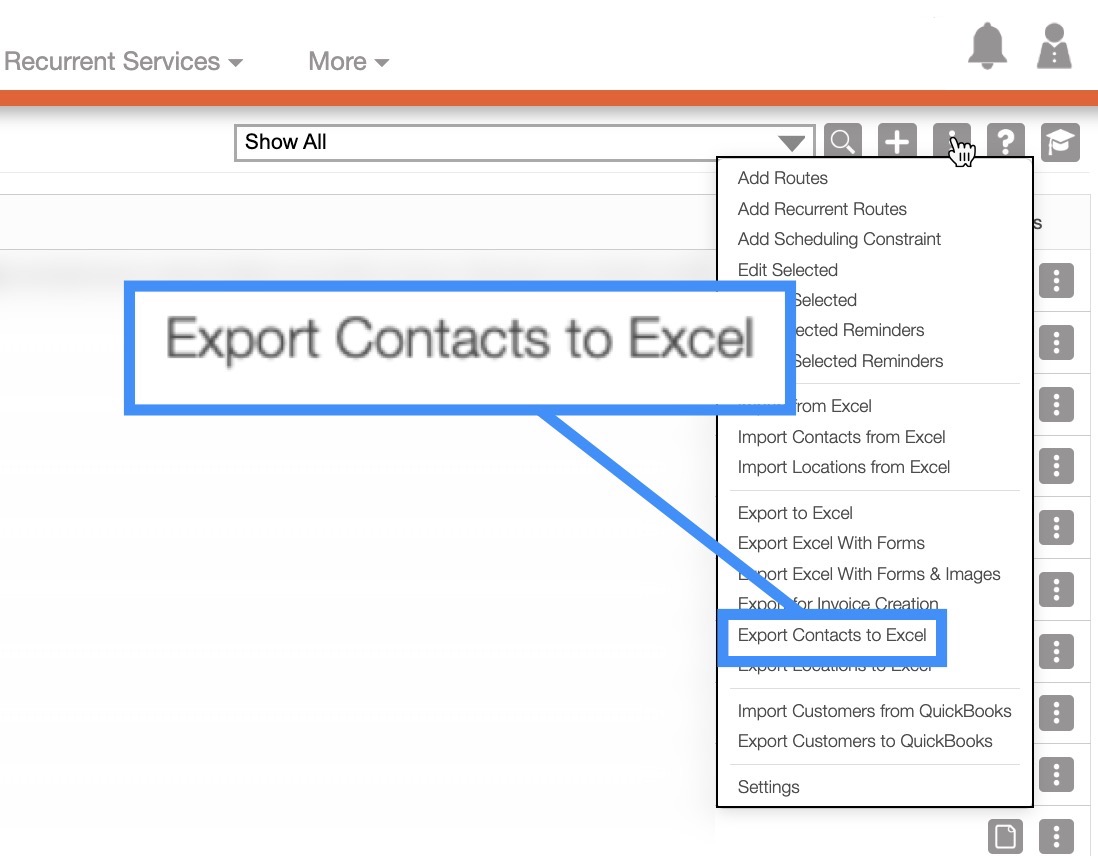
By selecting the "Export Contacts to Excel" option, you will only be exporting your contact, customer, and prospect information:
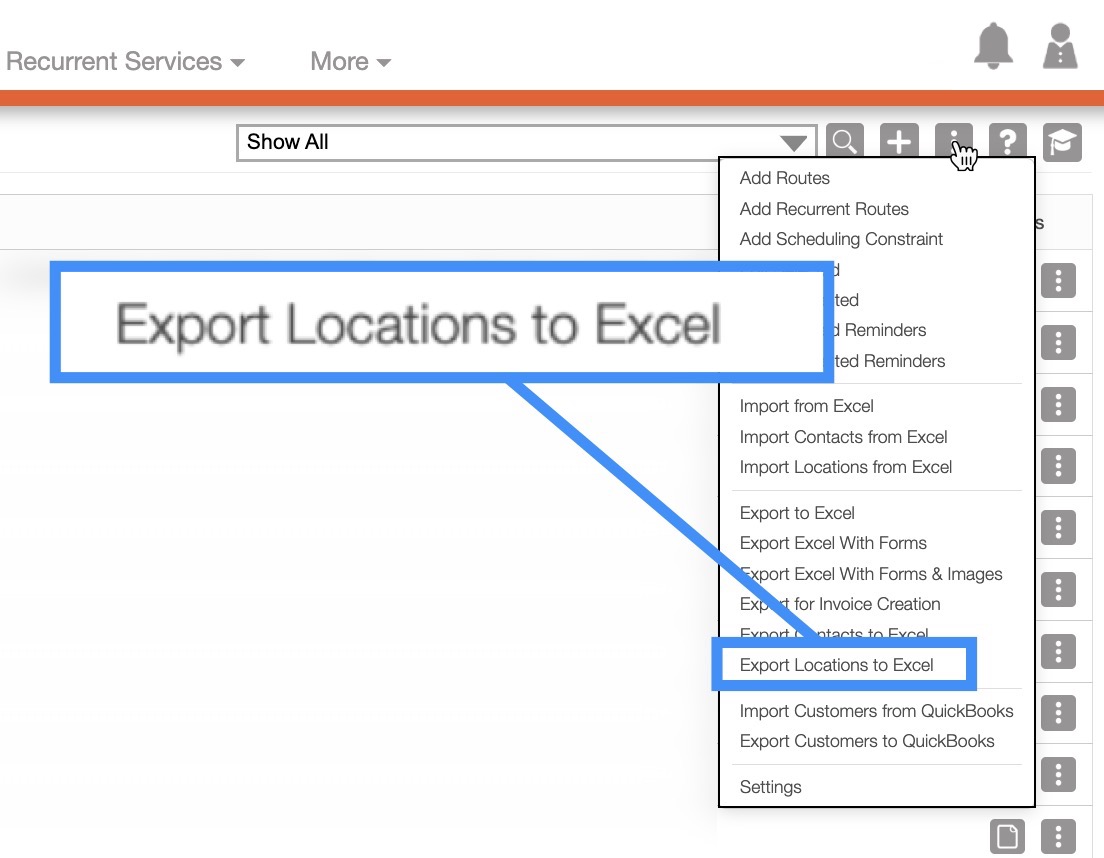
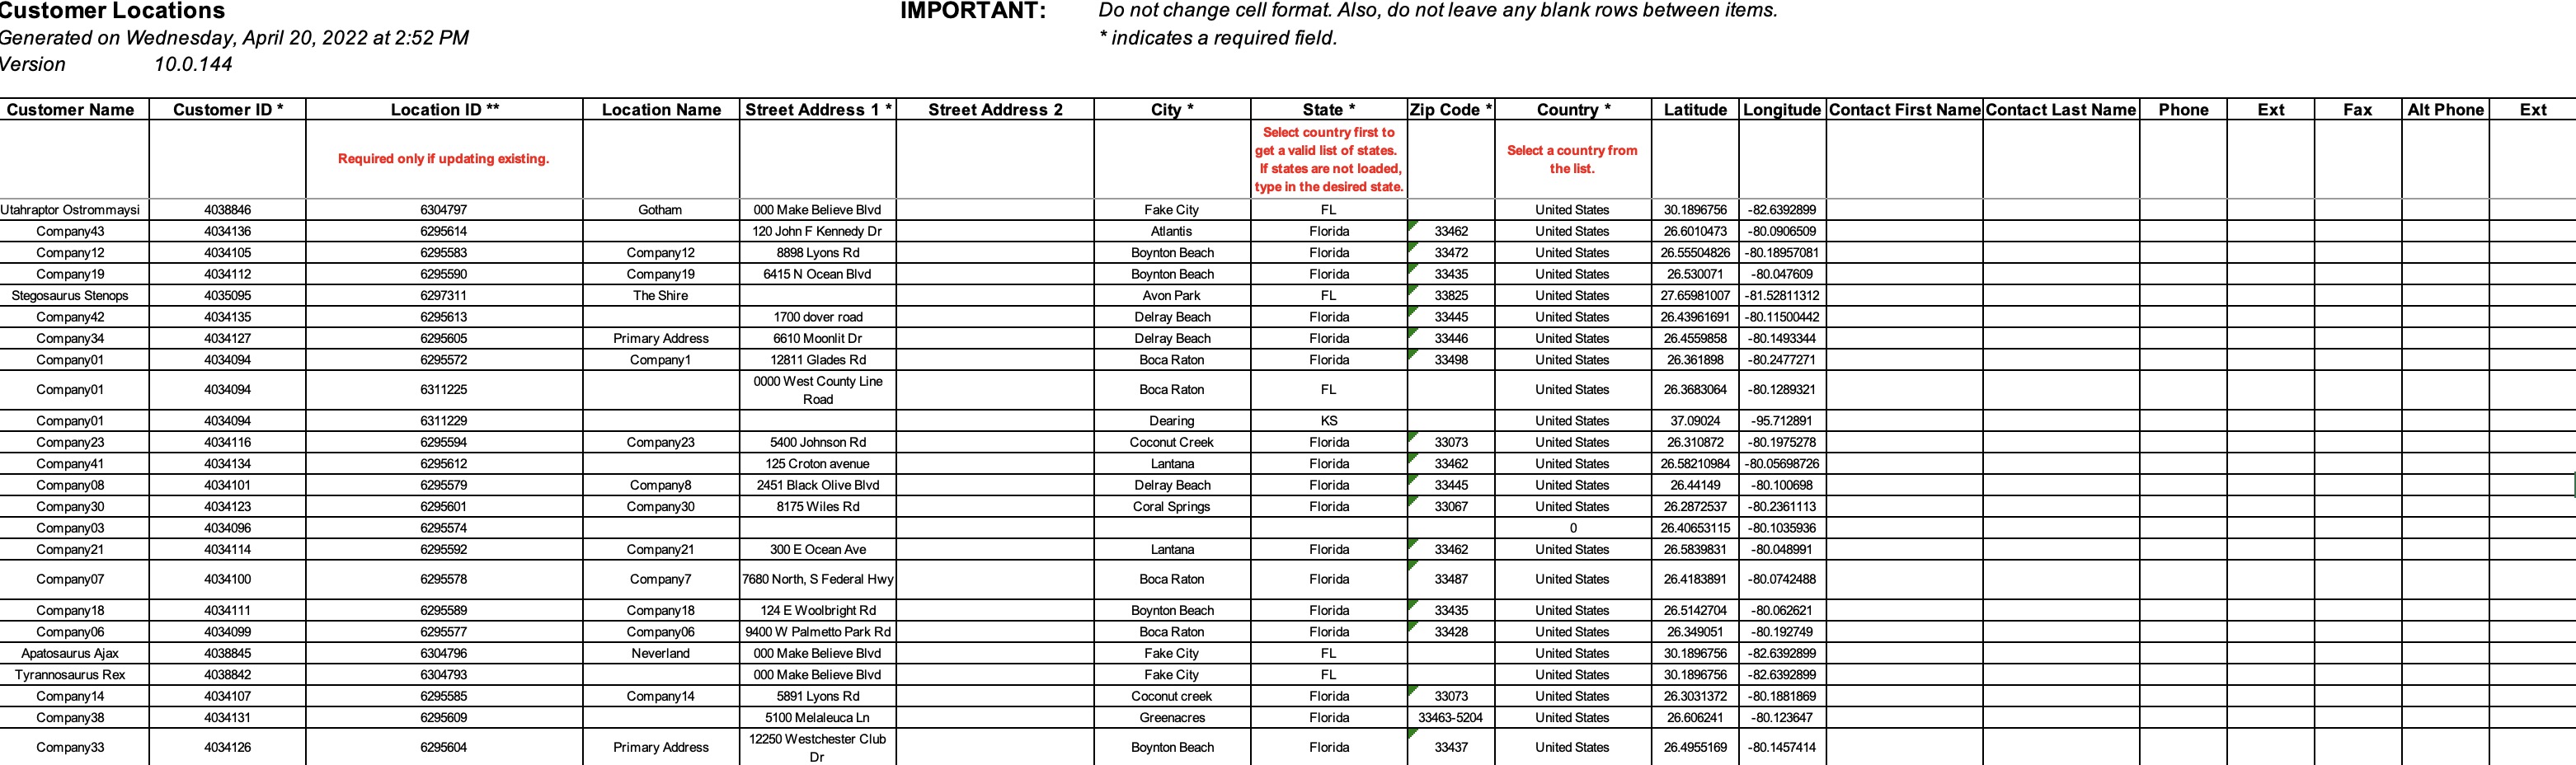
Export Locations to Excel
To export this file from the Customers feature page:
Select the customers that you would like to export to Excel:
- Please note that if you would like to export all your customers into Excel you can click on the topmost checkbox (Multiple Selection Area) located in the Customers feature page. Likewise, if you do not select any customers ALL records will be exported:
- Click on the More Actions button and from the drop-down menu select the "Export Locations to Excel" option:
- The Excel file will automatically download, and you will be able to locate it in your computer's Download folder.
By selecting the "Export Locations to Excel" option, you will only be exporting the locations, addresses, location names, etc. of your customer and prospect contacts:
To export your customers into QuickBooks, you will need to click on the More Actions button and from the drop-down menu select the "Export Customers into QuickBooks" option:

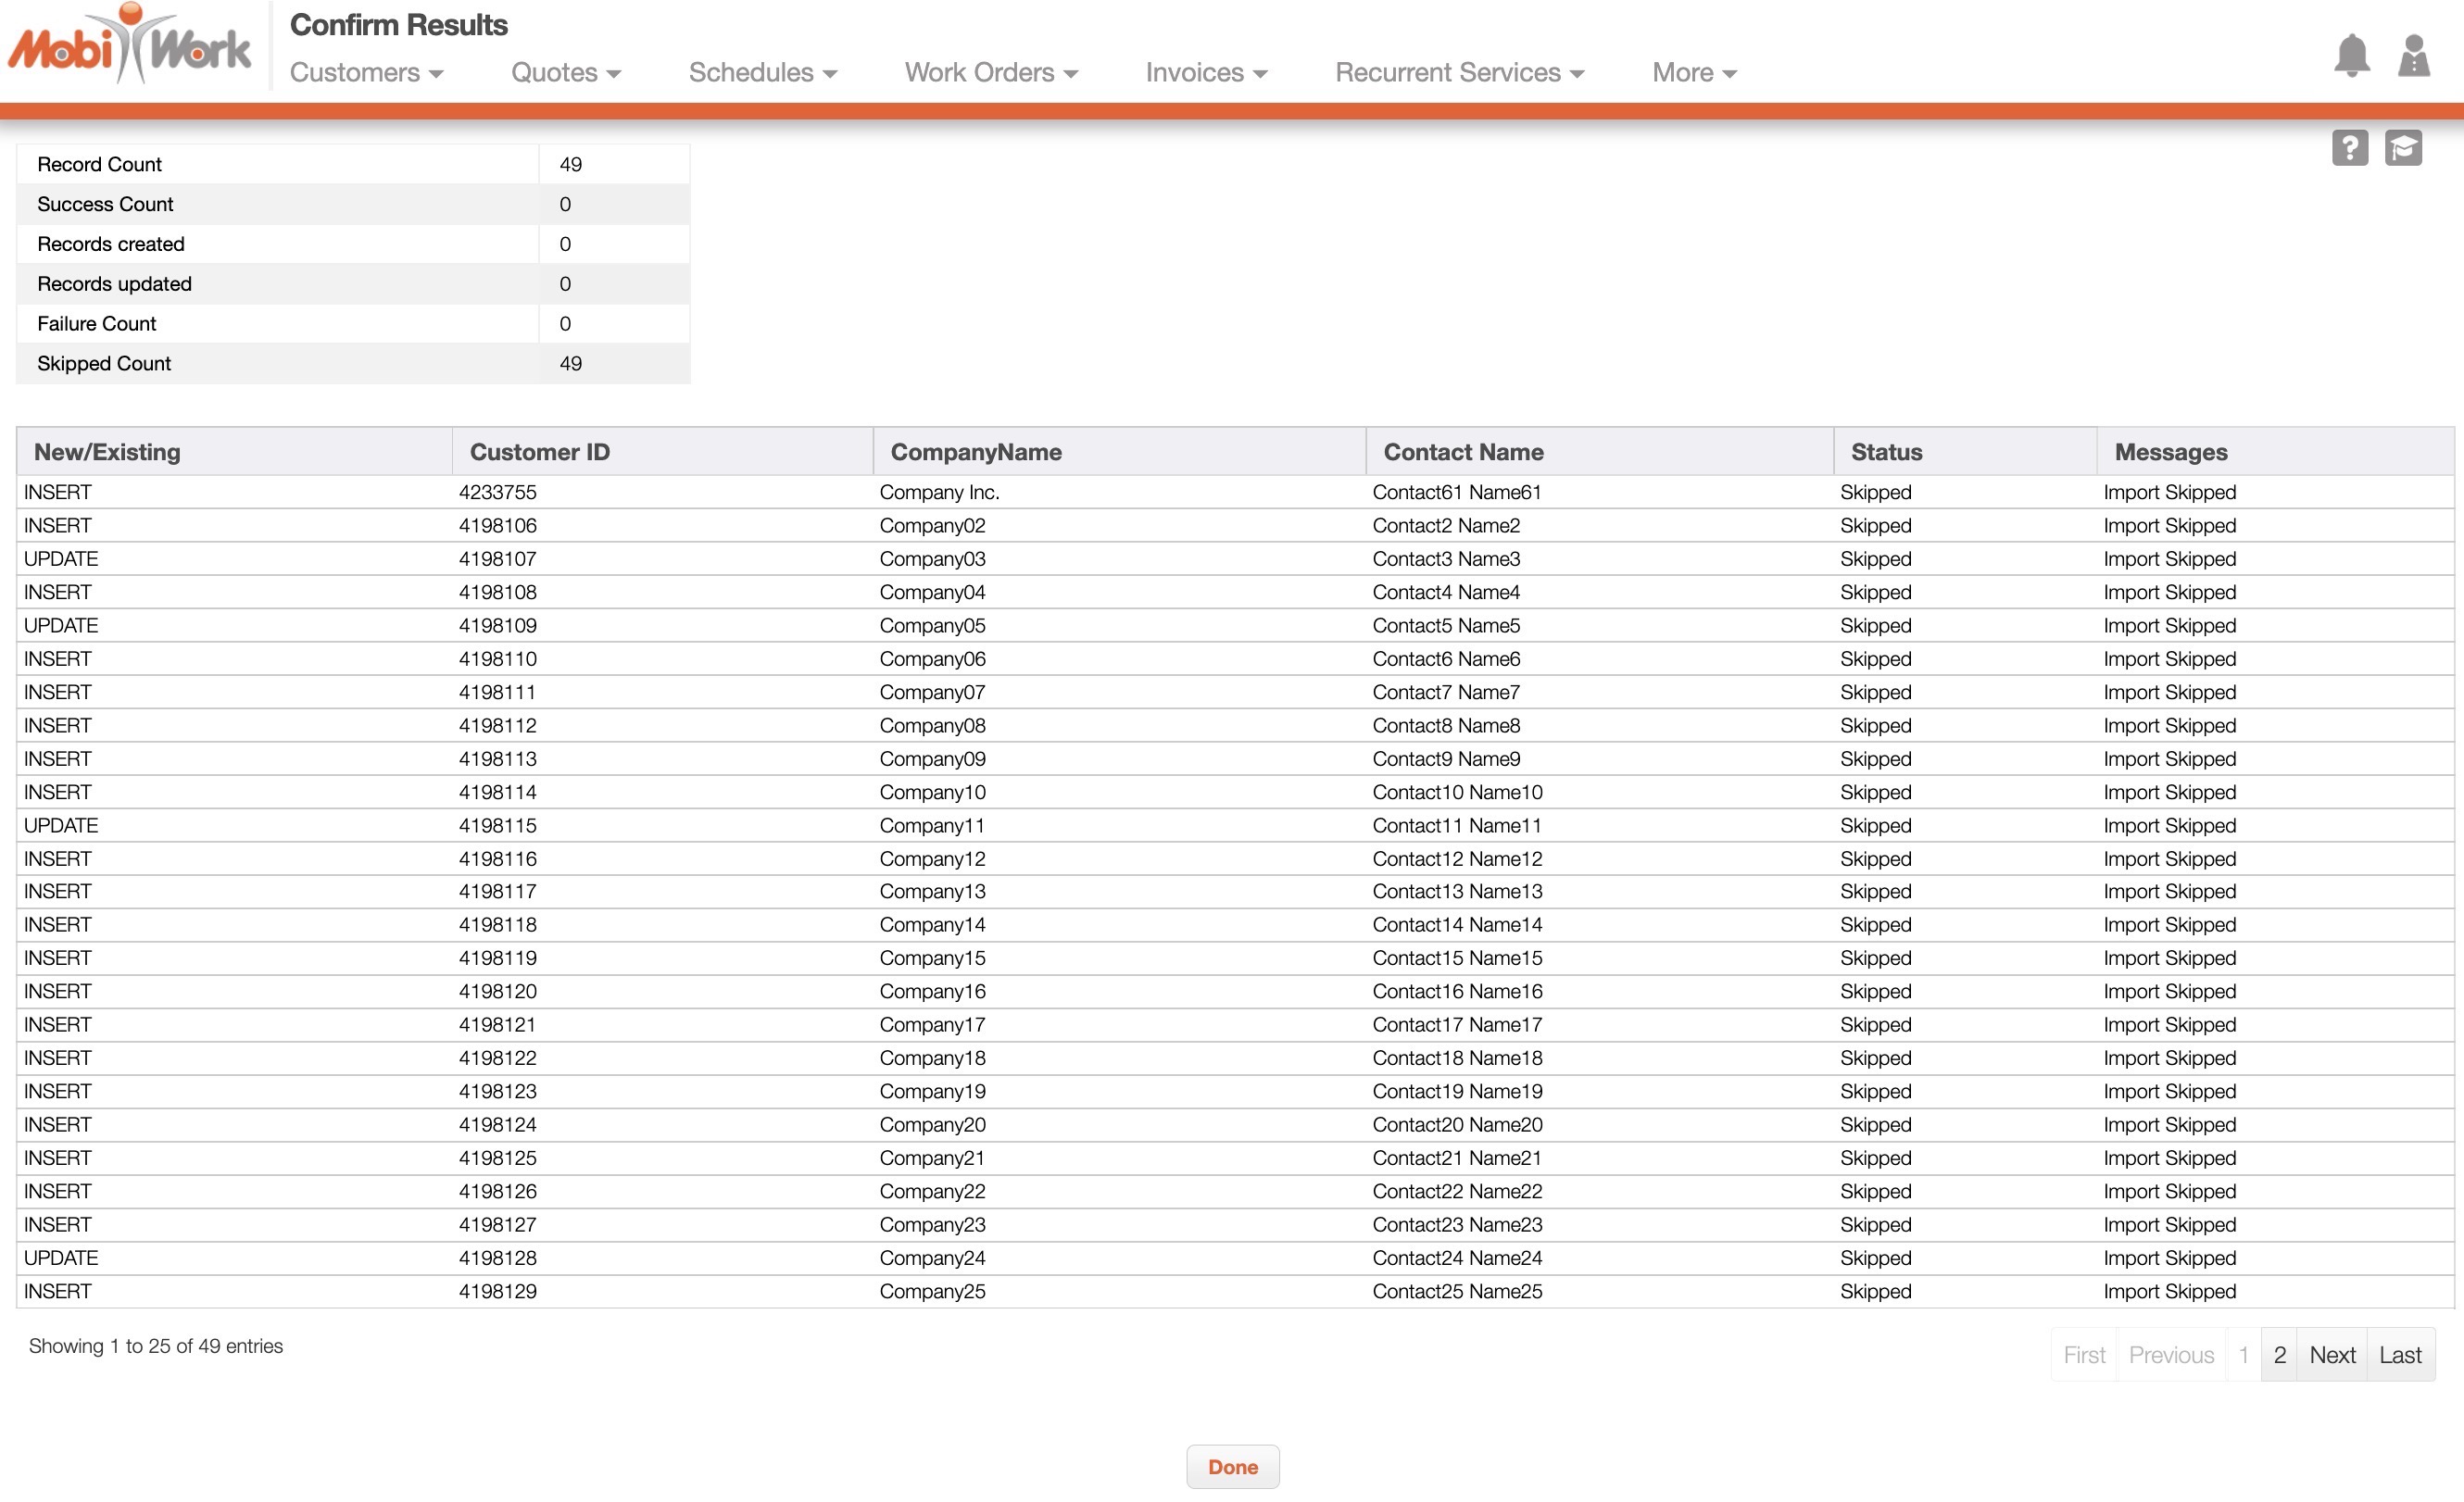
You will then be brought to the Confirmation page; on this page click the Submit button to confirm the export of your customers to QuickBooks:
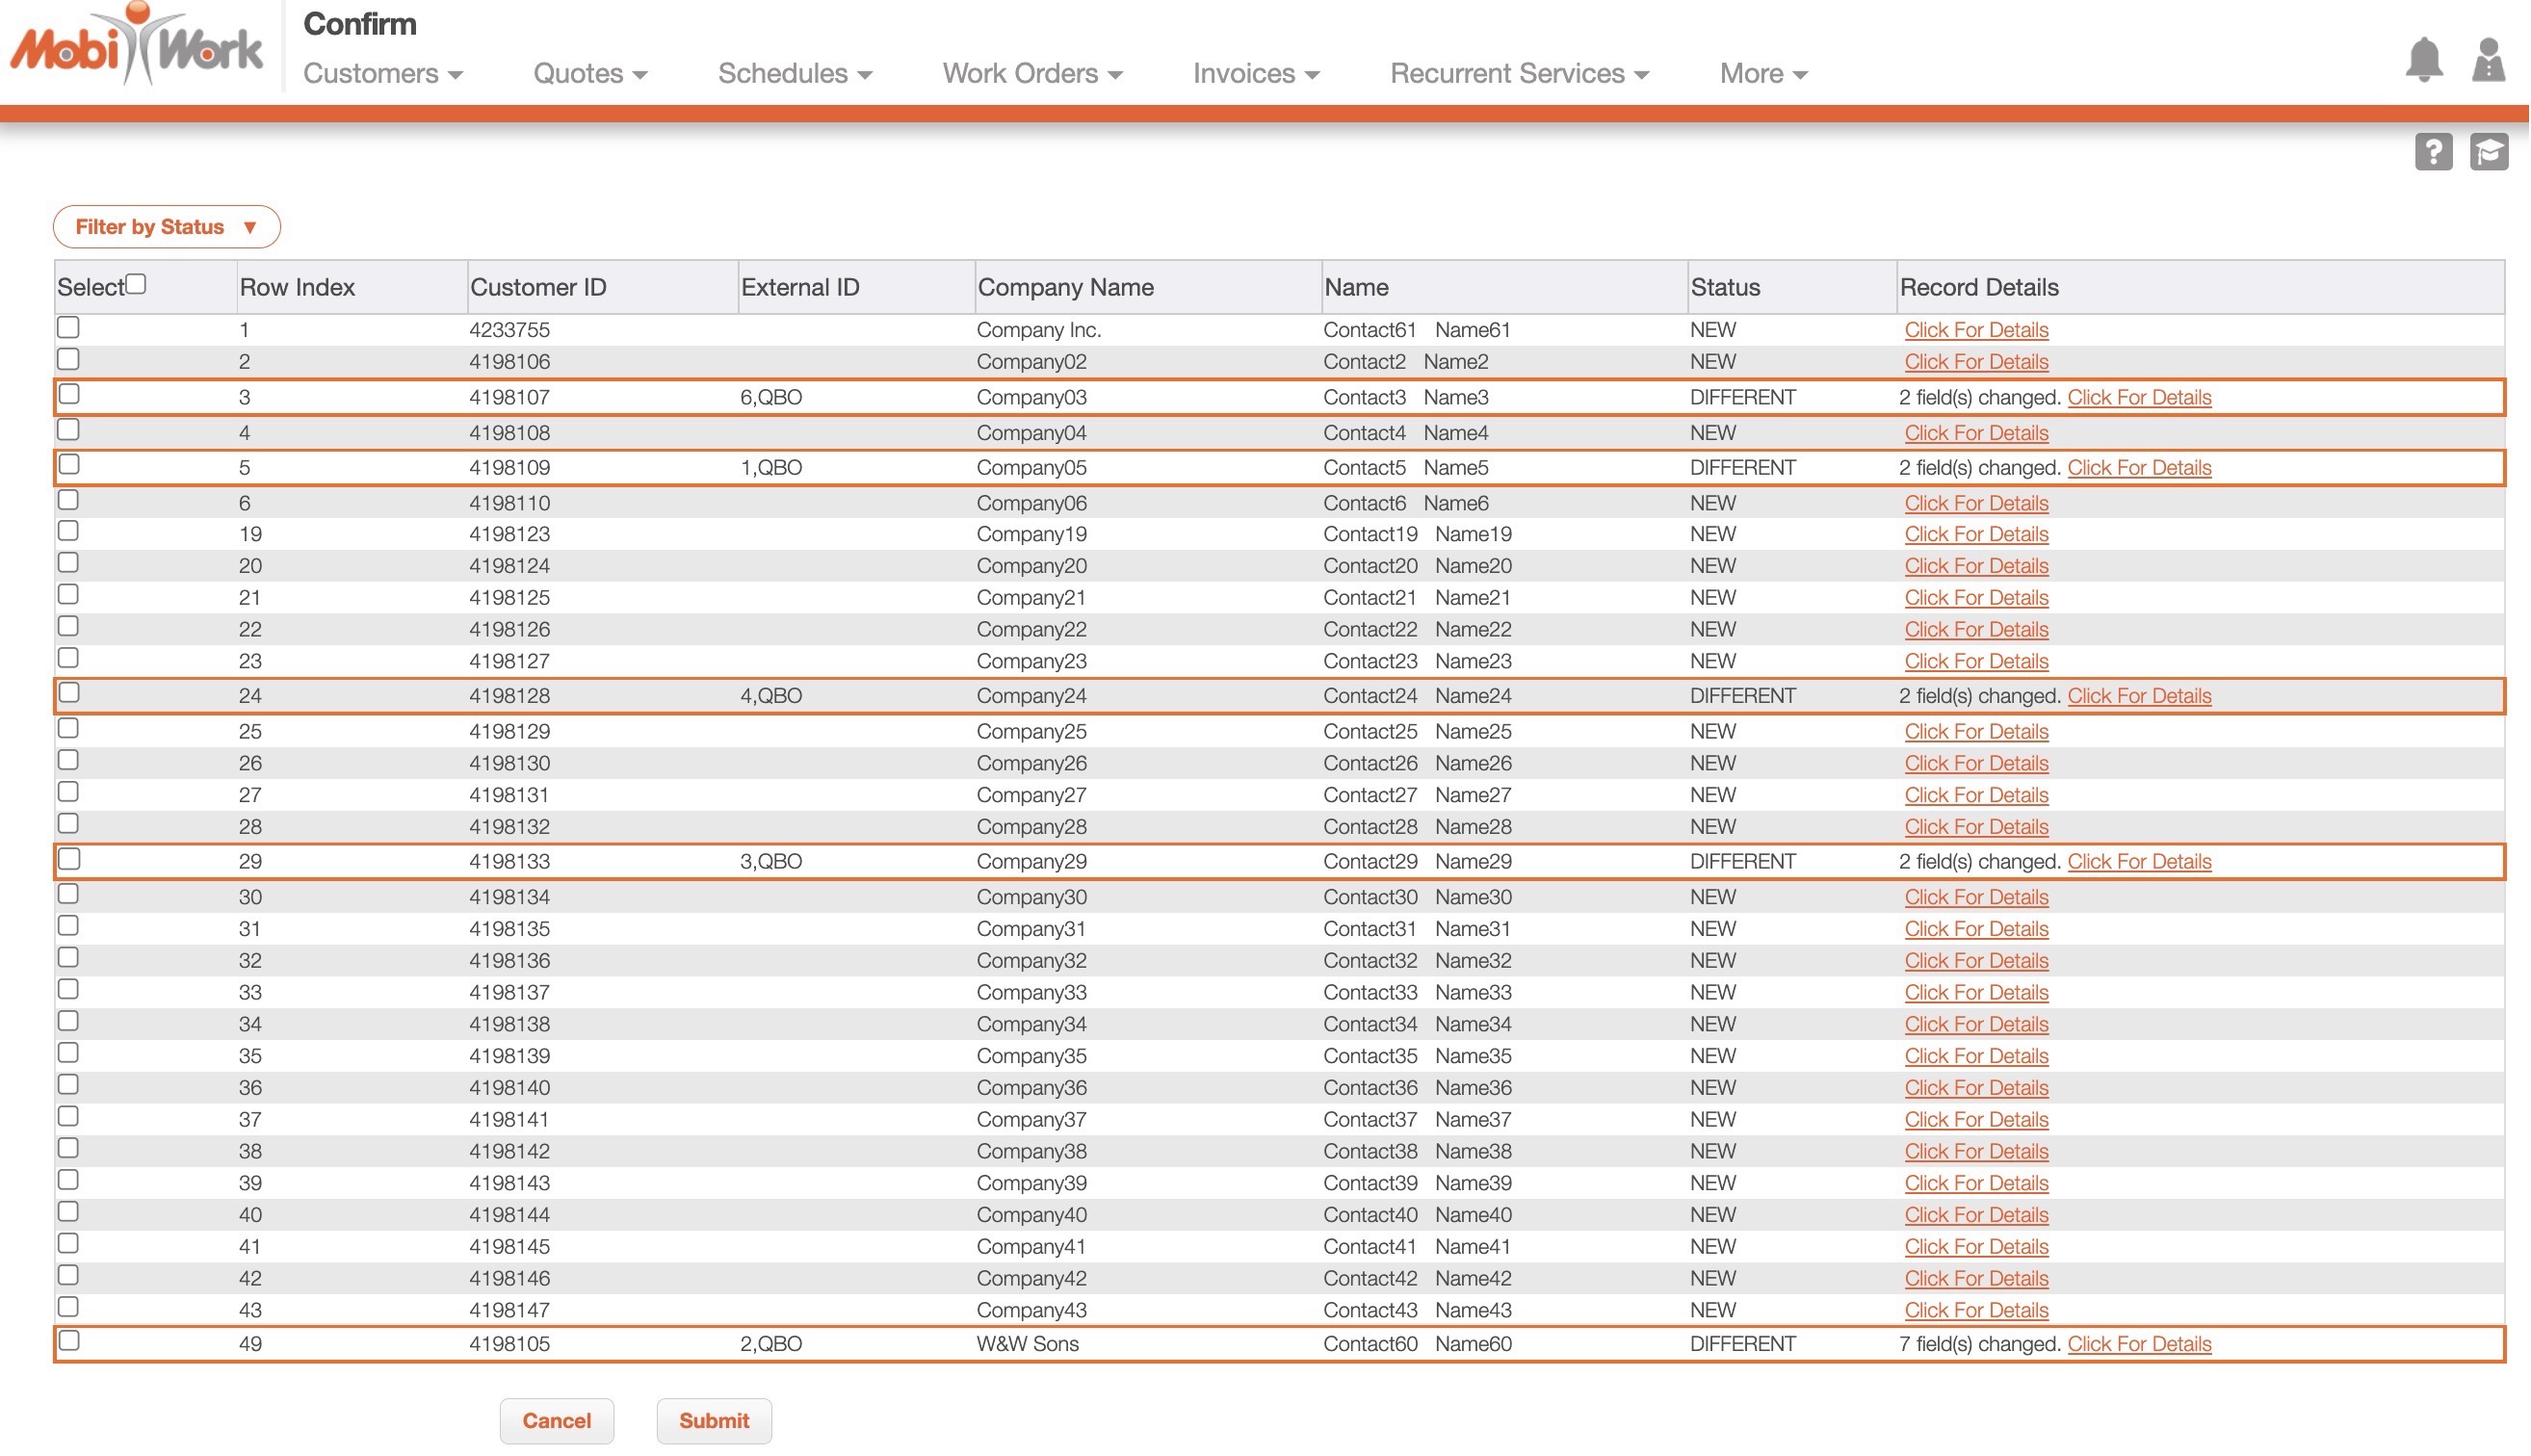
You will then be redirected to the Confirm Results page; click the Done button to finalize your export:
Before exporting your customers into QuickBooks Desktop, please make sure that you have a QuickBooks connector installed into your MobiWork Account. Please see the Connectors Framework: QuickBooks Desktop Web Connector for more information on how to use QuickBooks Desktop with MobiWork.
The following subsections will highlight how to export multiple customers or an individual customer into QuickBooks Desktop, as well as how to pause a customer from exporting to QuickBooks.
Export Multiple Customers to QuickBooks Desktop
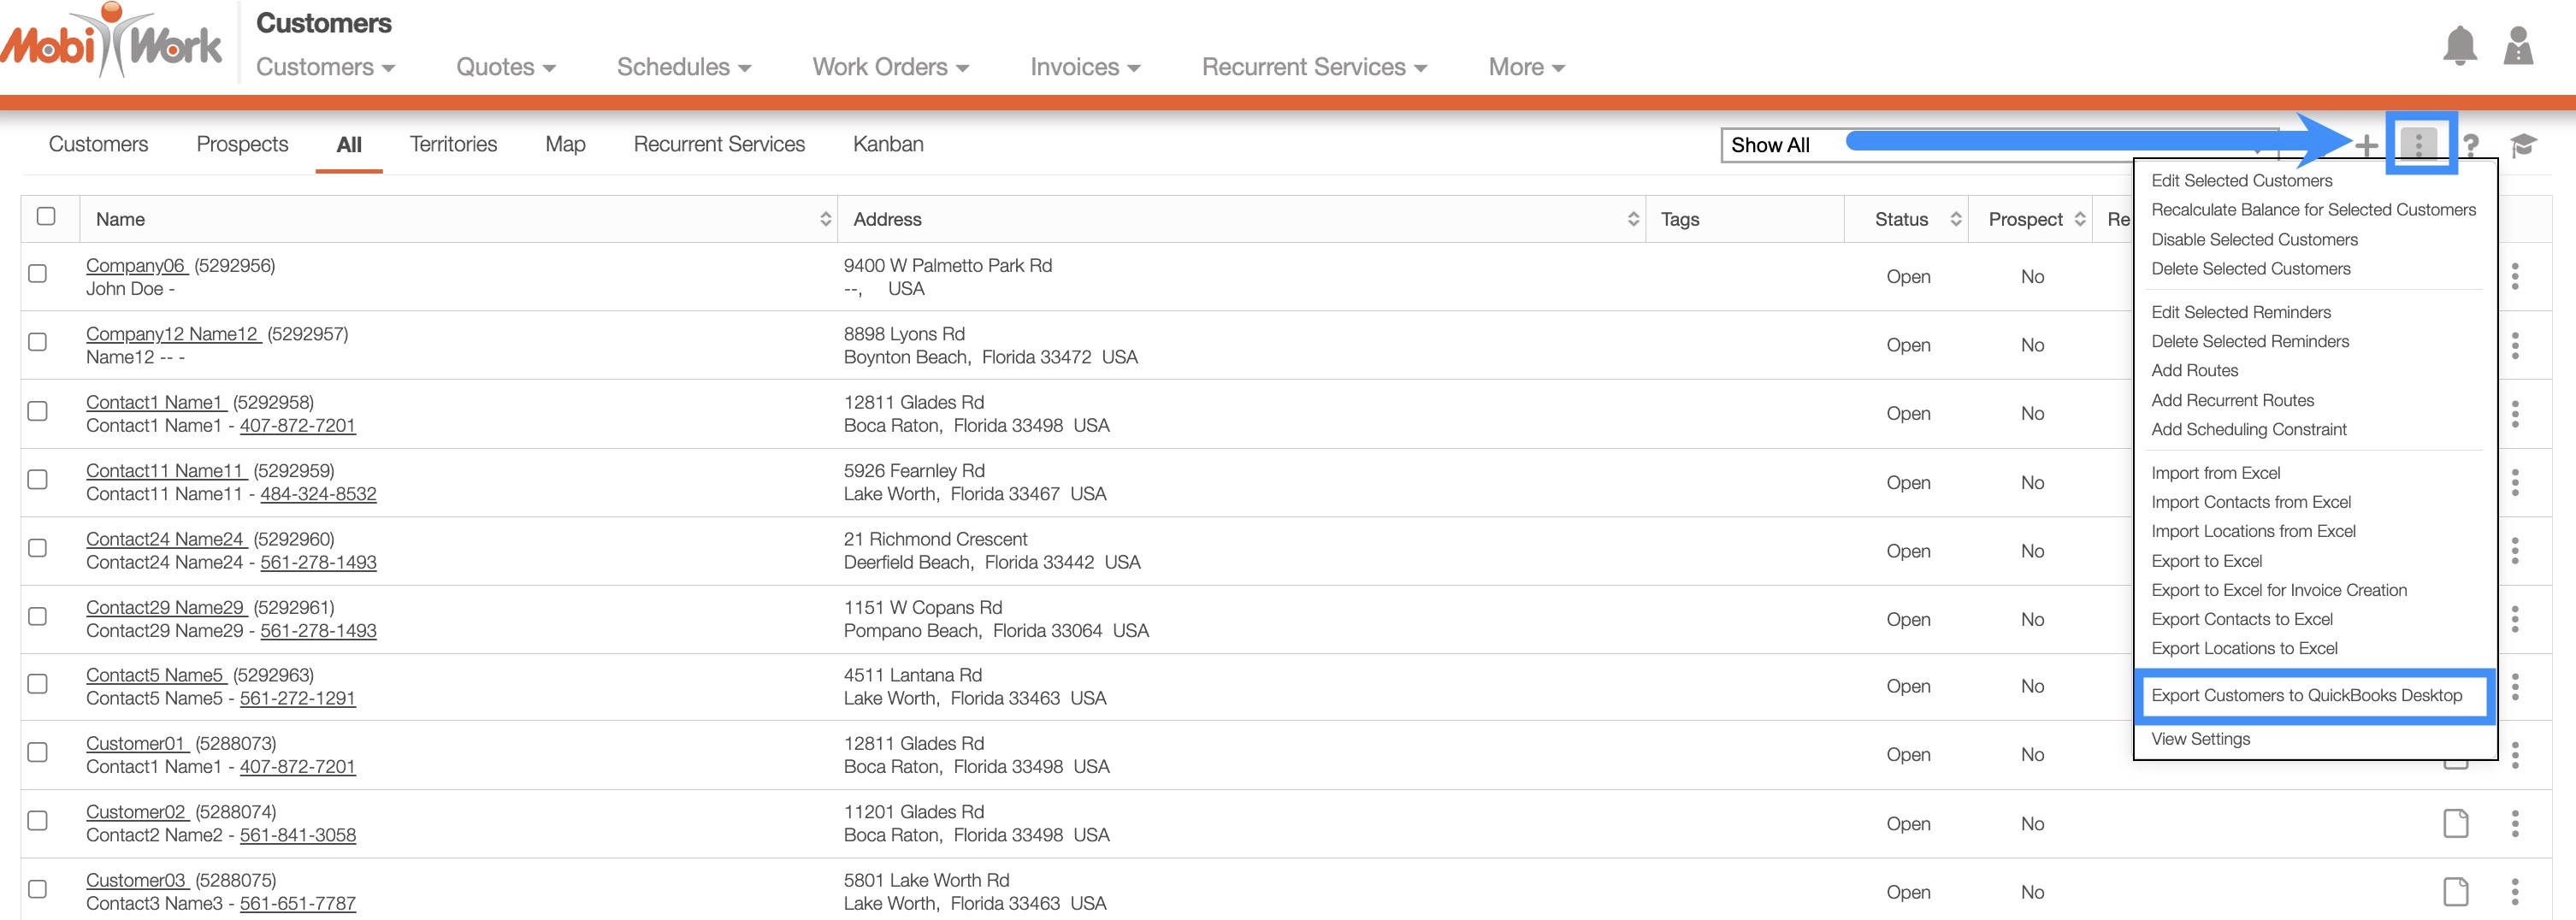
To export multiple customers to QuickBooks, select the customers you would like to export; please note that if you would like to export all your customers into QuickBooks Desktop you can click on the topmost checkbox (Multiple Selection Area) located in the "List" column:
From the More Actions button, select the "Export Customers to QuickBooks Desktop" option:
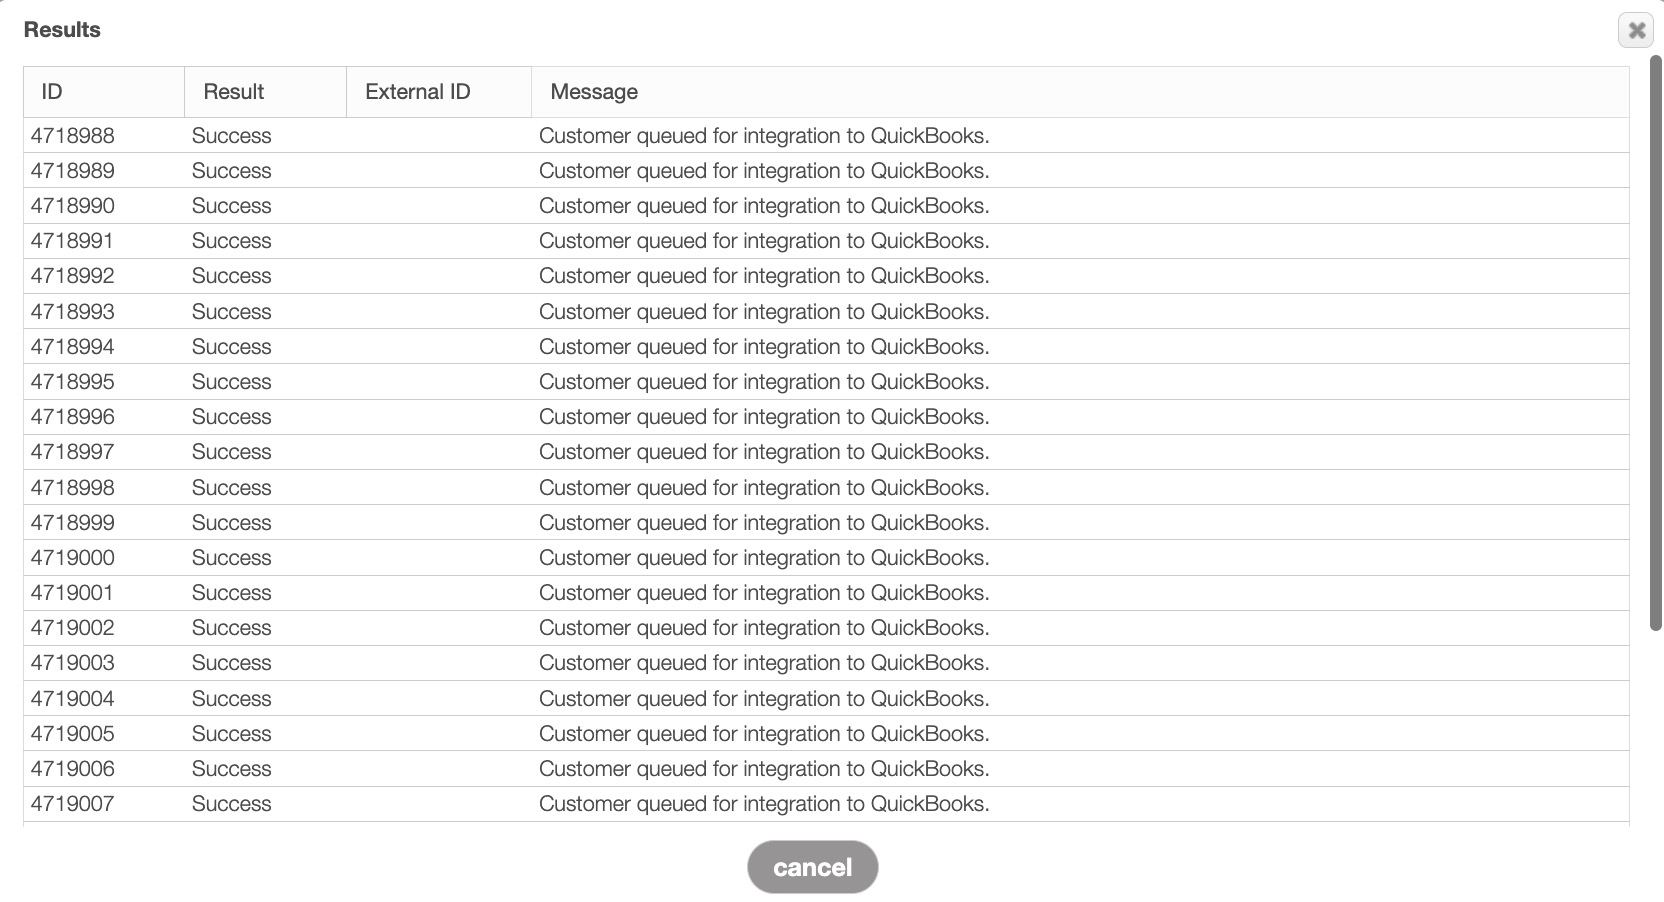
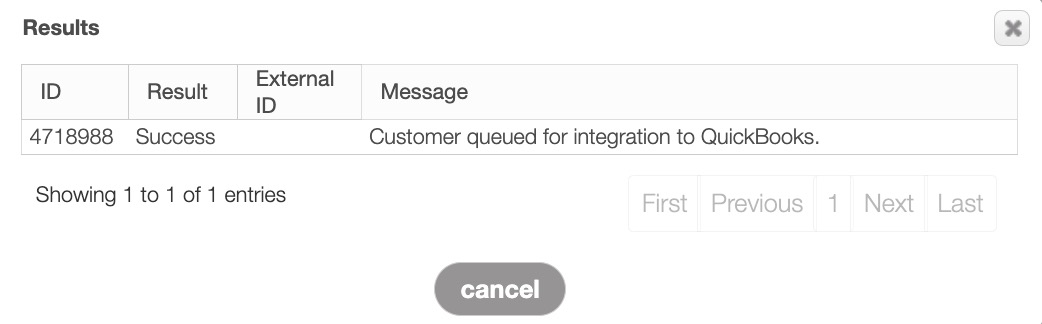
The selected customers will then be registered to be exported to QuickBooks Desktop upon the next sync. You will receive a pop-up window confirming the listed customers are registered for syncing:
Export a Customer to QuickBooks Desktop
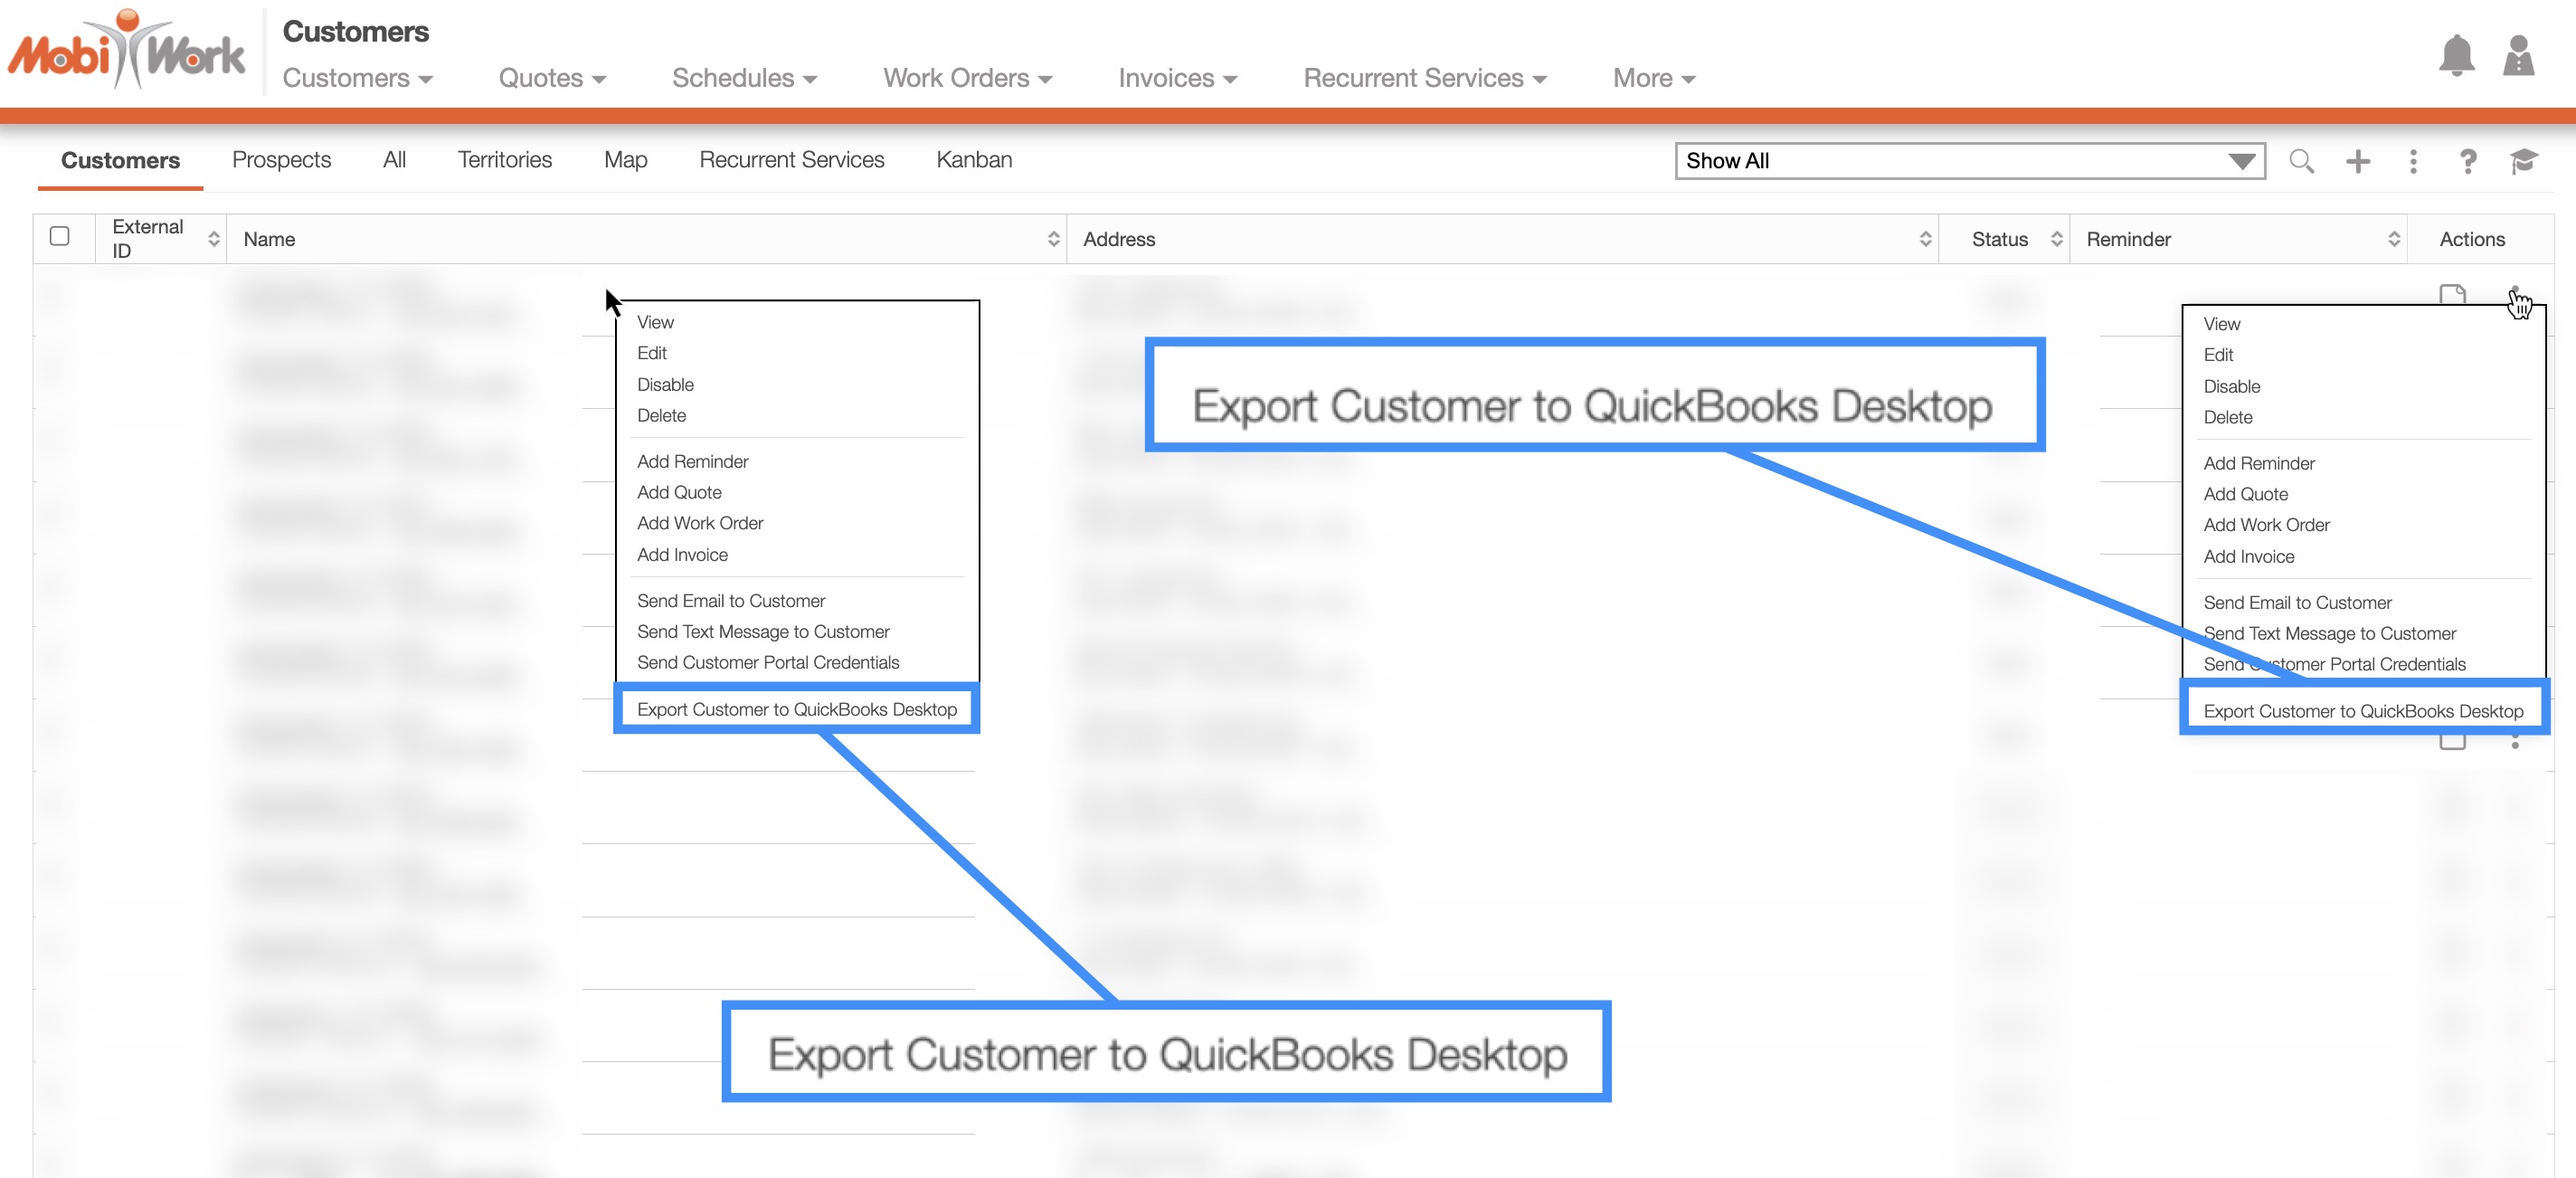
To export an individual customer to QuickBooks, you can select the "Export Customer to QuickBooks Desktop" option from the right-click options or the Individual Actions button:
The selected customer will then be registered to be exported to QuickBooks Desktop upon the next sync. You will receive a pop-up window confirming the listed customer is registered for syncing:
Pause QuickBooks Integration
If you change your mind about syncing a customer, you can pause the integration by selecting the "Do Not Export Customer to QuickBooks Desktop" option from the right-click options or the Individual Actions button:
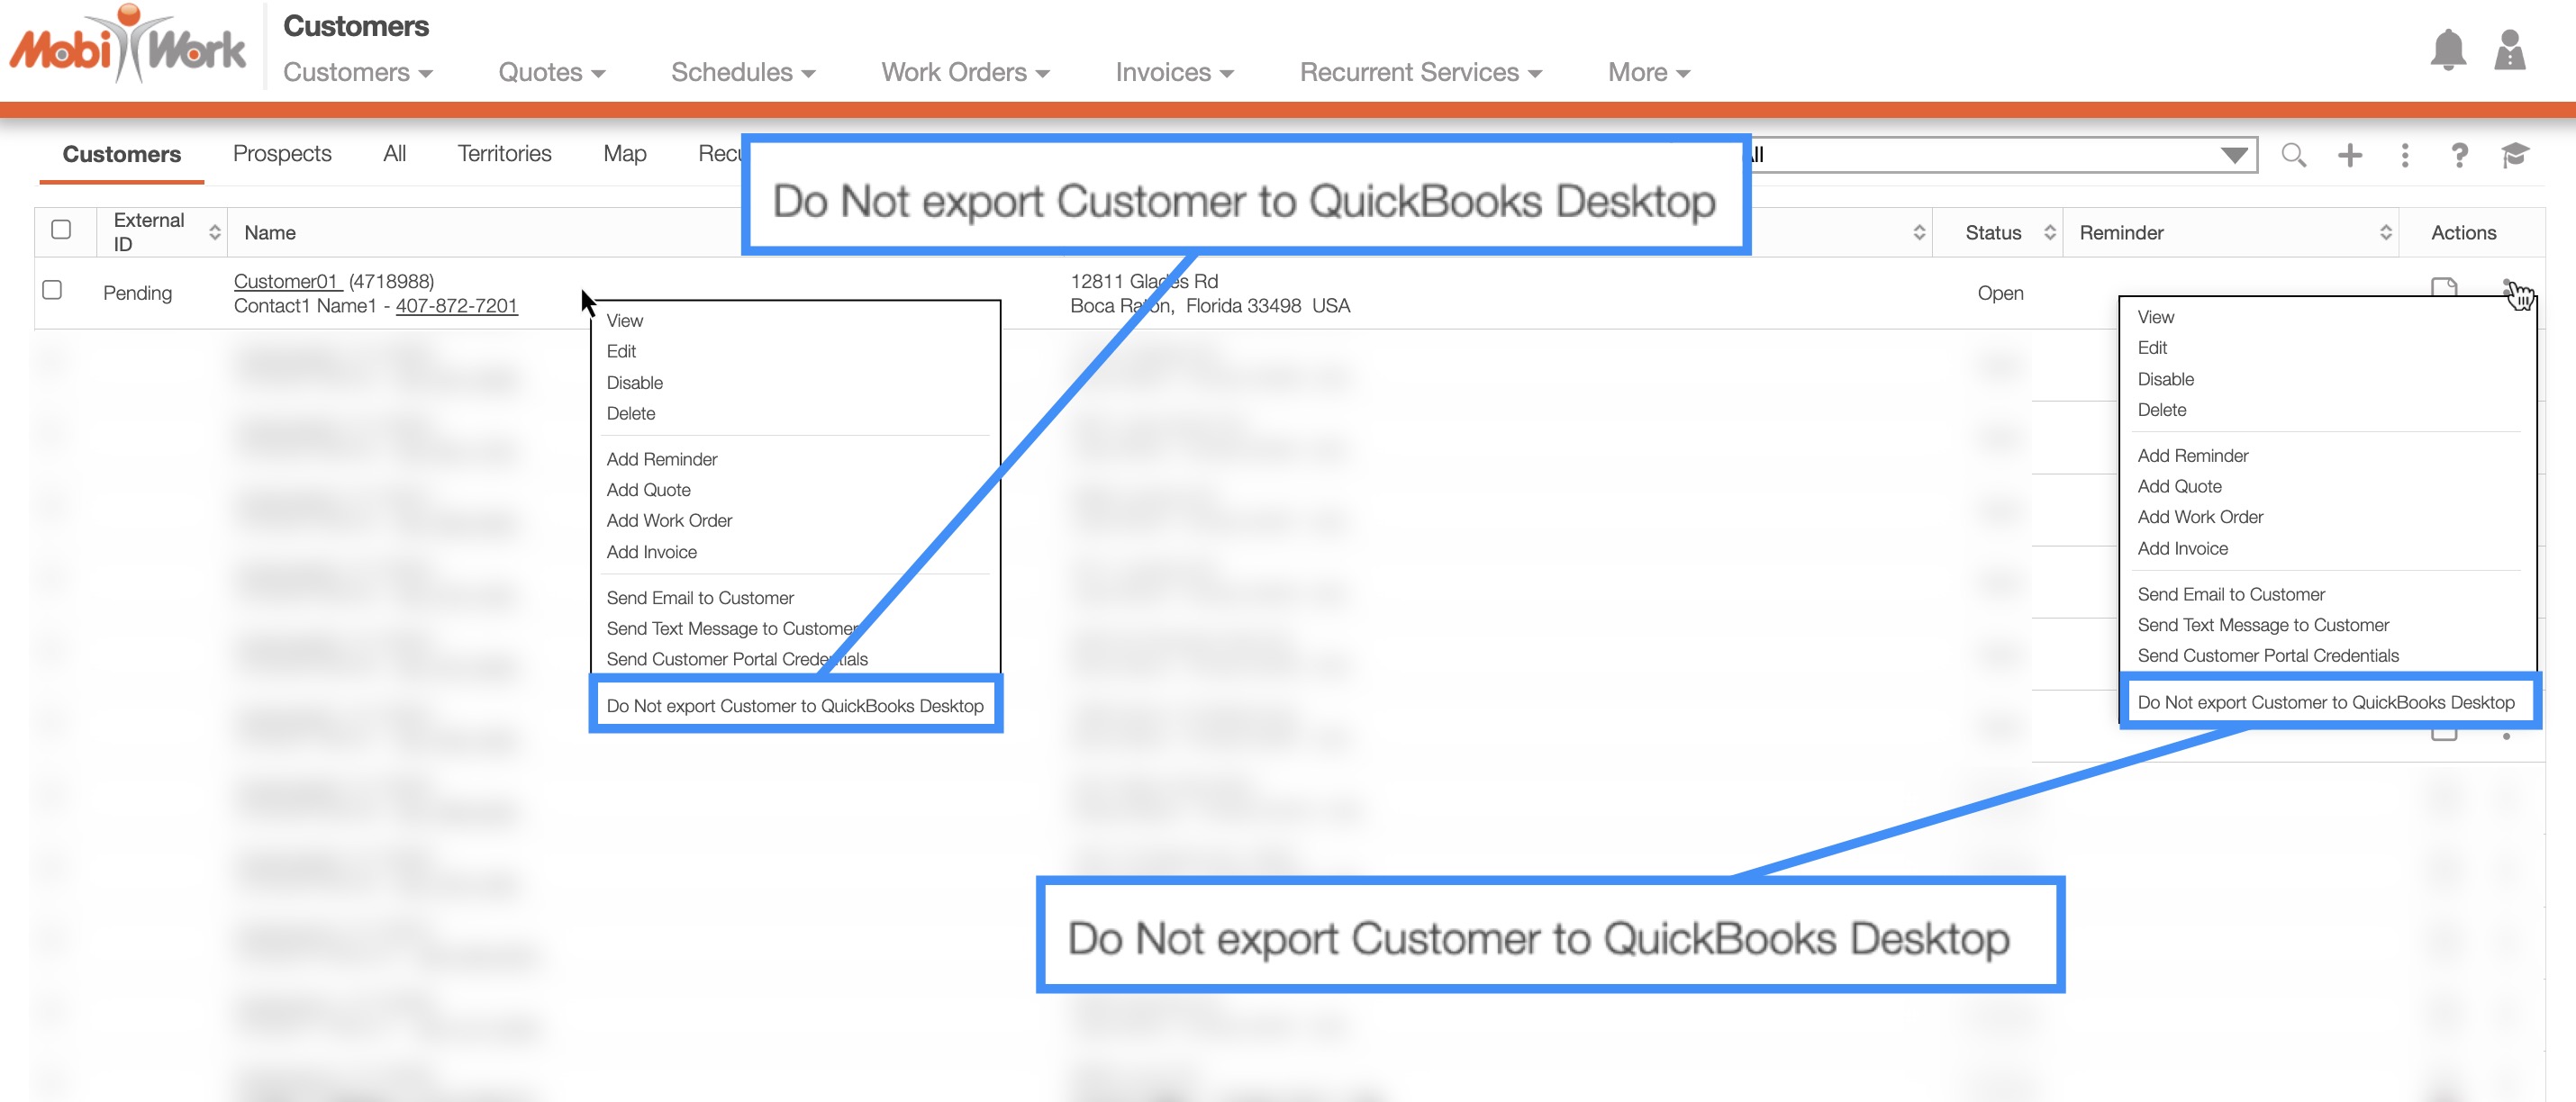
The selected customer will then not be exported to QuickBooks Desktop. You will receive a pop-up window confirming the listed customer will no longer sync to QuickBooks:
