- Overview
- Account Settings
- Assets
- Connectors Framework
- Overview
- QuickBooks Online
- QuickBooks Desktop Web Connector
- Azure AD
- Salesforce Integration
- FleetNet Connector
- Avalara Connector
- Inbound REST API
- Outbound REST API
- Mailchimp Connector
- Text Messaging Connector
- Clearent Connector
- Stripe Connector
- HubSpot Connector
- UKG Connector
- Paylocity Connector
- UKG Connector
- Gusto Connector
- iSolved Payroll Connector
- Customer Portal
- Customers
- Dashboards
- Devices
- Dispatching
- Forms
- Inventory
- Invoices & Billing
- Locations
- Payments
- Parts
- Projects
- Quotes
- Recurrent Routes
- Recurrent Services
- Reports
- Sales Orders
- Schedule
- Services
- Tasks
- Text Messaging
- Time Tracking
- Users
- Work Orders
The Customer Settings are predefined for your account; you will not be able to adjust or edit the fields. This section will briefly explain how the Customer Settings interface with the Customers feature.
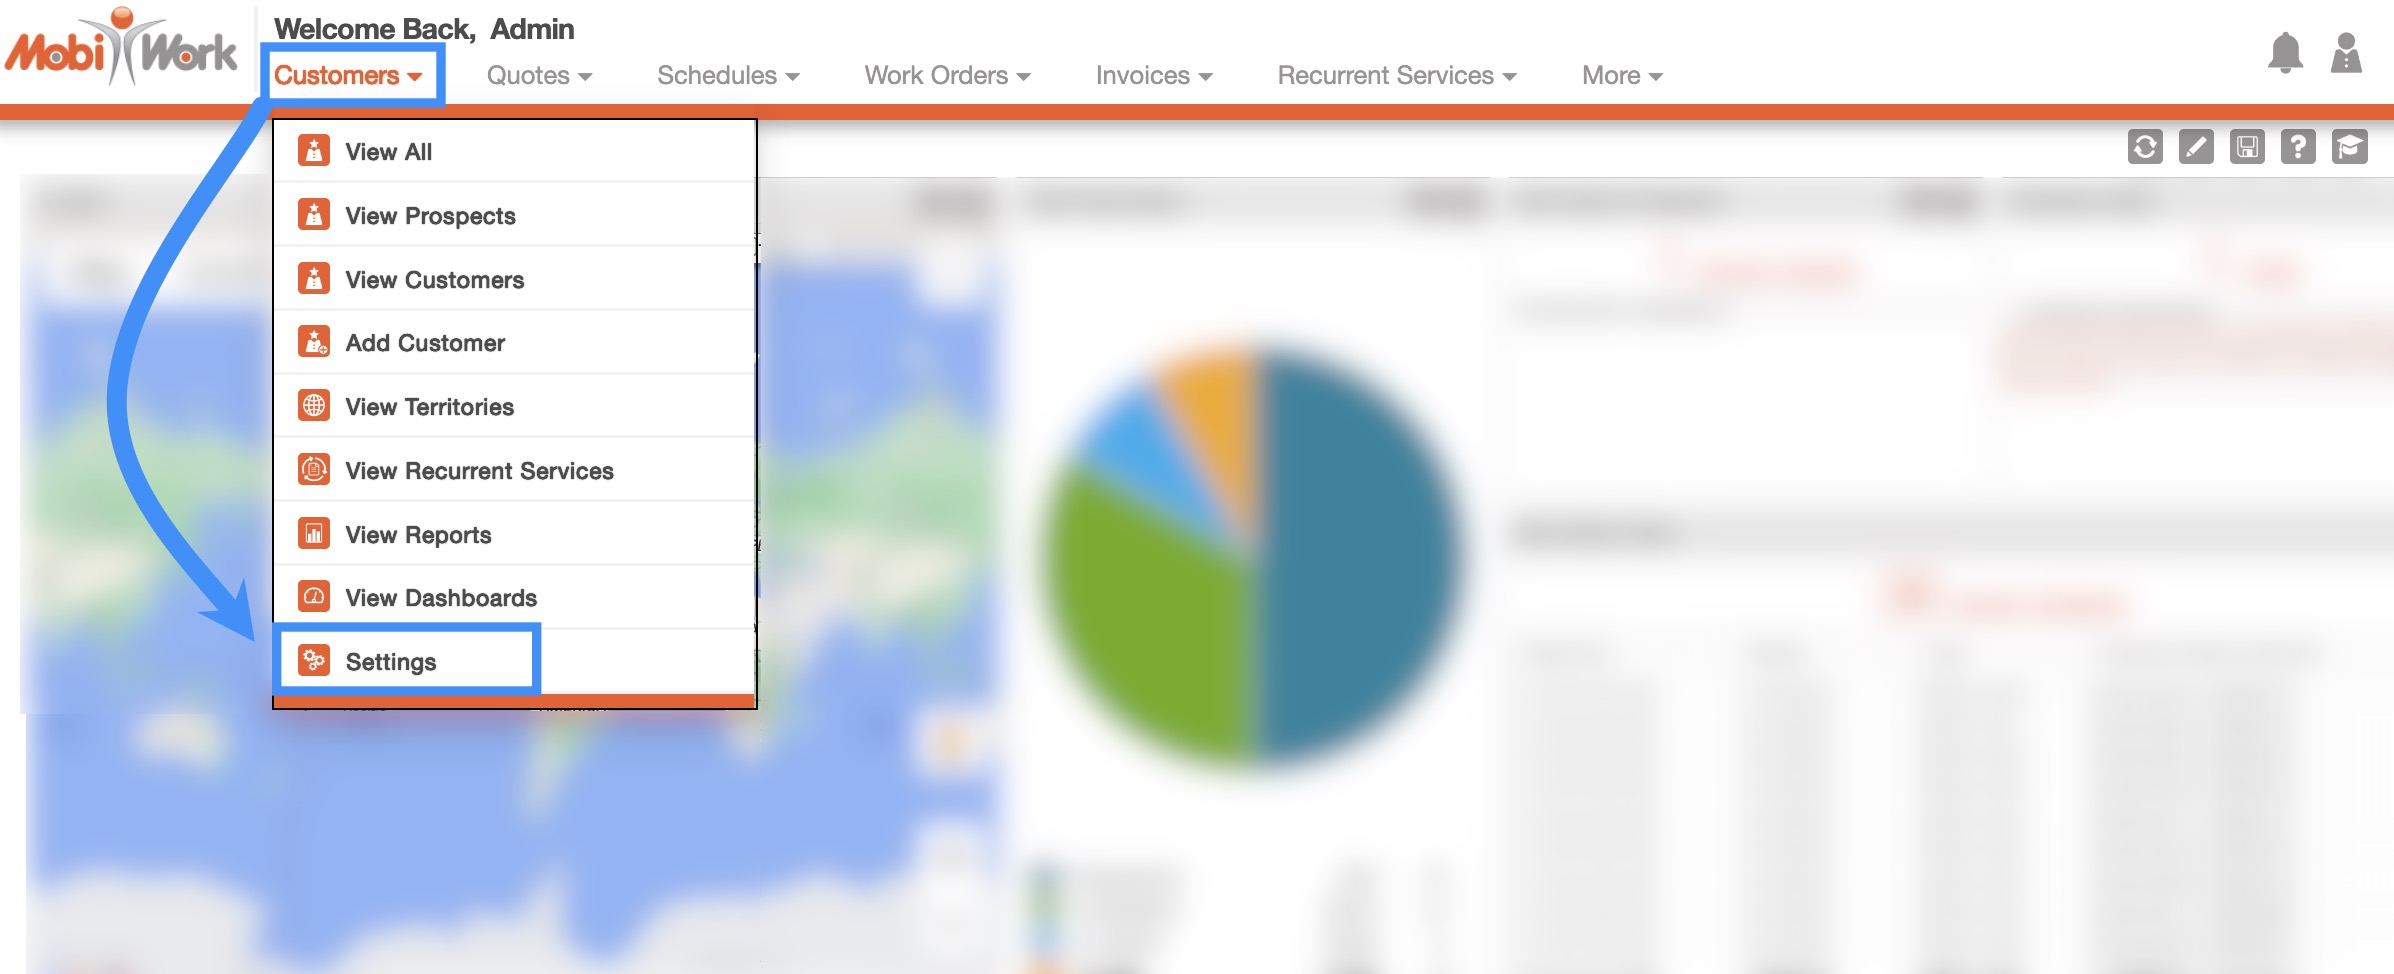
There are several different ways you can access the Customer Settings page:
You can directly access the Customer Settings page by selecting the Customers feature tab and clicking on the "Settings" option:
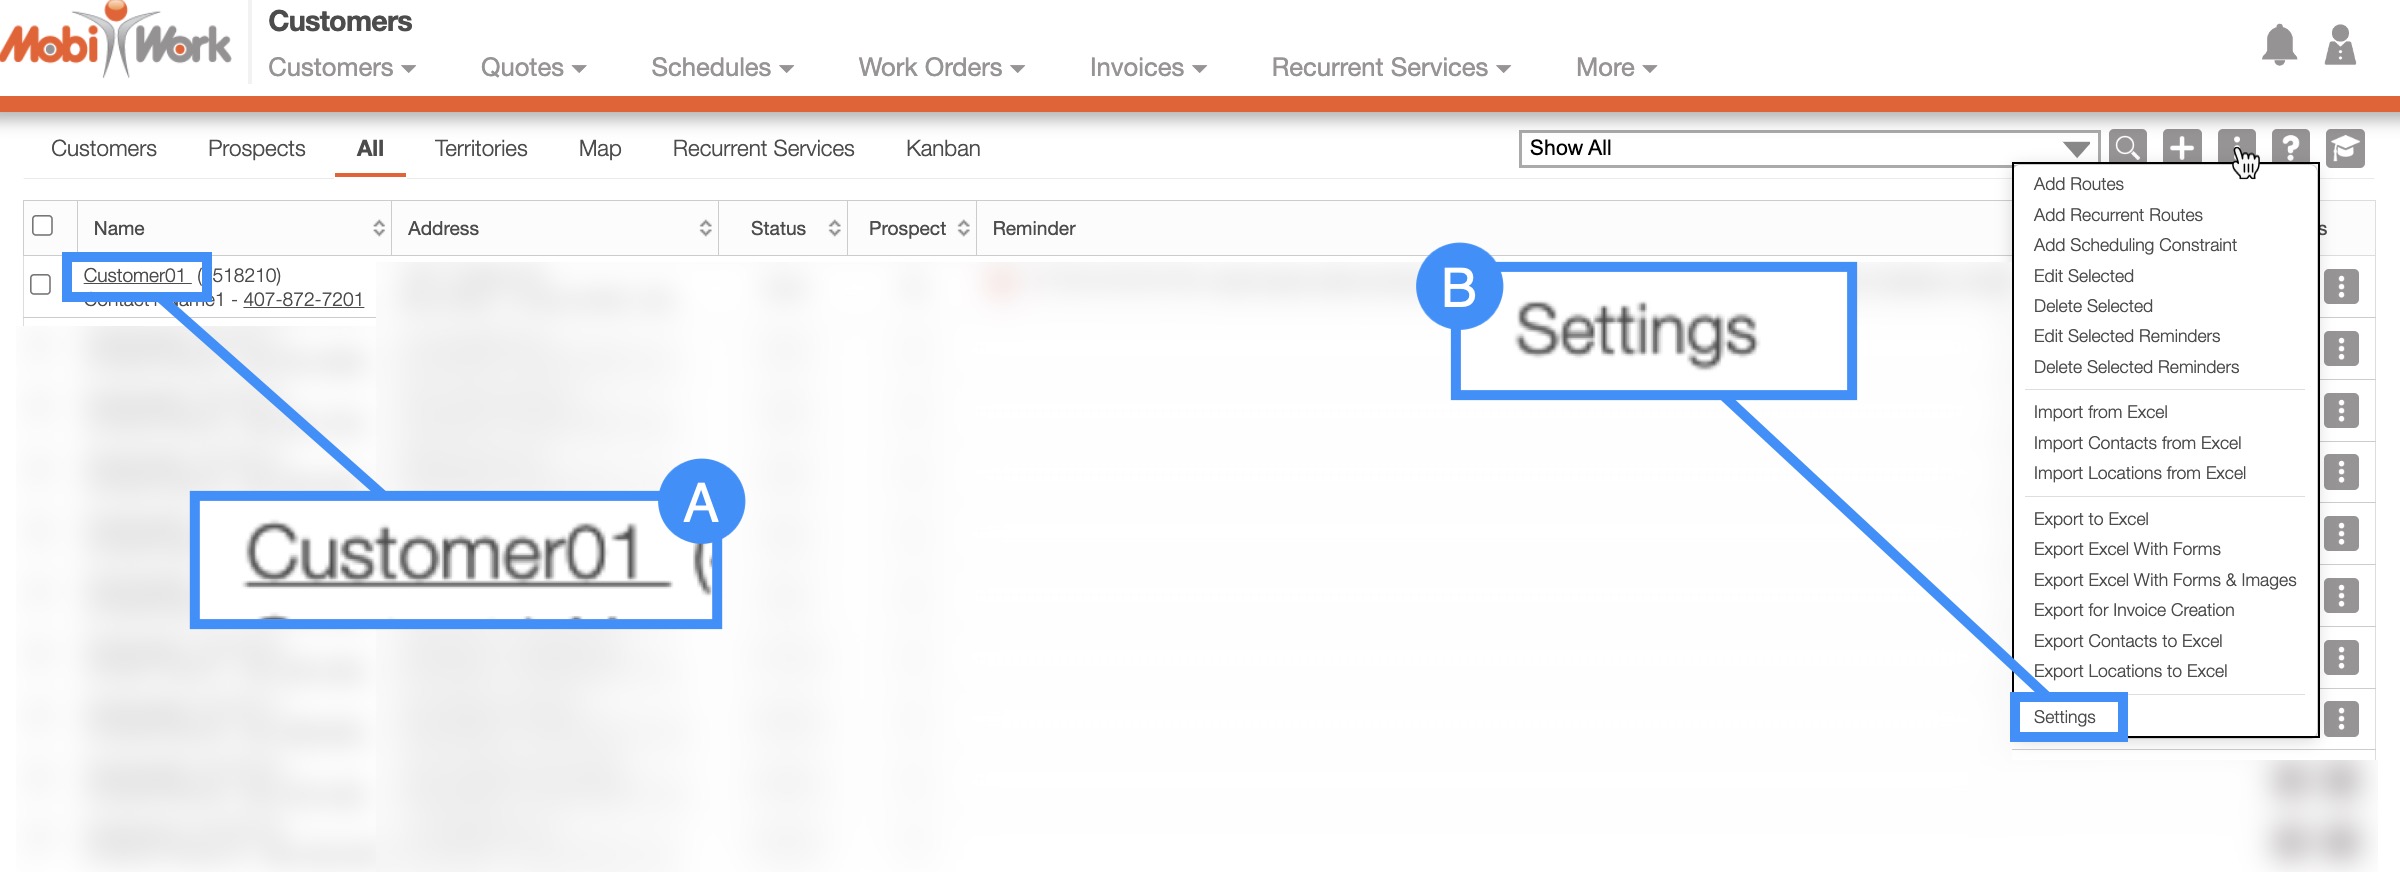
From the Customers feature page there are two different ways you can access the Customer Settings page. For more information on how to access the Customers feature page please see the Customers List section:
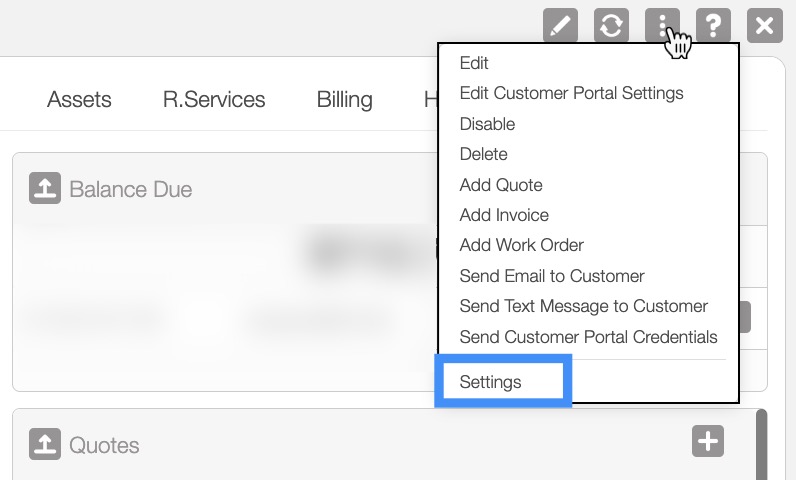
By clicking on the Customer ID and accessing the View Customer pop-up window. From the Individual Actions drop-down select the "Settings" option:
By clicking on the More Actions button located at the top-right of your Customers feature page and from the drop-down select the "Settings" option.
Once you are on the Customer Settings Page there will be a number of different sections:
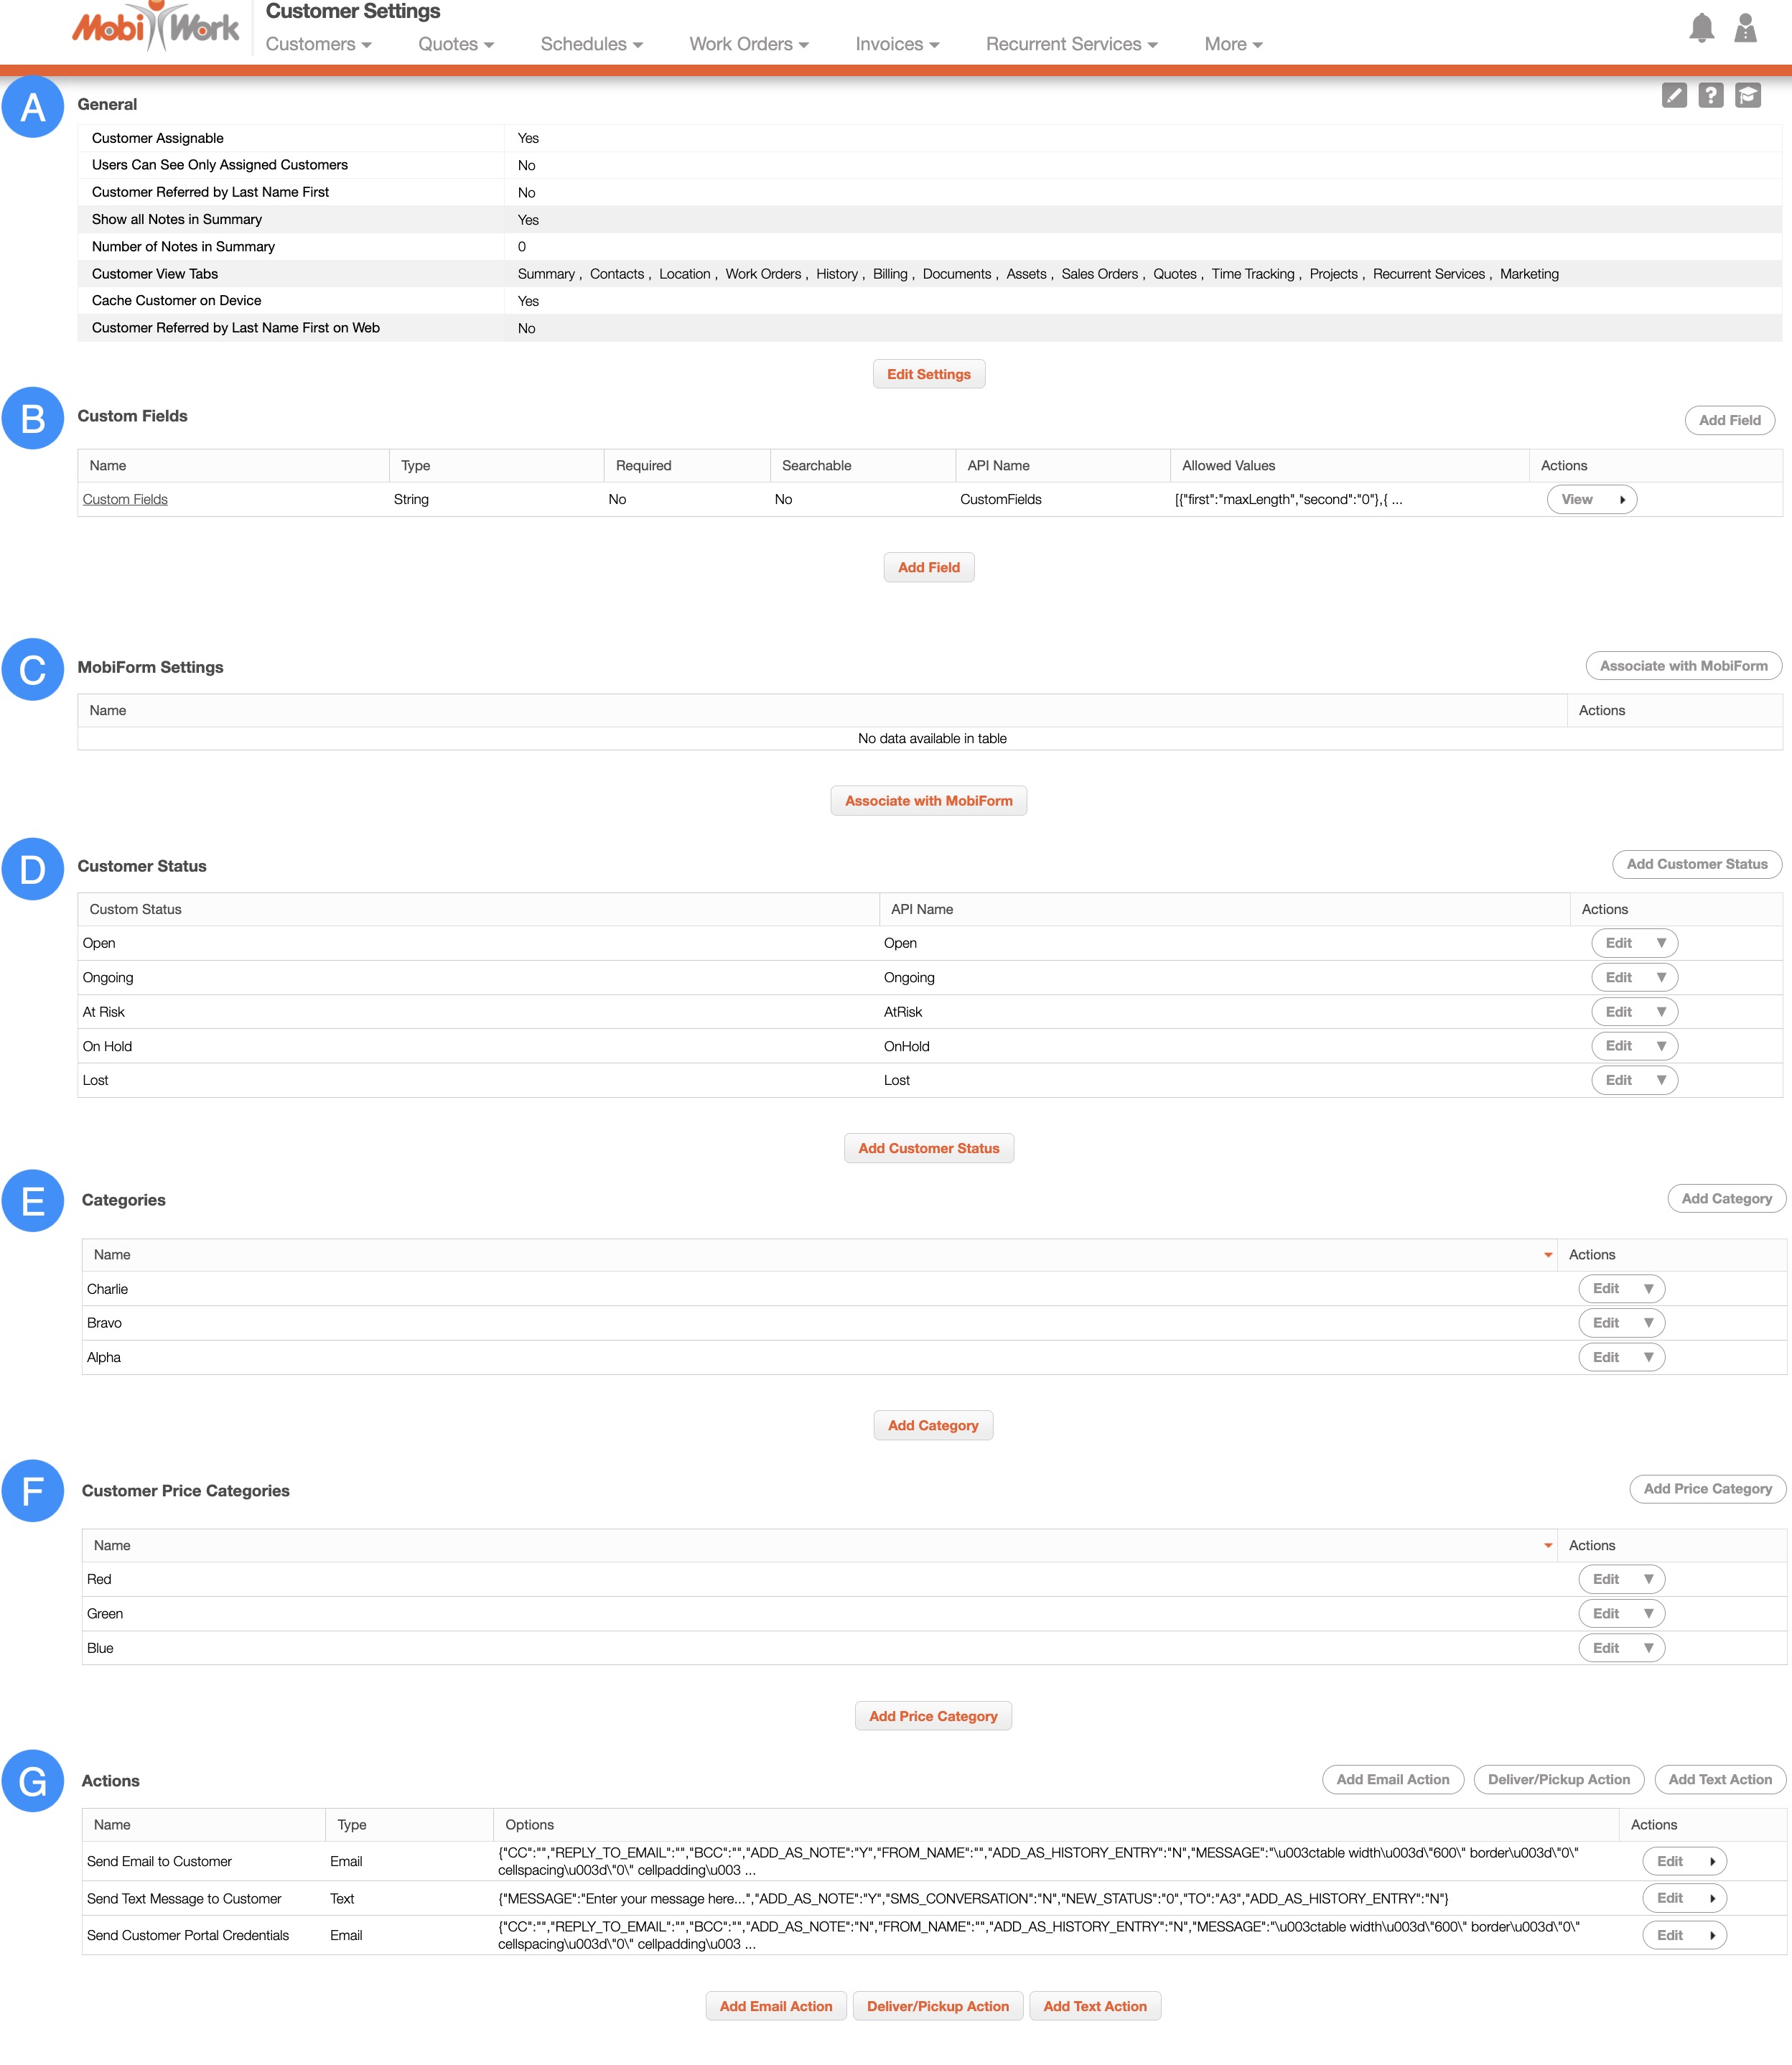
The "General" section will display how the customers are organized in MobiWork, the notes associated with the customer, etc.:

The terms found in the "General" section are defined below:
| Name: | Description: |
|---|---|
| "Customer Assignable" | The customers in MobiWork can be assigned to your users |
| "Users Can See Only Assigned Customers" | The users will only be able to see the customers that they are assigned to |
| "Customer Referred by Last Name First" | The customers on the device will be listed with their last name before their first name |
| "Show All Notes in Summary" | Your notes regarding the customer will be displayed in the "Summary" tab of the View Customer pop-up window |
| "Number of Notes in Summary" | The number of notes that are displayed in the "Summary" tab of the View Customer pop-up window. |
| "Customer View Tabs" | The list of tabs that are visible when opening the View Customer pop-up window. |
| "Cache Customer on Device" | The customer information will be saved on the user's device |
| "Customer Referred by Last Name First on Web" | Customers on the web will be listed with their last name before their first name |
The "Custom Fields" section is associated with the marketing campaign fields for your company. For more information about the different sections in the View Customer pop-up window are displayed, please see the View Customer page:

If you are not interested in using these fields, please contact the Customer Success Team to remove them.
MobiForms are fields where customer-associated data can be organized and stored:

The terms found in the MobiForm Settings are defined below:
| Name: | Description: |
|---|---|
| "Name" | The name and type of MobiForm |
| "Form Display Location" | Select how information should be captured. Options include- Do not Capture, which does not fill in customer data now (must get information from the field first), Display Initial (shows all customer information upfront on your field worker's mobile device), and Display in Separate Panel (shows customer information as a tab on your field worker's mobile device). |
| "Display In" | Select where the form should be displayed (either in the "Summary" tab or Form tab of the View Customer pop-up window) |
| "Show Advanced Options" | Click on Show Advanced Options to access the ability to modify the file layout and code to determine which customer the form is applicable for |
| "Import File Layout" | The file layout for importing forms |
| "Code to Determine Which Customer This Form is For" | The code that will determine which customer the form is applicable for |
The "Customer Status" section will display the available statuses for your customers; these statuses are used to help classify your customers:

The terms found in the "Customer Status" section are defined below:
| Name: | Description: |
|---|---|
| "Status Name" | What the specified status is called |
| "API Name" | The API name of the status. After the status is created this name cannot be changed or altered |
| "Actions" | Allows you to edit or delete the selected Customer Status |
The "Categories" section will allow you to view unique category identifiers that will help to better organize your customers (e.g., internal, external, etc.).
You can also use customer categories to narrow your search in the New Search pop-up window:

The terms found in the "Categories" section are defined below:
| Name: | Description: |
|---|---|
| "Name" | What the customer category is called. |
| "Actions" | Allows you to edit or delete the selected customer category. |
The "Price Categories" section will allow you to view unique price identifiers that are associated with specific customers:

The terms found in the "Price Categories" section are defined below:
| Name: | Description: |
|---|---|
| "Name" | What the price category is called. |
| "Actions" | Allows you to edit or delete the selected price category. |
The Actions Section will display the complex actions that can be implemented on one or more customers:

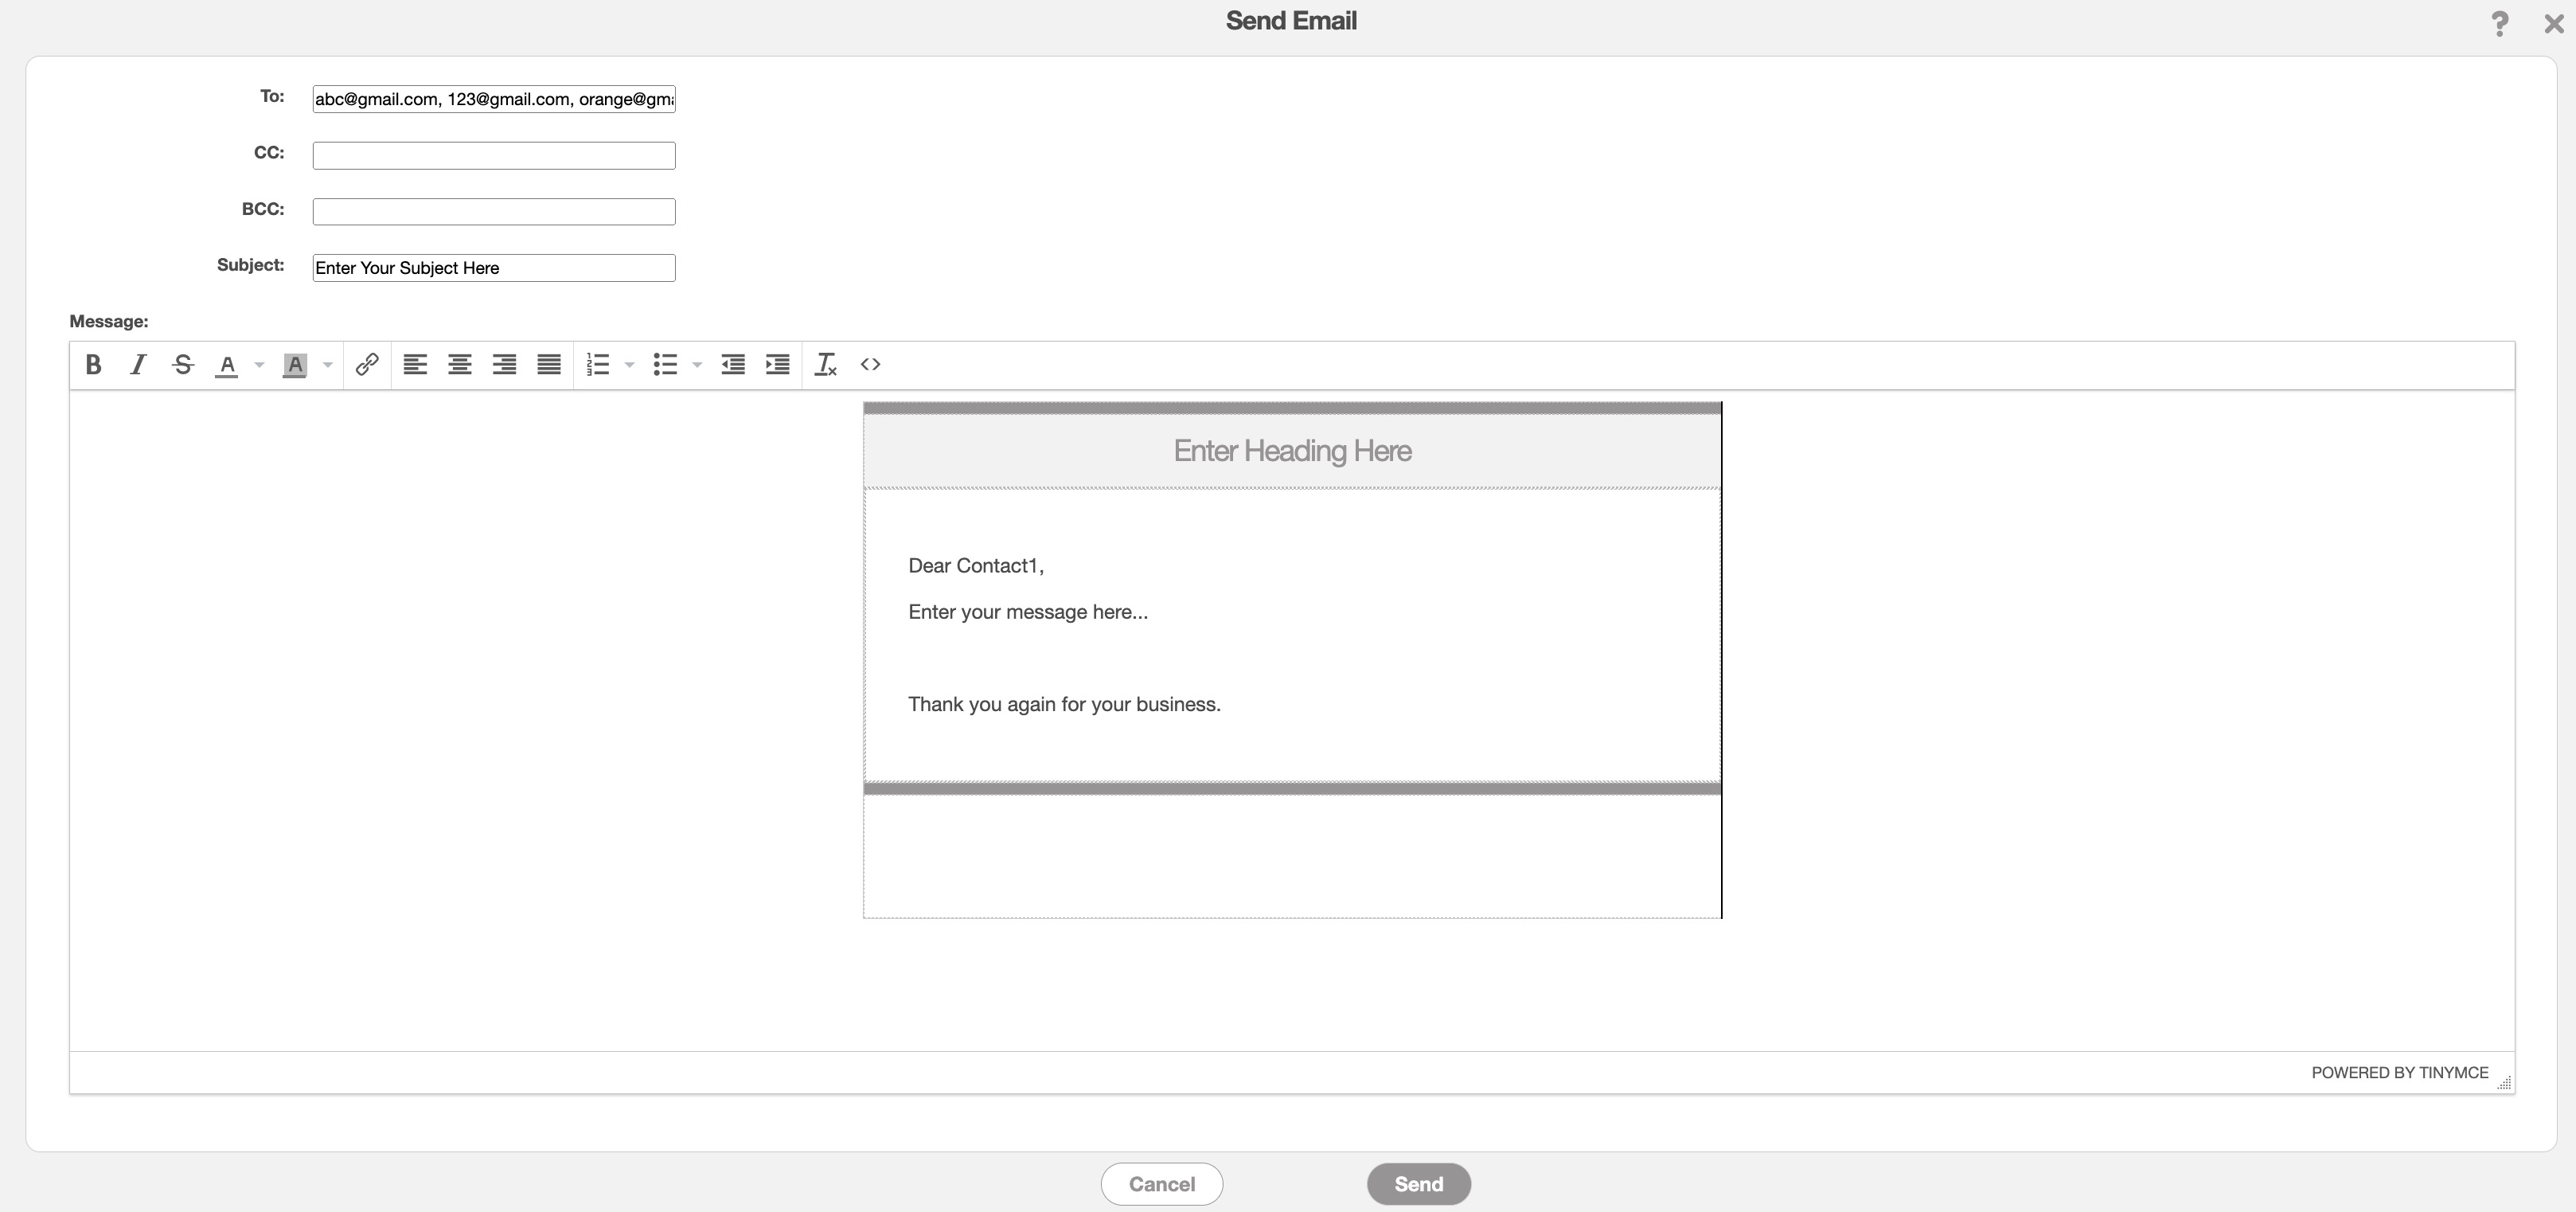
Below is a sample email of how the message will look:
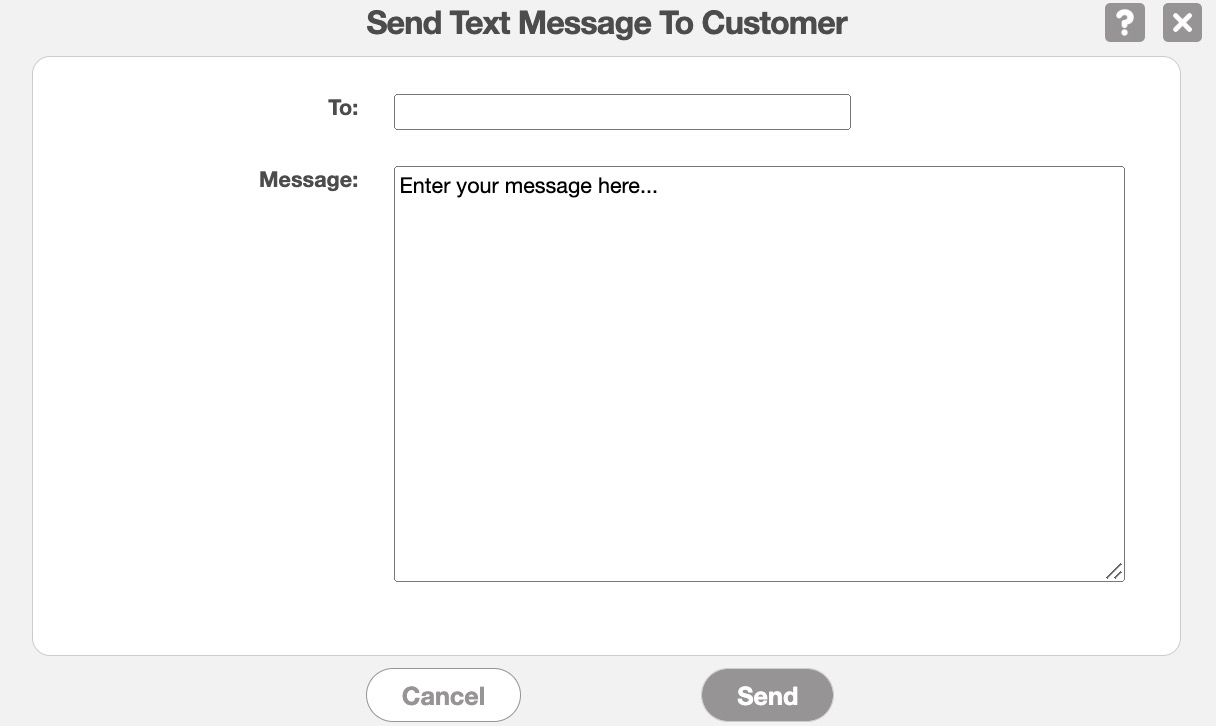
This image below shows a sample of a text message:
For more information about sending messages to your customer, please see the Send Messages to Customers page.
If you have any questions or need further assistance, please let us know. We'd be happy to help!
