

online-help.platform.features.customers.view.magraph
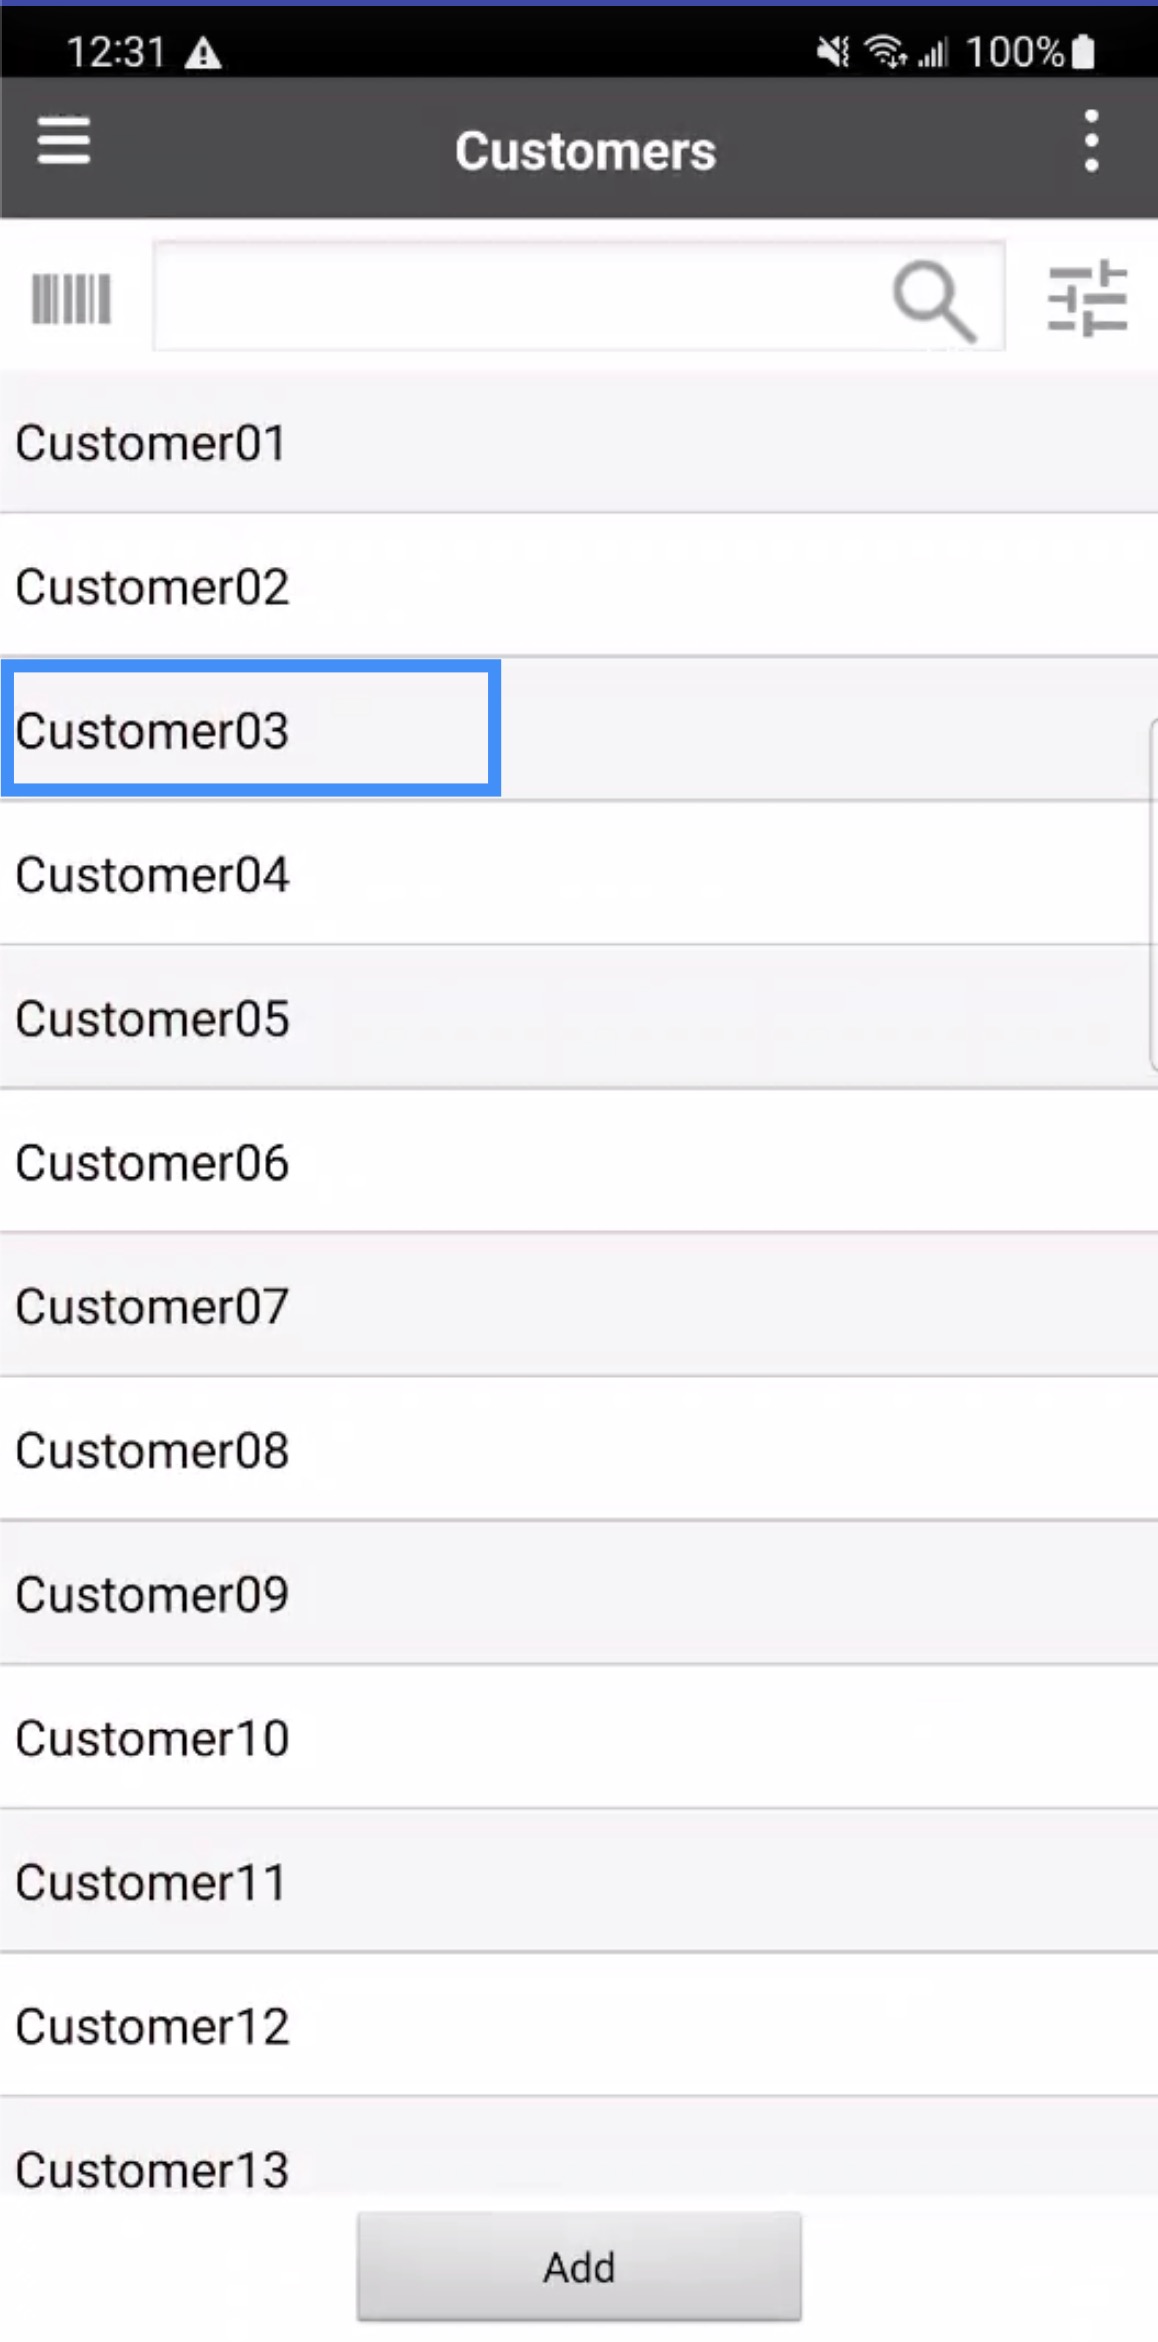
Once you select a customer, you will be redirected to the View Customer page. On this page, you can view the customer's contact information, the customer's outstanding balance, as well as the manager assigned to handle the customer.
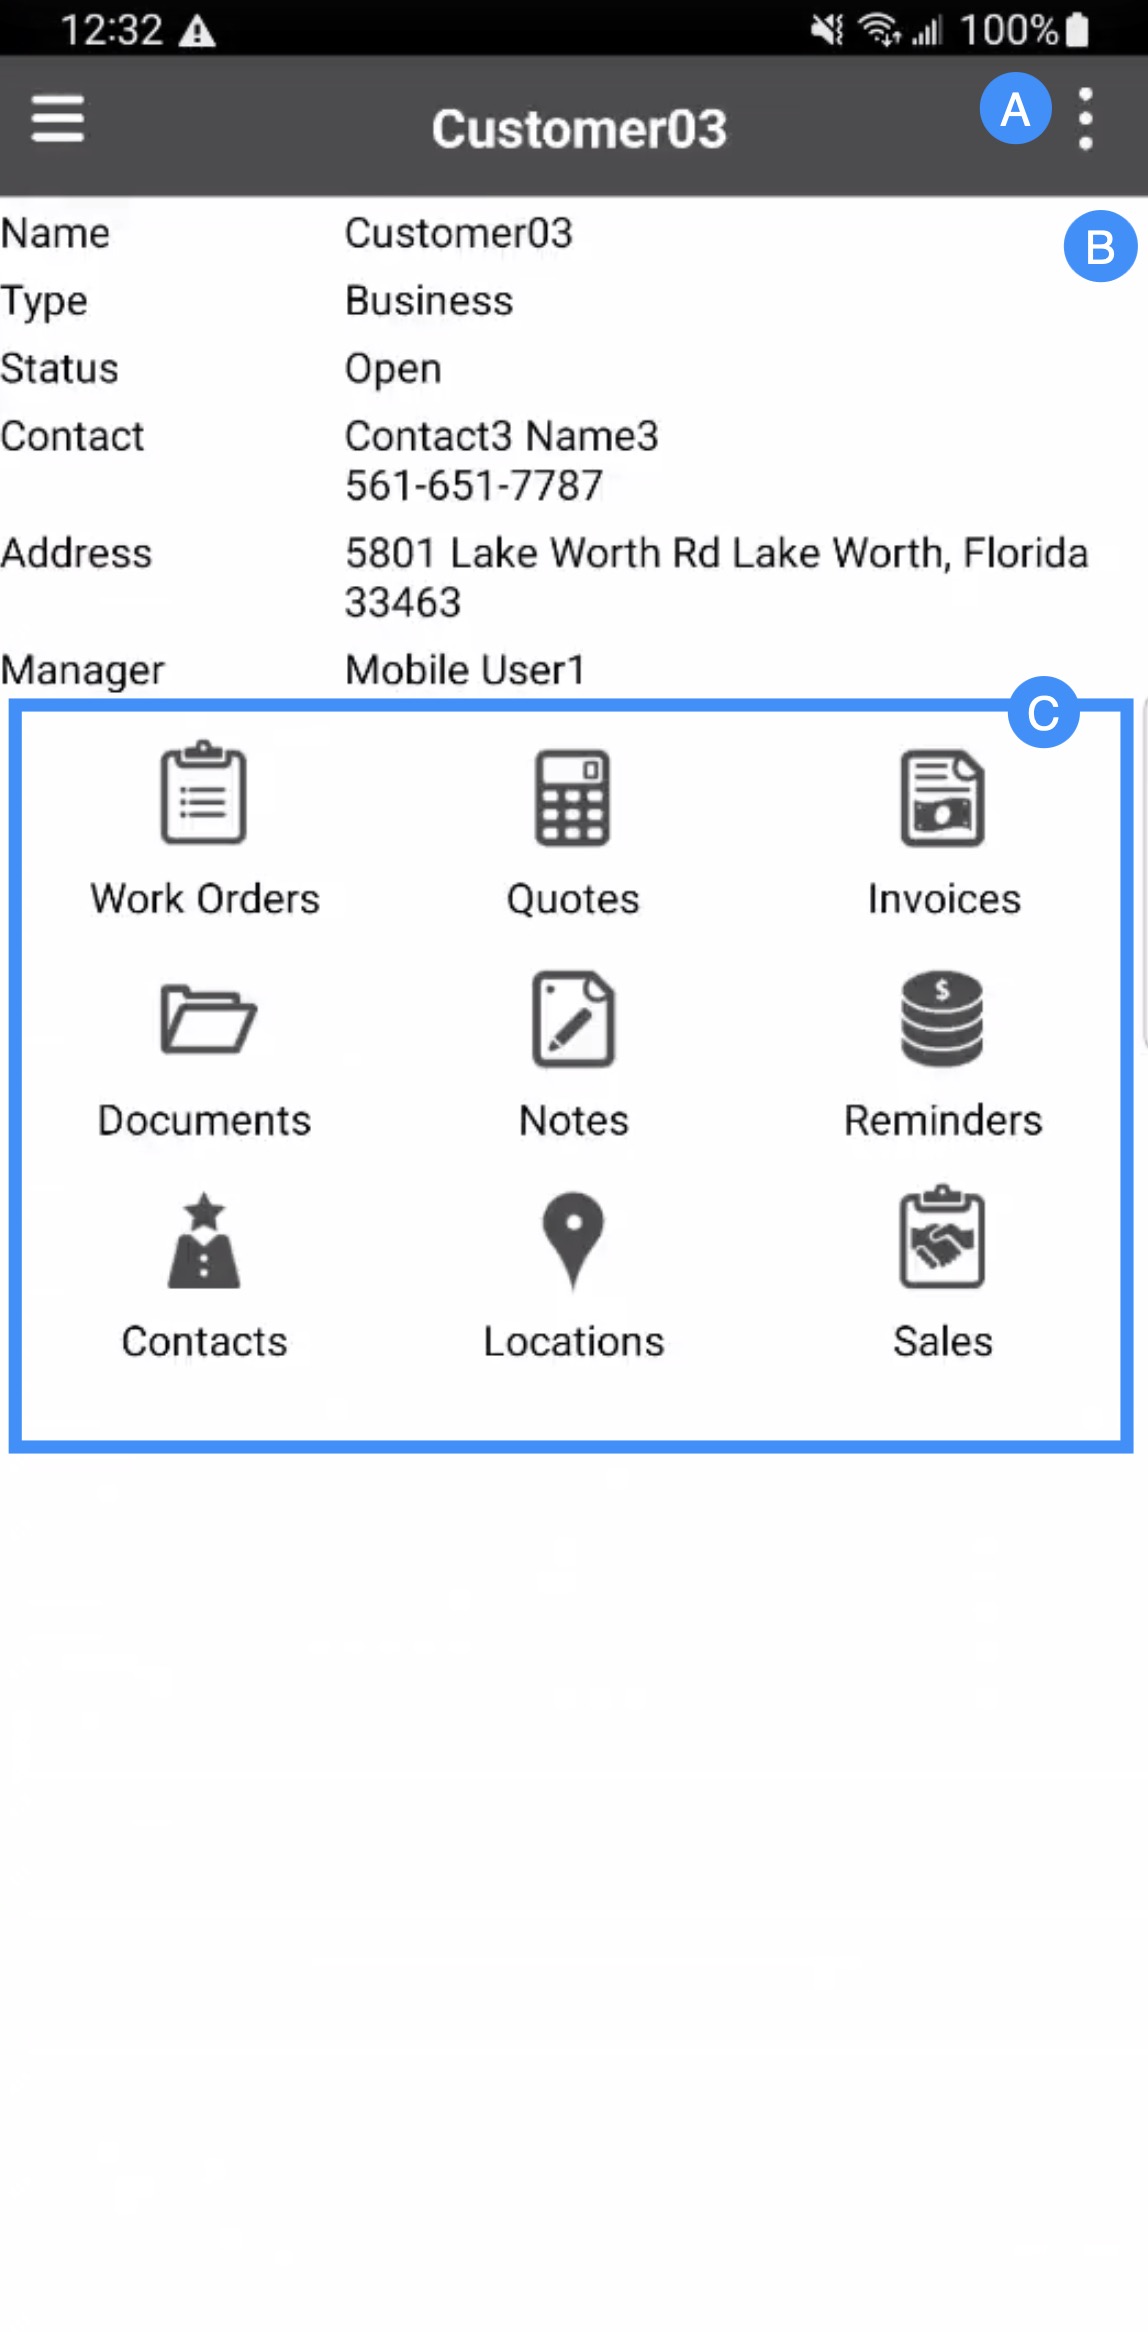
The Actions Panel provides access to additional customer-related actions, such as adding work orders, sales orders, documents, notes, reminders, and more.
The "Information Panel" will display key contact specific-data regarding the customer, including the name of the customer, the address of the customer, and more.
The "Custom Fields" section will display relevant MobiFields. By default, the manager in charge of the customer and the outstanding balance will be shown; however, other custom fields can be displayed here. The MobiFields that cannot be displayed here include: forms, products, tables, customer status, work order status, the view form, and the view form print view.
Selecting the Actions Panel tile provides access to actions that can be performed on the selected customer.
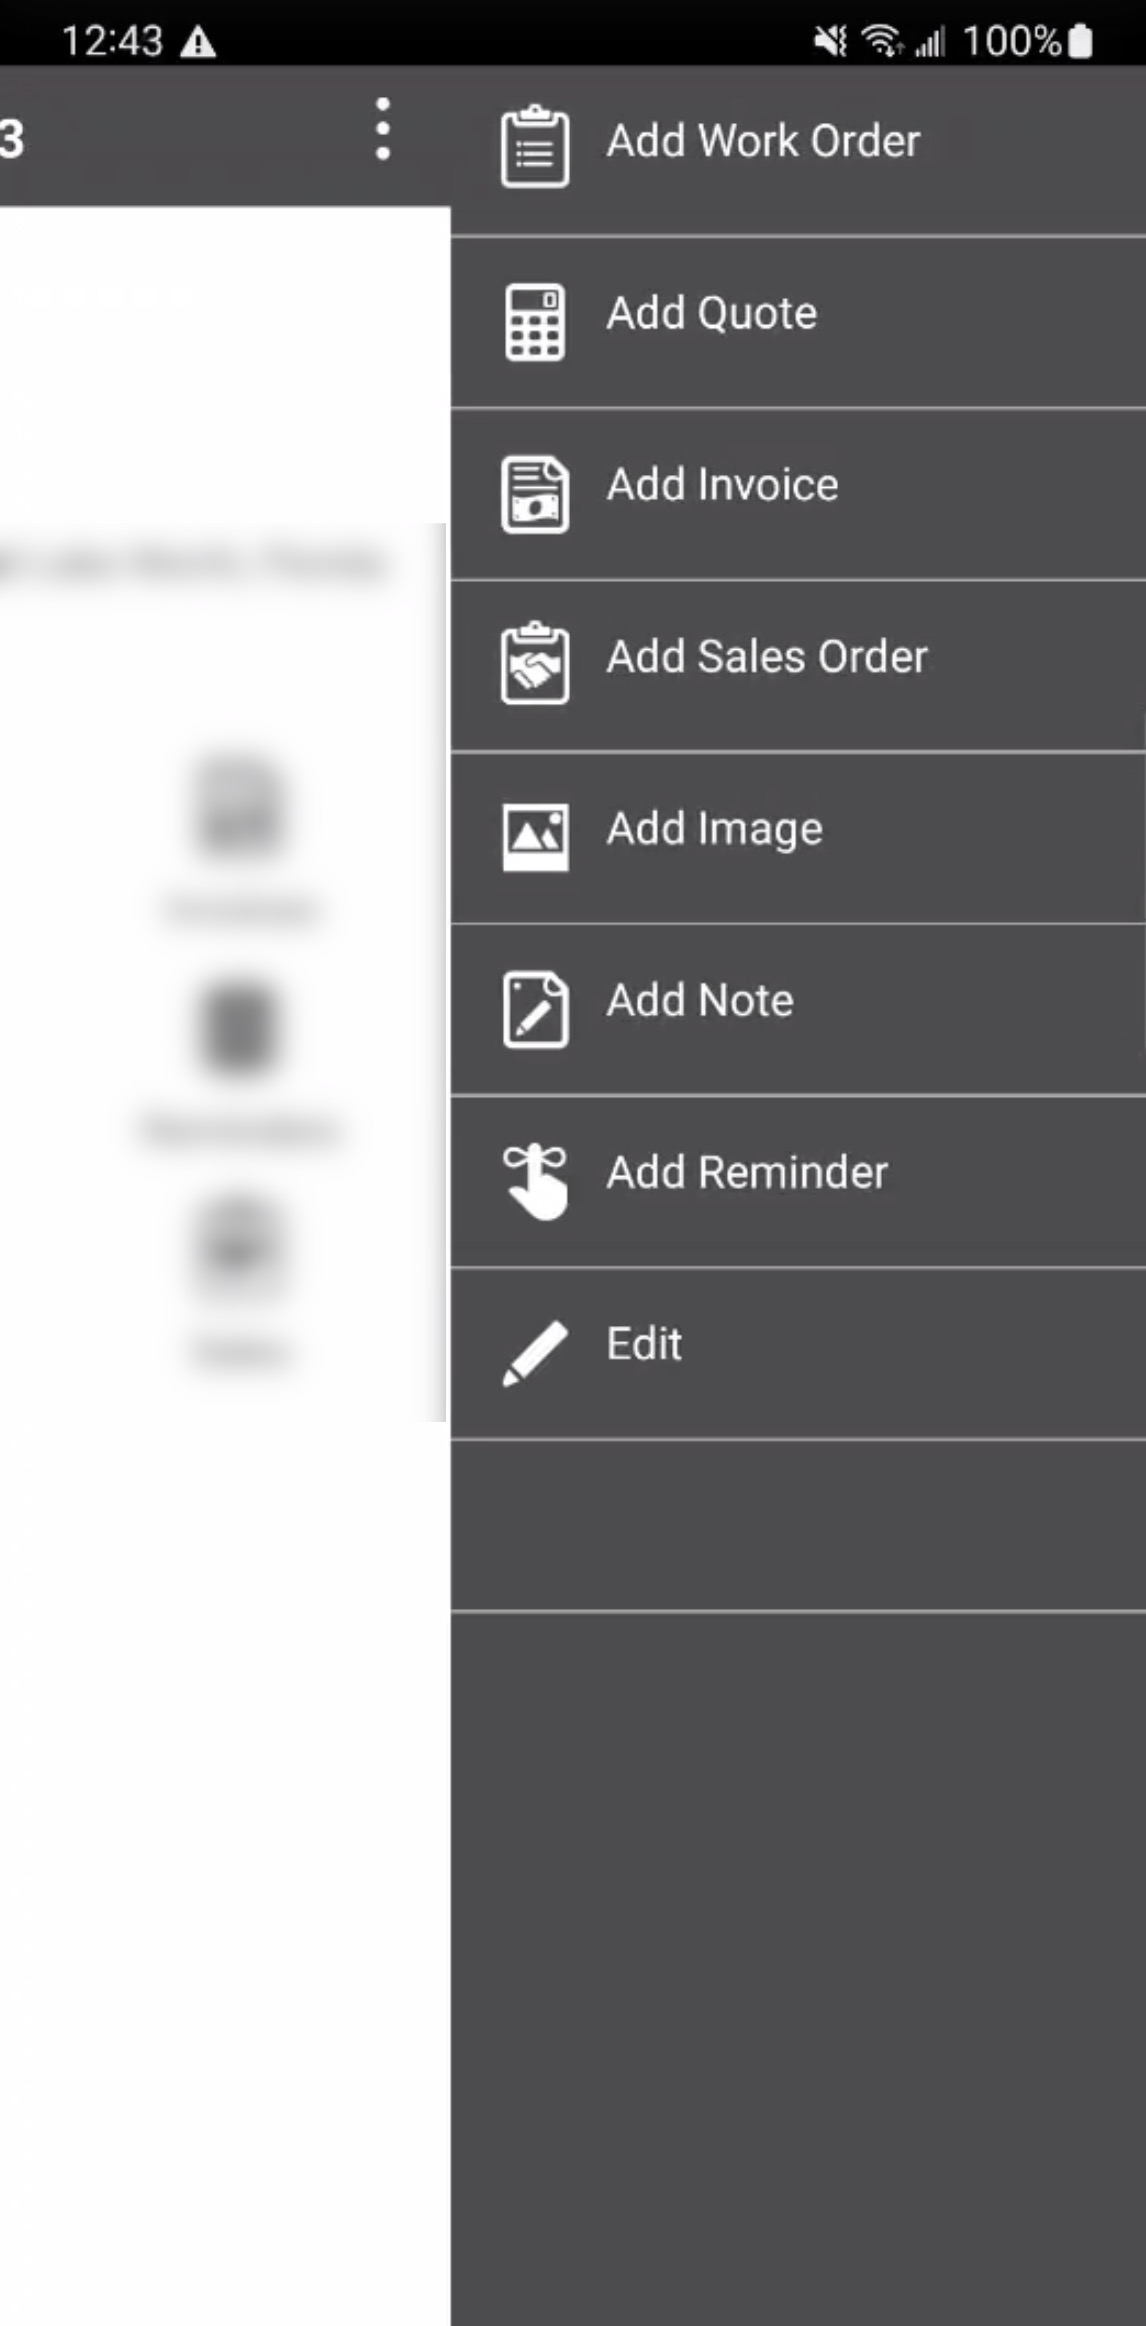
Some of these actions, like creating a work order, quote, etc. can also be accessed from the "Customer Actions" section.
| Name: | Description: |
|---|---|
| "Add Work Order" | Allows you to add a work order to the customer |
| "Add Quote" | Allows you to add a quote to the specified customer |
| "Add Invoice" | Allows you to add an invoice to the specified customer |
| "Add Sales Order" | Allows you to add a sales order to the customer |
| "Add Image" | Adds an image to the customer profile |
| "Add Note" | Adds a note to the customer profile |
| "Add Reminder" | Adds a reminder to the customer profile |
| "Edit" | Allows you to edit the data from the customer profile |
The following subsections go into detail regarding the different customer-specific actions that are available from the Actions Panel.
Add Work Order
The "Add Work Order" action will allow you to add a work order for the selected customer. After pressing on the action, you will be redirected to the Add Work Order page:
Add Quote
The "Add Quote" action allows you to create a quote for the selected customer; after selecting this action, you will be redirected to the Add Quote page:
Add Invoice
The "Add Invoice" action will allow you to add an invoice for the selected customer. After pressing on the action, you will be redirected to the Add Invoice page:
Add Sales Order
With the "Add Sales Order" action, you can add a new sales order for the selected customer; once you press on the tile, you will be redirected to the Add Sales Order page:
Add Image
The "Add Image" action makes it easy to capture and attach important visual information directly to the selected customer's profile. You can use your device's camera app to take a new picture, or select an existing image from your photo gallery using the Gallery tile:

This action gives you the flexibility to quickly capture and store customer-related images while working in the field.
Once saved, images can be easily accessed through the "Documents" action in either the Actions Panel or the "Customer Actions" section; thus, helping to keep important customer documentation conveniently organized and readily available.
Add Note
The "Add Note" action allows you to record important information about the selected customer. After entering the required information, select the Add tile to save the note:

Notes can be used to keep office staff informed, document customer-related details, or provide information for future reference. All notes associated with the customer can be accessed through the Notes feature in the Actions Panel.
Add Reminder
The "Add Reminder" feature will allow you to add a reminder for an intended user at a specific time. After pressing on the "Add Reminder" action, you will be redirected to the Add Reminder page.
On this page, select the users that the reminder is intended for, and the date/time of the reminder. You can also include a text description with additional details regarding the reminder. Once you are satisfied with the inputted information, press the Add tile to finalize the reminder or Cancel to go back:

Any reminders added from the web can also be viewed by the intended user on the device. Customer-specific reminders can be viewed on the customer profile. These reminders can also be viewed in your device's Notification Center. For more information about the Notification Center, please see the Notification Center page.
Edit
With the "Edit" action you will be able to update the customer's information even while on the go. After pressing on the Edit tile, you will be redirected to the Edit Customer page:
The "Contact Information" section will display your customer's contact information; this will include the contact's phone number, name, and address:
Selecting the customer's address opens the Location Dialog Box, which provides convenient access to location-related actions. From this dialog box, you can view the address in your device's maps application, get directions to the customer's location, edit the customer's address, or update the latitude and longitude coordinates:

You can also upload an image that represents the customer's address or home location. This image can be updated or replaced with a new photograph, helping ensure that the customer's profile contains current and relevant visual information. These options make it easier to verify customer locations, navigate to service sites, and maintain accurate location information.
| Name: | Description: |
|---|---|
| "Name" | The name of the customer |
| "Type" | The type of customer (i.e., residential or business) |
| "Status" | The status of the customer. The status can be "Open," "Ongoing," "At Risk," "On Hold," or "Lost." |
| "Contact" | The main contact name and number |
| "Address" | The address of the customer |
| "Assigned To" | The assigned customer manager |
The "Customer Actions" section provides convenient access to a variety of functions that can be applied to the specified customer. These actions allow you to manage customer-related activities directly from the customer profile, thus helping streamline workflows and improve efficiency:

For example, you can create a new work order or quote by selecting the corresponding tiles in the "Customer Actions" section.
Add Work Order
The "Add Work Order" action will allow you to add a work order for the selected customer. After pressing on the action, you will be redirected to the Add Work Order page:
Add Quote
The "Add Quote" action allows you to create a quote for the selected customer; after selecting this action, you will be redirected to the Add Quote page:
Add Invoice
The "Add Invoice" action will allow you to add an invoice for the selected customer. After pressing on the action, you will be redirected to the Add Invoice page:
Documents
The "Add Documents" feature will allow you to upload and view documents associated with the customer. Office users can also upload documents through the "Documents" tab in the View Customer pop-up window. For more information on how office users can upload documents through the web application, please see the View Customer page.
To view a document, press the right facing Arrow tile:

To add a new image or audio file, press the Actions Panel and select the desired format:

When uploading a new image, you can take a new picture or use the gallery to select an image that is already stored on your phone:
When uploading a segment of audio, you can choose to start, stop, or save by pressing the respective tiles:

Add Note
You can add a note about the customer (e.g., to keep the office apprised or as a note for future reference). The "Notes" feature will allow you to view all the notes associated with your customer:

By pressing on the Actions Panel, you will be able to refresh the data or add a new note:

Add Reminder
The "Add Reminder" feature will allow you to add a reminder for an intended user at a specific time. After pressing on the "Add Reminder" action, you will be redirected to the Add Reminder page.
On this page, select the users that the reminder is intended for, and the date/time of the reminder. You can also include a text description with additional details regarding the reminder. Once you are satisfied with the inputted information, press the Add tile to finalize the reminder or Cancel to go back:
Any reminders added from the web can also be viewed by the intended user on the device. Customer-specific reminders can be viewed on the customer profile. These reminders can also be viewed in your device's Notification Center. For more information about the Notification Center, please see the Notification Center page.
Contacts
The "Contacts" feature will list all of the contacts listed under the customer profile (e.g., husband and wife):

For more information about editing or adding contacts from the mobile device, please see the Contacts page.
Locations
The "Locations" feature will display the customer locations:

online-help.platform.features.customers.mobile.view_customer_add_salesorder.subheader
online-help.platform.features.customers.mobile.view_customer_add_salesorder.paragraph