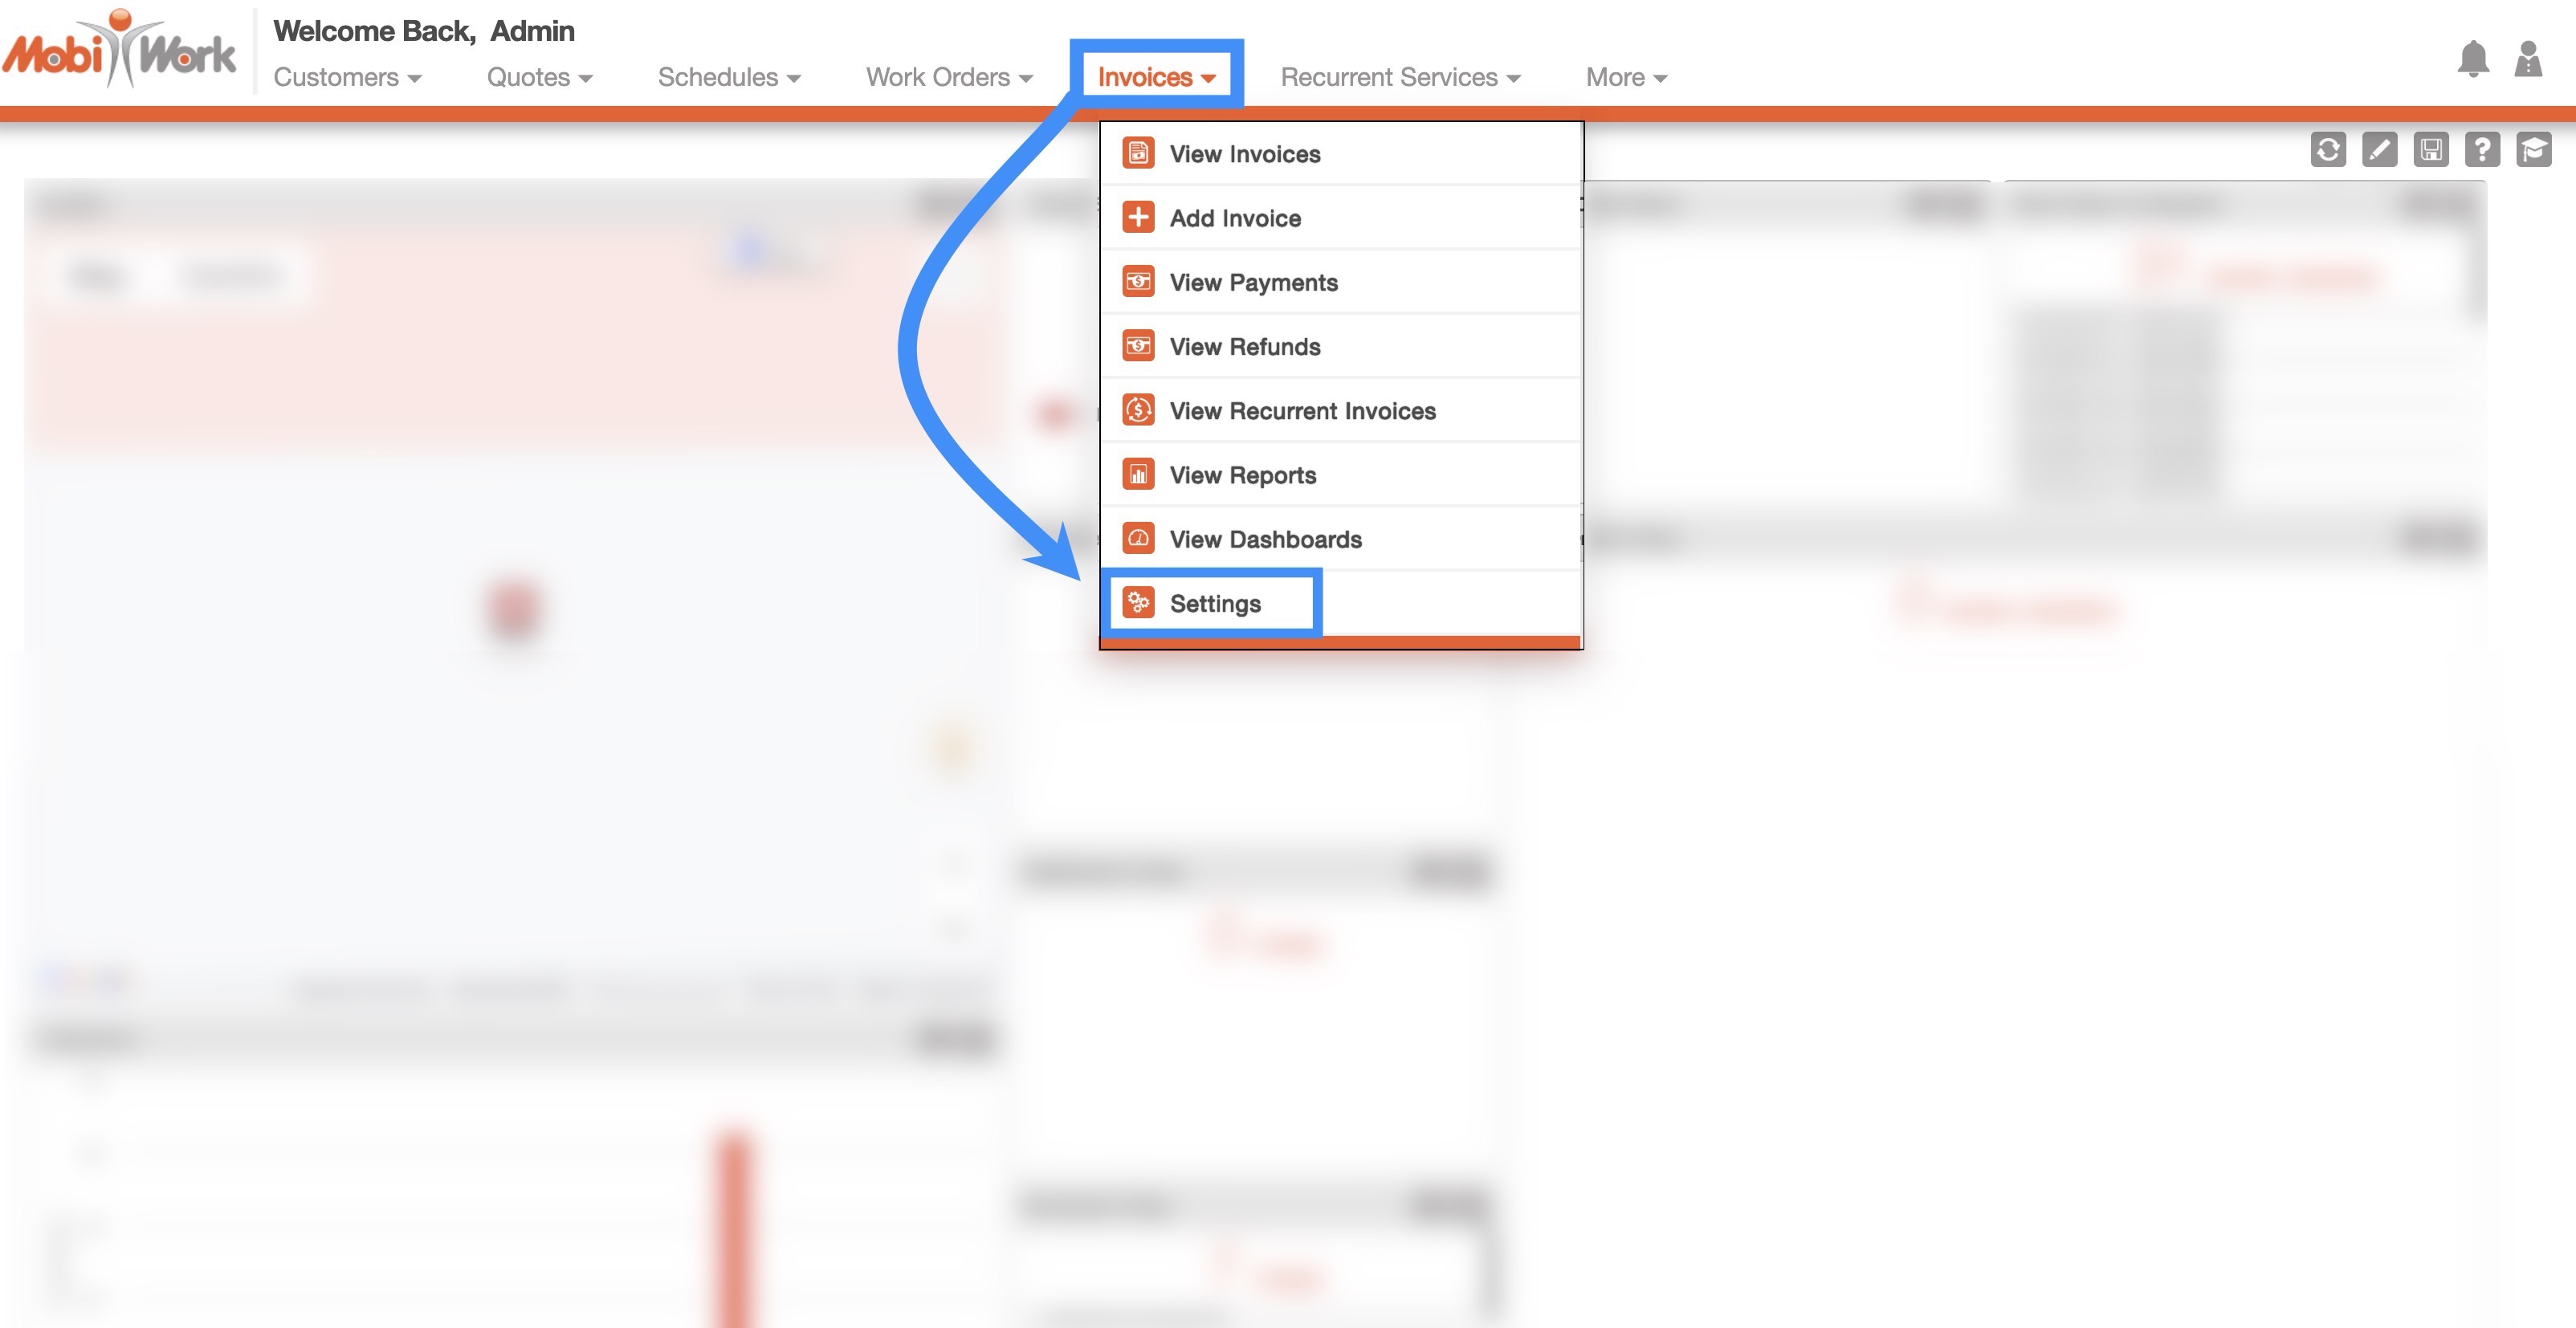
There are three main ways to navigate to the Settings page:
- You can directly access the Settings page by hovering over the Invoices feature from your MobiWork menu, and clicking on the "Settings" option:
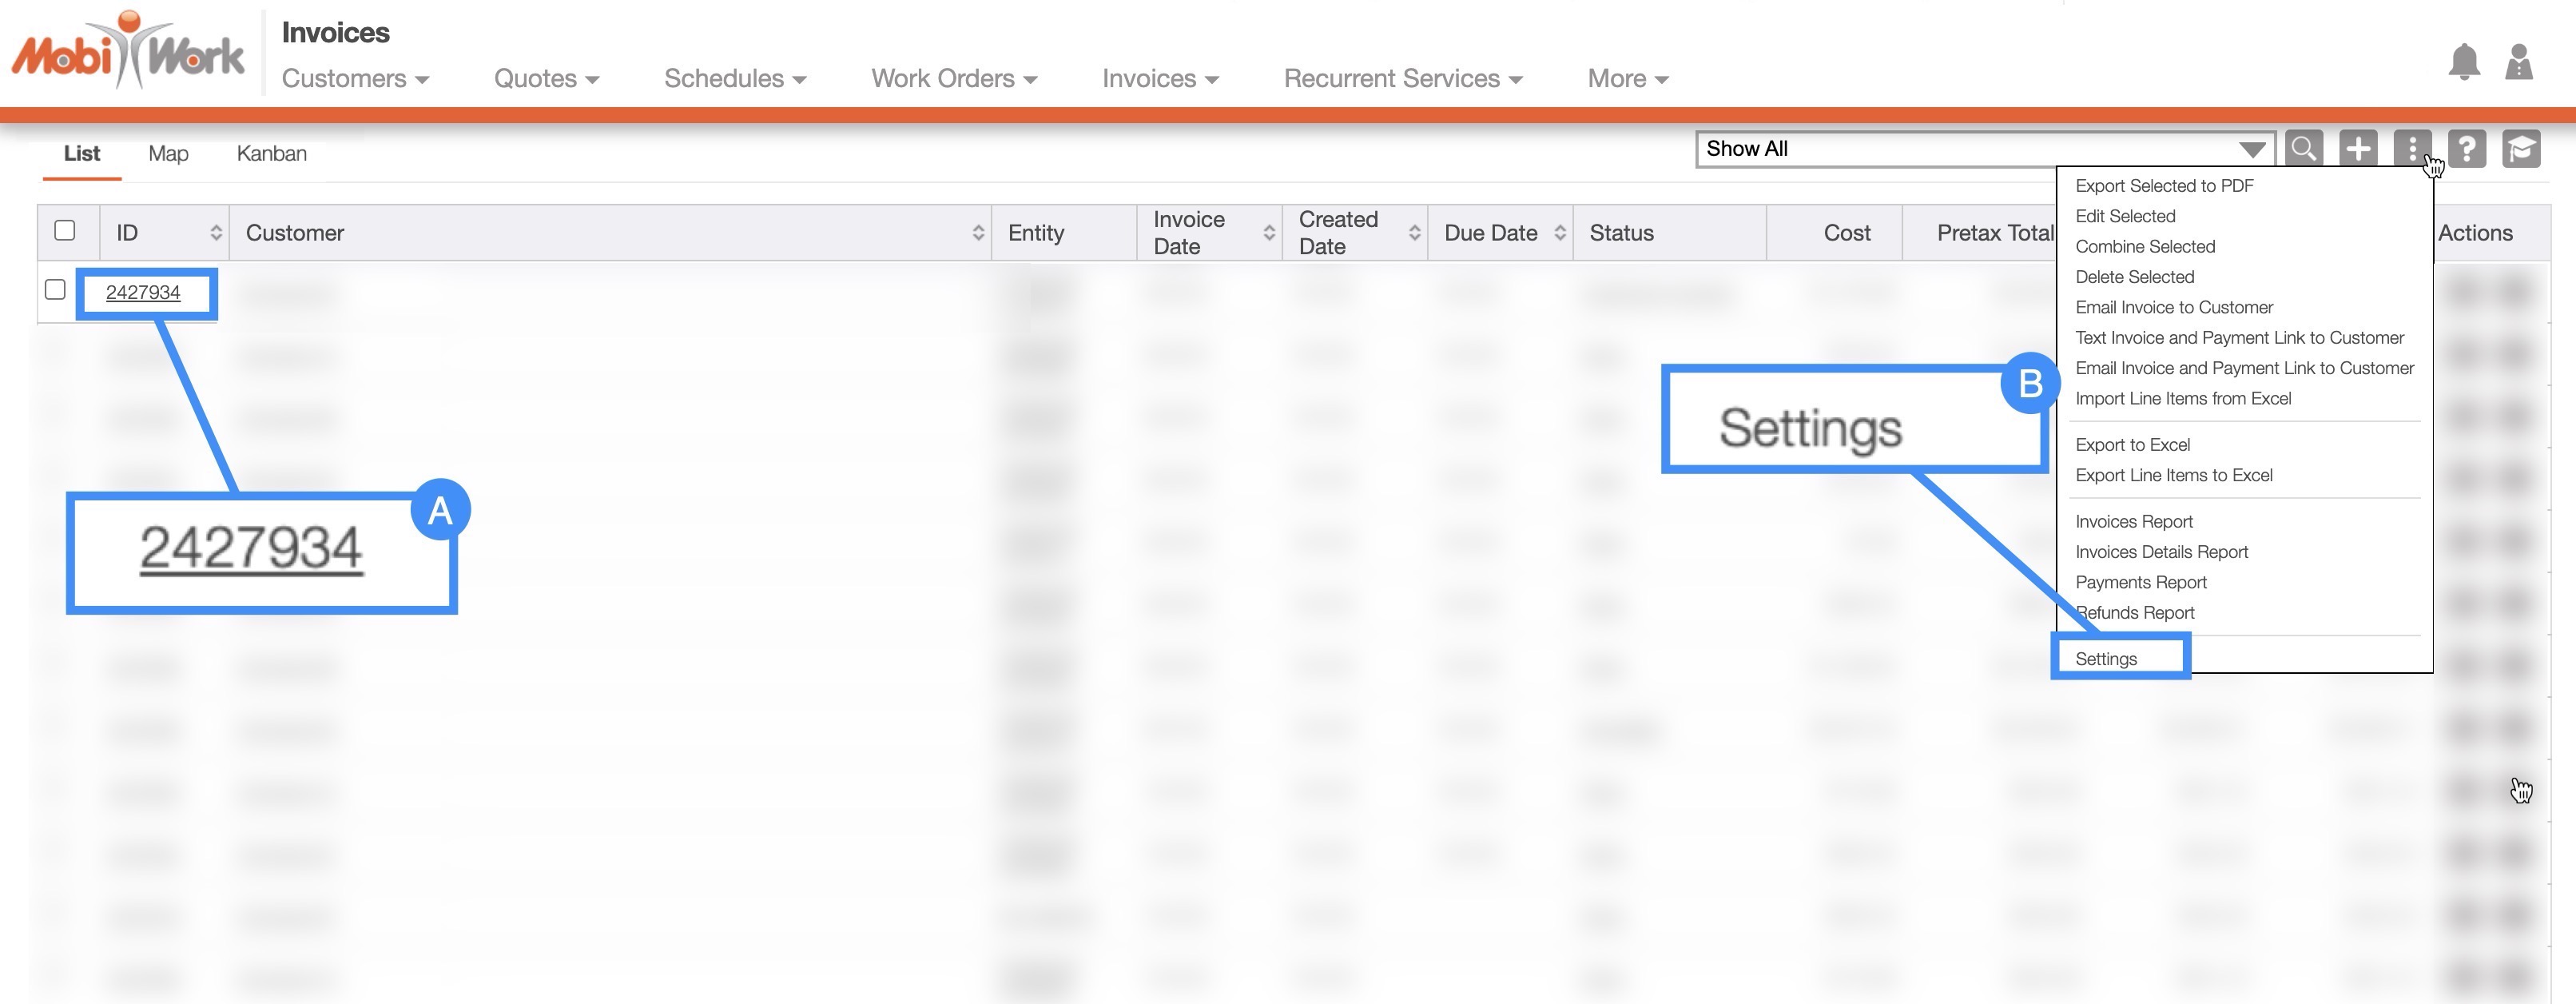
- Through the "List" tab. Please see Invoices List for more information on how to access this page:
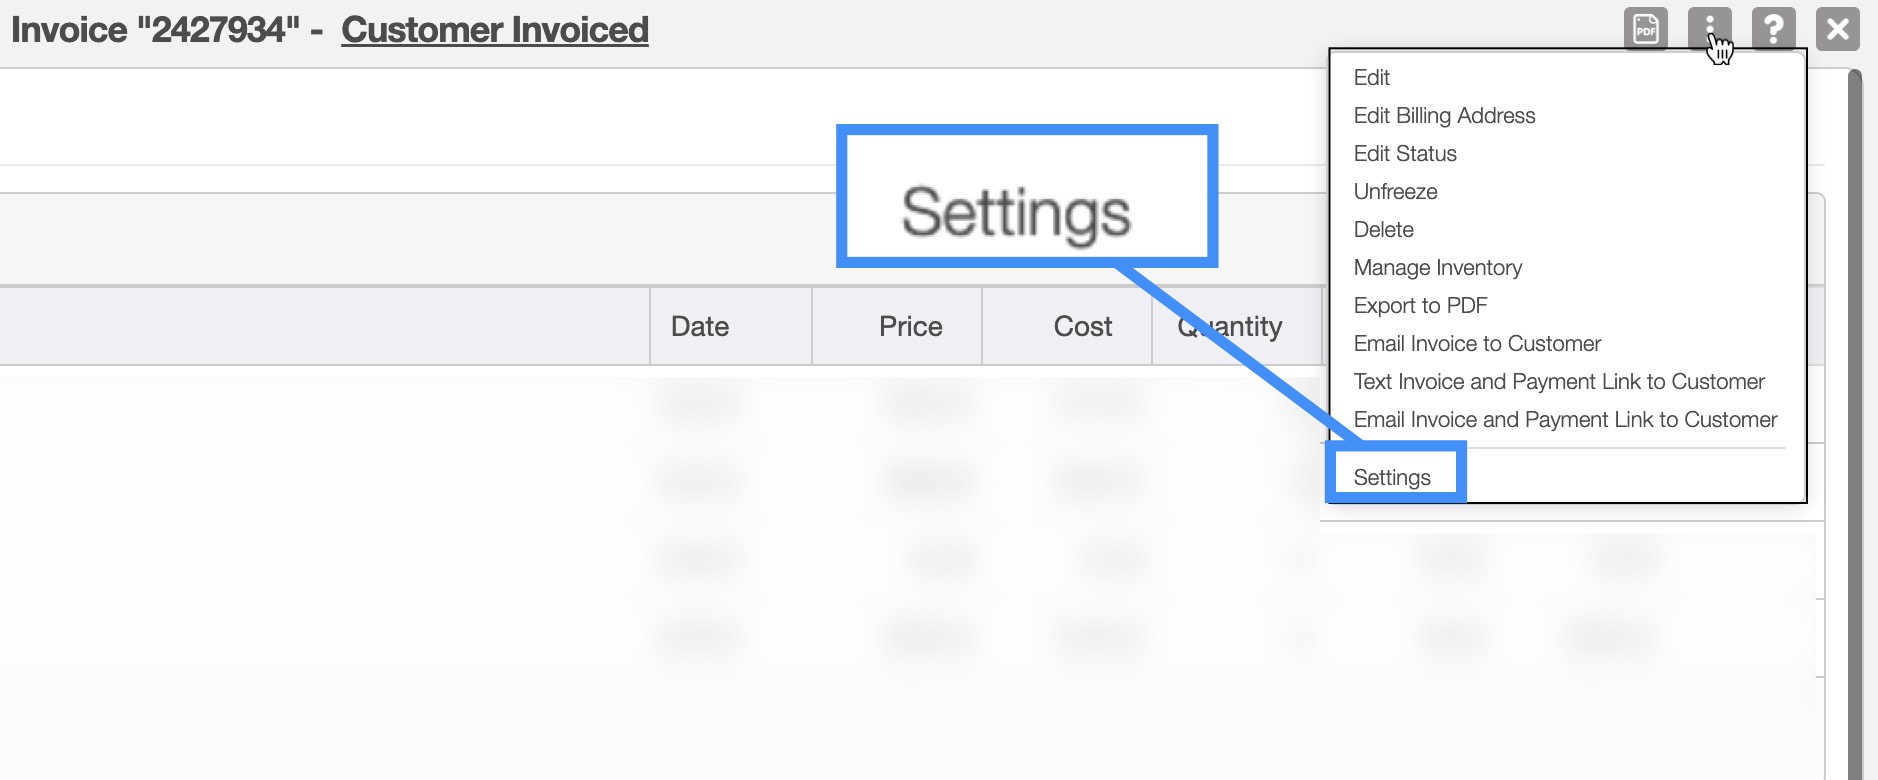
- By clicking on the ID number of an invoice and accessing the View Invoice pop-up window:
- By clicking on the More Actions button located at the top-right of the "List" tab.
Once you are on the Settings page there will be a several sections that you can access to further customize your invoices:
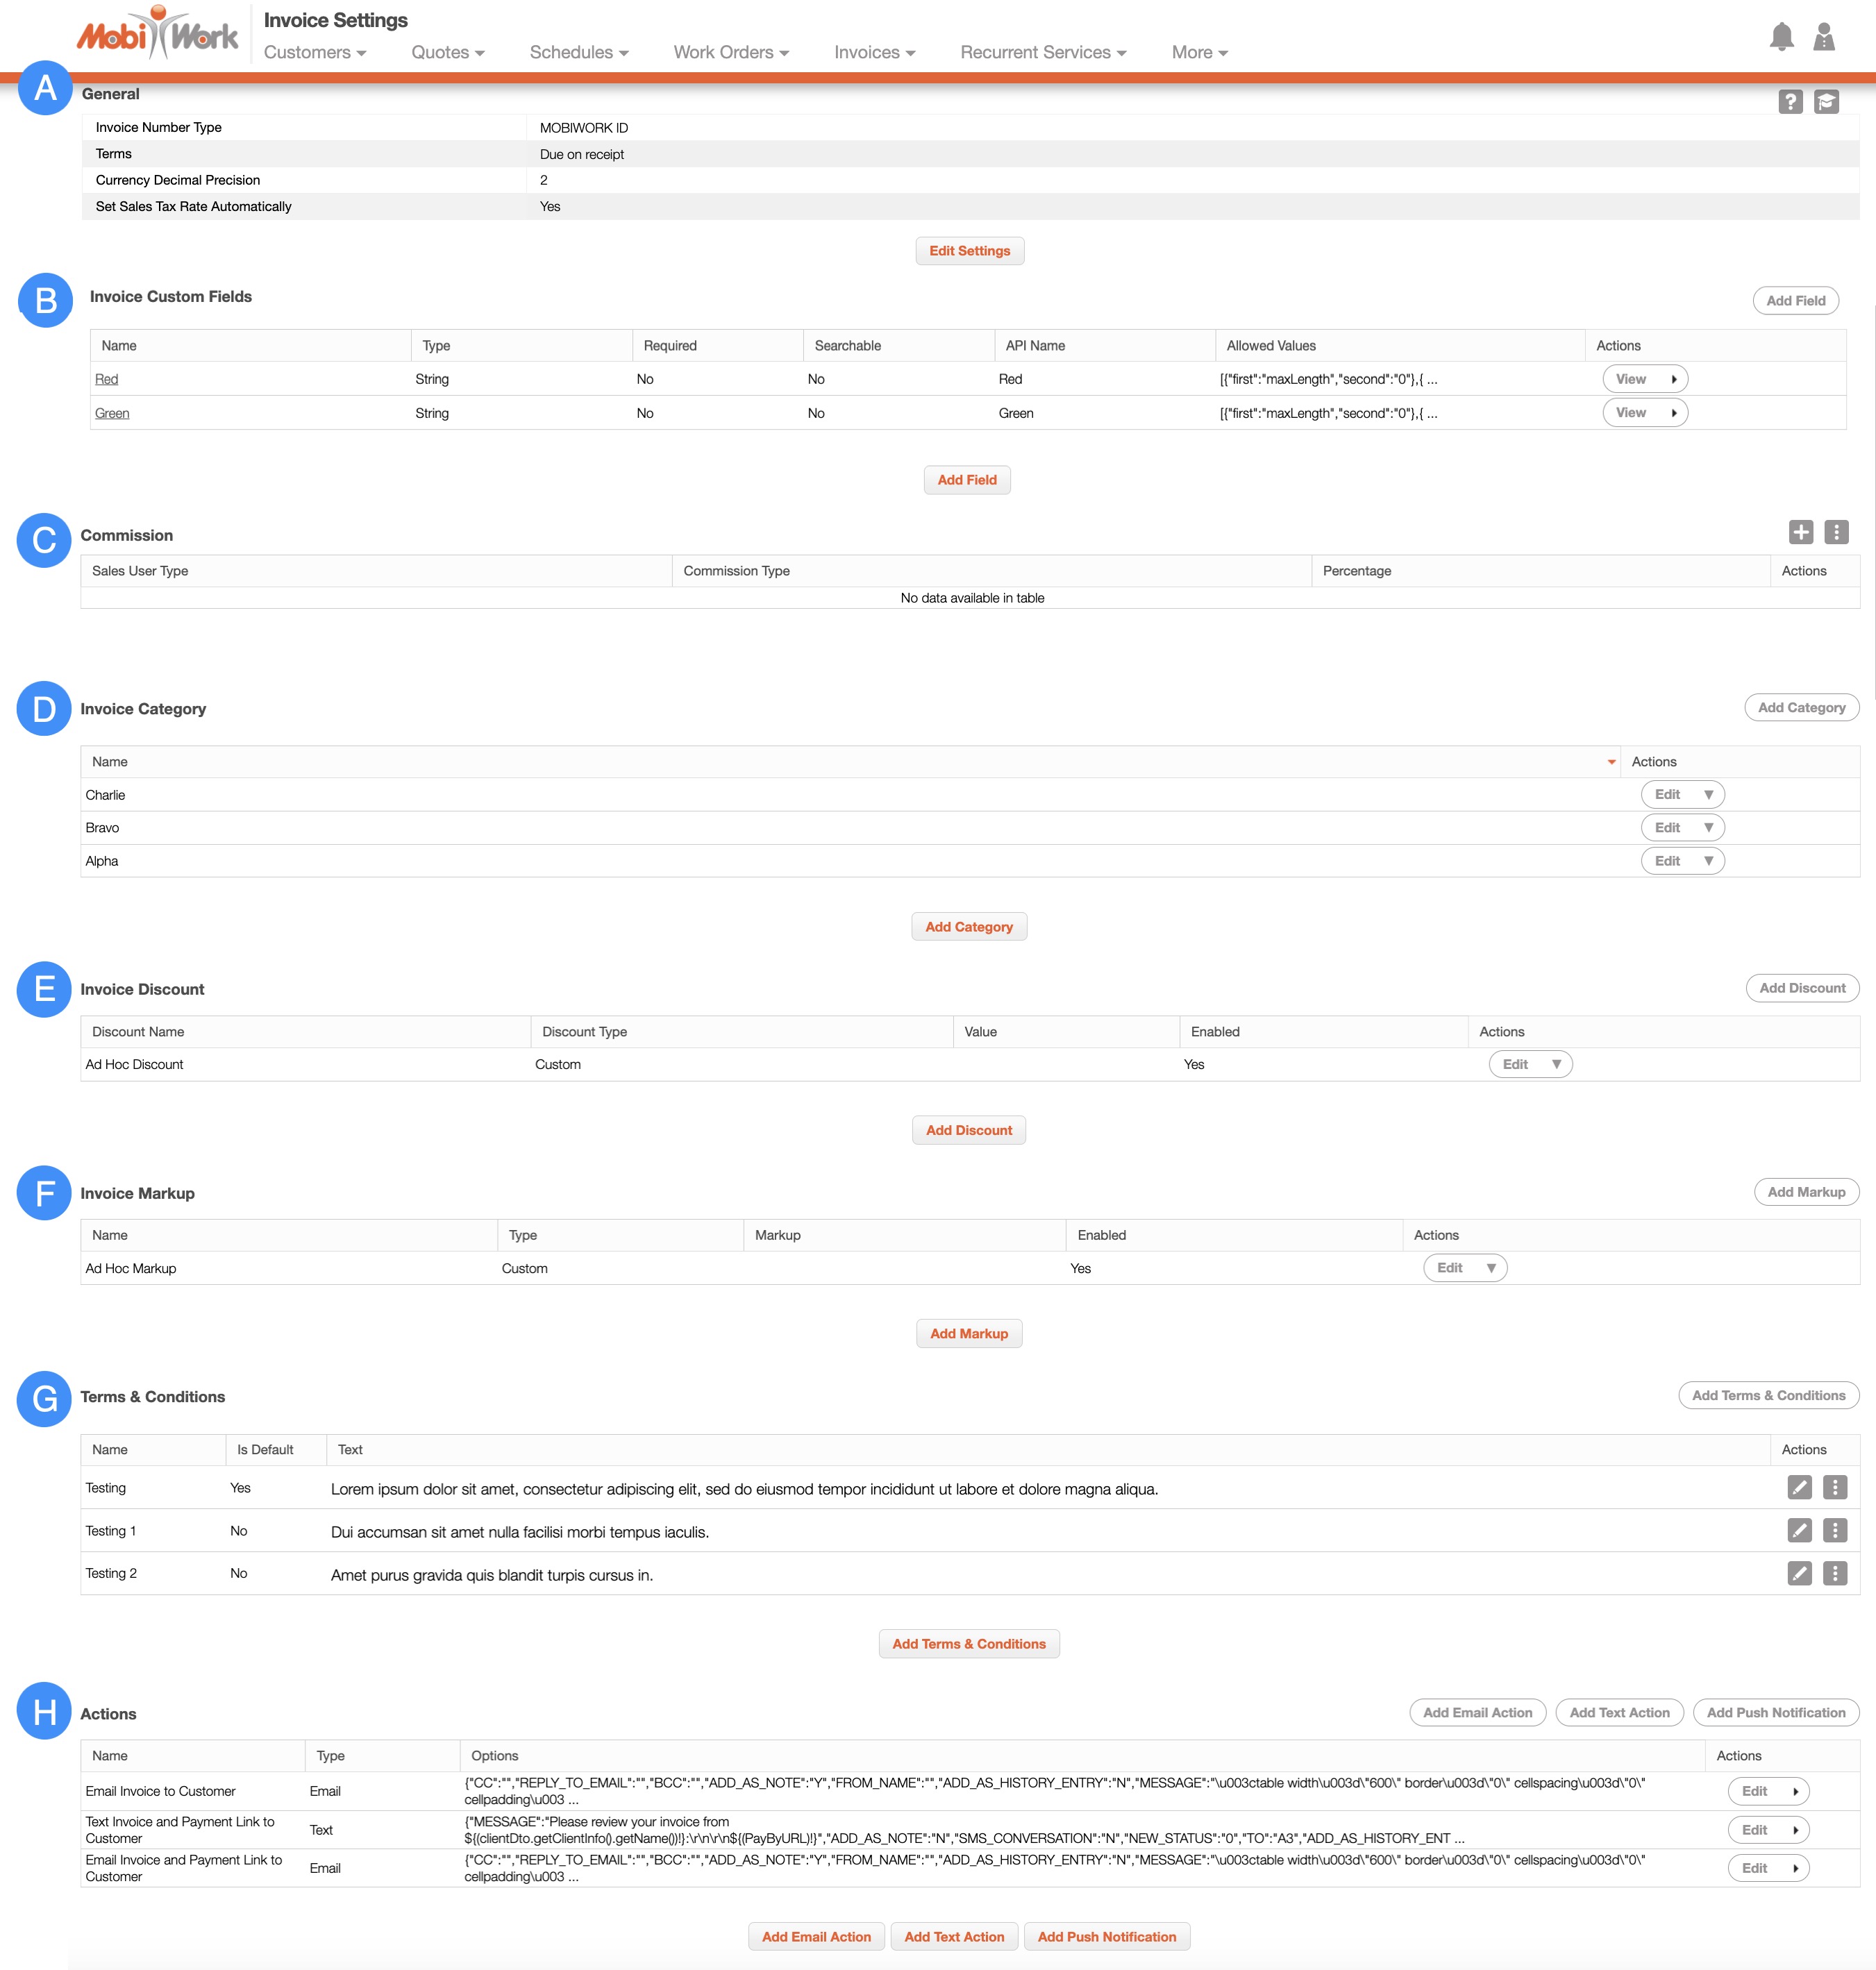
The "General Settings" section will allow you to edit the terms of your invoices as well as indicate how the sales tax should be implemented on the invoice:
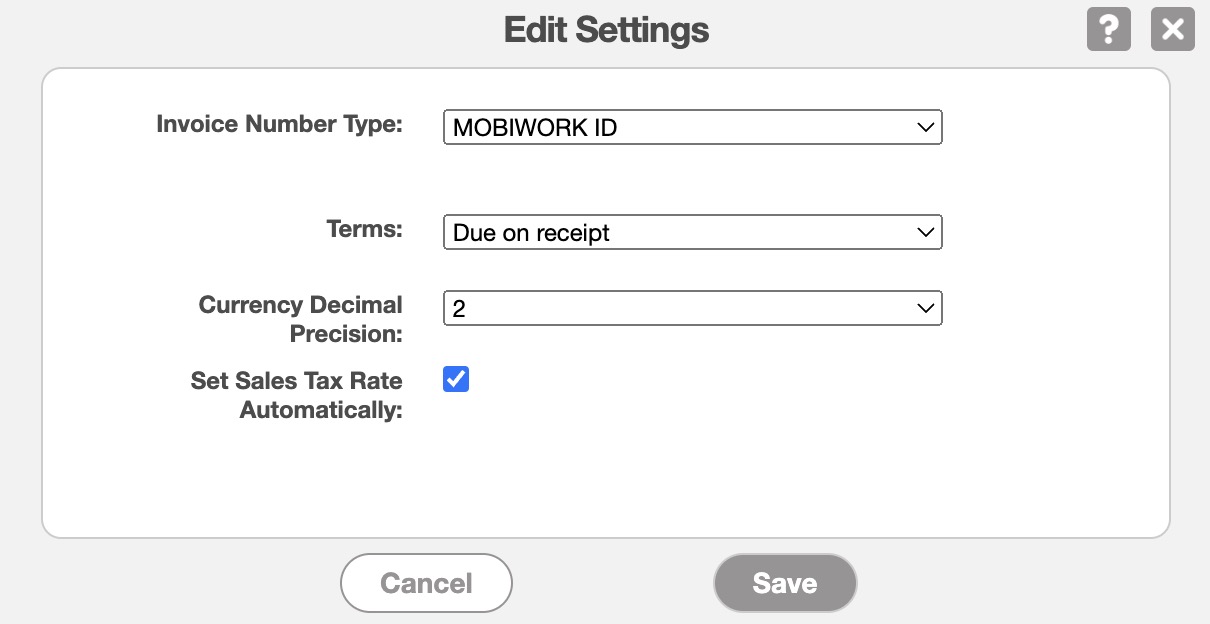
Once you select the Edit Settings button, the Edit Settings pop-up window will appear. Use the drop-downs to select:
- Invoice Number Type- which is a number or sequence used to organize the invoices in MobiWork.
- You can use MobiWork ID, enter a custom sequence with a prefix, start number, and suffix (which will increment by one), or enter the digits manually (where the user enters the invoice number).
- Terms- are when and how much you expect to be paid for the invoice (e.g., due on receipt or by net (15, 20, 30, etc.), meaning you expect payment within the specified number of days.)
- Currency Decimal Precision- Indicates how many decimal places are used to separate the dollar amount (e.g., two decimal places would be 100.00, while three would be 3.141).
- Set Sales Tax Rate Automatically- When checked will automatically include the sales tax rate on your invoices.
Once you have selected the desired values from the drop-downs, click on the Save button.
Sales Tax Note: Please note that MobiWork partners with Zip Tax. Zip Tax provides, free of charge, over 42,000 sales tax percentages based on the customer’s zip code. MobiWork also partners with Avalara for more advanced sales requirements. For more information about our Avalara connector, please see the Avalara Connector page.
With the "Custom Fields" section, you can add additional fields to your invoices along with the already existing fields. When you are on the add, edit, view, import/export pages these new fields will appear.
You decide how you want the fields to be displayed. If you want them to be searchable, optional, required, visible by the customer, appear once, etc. you can. It's all up to you!
To add the custom fields, click on the Add Field button and then input the desired information for your new field:

The terms for the "Custom Fields" columns are defined below:
| Name: | Description: |
|---|---|
| "Name" | The name of the custom field. |
| "Type" | The type of custom field which includes string, number, decimal, date, yes/no, multiple choice, QR code, signature, header, image capture, notes, phone number, phone number plus extension, SSN, time field, text area, vertical separator, vertical spacing, multiple QR code, customer field, product field, user field, project field, asset field, store field, dynamic header, and multiple option drop-down. |
| "Required" | Indicates if the custom field is required to fill or not. |
| "Searchable" | If checked, the custom field will become searchable within the New Search pop-up window. (It will not be searchable in the Free Text Search bar). |
| "API Name" | The API name of the custom field. It is used in the Reporting section and configuring PDFs; it does not change after it is created. |
| "Allowed Values" | Shows the configuration information; only provides value during troubleshooting. |
| "Actions" | Allows you to view, edit, and delete the selected custom field. |
| "Add Field" | Will add a custom field |
When you click the Add Field button, you will be automatically directed to another page to add the new invoice custom field. Input the desired data range, name, etc. into the fields provided and then click Add to save the new invoice custom field:
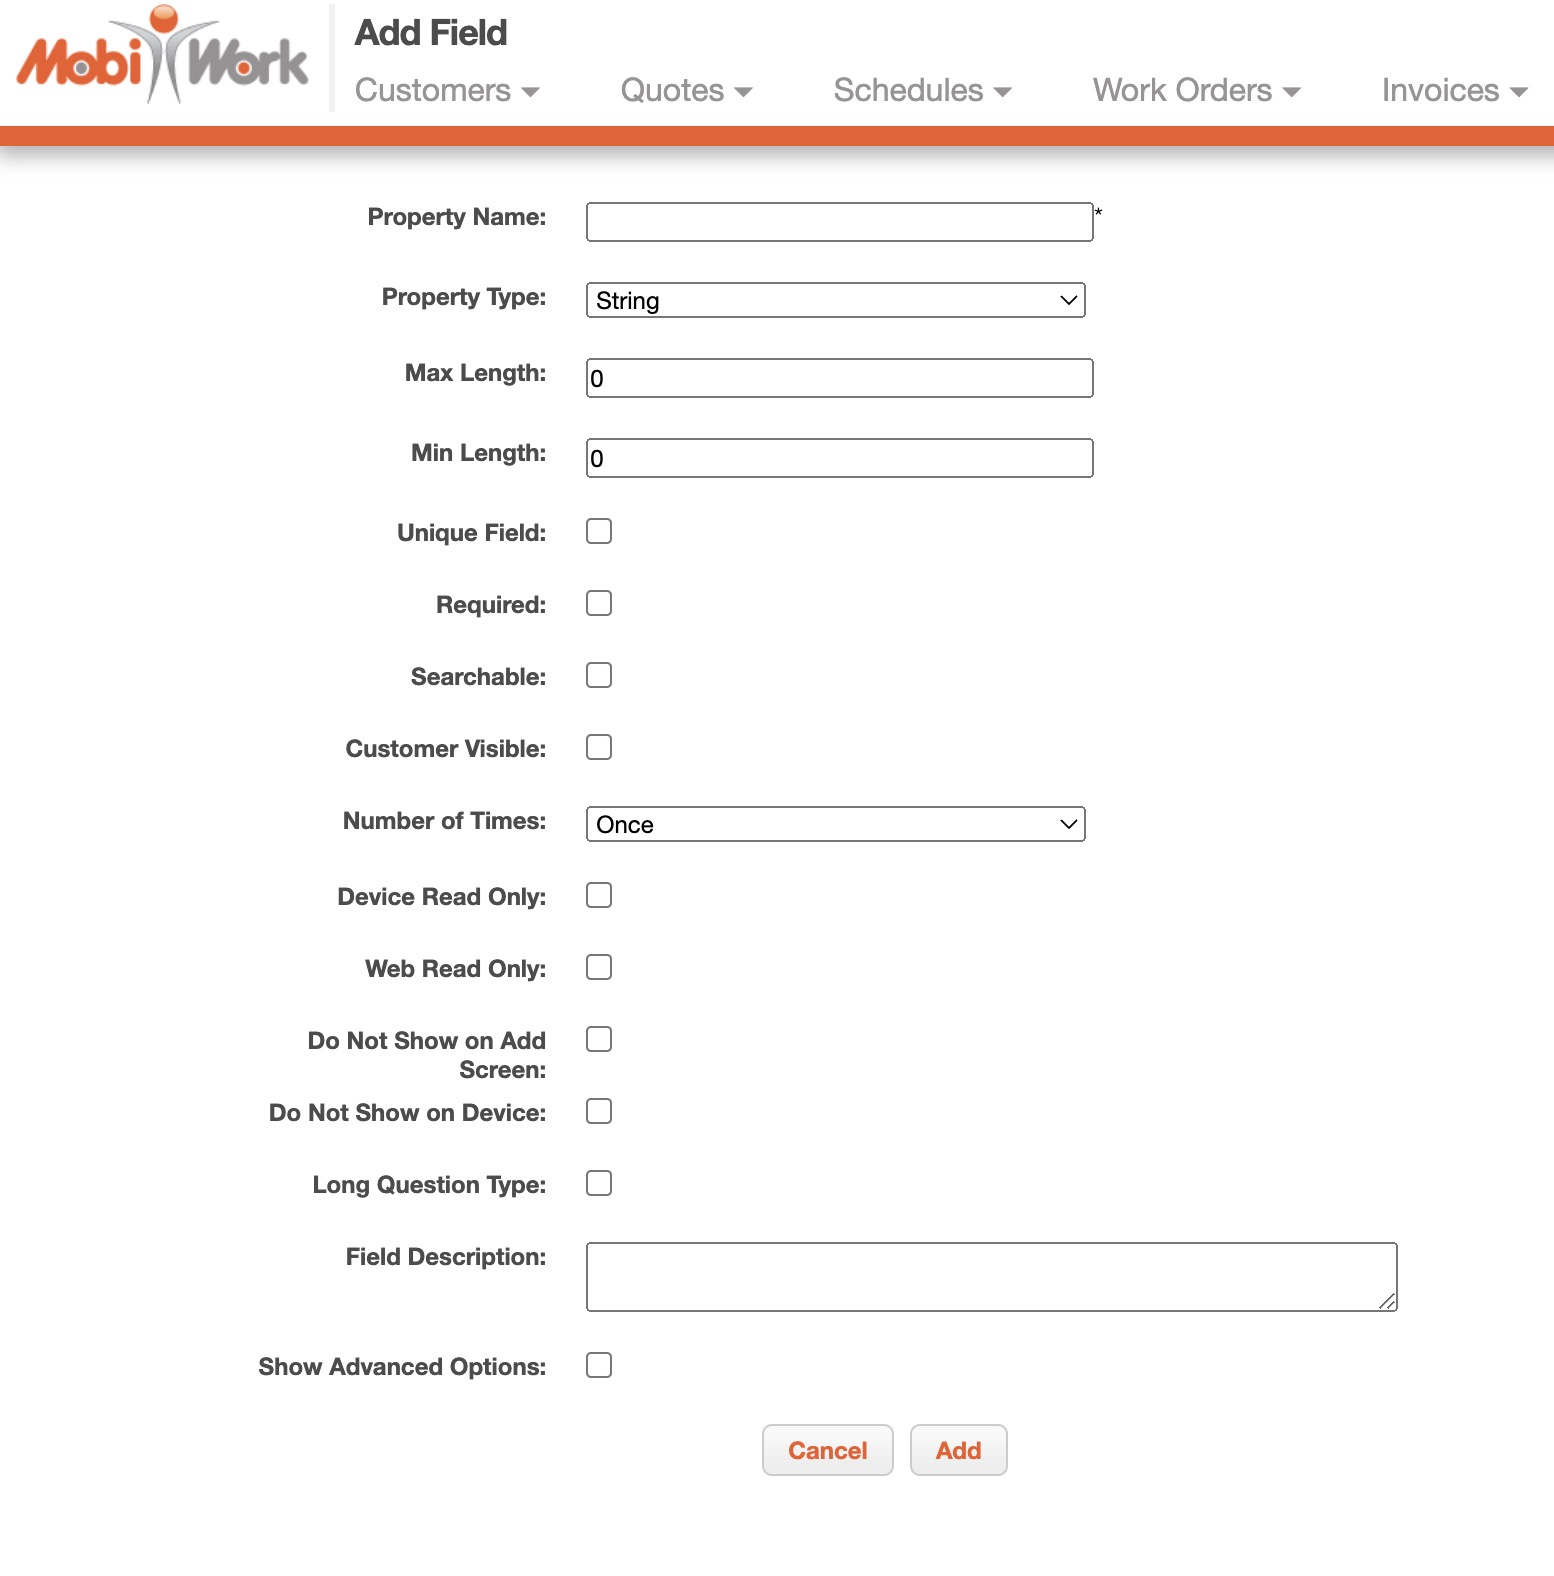
The terms for the adding a custom field are defined below:
| Name: | Description: |
|---|---|
| "Name" | The name of the custom field. |
| "Type" | The type of custom field which includes string, number, decimal, date, yes/no, multiple choice, QR code, signature, header, image capture, notes, phone number, phone number plus extension, SSN, time field, text area, vertical separator, vertical spacing, multiple QR code, customer field, product field, user field, project field, asset field, store field, dynamic header, and multiple option drop-down. |
| "String" | The field where the user can enter text. The field supports limiting the number of characters that can be entered. |
| "Number" | is a number field that does not accept decimals. The maximum and minimum number for the field can be defined. |
| "Decimal" | is a number field that accepts decimals. The maximum and minimum number for the field can be defined. |
| "Date" | is a field that allows the selection of the date from a pop-up calendar or a 3-field layout. It can be specified whether the current date will automatically appear and cannot be edited. |
| "Yes/No" | is a yes/no field indicated by a checkbox. |
| "Multiple Choice" | is a multiple-choice field where the values within it can be specified within "Select Values" by placing a comma between each value. You can indicate if the first value is invalid. For instance, if in the first value you want to give instructions for the multiple choice such as, "Please select from the following." |
| "QR Code" | is a field that captures barcode/QR code data (only for the device). |
| "Signature" | is a signature capture field to capture signatures (only for the device). |
| "Header" | is a bold label that does not allow input. |
| "Image Capture" | is an image capturing field that displays in the mobile device that allows photos to be taken to upload into the field or uploads existing images from the mobile device's gallery into the field. It can be specified to not allow images from the device gallery. |
| "Notes" | adds notes to the notes list for the entity. For example, if a form is filled for a work order, then the note field content will be added to the work order notes list. |
| "Phone Number" | is a phone number field that can be indicated if the phone number will appear in one or three fields. |
| "Phone Number Plus Extension" | is a phone number field that allows for an extension to be entered. It can be indicated if the phone number plus extension will appear in one or four fields. |
| "SSN" | allows the inputting of the social security number within 3 fields (###-##-#### format). |
| "Time Field" | Allows you to specify a 12- or 24-hour time format |
| "Text Area" | is a larger text field for multiple sentences, notes, etc. |
| "Vertical Separator" | is a vertical line separator for the web only. |
| "Vertical Spacing" | places spacing between rows for the web only. |
| "Multiple QR Code" | allows the scanning and inputting of multiple QR codes continuously in this field. |
| "Customer Field" | allows the selection of the customers available in the Permissions to appear in the field. |
| "Product Field" | allows the selection of the products available in the Permissions to appear in the field. |
| "User Field" | allows the selection of the users available in the Permissions to appear in this field. Default to device user, if selected, will display the user who is logged in on the device within the field. |
| "Project Field" | allows the selection of the projects available in the Permissions to appear in the field. |
| "Asset Field" | allows the selection of the assets available in the Permissions to appear in the field. Associate asset with work order, if selected, and if a custom field or form is associated to a work order then it will associate the asset with the work order. |
| "Store Field" | allows the selection of the stores available in the Permissions to appear in the field. |
| "Dynamic Header" | allows you to show data from the associated work order or customer (such as work order description, customer's name, etc.). |
| "Multiple Option Dropdown" | is a drop-down where you can select multiple options. |
| "Required" | Indicates if the custom field is required to fill or not. |
| "Searchable" | If checked, the custom field will become searchable within the New Search pop-up window. (It will not be searchable in the Free Text Search bar). |
| "Customer Visible" | will allow customers to view the form field on the Customer Portal. |
| "Number of Times" | include once which will show the form field one time or multiple open ended which will add the form field multiple times. |
| "Device Read Only" | means the field cannot be edited on the device. |
| "Web Read Only" | means the field cannot be edited on the web. |
| "Long Question Type" | is for the label of the field. It is a user interface setting which gives more space for the label on the device. |
| "Field Description" | are any comments that describe the field. |
| "Show Advanced Options" | include QuickBooks Field Name, Label CSS, and Initial Value for this Field. |
| "QuickBooks Field Name" | only applies to customer forms/custom fields. This refers to the name of the corresponding field in QuickBooks which is used during the import/sync. |
| "Label CSS" | is a web only feature which allows the entered HTML CSS attributes to be applied to the field label (for example, showing the label of the field in red with a font size of 20 px). |
| "Initial Value for this Field" | sets the initial value of this field when the form is added/opened on the device. At present, this needs to be configured by MobiWork's Professional Services team. |
MobiWork allows you to add predefined commissions onto the invoice; thus, eliminating the need to calculate the commission percentage.
To add commissions to your MobiWork account, you can click on the Plus Sign:

The Add Commission pop-up window will then appear:
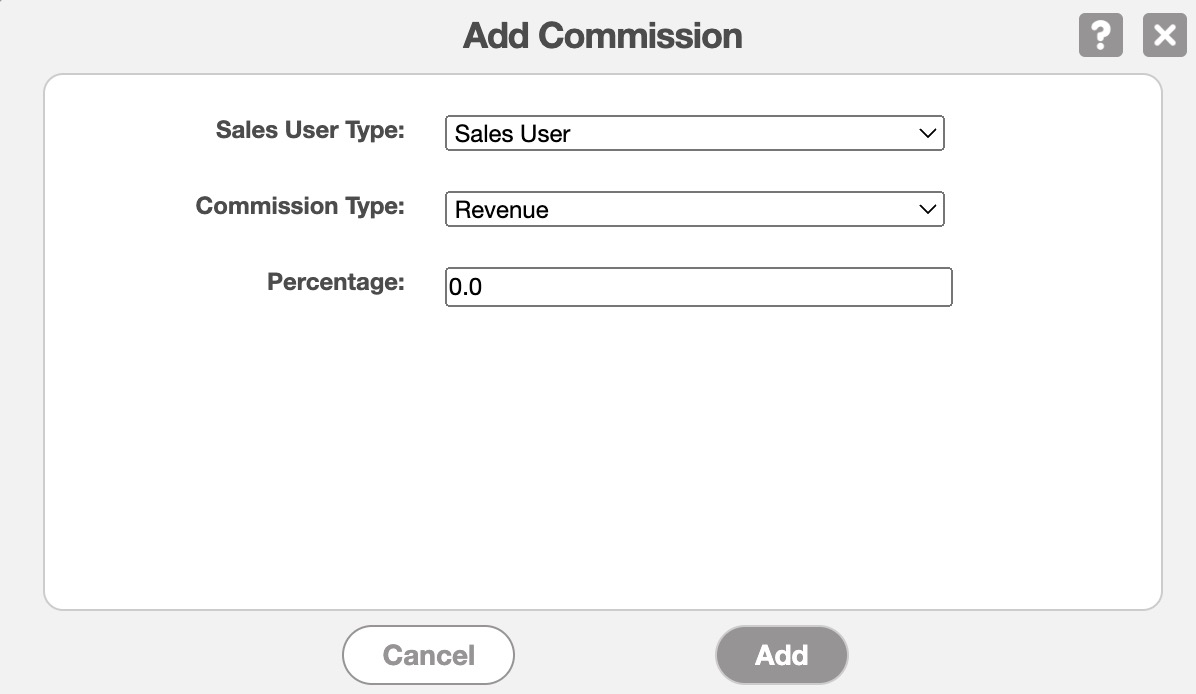
Use the provided fields to input:
- The Sales User Type- If the users are a Sales User or a Sales Manager
- Commission Type- If the commission is coming from revenue or profit
- Percentage- The percentage amount that the user will earn for commissions
"Invoice Categories" can be used to categorize your invoices; some examples of different categories include billing, lease to own, etc.:
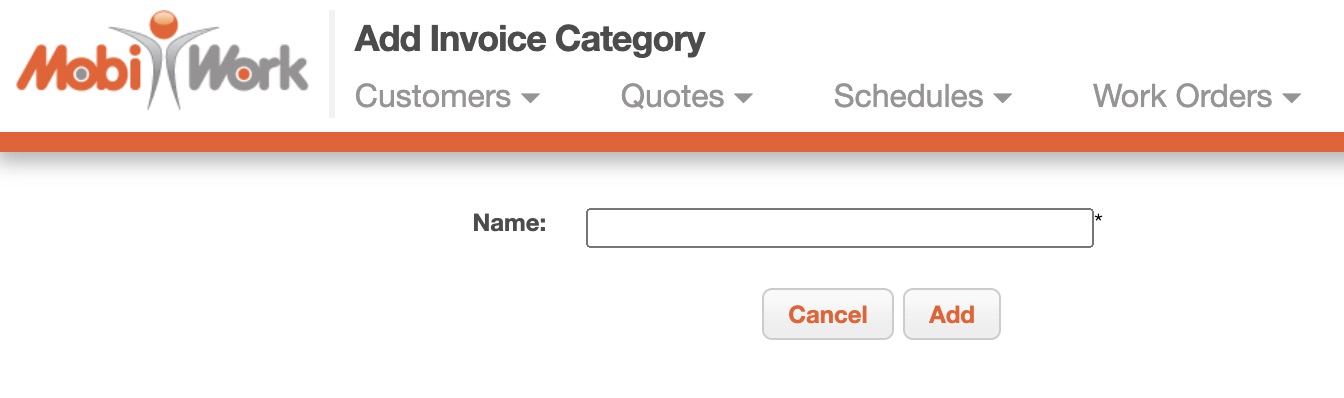
To add a new category, click on the Add Invoice Category button.

Enter the name of the category and then click on the Add button to save the new category:
The columns for the Invoice Category are defined below:
| Name: | Description: |
|---|---|
| "Name" | The name of the invoice category |
| "Actions" | Allows you to edit or delete the invoice |
| "Add Invoice Category" | adds an invoice category to "Invoice Categories." |
MobiWork allows you to include ad hoc discounts to your invoices. To add a new discount, click on the Add Discount button:

The Add Invoice Discount pop-up window will then appear:
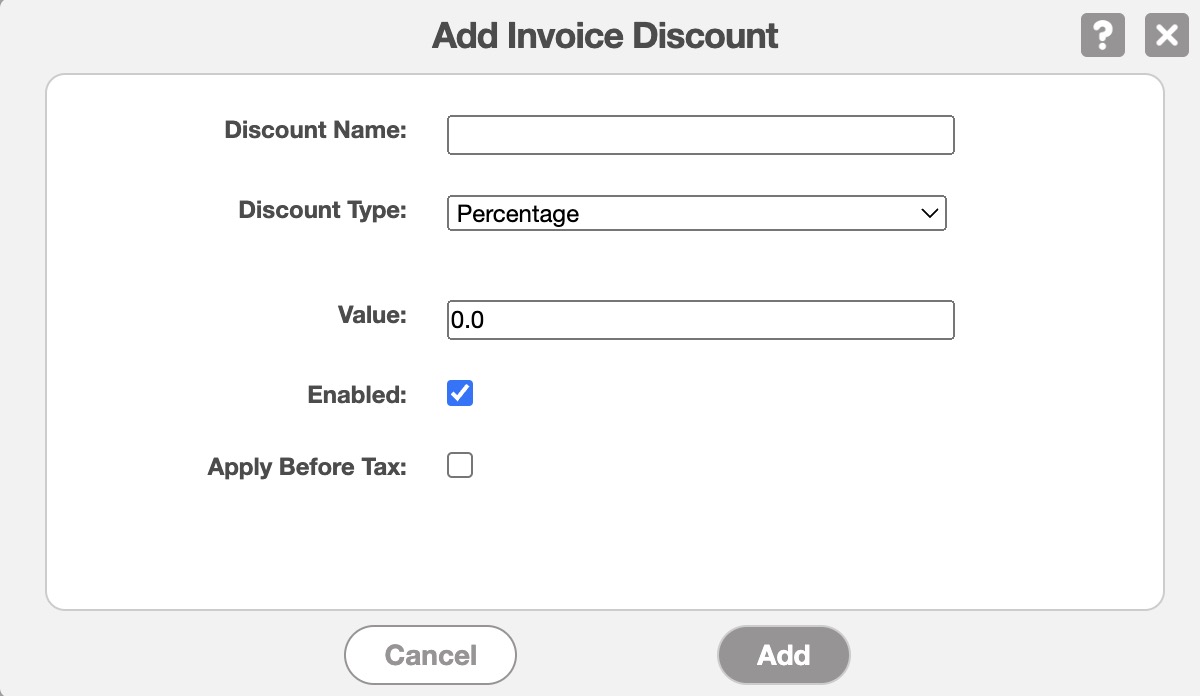
In the pop-up window enter the:
Discount Name- What the discount will be called for future use.
Discount Type- How the discount will be displayed; either in a percent format (e.g., 100%) or a numerical format (e.g., 100).
Value- How much the discount should be.
Enabled- The "Enabled" checkbox indicates whether the chosen discount should be visible when adding line items to the invoice.
Apply Before Tax- If checked, the discount will be applied to the total before tax.
MobiWork allows you to include ad hoc markups to your invoices. To add a new markup, click on the Add Markup button:

The Add Markup pop-up window will then appear:
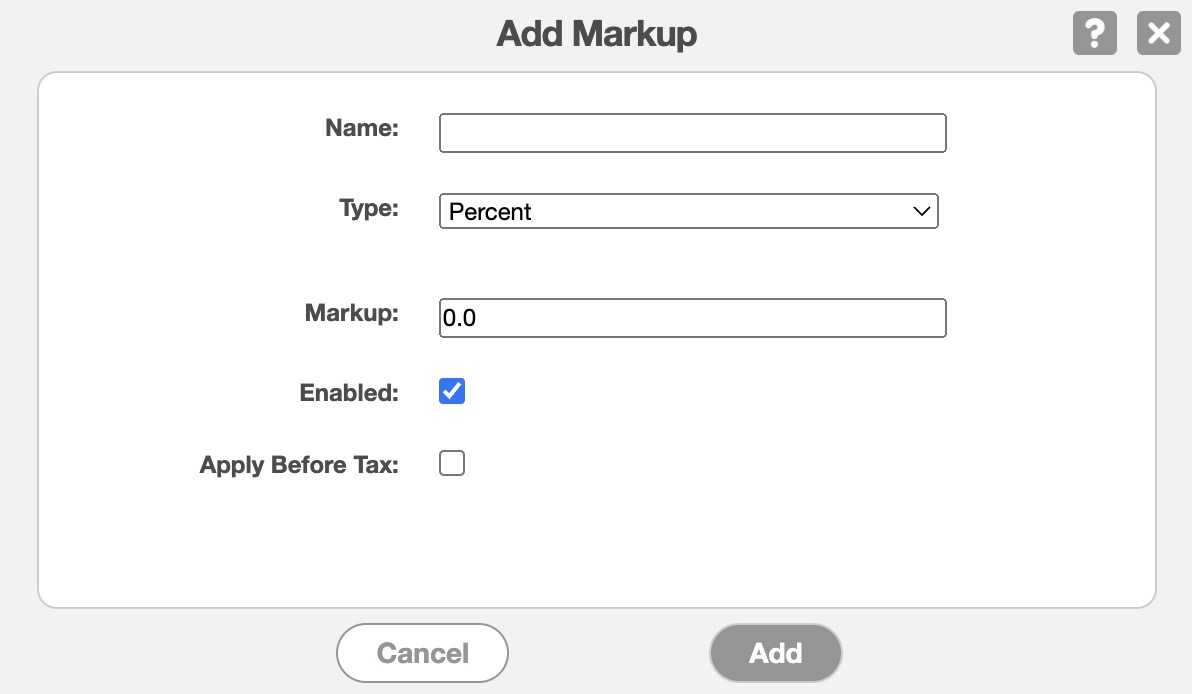
In the pop-up window enter the:
Name- What the markup will be called for future use.
Markup Type- How the markup will be displayed; either in a percent format (e.g., 100%) or a numerical format (e.g., 100).
Markup- How much the markup should be.
Enabled- The "Enabled" checkbox indicates whether the chosen markup should be visible when adding line items to the invoice.
Apply Before Tax- If checked, the markup should be applied to the total before tax.
The "Terms and Conditions" section for invoices, will allow you to create a template that will input specified terminology and phrases for the selected invoice. To add a new terms & conditions template, click on the Add Terms & Conditions button:
Once you click on the Add Terms & Conditions button, the Add Terms & Conditions pop-up window will appear:
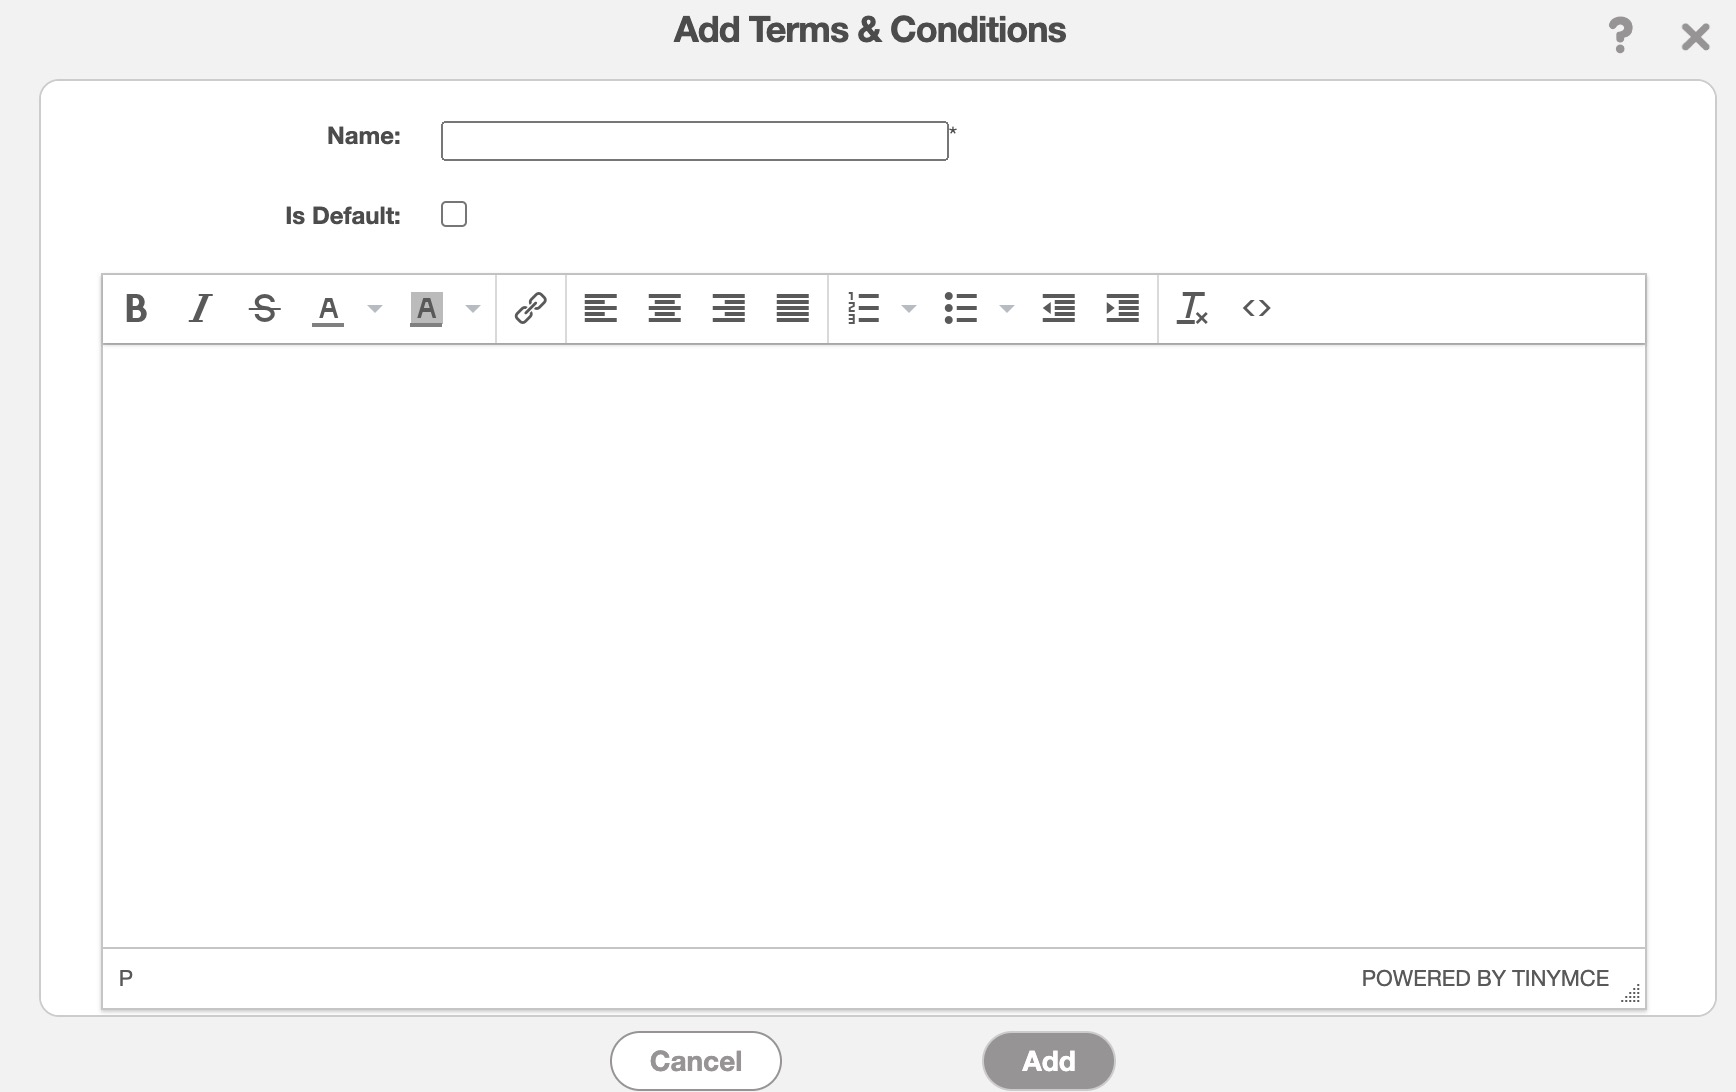
In this pop-up window indicate the following specifications:
If the terms and conditions should be included by default on invoices.
The nomenclature of the terms and conditions.
Once you have finished inputting the desired information, click the Add button to save the terms and conditions.
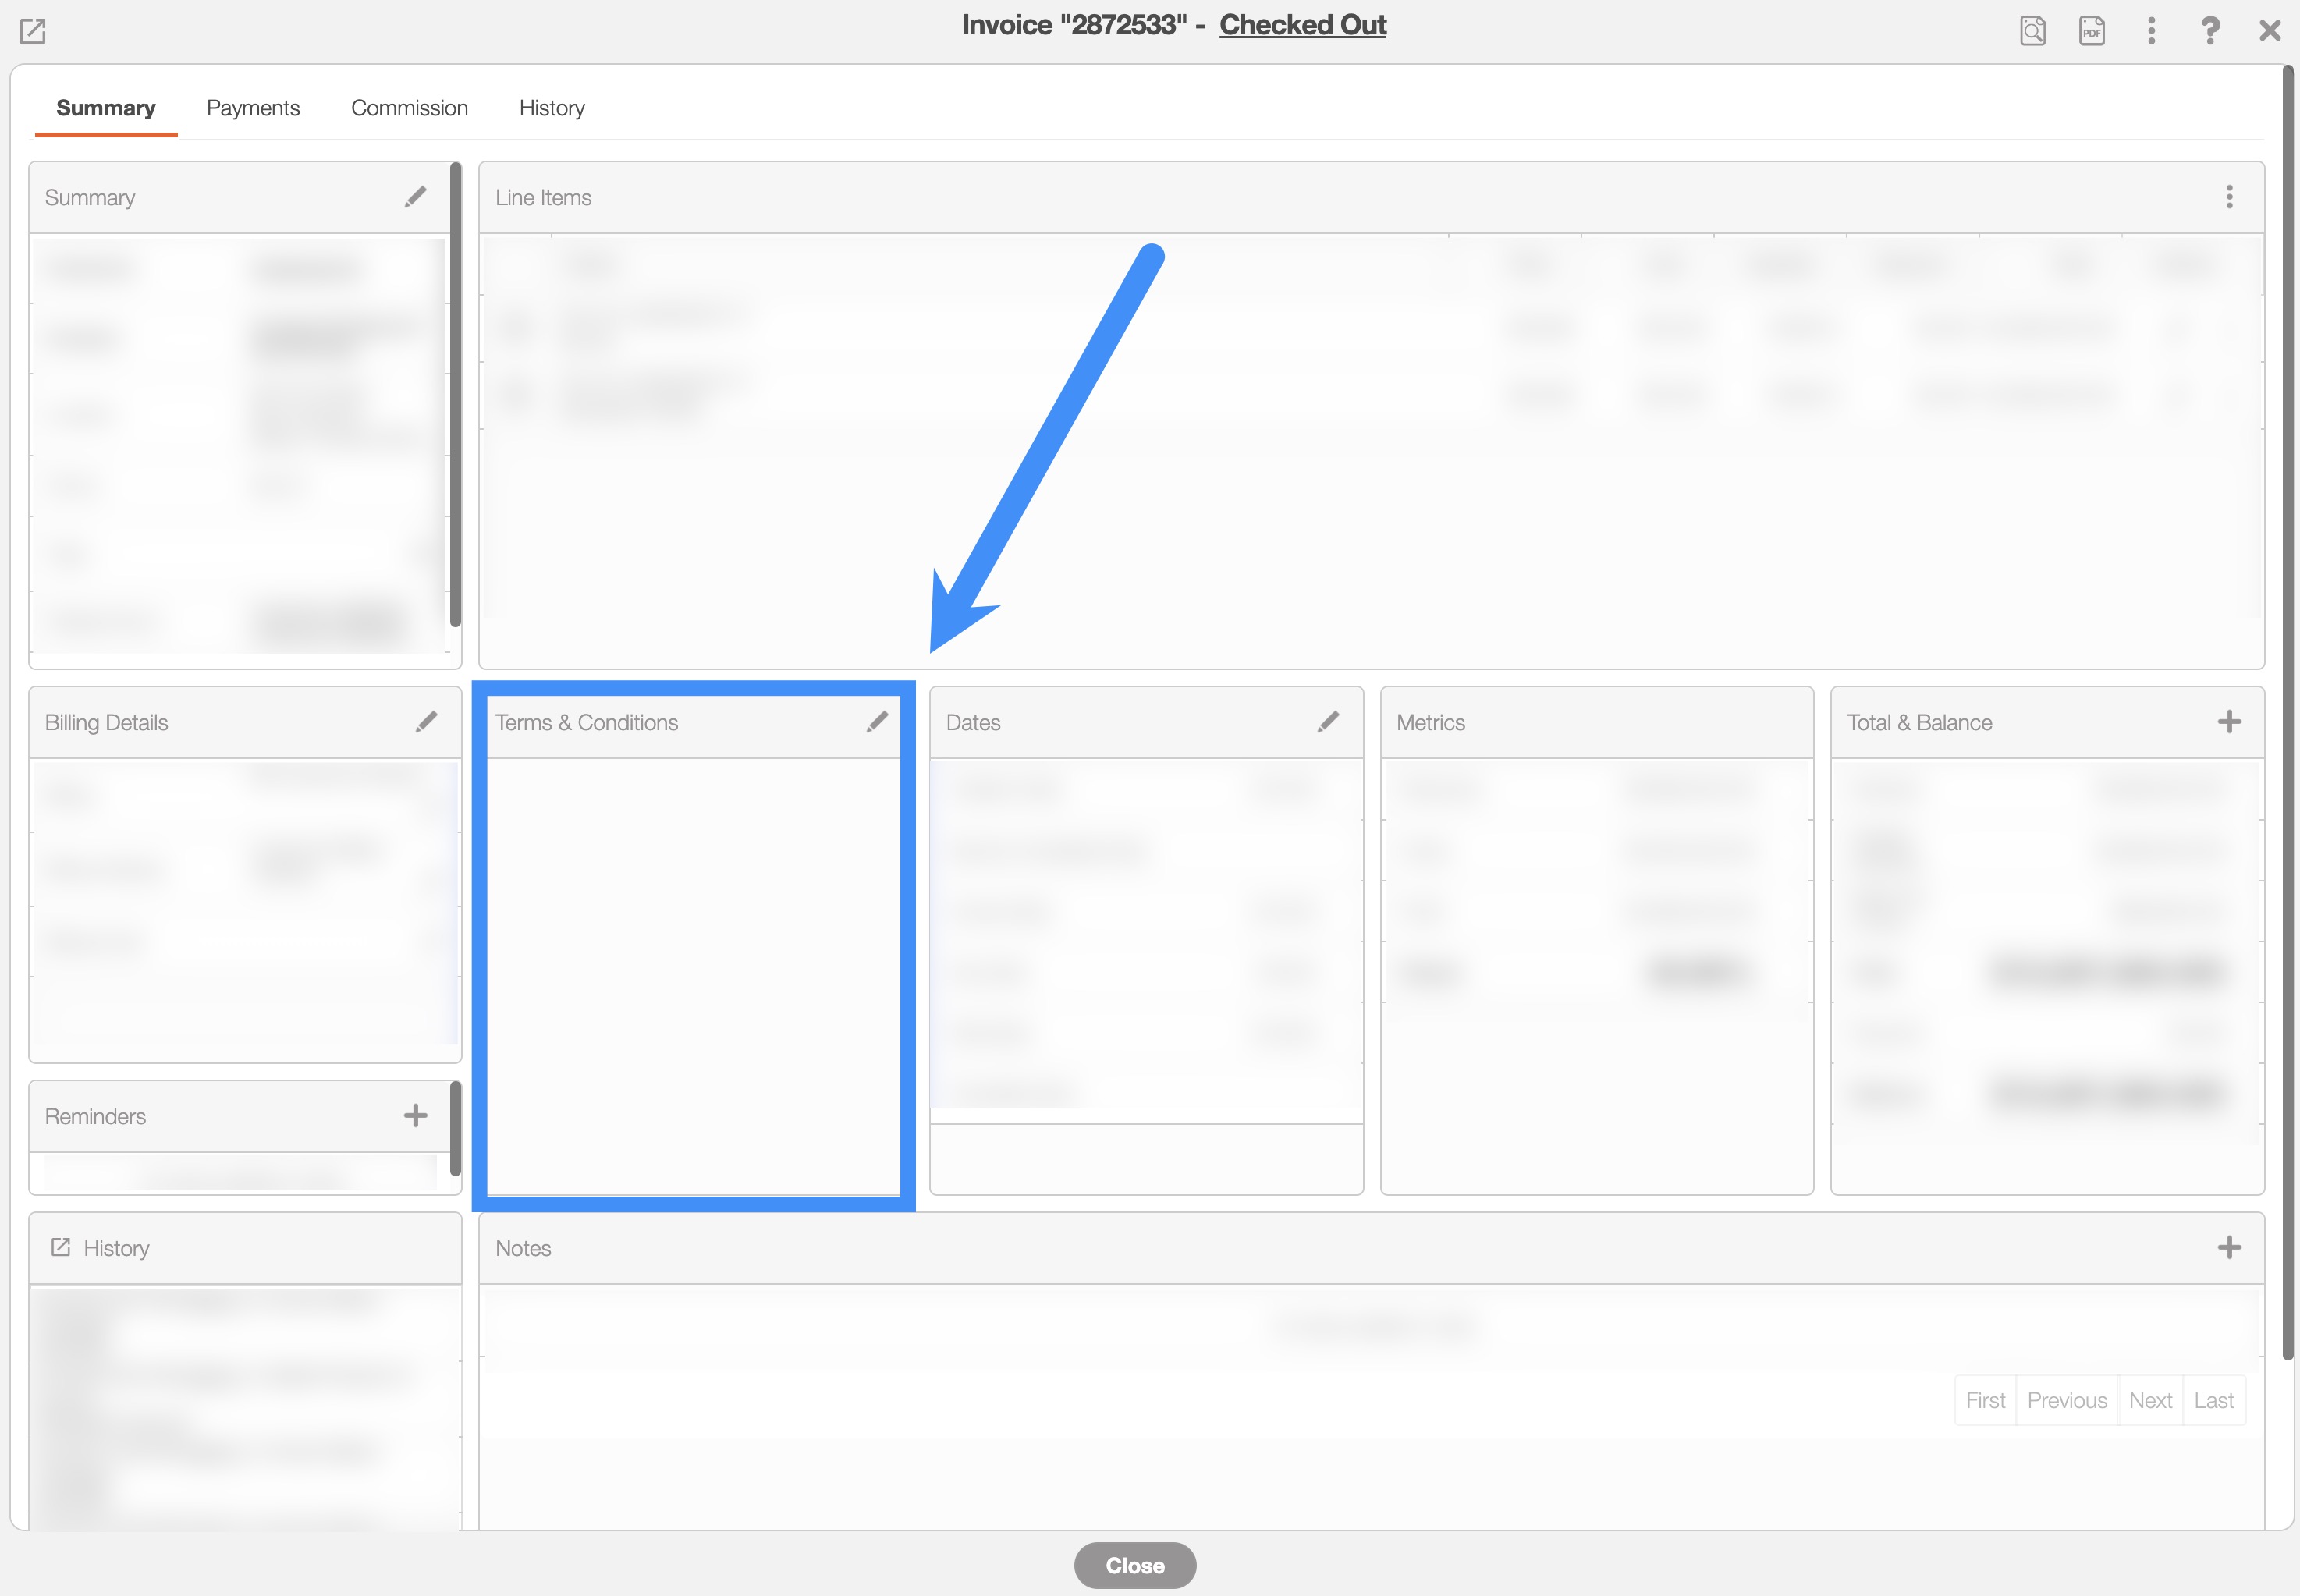
After you added your terms and conditions on the Settings page, you will be able to access them on the "Summary" tab of the View Invoice pop-up window:
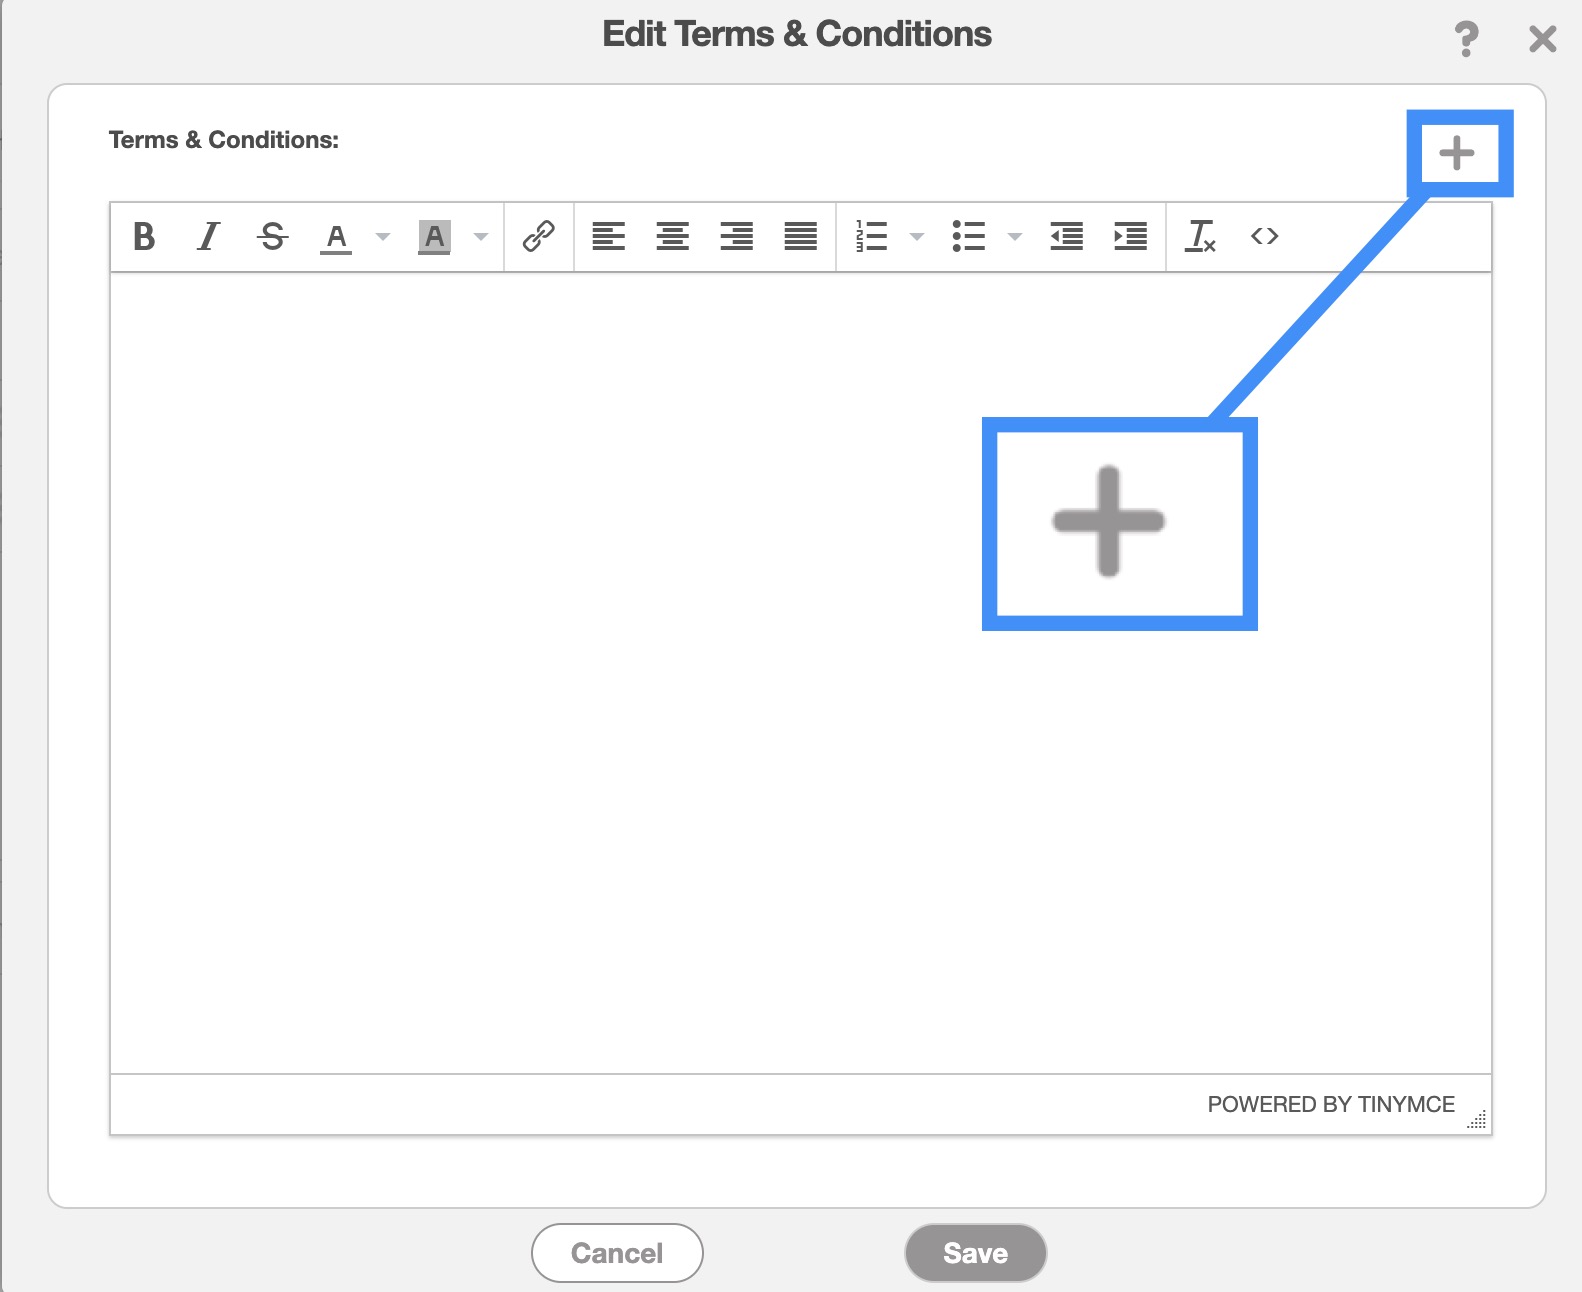
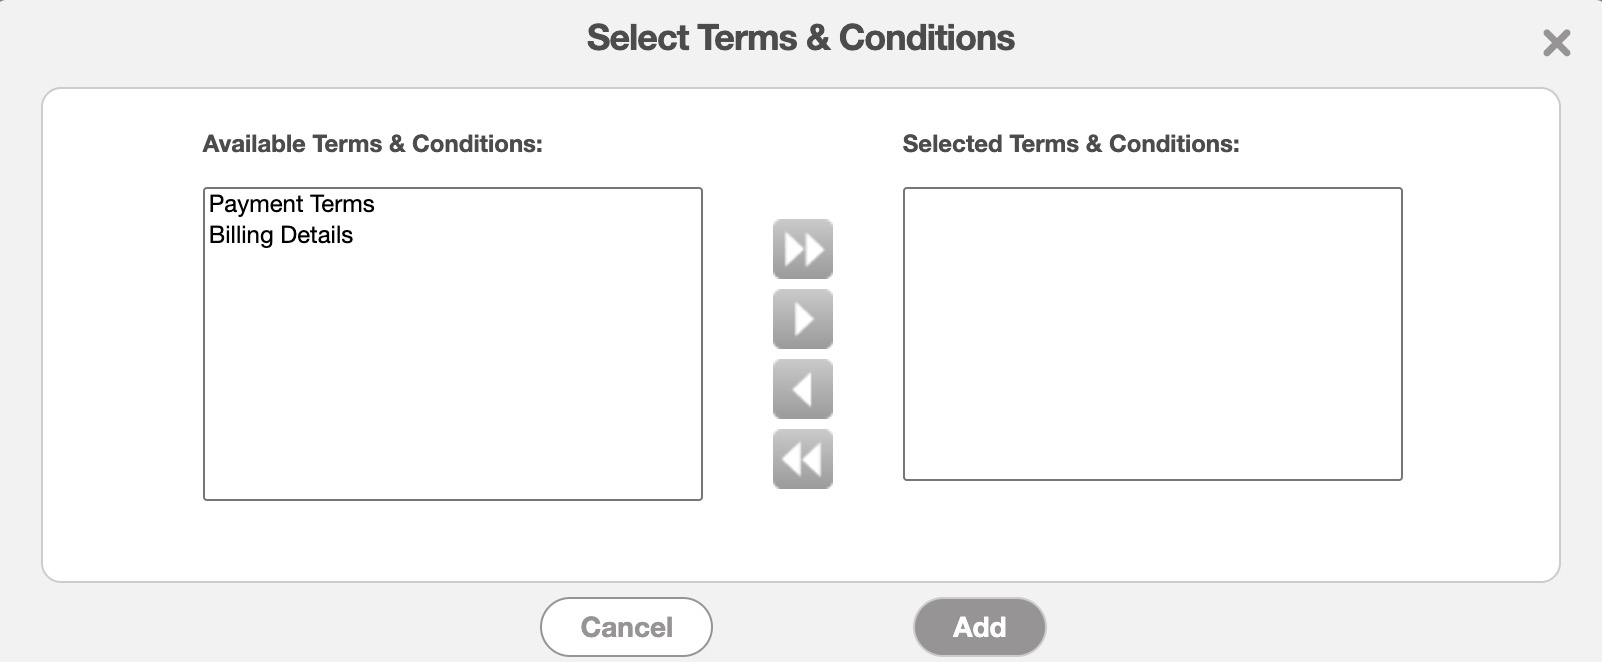
Once you have selected the desired terms and conditions, click the Add button:
Note: Please note that the Terms & Conditions that are generated in the Invoice Settings page will be mirrored for the terms and conditions for quotes.
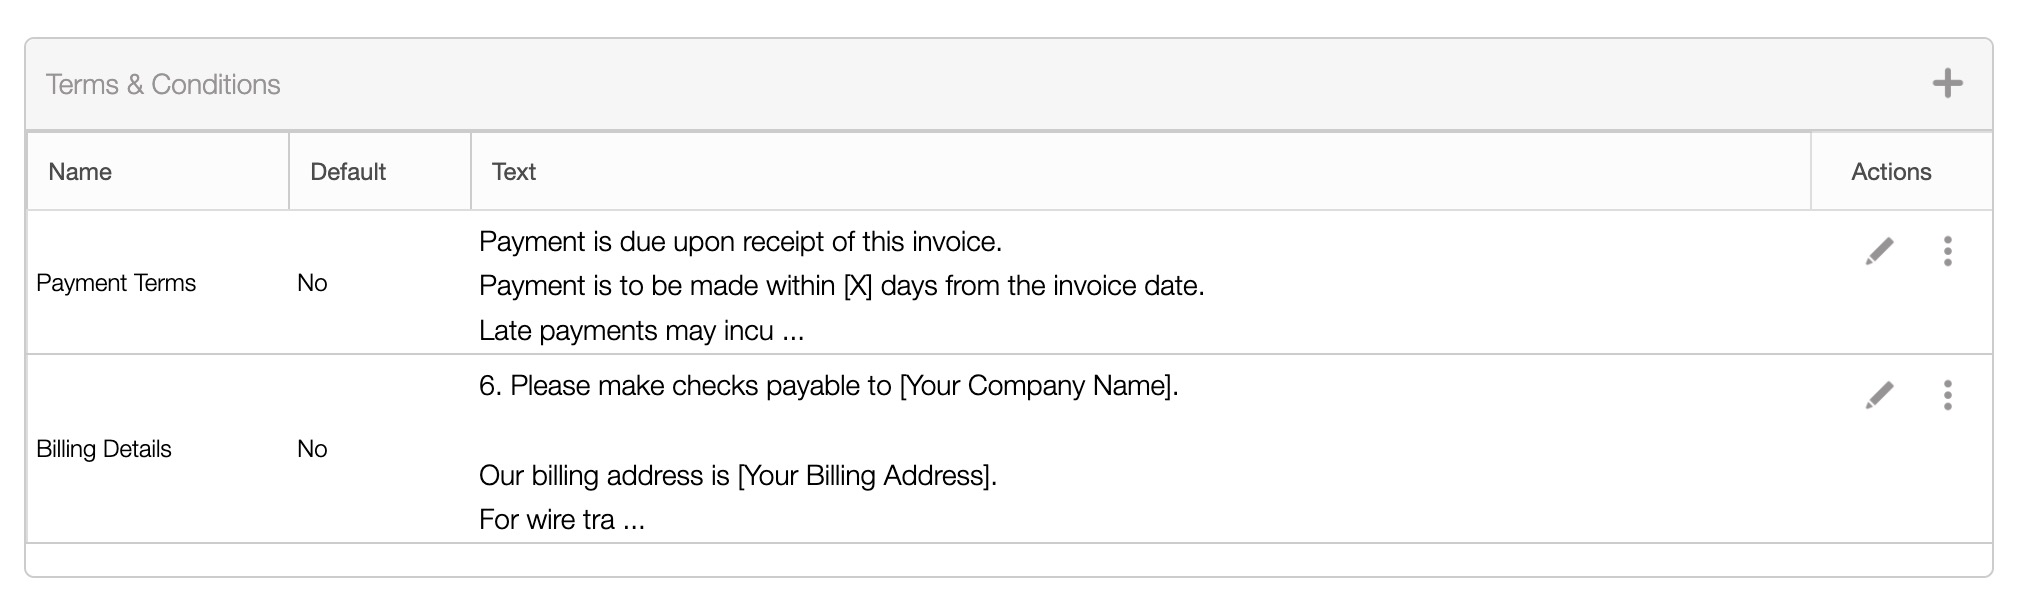
The terms found in the "Terms & Conditions" section are defined below:
| Name: | Description: |
|---|---|
| "Name" | The name of the Terms & Conditions. |
| "Default" | Indicates if the selected Terms & Condition is to be implemented by default. |
| "Text" | The text that comprises the Terms & Conditions. |
| "Actions" | Allows you to edit or delete the selected Terms & Conditions. |
Actions are a convenient way to perform complex actions on one or more invoices at once (e.g., sending messages to your customers).
These actions will appear in drop-down actions from the "List" tab, the View Invoice pop-up window and in the device:

You can choose to add an email action or a text action. Depending on your desired outcome, click on either the Add Email Action button or the Add Text Action button:
The columns found in the "Actions" section are defined below:
| Name: | Description: |
|---|---|
| "Name" | The name of the email action |
| "Type" | The type of action |
| "Options" | Shows the configuration information; only provides value during troubleshooting |
| "Actions" | Allows you to edit or delete the Action |
Add an Email Action
To add a new email action click on the Add Email Action button; the Add Action pop-up window will then appear:
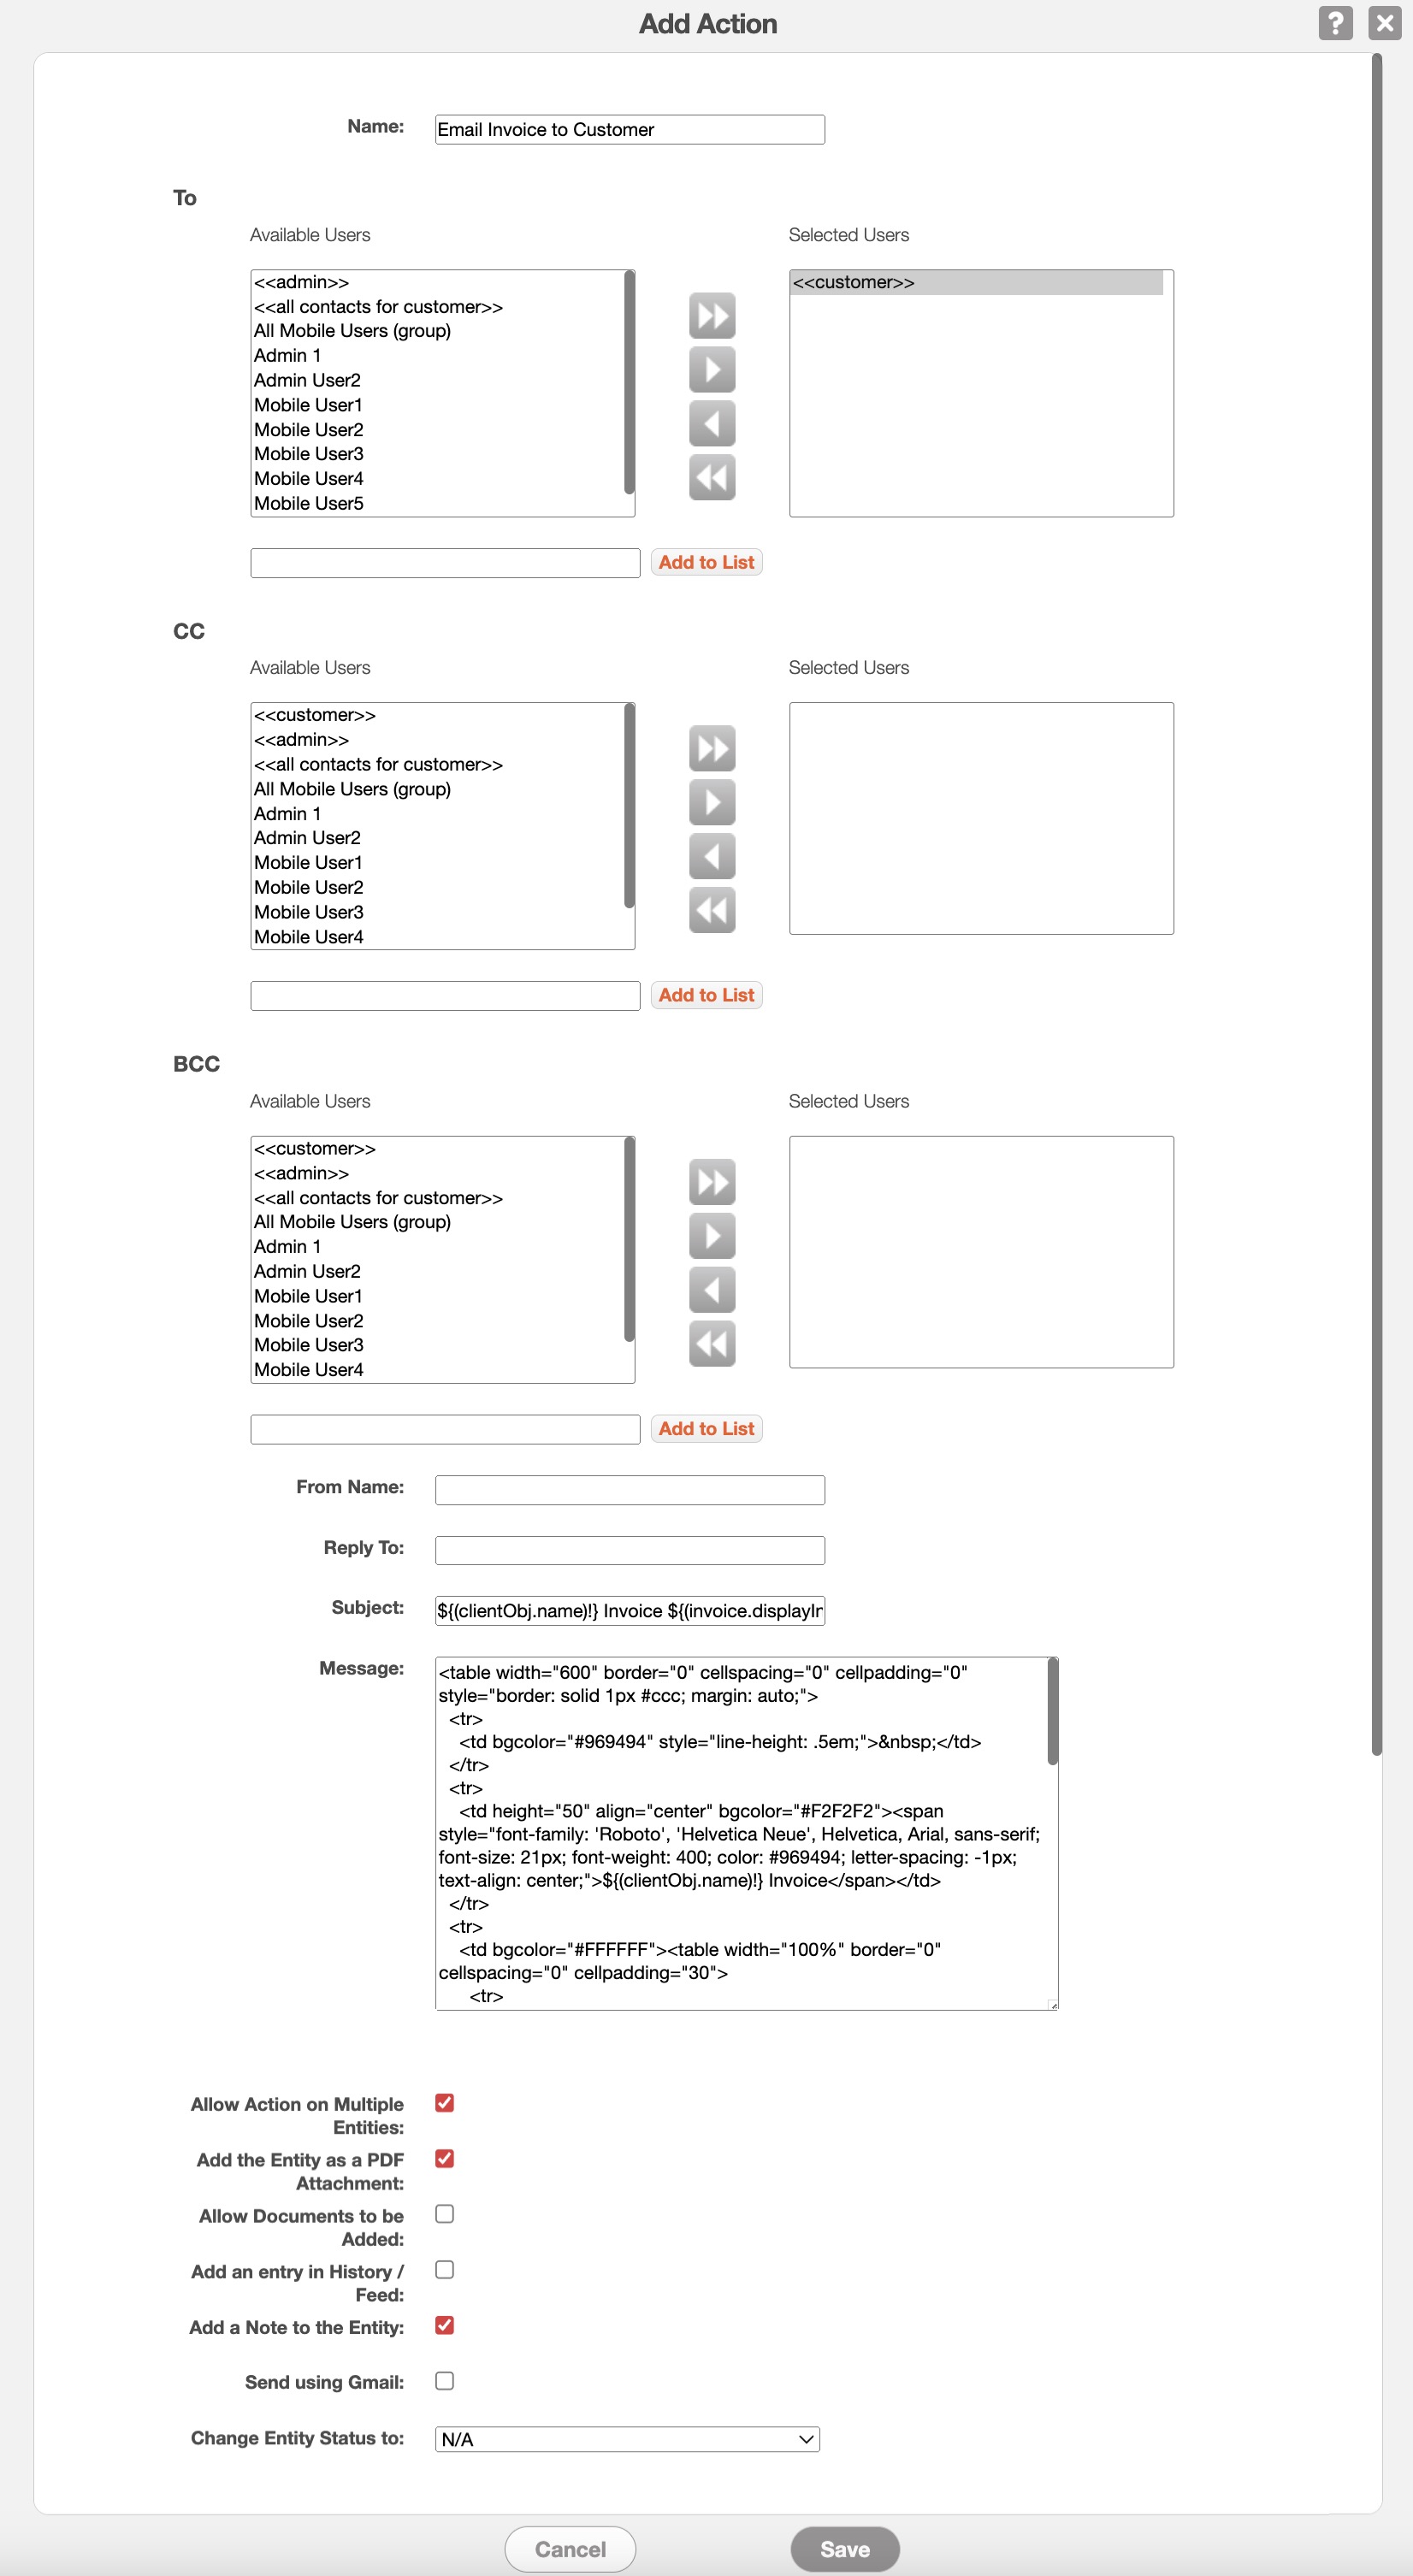
Enter the required information and once you are satisfied click on the Add button to save the new action:
- Name- What the email action will be called henceforth
To- Who will be the recipients of the email message
CC- Who will be carbon-copied on the email message (receives a copy of the email and is visible to other recipients)
BCC- Who will be blind carbon-copied on the email message (receives a copy of the email and is invisible to other recipients)
From Name- The sender of the email message
Reply To- The recipient of the email message
Subject- The subject title of the email message
Message- The message body of the email message
Allow Action on Multiple Entities- If checked, the email action can be performed on multiple invoices
Add Entity as a PDF Attachment- If checked, will add the entity information as a PDF attachment
Add an Entry in History/Feed- If checked, will add will an an entry to the "History" column of the View Invoice pop-up window
Allow Documents to be Added- If checked, documents can be added to the email action
Add a Note to the Entity- If checked, will add a note in the "Notes" column of the View Invoice pop-up window
Send using Gmail- If checked, the email will be sent using Gmail
Change Entity Status to- Once the email is sent the entity status will change to the status listed in the drop-down
Add a Text Action
To add a new text, action click on the Add Text Action button; the Add Action pop-up window will then appear:
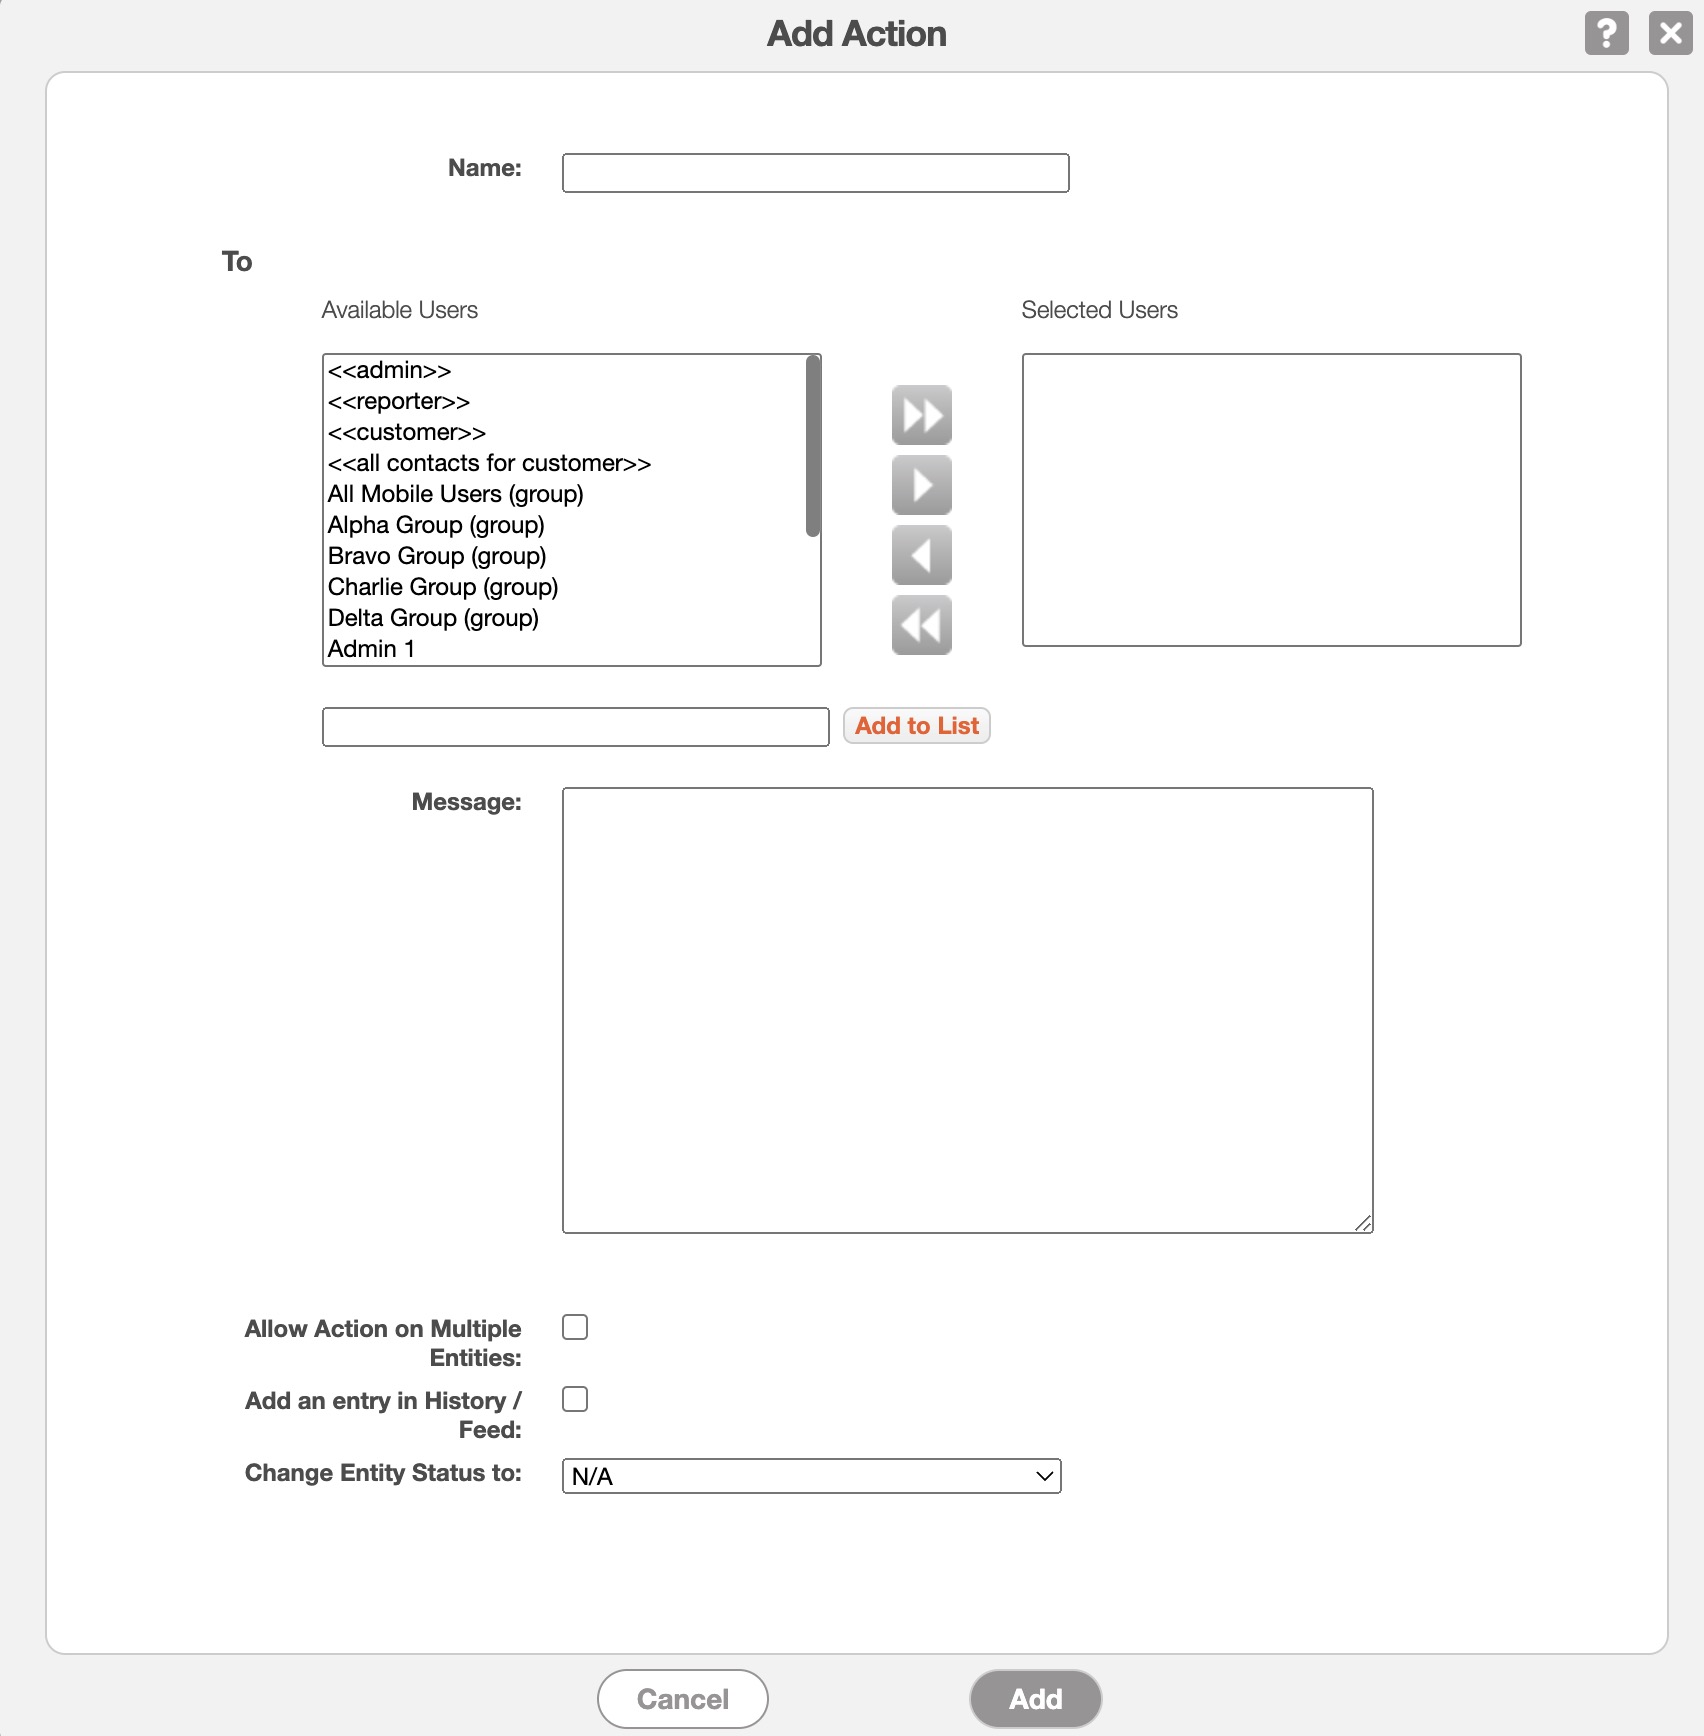
Enter the required information and once you are satisfied click on the Add button to save the new action:
Name- What the text action will be called henceforth
To- Who will be the recipients of the text message
Message- The message body of the text message
Allow Action on Multiple Entities- If checked, the text action can be performed on multiple invoices
Add a Note to the Entity- If checked, will add a note to the entity
Change Entity Status to- Once the text message is sent the entity status will change to the status listed in the drop-down