- Overview
- Account Settings
- Assets
- Connectors Framework
- Overview
- QuickBooks Online
- QuickBooks Desktop Web Connector
- Azure AD
- Salesforce Integration
- FleetNet Connector
- Avalara Connector
- Inbound REST API
- Outbound REST API
- Mailchimp Connector
- Text Messaging Connector
- Clearent Connector
- Stripe Connector
- HubSpot Connector
- UKG Connector
- Paylocity Connector
- UKG Connector
- Gusto Connector
- iSolved Payroll Connector
- Customer Portal
- Customers
- Dashboards
- Devices
- Dispatching
- Forms
- Inventory
- Invoices & Billing
- Locations
- Payments
- Parts
- Projects
- Quotes
- Recurrent Routes
- Recurrent Services
- Reports
- Sales Orders
- Schedule
- Services
- Tasks
- Text Messaging
- Time Tracking
- Users
- Work Orders
With MobiWork you can easily add a new recurrent route; this section will highlight the different ways you can add a new recurrent route.
There are a couple of different ways that you can add a new recurrent route into MobiWork. The following subsections will illustrate some of the more common methods.
From the Recurrent Route Drop-Down
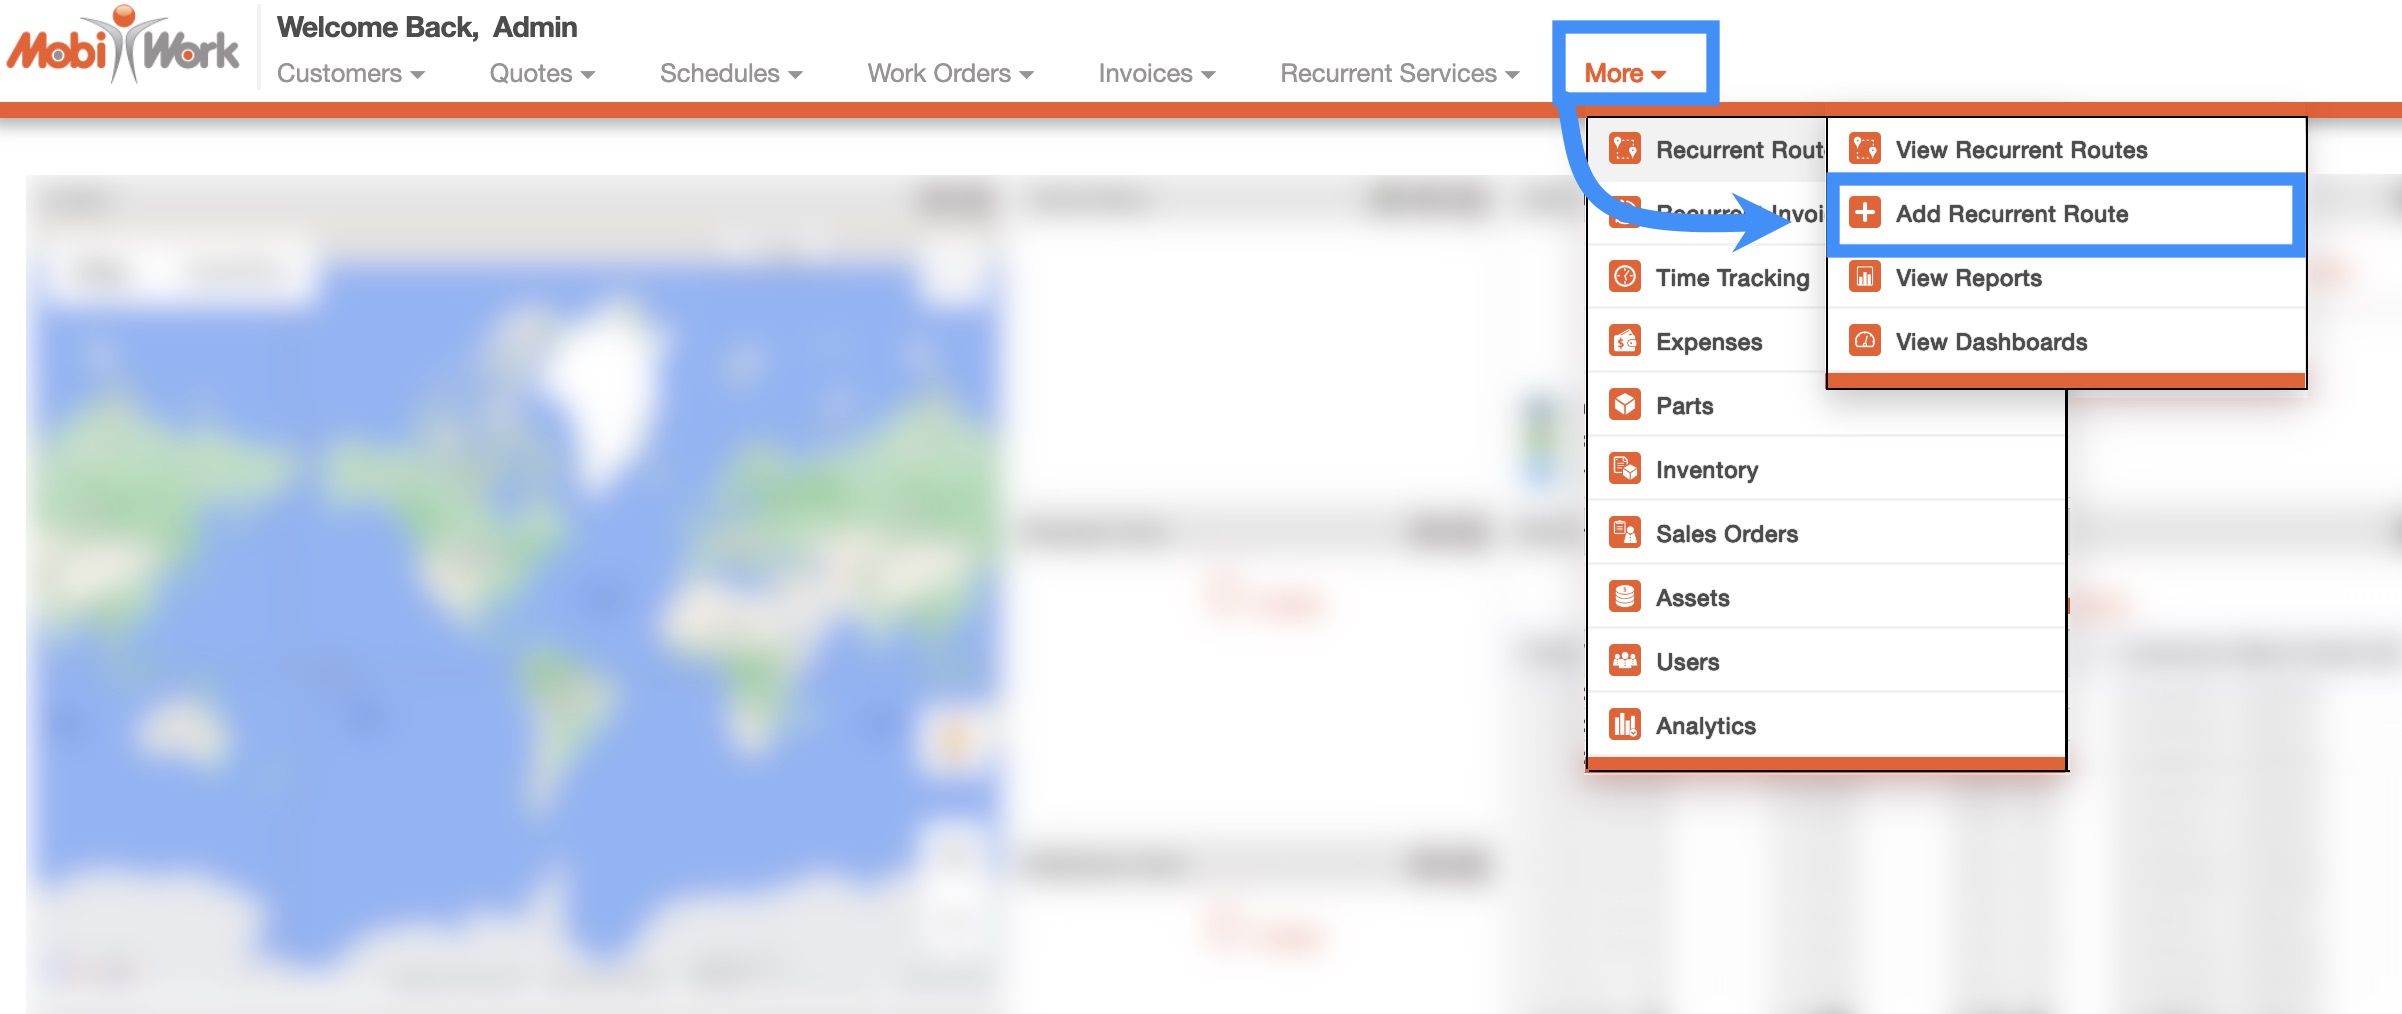
The fastest and easiest way to add a recurrent route is by accessing the drop-down menu from the Recurrent Route feature, located in your MobiWork menu:
Select the "Add Recurrent Route" option from the drop-down.
You will then be redirected to the Add Recurrent Route page.
From the Recurrent Routes' More Actions
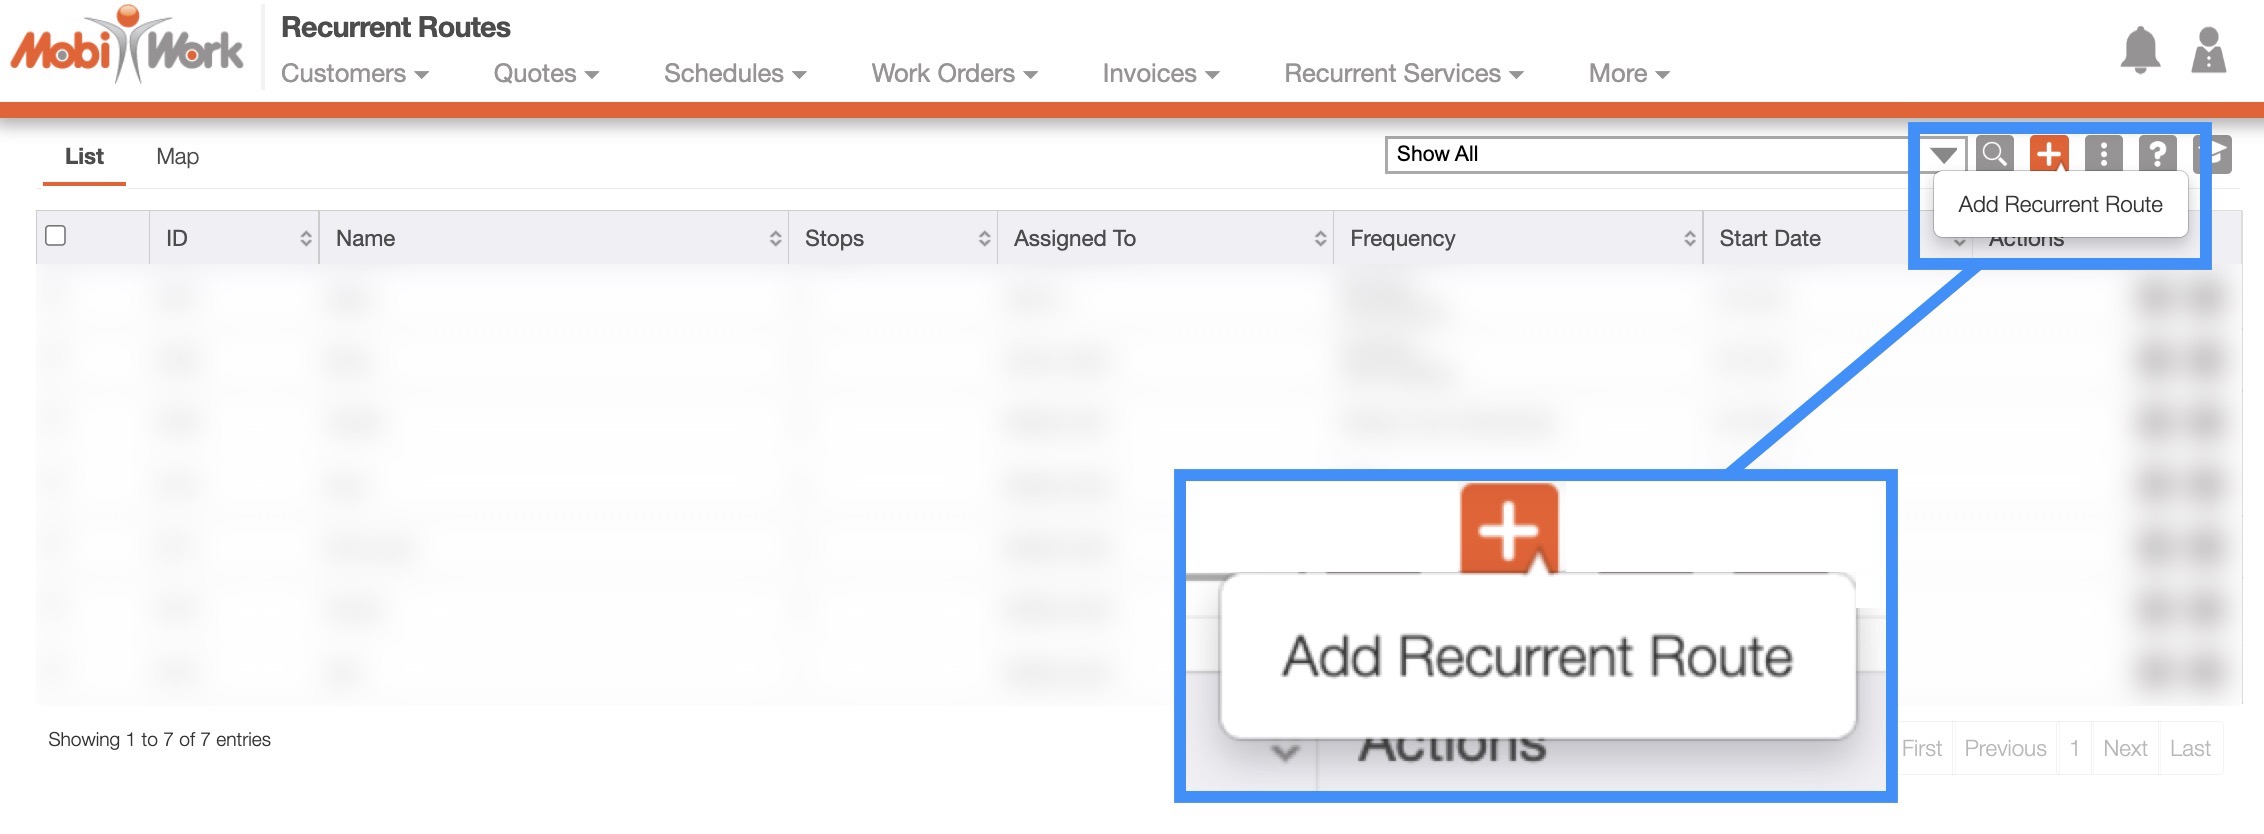
On the Recurrent Routes feature page, you will also be able to add a new recurrent route or import your recurrent routes from Excel:

Plus Sign- Adds a new recurrent route.
More Actions- Allows you to access the import drop-down actions.
Another convenient way to add a new recurrent route is through the More Actions button. For more information on how to access this page, please see the Recurrent Routes List section.
To add a new recurrent route from the Recurrent Routes page, please see the steps below:
Once you are on the Recurrent Routes feature page, click on the Plus Sign to add a new recurrent route:
You will then be redirected to the Add Recurrent Route page.
To add a recurrent route requires several steps. First you need to create a recurrent route, then you will need to populate that route with the desired stops. Once this is complete, the recurrent route will need to be published so that it is ready for use.
The following subsections will highlight how to create a recurrent route and add stops to it.
Add Recurrent Route Page
Regardless of the manner that you choose to add the recurrent route, you will be redirected to the Add Recurrent Route page. From this page, enter the required information for the recurrent route:
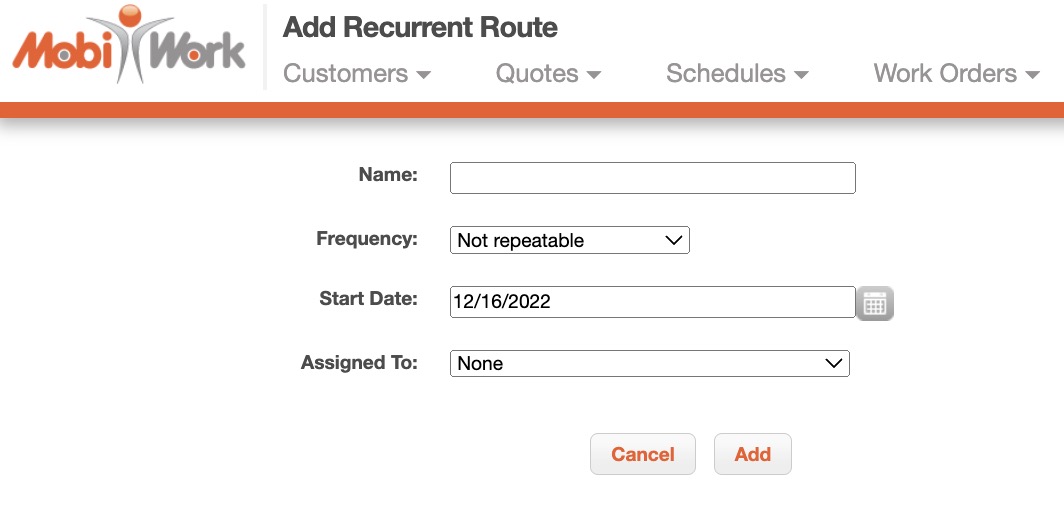
The name of the recurrent route.
How often the recurrent route should be completed.
The start date that the recurrent route should begin.
The user assigned to the recurrent route.
Once you are satisfied with the information entered, click the Add button.
Adding a recurrent route from the Add Recurrent Route page is the first step of creating a recurrent route for your users. You will also need to add the stops that are found along the route and then publish the changes so that the recurrent route is finalized.
The following subsections will illustrate how to add stops to your recurrent route and how to publish your recurrent route.
Add Stop
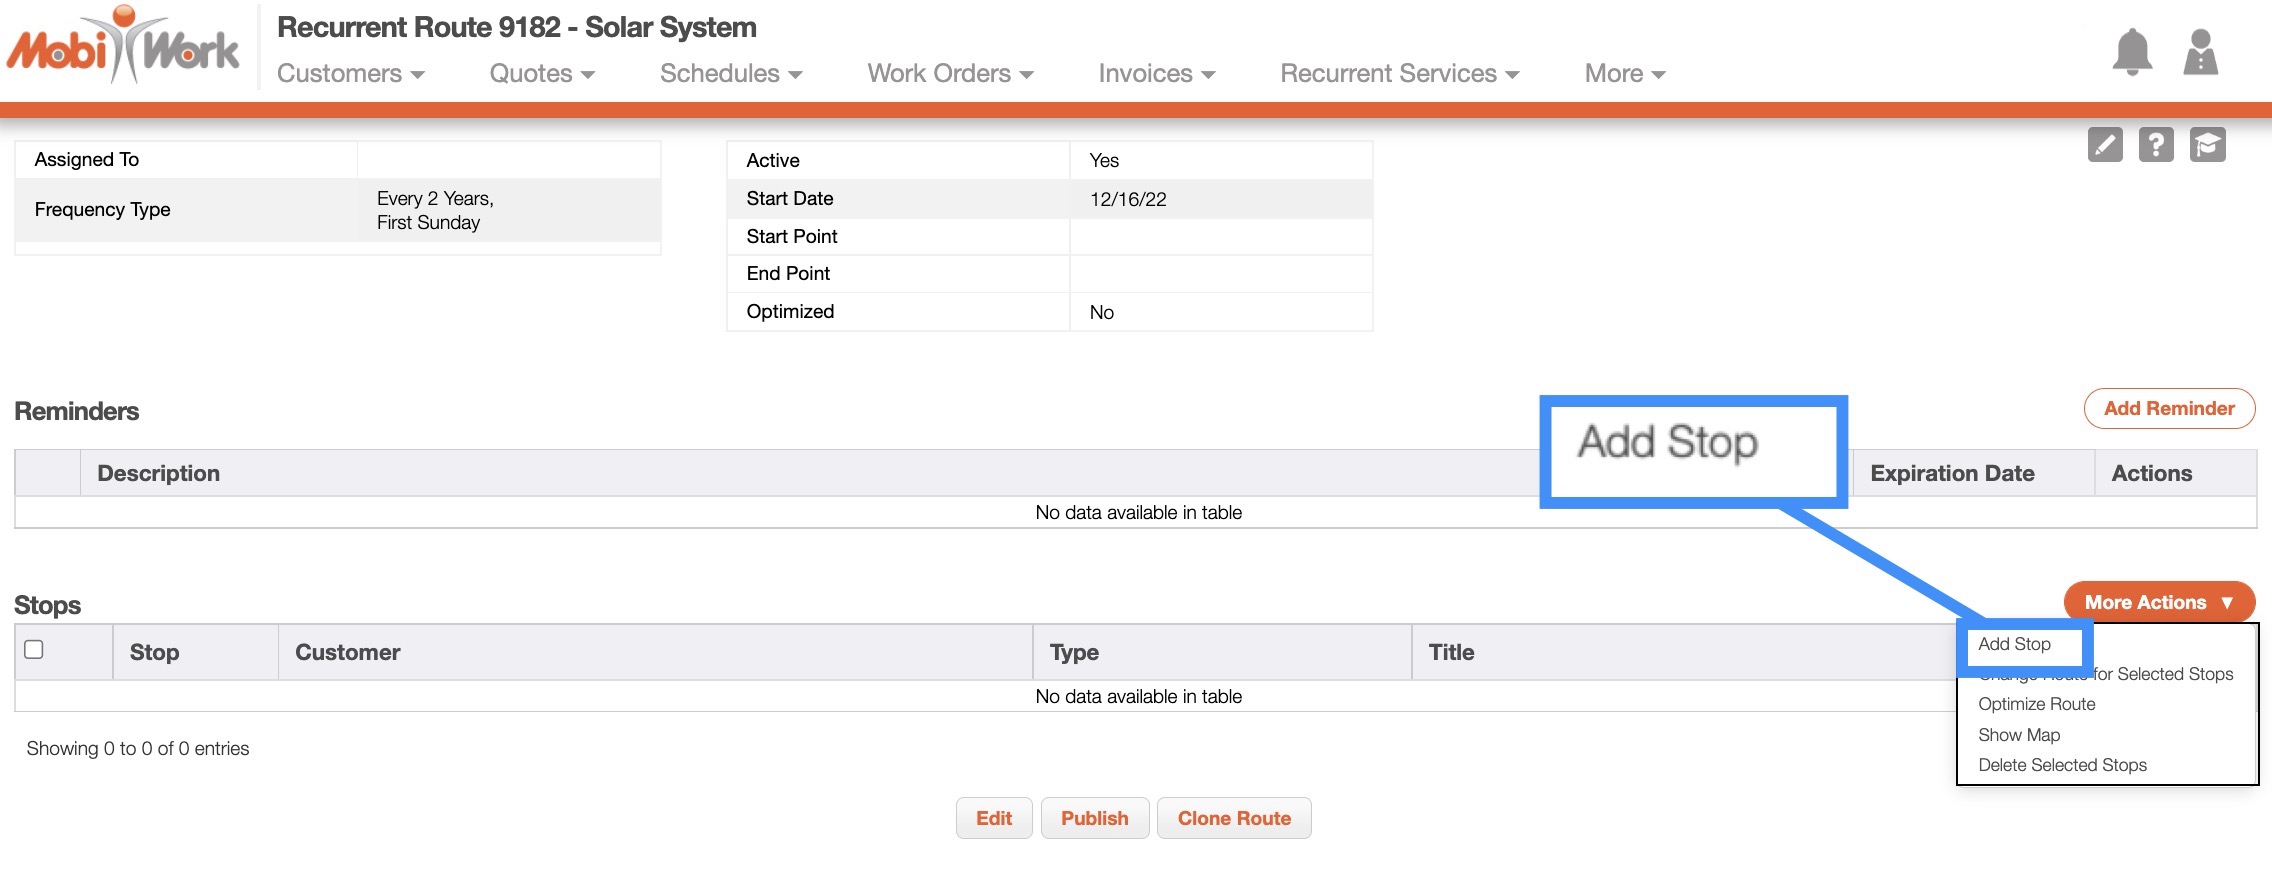
Once you create a recurrent route, you can add stops to it. To add stops to a recurrent route, you should first be on the View Recurrent Route page. For more information on how to access this page, please see the View Recurrent Route page.
On the View Recurrent Route page, click on the More Actions button and from the drop-down, select the "Add Stop" option:
The Add Stop pop-up window will then appear:
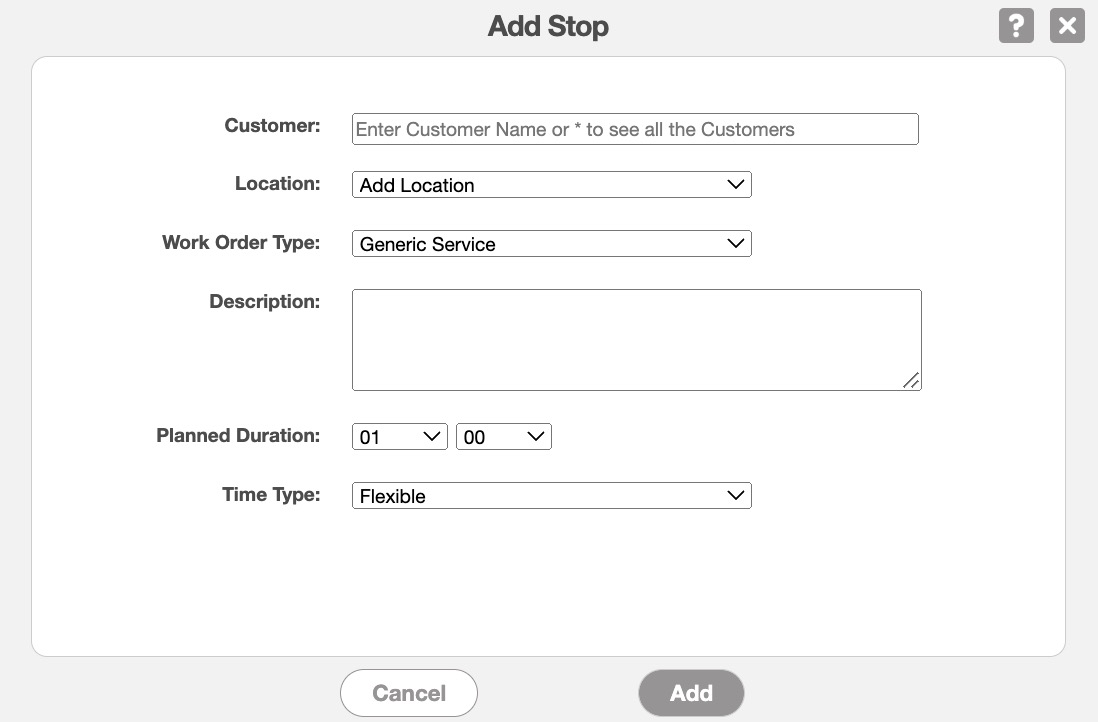
Input the required information in this pop-up window:
The customer.
The location.
The work order type.
The description.
How long the planned work order should take.
And the time type.
Repeat these steps as desired, until you have added all the required stops for the recurrent route. Please note that once you add a new stop, the recurrent route will need to be published to make the changes official.
Publish Routes
Once you add any stops or updates to a recurrent route, the changes are not official until you publish the recurrent route. There are two different ways to publish a recurrent route:
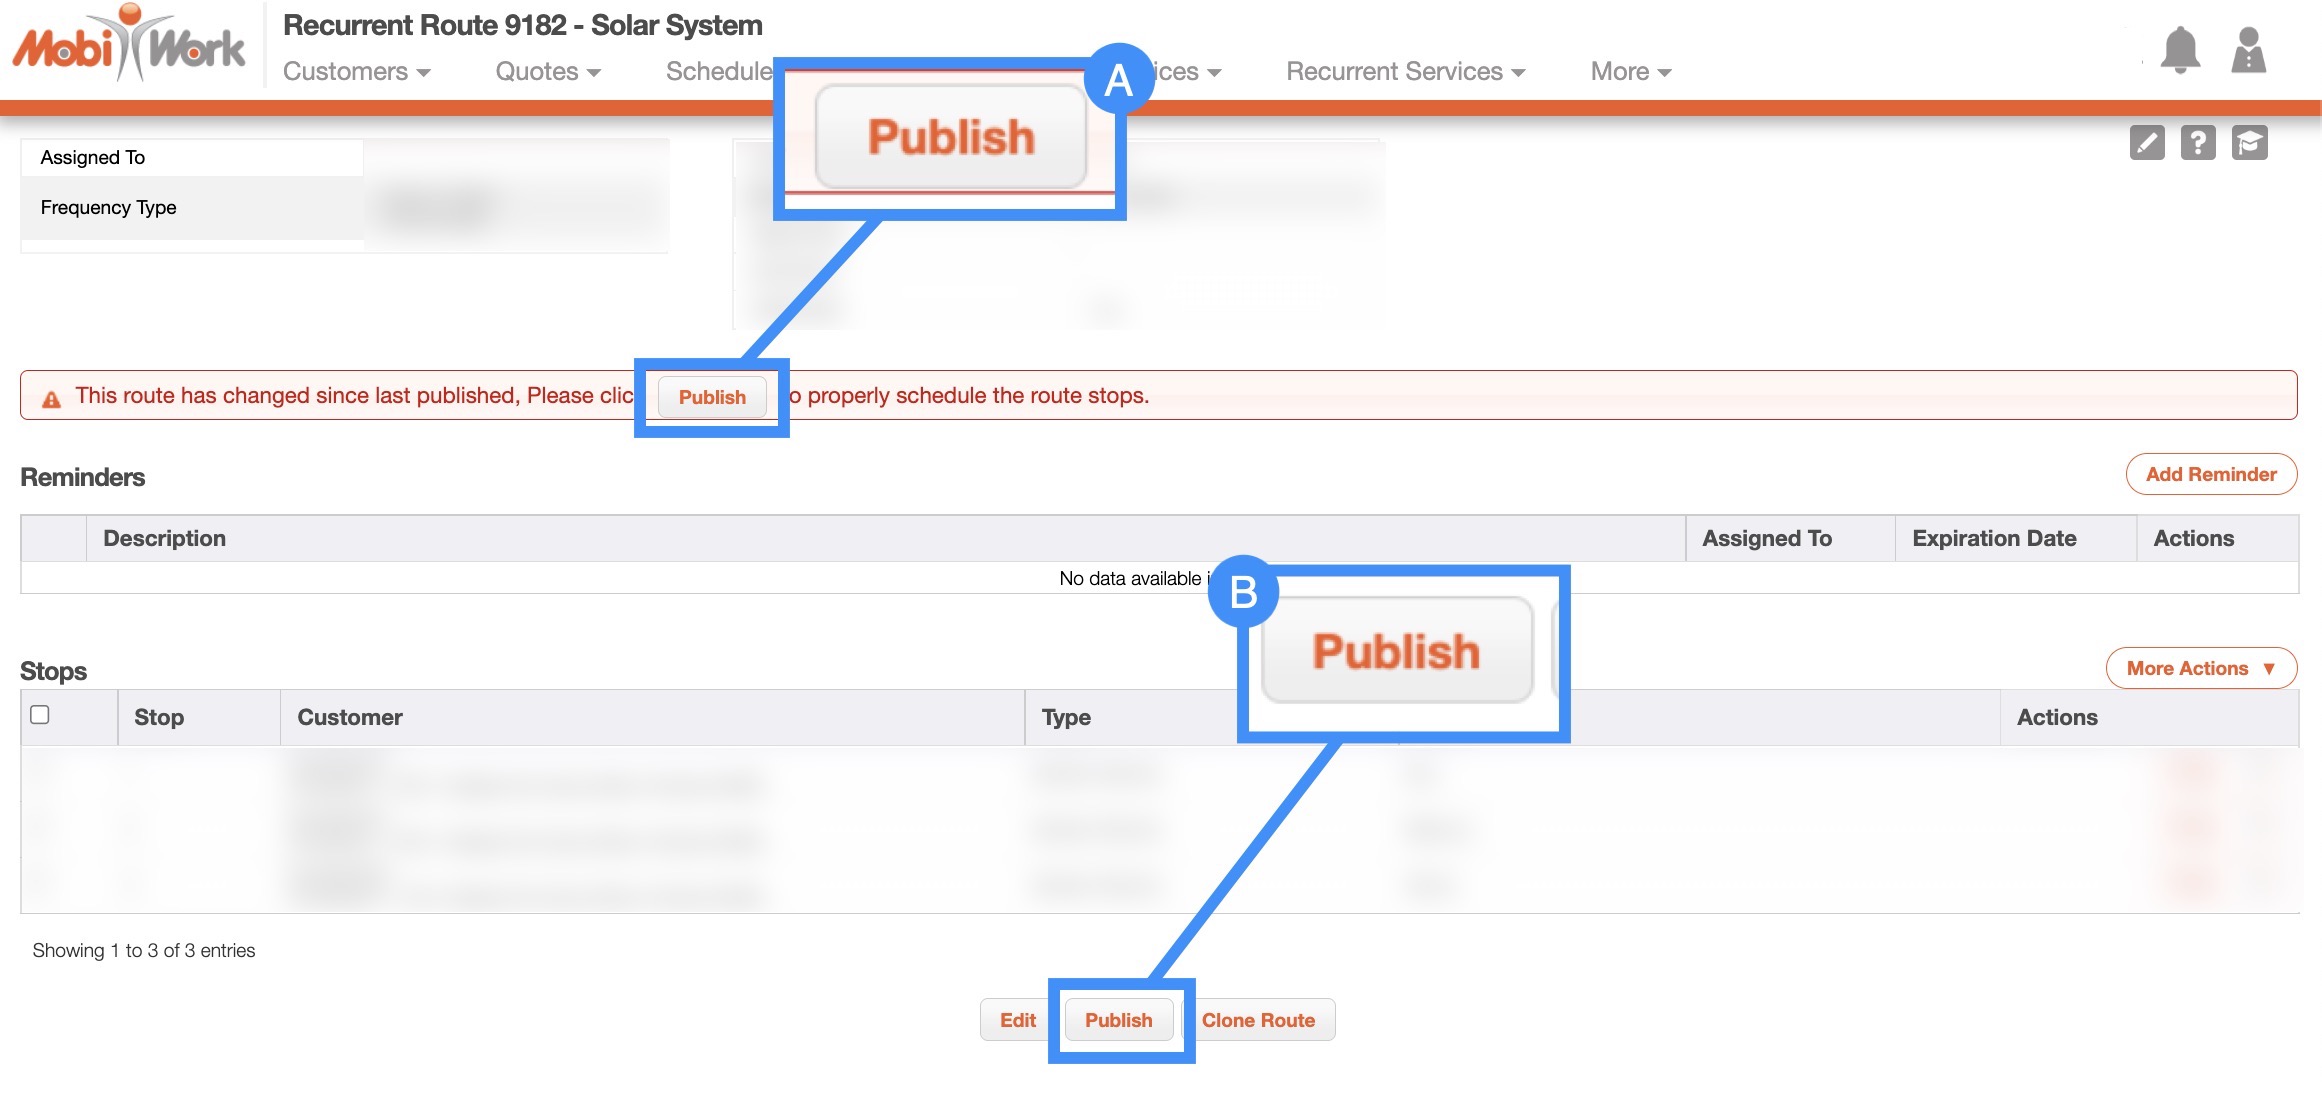
Click the Publish button from the red notification ribbon
Or click the Publish button from "Stops" section
Once you publish a recurrent route, it becomes ready to use within MobiWork for your users and for your customers. To assign your recurrent route to a customer, please see the View Customer page.
Another way to add a recurrent route, is by cloning an already existing recurrent route. Cloning recurrent routes is especially helpful if you have another user working the route on a different day or if you have a similar recurrent route with minor changes.
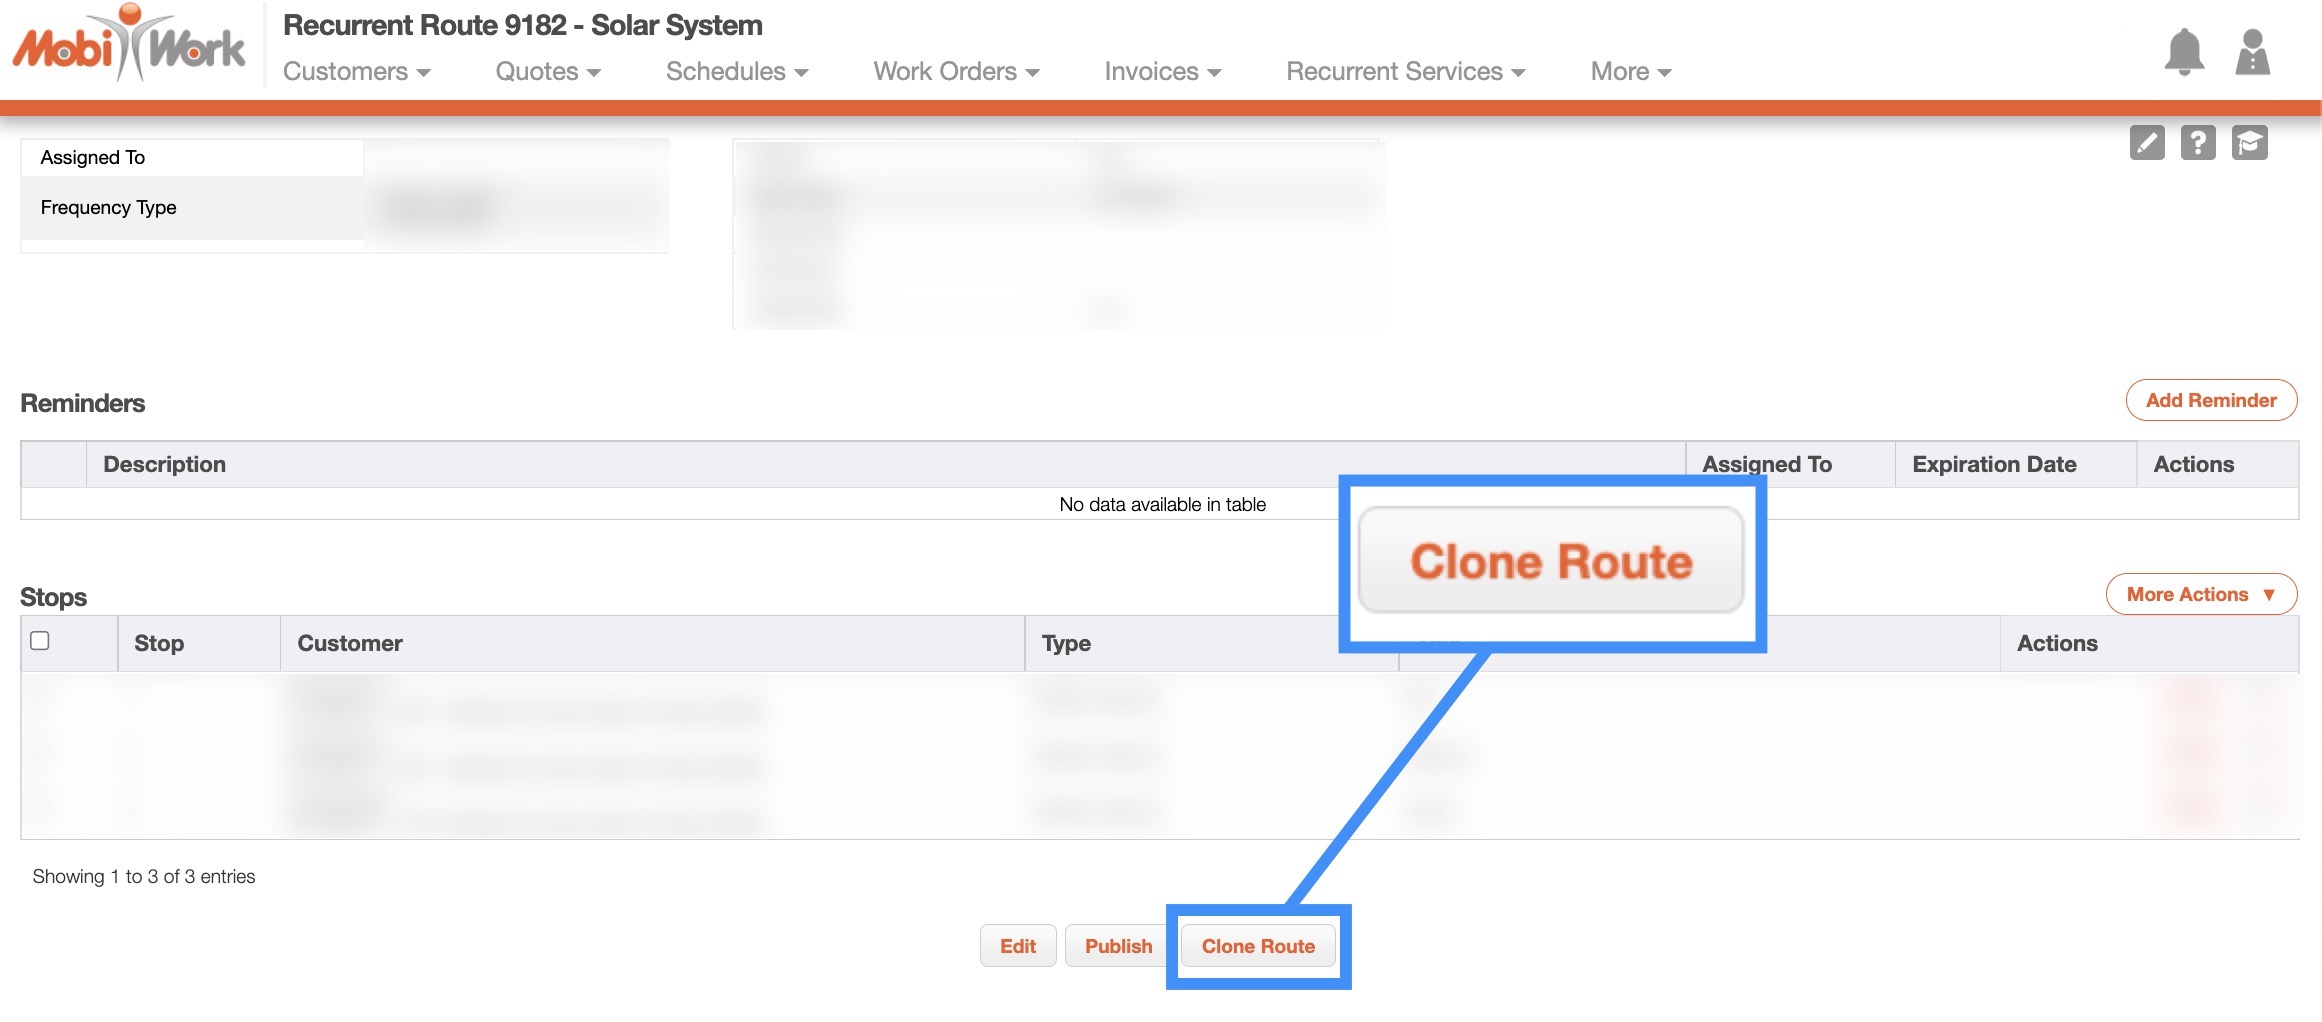
To clone a recurrent route, you will first need to be on the View Recurrent Route page; once you are on this page, click on the Clone Route button to create a duplicate recurrent route.
The confirmation pop-up window will then appear. Click the Yes button to confirm that you would like to clone the recurrent route:
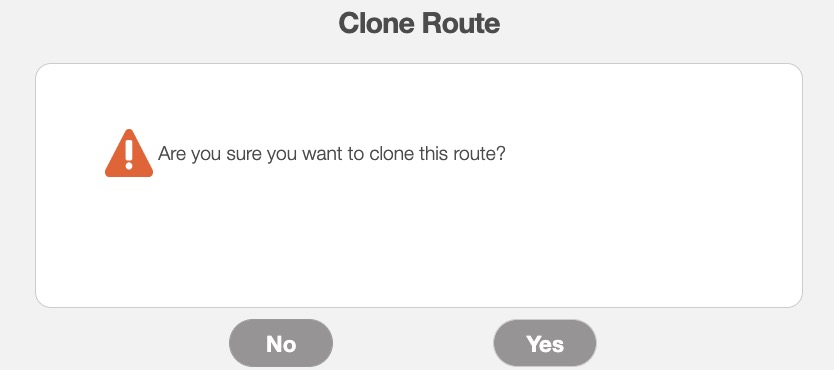
Once you confirm that you would like to clone the original recurrent route, you will be redirected to the cloned copy of the recurrent route. You will notice that the name of the cloned recurrent route will say "Copy:"
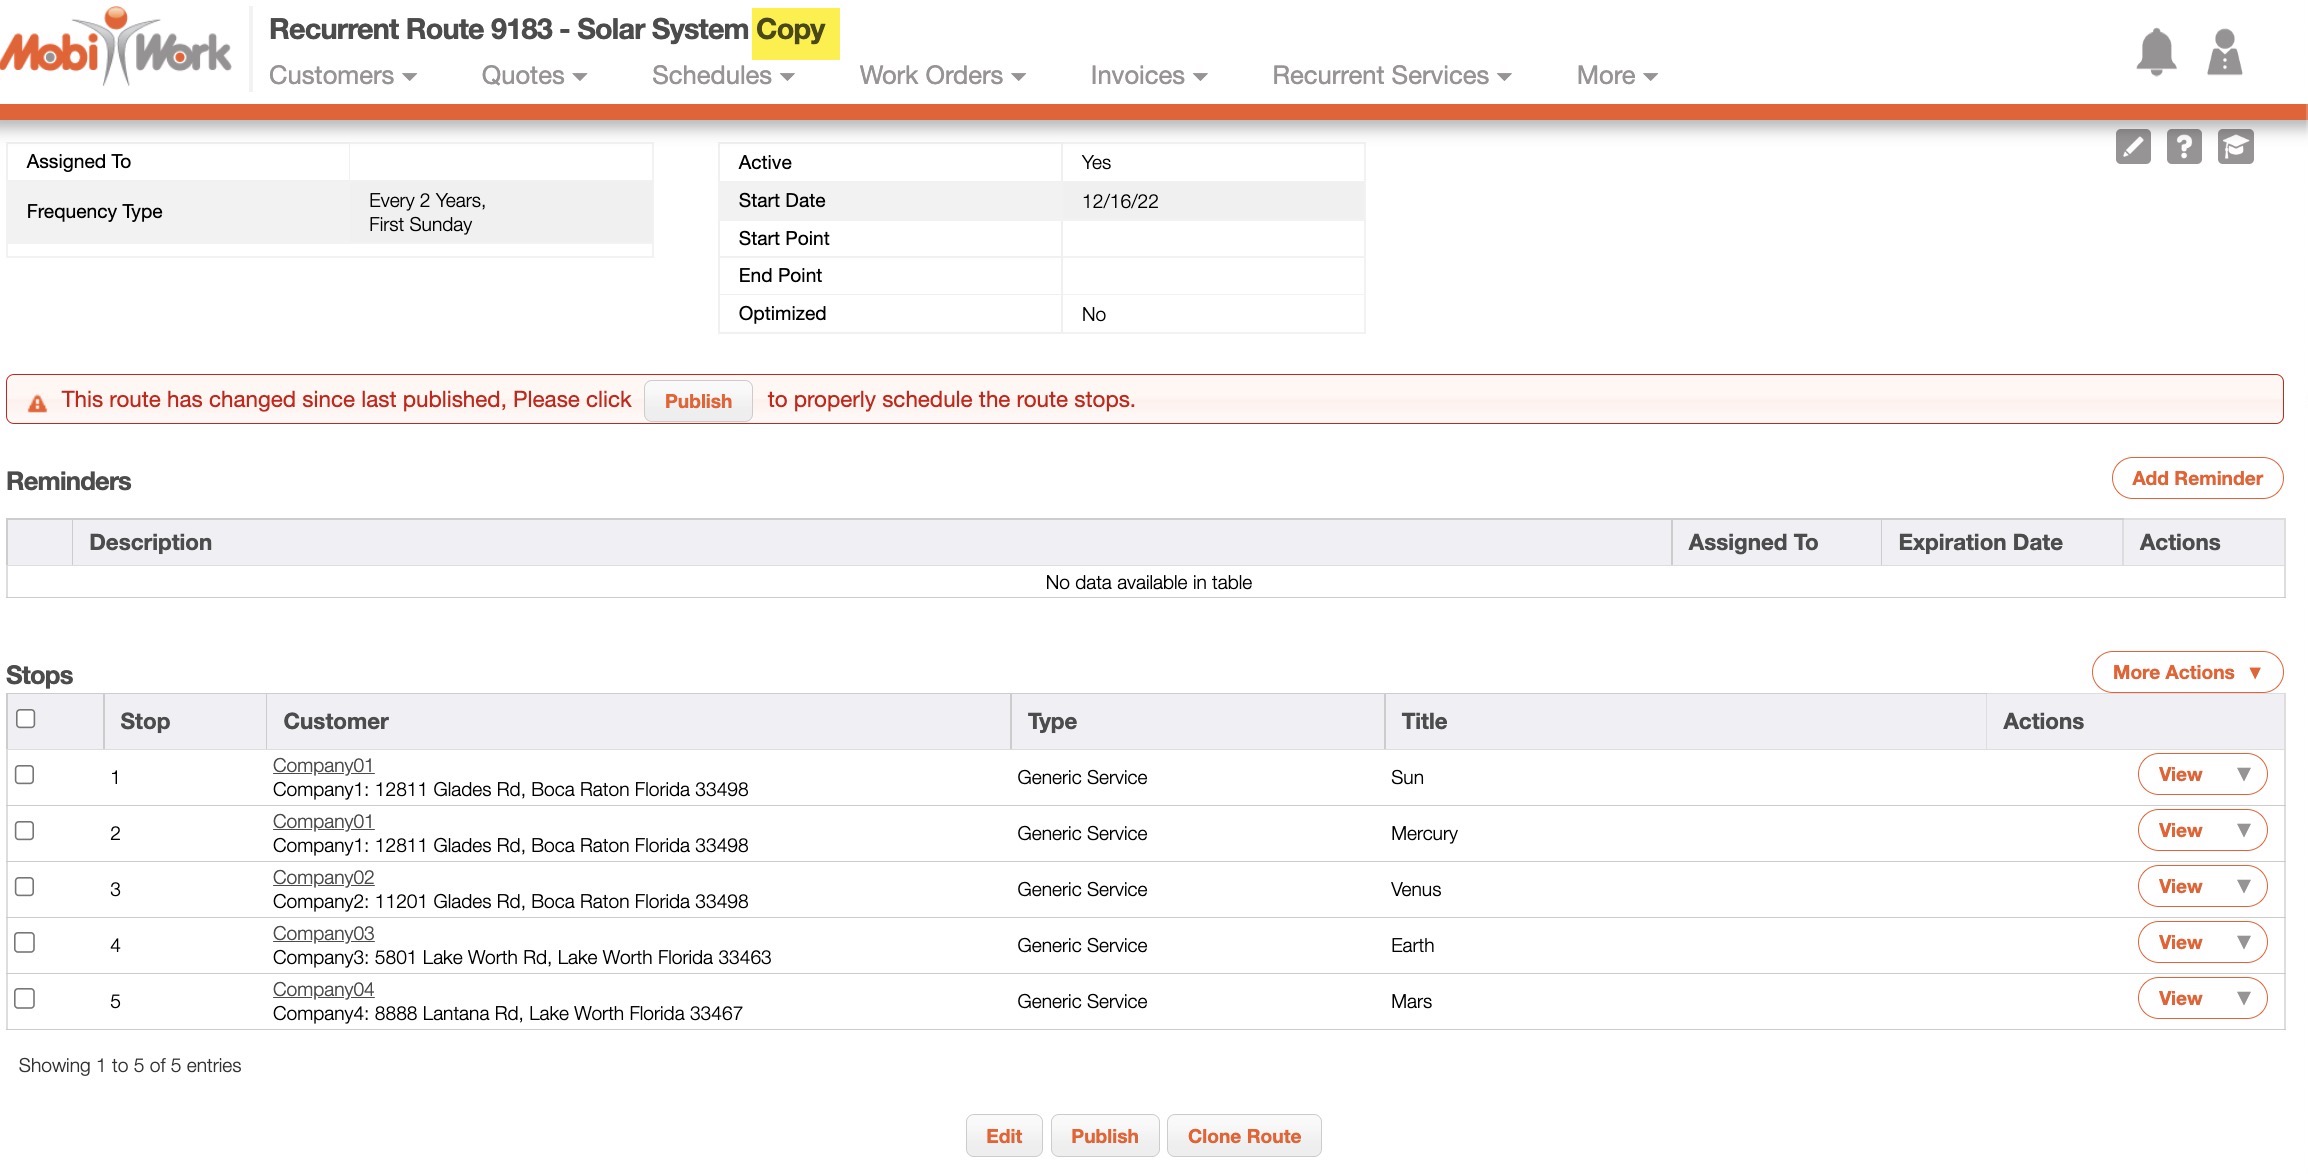
To save this cloned recurrent route and make it ready for use, click the Publish button.
If you have any questions or need further assistance, please let us know. We'd be happy to help!
