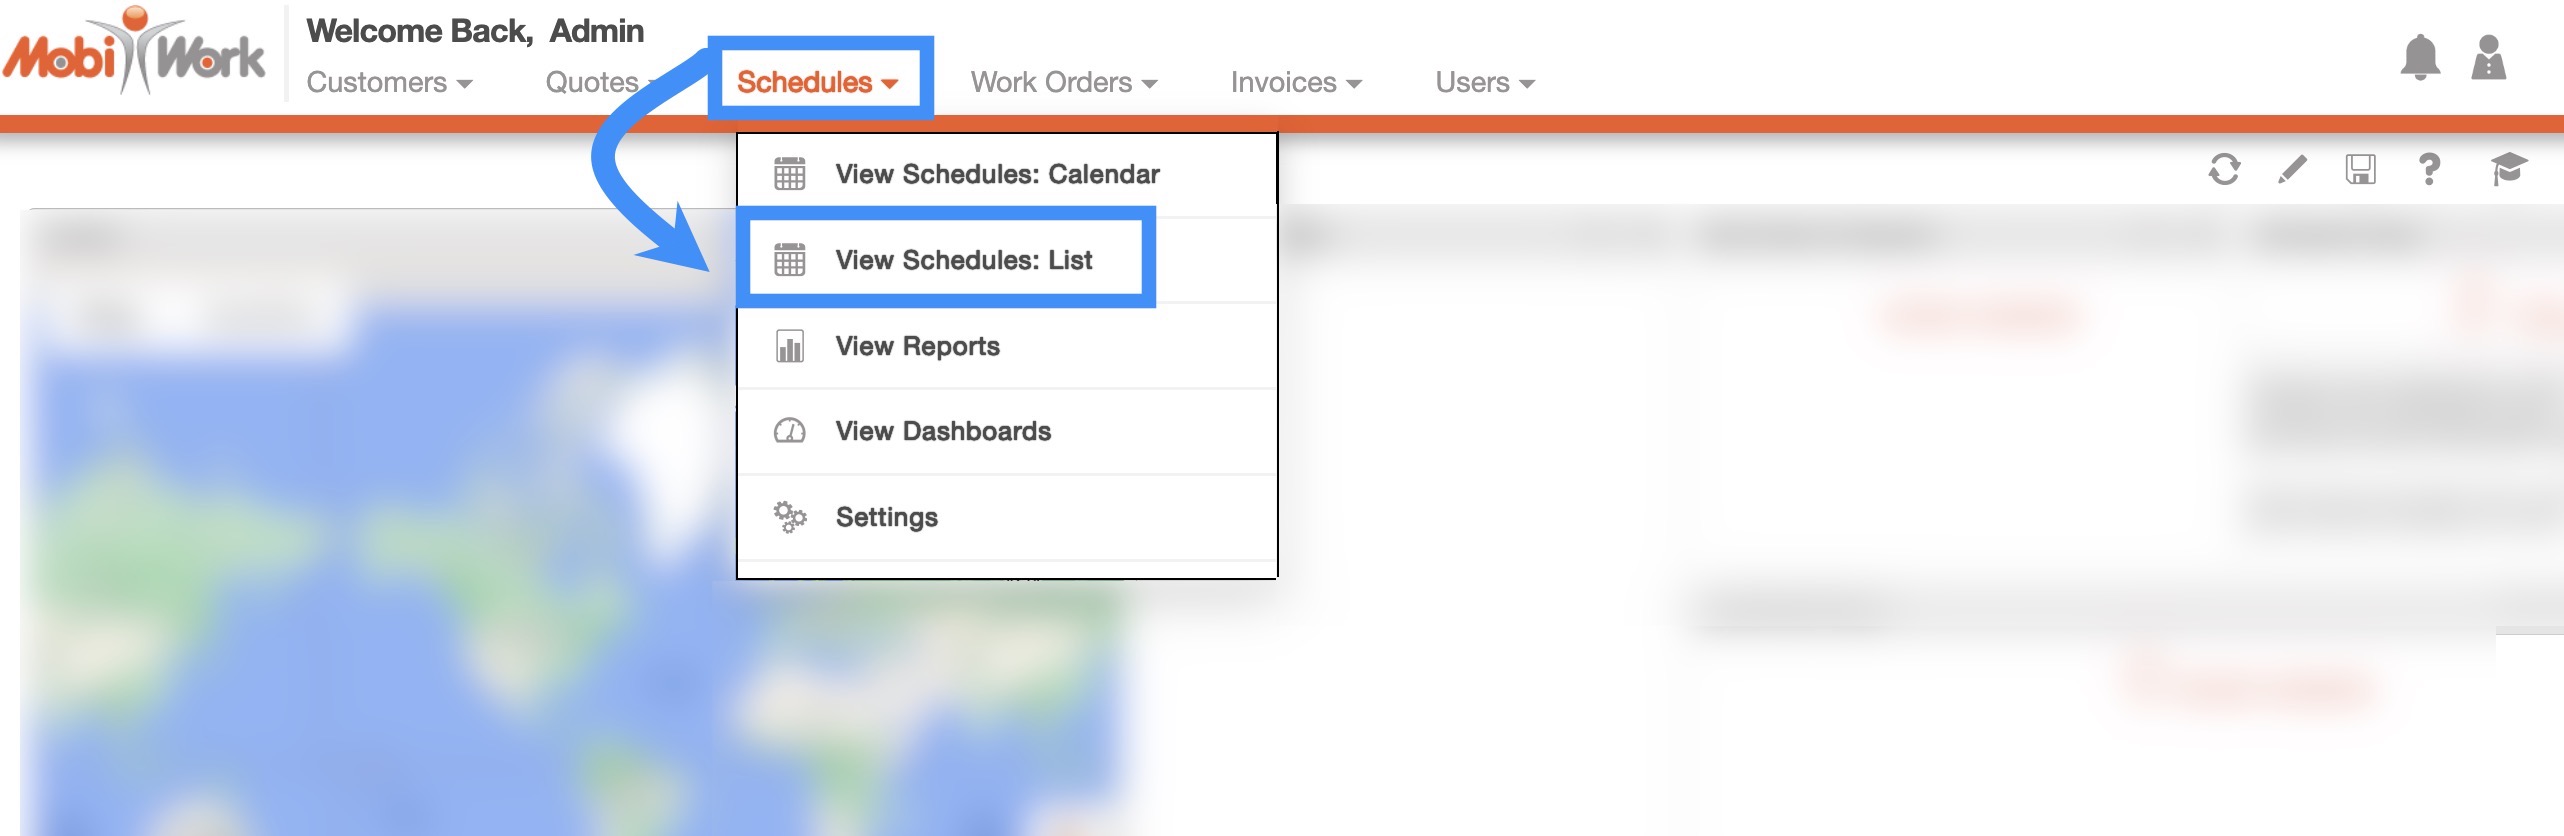
You can access the Schedules feature page by hovering over the Schedules feature from your MobiWork menu and clicking on the "View Schedules: List" option:
The "List" tab is the one of tabs that can be found once you navigate to the Schedules feature page; from this page you can navigate to other tabs and see all your user schedules, dispatching, and work order data summarized on one page.
Some features (e.g., the Search Area, Global Actions, etc.) can be found in all the tabs. Below is a list of the main features that are located on the "List" tab page:
This webpage will expound upon the other tabs in further detail; to navigate to these subsections please see the table of contents at the beginning of this section.
Free-Text Search
You can type in the search bar (free-text search) to locate a specific work order or user schedule. Once you click in the search bar, the search drop-down menu will automatically appear. You can use the search drop-down menu or continue typing your own search parameters:

With free-text search you will also be able to search by:
Customer's Name (any word under the customer's name will be appropriate)
Username
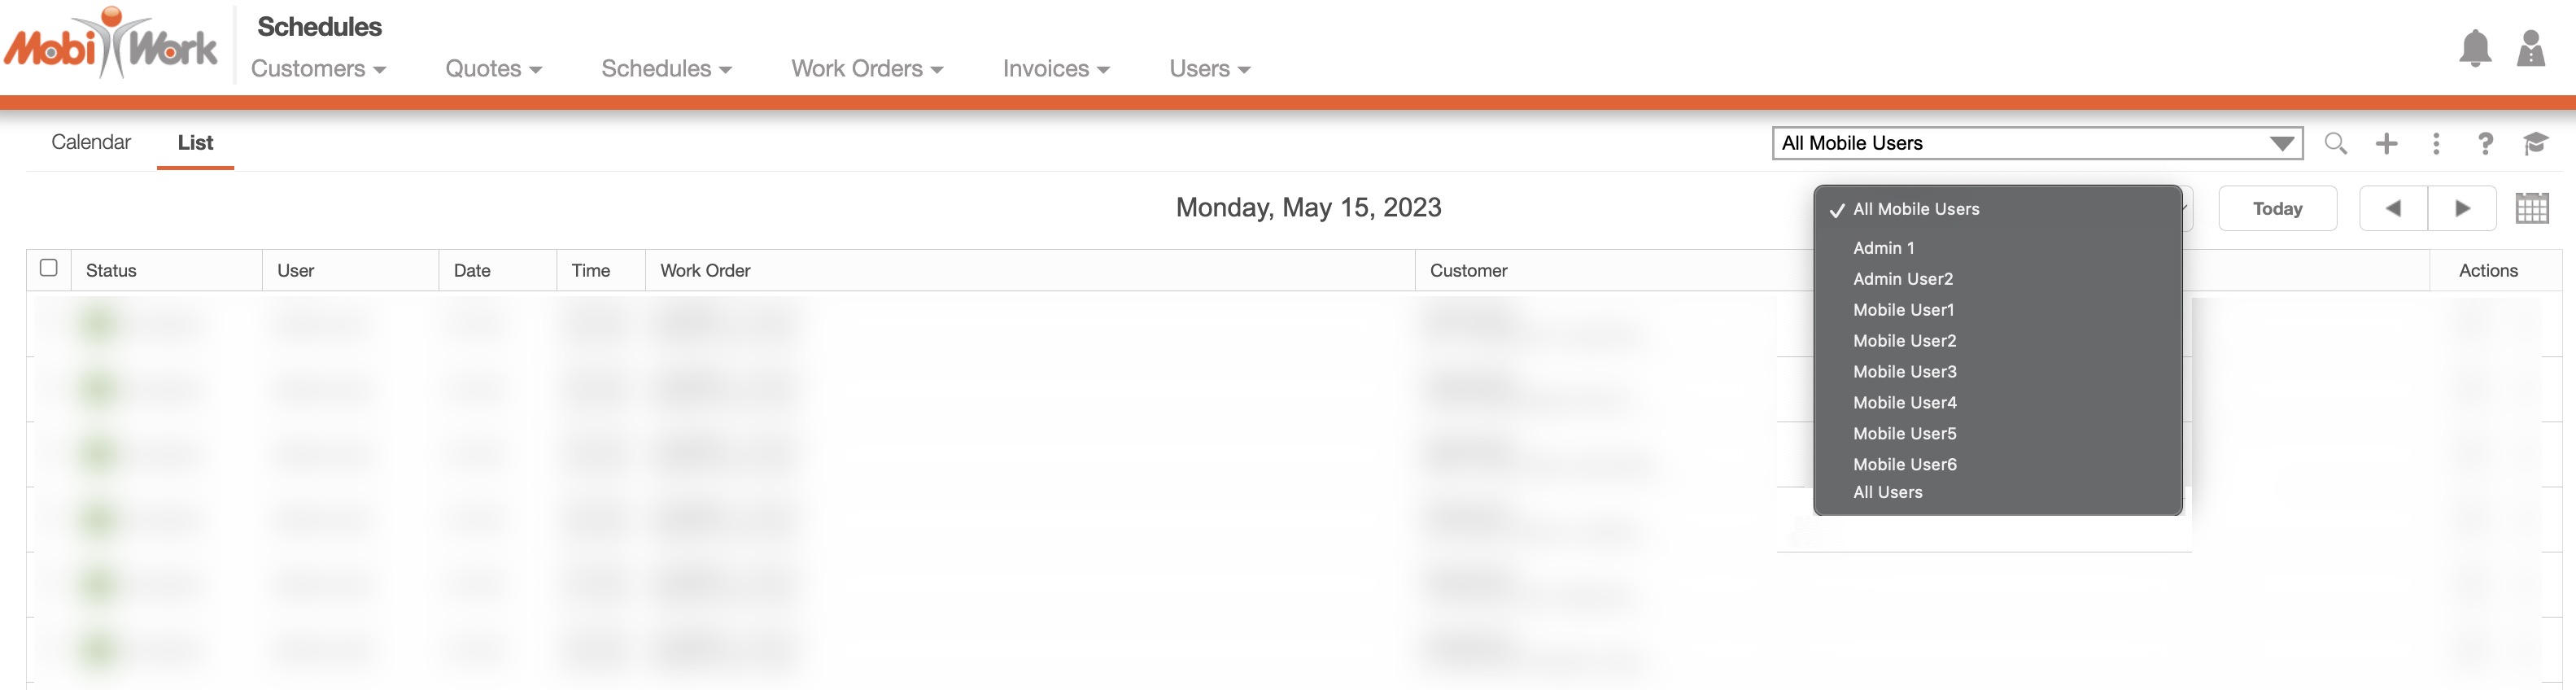
You can also use the drop-down selection to narrow the results found in the list tab. For example, you can look at work orders assigned to a specific user, a certain group, or filter the results so only unassigned work orders are shown:
Predefined Saved Searches
Saved searches are a powerful search tool where the search-criteria has been saved for future use.
These saved searches will appear in the drop-down menu and can also be used for dashboards and reports.
By default, MobiWork provides several saved searches for you to use, which are organized by status and date (e.g., Today, etc.):

You can access any of these saved searches by clicking in the search bar and selecting your desired saved search from the drop-down menu.
If you would like to view all your users and work orders, click on the "Show All" option from the drop-down menu:

New Search
To create a new saved search, select the "Create a New Advanced Search" option from the drop-down menu:

After clicking on "Create a New Advanced Search," a pop-up window will appear where you can enter your data in the appropriate fields. If you would like to exit from this pop-up window you can click on the esc button from your keyboard.
Please note that once you name a new saved search, you will be unable to rename it (instead you would need to delete your saved search and create a new one).
Once you have finished inputting the required information, you can save the search, make it available to all users, or make it your default search:
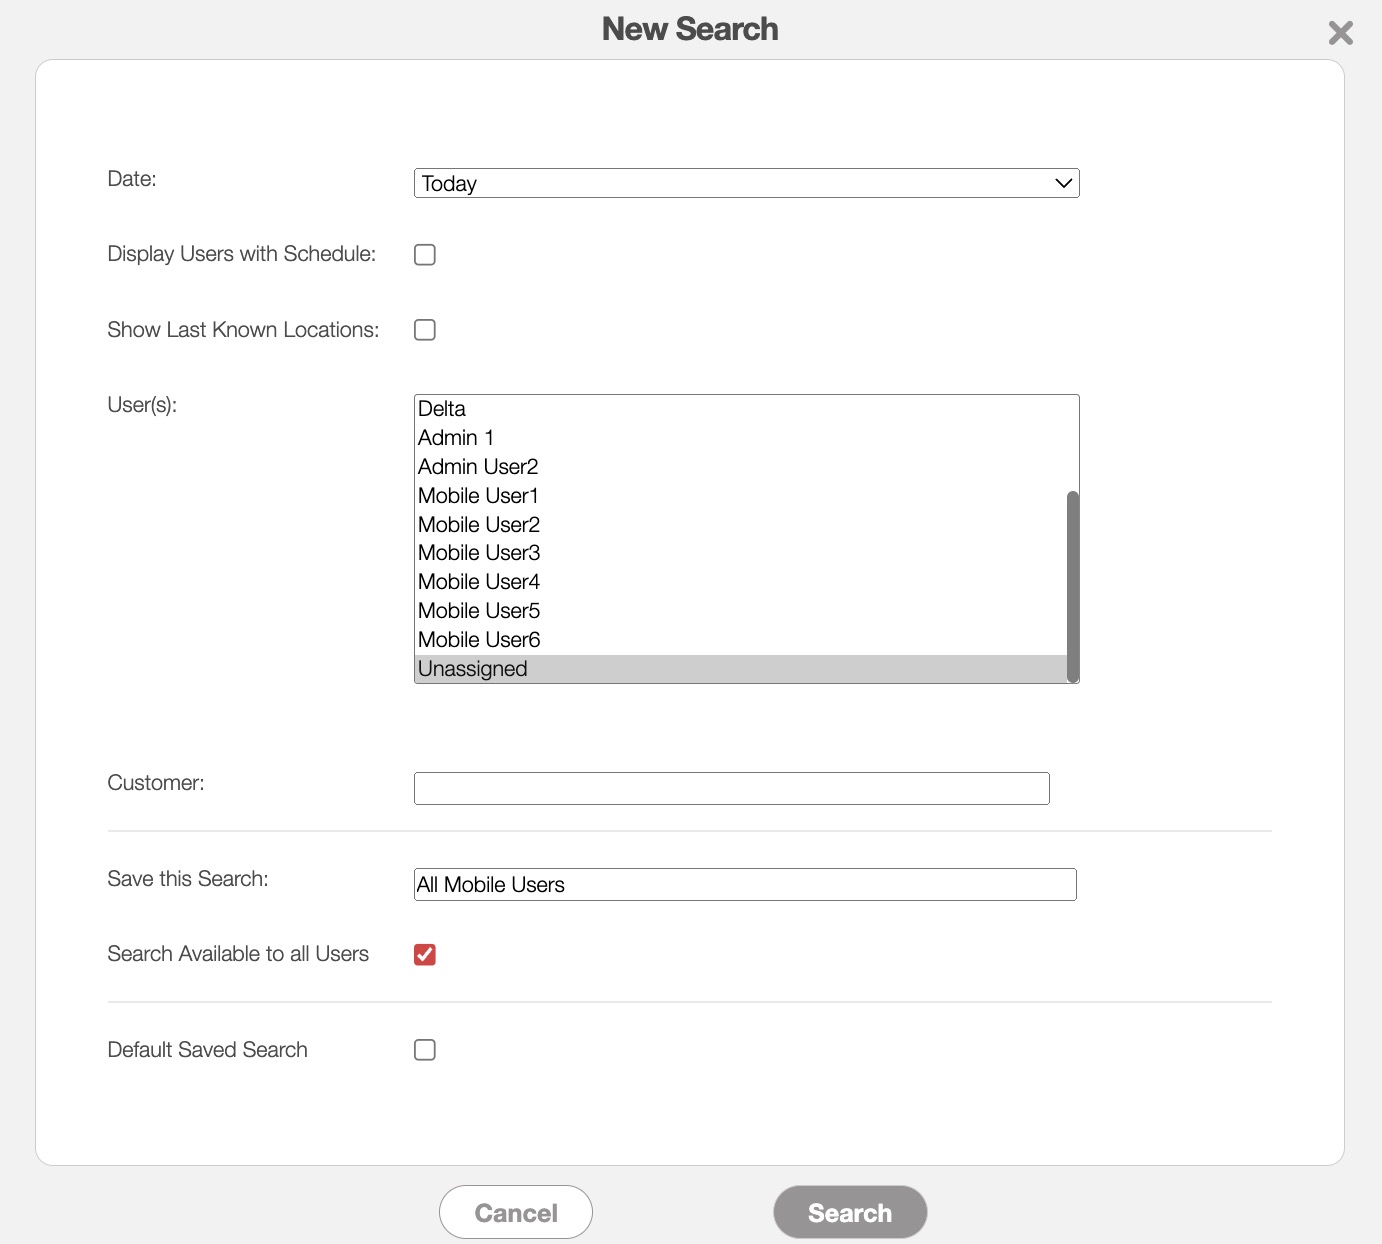
Further definitions for all the terms in the New Search pop-up window can be found below:
| Name: | Description: |
|---|---|
| "Date" | The date of the scheduled work order (e.g., work orders scheduled for today, in the past, in the future, etc.). |
| "Display Users with Schedule" | Will only display users with a schedule (e.g., if they have been assigned a work order). |
| "Show Last Known Locations" | Will show the last known location of the user on the map. |
| "User(s)" | Will display the schedule of the selected user(s). |
| "Customer(s)" | Will display the schedule of the selected customer(s). |
| "Save this Search" | Allows the search parameters to be saved under a name to be reused in the future. |
| "Search Available to all Users" | Allows the search to be available to all users. |
| "Default Saved Search" | Sets the saved search as the default view when accessing the search feature in the future. |
Manage Saved Searches
Any new searches that are added can be managed or edited in the Manage Saved Searches pop-up window:

To manage, edit, or remove any saved searches you can access the "Manage Saved Searches" option in the drop-down menu; the Manage Saved Searches pop-up window will then appear:

You can add a new saved search by clicking the New Search button in the top right of the pop-up window.
You can rearrange the order of the saved searches by clicking, then dragging & dropping the selected Search.
You can edit or delete a selected saved search by using the drop-down menu under the "Actions" column.
If you would like to easily close this pop-up window, you can click on the esc button from your keyboard.
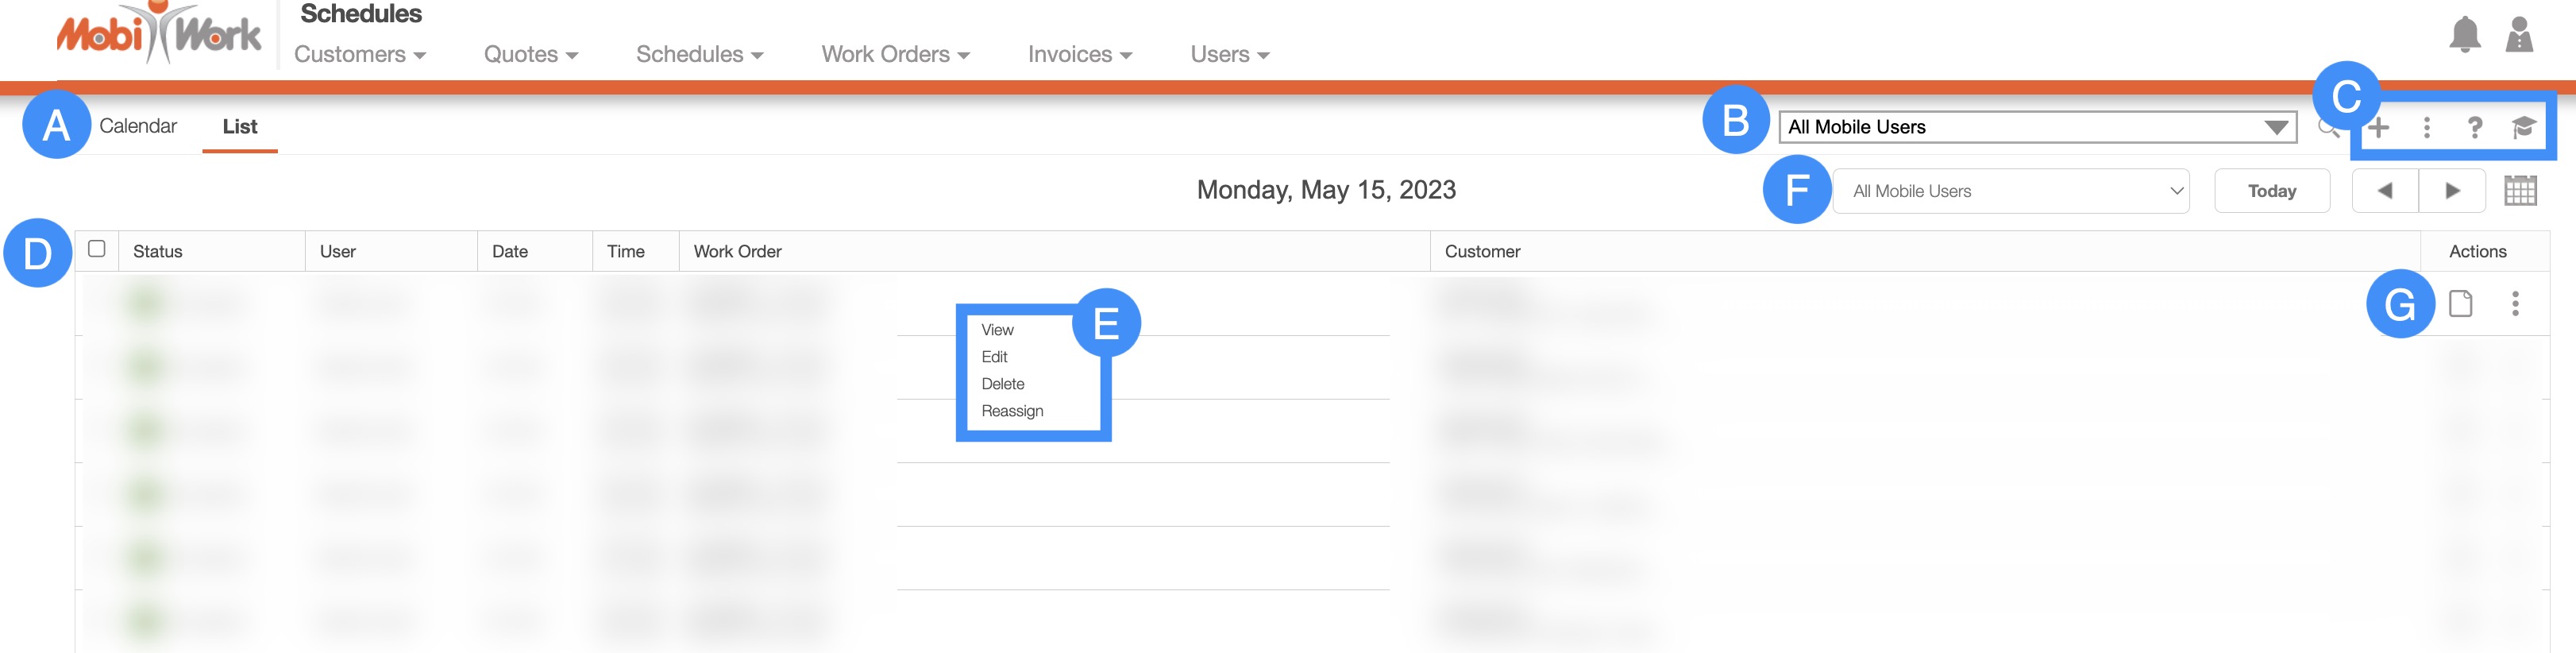
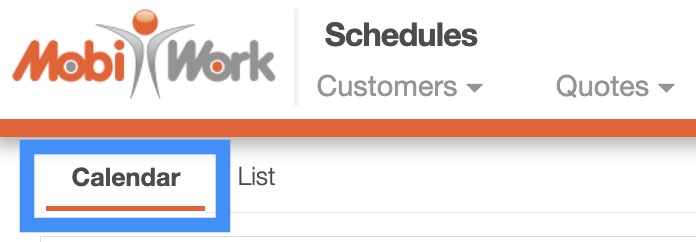
Tabs are located under the MobiWork logo. You can change the way that the information is displayed by clicking on the desired tab:
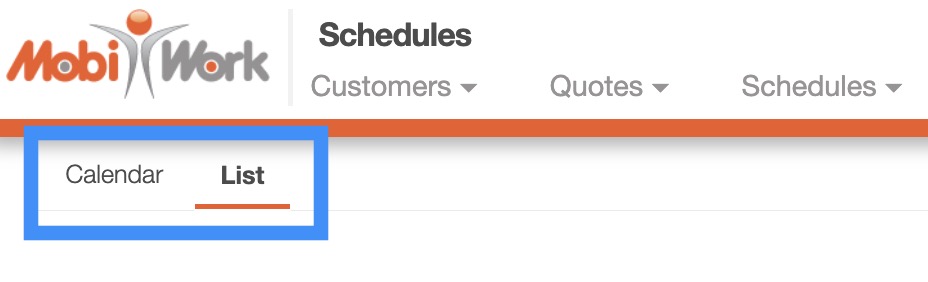
There are two tabs that you can toggle between on the Schedules feature page. They are the "Calendar" and "List" tabs.
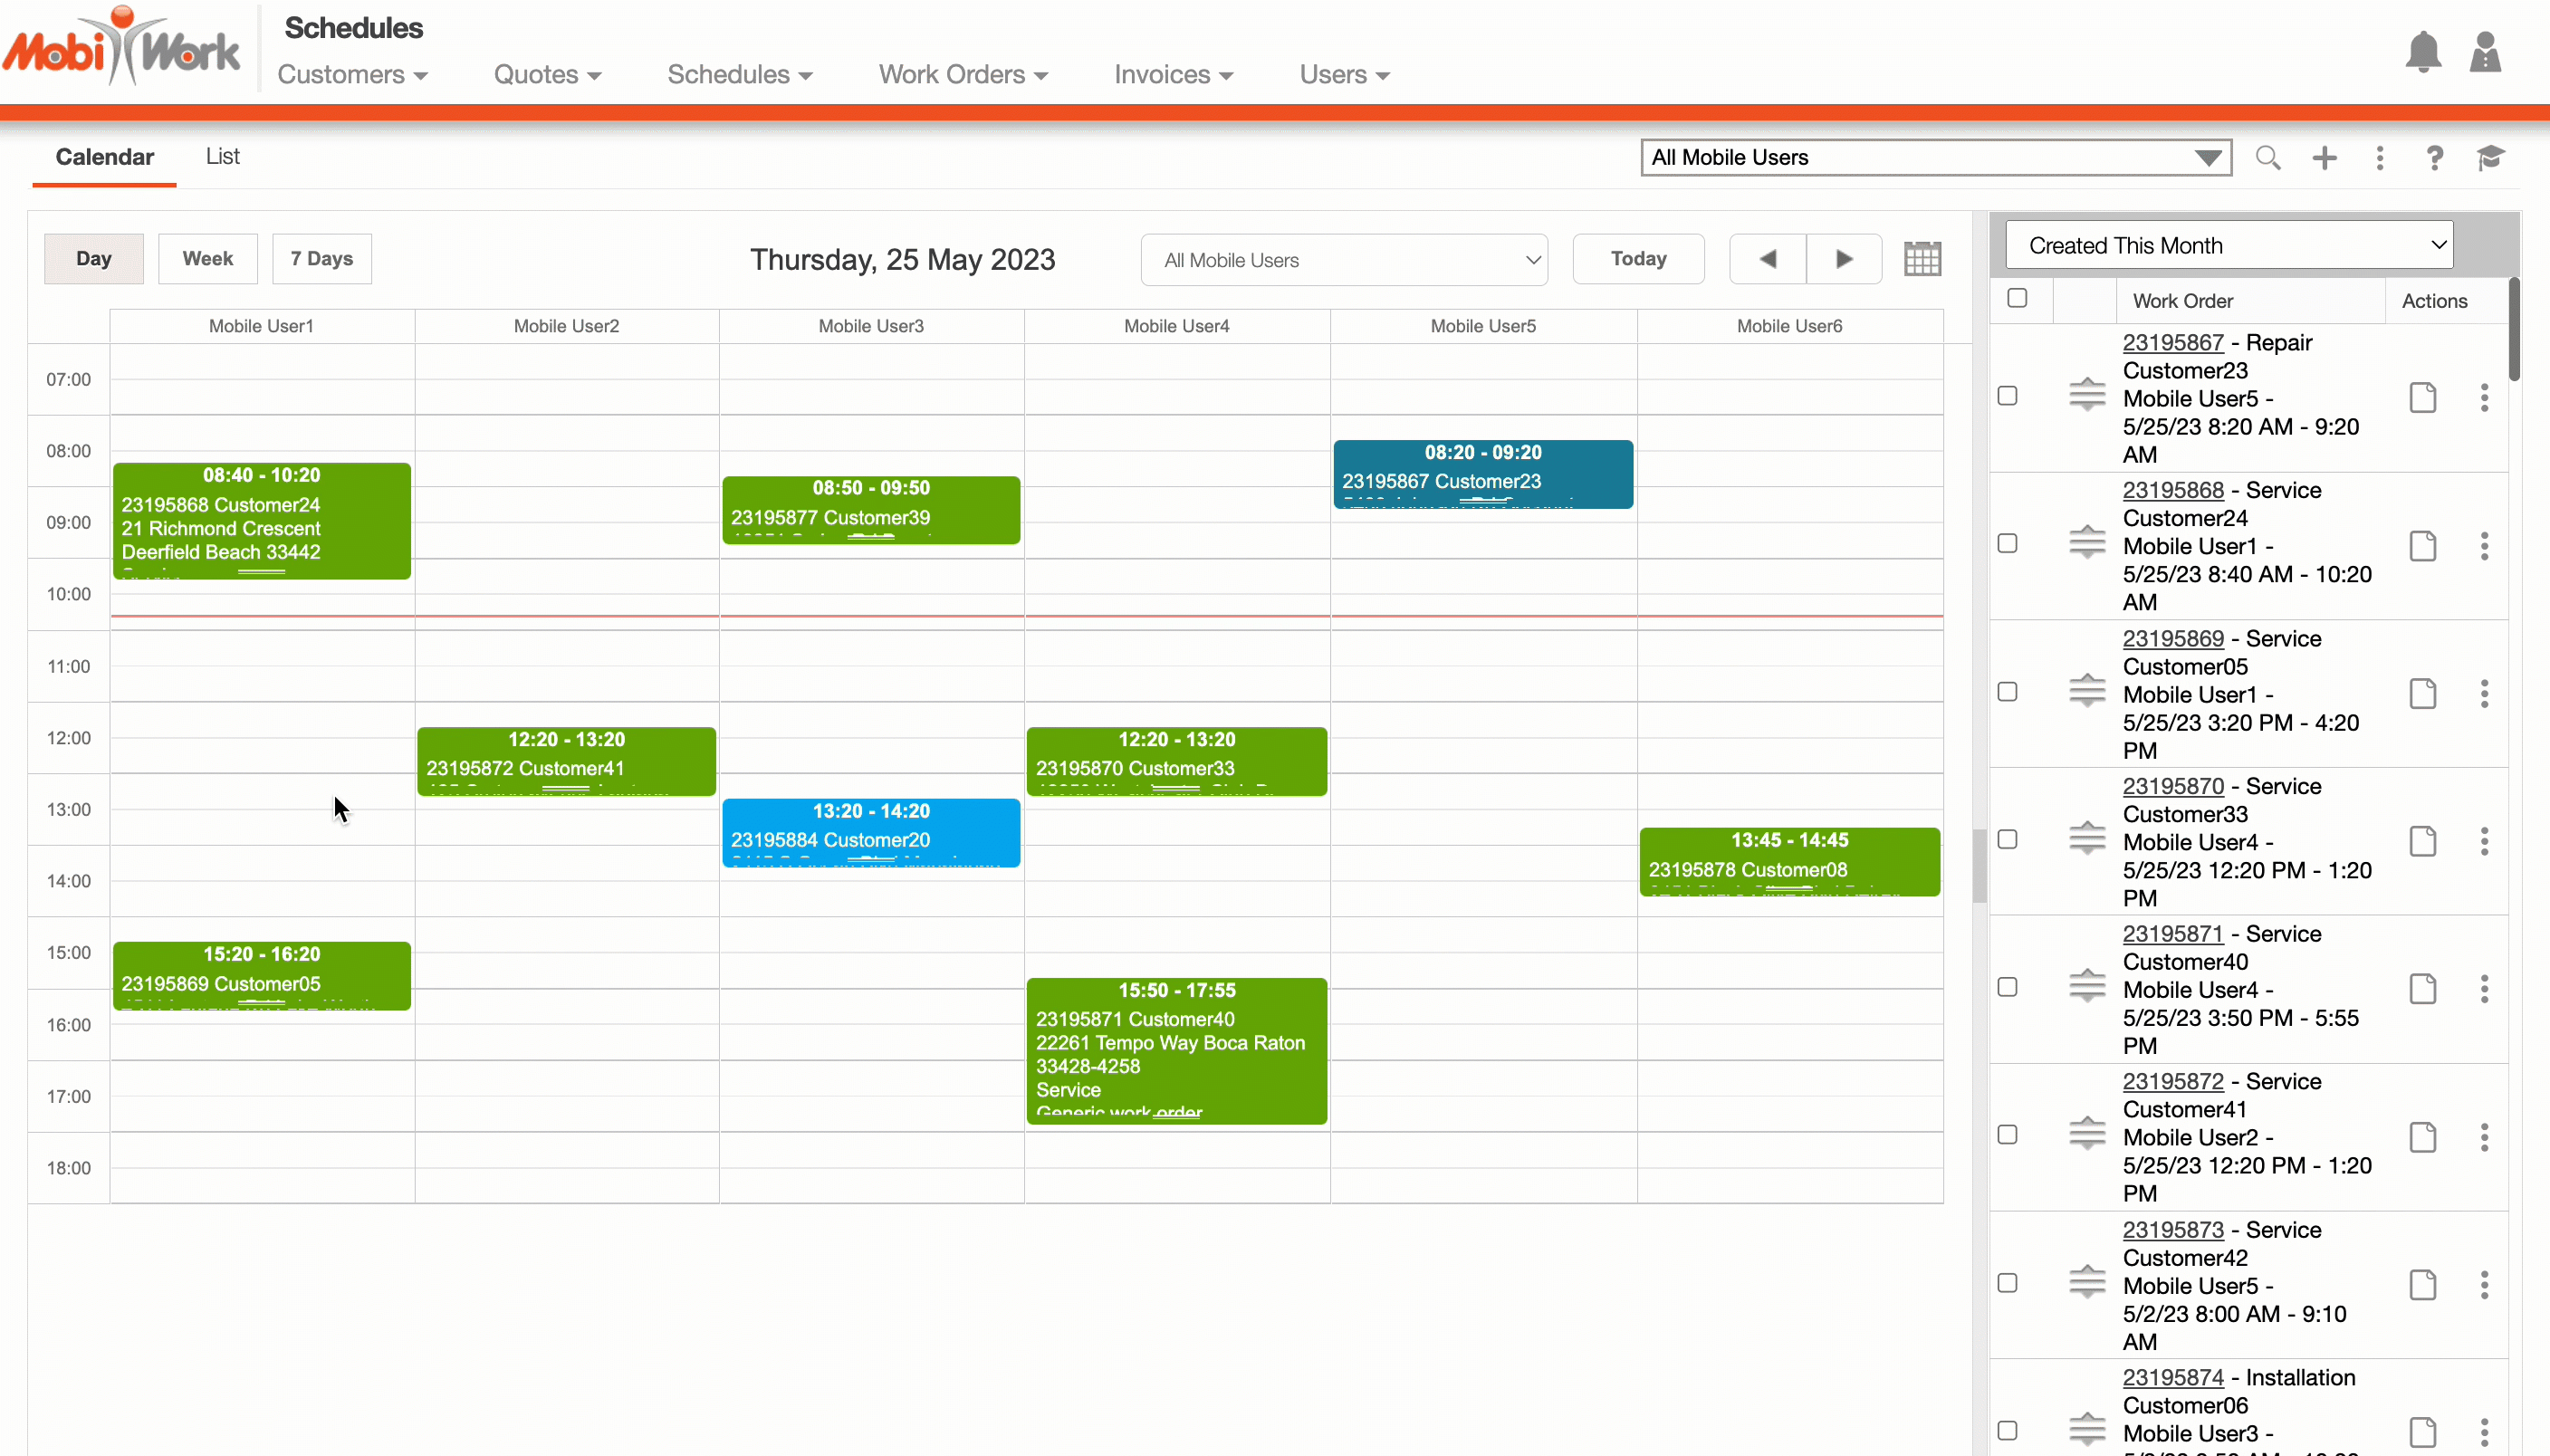
The "Calendar" tab will visually display your assigned work orders in a time-date format. You will be able to easily view which user is assigned which work order:
Calendar Tab Layout
The "Calendar" tab is composed of two different sections, the "Calendar View" section, and the "List View" section. The work orders will be color-coded so you can immediately tell the status for each individual work order:
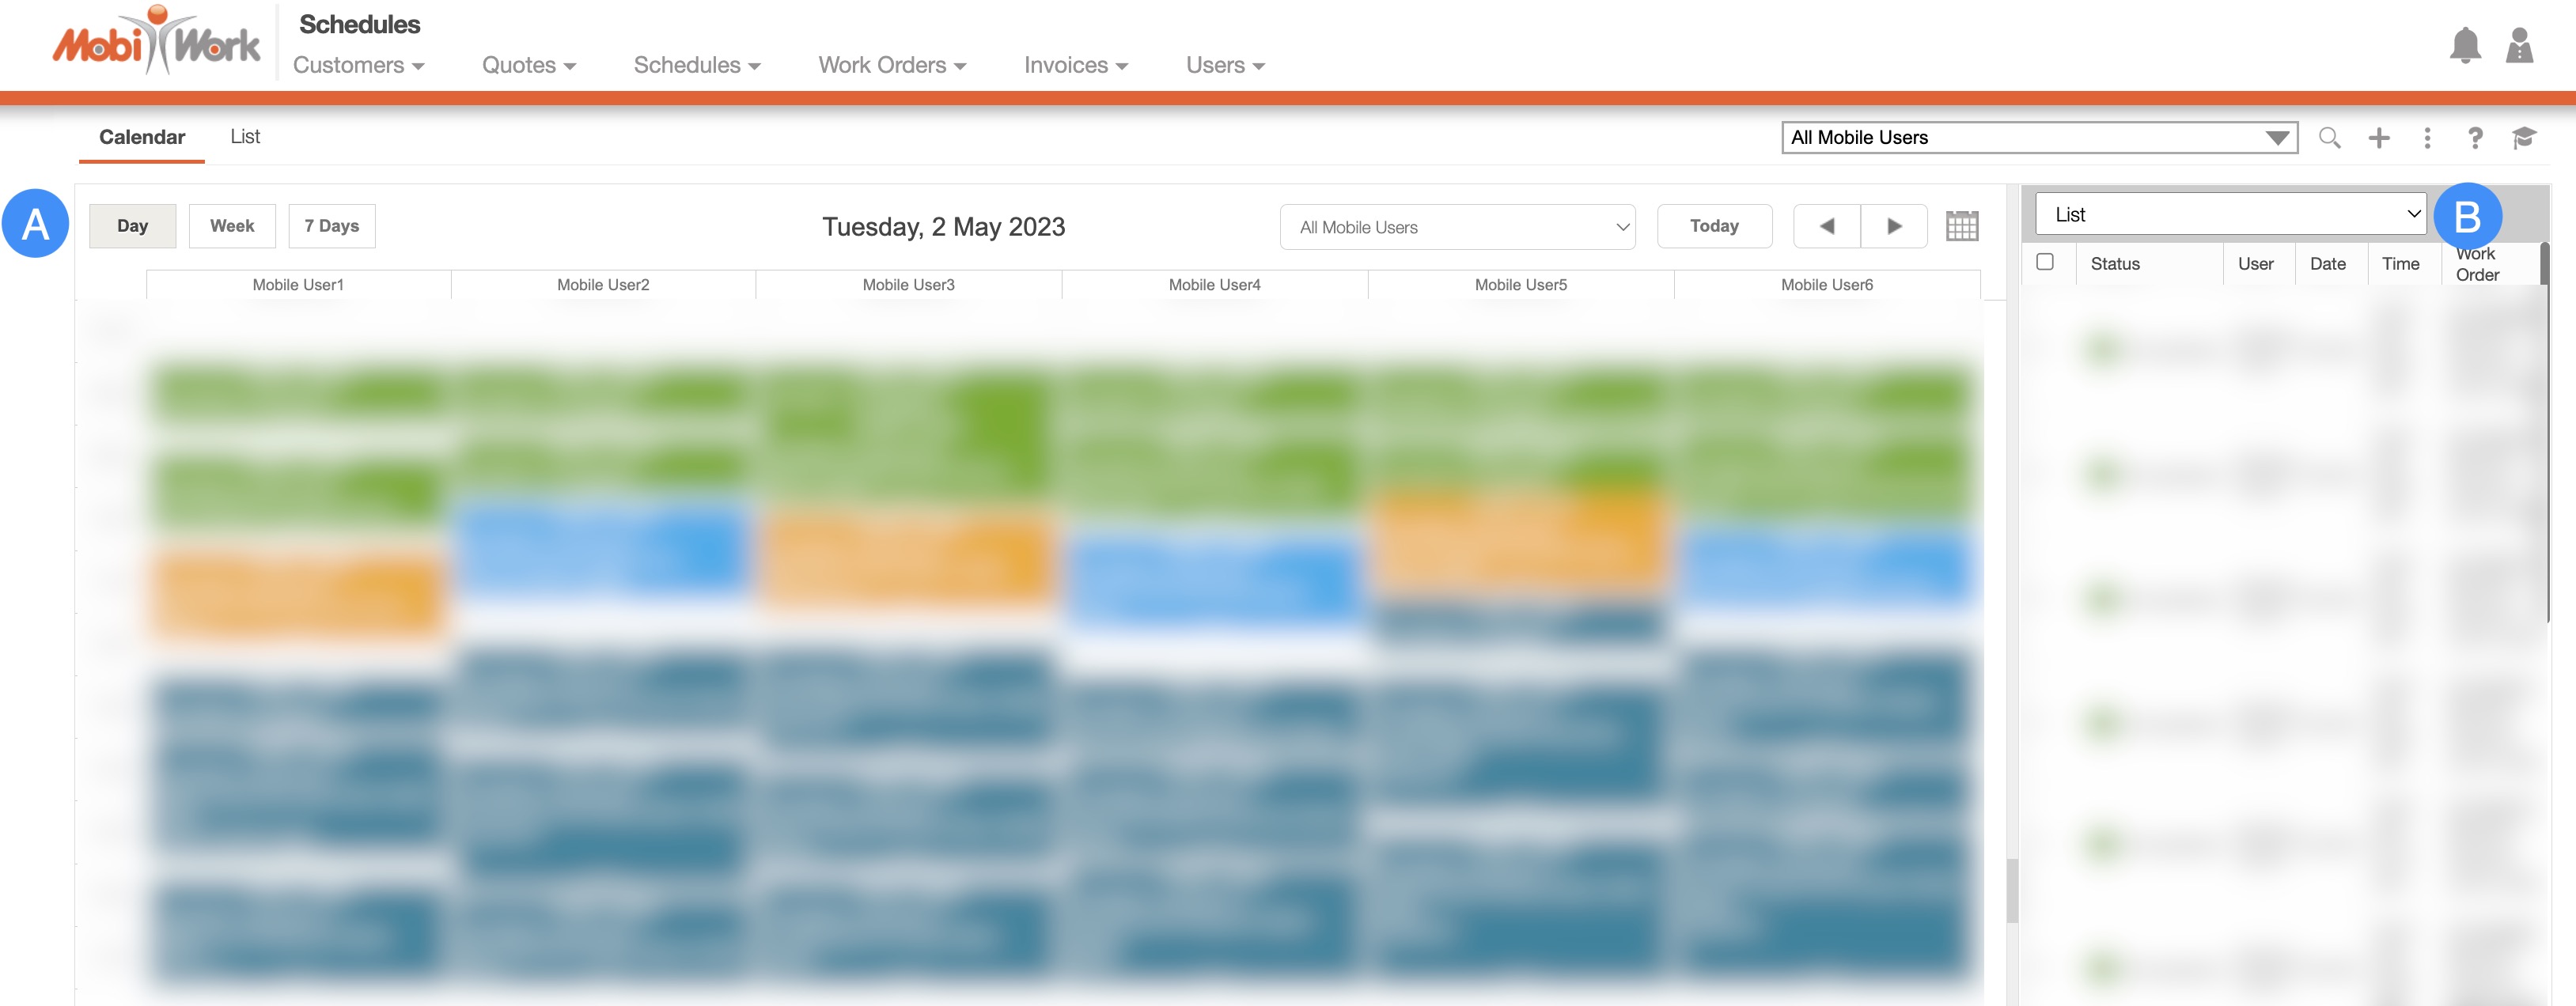
Calendar View Section
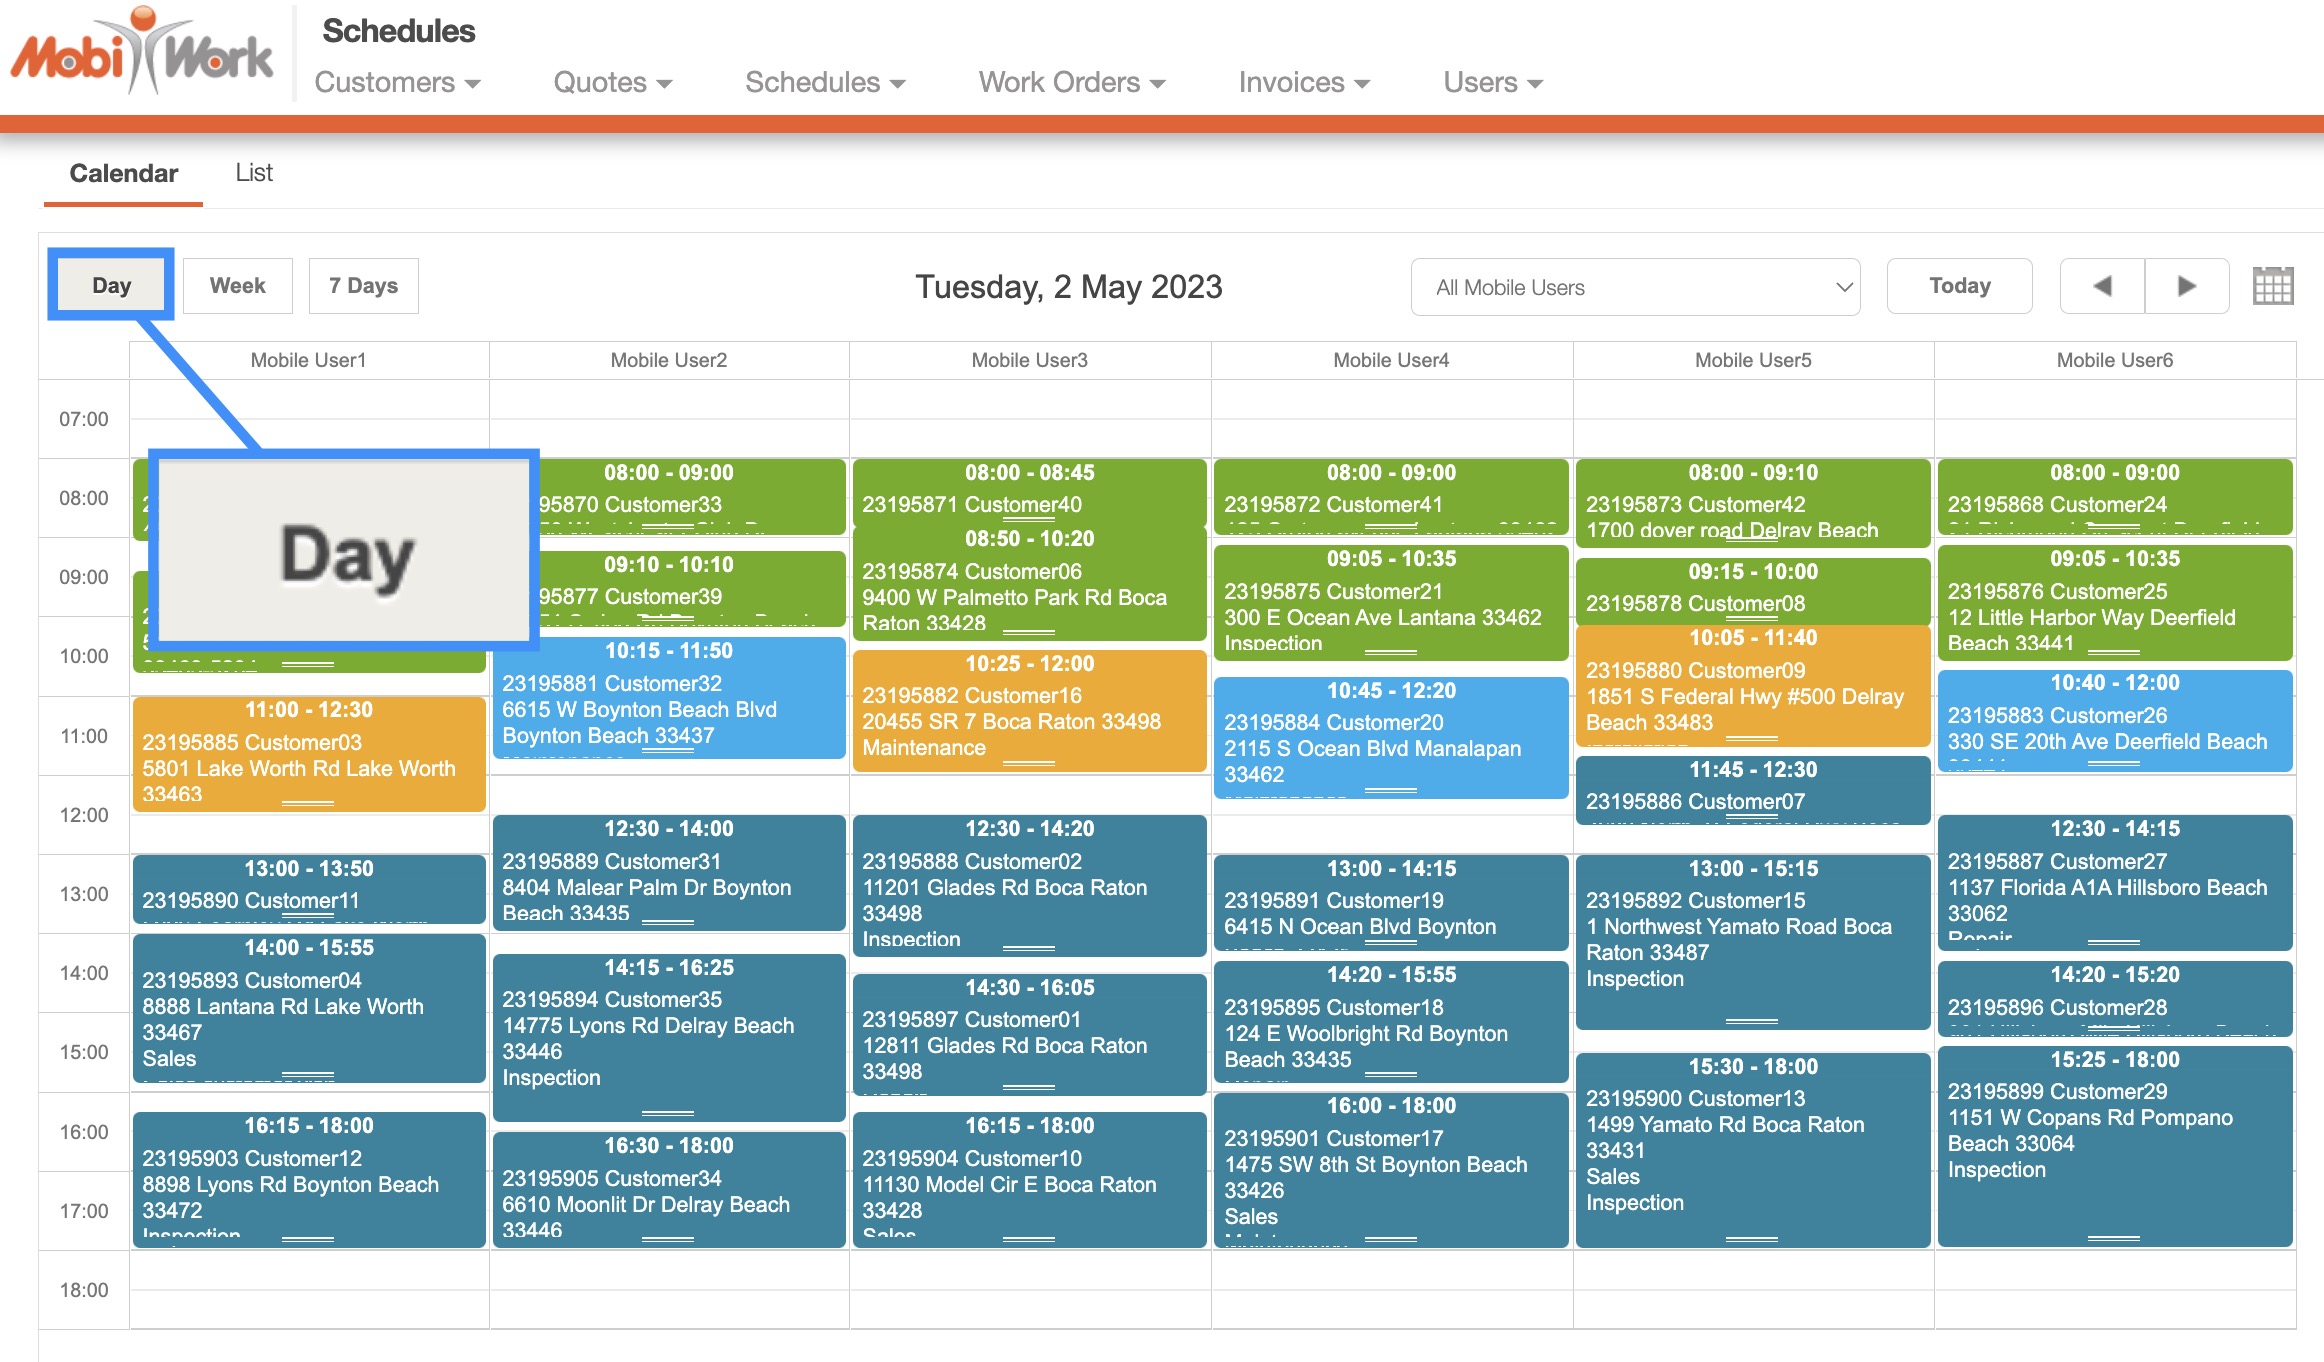
The Date buttons will allow you to specify the date range of the works orders and your users. To change the date range, click on your preferred date (i.e., Day, Week, 7 Days, Month, 31 Days).
The drop-down will allow you to select the desired user. By selecting a specific user, you will see the work orders assigned to only that user.
The Today button will automatically bring you to the current date and display the work orders and users for that date. You can use the arrows next to this button to manually navigate to a different day or use the Calendar icon to select a specific day/month.
The column headings will display the user, while the work orders assigned for a specific user will be color-coded below.
The work orders assigned to a user will be color-coded in blocks. By clicking on these blocks, you will be automatically redirected to the View Work Order pop-up window.
If you hover over a work order, the tooltips will appear. You can click on any hyperlinks in the tooltips.
When you right-click on a work order, you can either view, edit, or add a constraint to the desired work order.
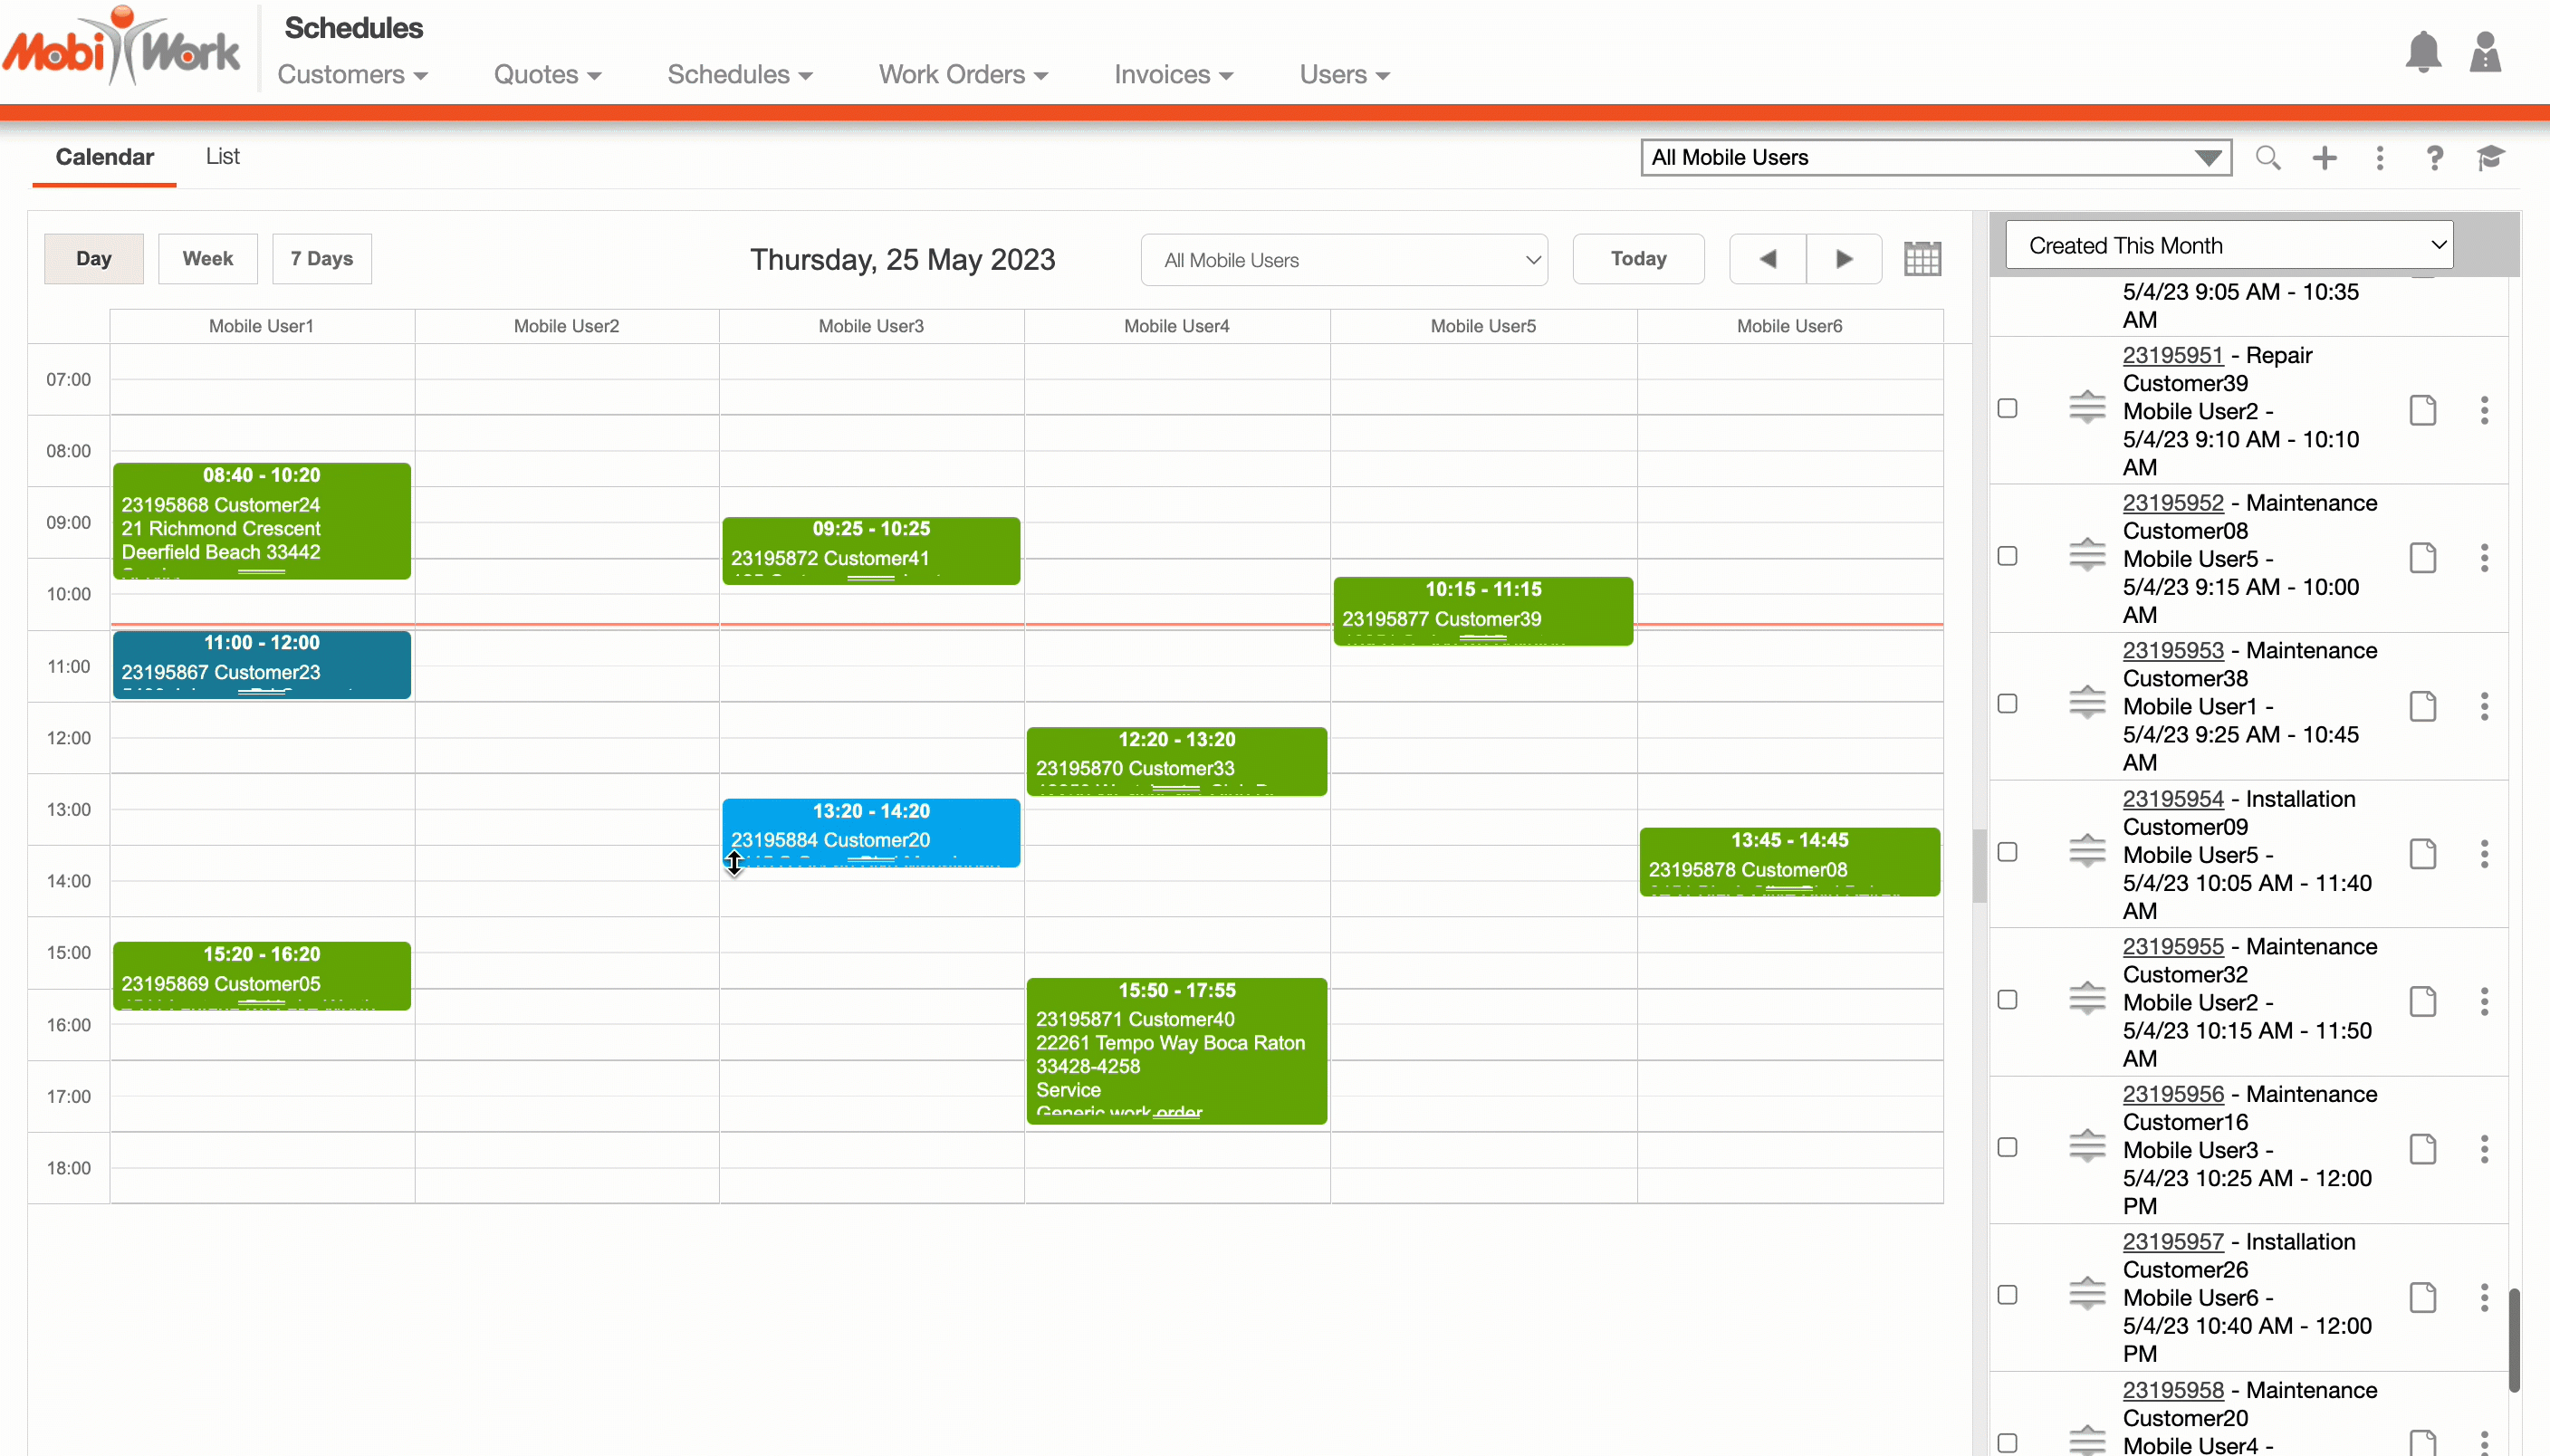
List View Section
The drop-down from the "List View" will allow you to toggle the statuses of the work orders. For example, if you would like to see only "Open" work orders, simply use the drop-down to select the desired status.
The "List View" section will also depict the work order summary, including the work order ID, the type of work order, the customer, etc.
The "Actions" column will allow you to view the work order (from the Individual Actions button or the View icon) or to dispatch a user to the work order (the "Dispatch" option from Individual Actions).
Drag & Drop
In the "Calendar" tab you will be able to drag & drop work orders to other users to easily reassign them. You can drag & drop a work order by clicking on the selected work order and dragging it to the new user:
The user who gets the reassigned work order will automatically get a notification of the new job.
If you have a work order in the "List View" section that has not been dispatched, you can also drag & drop the selected work order to the "Calendar View" section:
Once you drag & drop the new work order to the "Calendar View" section, refresh the page to officially change the work order status.
Calendar Dates
On the "Calendar" tab you will be able to switch your date range to see upcoming or current work orders. There are five options to choose from (i.e., Day, Week, 7 Days, Month, and 31 Days):
The default date range is the "Day" date range. This range will depict all work orders from the specified day:
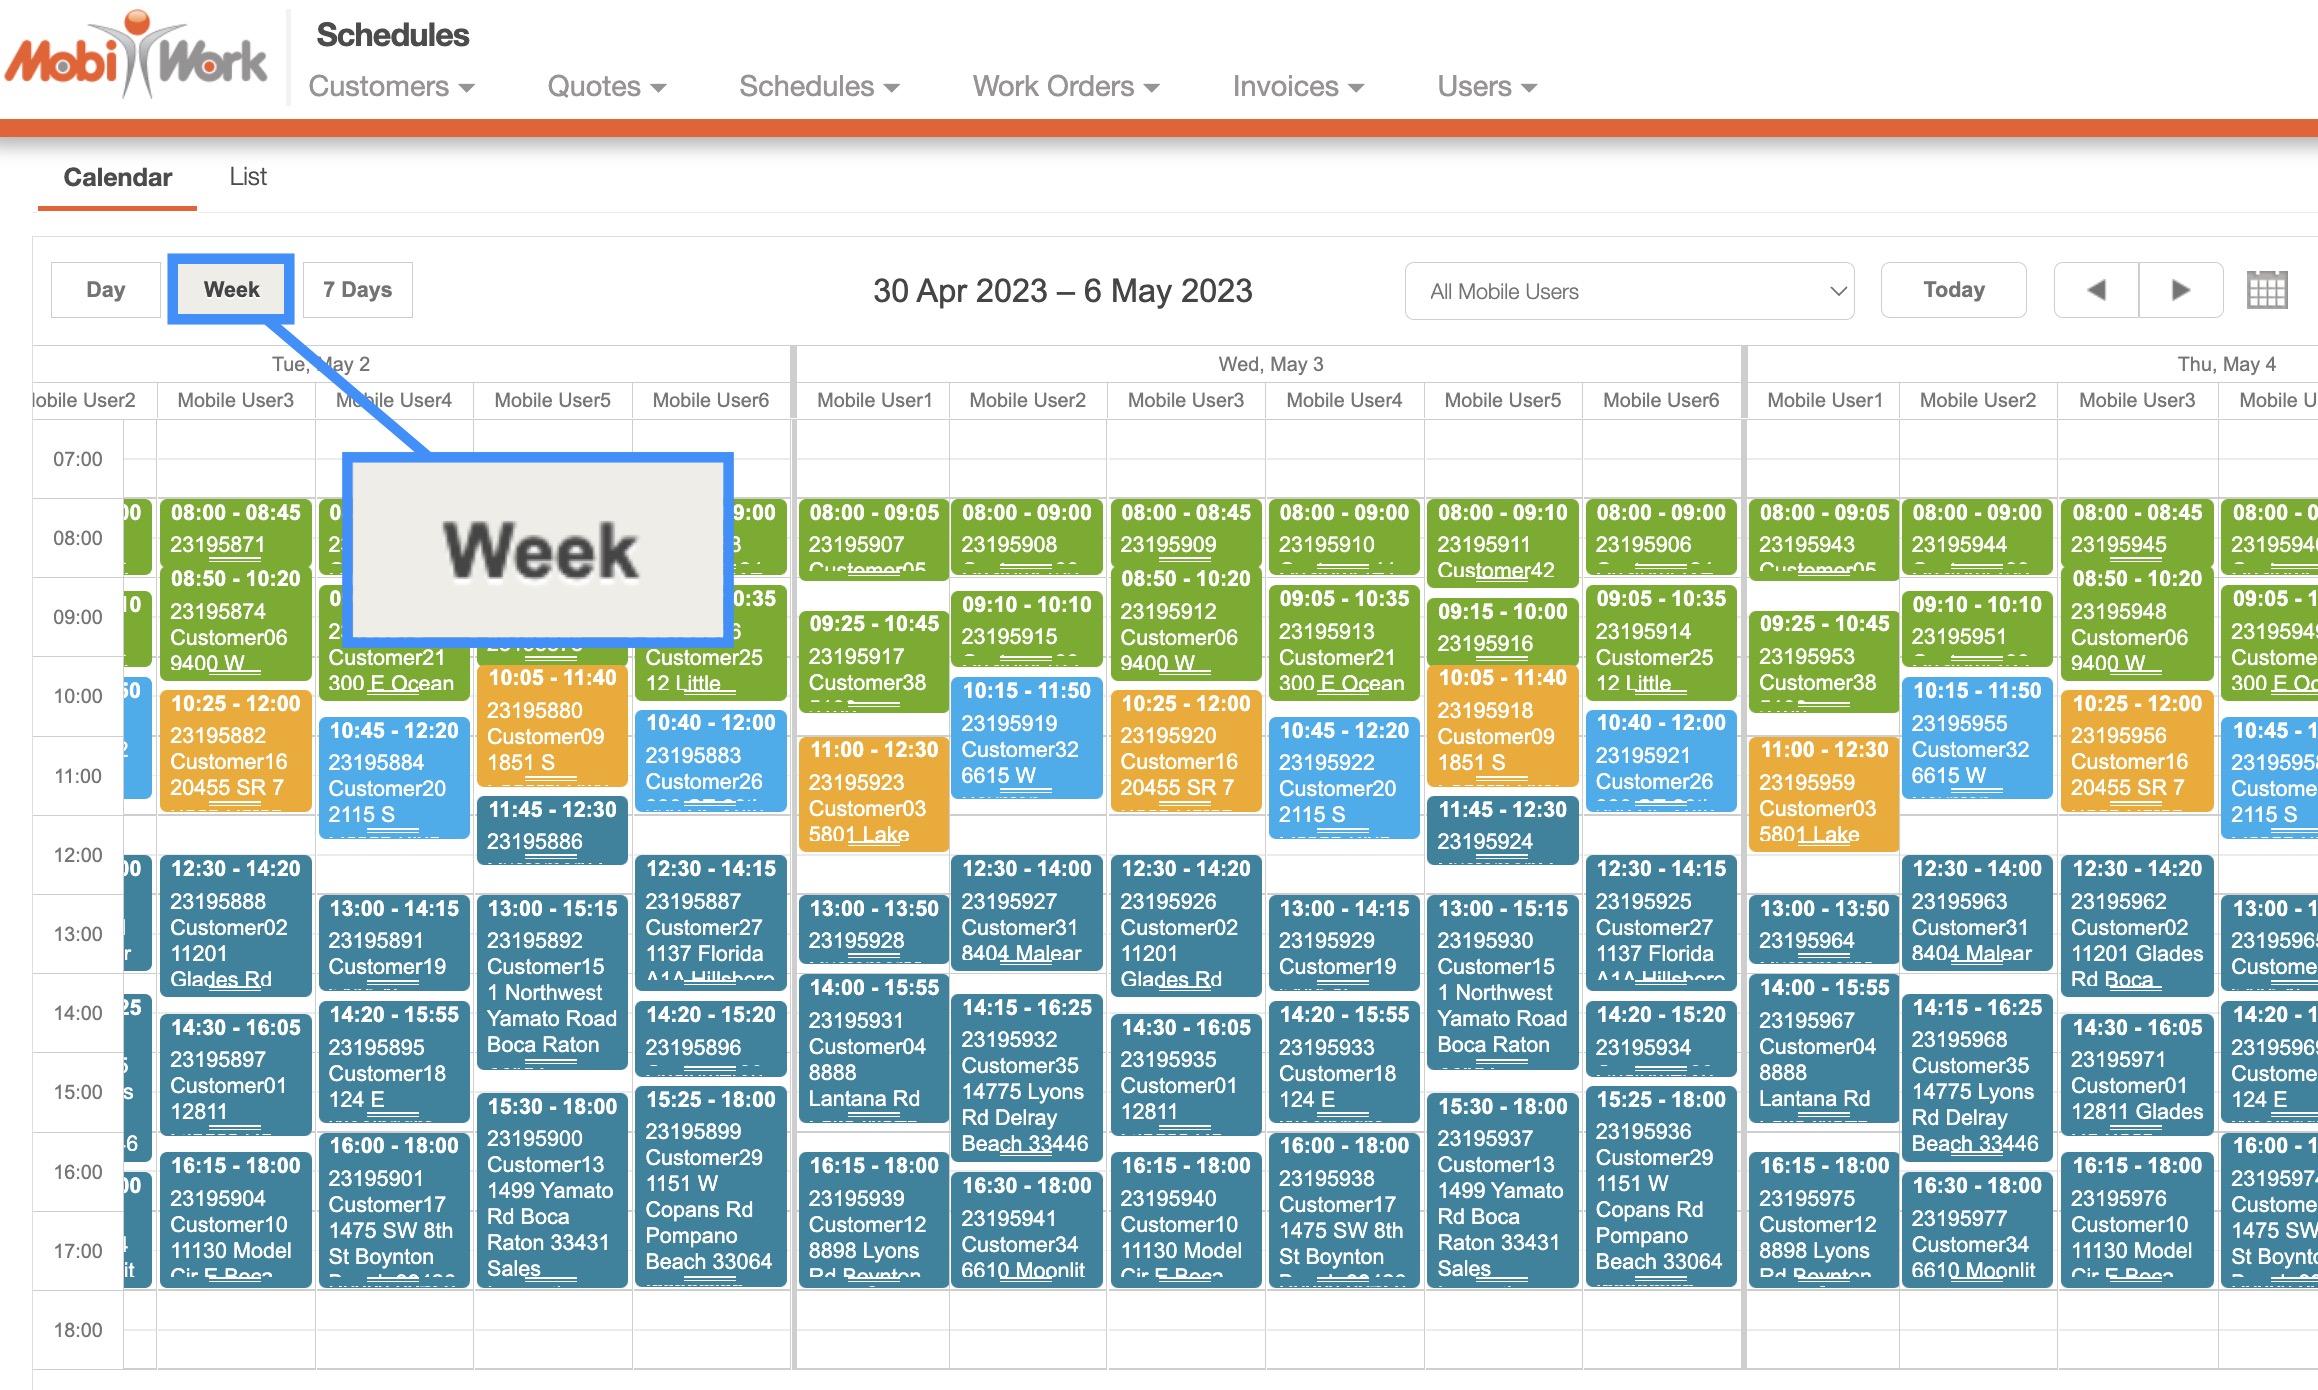
The "Week" date range will display all work orders within the specified week (Monday through Sunday):
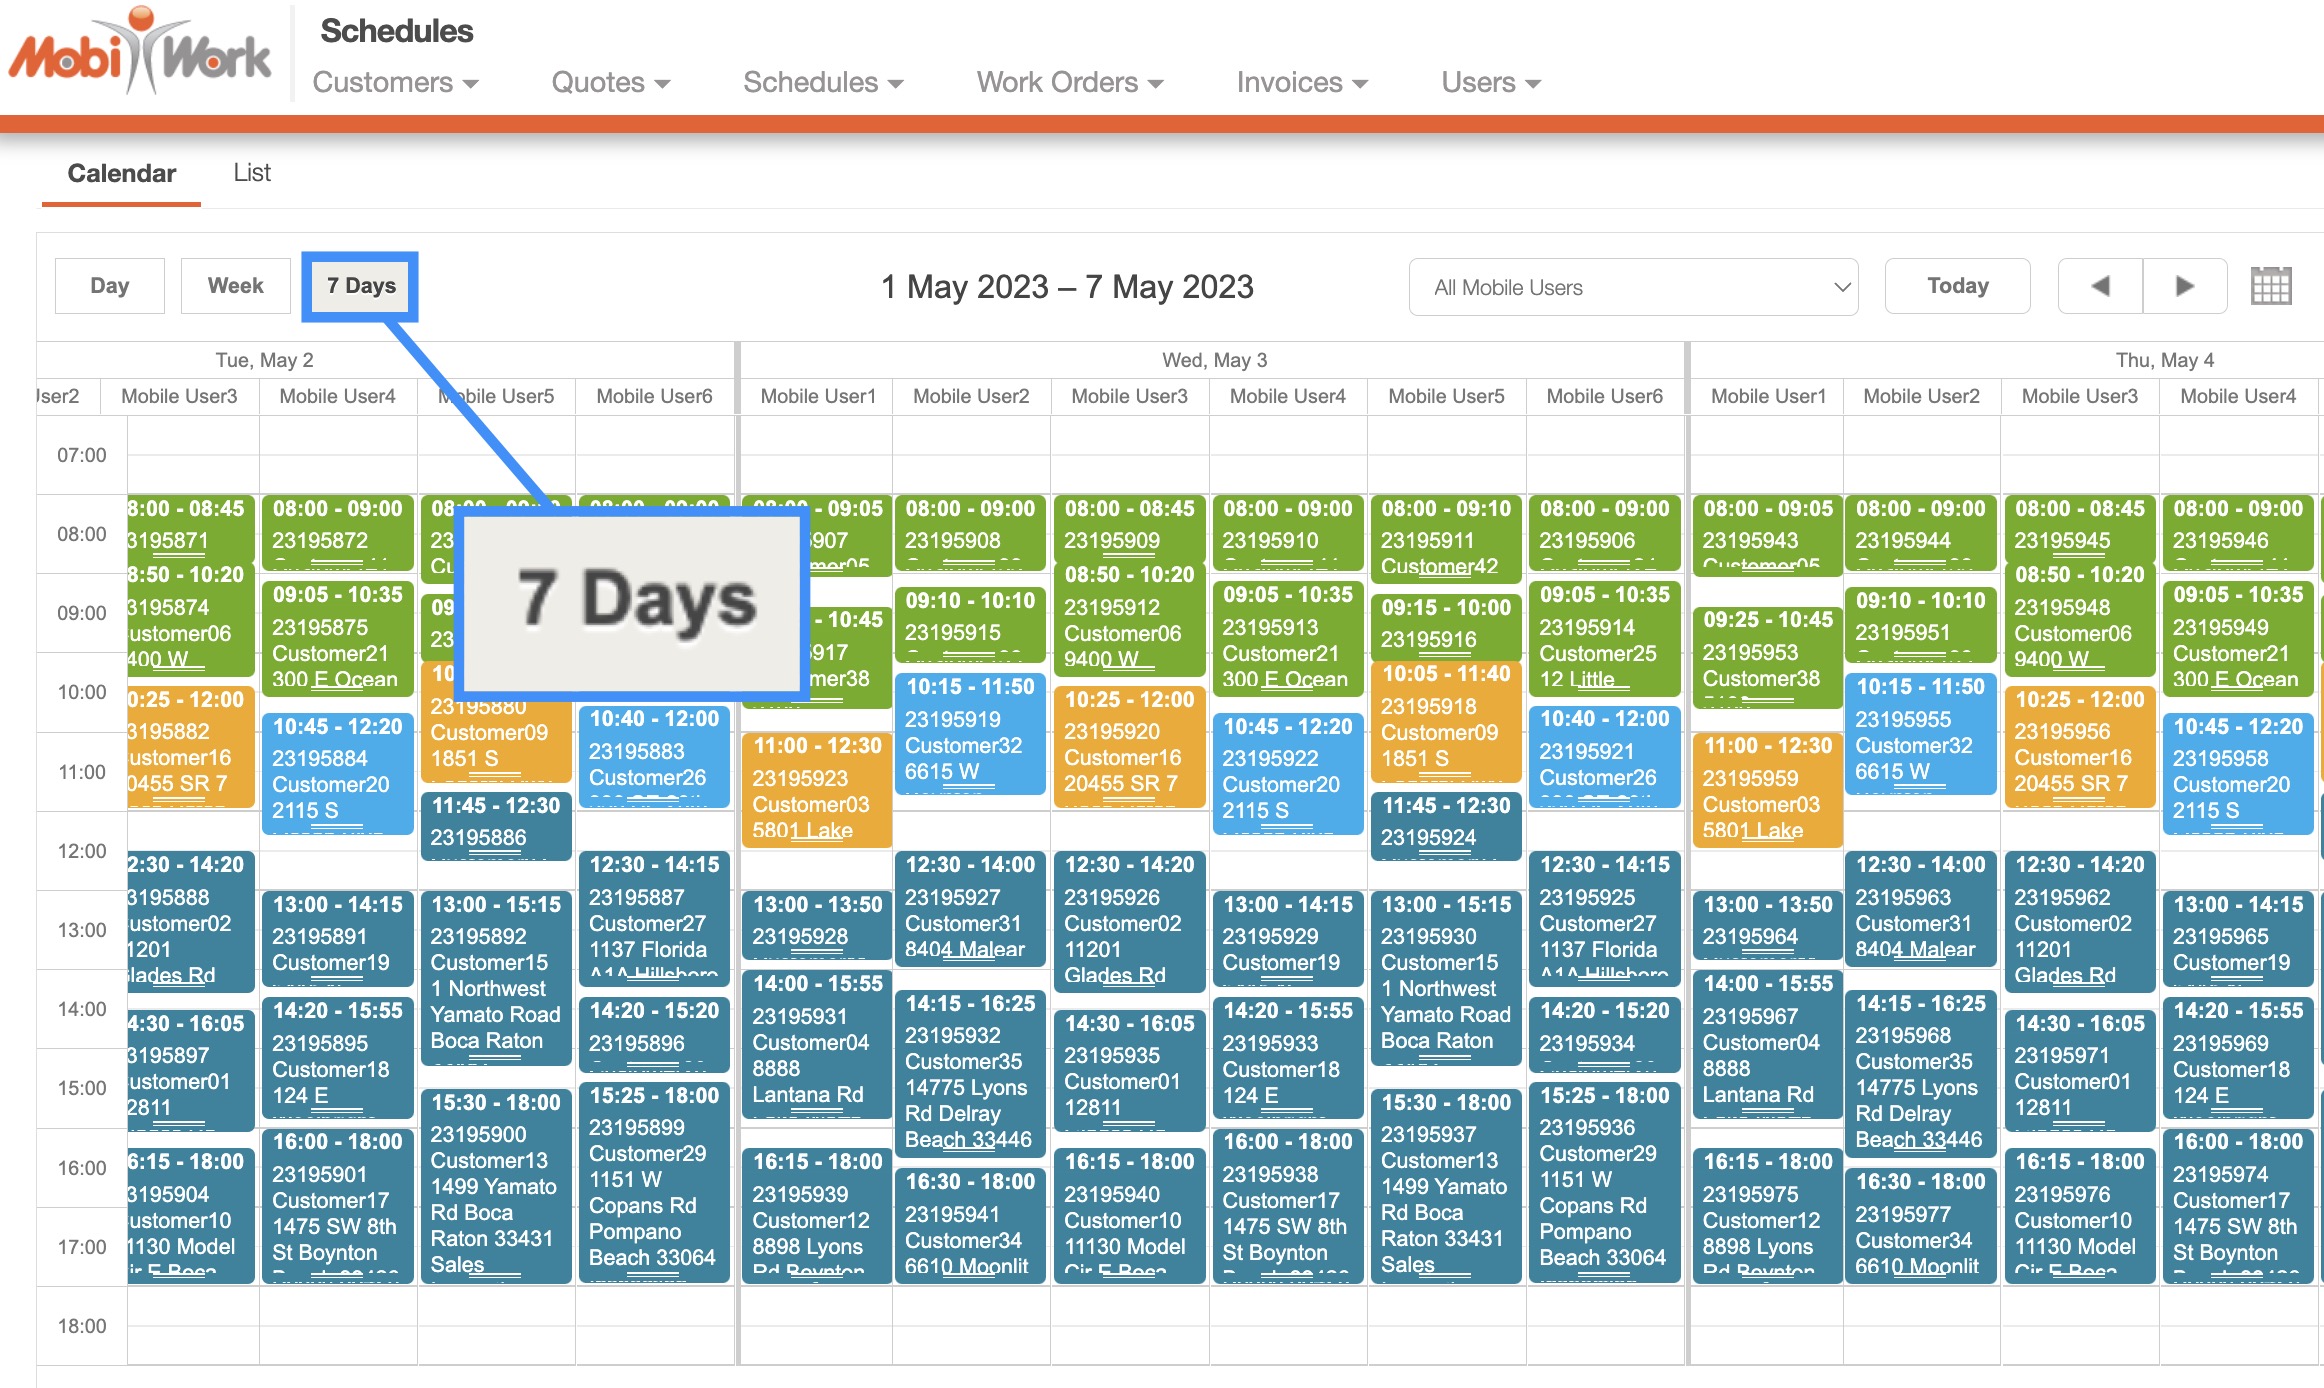
The "7 days" date range will display all work orders within the next seven days:
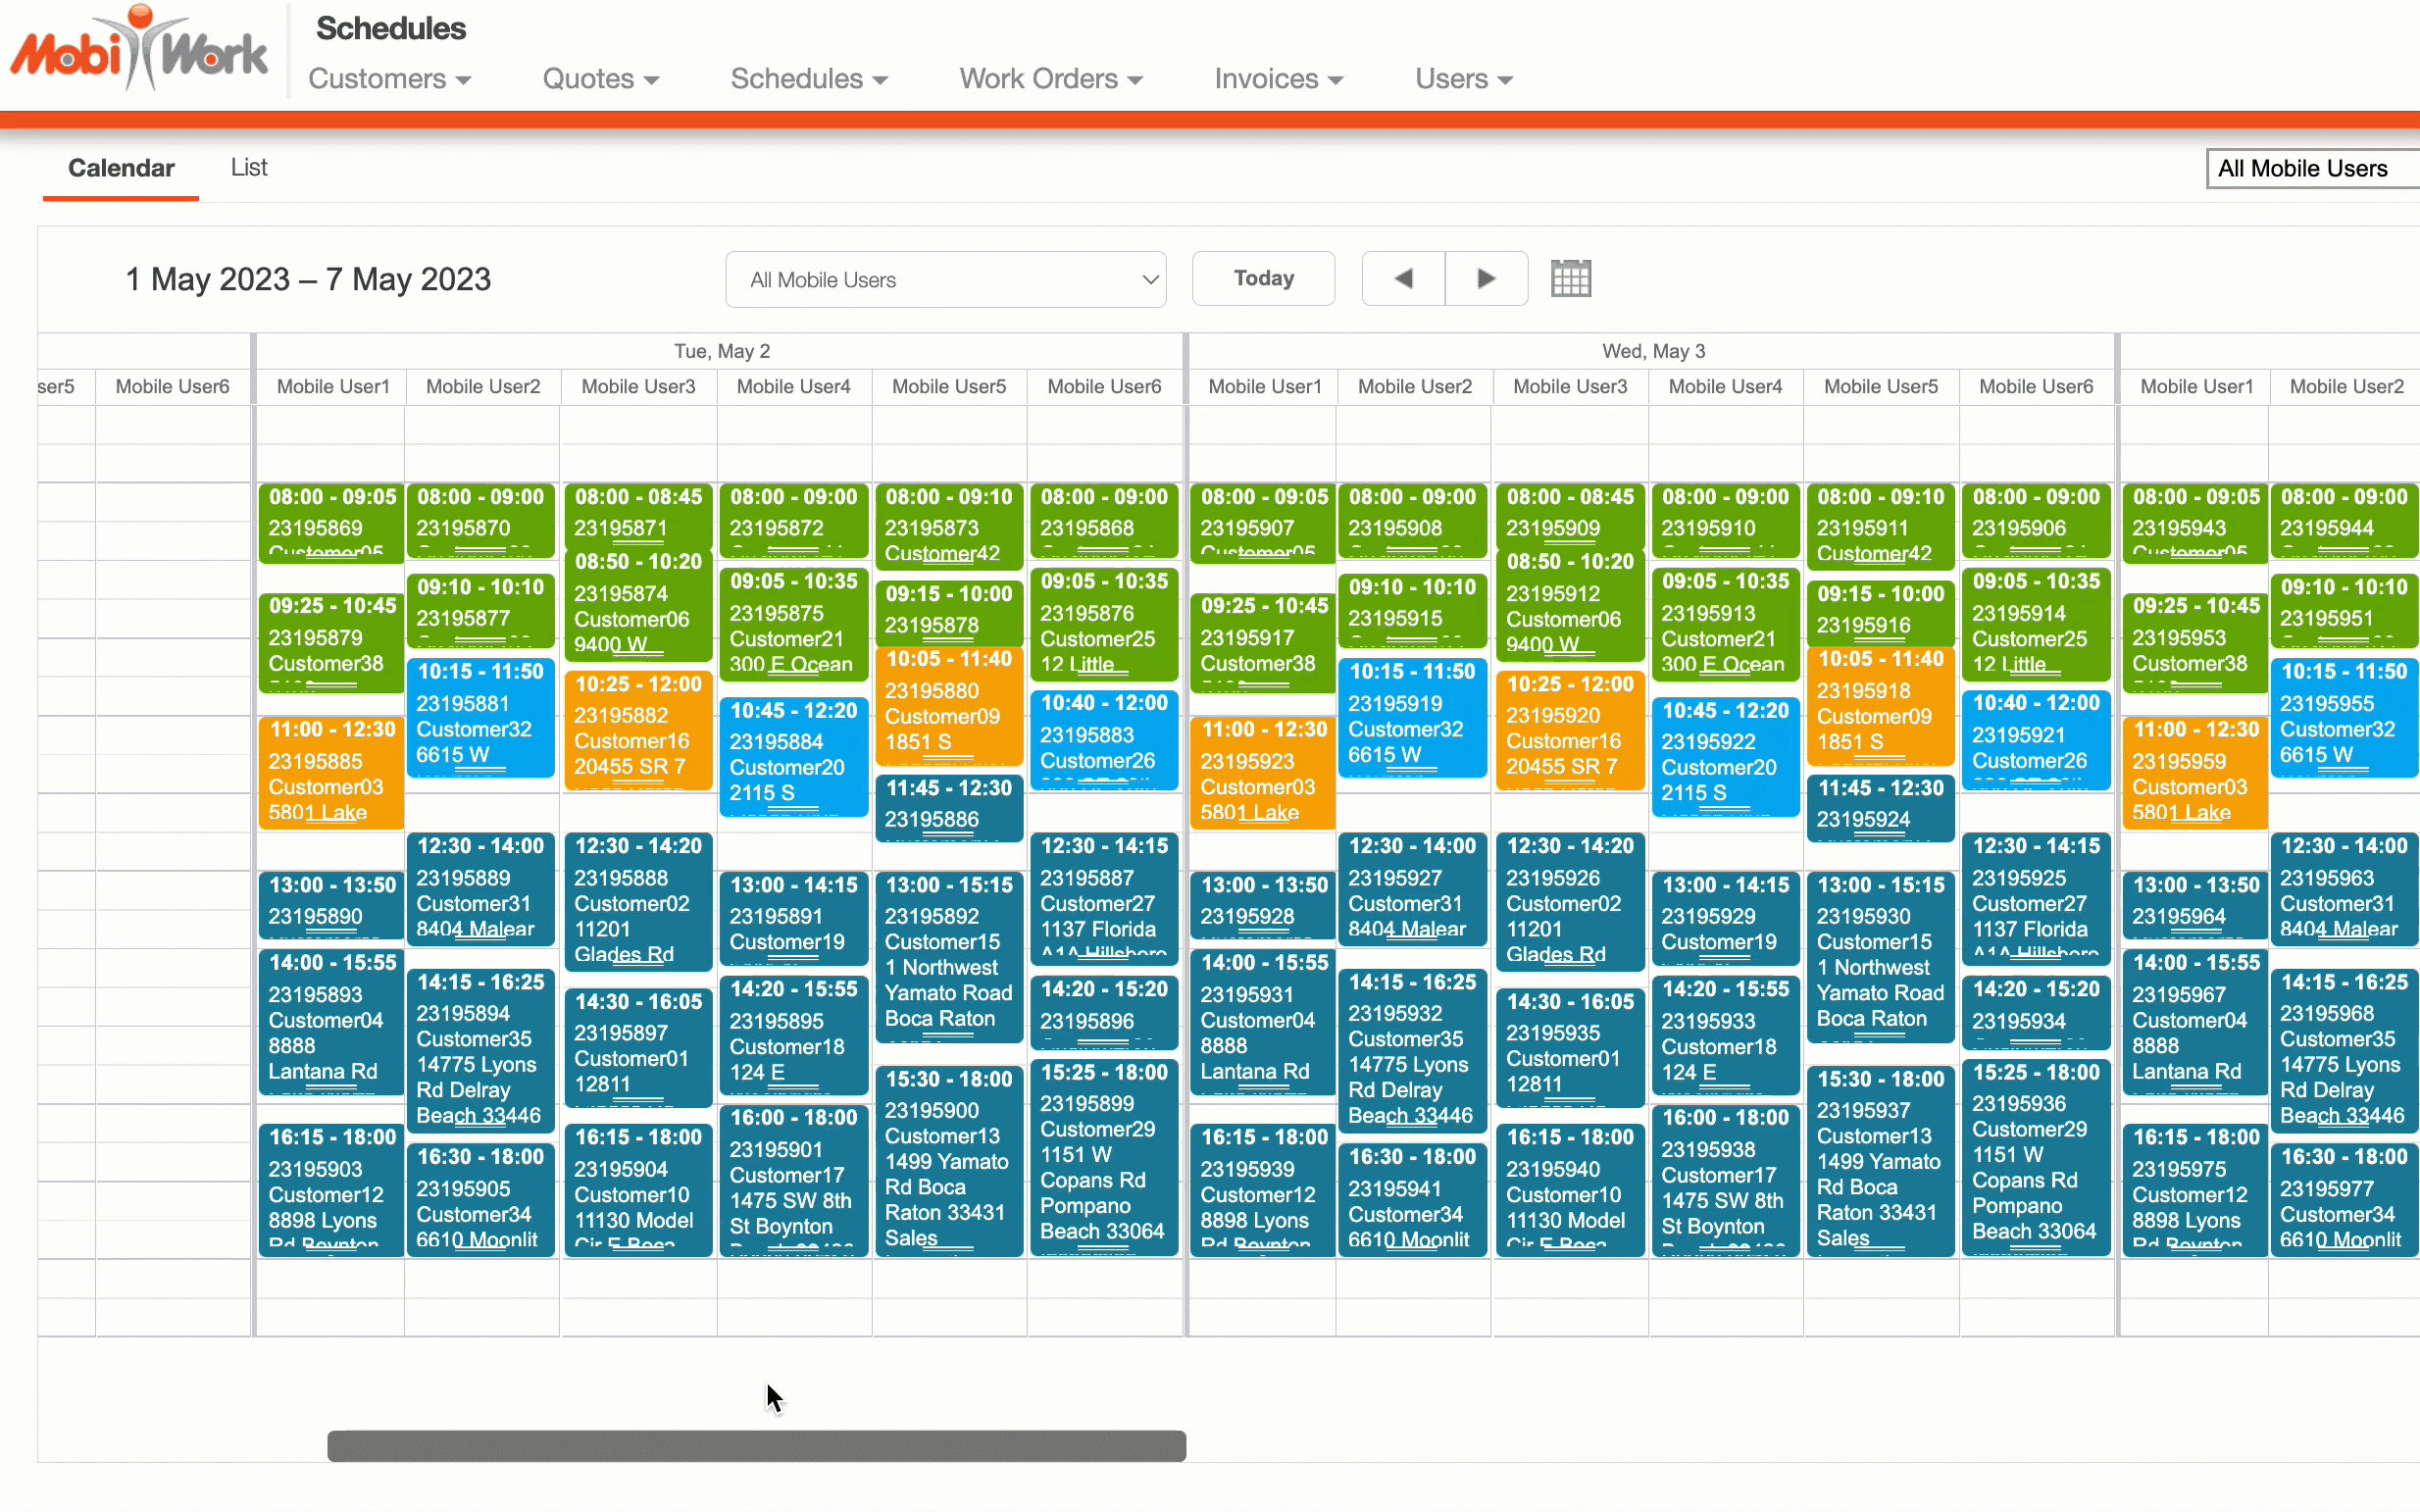
Note: If you do not see all the dates in the selected date range, you can use the bar towards the bottom of your "Calendar View" section to scroll to the right:
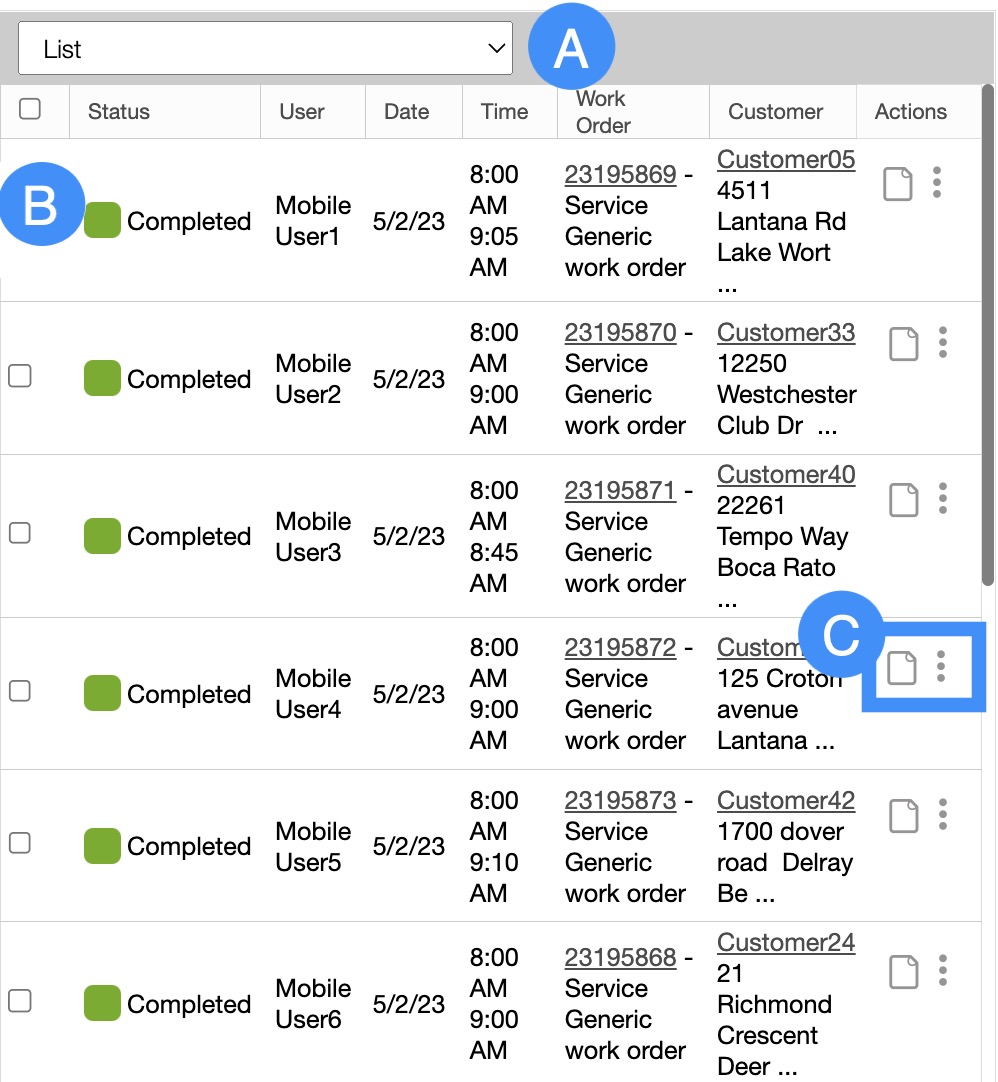
The "List" tab will display your work order ID, the work order status, user pin, the customer's name, etc.:
List Tab Columns
In the "List" tab, the columns are structured to display specific data related to each individual work order and user.
These columns are organized as: "Status," "User," "Date," "Time," "Work Order," "Customer," and "Actions:"
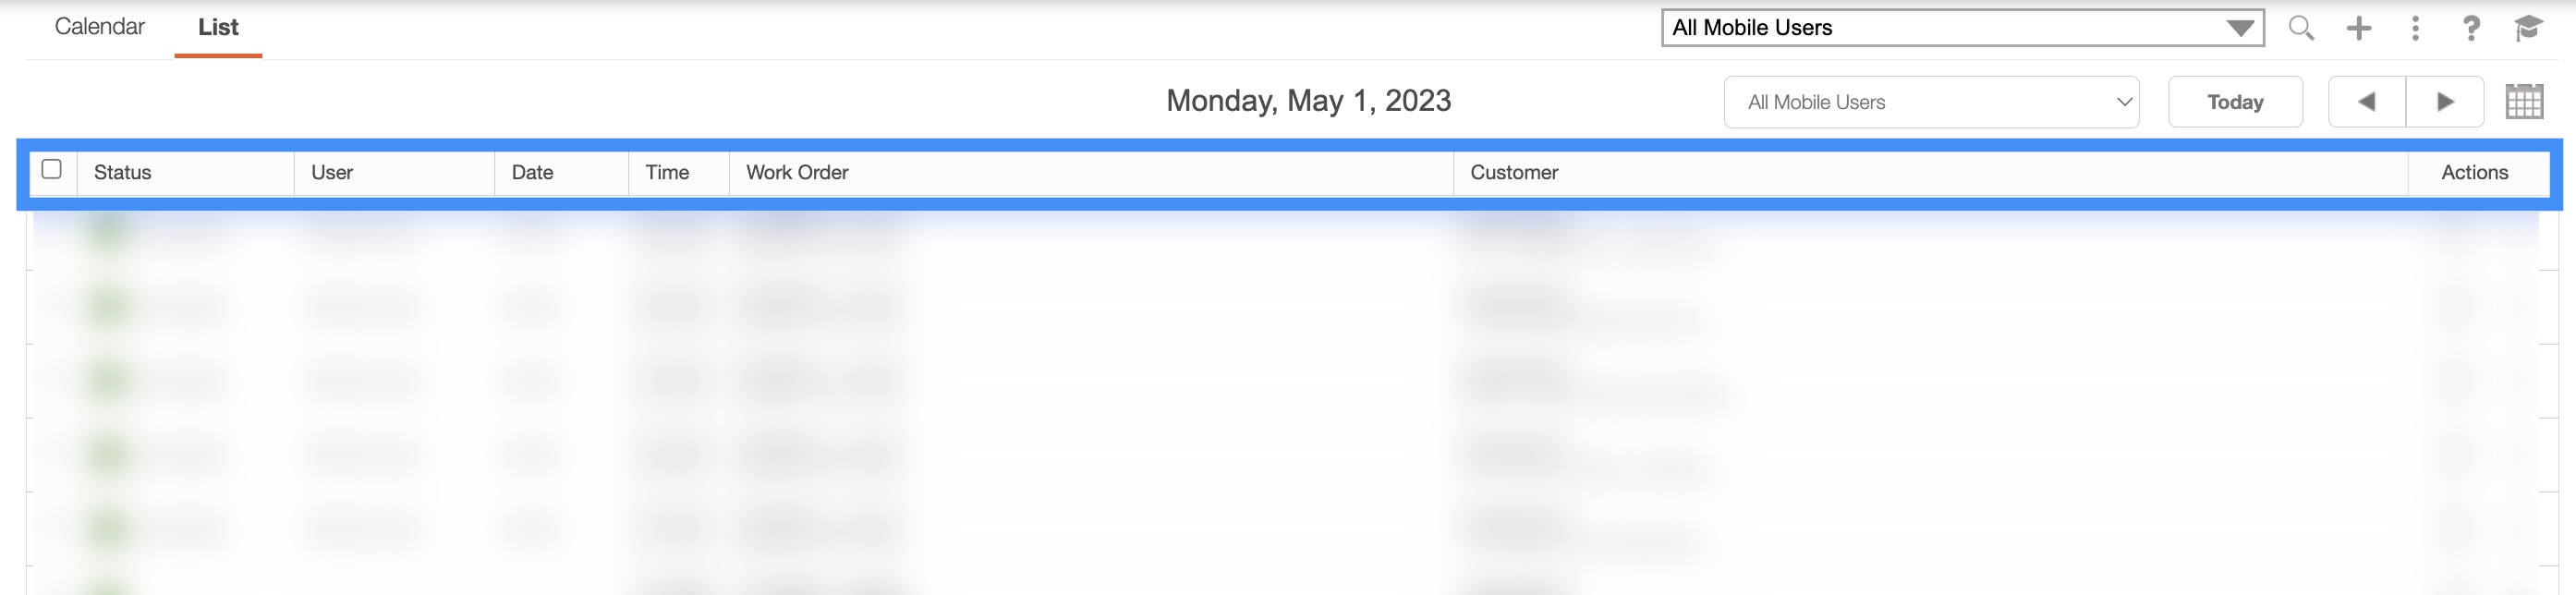
The corresponding rows under the column headings will display the relevant schedule data.
The checkboxes (multiple selection area) found to the left of the "Name" column, will allow you to select either one or multiple users assigned work orders to manage, edit, remove, etc.:
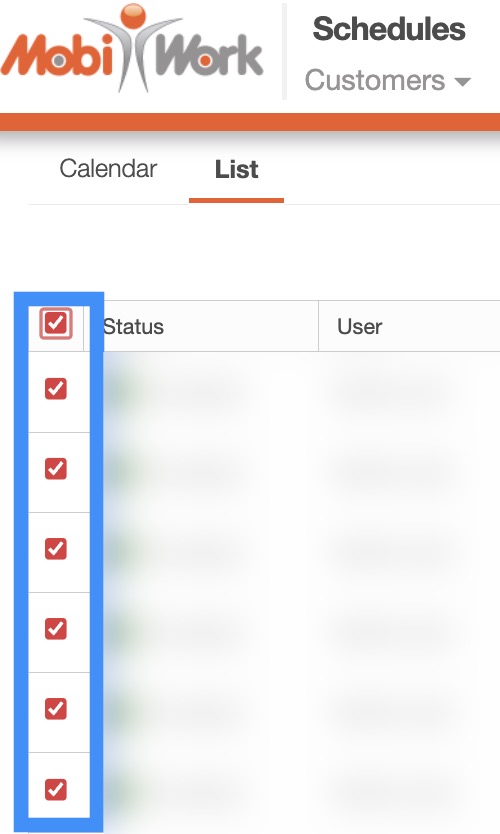
By clicking the topmost checkbox in the column heading you will select all the scheduled work orders.
The "List" tab column headings are defined as:
| Name: | Description: |
|---|---|
| "Status" | Displays the color-coded status of the work order (e.g., Open, Dispatched, In Transit, On Site, or Completed). |
| "User" | The user and the color-coded user pin assigned to the work order. |
| "Date" | The date of the scheduled work order. |
| "Time" | The scheduled time of the work order. |
| "Work Order" | The work order ID and type of work order. |
| "Customer" | The customer associated with the work order. |
| "Actions" | Allows you to view, edit, delete, or reassign the work order to another user. |
List Tab Individual Actions
When selecting a scheduled work order and clicking on the Individual Actions button (the three vertical dots under the "Actions" column) you will be able to view, edit, delete, and reassigned the selected work order.
Any actions that are done with the Individual Actions button will only apply to the selected work order:
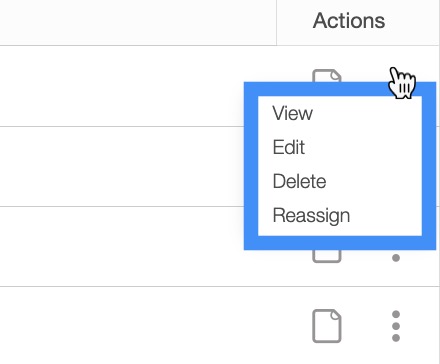
The View icon found under the "Actions" column will allow you to quickly access the View Work Order pop-up window of the selected work order:
![]()
List Right-Click Actions
When right-clicking with your mouse on a scheduled work order in the "List" tab, you will be able to view, edit, add work order, and more to the selected work order.
The options that are displayed when you right-click on a scheduled work order are also available when you select the Individual Actions button.
Any actions that are done with the right-click actions will only apply to the selected work order:
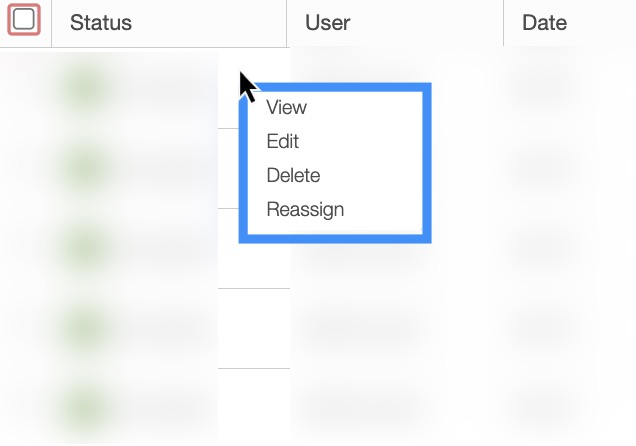
The definitions for the actions found in the Individual Actions and when you right-click in the "List" tab are below:
| Name: | Description: |
|---|---|
| "View" | Opens the View Work Order pop-up window. |
| "Edit" | Edits the selected work order. |
| "Delete" | Deletes the selected work order. |
| "Reassign" | Allows you to reassign the work order to another selected user. |
The "Global Actions" section is located at the top-right of your Schedules tabs; regardless of the tab that you are on, the "Global Actions" will remain in the top-right corner:
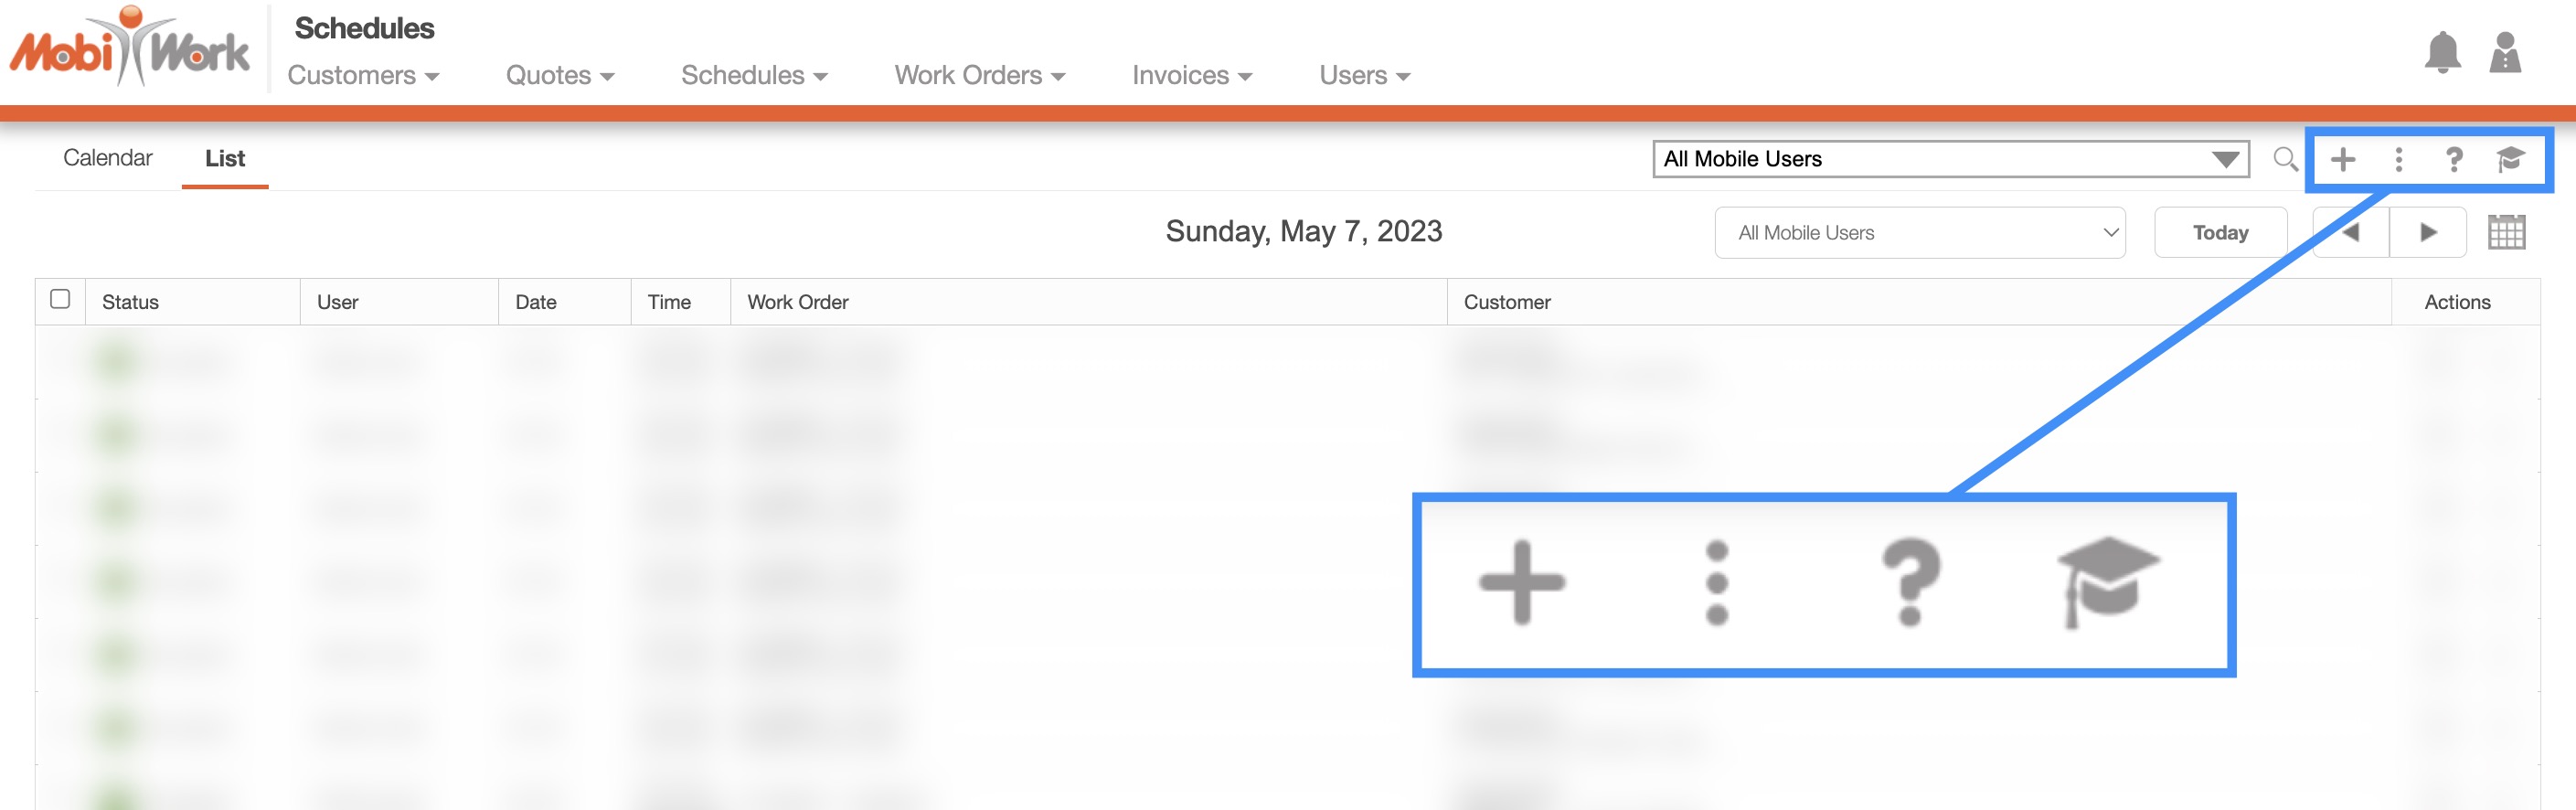
The "Global Actions" section includes:
The Plus Sign button which will allow you to quickly add a new work order.
The More Actions button (represented by the three vertical dots) which will allow you to edit selected work order statuses, dispatch users to their assigned work orders, optimize routes and more.
The Question Mark button which will direct you to the respective MobiWork Features page.
The Graduation Cap which will activate the Onboarding Assistant.
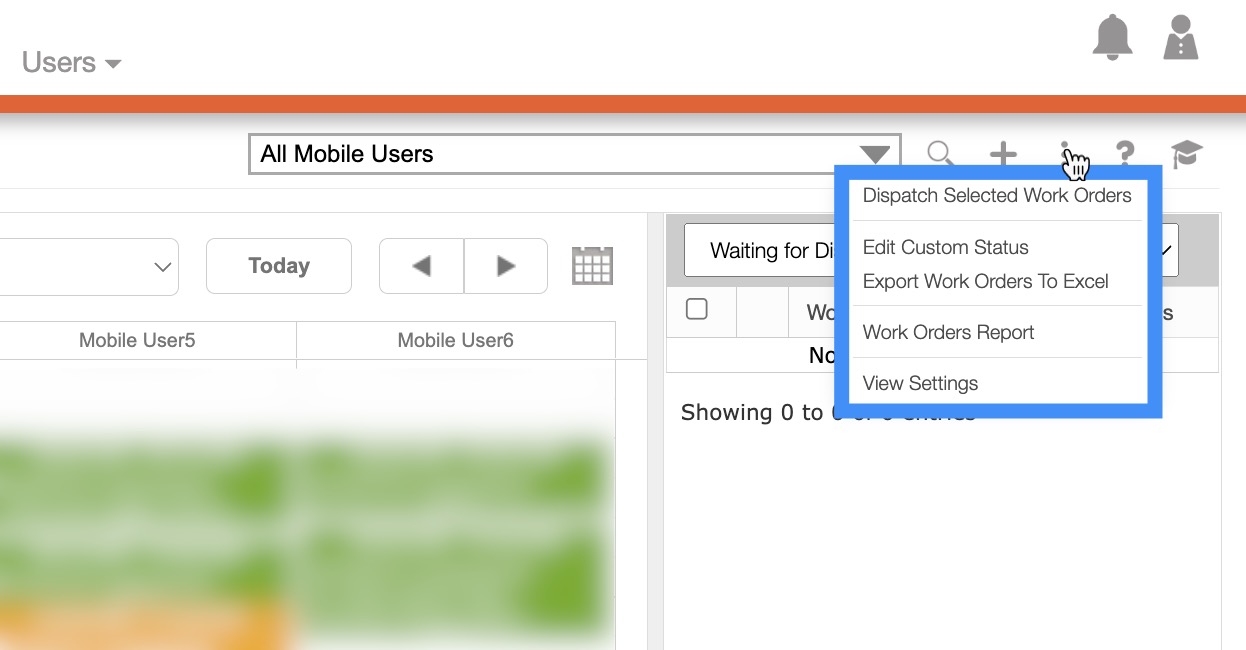
After clicking on the vertical three dots in the top-right corner, the More Actions drop-down menu will appear.
From the More Actions drop-down menu, you can select various actions that will help to manage your scheduled work orders, such as optimizing routes, dispatching users to their assigned work orders, exporting/importing user schedules, and more.
These actions can be performed on a single work order or on multiple work orders.
The complete list of actions found in the More Actions drop-down menu are defined below:
| Name: | Description: |
|---|---|
| "Dispatch Selected Work Orders" | Dispatches the assigned user to the work order |
| "Edit Custom Status" | The custom status of the work order. This can be adjusted in the Work Order Settings section |
| "Export Work Orders to Excel" | Exports the work order to Excel |
| "Settings" | Directs you to the Settings page where you can further customize the information and settings (e.g., display) found on your schedule page |