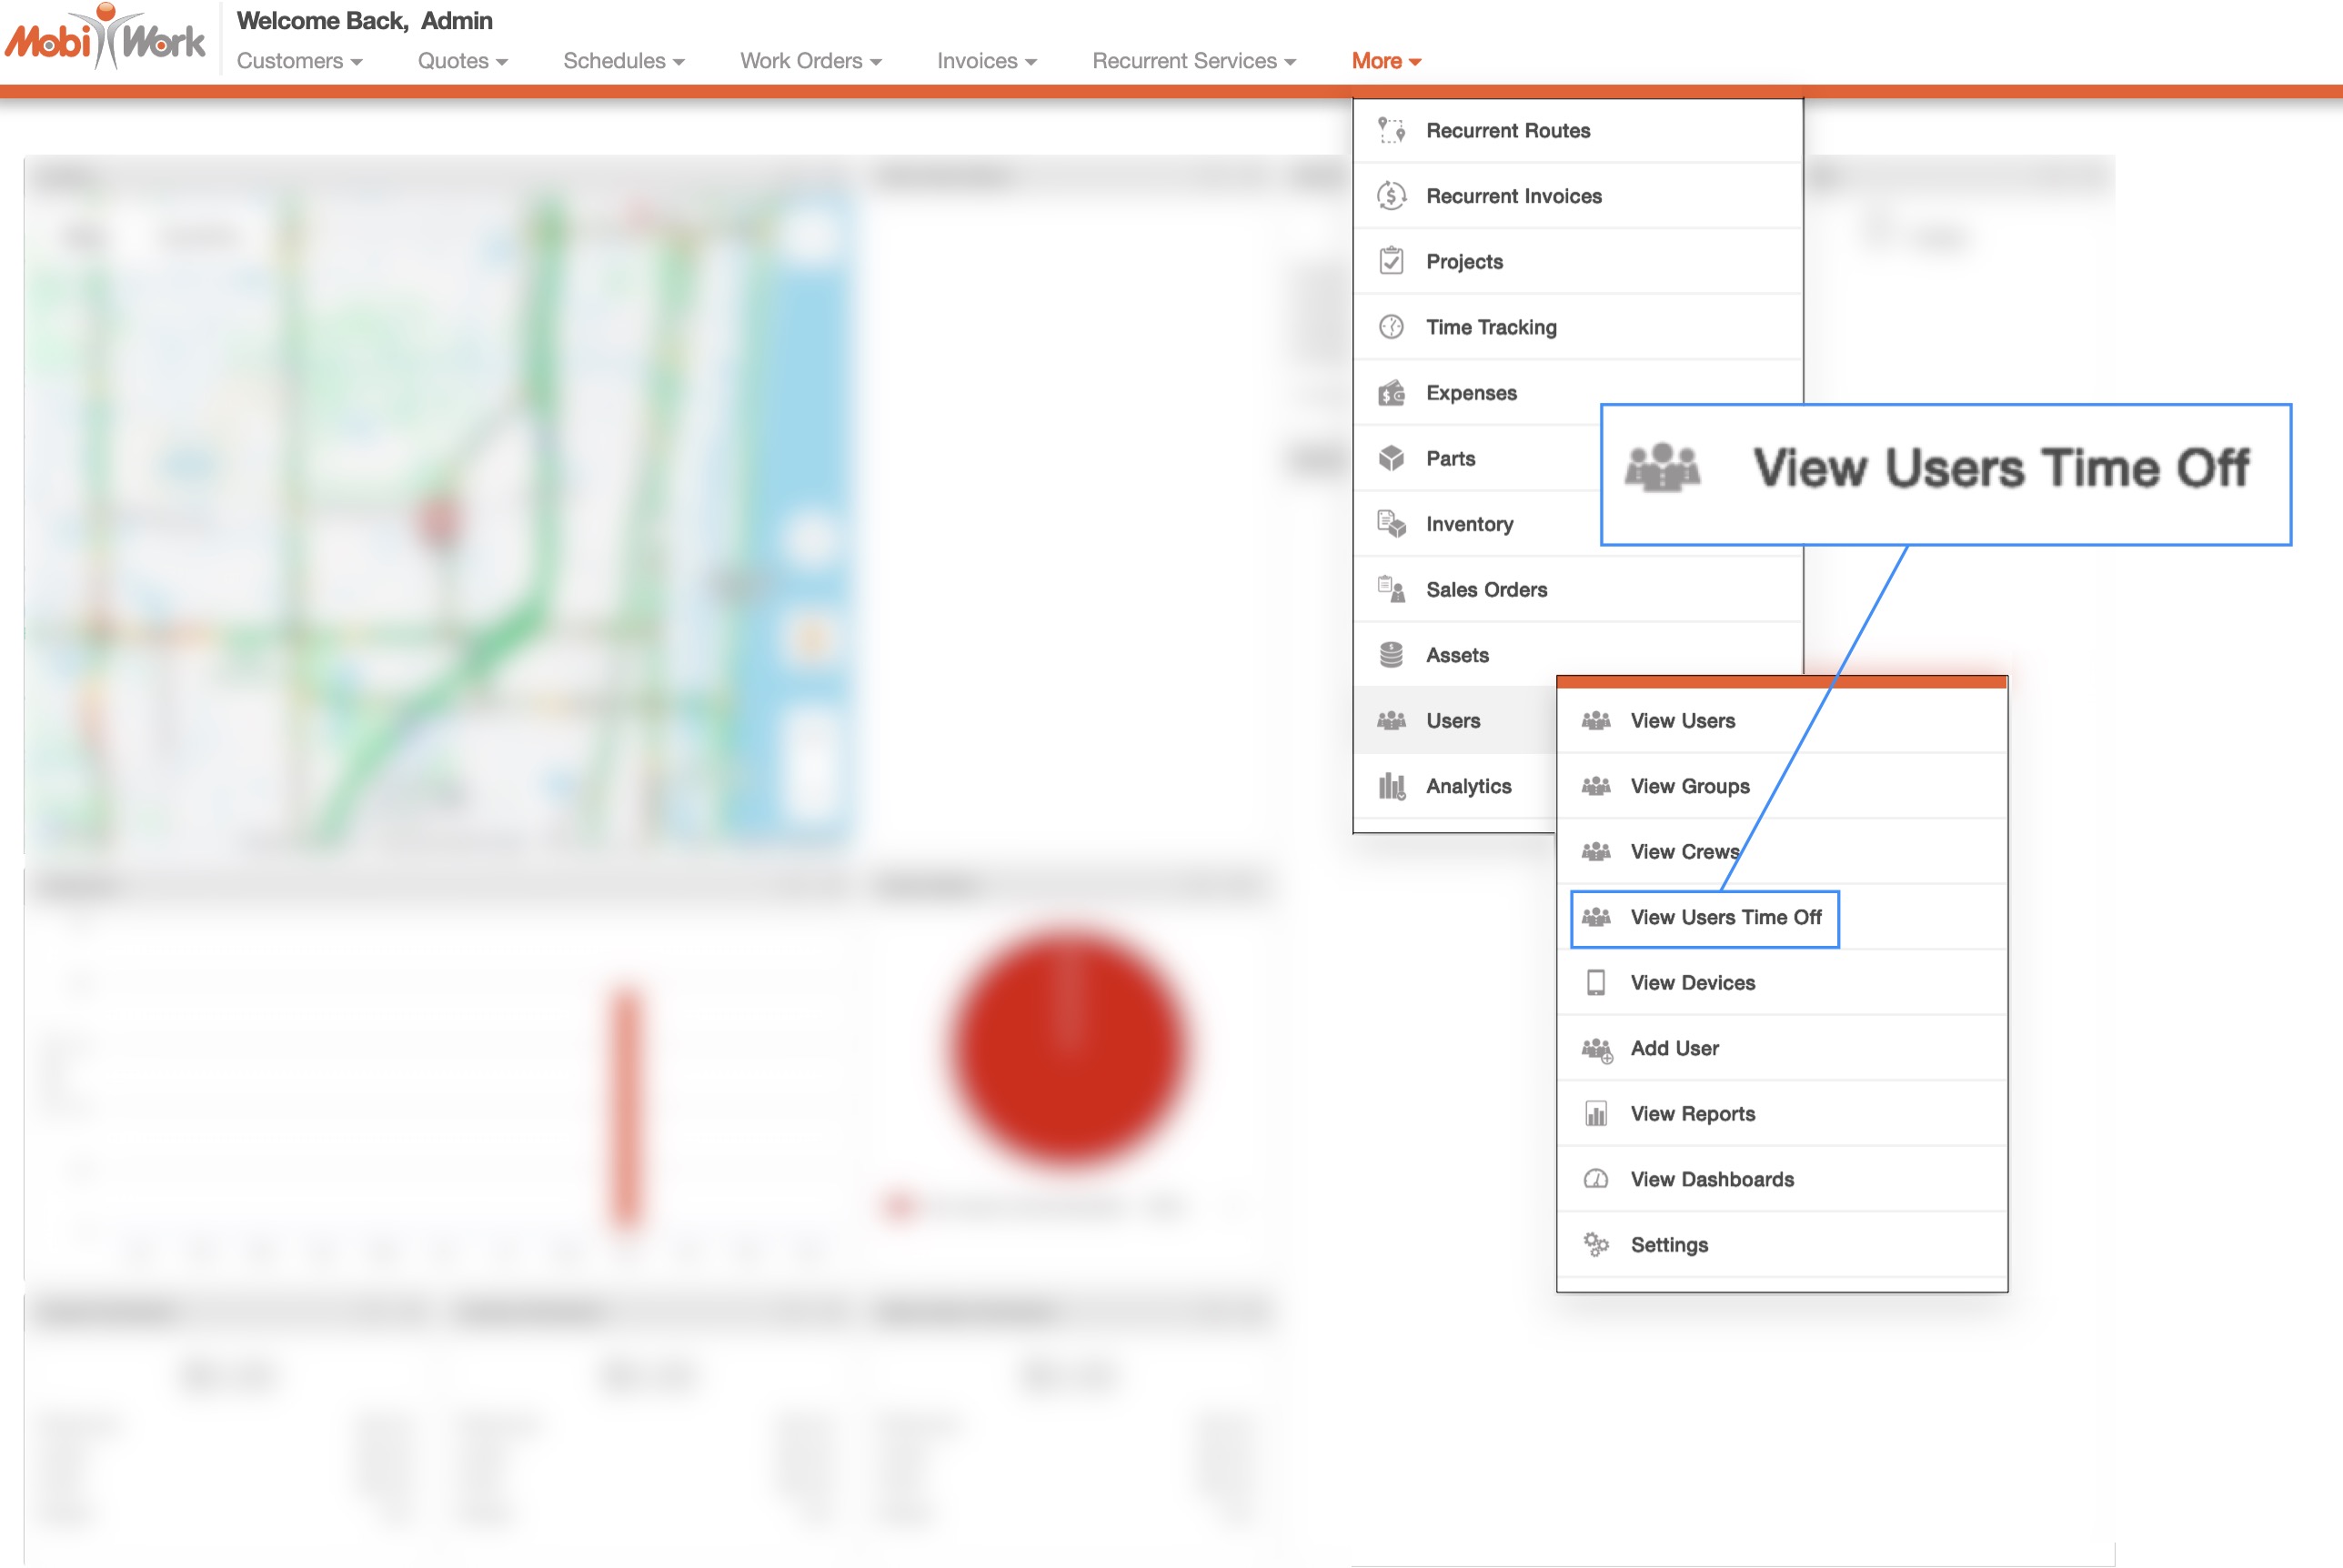
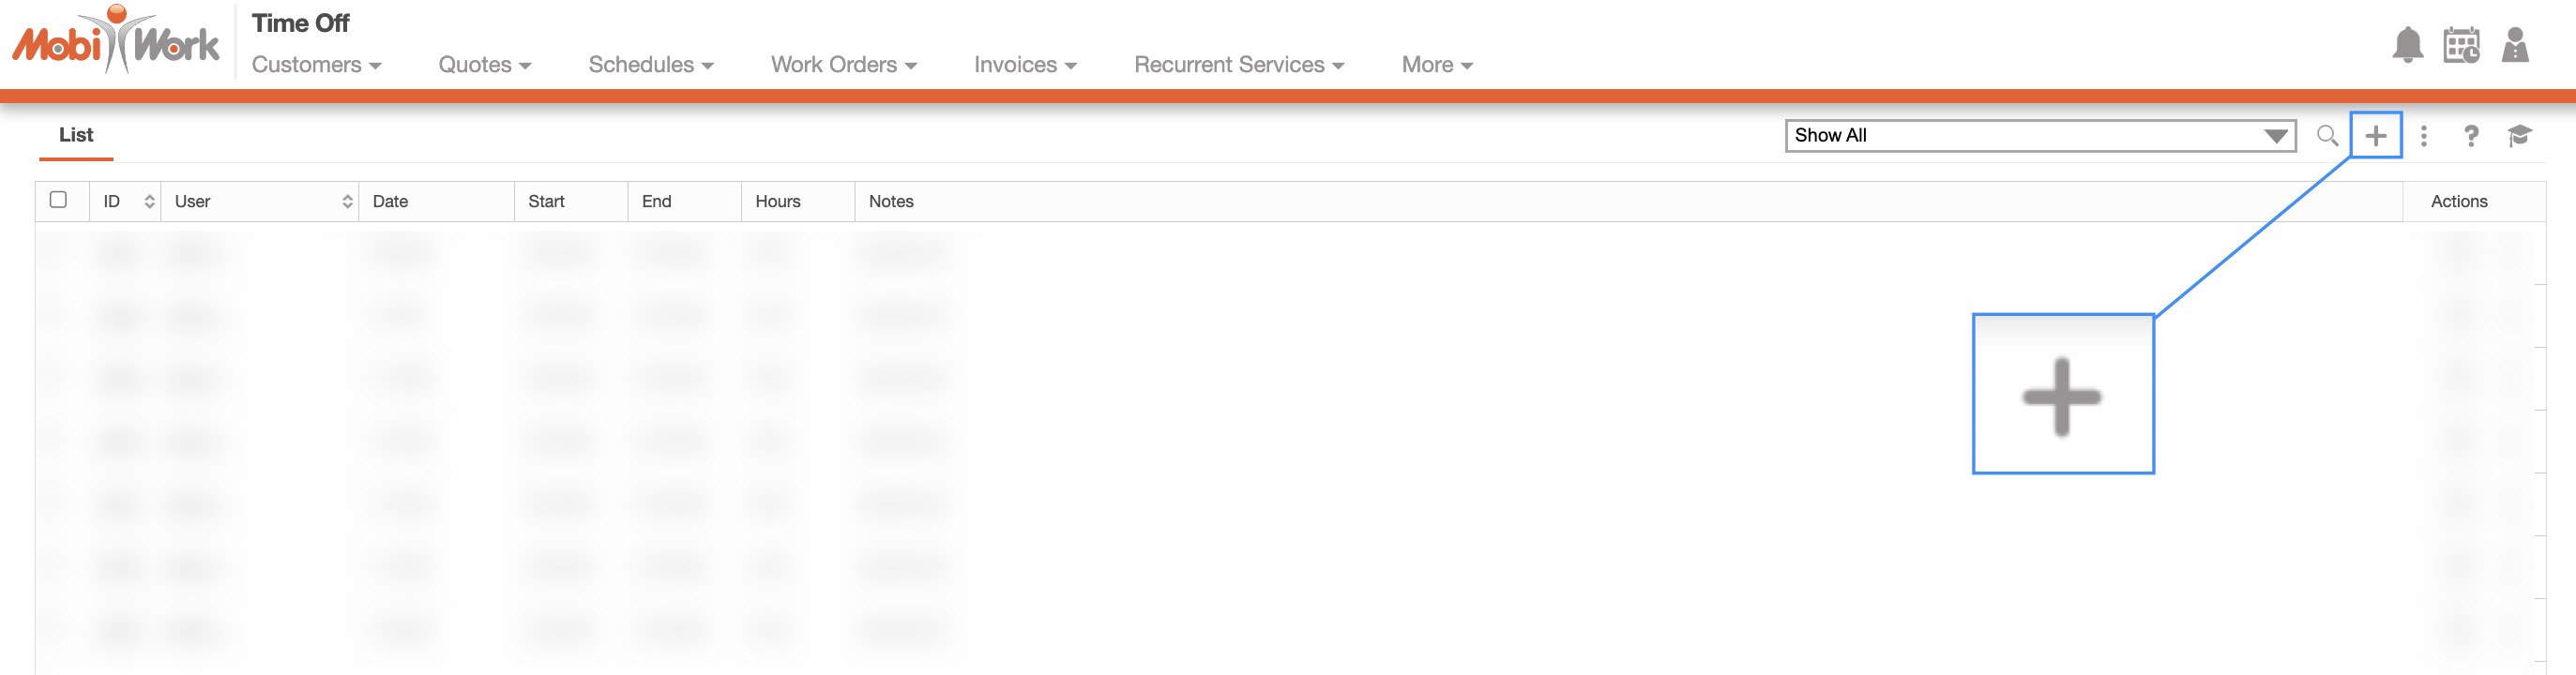
The Time Off List page will allow you to view all your users' time off requests. You can access this page by hovering over the Users feature in the MobiWork menu and clicking on the "View Users Time Off" option:
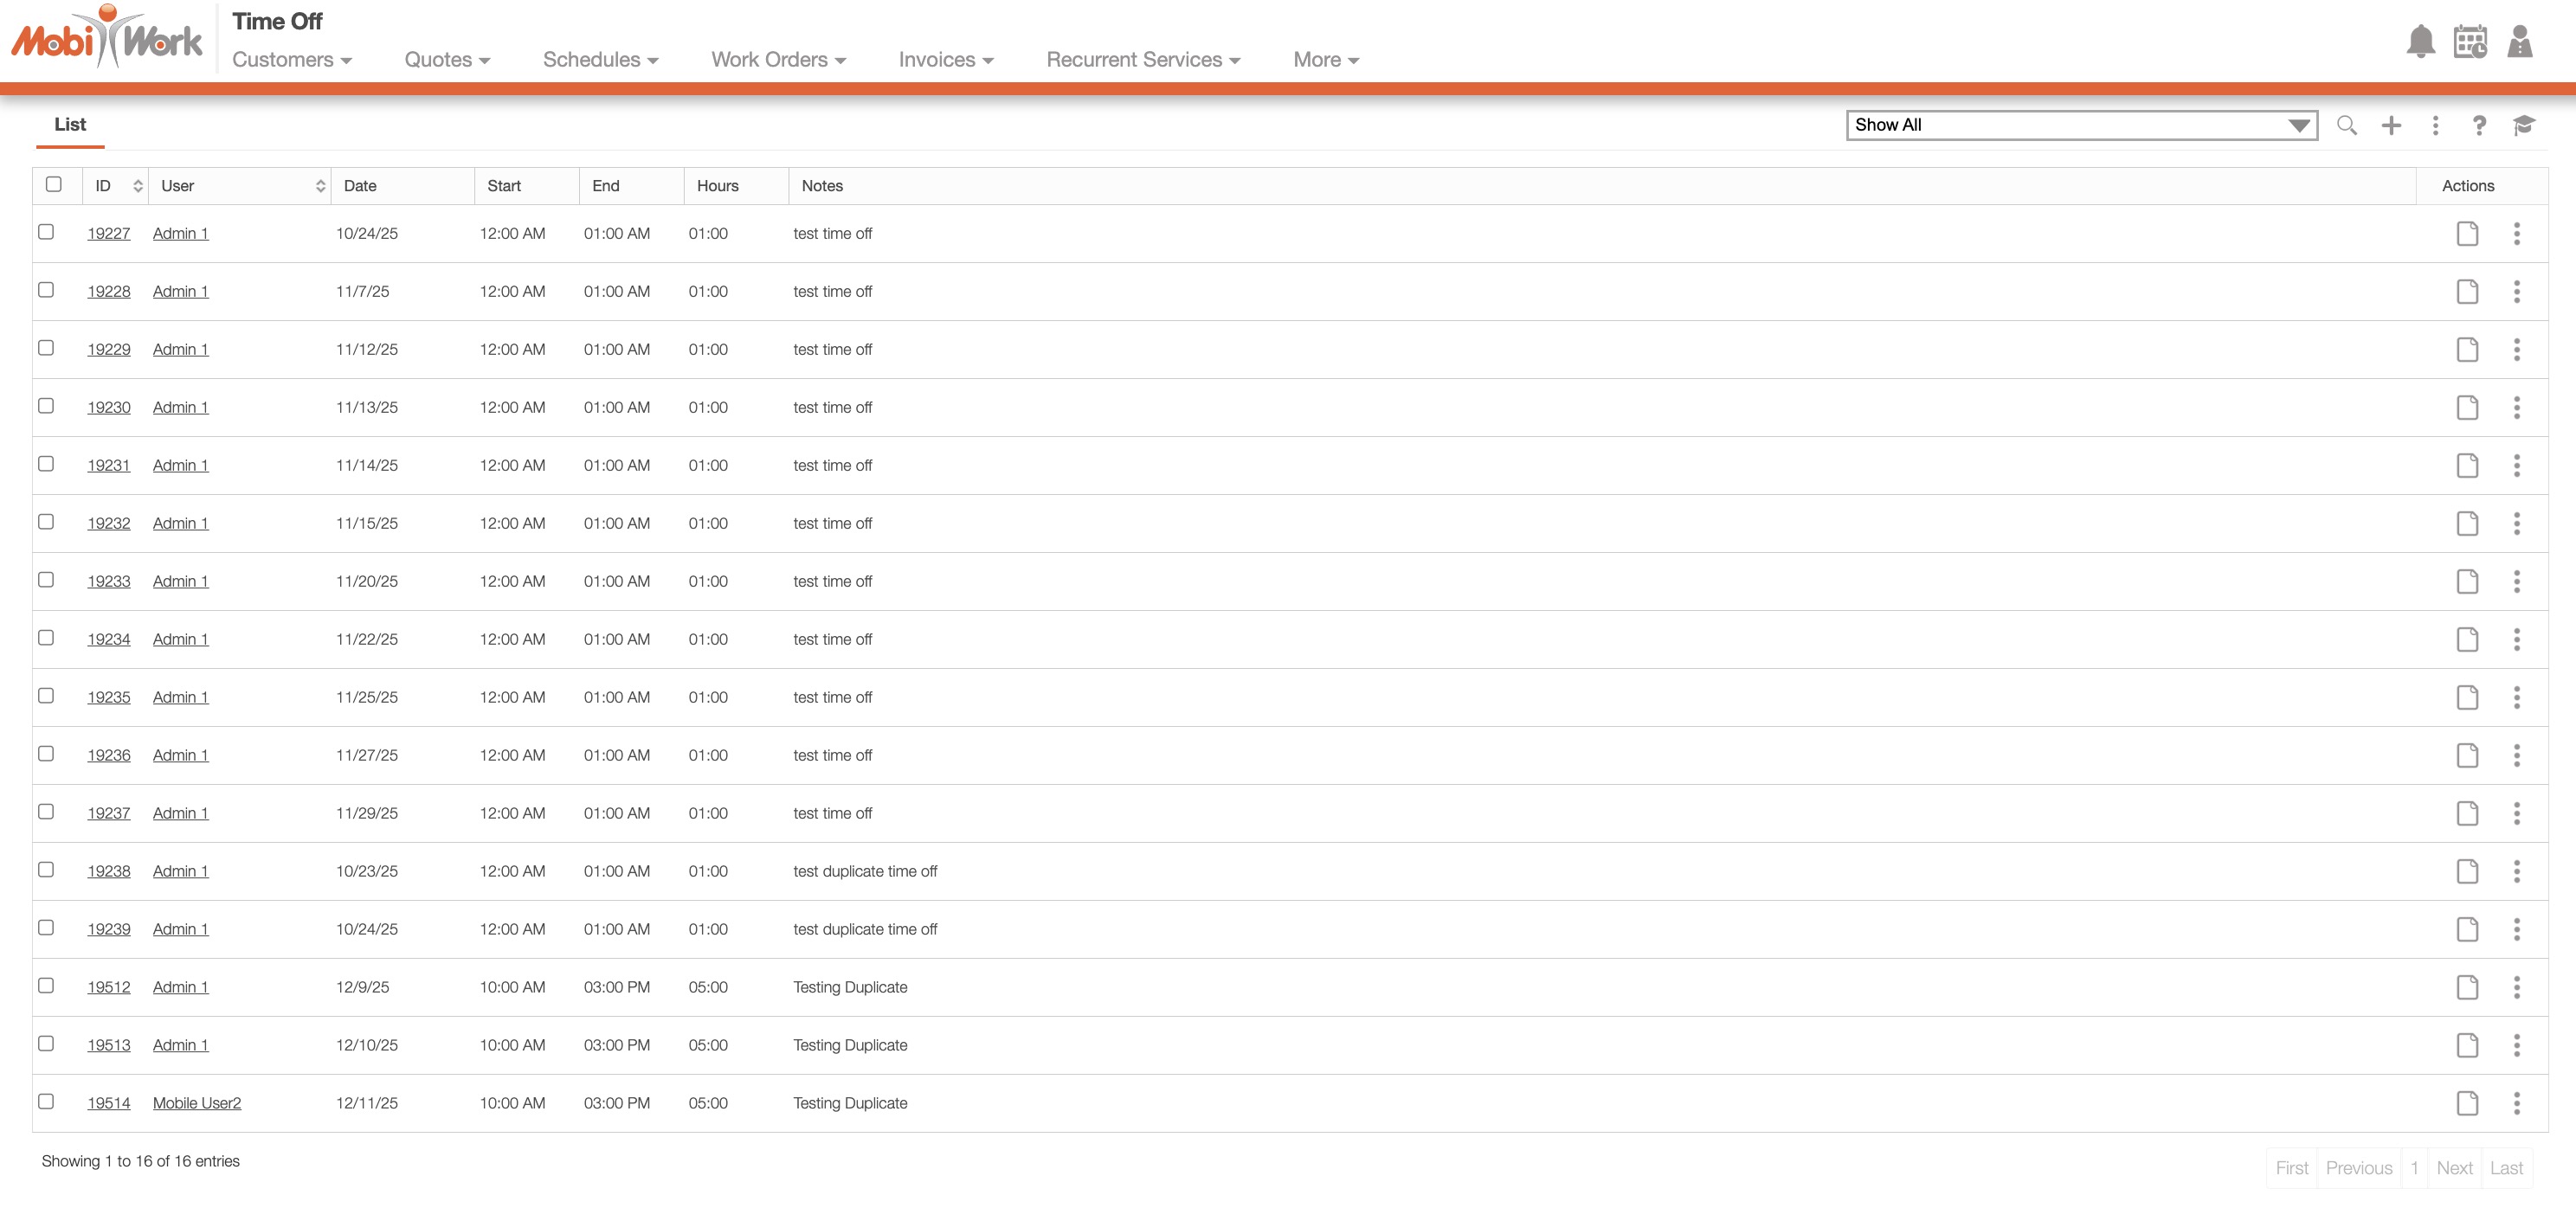
You will then be redirected to the Time Off List page. On this page, you can add new time off entries, edit existing ones, and remove irrelevant or outdated entries for multiple users:
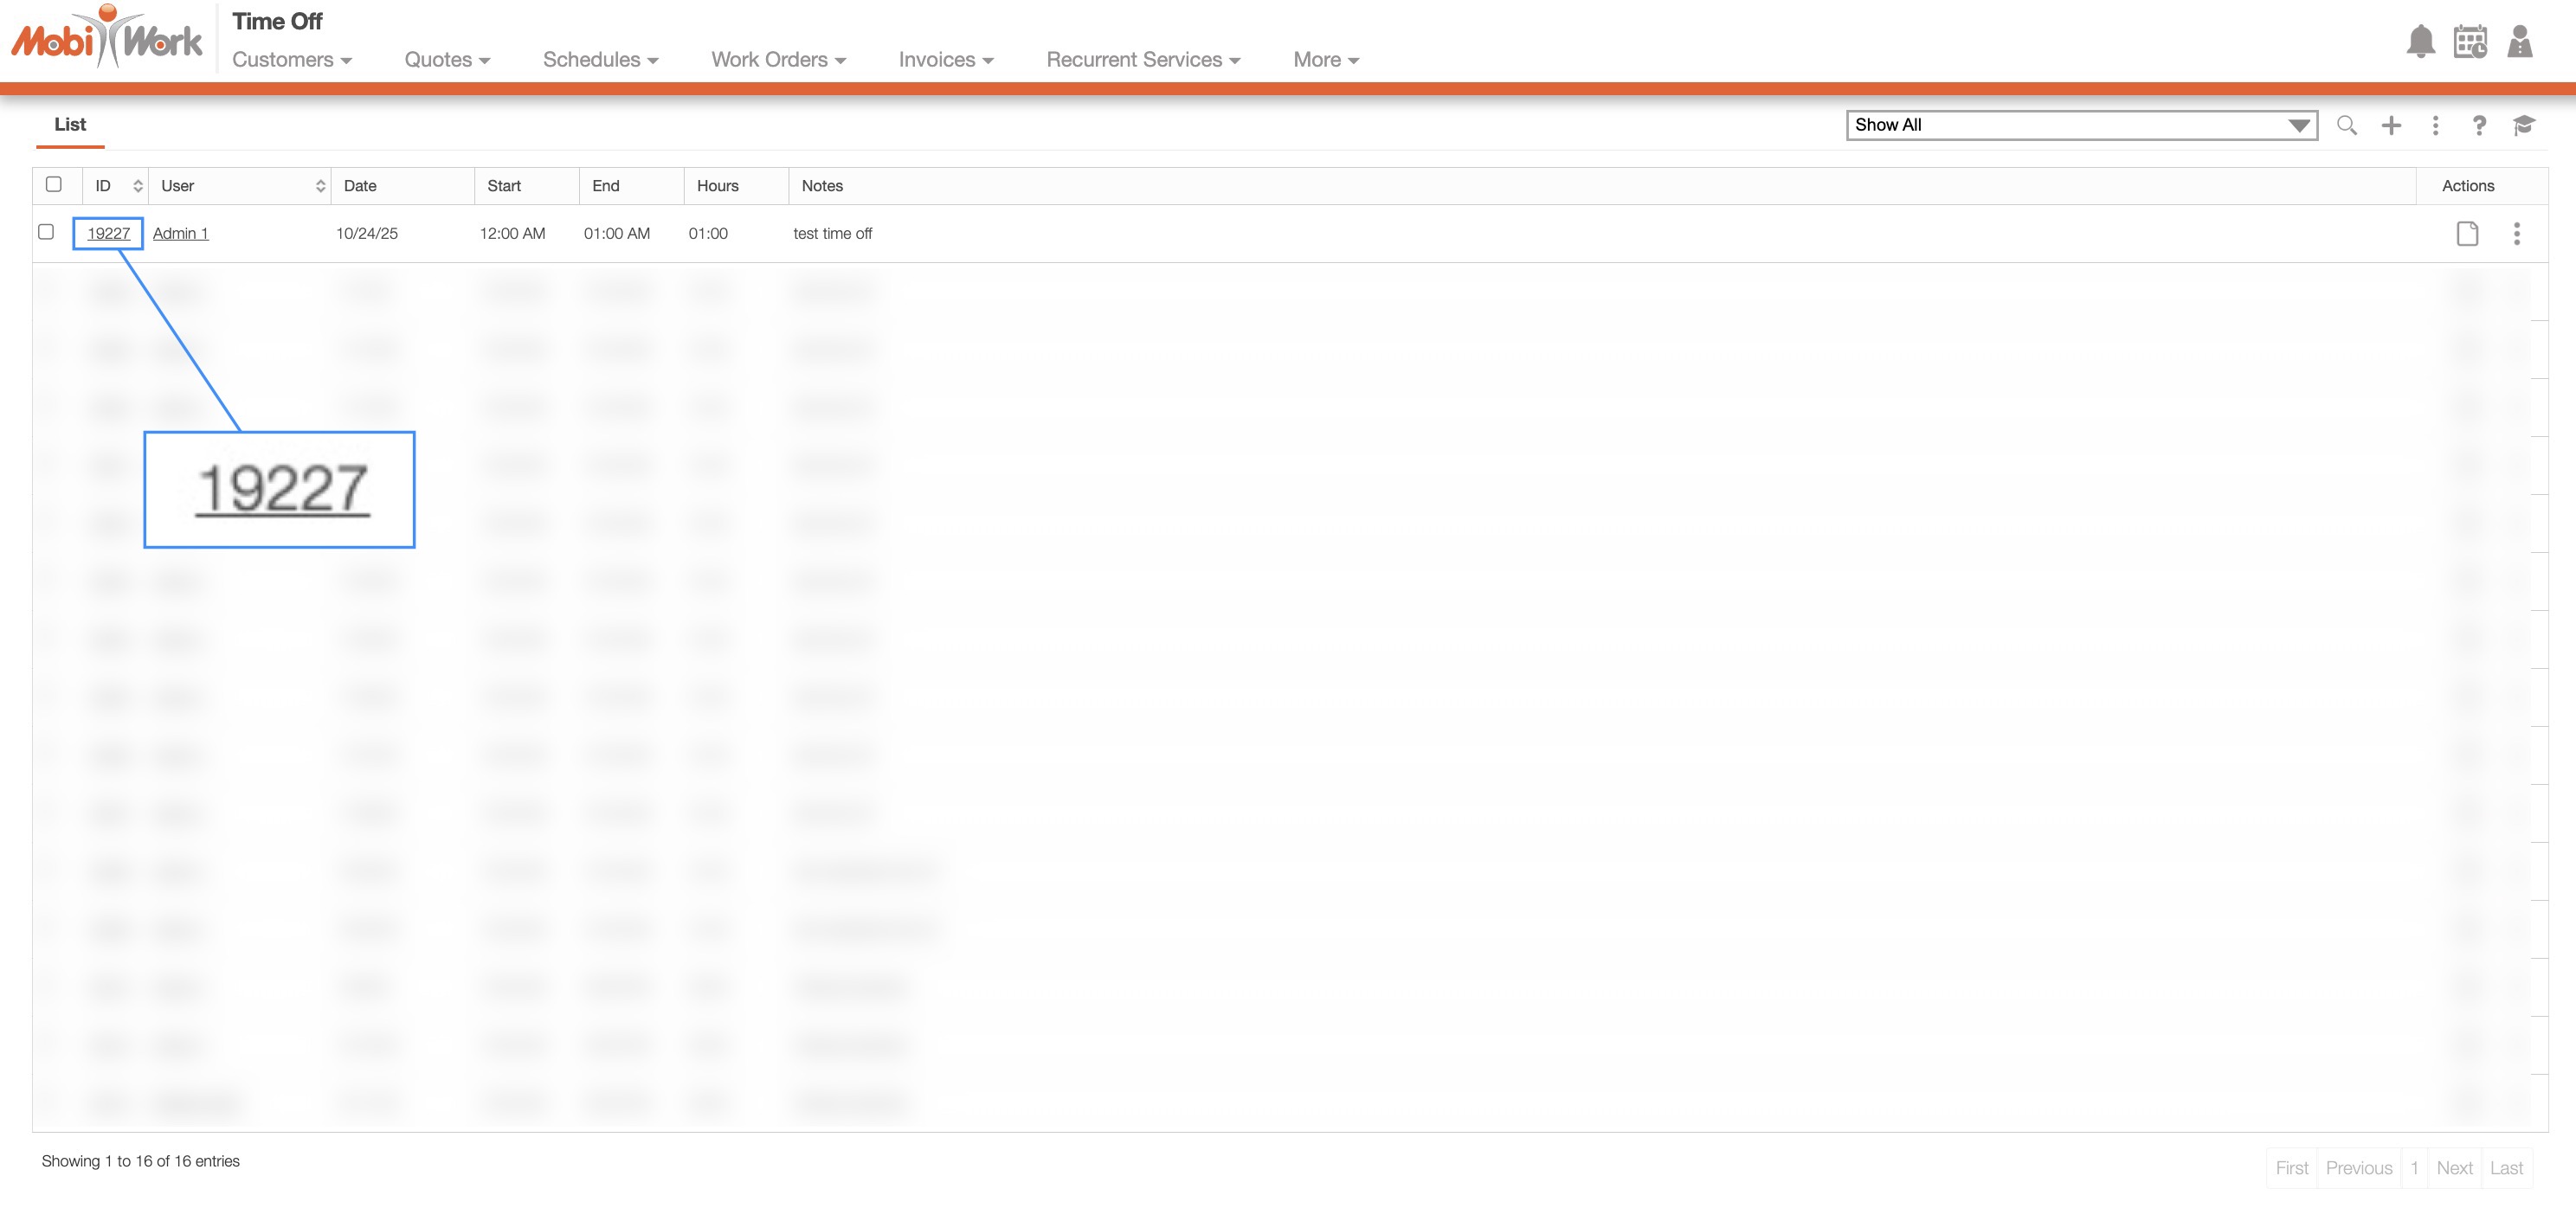
You will be able to view your users' time off entries from the Time Off List page. On this page, select the desired time off entry ID to access the View Time Off pop-up window:
This pop-up window displays the requested time-off date, the number of hours, and the user associated with the request, along with any relevant notes, reminders, and history. With the Individual Actions button, you will also be able to edit, delete, and duplicate the entry:
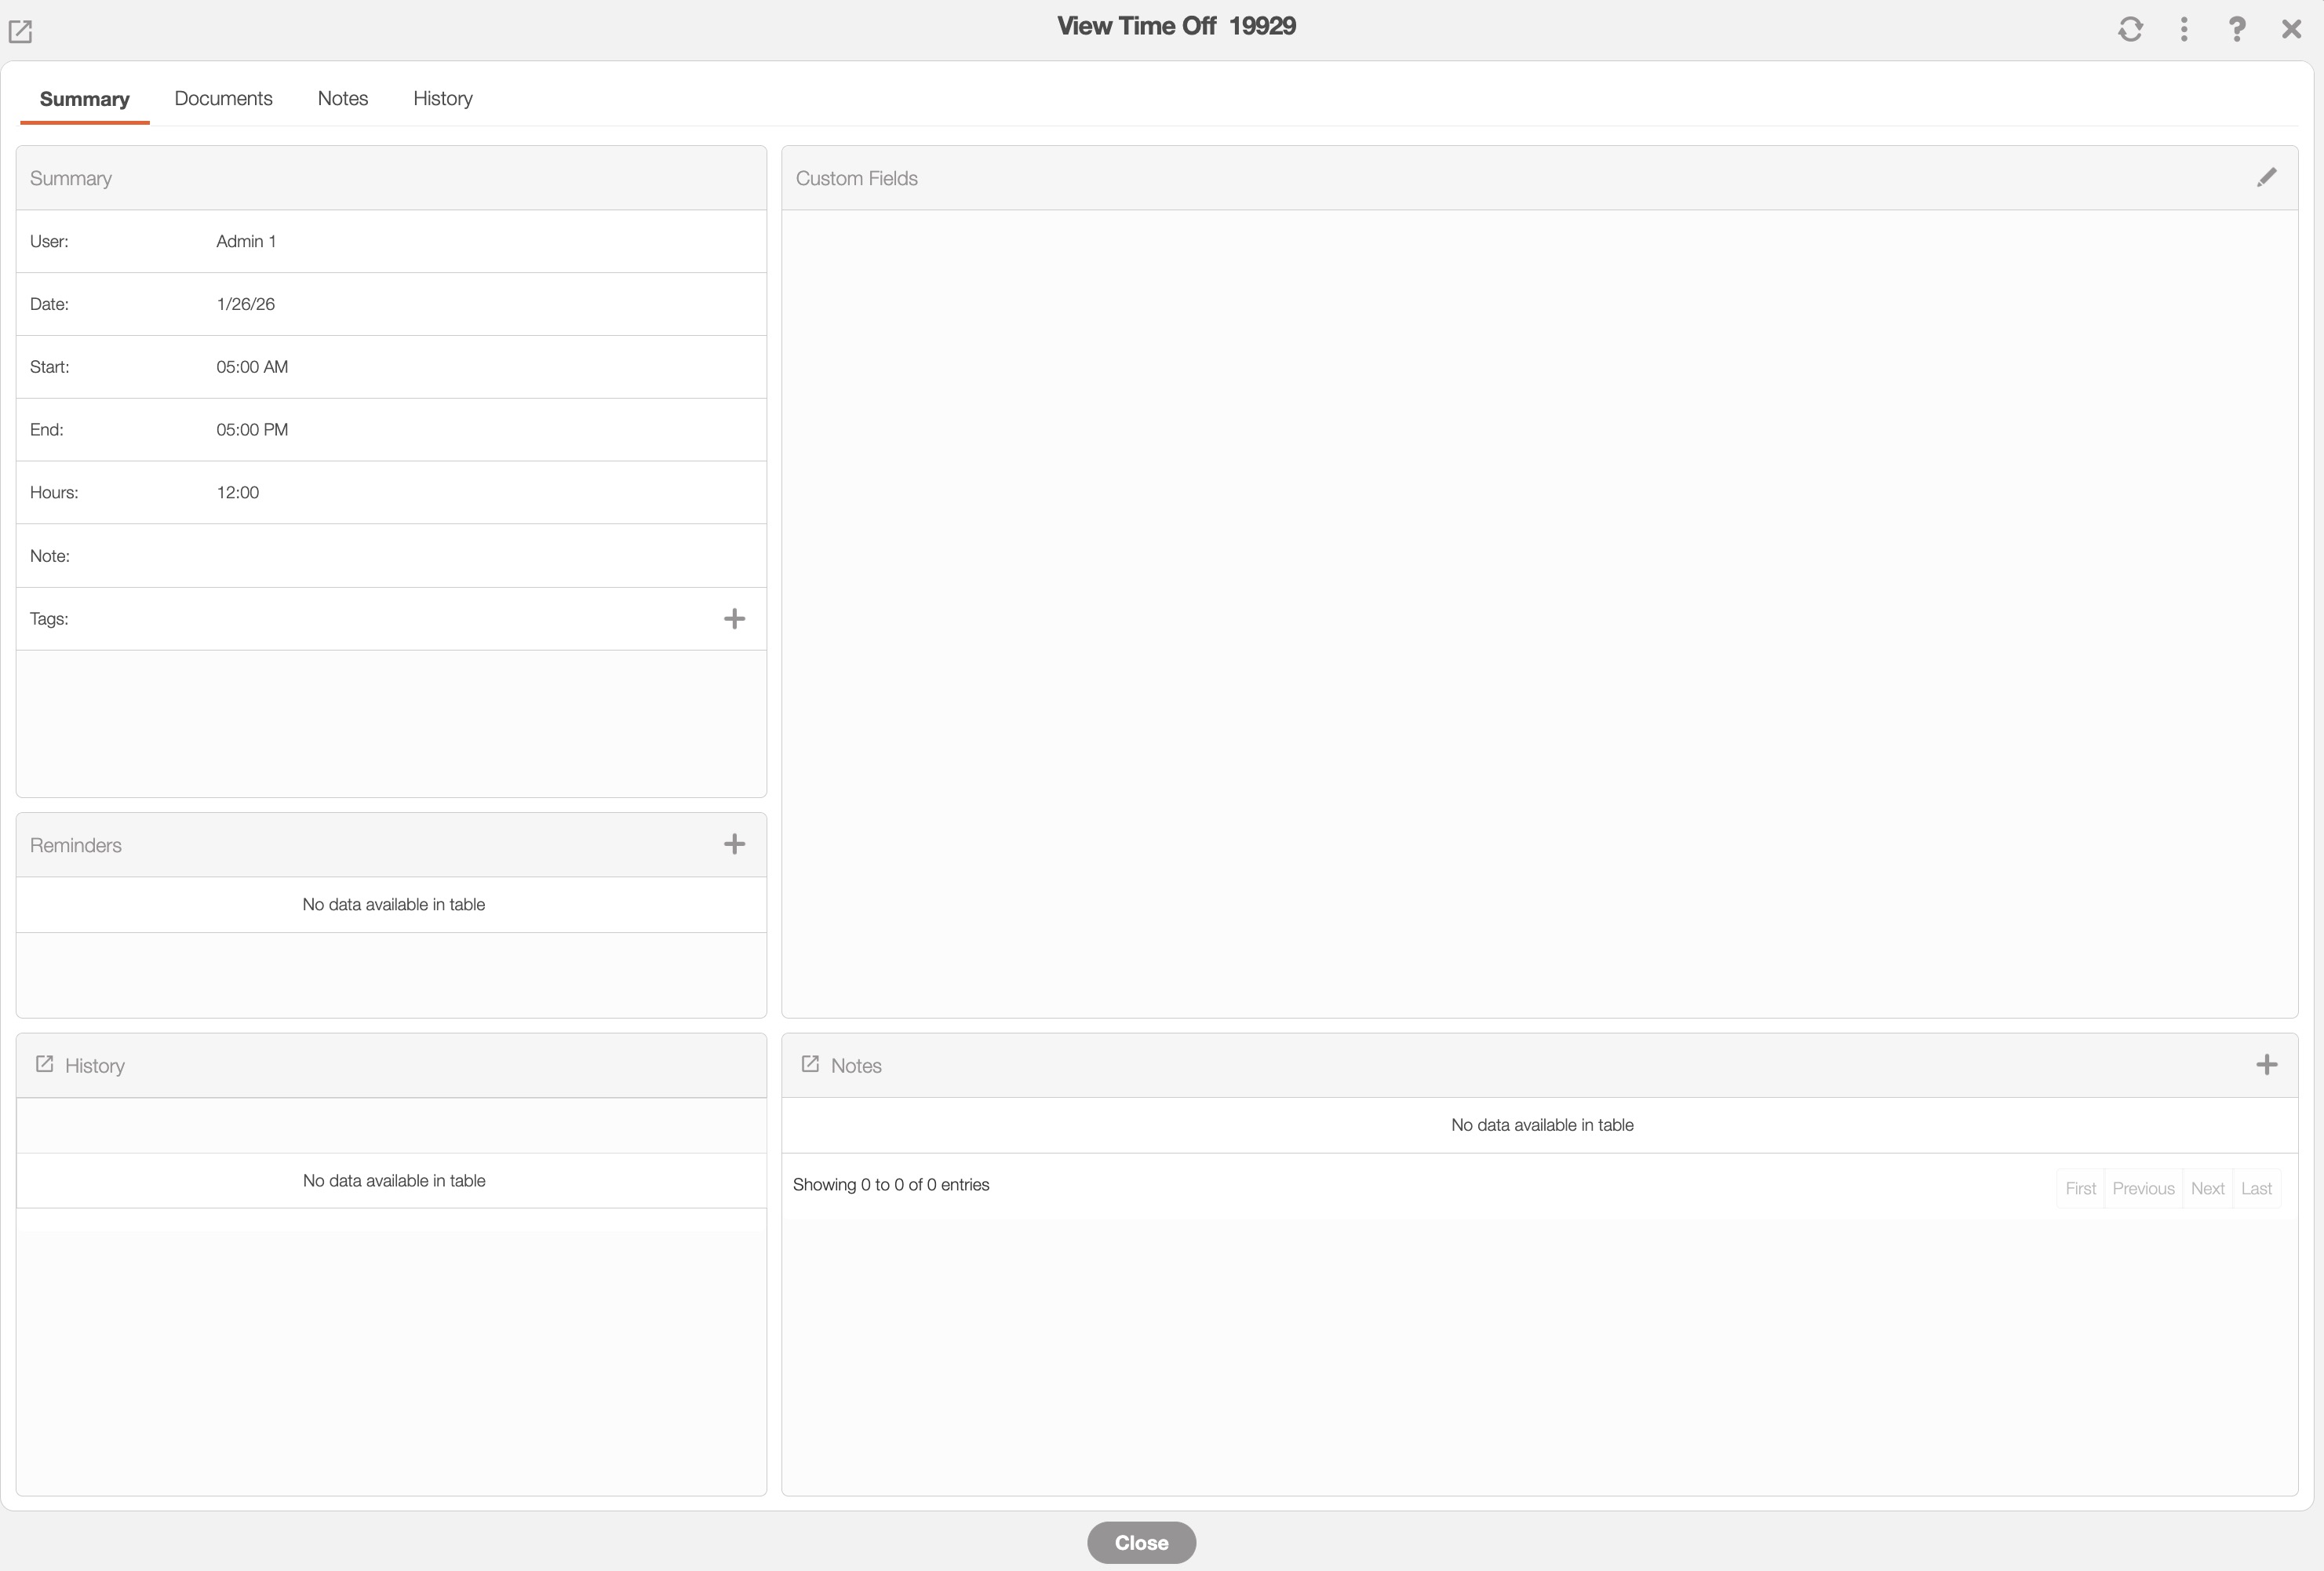
In the "Documents" tab, you can also add any relevant files. For example, you can add a doctor's note if the user is out sick.
When a time off entry is added, the user's schedule will display a gray striped block; this serves as a visual reminder that the user is off for that period:
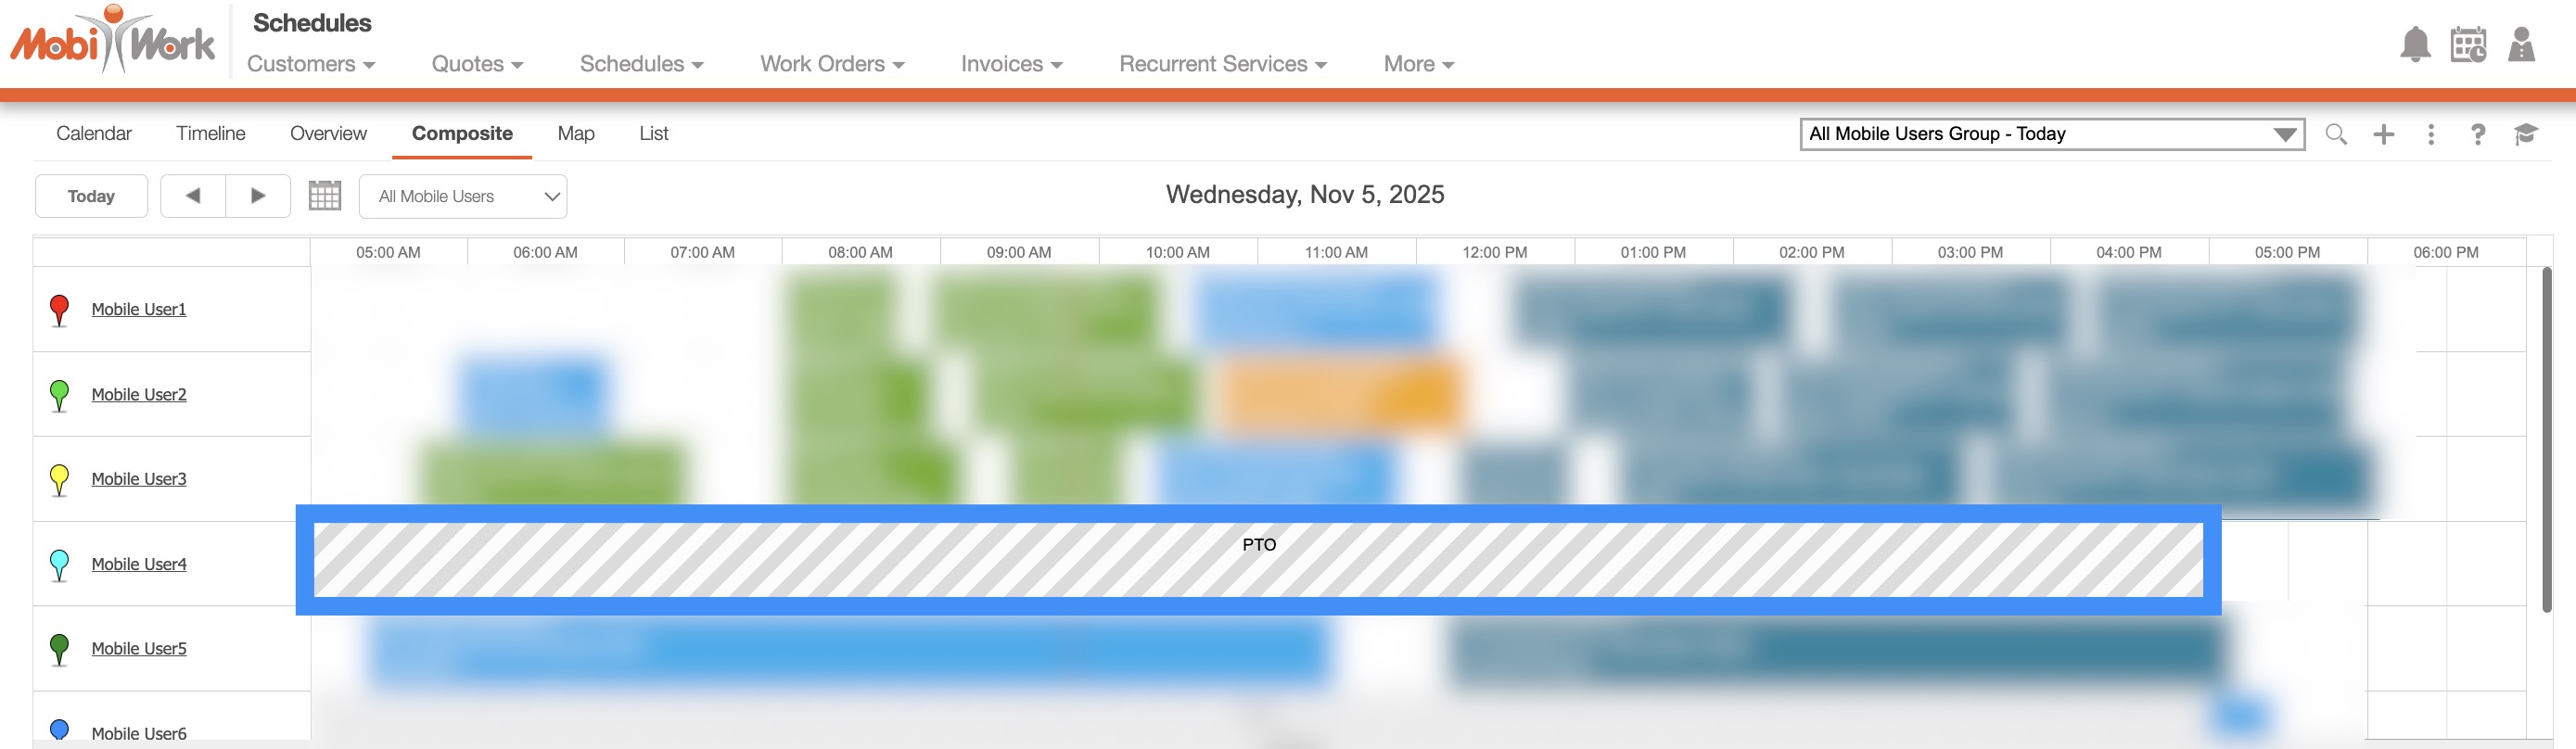
Any new work orders cannot be assigned to the user while they are marked as unavailable:
Important: Any work orders already assigned to the user will not be automatically reassigned and should be manually moved to another user as needed.
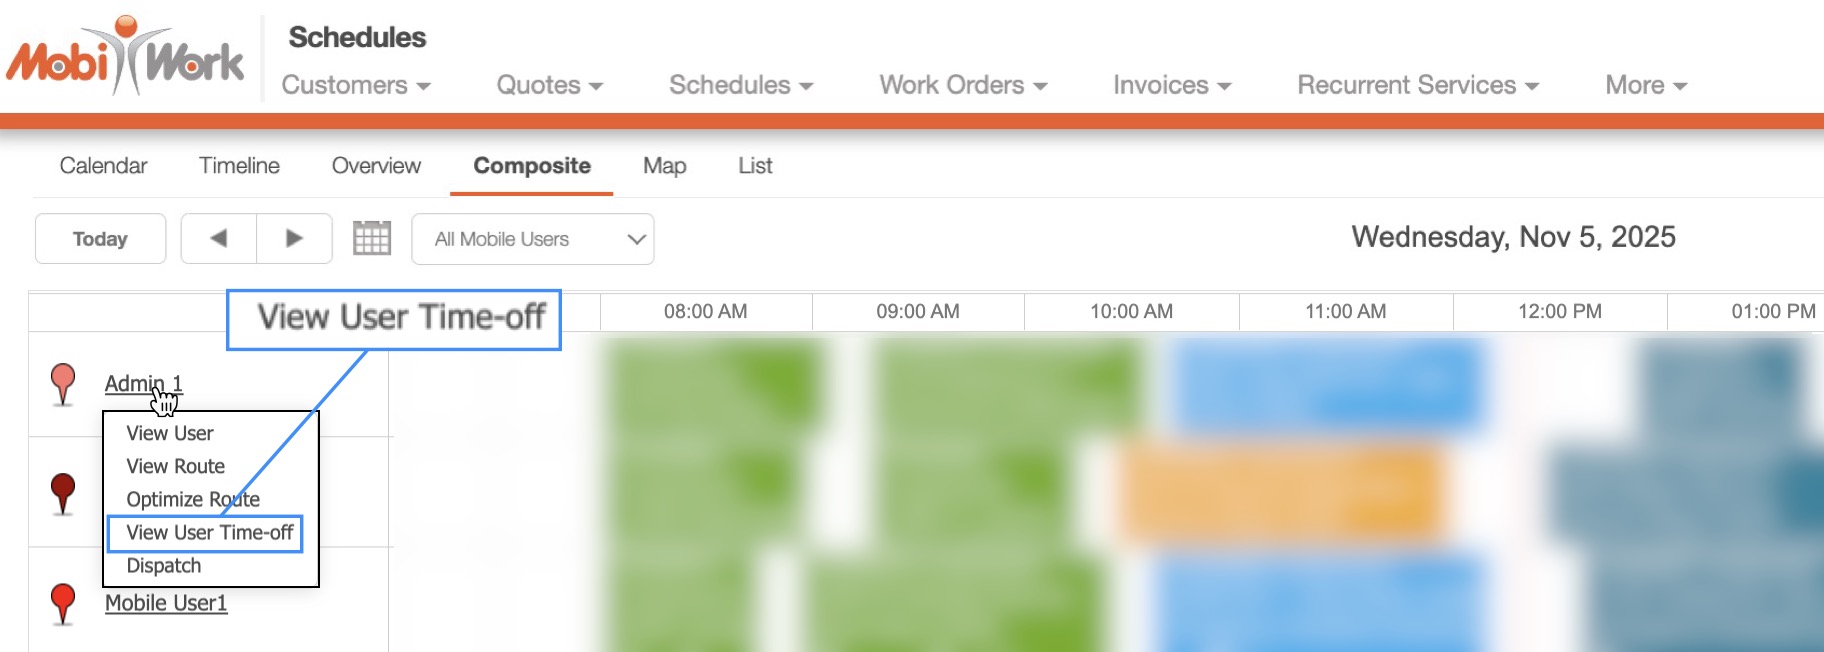
You can directly access the user's View Time Off pop-up window in the "Timeline" and "Composite" tabs. On these tabs, click on the desired user and from the drop-down select the "View User Time-Off" option:
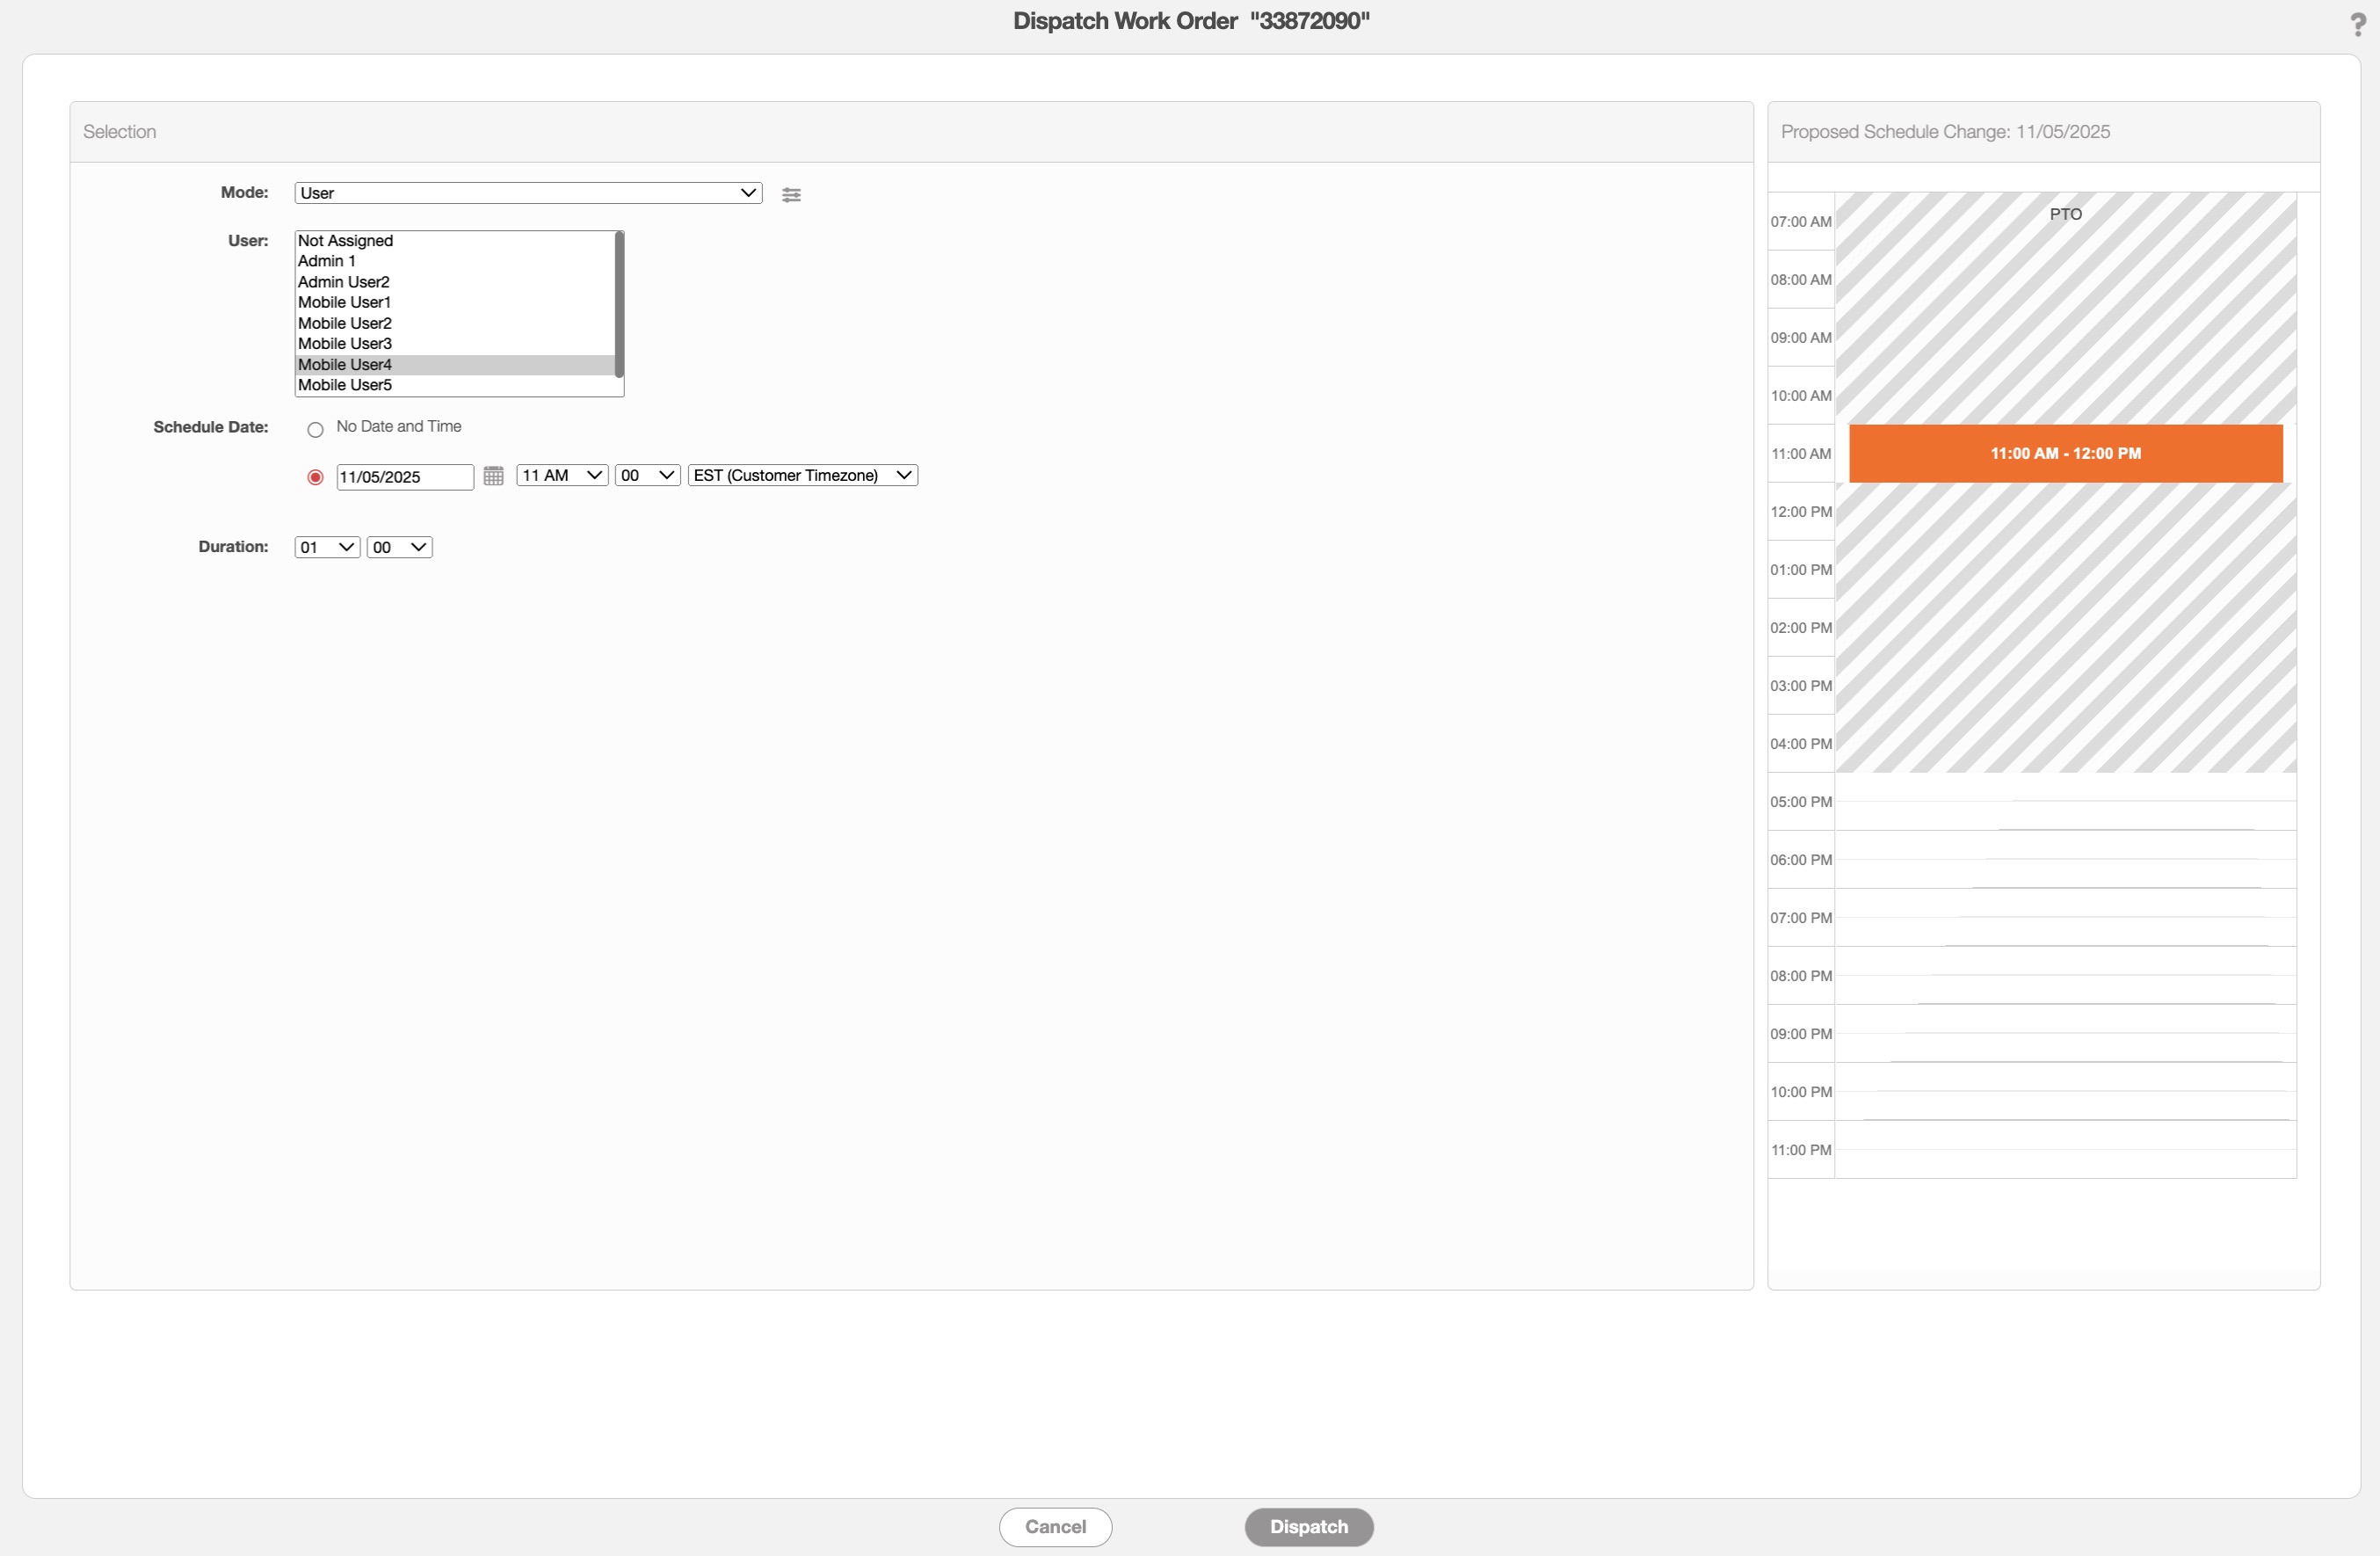
In the Time Off List page, you can click on the Plus Sign button to create a new time off entry:
Once you click on the Plus Sign button, the Add Time Off pop-up window will then appear:
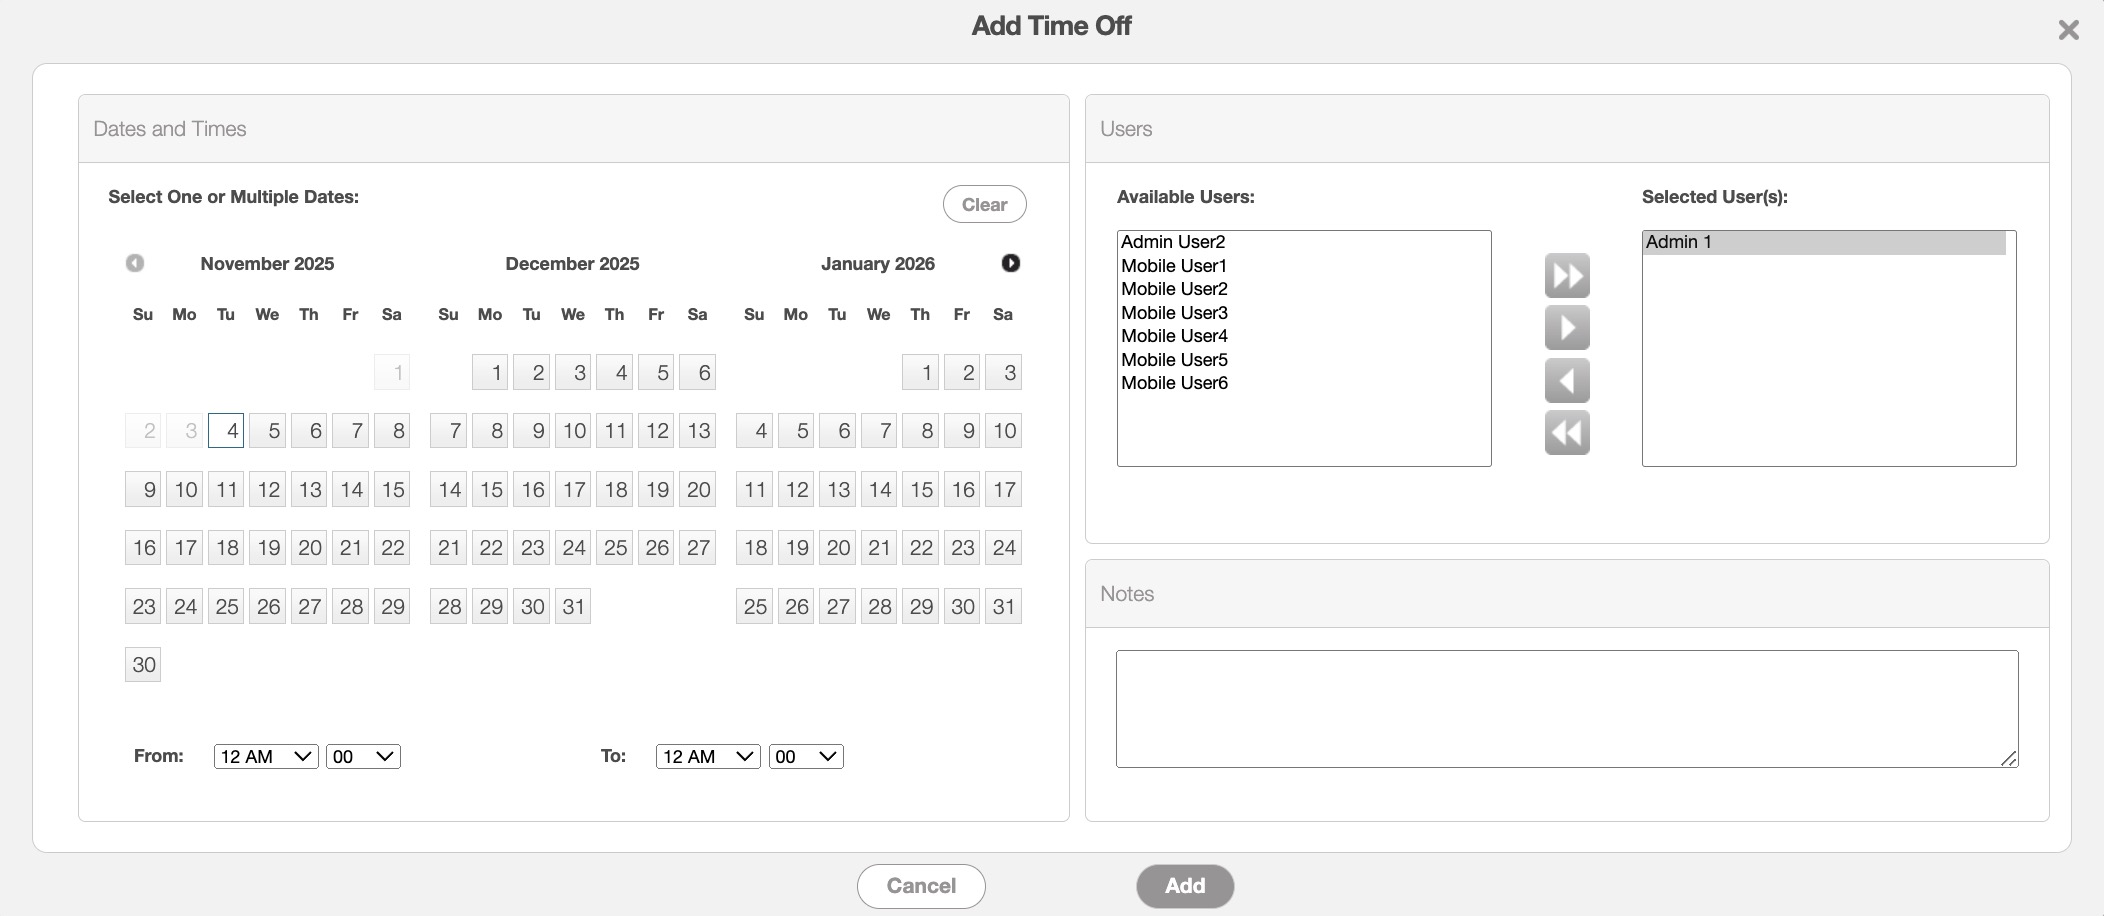
Enter the following information in order to populate the time off entry:
The date and time range for the time off. The date range can include one or multiple days.
The user(s) that the time off entry is scheduled for. You can hold the Command key (Mac) or the Shift key (Windows) to select multiple users. With the designated arrows, you can move the specified users left or right.
You will also be able to add any relevant notes regarding the time off entries. For example, if this entry is for sick time or vacation.
Once all the details have been completed, click the Add button to save the time off entry.
When a time off entry is added, the user's schedule will display a gray striped block; this serves as a visual reminder that the user is off for that period:
Any new work orders cannot be assigned to the user while they are marked as unavailable:
Important: Any work orders already assigned to the user will not be automatically reassigned and should be manually moved to another user as needed.
MobiWork allows you to easily duplicate existing time off entries. This feature is especially useful when you need to create additional time off entries for the same user. For example, if a user is sick and requires an additional day off, you can quickly duplicate their previous sick-day details. The note and time frame will remain unchanged, only the dates will need to be updated.
There are several ways to duplicate a time off entry. In this example, right-click the selected entry and choose Duplicate from the drop-down menu:
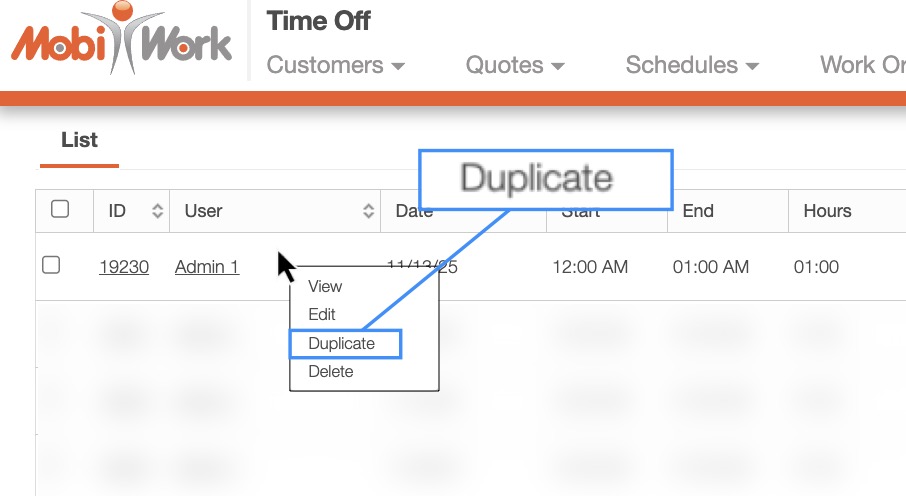
Once selected, the Add time Off pop-up window will then appear. Enter the new dates and select the Save button to confirm the time off entry.
MobiWork allows you to edit existing time off entries. There are several different ways you can edit a time off entry. In this example we will right-click on the selected entry. Then from the drop-down select the "Edit" option:
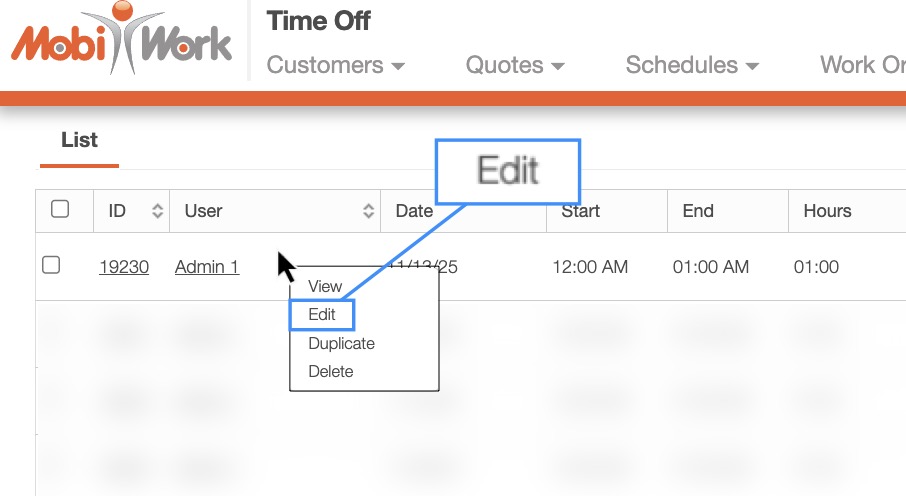
The Edit Time Off pop-up window will then appear:
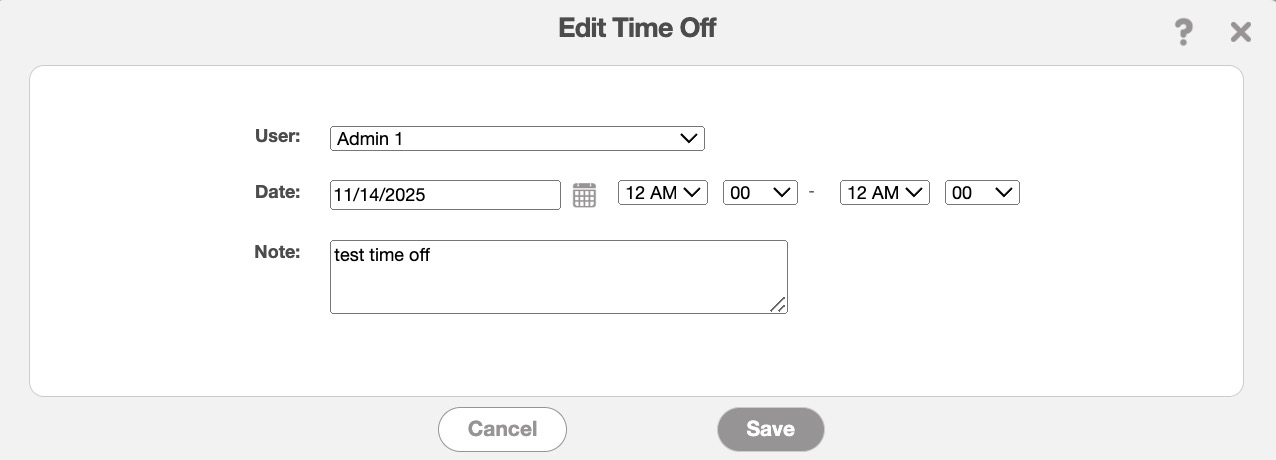
In this pop-up window, update the time off details as needed:
The user the time off entry is intended for.
The date and time range
And any relevant notes regarding the time off entry.
Once all the necessary information has been updated, click the Save button to confirm the changes.
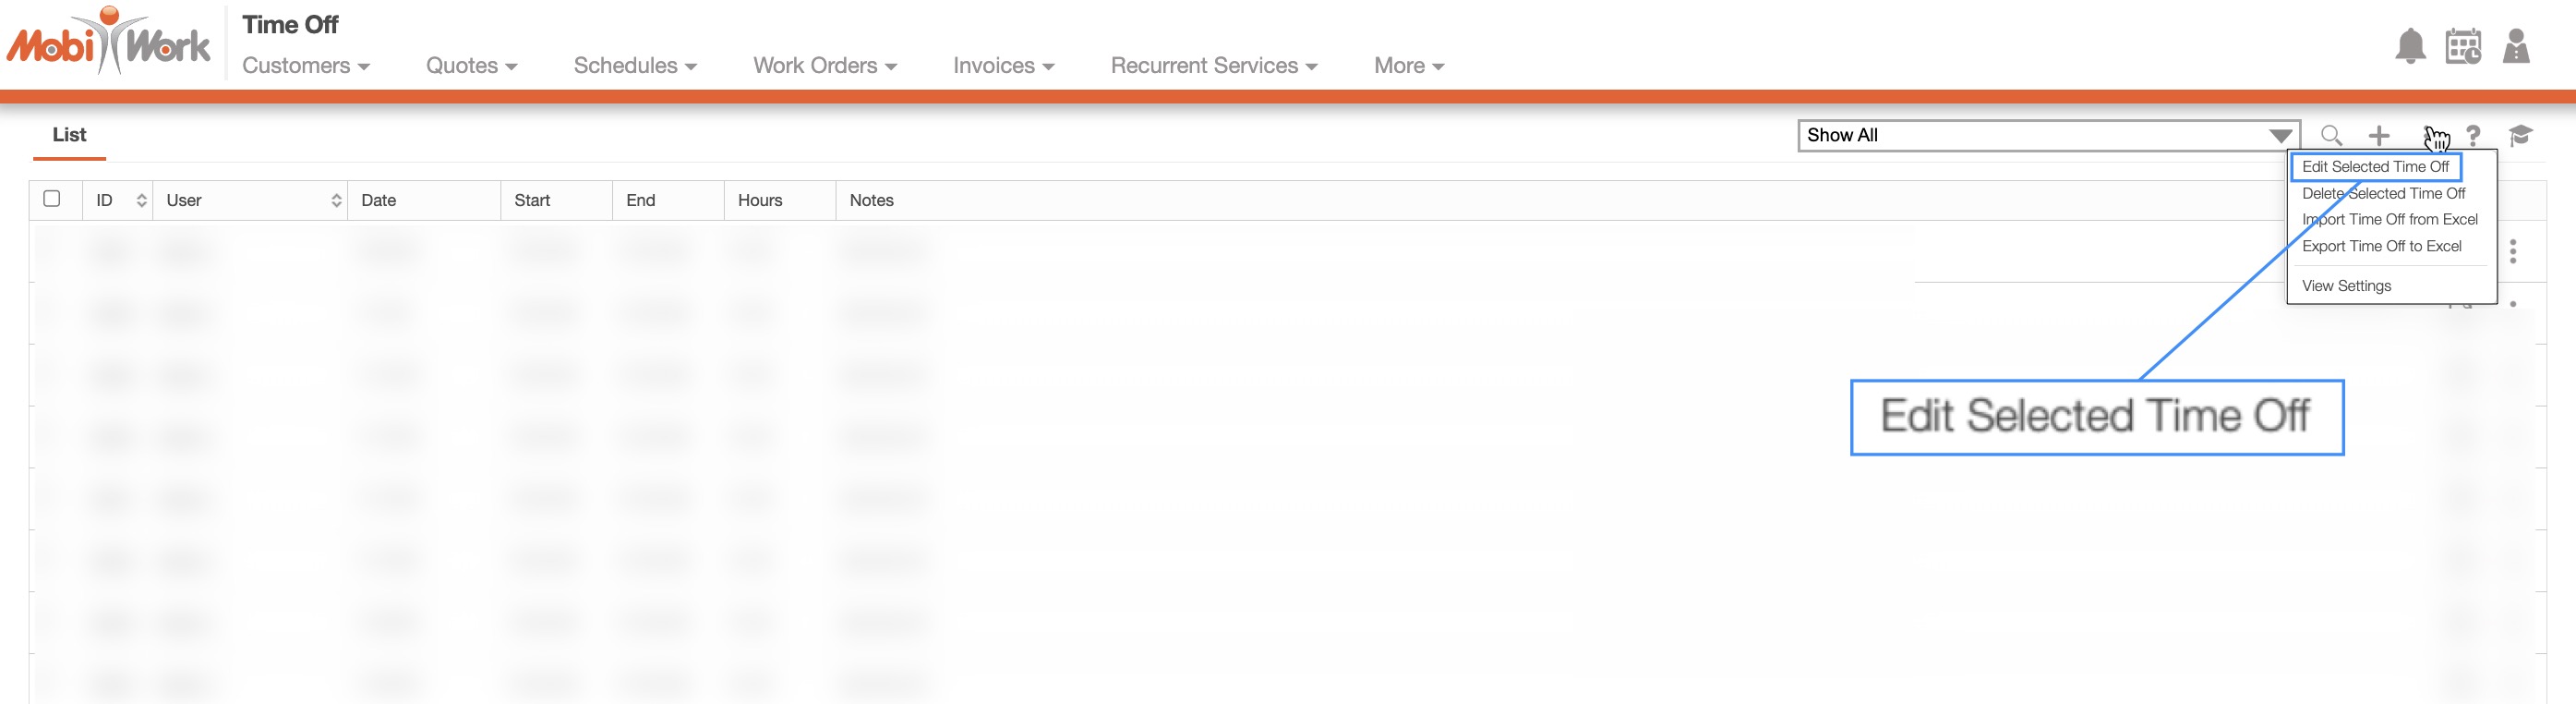
MobiWork allows you to edit multiple time off entries through the web user interface. To edit multiple entries, first navigate to the Time Off List page. Then selected the entries you would like to update. Once selected, click the More Actions button and from the drop-down select the "Edit Selected Time Off" option:
The Edit Multiple Time Off pop-up window will then appear:
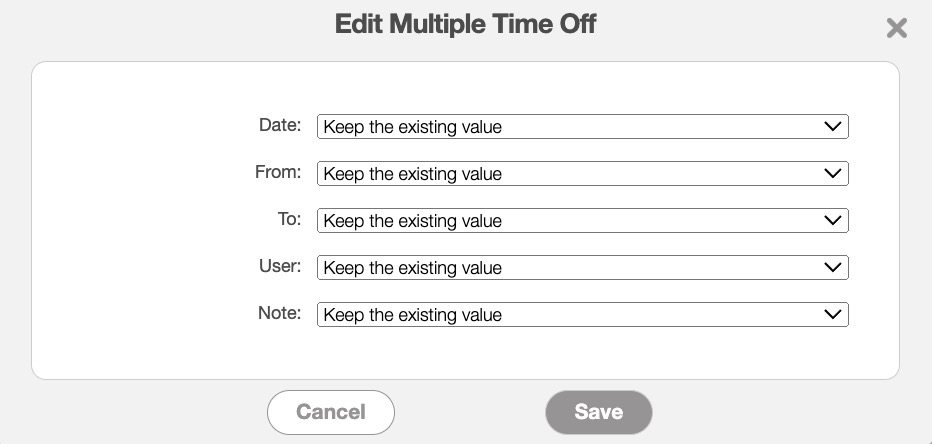
This pop-up window will allow you to update the "Date," "From," "To," "User," and "Note" fields. Simply use the drop-down for the chosen fields to select the new value. Choosing the "Enter New Value" option will allow you to enter the new date, time range, or note:
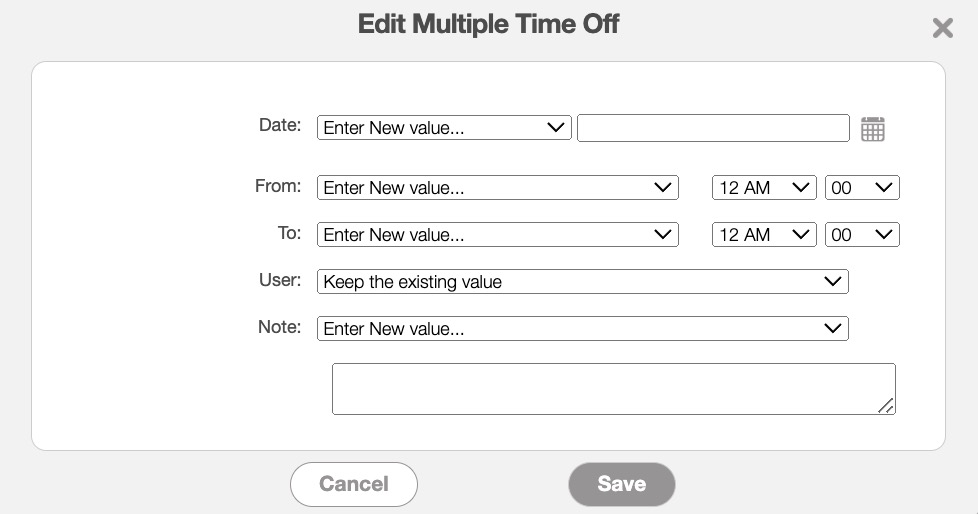
The "User" field will allow you to select from your list of MobiWork users.
Once the selected fields are updated accordingly, click the Save button to confirm the changes.
You can delete any irrelevant or outdated time off entries directly from the Time Off List page. There are several different ways you can remove a time off entry from this page. In this example we will click on the selected entry's Individual Actions button. Then from the drop-down select the "Delete" option:

The Delete Time Off pop-up window will appear, asking you to confirm if you would like to delete the selected entry. Click the Yes button to confirm deletion:
The Delete Time Off pop-up window will appear, asking you to confirm if you would like to delete the selected entry. Click the Yes button to confirm deletion:
Important: Once you delete a time off entry, it will be permanently removed from the system.
MobiWork allows you to delete multiple time off entries through the web user interface. To delete multiple entries, first navigate to the Time Off List page. Then selected the entries you would like to delete. Once selected, click the More Actions button and from the drop-down select the "Delete Selected Time Off" option:
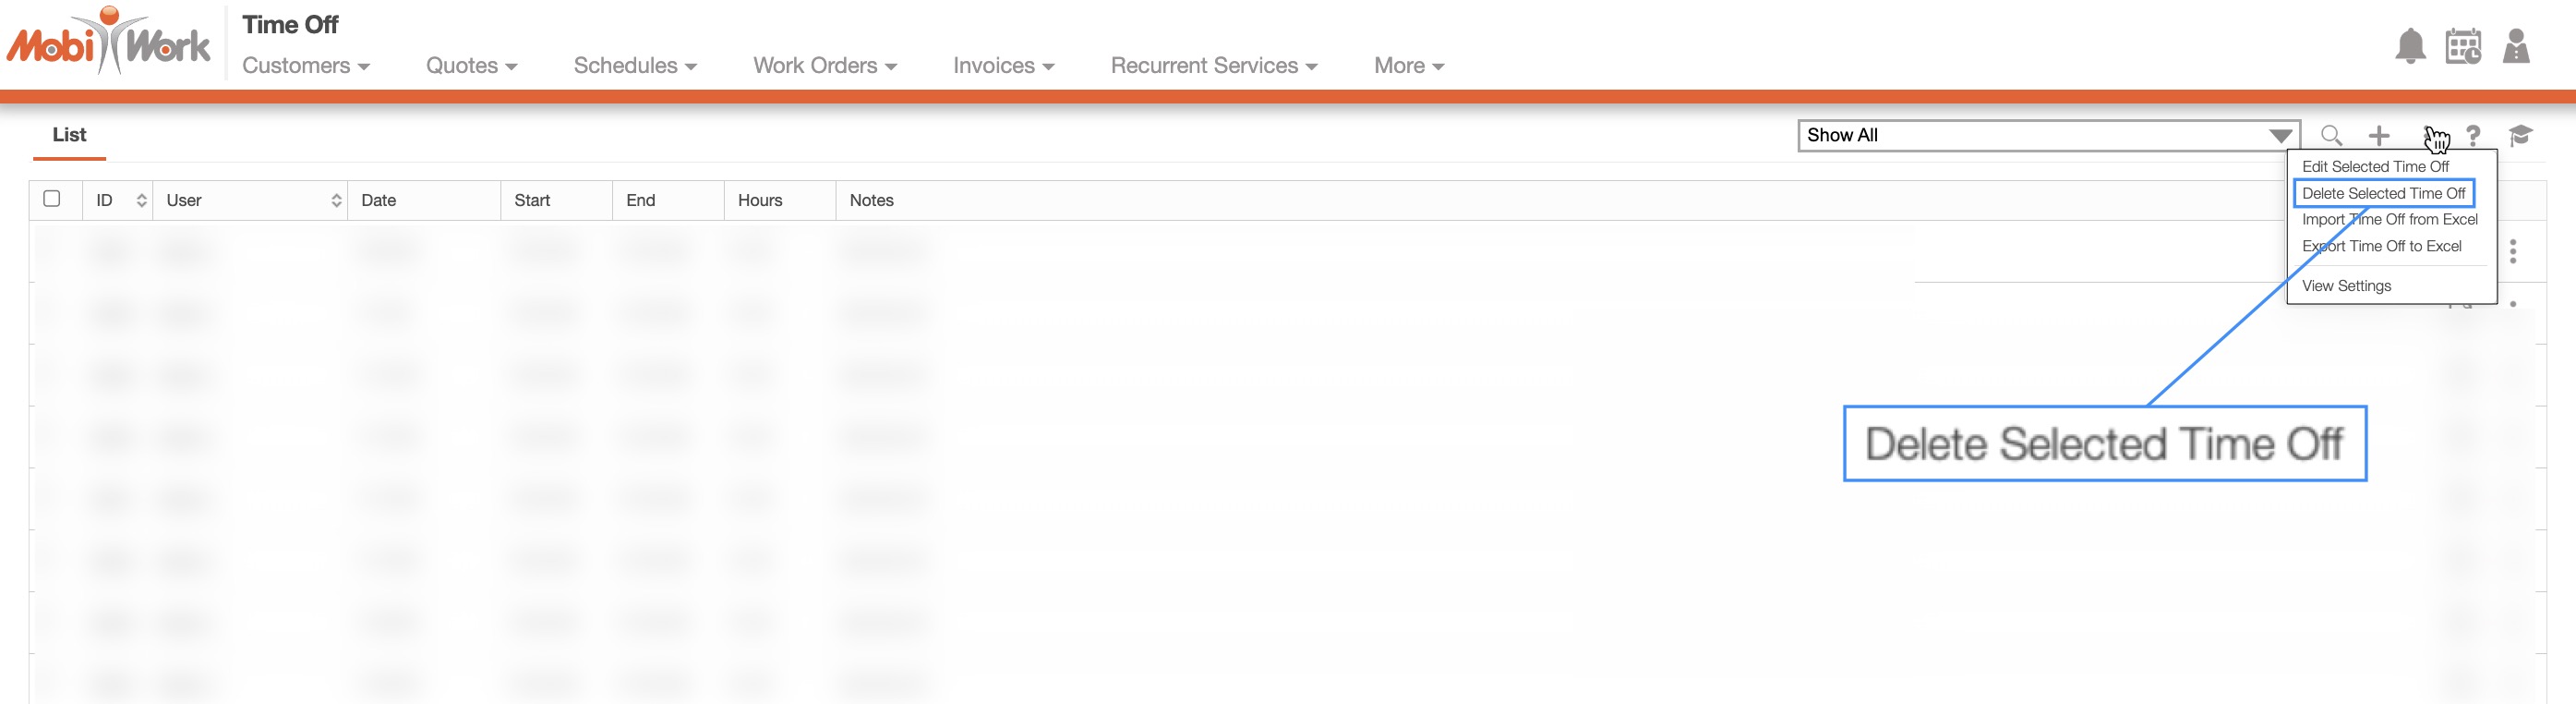
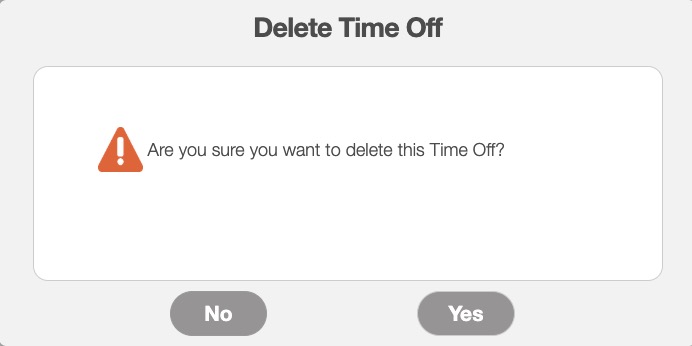
The Delete Time Off pop-up window will appear, asking you to confirm if you would like to delete the selected entries. Click the Yes button to confirm deletion:
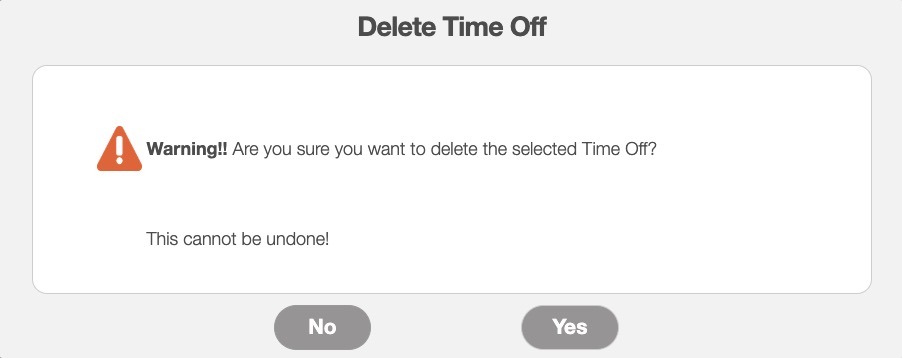
Important: Once you delete a time off entry, it will be permanently removed from the system.
In the New Saved Search pop-up window, you can organize time-off requests in either ascending or descending order. Sorting time-off requests by start date helps managers and schedulers quickly understand upcoming availability and plan workloads more effectively:
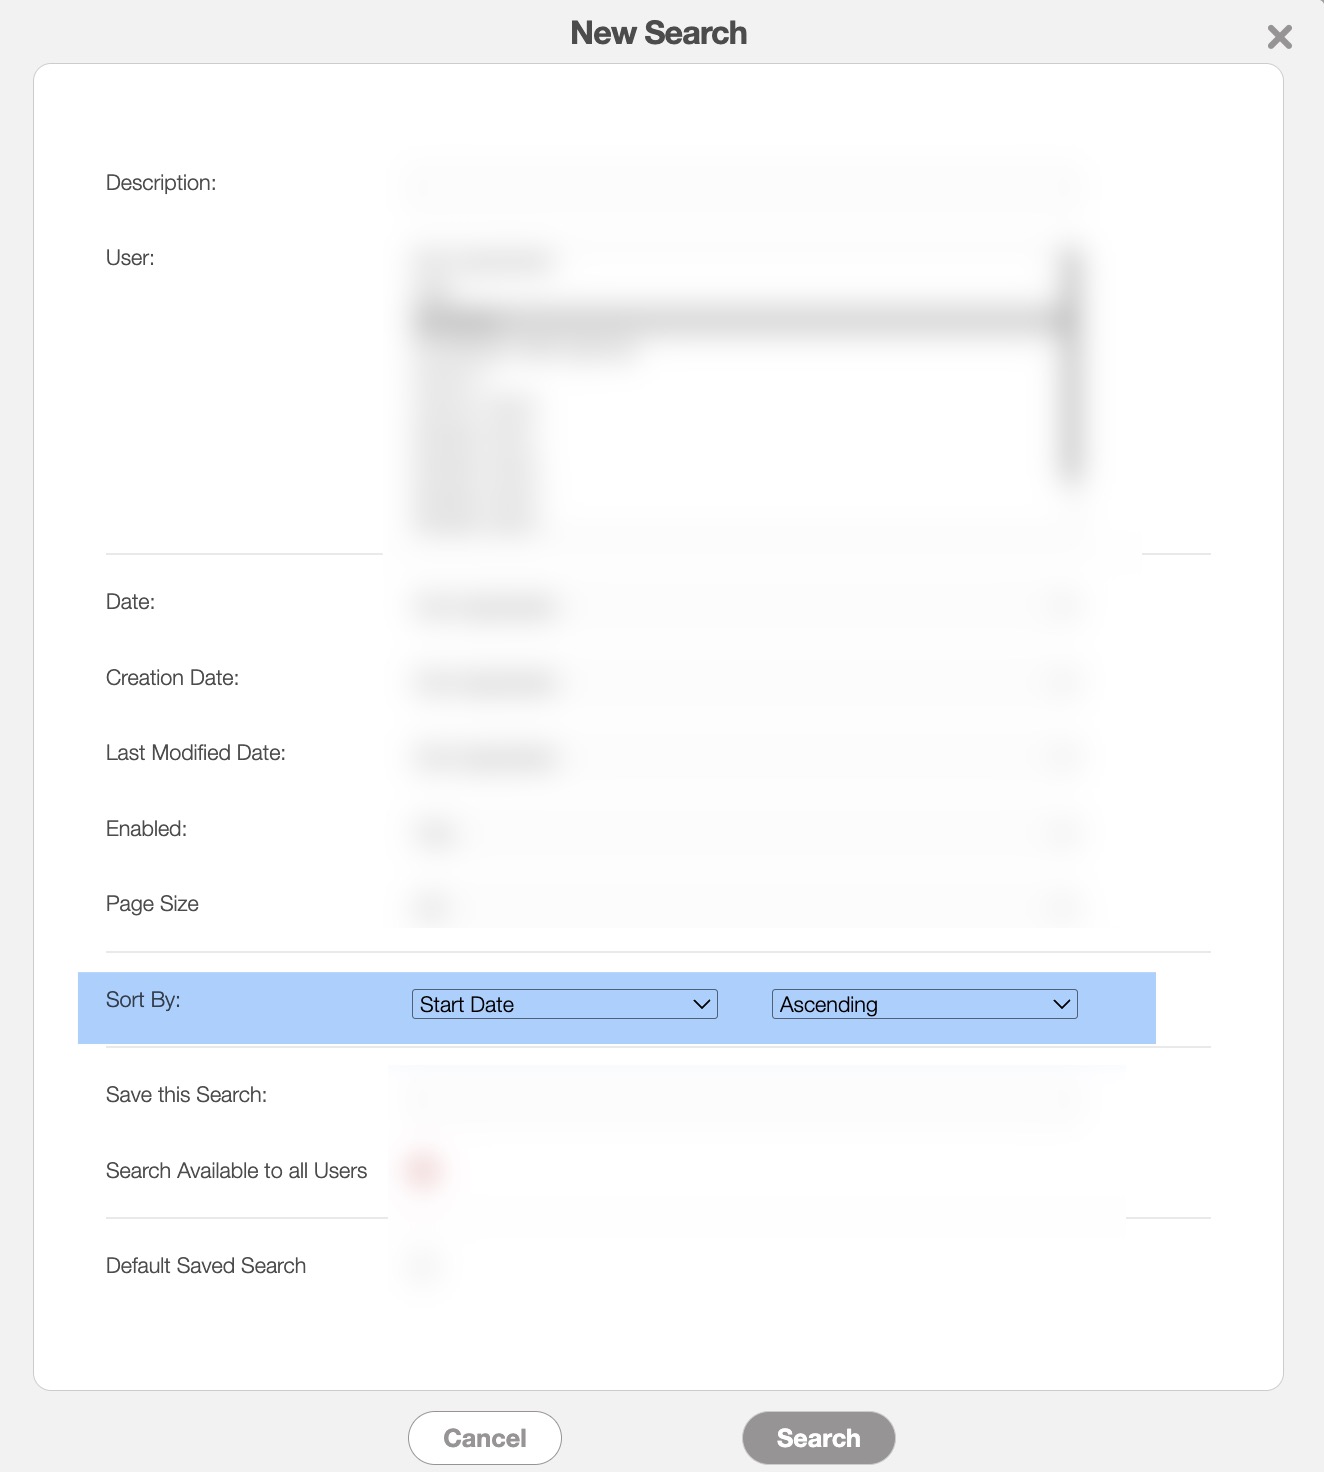
In the "Sort By" field use the first drop-down to select the "Start Date" option. In the second drop-down select either the "Ascending" or "Descending" option. The "Ascending" option will allow you to see earliest (closest upcoming) dates first, while "Descending" option will display the most recent or furthest-out dates first. You can save this search for future use by entering a name in the "Save This Search" field and clicking the Search button.
Viewing requests in ascending order allows you to identify employees who will be out soon and make scheduling or staffing adjustments in advance, while descending order is useful for reviewing recent or long-term requests for auditing or record-keeping purposes.