You can easily remove tabs from the customer/prospect profile (also known as the View Customer pop-up window) to fit your desired preference.
To remove the specified tabs, you will first need to be on the Customers Settings page. For more information about this page, please visit Customer Settings page.
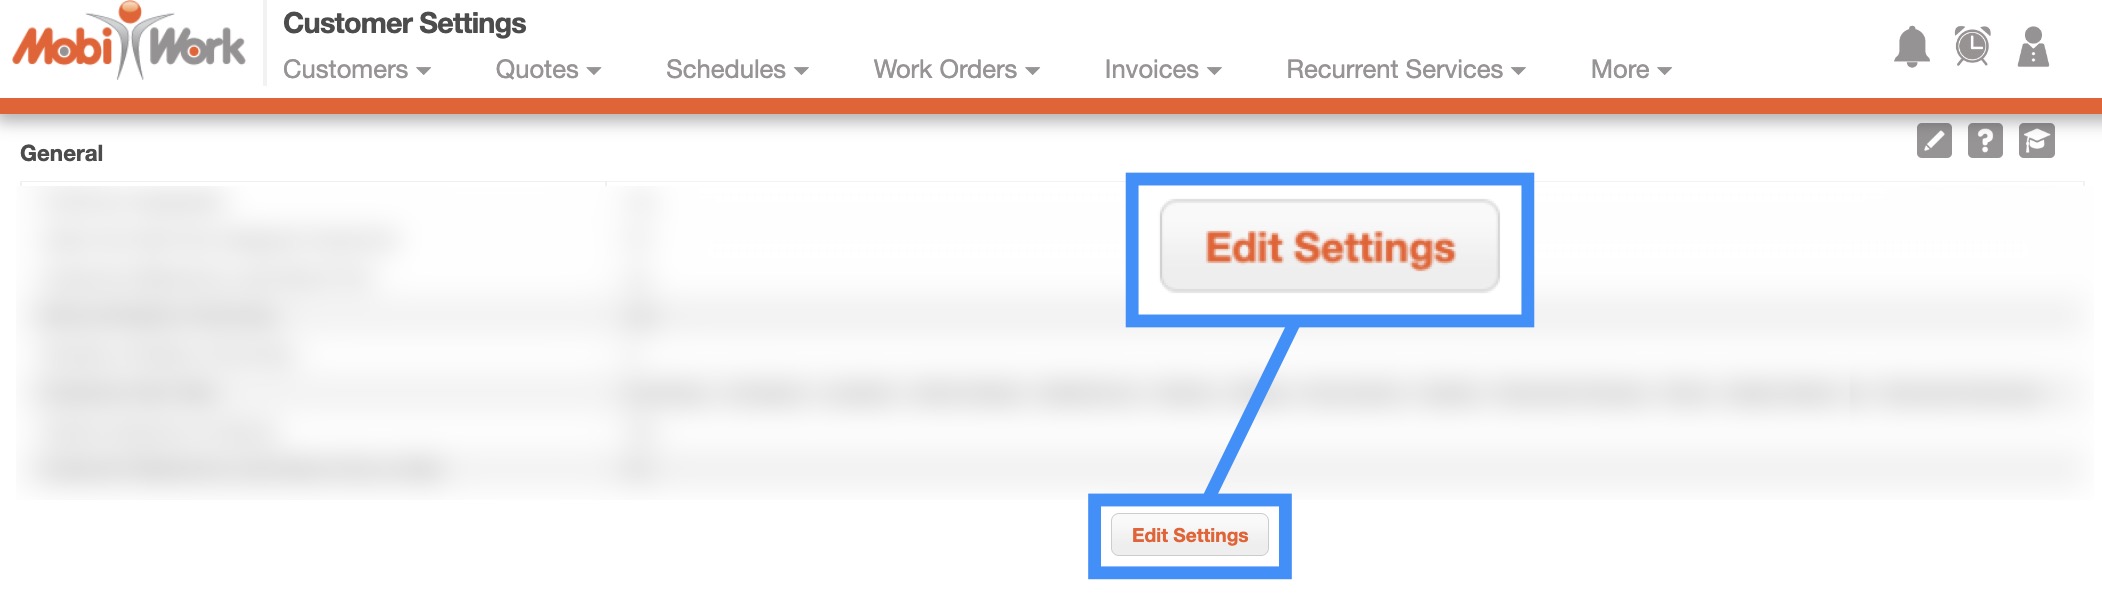
Once you are on this page, click on the Edit Settings button under the "General" section:
You will then be redirected to the Edit Customer Settings page. On this page, you can select the displayed tabs by clicking on the desired tab option. To click multiple options, you can hold the Command key (Mac) or the Shift key (Windows) while clicking on the specified tabs:
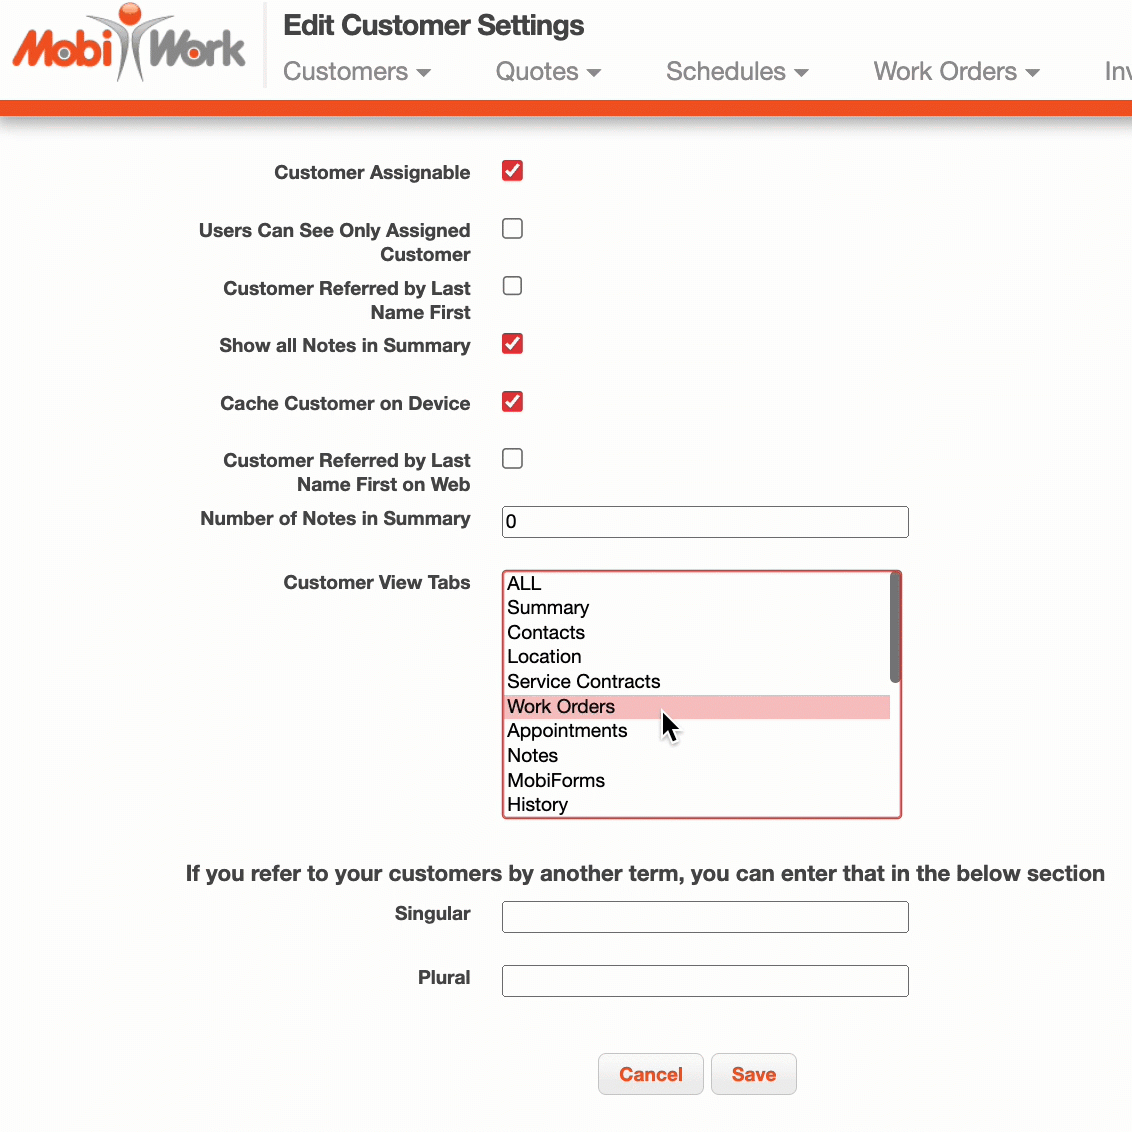
Once you are satisfied with the selected tabs, click the Save button to finalize the changes. The tabs on the View Customer pop-up window will then only display the newly selected tabs.
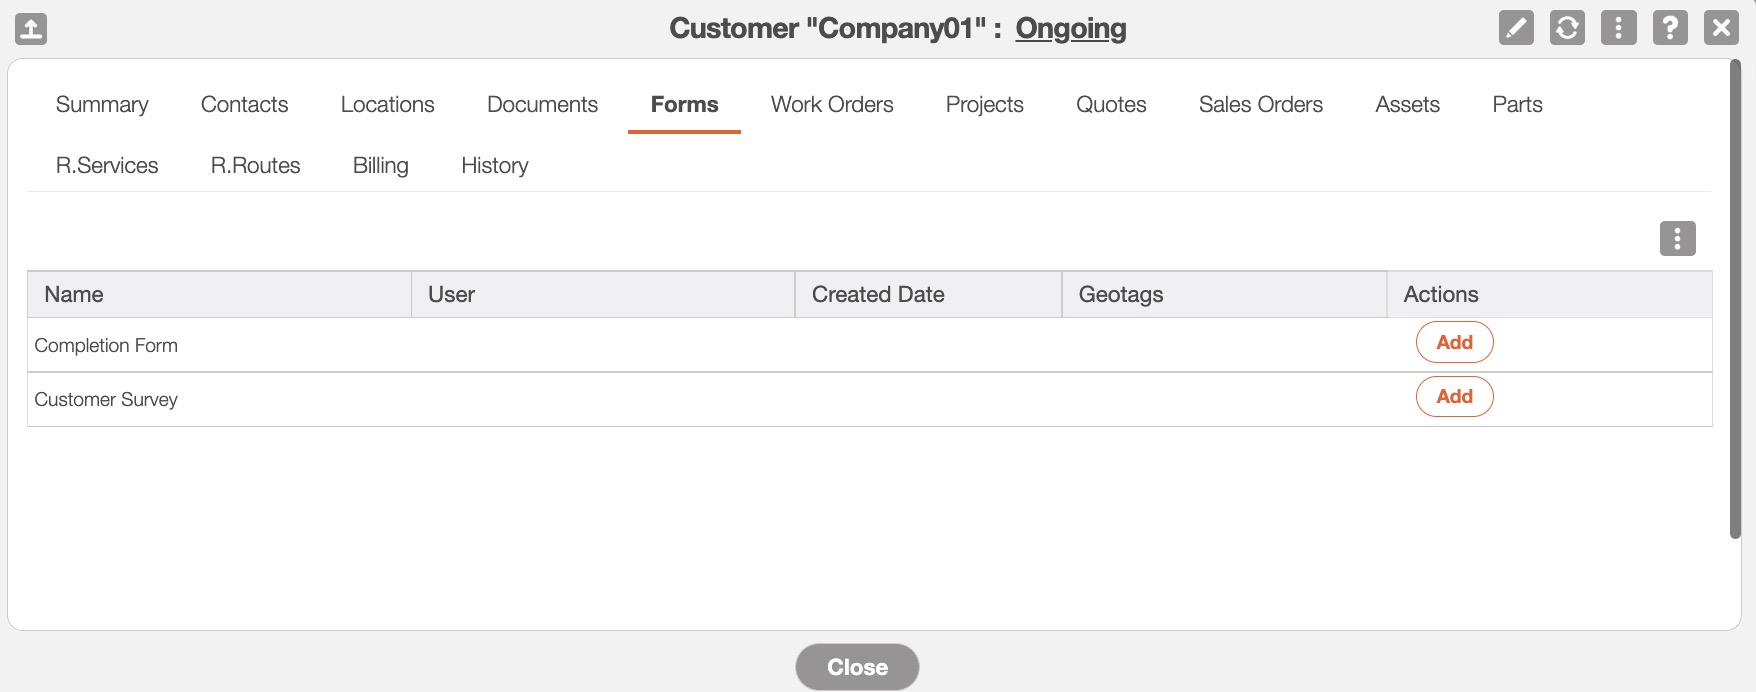
The forms listed under the "Forms" tab of the View Customer pop-up window, will only show the forms that are associated with the customer entity (e.g., a new customer that requires an intake form that is populated with a series of questions).
Each time a new customer is created, the designated forms will automatically be accessible in the "Forms" tab:
Please note, initially your account will not list any forms; you will need to populate the forms through the Customers Settings page. For more information about this page, please visit Customer Settings page.
Once on this page, you can associate forms by clicking the Associate with MobiForm button in the MobiForm Settings section:

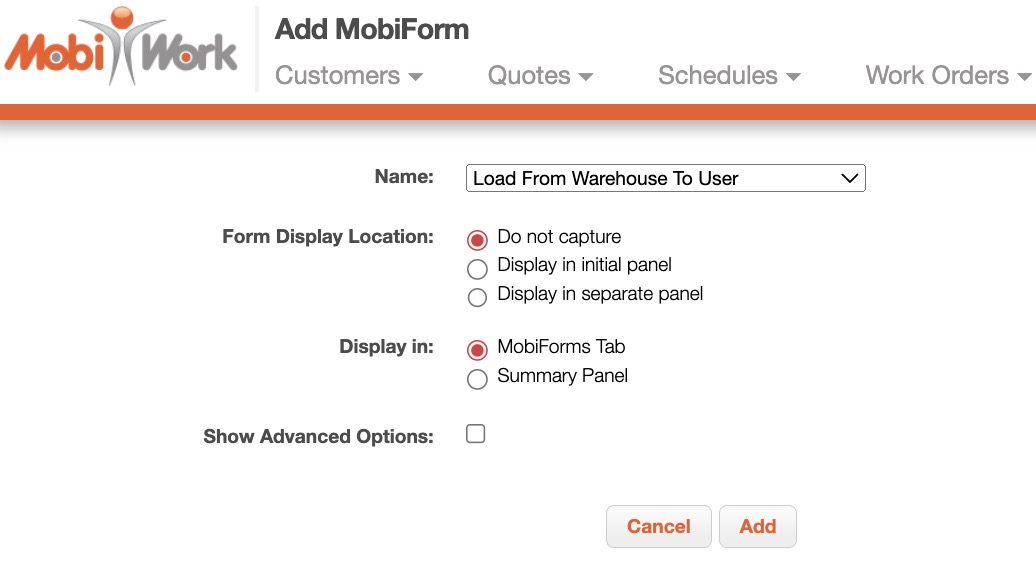
You will then be redirected to the Add MobiForm page. On this page select the desired form and click the Add button to finalize: