This section will highlight some commonly asked questions regarding your Twilio connector.
If you have any questions regarding Twilio itself please see the Twilio Support site at Help Center. Please note that this is a third-party page, and MobiWork is not responsible for the content that appears on these pages.
To ensure that your text messages are sent, please confirm that the following criteria are met:
You must first have a Text Message Connector installed in your MobiWork Web Application. Please see the Adding a Text Message Connector for more information on how to add a text message connector to your MobiWork account.
The customer must have a cell phone number associated with their profile. For a new customer you can add the cell number directly onto their profile; please see the Add Customer. For an already existing customer, please see the Edit Customer(s) page for more information on how to edit their contact details:
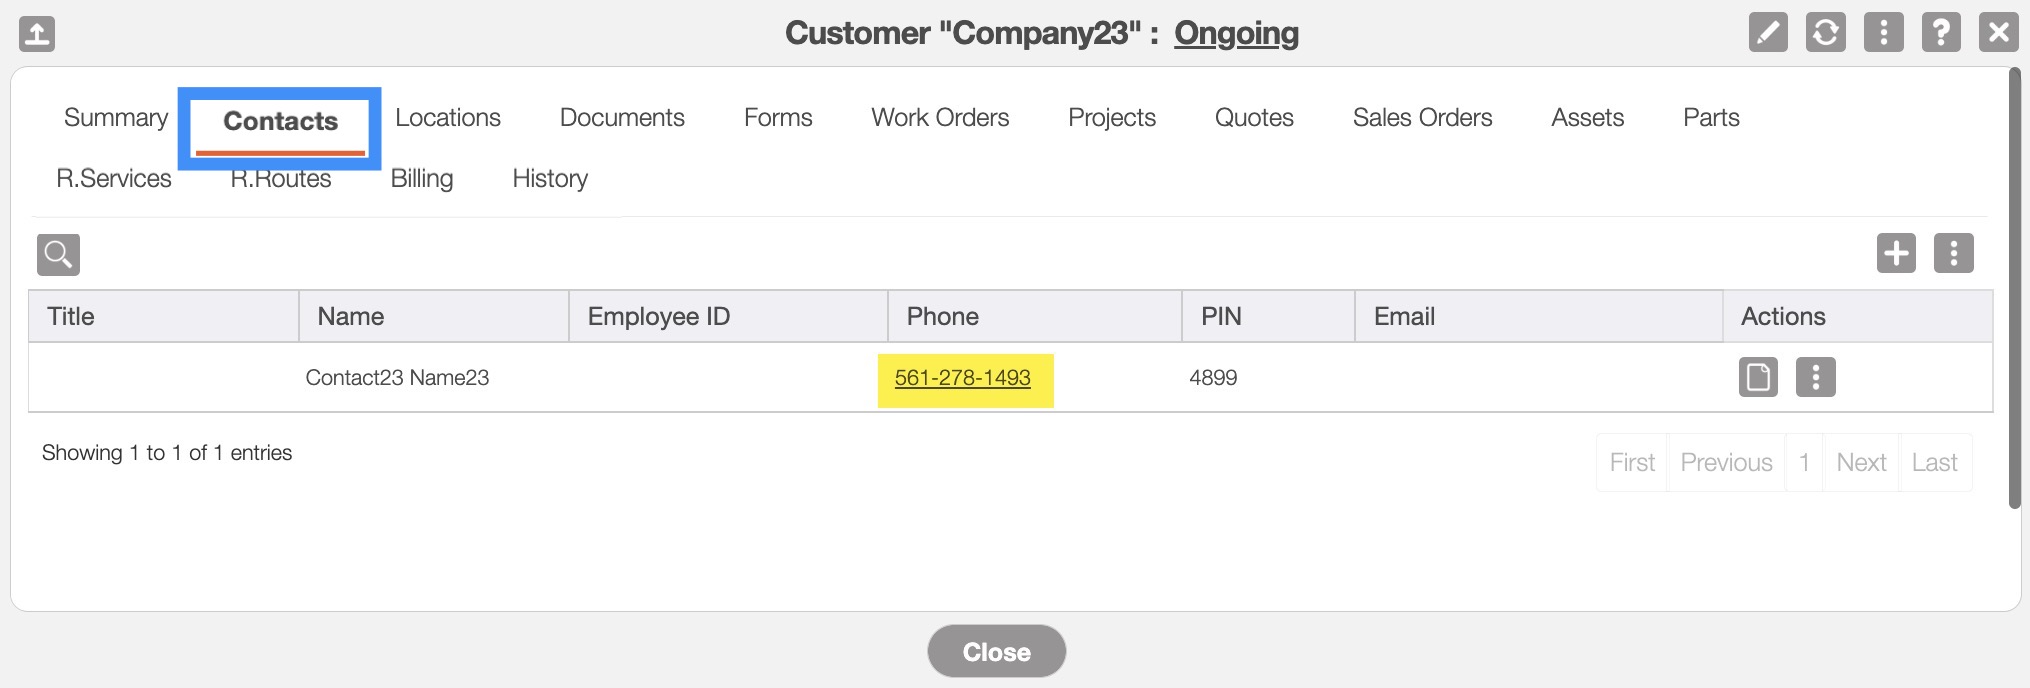
Note: Please note when adding or editing the contact's phone number, only input numerical characters (e.g., no letters, no dashes, etc.). Only use numbers when inputting the phone number, otherwise, errors will occur when you try to message the contact.
To send text messages using Twilio, you first need to complete Toll-Free Verification for your account. The following steps will highlight how to complete the verification process:
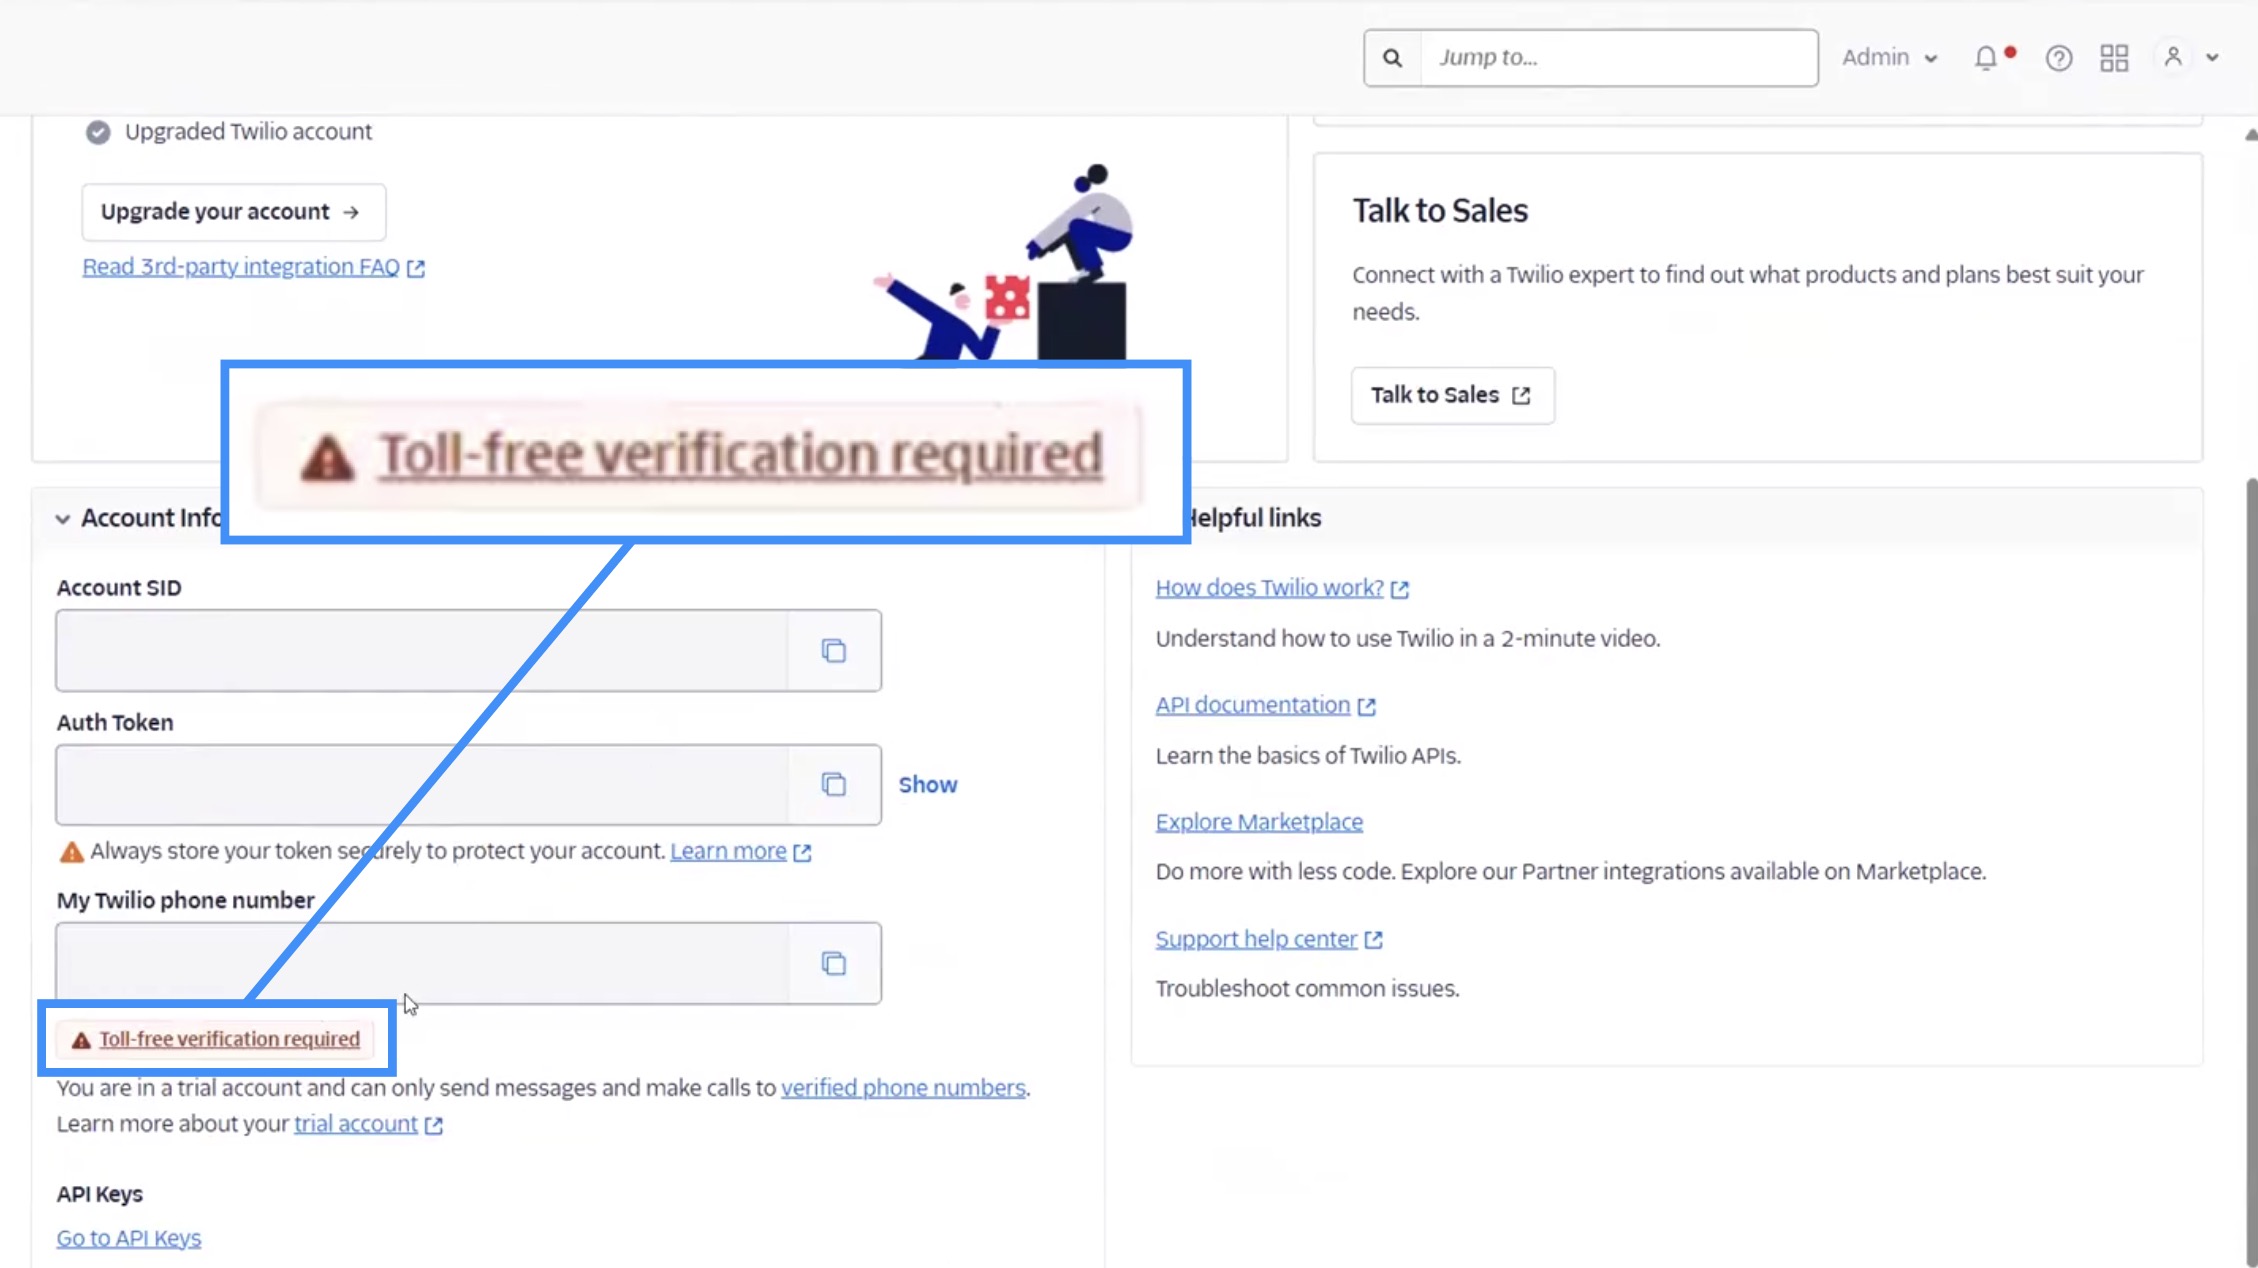
STEP 1: Access Your Twilio Profile
Once you have logged onto your Twilio account page and locate and click on the "Toll-Free Verification" link:
A pop-up window will appear, informing you of the required information you'll need before starting the process:
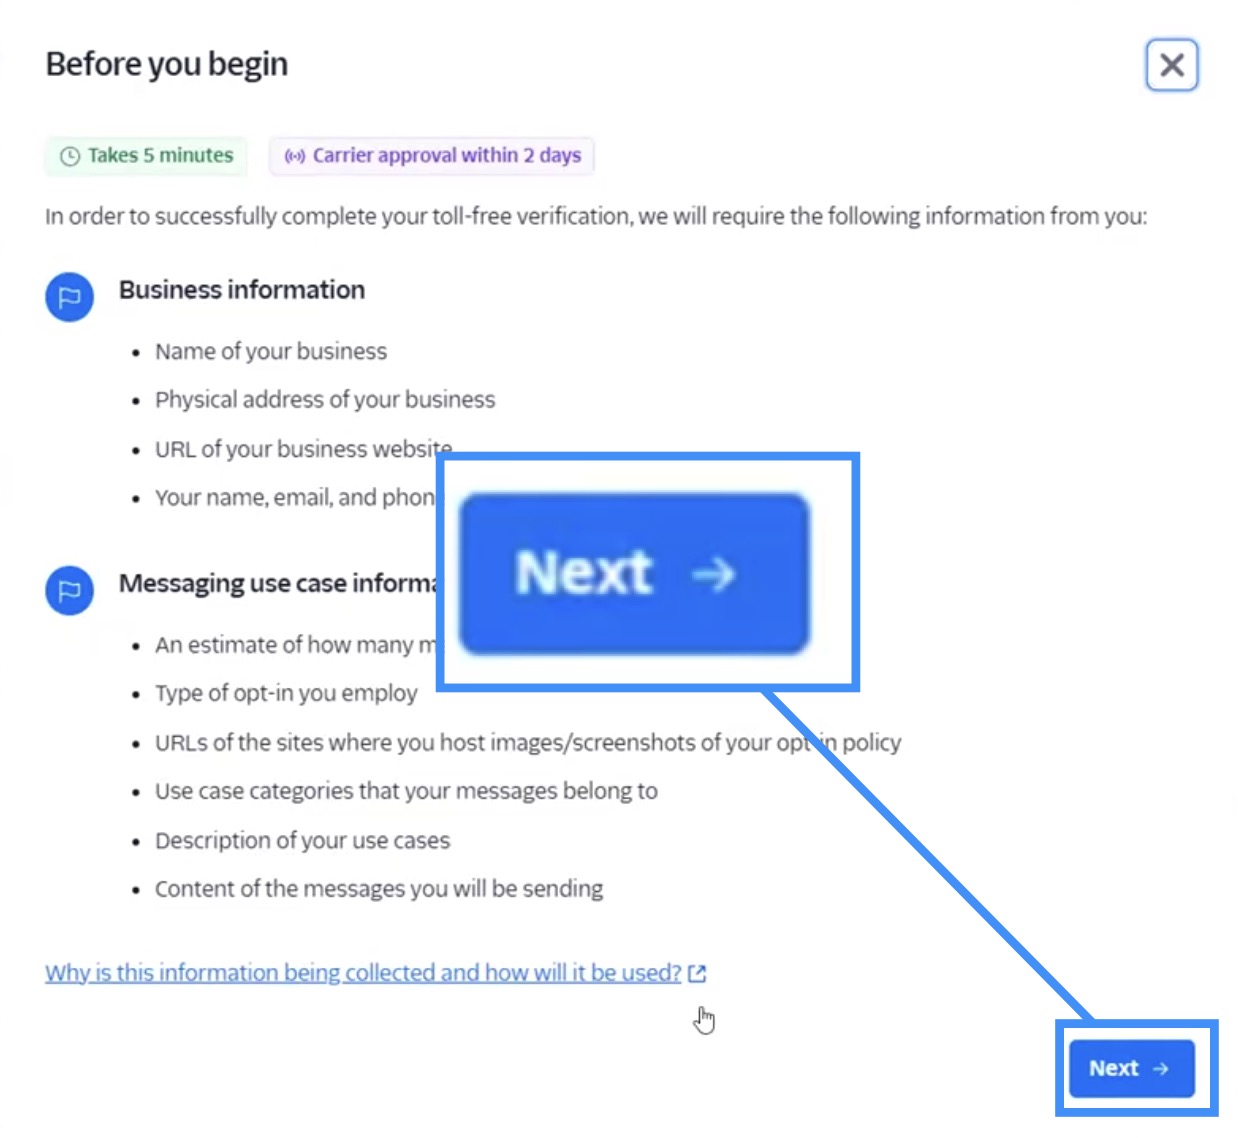
Click the Next button to begin inputting the required information.
STEP 2: Input Business and Contact Information
You will then be prompted to enter your business and contact information:
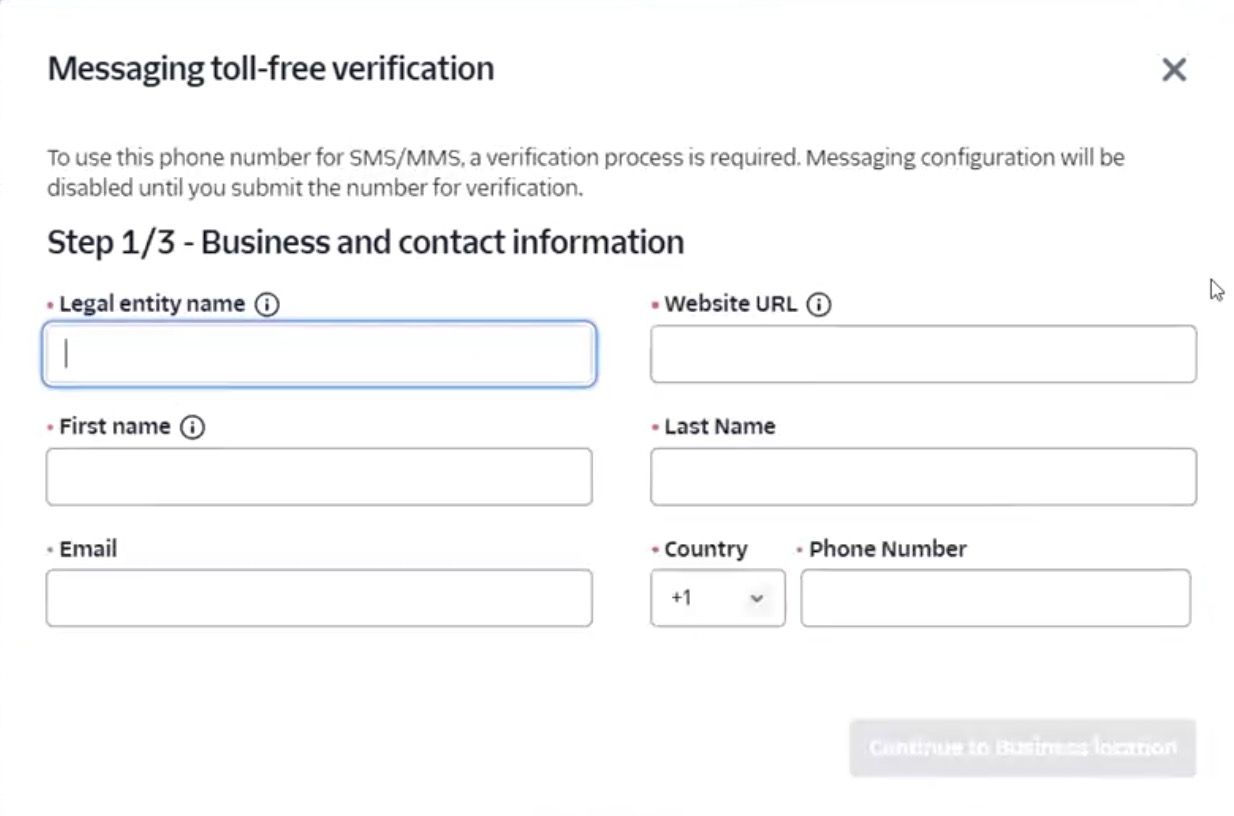
In the appropriate fields, enter the following details:
Legal Entity Name- Your company's official name.
First Name- The first name of the Twilio account holder for your company.
Email- The email address associated with your company.
Website URL- Your company website. Please ensure you include http:// or https:// in the URL and that the URL does not have spaces, otherwise, the field will display an error.
Last Name- The last name of the Twilio account holder for your company.
Phone Number- Your company's9s contact number.
Once all fields are completed, Click the Continue to Business Location button to proceed to the next step.
STEP 3: Enter Business Location
Now we will enter the location details regarding your company:
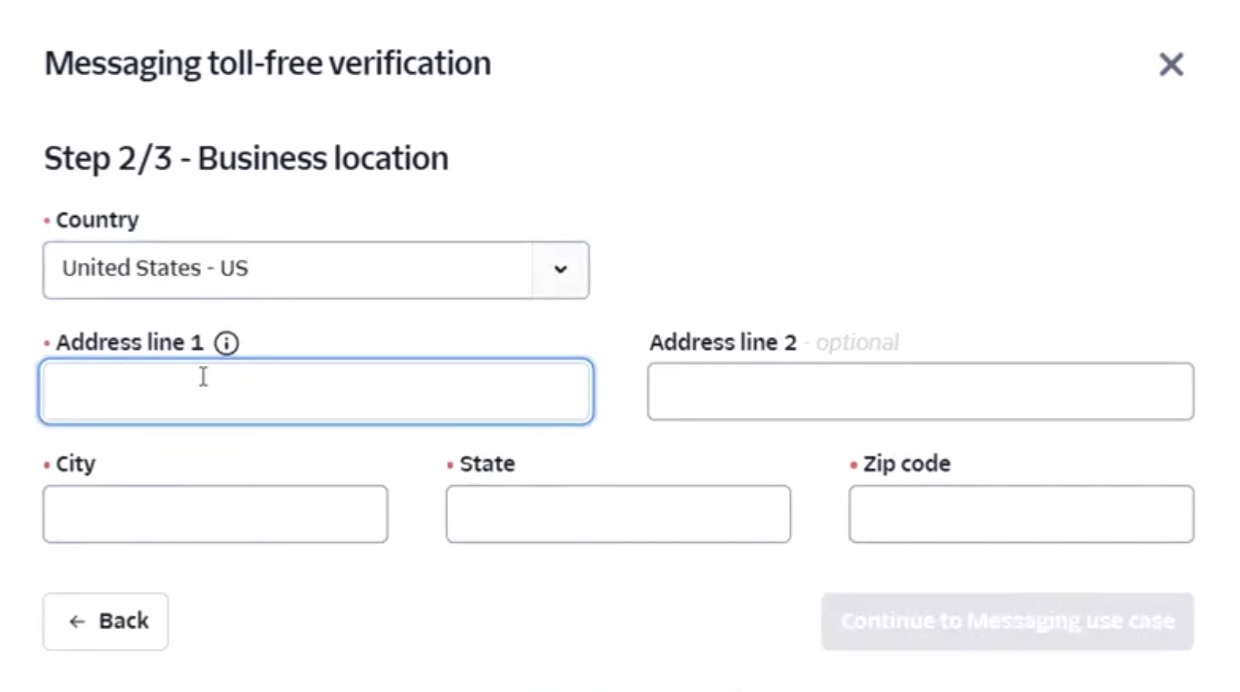
In the corresponding fields, enter the following details:
Country- From the drop-down select the country where you company resides.
Address Line 1- Input the street address for your company.
Address Line 2- Use this field if the street address in Address Line 1 is too long.
City- The city where your company resides.
State- (For U.S. companies only) Select the state where your company operates.
Zip Code- The zip code where your company resides.
Click the Continue to Messaging User Case to proceed to the next step
STEP 4: Input Your Company's Messaging Use Case
Next, you will explain the use case for your company's use of Twilio. This section will go into detail about how you obtain consent from your customers, how many texts you plan to send in a month time span and more.
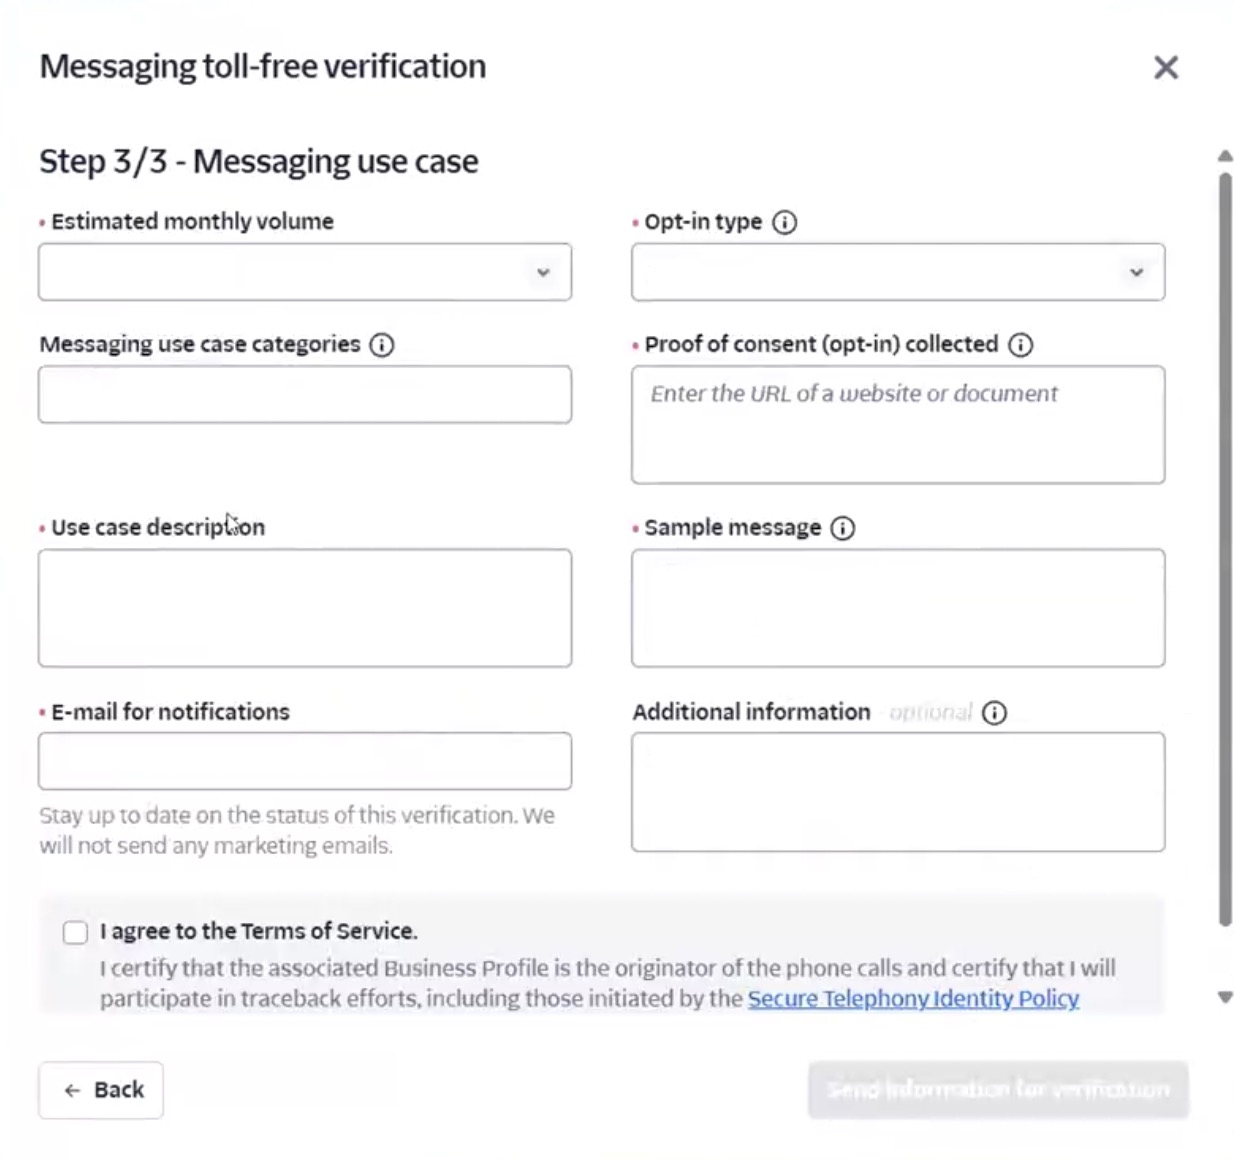
In the subsequent fields, input the following information:
Estimated Monthly Volume- The approximate number of messages you will send each month.
Messaging Use Case Categories- A brief explanation of why you are sending the texts. The drop-down provides common use cases.
Use Case Description- An overview of the text message content.
Email for Notifications- The email address where you want to receive verification notifications.
Opt-in Type- How users will provide consent to receive text messages (e.g., website form, opt-in checkbox).
Proof of Consent (Opt-in) Collected- Include a website form of consent collection. When providing the URL, ensure it includes http:// or https:// and that the URL does not have spaces, otherwise, the field will display an error.
Sample Message- An example of the text message customers will receive.
Additional Information- Any other additional information that you wish to provide about your text message use cases.
Do not forget to agree to the Terms of Service. Once all the information is entered, click the Send Information for Verification button to submit your request. Your account will now be submitted for Toll-Free Verification, allowing you to send text messages through Twilio.
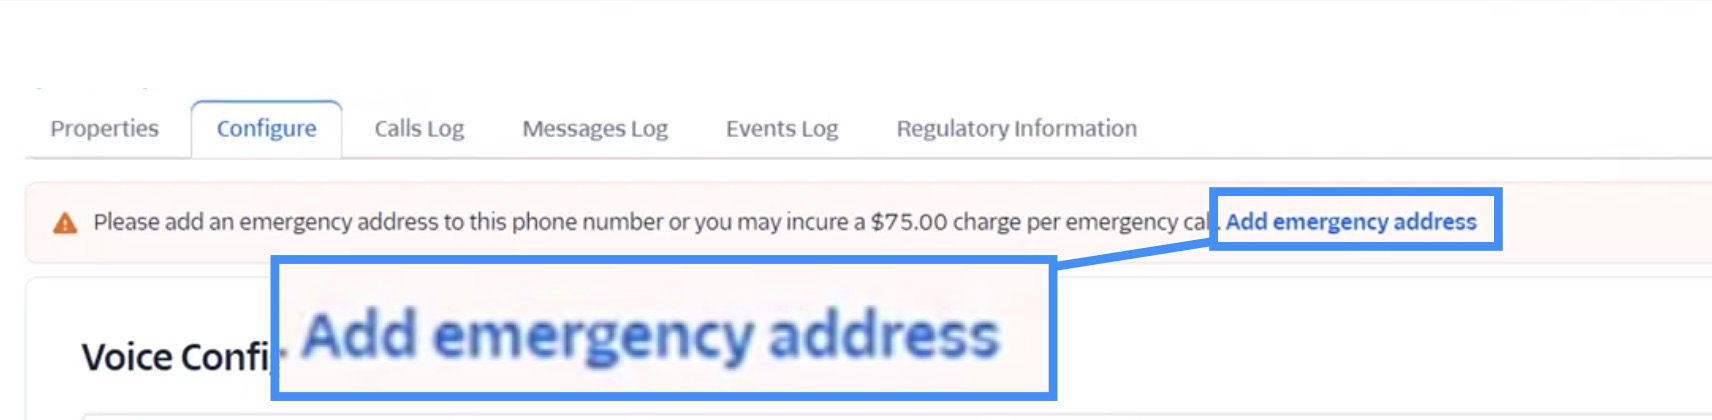
To avoid the risk of a $75 charge per emergency call, you must add an emergency address to your Twilio account. This section will guide you through the process of adding an emergency address.
First, locate the ribbon in your profile that states, "Please add an emergency address to this phone number or you may incur a $75.00 charge per emergency call. Add Emergency Address." Click on hyperlink in the ribbon:
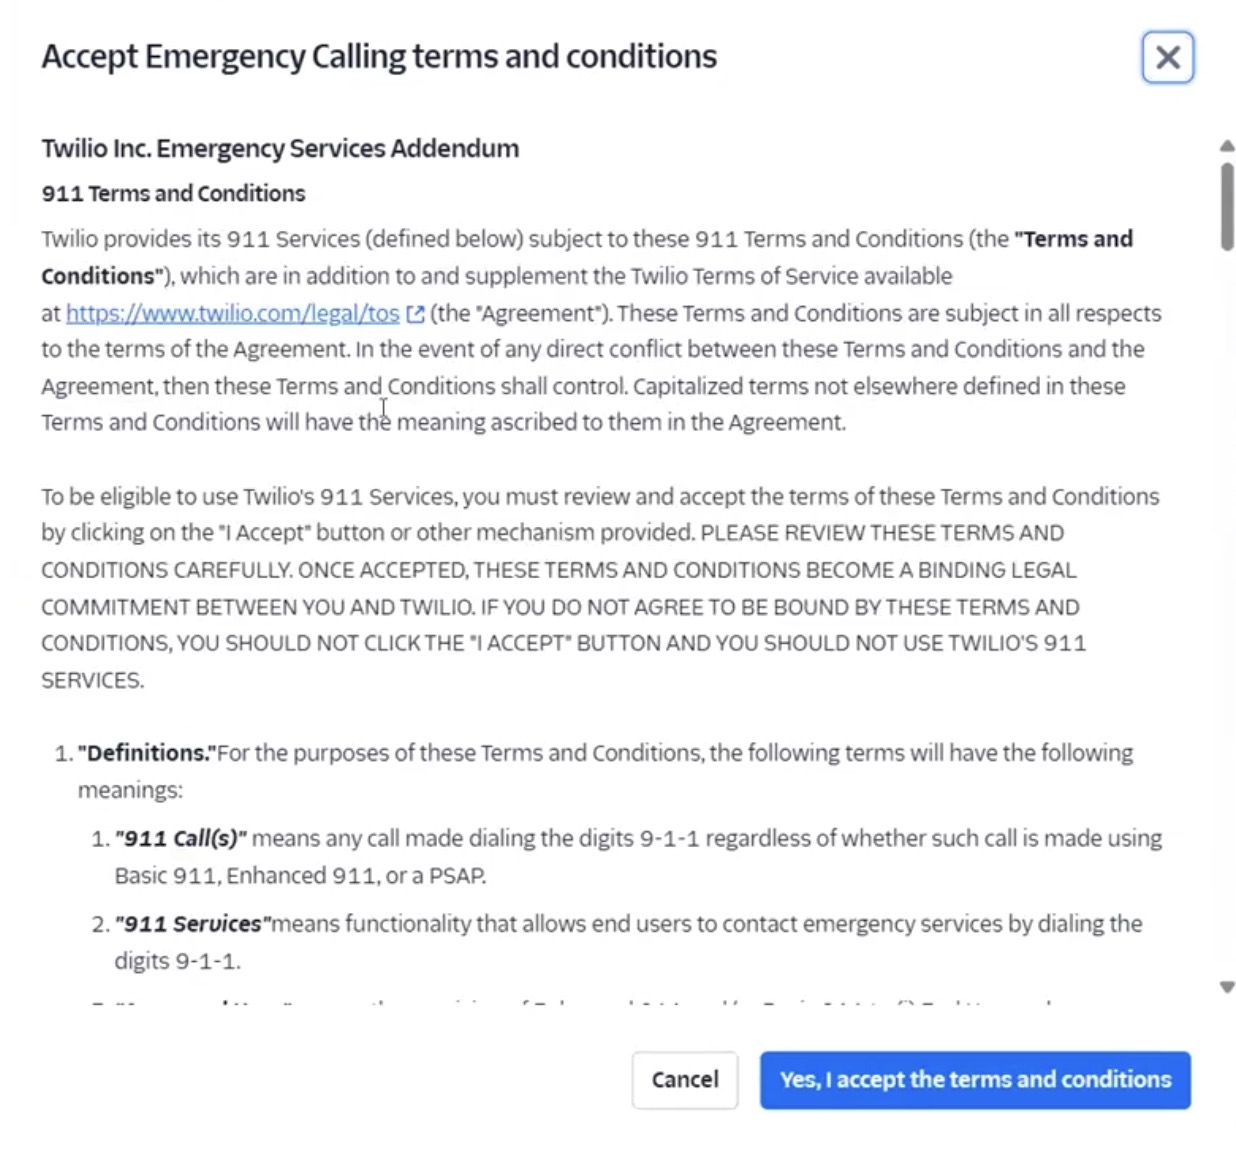
You will be directed to the Accept Emergency Calling Terms and Conditions pop-up window. Click the Yes, I accept the terms and conditions button to proceed with adding your emergency address:
Next, enter your company's emergency phone number and click the Add Emergency Address button:
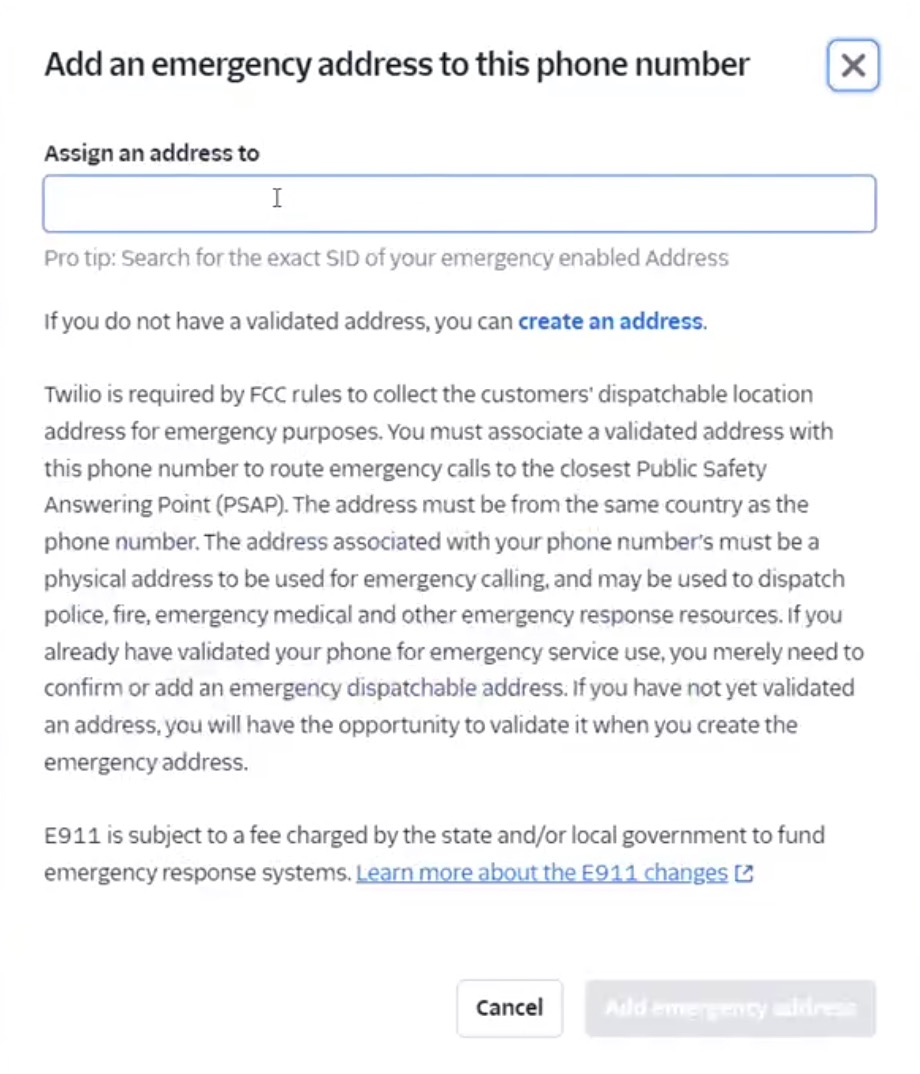
You will then be prompted to input the company's emergency address:
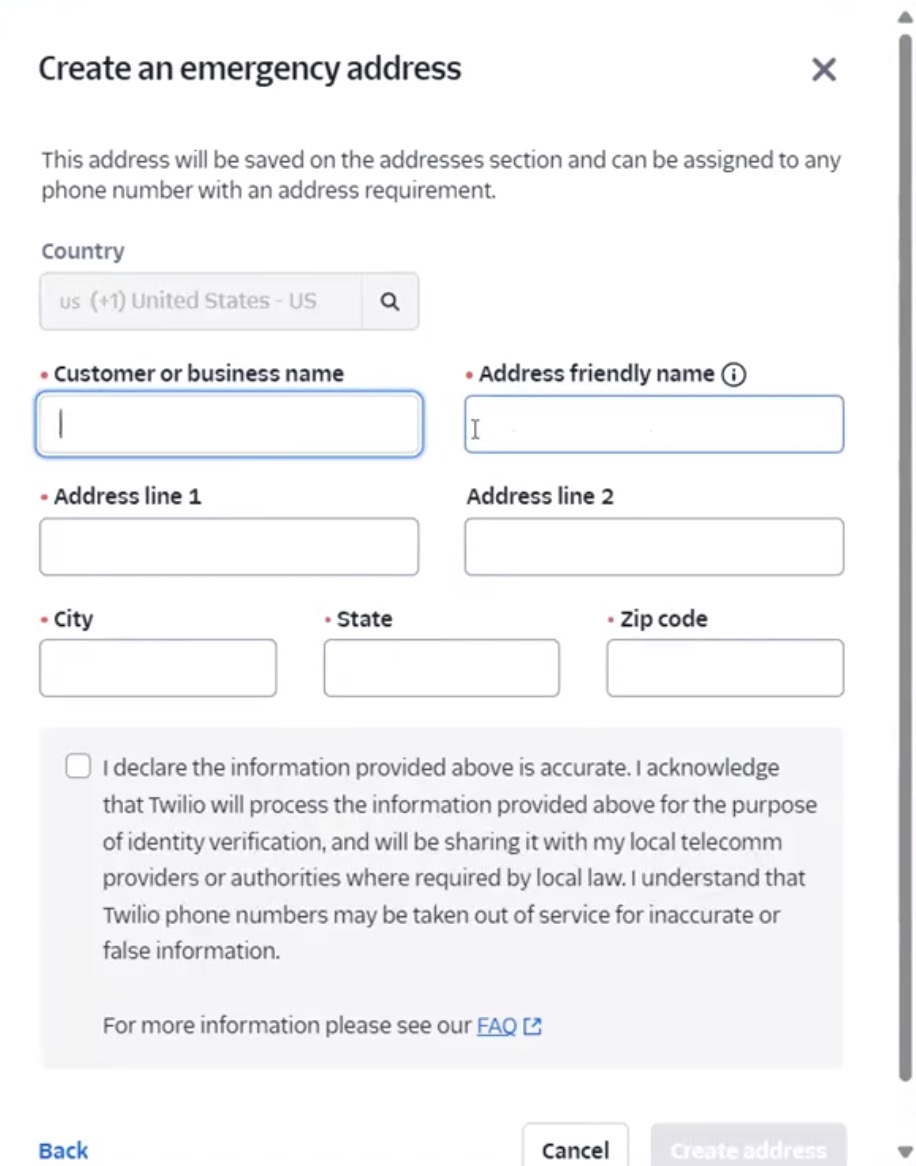
In the Create an Emergency Address window, provide the following details:
Customer or Business Name- Enter your company's name.
Address Friendly Name- An informal name for your address (e.g., Main Office)
Address Line 1- Input the street address for your company.
Address Line 2- Use this field if the street address in Address Line 1 is too long.
City- The city where your company resides.
State- (For U.S. companies only) Select the state where your company operates.
Zip Code- The zip code where your company resides.
Once you have entered the required information, check the box confirming the accuracy of the details provided. Finally, click the "Create Address" button to complete the process of adding the emergency address to your Twilio account.