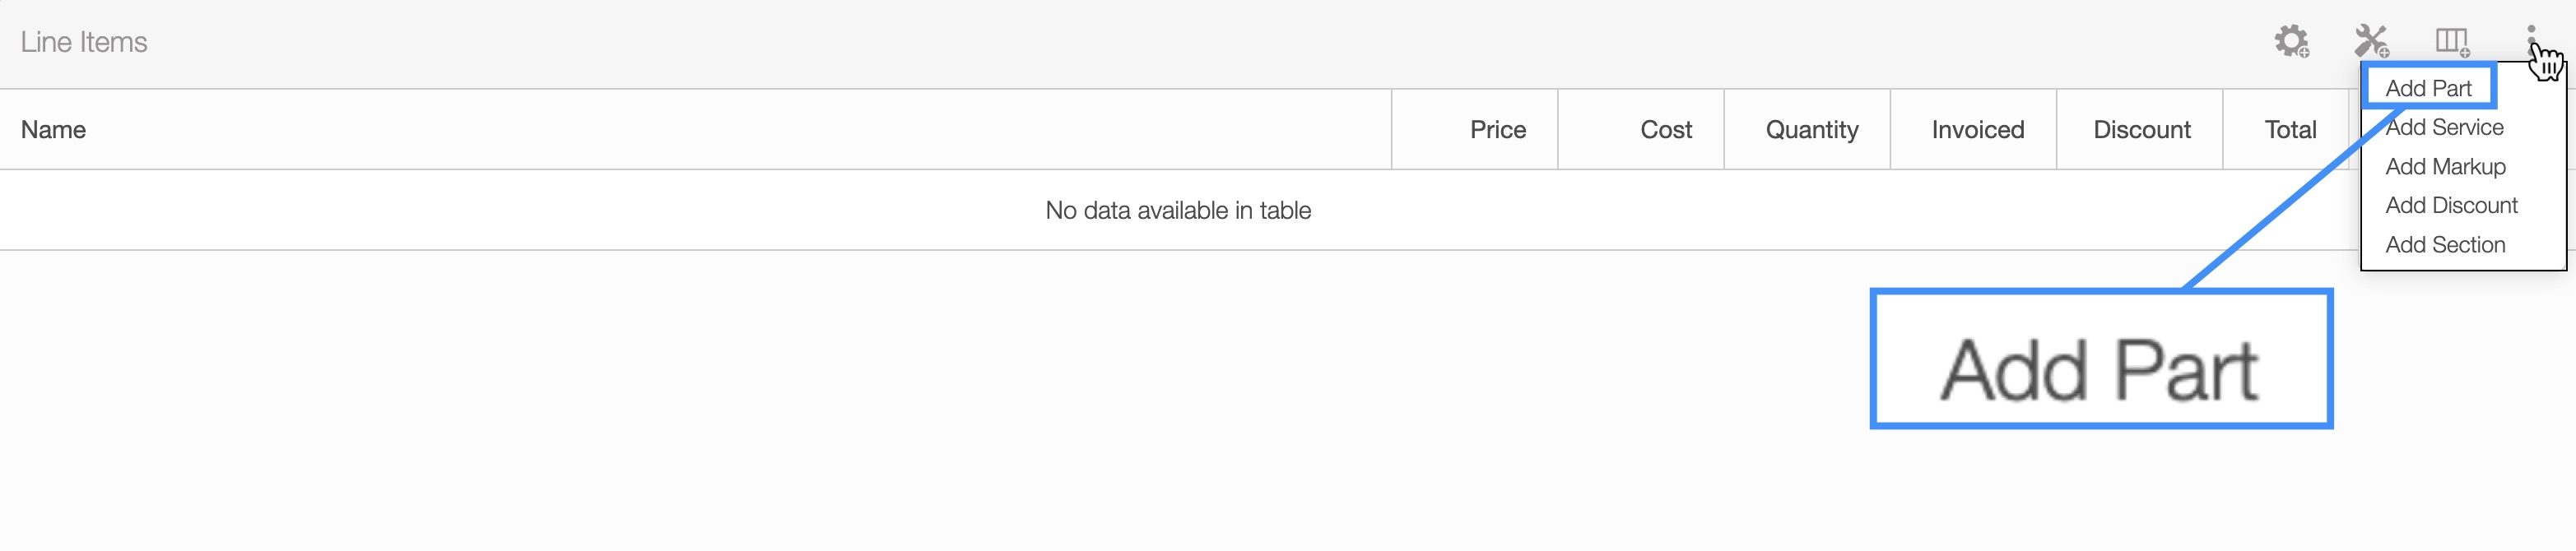
In the "Line Items" panel click on the Individual Actions in the top-right. From the drop-down menu that appears, select the "Add Part" option:
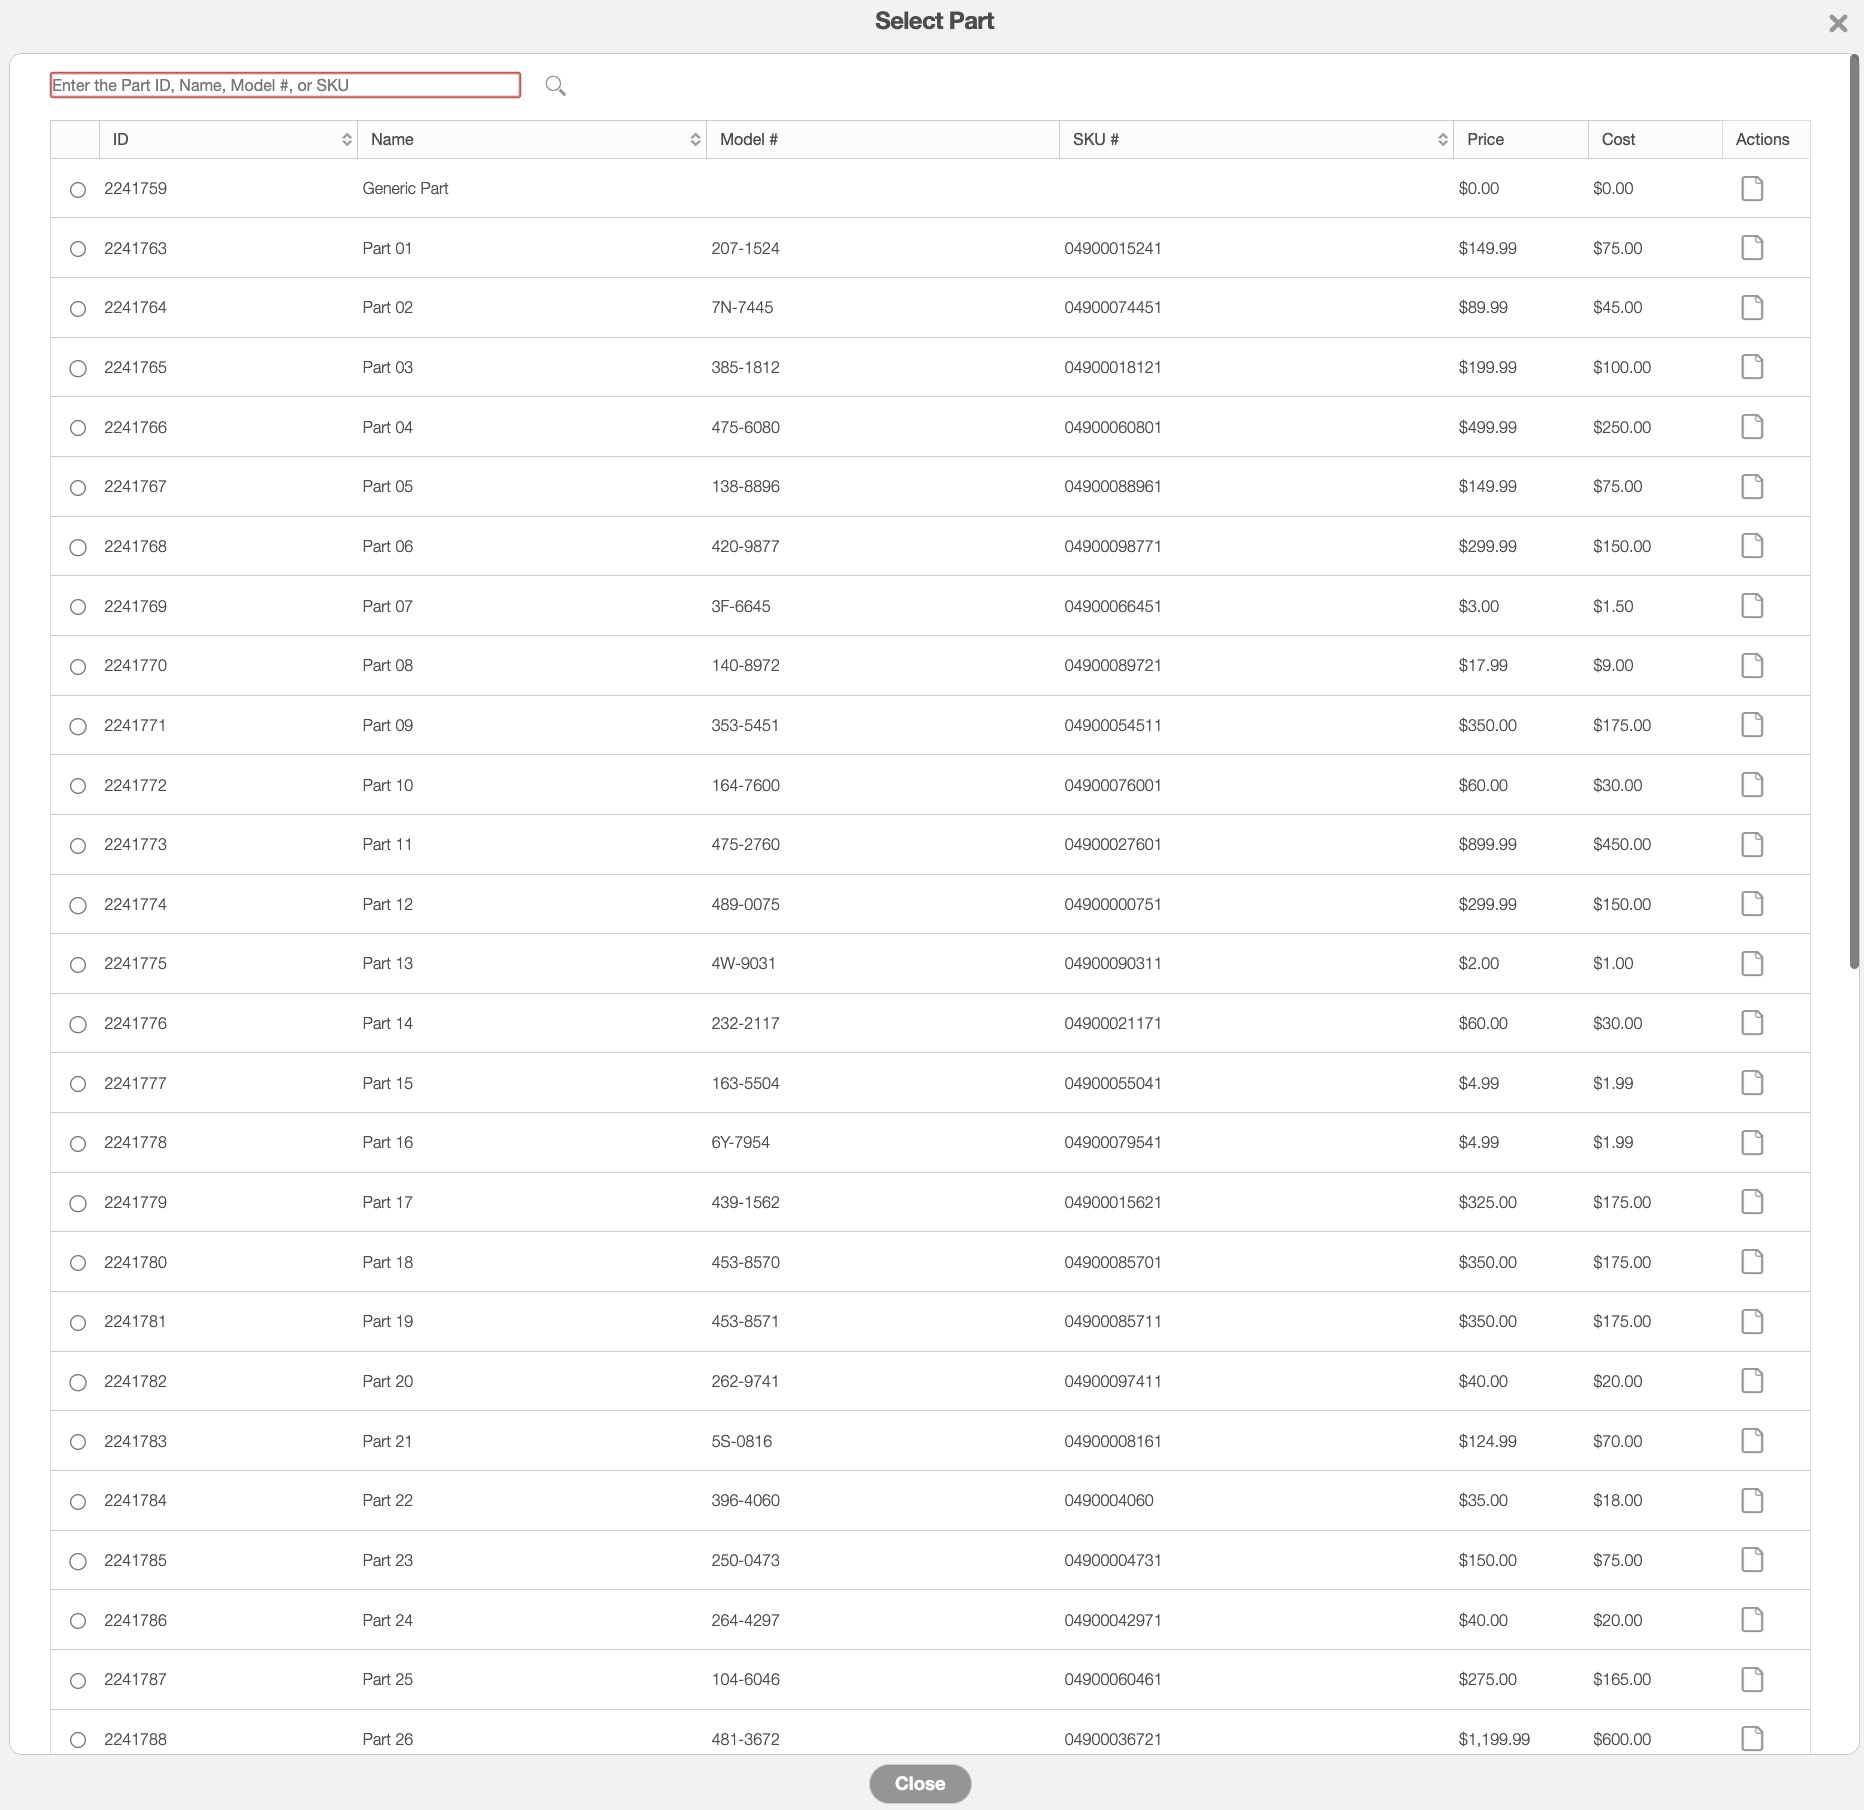
The Select Part pop-up window will appear. From there, choose the desired part:
After selecting a part from the Select Part pop-up window, the Add Part to Quote pop-up window will appear, allowing you to adjust the quantity, section, and other details:
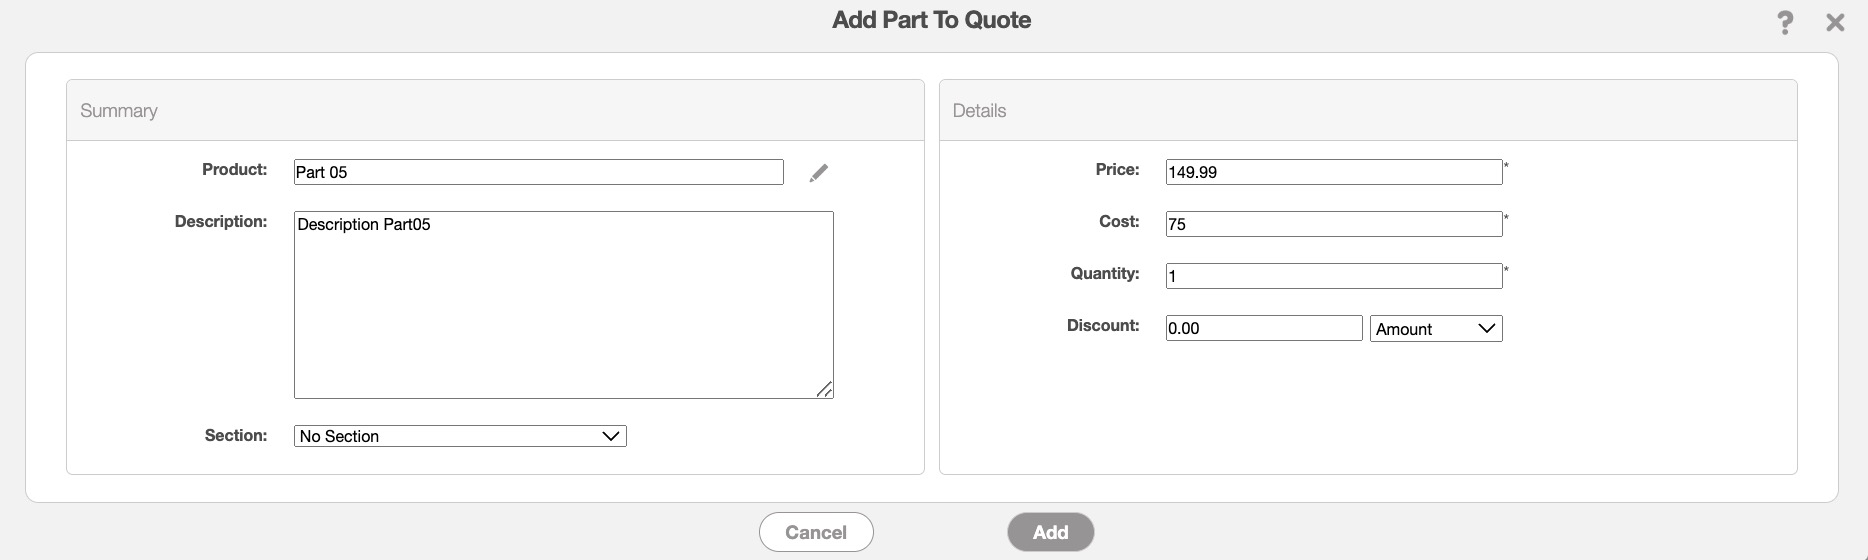
In this pop-up window enter the following details:
Product- The name of the part or product. By clicking the Pencil icon you can reselect the desired product.
Description- The description of the part or product. This field is optional.
Price and Cost- These fields will be automatically filled based on the saved data you have in your parts catalog; however, you can directly edit the price and cost when adding it to the quote. For more information about your parts catalog, please see the Parts List (Catalog) page.
Quantity- Specify the quantity of the part or product needed for the quote.
Discount- If applicable, you can enter an individual discount for the selected part.
Section- You can also directly add the part to a specific section for better organization of the quote line items.
Note: Please note that only one part can be added to a quote line item at a time.
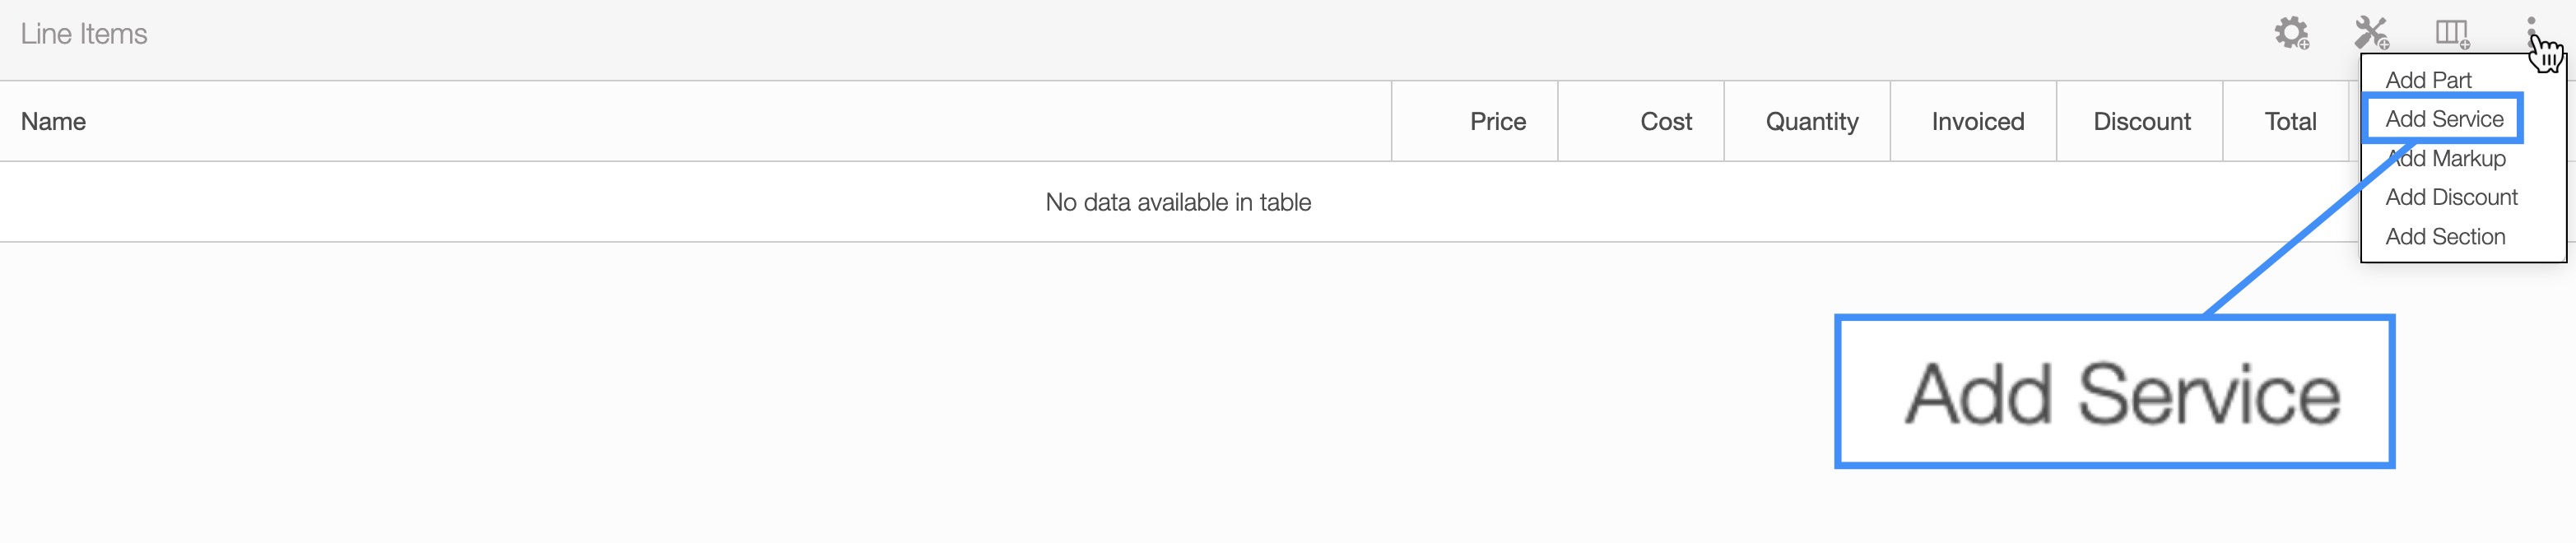
In the "Line Items" panel click on the Individual Actions in the top-right. From the drop-down menu that appears, select the "Add Service" option:
The Select Service pop-up window will appear. From there, choose the desired service:

After selecting a service from the Select Service pop-up window, the Add Service to Quote pop-up window will appear, allowing you to adjust the quantity, section, and other details:
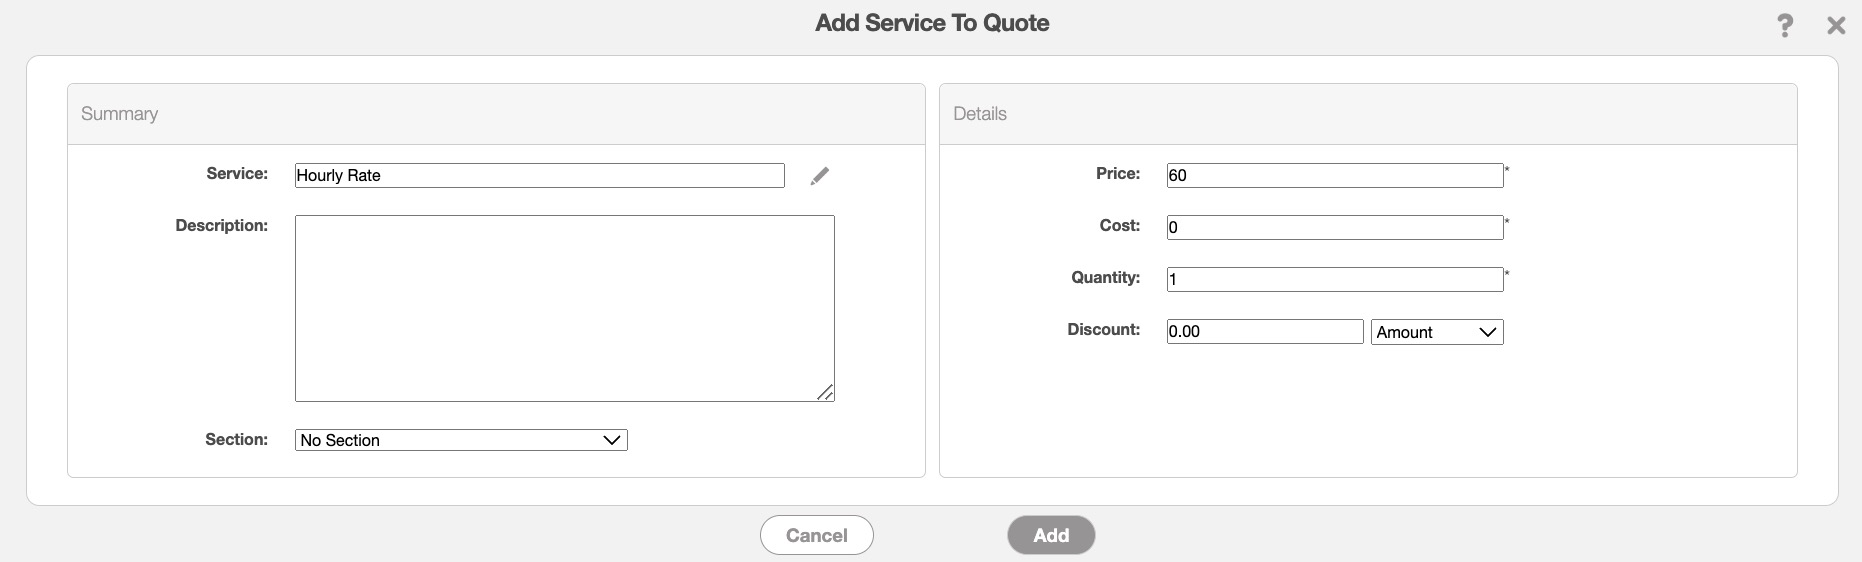
In this pop-up window enter the following details:
Service- The name and type of service.
Description- The description of the service. This field is optional.
Price and Cost- These fields will be automatically filled based on the saved data you have in your services catalog; however, you can directly edit the price and cost when adding it to the quote. For more information about your services catalog, please see the Service Catalog (list) page.
Quantity- Specify the hours worked by the user for the service.
Discount- If applicable, you can enter an individual discount for the selected service.
Section- You can also directly add the part to a specific section for better organization of the quote line items.
Note: Please note that only one service can be added to a quote line item at a time.
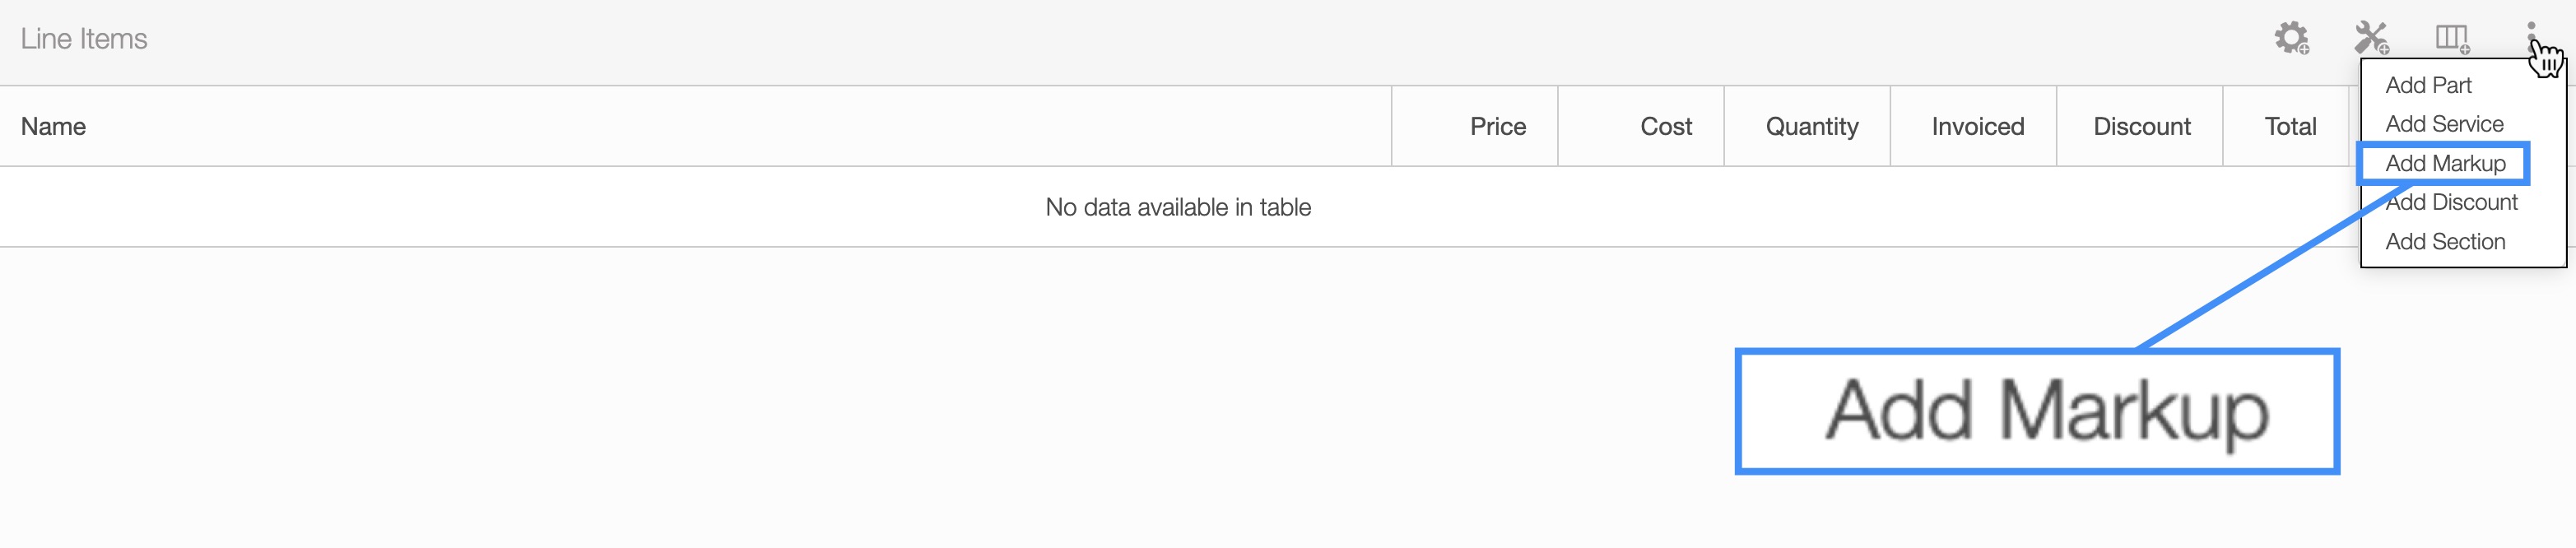
In the "Line Items" panel click on the Individual Actions in the top-right. From the drop-down menu that appears, select the "Add Markup" option.
You will be able to add additional markups to choose from, from the Quote Settings page. For more information on how to add or edit a markup, please see the Quote Settings page:
Once you click on the "Add Markup" option, the Add Markup pop-up window will appear:
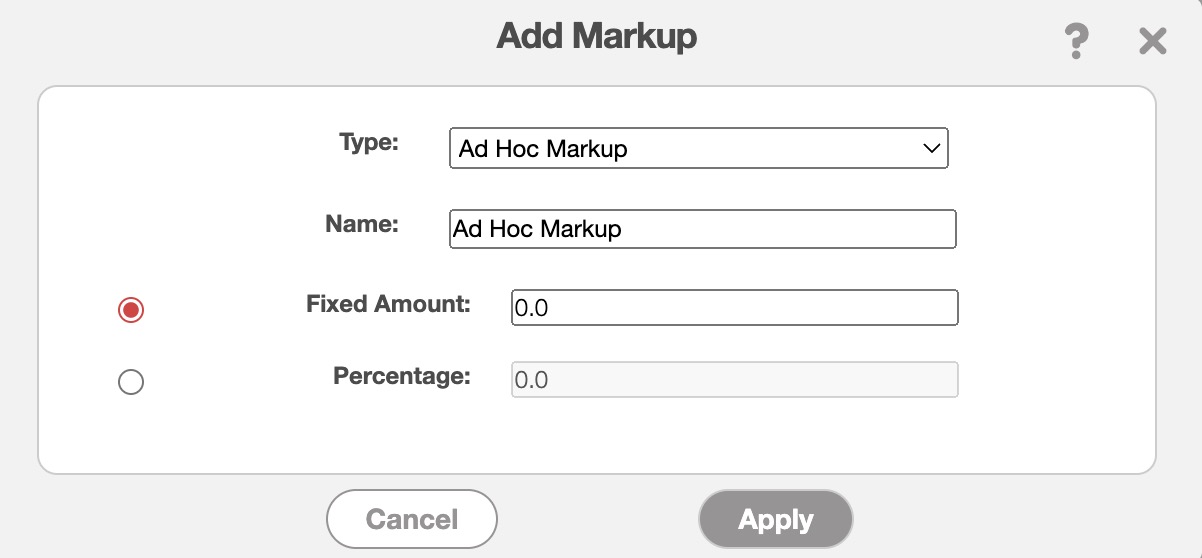
In this pop-up window select the type of markup you would like to apply. If the selected markup has predefined values for the fixed amount and percentage, these values will be automatically applied. If there are no predefined values for the selected markup, you can manually input the fixed amount and percentage.
After applying this markup, you will be able to see it in the "Total & Balance" panel of your quote:
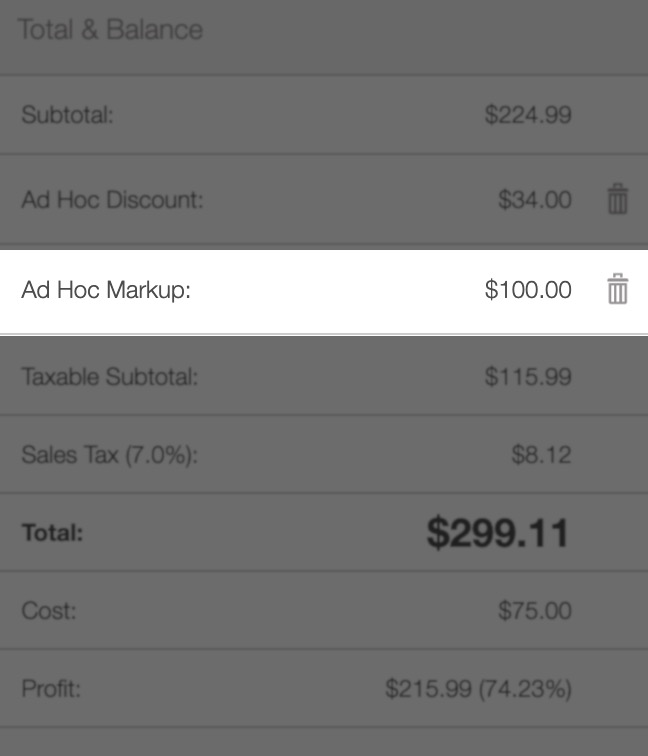
If you decide to no longer apply the markup, you can select the Trash Can icon next to the marked-up amount.
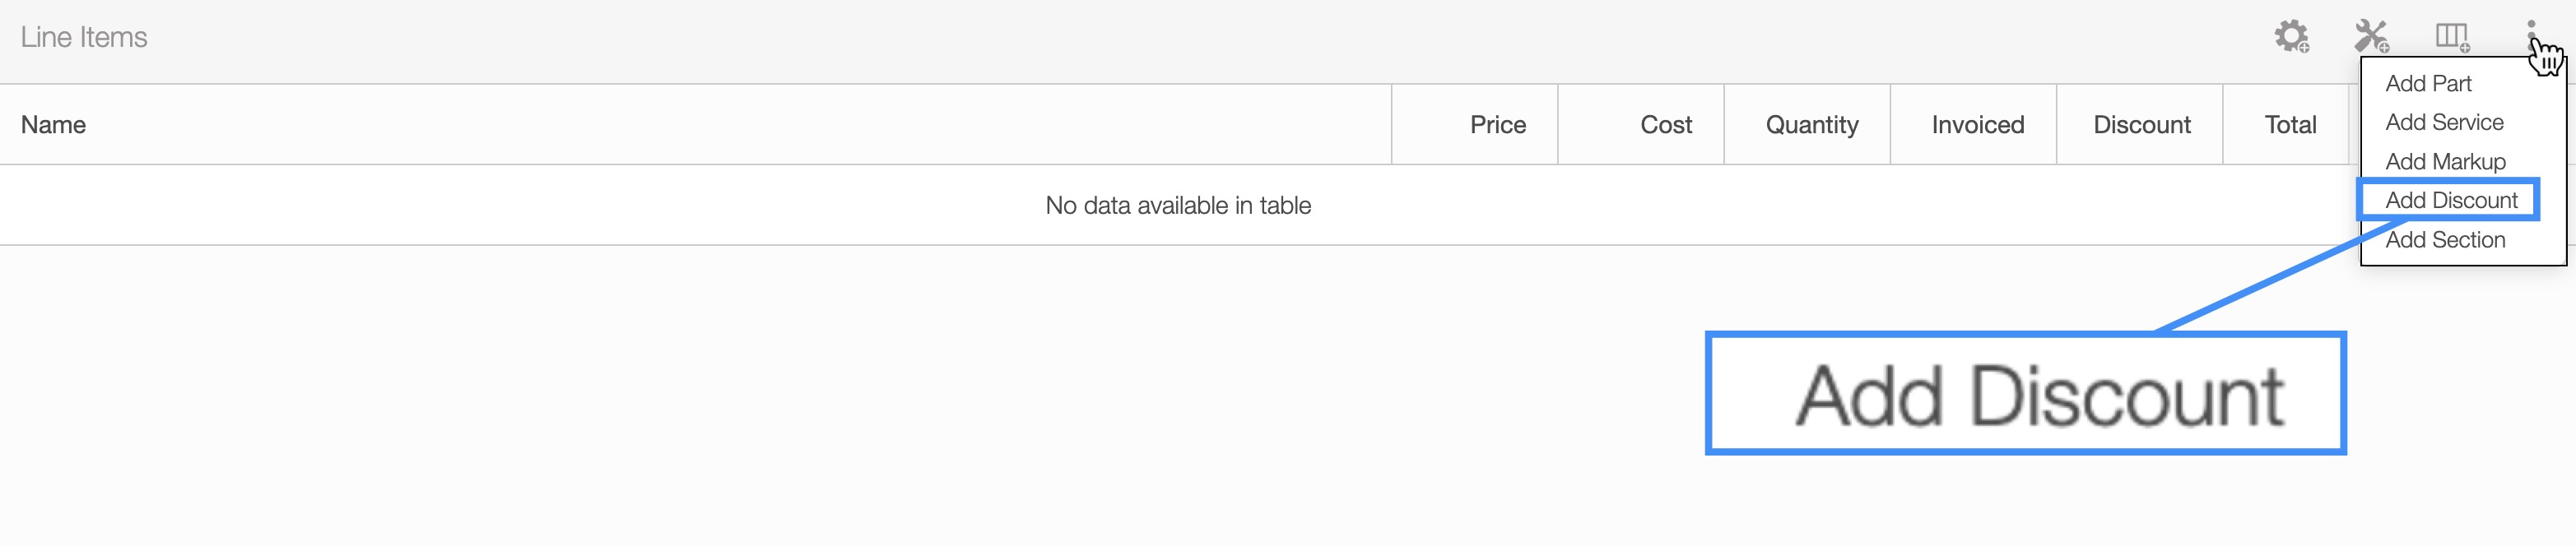
In the "Line Items" panel click on the Individual Actions in the top-right. From the drop-down menu that appears, select the "Add Discount" option. This discount option will allow you to add a discount to the entire quote.
You will be able to add additional general discounts to choose from, from the Quote Settings page. For more information on how to add or edit a general discount, please see the Quote Settings page:
Once you click on the "Add Discount" option, the Apply Discount pop-up window will appear:
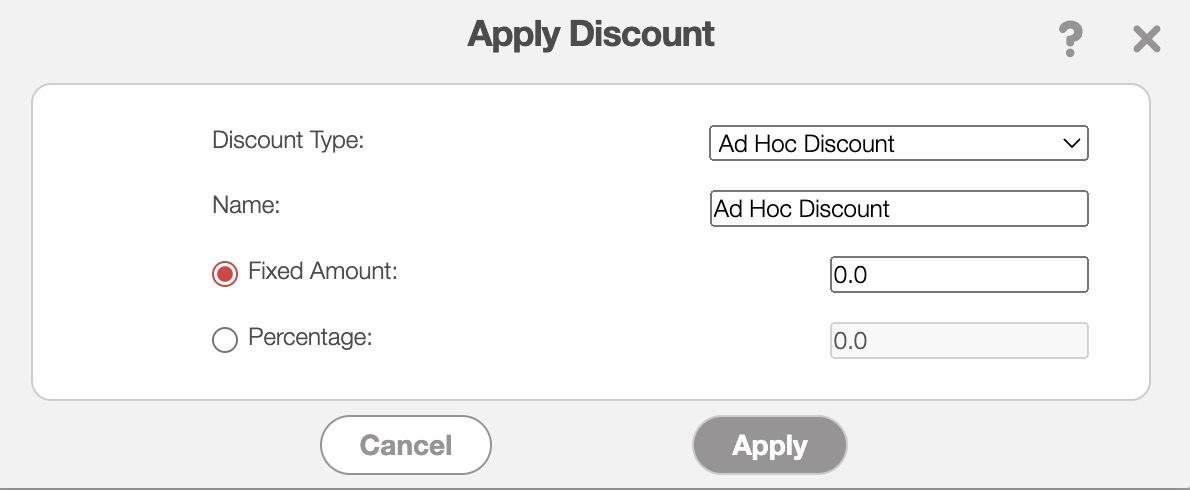
In this pop-up window select the type of discount you would like to apply. If the selected discount has predefined values for the fixed amount and percentage, these values will be automatically applied. If there are no predefined values for the selected discount, you can manually input the fixed amount and percentage.
After applying this discount, you will be able to see it in the "Total & Balance" panel of your quote:
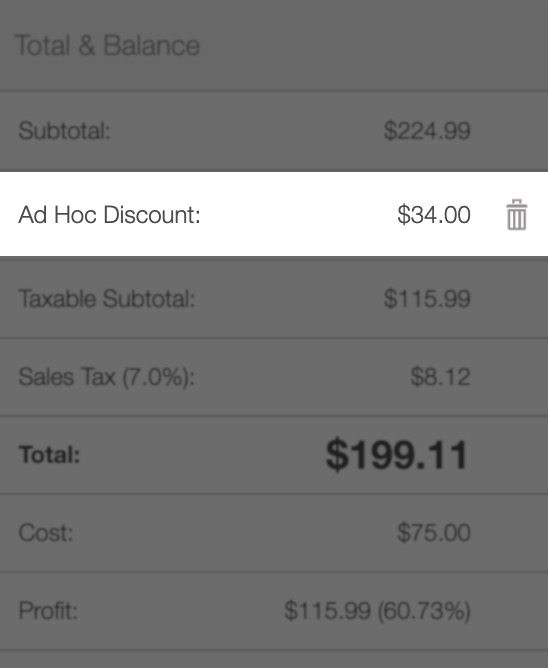
If you decide to no longer apply the discount, you can select the Trash Can icon next to the discounted amount.
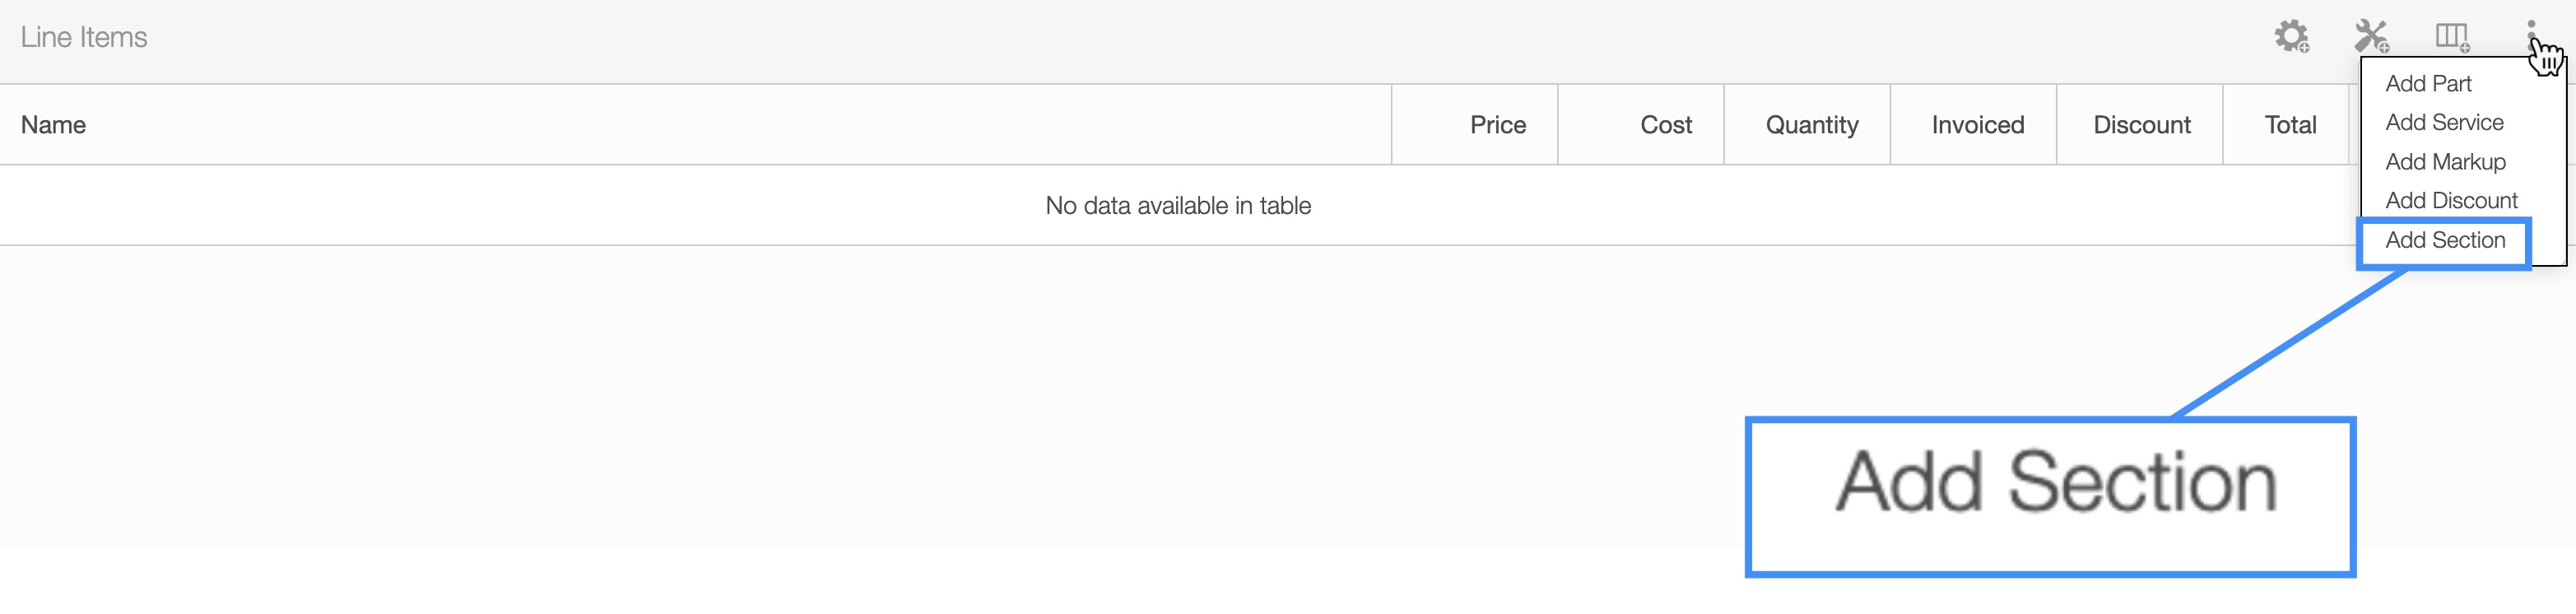
In the "Line Items" panel click on the Individual Actions in the top-right. From the drop-down menu that appears, select the "Add Section" option:
Once you click on the "Add Section" option, the Add Section pop-up window will appear:
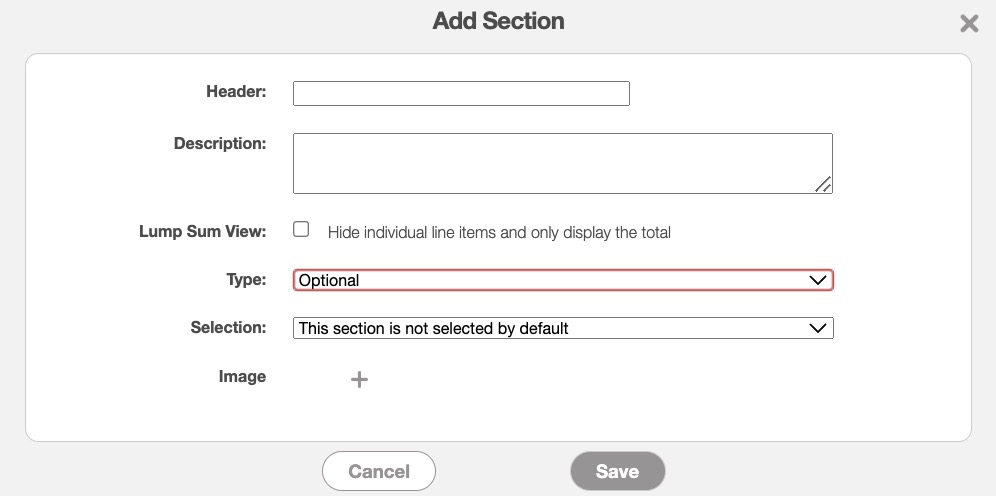
In this pop-up window enter the following details:
Header- The name of the section.
Description- The description of the section.
Lump Sum View- By clicking on the lump sum view for the Add Section pop-up window, you will be able to hide the individual line items for the items listed in the specified section. This option is different from the "Lump Sum View" checkbox in the Add Quote pop-up window and the Edit Quote pop-up window; this lump sum view will apply to the entire quote.
Type- The type drop-down indicates the category (i.e., Required, Optional, Alternate) to which the section, along with its corresponding parts and services, belongs. Optional or Alternate sections allow customers to select the options they prefer from the emailed quote. This is especially helpful for Good, Better, Best estimates.
Selection- If you select the Optional or Alternate types, then the "Selection" field will appear. This field will indicate if the parts or services in the section are selected by default.
Image- Allows you to upload a small image for the section.
The section will then appear in the "Line Items" panel; the parts and services listed under it will be contained in the respective section:
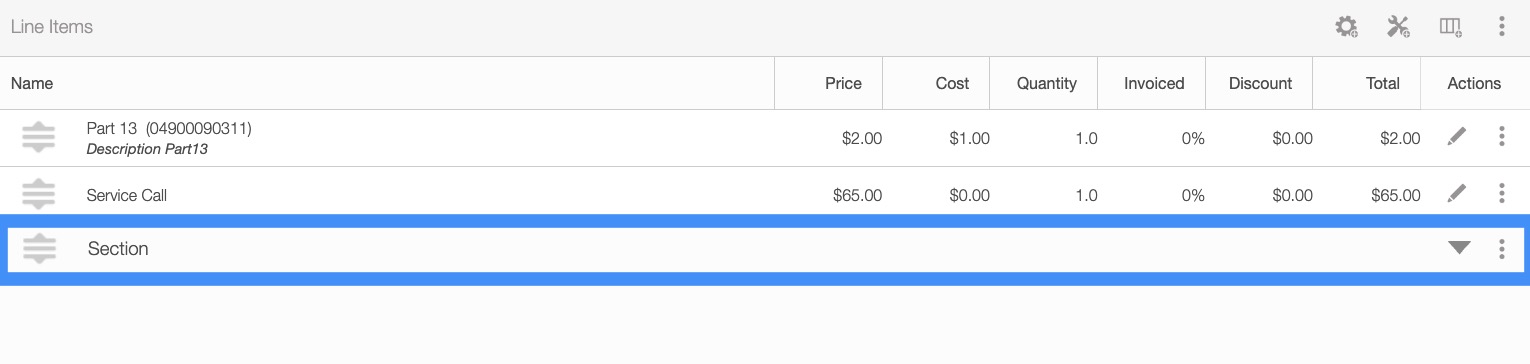
You can add parts or services to a specified section through the Add Part to Quote or Add Service to Quote pop-up window and selecting the desired section from the "Section" drop-down.
You can also use the section header to store comments about the quote.